
Paul, now I see what you are doing!  Looks good!

So you are telling me this doesn’t meet code!

B32A3681-1FDE-4A58-AC94-A48BCE0B0ECC9083F7E1-FCAE-4110-AAED-271E64D970FC

Well it is temporary.  When the layout gets going in the family room, the tiny train room will become the workshop and both Ceiling Central RR and the Blackwater Canyon Line will be in the same room.

I just realized, I’ll be 62 in 33 days and I never had a workshop before!!  I have always had to scrounge a few inches here or there to work on projects!  LOL

Attachments

Images (2)
  • B32A3681-1FDE-4A58-AC94-A48BCE0B0ECC
  • 9083F7E1-FCAE-4110-AAED-271E64D970FC

Mark, nothing wrong with the way you did it. Sometimes you have to do something on a temporary basis. Mine is permanent and if I would of done this at the beginning I would of been further ahead. Plus I am working with 5 14 gauge wires and all different colors. I got the last section in on the furnace side. All I have left is to measure to drill an opening in the wall to bring the last piece of PVC pipe under the table. Then all that is left is terminal blocks to wire and take the other end of the wires and hook them up to the control panel. Taking the CEO out for dinner and maybe when we get back I'll try to do the last section tonight. Pics..............Paul

DSCN2380DSCN2381

Attachments

Images (2)
  • DSCN2380
  • DSCN2381

Matt,

What a great idea for using under-table space for storage!  Could you write that up with just a little more information on the type of dollies you used?  I'd like to make you a featured "Guest Backshop Forman" and put your creation in the magazine.  What do you say? Don't be bashful if you need any assistance writing it up.  I'd be glad to help you out. 

Jim Barrett posted:

Matt,

What a great idea for using under-table space for storage!  Could you write that up with just a little more information on the type of dollies you used?  I'd like to make you a featured "Guest Backshop Forman" and put your creation in the magazine.  What do you say? Don't be bashful if you need any assistance writing it up.  I'd be glad to help you out. 

Go for it Matt!!!

Today I replaced 2 dim LED headlamps in one of my MTH FP45s, installed a BCR in a PS 2 engine that I just bought and put conspicuity striping on one of the 4 recently purchased K-Line hoppers.   In that PS 2 engine I also put some putty along the top edge of the  windshields to keep the light bulbs for the number boards from shining into the windshields.


Larry

Last edited by PSAP2010

Paul,

Well I guess the voodoo curse you put on me for "borrowing" your york badge worked.  Since I had that badge in my home my 8 year old refrigerator went out and I was hoping it was some minor repair.  Nope, some sealed system leak that runs close to 1,000 for parts and labor.  So that doesn't make sense to repair it when I can get a new model for roughly 500 more brand new.  So lets just say the York slush fund was cut in half today.  The only silver lining is that we kept the refrigerator that came with the house when we purchased the home in 2010, and that thing has to be at least 20 years old but still running, so no food lost.  

         sorry, no video, been tearing out a lot to redo this winter, and getting ready to work more on the new layout room, lots of pictures soon...

                          now what, that mean we're back in here again ???


          yep...


         aahhh  mann...   here we go again...  so much for playing outside...

Attachments

Images (4)
  • mceclip0
  • mceclip0
  • mceclip0
  • mceclip0
Last edited by briansilvermustang

Hmmmm Bryan, York slush fund down a bit. Wonder if the fridge would still be working if you had not held my badge for ransom LOL. I would say you just never know when something is going to break down. This morning I called the hotel to conform my reservations. All set for York. Then I headed out to Harbor Freight because they had clamps on sale for 2.99 each  so I picked up 6 of them plus some more box cutters. Now when I do another Downtown Deco building I can glue more walls at a time. Got the wire strung through to the underside of the island table. And that is the extent of work today. It's a Tuesday night crew get together and my buddy Bryan will be there to return my badge. Tomorrow I can now start getting terminal blocks in and do some wiring. Pics...........Paul

DSCN2383DSCN2384DSCN2385


Attachments

Images (3)
  • DSCN2383
  • DSCN2384
  • DSCN2385

gotta laugh every time I look at Izzy. She just has this, oh come on....really????? look. Just bribe her with more ice cream.

can't wait to see some progress Brian. I seem to recall its been a while since you started the new train room .

Glad you got the wires run Paul . Sorry I couldn't make it there to help. The chili gods were just not strong enough....

Sorry about the fridge Bryan- always sucks when unexpected expenses pop up.

Bob

I would say after then I can borrow from my wife. lol  In reality we have slush funds as we like to call them where we throw money into each month.  I have the trains and vacations money.  She has the entertainment/dining out money.  We have a fund that we use for household repair and our rental property expenses.  So in reality the York funds are okay but in the back of my mind I do need to throw some money into that pile because I don't like it dipping below a certain level.  

I before getting the laundry out of the dryer I would put in 4 terminal blocks. The four blocks will be for power and ground. I need bigger terminal blocks for ground to do both sides of the Gar Graves track. I know it is over kill when I could twist two wires together and run a single wire to the terminal block. But that's all I could get done for the day. Tomorrow morning I can connect the other end of the wires to the control panel and then start running my wires on the island. Pics...............Paul

DSCN2386DSCN2387

Attachments

Images (2)
  • DSCN2386
  • DSCN2387

Working on seated figures for an Amtrak Passenger Car.

1 Amtrak Figure hiegth_edited-1

Step 1: Look at the back of the seat and have the head just above the head rest.

2 Amtrak and tools_edited-1

Step 2: The tools and supplies needed.

3 Glue needed_edited-1

Step 3: I have been using Cyanoacrylate with gap filler. I will also be using these glues.

4 Slide out seats_edited-1

Step 4: In these RailKing cars the seats slide out, after removing ten screws.

5 RailKing Figures_edited-1

Step 5: I have been using RailKing figures and O gauge figures in bags from one of those big box on-line stores.

6 Open window_edited-1

Step 6: Nice day so I opened the window to get fresh air when using these glues.

7 All figures_edited-1

Step 7: All the passengers glued in and two guys walking in the aisle.

Gary

Attachments

Images (7)
  • 1 Amtrak Figure hiegth_edited-1
  • 2 Amtrak and tools_edited-1
  • 3 Glue needed_edited-1
  • 4 Slide out seats_edited-1
  • 5 RailKing Figures_edited-1
  • 6 Open window_edited-1
  • 7 All figures_edited-1

Gary   really nice work on those Amtrak cars.   I always liked those cars but sold mine off when I decided to model the steam/diesel transition era.    

Paul,   one thing I started doing to save terminal block locations is to put 2 wires in the crimp-on spade connectors and clamp them down tight there, works pretty well.  Sometimes I'll flip one spade connector upside down and stack them back to back so they fit under the screw and don't bend and bind up.   

Brian,  now I can see why Paul told us the TOFC and trailers don't come up for sale very often.  Based on the photo of the shelf system there, looks like you have the "market" cornered... Nice shelving !!!

Bryan, Sorry about the fridge, but it shows you they don't build things like they use too! 20 Yo fridge still running! Kinda like some of the guys on this forum! LOL

Paul, the wiring is looking good! You will be running trains tomorrow! I can see it!

Gary, your crowd sure looks nice and comfy on the train! Nice work!

Had a great night at our weekly train group meeting.  We saw the pictures for our next group beer reefer that we commissioned MTH to make and they are going to be fantastic.  (Sorry but I think they will be sold out to just our group, they were that well received)  Now I am next up in the hosting duties so tonight (after buying a new refrigerator)  I have to pick out what I am going to run and start to make sure there are no gremlins on the layout for next week.  By the way for those wondering yes Paul got his badge back and I was even able to capture a picture of the reunion.  

paul

Attachments

Images (1)
  • paul
Last edited by Bryan in Ohio
Bryan in Ohio posted:

Had a great night at our weekly train group meeting.  We saw the pictures for our next group beer reefer that we commissioned MTH to make and they are going to be fantastic.  (Sorry but I think they will be sold out to just our group, they were that well received)  Now I am next up in the hosting duties so tonight (after buying a new refrigerator)  I have to pick out what I am going to run and start to make sure there are no gremlins on the layout for next week.  By the way for those wondering yes Paul got his badge back and I was even able to capture a picture of the reunion.  

paul

Very clever - Gollum!

Bryan, hilarious!  Are you riding to York with Paul and Shirley?  I would like to ride along for the fun!

Paul, I think your good nature keeps you from hitting Bryan as hard as he hits.  I worked with a guy like that some years ago.  I would say something just to see what outrageous comment he would fire back with.  It was all in fun, and I miss working with that guy.

Mark Boyce posted:

Bryan, hilarious!  Are you riding to York with Paul and Shirley?  I would like to ride along for the fun!

Paul, I think your good nature keeps you from hitting Bryan as hard as he hits.  I worked with a guy like that some years ago.  I would say something just to see what outrageous comment he would fire back with.  It was all in fun, and I miss working with that guy.

No, I think we would end up driving off the road and besides Paul will never ride with me since last time it took him a month to recover seeing that my car sits real low to the ground and it's not that easy to get in to and out of for shall we say the "older generation" 

OMG, Paul has you guys convinced that I am the guilty party. I invite anyone to attend one of our gatherings and see all the grief I get every night.  I am by far the youngest member (by at least 15 years) of any other person there and as such I get all the younger generation scorn cast in my direction.  I can't even repeat what was said last night on this family forum but trust me your "innocent" Paul is not who he portrays on this forum.  lol

Last edited by Bryan in Ohio
paul 2 posted:

I before getting the laundry out of the dryer I would put in 4 terminal blocks. The four blocks will be for power and ground. I need bigger terminal blocks for ground to do both sides of the Gar Graves track. I know it is over kill when I could twist two wires together and run a single wire to the terminal block. But that's all I could get done for the day. Tomorrow morning I can connect the other end of the wires to the control panel and then start running my wires on the island. Pics...............Paul

DSCN2386DSCN2387

Another option for terminal connection:  Square D Terminal Ground Bars.   Menards/Home Depot have several to choose from $6-8.  They can be cut in half with a hacksaw, one half for positive and other half for ground.   You can gang several wires into each port and no need to crimp on spade terminals or solder tin the wire tips.   These are what I use.   squared_57033

Cheers, Dave

Attachments

Images (1)
  • squared_57033
Last edited by darlander

Bryan, I saw Paul provoked this last round with his signs at his house last week.  Though he may say that was in retaliation for something!  

I already knew you were the odd man out since you are younger than the rest of the group.  As for me, I would only feel like I wish I was your age again.  Yes, I would have to ride with Paul.  My 2004 Hyundai gets closer to the ground every year, though it may literally be so.  The tire man said my tires are wearing funny because the suspension is getting weaker. I know my personal suspension is getting weaker.  That is why a once comfortable ride is getting harder and I have to pull myself up out of the car.  I could get an SUV, but this car is paid for and dependable!  

I have to interject here. Bryan has the advantage because as he stated he is the youngest in the group. So he is more tech savy and can do all the stuff on the computer. As to traveling together that is not an option. That would sacrifice space for my purchases. I will agree with him that the car Al and Jerry designed for the Tuesday night crew will be a sellout among the group. And  Bryan, Shirley now sides with me. Can't fool her anymore LOL. Now time to do some wiring.  Looking forward to seeing you next week............Paul

Not to get all Oscar worthy speech here and I would be the last to tell anyone how to enjoy the hobby BUT I really think that guys that go this alone and are the lone wolves are really missing out.  Not everyone can have a great local group like we do. We are very fortunate in that we have a large group of 3 railers in our area that want to open up their homes each week; but even so, this forum and this thread is like our own little group and it amazes me the wealth of sharing and learning from each other we obtain on here on a daily basis.  

Mark Boyce posted:

Nice job, Gary!

lee drennen posted:

Great job Gary. I’m not much on passenger cars but this has caught my attention 

ToledoEd posted:

Gary, looks great!  I like the standing figures...enhances the scene.  

Hi fellow members: Thanks for all the support and suggestions on this project. 

I would like to share one more tip, MTH has Premier Passenger Cars and RailKing Passenger cars. I am using RailKing Passengers cars.  The interior is smaller and not has high. Thus you have to use a file, and use Dremel Tool, with a sanding drum to shave off the butts of these paying Amtrak Passengers, and use the tin zips to cut of their legs just below the knee caps.

Hope these photos and tips help: Gary

Last edited by trainroomgary
chris a posted:

Brian,  now I can see why Paul told us the TOFC and trailers don't come up for sale very often.  Based on the photo of the shelf system there, looks like you have the "market" cornered... Nice shelving !!!

                                thanks Chris.... here is a few more...

                                       these shelves are two rows deep...

                                  guess Dad and I like intermodal...


                                     over 50 sets of these spline cars...


                                       some homemade 5 car sets...


                 and a stash of unopened Atlas intermodal  cars in the house...


             a couple of the engines ready to pull...  waiting on the track crew...


Attachments

Images (17)
  • mceclip0
  • mceclip1
  • mceclip2
  • mceclip3
  • mceclip4
  • mceclip5
  • mceclip6
  • mceclip7
  • mceclip8
  • mceclip9
  • mceclip10
  • mceclip11
  • mceclip12
  • mceclip13
  • mceclip14
  • mceclip15
  • mceclip16
Last edited by briansilvermustang
trainroomgary posted:
Mark Boyce posted:

Nice job, Gary!

lee drennen posted:

Great job Gary. I’m not much on passenger cars but this has caught my attention 

ToledoEd posted:

Gary, looks great!  I like the standing figures...enhances the scene.  

Hi fellow members: Thanks for all the support and suggestions on this project. 

I would like to share one more tip, MTH has Premier Passenger Cars and RailKing Passenger cars. I am using RailKing Passengers cars.  The interior is smaller and not has high. Thus you have to use a file, and use Dremel Tool, with a sanding drum to shave off the butts of these paying Amtrak Passengers, and use the tin zips to cut of their legs just below the knee caps.

Hope these photos and tips help: Gary

Thank you, Gary.  My few cars are all RailKing 60 footers.  I was aware passengers often need surgery to fit in the seats.  Hence your photograph of where there head should be in relation to the headrest and window.  Thanks a bunch!!

The morning progressed pretty good considering I was still recuperating from the traumatic act of my badge being held for ransom. I can see that I have to batten down hatches before said person returns to my home again. LOL But the plus side is he returned it no worse for wear. So far I got the power and ground hooked up at the control panel and to the terminal blocks. I am not too worried about the holes drilled because I will make up covers to conceal the terminal blocks. After lunch I hope to get a few tracks wired up. Pics..............Paul

DSCN2393DSCN2390DSCN2391DSCN2392

Attachments

Images (4)
  • DSCN2393
  • DSCN2390
  • DSCN2391
  • DSCN2392
mike g. posted:

Lee, still looks like you had fun!

Paul, when you get your strip connectors installed can you take a picture, I have never seen them used!

Mike,

That would be one picture without the 1000 words.  The blades installed are practically invissble.  Pictorial installation instructions would be most informative.

I have used the blades on sections of track over incomplete bridges so that the structure can be removed for further work at the bench.  A skewed girder bridge on my layout is currently mid construction, yet supporting a section of removable track when I want to run trains, thanks to the GG blades. 

Blades are installed by gently driving them inside the ends of the permanently mounted rails, leaving about a half inch sticking out.  Draw back the first few ties at both ends of the precut lift out track section, align and push down into place.  Slide the ties back into position and yer done.  I could see where blades might be a better alternative to track pins on modular layouts.

Bruce

Makes sense, Mike.

If the bridge is to be constantly lifted out and installed, you're probably best to go with some other method.  The blades wouldn't hold up, neither would the rail ends on the bridge.

For reliable continuity and quick disconnect / connect, the easiest, cheapest route might be using good old household wiring components.  Wall outlets at both layout ends with extension cord male ends connected to bridge rails.  Positive flawless continuity every time assuming you have a fool proof method of track alignment.

Bruce

Went back down to do more wires. I connected enough to do an inaugural run over the bridge. But it wasn't meant to be. Turn the Z4000 on, turned up the voltage and suddenly got a red light. Something is wrong and I have to find out what. I looked over all the track and nothing left on the rails to cause a short. All wires hooked up right. Green for power white for ground. Right now I am at a loss. After dinner I'll start trouble shooting. I knew it was going along too well. Bryan must of put a hex on me LOL...........Paul

trainroomgary posted:

Working on seated figures for an Amtrak Passenger Car.

1 Amtrak Figure hiegth_edited-1

Step 1: Look at the back of the seat and have the head just above the head rest.

2 Amtrak and tools_edited-1

Step 2: The tools and supplies needed.

3 Glue needed_edited-1

Step 3: I have been using Cyanoacrylate with gap filler. I will also be using these glues.

4 Slide out seats_edited-1

Step 4: In these RailKing cars the seats slide out, after removing ten screws.

5 RailKing Figures_edited-1

Step 5: I have been using RailKing figures and O gauge figures in bags from one of those big box on-line stores.

6 Open window_edited-1

Step 6: Nice day so I opened the window to get fresh air when using these glues.

7 All figures_edited-1

Step 7: All the passengers glued in and two guys walking in the aisle.

Gary

I have done this in the past with some Rail King 1800 era coaches and I'm sure that's what helped me sell them.  I have 4 Rail King PA 60' Passenger cars that I've tried to sell b4 with no luck and now I'm going to update them with passengers.  I have a half /bag of seated passengers that I got from china.  They are ok but I'll be looking for some better quality.  I hate the squeal that they make when I have to amputate their legs! (sorry)

paul 2 posted:

Went back down to do more wires. I connected enough to do an inaugural run over the bridge. But it wasn't meant to be. Turn the Z4000 on, turned up the voltage and suddenly got a red light. Something is wrong and I have to find out what. I looked over all the track and nothing left on the rails to cause a short. All wires hooked up right. Green for power white for ground. Right now I am at a loss. After dinner I'll start trouble shooting. I knew it was going along too well. Bryan must of put a hex on me LOL...........Paul

Oh no!  It could be the simplest thing 

paul 2 posted:

Went back down to do more wires. I connected enough to do an inaugural run over the bridge. But it wasn't meant to be. Turn the Z4000 on, turned up the voltage and suddenly got a red light. Something is wrong and I have to find out what. I looked over all the track and nothing left on the rails to cause a short. All wires hooked up right. Green for power white for ground. Right now I am at a loss. After dinner I'll start trouble shooting. I knew it was going along too well. Bryan must of put a hex on me LOL...........Paul

  What kind of track? (GG?) My first thought is the blades hitting a metal bridge or center rail insulators moved /lost while moving ties or something.

Paul2,

You may want to disconnect wires in reverse order.  (Or disconnect just the green.)  If you have a switch-up between green and white on a set of wires, it will still short out.

I had a new MTH Block that had a short in the two-row Block.  I replaced it with a MTH single-row block and all was fine.  Sometimes it is not your track, it could be the block, or just one pair of posts on a block.  Metal debris can get caught in the block when it is manufactured.

I recommend that you go slowly backward through the new section of wiring, disconnecting one, then testing.

Sincerely, John Rowlen

Attachments

Images (1)
  • DSCN0958
decoynh posted:
trainroomgary posted:

Working on seated figures for an Amtrak Passenger Car.


I have done this in the past with some Rail King 1800 era coaches and I'm sure that's what helped me sell them.  I have 4 Rail King PA 60' Passenger cars that I've tried to sell b4 with no luck and now I'm going to update them with passengers.  I have a half /bag of seated passengers that I got from china.  They are ok but I'll be looking for some better quality.  I hate the squeal that they make when I have to amputate their legs! (sorry)

Hi Matt

The companies in China are now selling their stuff on the 'Big River' / See screenshot below / No more waiting three to four weeks.

1 AMAZON FIGURES copy

They have five styles in stock and ship the next day.

Gary

Attachments

Images (1)
  • 1 AMAZON FIGURES copy
Last edited by trainroomgary

The Chinese Painted figures shown above are copies of Preiser figures from Germany.  I am surprised Preiser has not taken action against these knock-off sellers.  The paint job is very poor when compared to Preiser's 68209 six pack of figures.

The Chinese have also copied the Preiser 65602 24 seated figures. The only figures the Chinese have not copied are the parents seated with babies.  These figures have two to four parts that are painted and then glued together.  I guess it is too much work for them.

Sincerely, John Rowlen

Finally pulled the trigger and decided to start up my WWII war effort train. Have about 5 of the MTH Sherman cars. Also with one of the table top games I play I now have more tanks. Games called bolt action from warlord games. Tanks are a tad bit smaller but close enough for me. So tonight I added a wood deck to the flat car and weathered it. Tanks shown are the one MTH one for scale, a 76 easy 8, m4, m18 hellcat. E01B5F43-2A5B-4009-84DF-50EF152E0E5BBE18EA3F-3424-4EA1-A80A-E4E0FFA0025741CDCCC7-F56A-44D5-8544-821381C235E0A5F8C9B0-8032-4565-BCF7-20CF1106294D

Attachments

Images (4)
  • E01B5F43-2A5B-4009-84DF-50EF152E0E5B
  • BE18EA3F-3424-4EA1-A80A-E4E0FFA00257
  • 41CDCCC7-F56A-44D5-8544-821381C235E0
  • A5F8C9B0-8032-4565-BCF7-20CF1106294D
decoynh posted:
trainroomgary posted:

Working on seated figures for an Amtrak Passenger Car.

1 Amtrak Figure hiegth_edited-1

Step 1: Look at the back of the seat and have the head just above the head rest.

2 Amtrak and tools_edited-1

Step 2: The tools and supplies needed.

3 Glue needed_edited-1

Step 3: I have been using Cyanoacrylate with gap filler. I will also be using these glues.

4 Slide out seats_edited-1

Step 4: In these RailKing cars the seats slide out, after removing ten screws.

5 RailKing Figures_edited-1

Step 5: I have been using RailKing figures and O gauge figures in bags from one of those big box on-line stores.

6 Open window_edited-1

Step 6: Nice day so I opened the window to get fresh air when using these glues.

7 All figures_edited-1

Step 7: All the passengers glued in and two guys walking in the aisle.

Gary

I have done this in the past with some Rail King 1800 era coaches and I'm sure that's what helped me sell them.  I have 4 Rail King PA 60' Passenger cars that I've tried to sell b4 with no luck and now I'm going to update them with passengers.  I have a half /bag of seated passengers that I got from china.  They are ok but I'll be looking for some better quality.  I hate the squeal that they make when I have to amputate their legs! (sorry)

Why let all the funk out.  Breath deep, the gathering gloom.....LOL

Working on seated figures for the observation car.

Ran into some ‘Chaos’

1 Observation Car Full Side

Need your help, removed the 4 screws on the bottom of the car, see the red arrows in the photo below. The plastic body will not come off, any ideas of how to solve this issue? (2 Screws by each truck for a total of 4)

2 4 Screws on base

Thanks: Gary

Attachments

Images (2)
  • 1 Observation Car Full Side
  • 2 4 Screws on base
Last edited by trainroomgary
Lou1985 posted:
trainroomgary posted:
Lou1985 posted:

I think you remove the roof screws and the twist each end of the car in opposite directions. Then the roof should pop off.

Hi Lou: Thanks for the help, but no roof screws

Gary

The roof screws. The ones you removed from under the car. There are instructions for roof removal here under the support tab: https://mthtrains.com/30-67142

Hi Lou: Wow - Got it, thanks for the tip.

1 Drawing remove roof2 Roof off ovservation car

I owe you an ice-cream cone.  Gary

Attachments

Images (2)
  • 1 Drawing remove roof
  • 2 Roof off ovservation car

Opened a new Lionel Erie Mikado and it actually worked.  Wow.  Who would have seen that happening.  The engine ran nicely along my main line on the opposite track of my Pennsylvania K-4 whistle steam. Have call tags for my VL GG1 #4935 and PH40 CSX #9999.  The smoke fan on the CSX stopped working after the first repair trip last month. I hate to send engines in because sometimes they get a nick in them.

I was getting use to the idea of buying a new engine and then immediately shipping the engine for repair. Most of the previously owned engines I buy on Ebay run perfectly.  It is when I buy new engines from an authorized dealer that I have had problems.

Mr. Muffins delivered a winner: a perfectly working Lionel Erie Heavy Mikado with Steam Whistle.  It pulled my new Atlas O Erie X-29 and single-sheathed box cars and some Erie Steel Refrigerator cars.  It was a good night running the layout.

Sincerely,  John Rowlen

Thanks Mike maybe Bryan did put a hex on me LOL.  John, I think it is not going to be an easy find. Two terminal blocks. One for power and one for ground using terminal jumpers to make each block act as one. Plus I used green for power and white for ground just as I did for the rest of the track on the other side of the bridge. But it still could be something simple. I didn't get a chance to work on the ,ayout tonight after dinner. Tomorrow morning I'll start searching for the problem again................Paul

 
Jack118711 posted:

Bruce, there’s also a protosound 1 version they made that’s not too expensive. BUT if you run DCS then I’d definitely save up for the PS3 one. 

Sorry for the late response, Jack.  I usually skip over PS1 versions unless it's economically doable to convert them to TMCC.  PS1 sound sets always seem better than PS2.  If only there was an easy way to transfer PS1 sounds into TMCC, I'd be a happy hacker.

My only PS3 steamer is a Pennsy H10 and I've been nothing short of thrilled with it.  I needed some variety in my freight hauling roster and it fit the bill perfectly.  While double headed GG1's handle the long drags, the H10 is on local runs.  

Still staying allert for a suitable Y3 - Y6, no matter the road.  Cross border shopping these days is a total write off.

Bruce

Last edited by brwebster

Mark, Mike, John and other that offered suggestions, thanks............I am up and running with power to the island table. This morning I started off turning on the power. When I moved the handle forward it would get to about 8 volts and the red light would go on. I was scratching my head and I could not find my voltage tester. So I started with trial and error. I disconnected the power first then the ground. At one point it was working so I hooked everything back up but then it shorted out when I turned the power to track on. I thought at one point it may be a bad terminal block on the ground side so I changed it out, hooked up the wires but the same problem occured. Now I was really scratching my head. So as some mention maybe it is something simple I stepped back and thpought about it. Checked to make sure I had no metal laying on the tracks and then I decided to follow the tracks around to the brewery area and I found my problem. On the island table I have a mix of older Ross switches that are not prewired and in the brewery area I have newer ones that I had Steve prewire. Ready for this, after all this searching I found the problem was one of the box cars on a track at the back of the sidings in the brewery area was off the track and shorting out the track when I turned on the power. I ran a MTH DCS engine and a Legacy engine through the tracks I had wired and they both worked with no problem. My problem solved..........Pics............Paul

DSCN2395DSCN2396DSCN2397DSCN2398DSCN2399DSCN2400DSCN2401DSCN2402DSCN2403DSCN2404DSCN2405DSCN2406

Attachments

Images (12)
  • DSCN2395
  • DSCN2396
  • DSCN2397
  • DSCN2398
  • DSCN2399
  • DSCN2400
  • DSCN2401
  • DSCN2402
  • DSCN2403
  • DSCN2404
  • DSCN2405
  • DSCN2406

A tale of two cabooses (cabeese?  Whatever.  Save this picture for when someone asks what the difference between "scale"  and "classic" is... ) ;-) 

GEDC1161

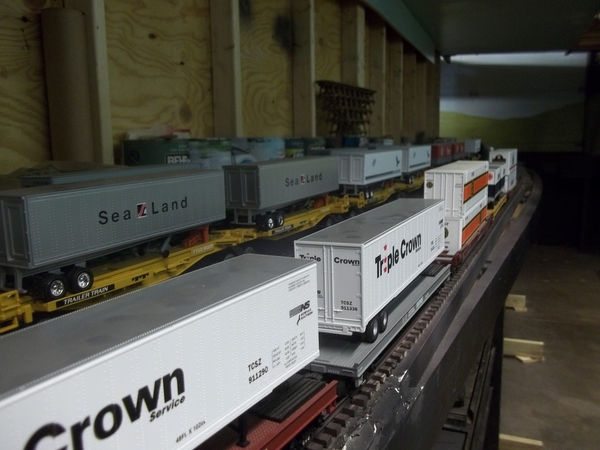
@JohnD's father, code name "Mickey Mantle", has hired the Razorback Traction Company's shops to service, clean and repair a couple of boxes of rolling stock and motive power.   One of the tasks was to add a second pickup to the NYC caboose;  another was to add a light to the Undec caboose.  

The NYC caboose is a ca. 1990 Lionel offering.  Somewhat odd construction as it has bar-end postwar trucks as opposed to a more modern MPC-era type.   It has a working smoke chimney (the Mickster was surprised to learn this; he'd operated the caboose for years without being aware of the feature) with a cam on the rear inside axle to operate the smoke piston.   This made putting a second pickup on the truck somewhat challenging;  I wound up modifying a 482-3 roller base plate to accommodate the cam.   In addition, the caboose only had one bulb under the cupola,  which meant that the front windows weren't lit very well.  So,  I fastened a 12v grain of wheat bulb to the center window frame,  lighting the front windows. 

The brown caboose is apparently a product of Lionel's last days in the late 1960s.  No lights, no windows, no printing, no nuthin.  The tabbed chassis has mismatched archbar and AAR trucks!  I'm surprised it has ladders and a chimney.   Obviously a 'clear out the parts bin' job.  

One of the nice things about Lionel: When they came up with a good product,  they didn't go monkeying about with the dimensions.   Thus,  I managed to mate a fifty year old shell to a seventy year old caboose chassis with no trouble whatsoever.  Both staple-end trucks are equipped with roller pickups.  The windows are thin white plastic cut from a cheap plastic "For Sale" sign. The chassis has a built-in bayonet base, making installation a snap!  

All in all, a couple of productive afternoons!   

Mitch 

Attachments

Images (1)
  • GEDC1161
Last edited by M. Mitchell Marmel

Paul, I'm glad you found the problem!!  Something simple?  Yes indeed!!   The layout scenery really looks great!

Brian, So there's that Rio Grande you were talking about!  Looks great!!  Give Izzy some more ice cream!!  

John, Steam ahead!!  More steam engines!!! 

Gary, I'm glad you found the screws to get that vista dome lid off.  I look forward to seeing lots of passengers enjoying the view!!

Jushavnfun,  I'll have to take a look at what you are doing in the scenery forum.  Looks interesting!

Mitch, So I see that robot is your head car shop mechanic!  With him around, you shouldn't have any trouble finishing John D's dad's requests!!  Congratulations!!

Colorado Hirailer, I'll be looking forward to seeing the photographs.


Me? I did two things.  I have been working with Briansilvermustang on some motive transfers across the Pennsylvania-Ohio state line.  So we got all the government red tape taken care of one is delivered, and one has exited the repair shop, passed all tests, and will be heading to Ohio after all the paperwork is notarized.

Second, I sold some locomotives and bankrolled enough money to get Mrs. B. to give the high sign to place my first of two, maybe three orders to Mianne.  I will take the deck off the rollaround (6 screws from the bottom) then move it to the family room.  The first Mianni order will take in one wall.  The rollaround turnback curves Thomas/Elkins WV will but up against it.  Then Mianne order two will go down the adjacent wall.  I will then decide whether to build the Parsons turnback loop or get a third Mianne kit.  That will be down the road.  I'll get some photographs and drawings up when I get time.

Well there isn't much for me to say tonight as it looks like Mark has covered everything! LOL Thanks Marks kind of saves me a lot of typing.

But I do want to say it sure looks like everyone has a handle on all there projects! 

Mark It is really nice to hear that your moving forward! I really cant wait to see your build start and progress over time! Every time someone starts a layout its like a little insite to that person! I know its going to be a fun trip!

Tonight I started on a small store, having finished the last elevator. but it is not a laser kit and involves cutting parts to size by templates and is much slower going.  Before that l took pictures of the elevator and other structures l have been cranking out like crazy since l recovered from hospitalizations....Chinese laundry, ore tipple, coal shed, Tankar gas station, and another elevator.

.

Mark, good to hear that your layout is moving forward. Mike it is always a good feeling to have a handle on everything. I thought I was going to have a nightmare and it turned into a simple problem with the wiring. Today I got all the wires hooked up to the front half of the island table. This afternoon I got all the holes drilled in the tracks in the brewery area so tomorrow all I have to do is run wires. I did do a little train running through what was wired. I found out that the Lionel switcher will not get through the small radius switches in the brewery area without knocking off the Caboose ground throws. It was a plus I decided to buy the MTH 44 toner at york this past April. Looks like that is the only engine that will clear them without knocking them off. Learn something new everyday............Paul

Add Reply

Post

OGR Publishing, Inc., 1310 Eastside Centre Ct, Suite 6, Mountain Home, AR 72653
800-980-OGRR (6477)
www.ogaugerr.com

×
×
×
×
Link copied to your clipboard.
×
×