I did nothing on my layout today. But as this is a summer Sunday, the local steam railway is operating. There is not much better to wake up than to hear the sound of a steam whistle in the distance on a sunny day. 

So, this afternoon I have spent a very happy couple of hours at Beekbergen station, watching the trains and breathing in that wonderful concoction of steam, coal dust and oil fumes. 

Last edited by N.Q.D.Y.
Originally Posted by Mark Boyce:
Originally Posted by Jhainer:

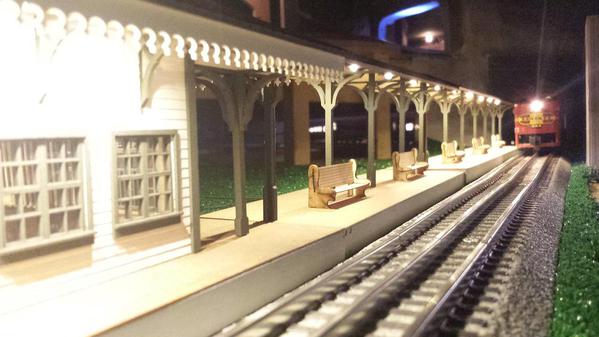
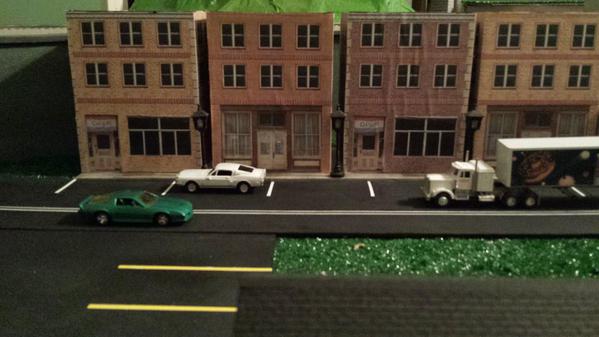
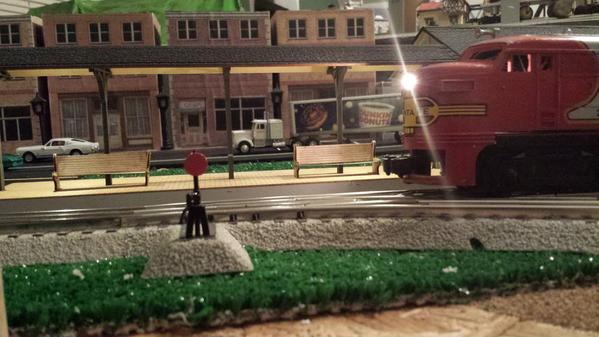
station and platforms with lights on worth the wait.

  20140619_223357


I'll say it was worth the wait.  It is beautiful under the lights.  Classic Santa Fe, to boot!  I can see why you are happy with it.

Classic Santa Fe but updated that's the one I put a err ac commander in with railsounds I like the engine now but just wish it had more pulling power. it's a lot lighter now with everything removed inside and just electronics put in I have 4 passenger cars and a dummy band a unit and it won't pull the incline it just spins so I am going to have to figure something out. it has magna traction can you add a traction tire to them? or should I just add a lead weight to it.

Mark Boyce:  I posted photos of the mill, but not of the side views of the flume, as

those were not good.  Did take others which will post later.  As noted, the flume logs were cut from garden stake bamboo, which is prone to splitting, and a pain, but looks good (to me). 

I have a long list of kits and projects that I can't decide on which to start... another grain elevator box is staring at me (along with other kit boxes), have too many elevators built already....I want to replace all tenders on the locos I plan to use lettered for my free lance road name, with Vanderbilts, equip all of those with smoke box elescos and flying pumps, reletter a  couple of other locos with Great Western decals (decals are in hand, locos are iffy), researching a possible iron furnace scratchbuild, build a couple of Mullet River side door caboose kits, scratchbuild or

have built a FEC/Great Westerm side door caboose, kit bash on Marx chasses a

couple of inspection engines, and.......decisions, decisions.


Originally Posted by colorado hirailer:

Mark Boyce:  I posted photos of the mill, but not of the side views of the flume, as

those were not good.  Did take others which will post later.  As noted, the flume logs were cut from garden stake bamboo, which is prone to splitting, and a pain, but looks good (to me). 

I have a long list of kits and projects that I can't decide on which to start... another grain elevator box is staring at me (along with other kit boxes), have too many elevators built already....I want to replace all tenders on the locos I plan to use lettered for my free lance road name, with Vanderbilts, equip all of those with smoke box elescos and flying pumps, reletter a  couple of other locos with Great Western decals (decals are in hand, locos are iffy), researching a possible iron furnace scratchbuild, build a couple of Mullet River side door caboose kits, scratchbuild or

have built a FEC/Great Westerm side door caboose, kit bash on Marx chasses a

couple of inspection engines, and.......decisions, decisions.


Colorado,

I know what you mean about photos not being that good.  My trains are in a temporary location right now that has poor lighting.  That and the only digital camera I have right now is on my iPhone 4, My best photos are the ones I take out on the patio.  Thank you for the consideration.

Oh, shay can you shee?.....a K-Line shay floated in yesterday, to power the logging

branch.  Would rather have a smaller Heisler, so this is a make do.  The Willamette

kitbash  languishes as I have gone off on other tangents, so the Shay will stand in.  Horror of horrors, it will probably get my road's relettering.  Beyond that, yesterday, I made some progress on the Q caboose kit build.  Like too many kits, the instructions leave a lot to experience...had to correct one wrong guess on interior formers.   I am working on interiors, a new road to go down for my caboose models.  This kit has clever engineering, a gazillion details,  but only a platform, presumed for standing, in the cupola and no seats. Wonder if that is standard Q practice?  I think all cabooses I have been in have seats.  Was not inside the prototype in N. Freedom, Wis.

Once again I've switched gears, and am back on wiring and control panels.

I'm so close to being able to open the new hidden yard. Wednesday I connected all the bus wires to the power supply. Today I prepped for the stopping zones by bringing the wires to a terminal strip. One wire is the power source. The other goes out to the stopping section. The empty terminals will be the legs that go to the panel switches.

IMG_4406
I made this panel today. The wires are color coded and so are the tracks. Color symbol for number, just like resistors.

IMG_4405
Tomorrow is going to be a big day. Both Matt and Jon are coming over.

Attachments

Images (2)
  • IMG_4406
  • IMG_4405

Not much done on, now C&S, Mullet kit today.  Mounted windows in walls and doors...

side windows slide up and down in their frames (with a tweezer, probably after assy.),

although I do plan to not glue down roof, since there is an interior and I may need

to add weight. One job I don't like is using wire for the handrails, but wire provided

is softer than piano wire so one side is done.

didn't do much just been wanting to setup a website for the trains so I did. I hae been working on it all night. Uploading Pictures and Video's. Be nice the site has been up for about 5 hr's now.

http://mail.intergrated-it.com:90/


Right now it is piggy backing off of my companies Domain pointing to my mail server on a different port than port 80 Because a website I have been working on for someone is on port 80  there both WordPress sites and I am learning how to use Wordpress. so please be Kind.  

Today, Sat., after too long further research, trying to identify a number on 28' side

door C&S caboose, I am told the CB&Q only had the one at N. Freedom, Wis. and

that all others were 30'?  I did find photos of Q caboose with light green interior.  However, I formed and installed all the wire handgrabs and rails on the model's ends and body, and did several paint touch-up on ends and doors.  Glad the wire bending

is over.

Matt and Jon were here today. Matt did 11 more Tortoises while Jon and I continued to rewire the hidden yard. Not very glamorous stuff really, but it all needs doing. The pieces of the puzzle are falling into place.


It seems that the construction dust has taken its toll. Some serious track and wheel cleaning are in order.


Patrick I need you!

Ran a MARX A-A Southern Pacific set around after an armature to driveshaft repair.

Looks like it slipped soon after it was bought, then put away for many years (after "whoever" chipped a driver trying to get it off to access the armature). Arrived by mail in 1952 anyway(postmark),and its has some of the cleanest cars I've ever seen.

I always like to run tins on newly laid track ASAP(I hadn't). With the light weight, they reveal any bumps, twists, etc., in the track, very quickly. My elevation turned out very well. The largest deviation from level I can find is a .3 ..Flatter than the table its on .  

Tuesday:

I have a challenge for N scalers. Lemme see your working windows?  I just put sliding sashes in cupola windows of this O scale CB&Q caboose, and then put on the roof.  The lower windows already raise up and down in their tracks.  I have to put on the platform railings before I can paint the frame and then put body on frame followed by roof.  I see a dim hint of light at the end of the tunnel.

After reaching the major milestone of opening the small helix and the new hidden yard late last night, I was back at it today.

I threw the 072 switch at the cutoff which changed the whole traffic pattern on the layout. What I discovered when I tried to run a train was, a couple of feeders were never connected to the power buss. Quick fix.

IMG_4424

I also cleaned the wheels and rollers on a couple more engines, and dusted off their cars. More vacuuming in the hidden yard, still cleaning up the dust from sanding the backdrops. More test running. There are a few spots that need some attention, but all in all, things are running pretty well.

Attachments

Images (1)
  • IMG_4424

Ordered some more stuff !!! received my DCS remote and TIU also Received AIU of course tested them on a loop worked great it almost instantly found the only mth engine I have and set it up cruised it around testing the loop 10's all the way around. strung up 27 ft of rope led lights under the layout since that will be my new home for a few days. a lot of wiring to do. received the powerhouse to TIU cable to power the track. Picked up a railsounds 4 sound upgrade for a few bucks so I put eh board in the 4004 it now has sound. still waiting for the tmcc to TIU cable a 072 remote switch and 2 left and 2 right 036 switches what I need to do is spend a day cleaning up the room it's getting out of hand


Originally Posted by Bruce E. Vincelette:
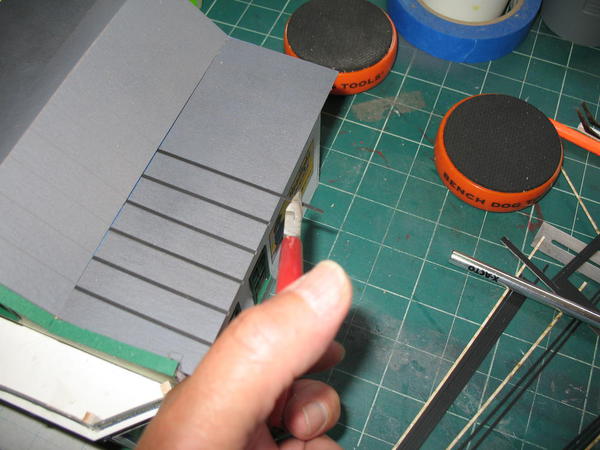
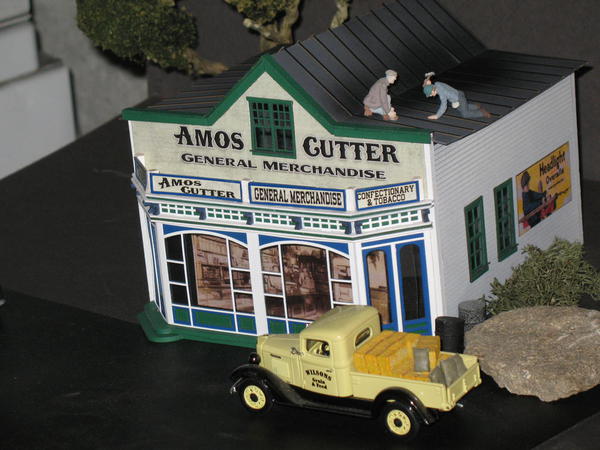
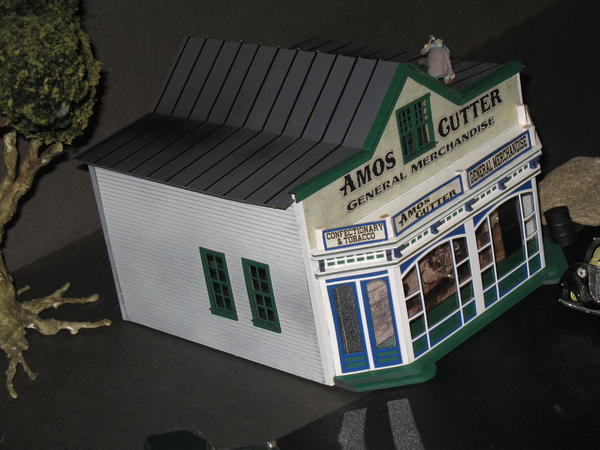
Mark, thank you. The roof is actually card stock.
Originally Posted by Bruce E. Vincelette:


Bruce,

I saw your photos on Facebook.  The general store turned out very nice!  I like the metal roof.


Well, simulated metal roof.  I did one in styrene once, where there are slots in the roofing material, and the stand up strips are glued in the slots.  Makes it easy to get them parallel to each other and perpendicular to the roof.  Your looks looks like it would be harder to do, but looks very good. I think I see faint parallel lines for you to line up the strips on yours.

Originally Posted by Mark Boyce:
Originally Posted by Bruce E. Vincelette:
Mark, thank you. The roof is actually card stock.
Yes, there are score marks to follow, and the wood strips are self-adhesive, so it was easy and went fast. This kit is all about the front, and unlike every other BAR MILLS kit the front is added to the already assembled 3 sides at a late step. If the back and 2 sides are not square and plumb, there would be big problems for the builder. I am always pleased with how nice BAR MILLS' craftsman kits are, and it's a joy to build them.
Originally Posted by Bruce E. Vincelette:


Bruce,

I saw your photos on Facebook.  The general store turned out very nice!  I like the metal roof.


Well, simulated metal roof.  I did one in styrene once, where there are slots in the roofing material, and the stand up strips are glued in the slots.  Makes it easy to get them parallel to each other and perpendicular to the roof.  Your looks looks like it would be harder to do, but looks very good. I think I see faint parallel lines for you to line up the strips on yours.


mounted the tiu and aiu wired up my tracks ran power to fixed input 1 and var1 hooked up tmcc. via a cable to the tiu programmed all the tmcc engines in and tested them and the mth engine and then tested the conventional loop all worked great started cleaning up wiring under the table. going to be running all the remote switches in the next few days that should be fun it's getting there it was nice to run all trains from 1 remote.


Blew whole day driving to and from a distant auction.  Some three rail trains, and some two rail kits, a few nice to have, but not worth staying for and a late return, after a preview.  Walthers gas electric and JC passenger car kits, and a number of unmemorable roadname freight car kits.  Some O scale loco kits, but of the usual NYC and Pa. prototypes. Interesting were two huge scrapbooks full of old, including many prewar, O scale kit builder catalogs (including that Vanderboom catalog, again...still wonder if they produced anything in it). Tempted, but late drive was unappealing....

Originally Posted by Jhainer:

mounted the tiu and aiu wired up my tracks ran power to fixed input 1 and var1 hooked up tmcc. via a cable to the tiu programmed all the tmcc engines in and tested them and the mth engine and then tested the conventional loop all worked great started cleaning up wiring under the table. going to be running all the remote switches in the next few days that should be fun it's getting there it was nice to run all trains from 1 remote.


That's great!  I just bought a DCS system recently, and while I don't have a permanent Layout, I have had some time to start learning how to use the DCS.  I have 2 of my 3 MTH engines programmed.    You are making great progress considering you have a large family in your home.  My family is the reason I am slow getting going again, but family comes first, as I know yours does.

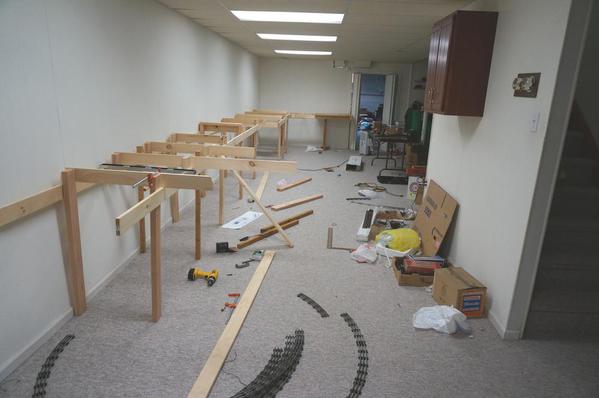
I started the bench work on my second layout.  The first layout which is a prewar toy train layout is at the right of the stairs.  The second layout will be hi-rail  At this point it is a most wonderful layout because it is all in my head.  Reality might be quite different. I have been accumulating Gargraves track this week and next I need to gather some Ross switches.

new layout 6:14

Attachments

Images (1)
  • new layout 6:14
Originally Posted by Al Galli:

I started the bench work on my second layout.  The first layout which is a prewar toy train layout is at the right of the stairs.  The second layout will be hi-rail  At this point it is a most wonderful layout because it is all in my head.  Reality might be quite different. I have been accumulating Gargraves track this week and next I need to gather some Ross switches.

new layout 6:14

Al, It certainly looks like a good start to me.  Reality is always different, even if you have it all planned out on paper, or computer these days.  Once a person gets building, new ideas will take shape.  I am looking forward to seeing your progress as time passes.

Now have four walls on the chassis and the roof is being fitted.  It is removeable so

that is trial and error, like much of this kit.  Today, the Fourth,  I dug through some boxes not explored since a move some years ago, and found a stash of archbar and caboose trucks.  Did not find underframe brake components I was looking for, but did find a lot of brake wheels, timely, since I broke one mounting it on this caboose.

Put Lionel's Rio Grande Ski Train ABA with the add-on cars on our layout last night.  Its orange & black colors look like fireworks against the snowy winter section.  Ran the Ski Train around twice or three times before it ground to a halt.  The powered engine picked up something loose like a stone, don't really know, from between the tracks that jammed its gears.  Surgery is scheduled today to remove the stone.  It is real important to vacuum the tracks regularly!

Matt came over today. I bought a couple of carts online, one for tools and one for electrical stuff, so we assembled and loaded them. Then we moved all the non-functioning engines to a spot I had cleared above the workbench.


While Matt worked on engines, I finally completed the stopping zone project in the hidden yard. I also unpacked the closed circuit camera system that will be used to monitor the trains down there. This is really getting interesting.


I thought some of those engines would never run right (everybody's rejects from eBay). But after lengthening the antenna, and adding a shield to the coil on the RS board, they were good as new.


After dinner, it was playtime. This is something new!!!


I was running the freight, and shooting the video, while Matt ran the Empire Builder. Things were running pretty smoothly, until the Builder had to pass through an 072 wye right at the end of the video. There is an electrical problem when the passenger cars hit that switch. There is also a spot on one curve where some engines have signal issues. My train is out of frame as I juggle the camera and the cab-1, and try to put my other hand over the engine to get it to throttle up.

Originally Posted by Big_Boy_4005:

Matt came over today. I bought a couple of carts online, one for tools and one for electrical stuff, so we assembled and loaded them. Then we moved all the non-functioning engines to a spot I had cleared above the workbench.


While Matt worked on engines, I finally completed the stopping zone project in the hidden yard. I also unpacked the closed circuit camera system that will be used to monitor the trains down there. This is really getting interesting.


I thought some of those engines would never run right (everybody's rejects from eBay). But after lengthening the antenna, and adding a shield to the coil on the RS board, they were good as new.


After dinner, it was playtime. This is something new!!!


I was running the freight, and shooting the video, while Matt ran the Empire Builder. Things were running pretty smoothly, until the Builder had to pass through an 072 wye right at the end of the video. There is an electrical problem when the passenger cars hit that switch. There is also a spot on one curve where some engines have signal issues. My train is out of frame as I juggle the camera and the cab-1, and try to put my other hand over the engine to get it to throttle up.

Elliot,

It is great to see the trains in action on your layout.  I think the runs were great!

Originally Posted by Matt Makens:

Elliot, i think we should share that information about the loco repair with the forum. Maybe some photos next time if fix a loco. Im sure you are not the only person that has that issue. I was fun to finally run trains after a year

Matt,

Many thanks for your work with Elliot!  You deserve a round of applause.  

Photos on loco repair would be useful!

Thank you

I agree Matt. The camera was right there on the workbench. The thought went through my mind... then kept right on going out the other side.


Jon, when Matt figures out his schedule, I'll give you a call, so the three musketeers (or is it stooges?) can ride again. If I had known it was that easy to make and post videos, I'd have done more a long time ago.


Patrick, wherefore art thou? If you don't get better soon, I may forget how to lay track.

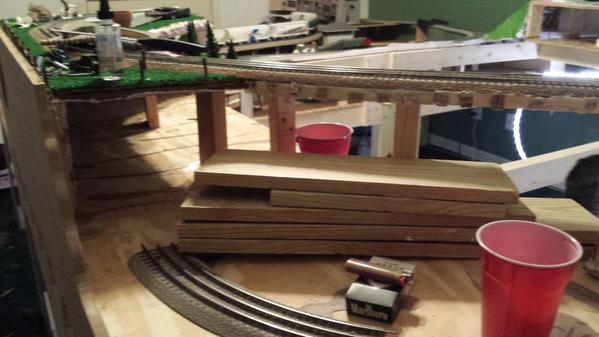
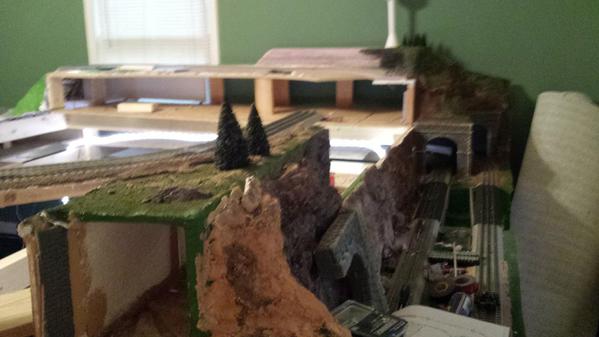
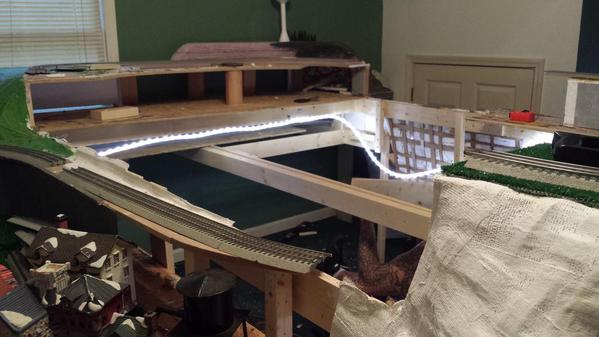
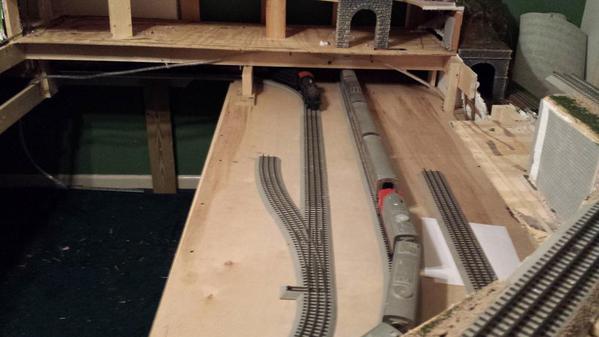
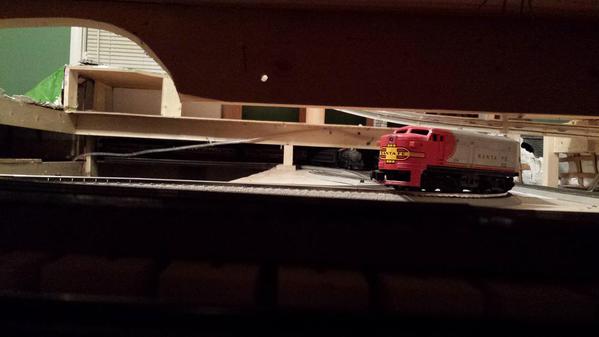
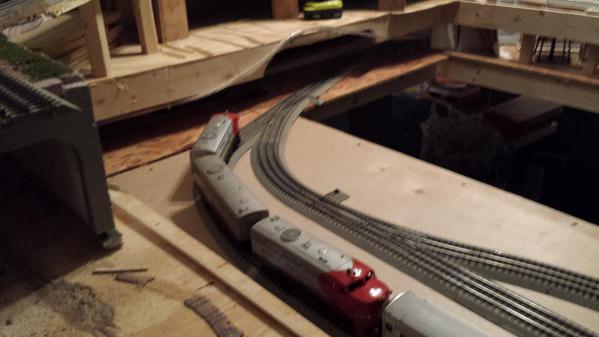
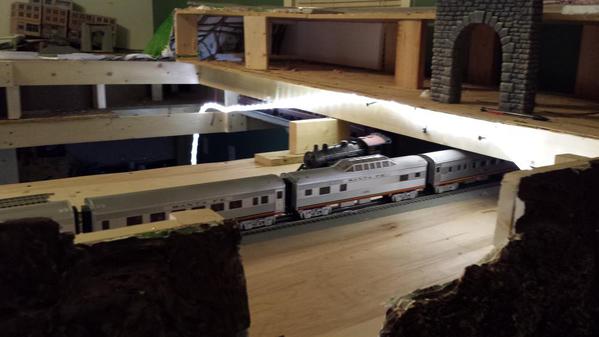
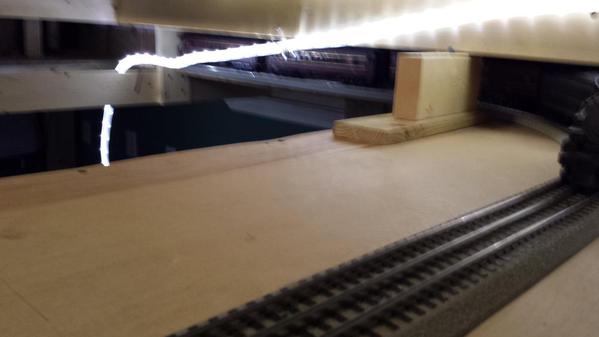
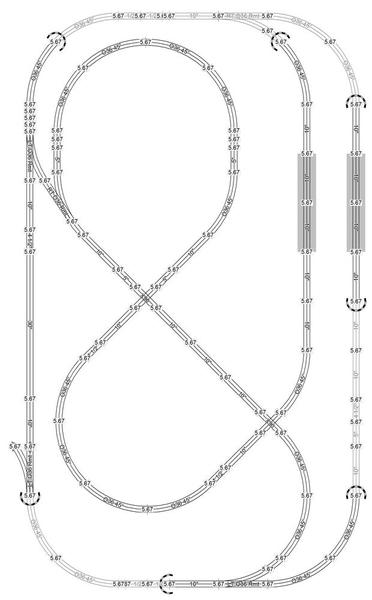
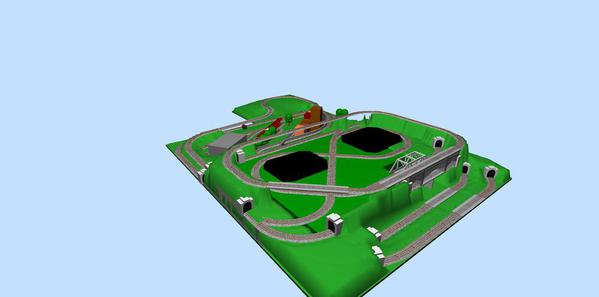
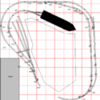
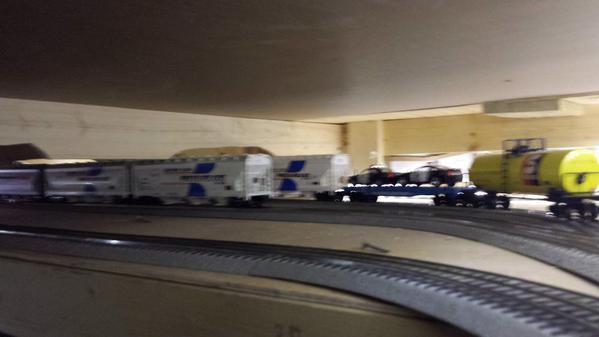
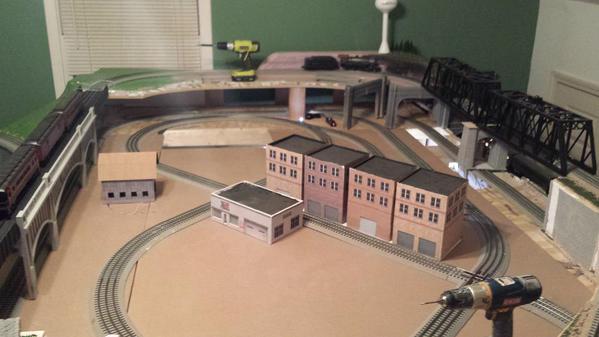
well my homemade tunnel portals I thought I did such a good job on with the new engines I have been picking up well the overhang hits them. so off they came. I have been planning a yard of some sort under the middle level of the layout so with the clearance issues and the yard needing done and my switches came in reconstruction begain last night with removing all the track from the middle level. which got me thinking 2 simple loops in this 6 x10 area I can do better than that. also needed to fix where I cut the layout in half to move it a few months ago it supported my weight but just so that needed addressed so out came the saw I removed all plywood on the middle level. removed all the bracing. built bracing for the yard and added plywood to it. tomorrow I will add the bracing to the middle level again and put down new plywood. they layout the new track plan up there. here are photos of my labors. it's a mess up there now. also adding in 2 popups to access the middle level.

20140705_202920

20140705_202926

20140705_202929

20140705_202938

20140705_202951

20140706_000510

20140706_000524

20140706_000538

20140706_000625

20140706_000631

20140706_000637

middlelevel

middlelevel3d

Attachments

Images (13)
  • 20140705_202920
  • 20140705_202926
  • 20140705_202929
  • 20140705_202938
  • 20140705_202951
  • 20140706_000510
  • 20140706_000524
  • 20140706_000538
  • 20140706_000625
  • 20140706_000631
  • 20140706_000637
  • middlelevel
  • middlelevel3d
Last edited by Jhainer
Originally Posted by Al Galli:

I started the bench work on my second layout.  The first layout which is a prewar toy train layout is at the right of the stairs.  The second layout will be hi-rail  At this point it is a most wonderful layout because it is all in my head.  Reality might be quite different. I have been accumulating Gargraves track this week and next I need to gather some Ross switches.

new layout 6:14


   Just curious as to your room dimensions ? My train room looks almost identical to yours with the stairs being in the same location and all.


 Can't wait to see your progress as you go along,maybe stealing a few ideas from you !

Originally Posted by Jhainer:

well my homemade tunnel portals I thought I did such a good job on with the new engines I have been picking up well the overhang hits them. so off they came. I have been planning a yard of some sort under the middle level of the layout so with the clearance issues and the yard needing done and my switches came in reconstruction begain last night with removing all the track from the middle level. which got me thinking 2 simple loops in this 6 x10 area I can do better than that. also needed to fix where I cut the layout in half to move it a few months ago it supported my weight but just so that needed addressed so out came the saw I removed all plywood on the middle level. removed all the bracing. built bracing for the yard and added plywood to it. tomorrow I will add the bracing to the middle level again and put down new plywood. they layout the new track plan up there. here are photos of my labors. it's a mess up there now. also adding in 2 popups to access the middle level.


Now is the time to make these kind of changes.  I'm sure you will never regret it.  You have been doing a great job, so I'm sure it won't be long you will have trains running on that level again!

Originally Posted by Big_Boy_4005:
Originally Posted by Mark Boyce:

Looking good, Elliot!  I'm sure you have stated it before, but what is the diameter of the helix?  It looks quite large.

The big helix in the first video is 10' outside diameter. The small one in the second video is 8' outside diameter. Double tracks are 4" centers.

Thank you Elliot.  Those are the largest helixes I have seen.  The large one would almost take up my daughter's room that I plan to use for my layout when she moves out.  Your long equipment should negotiate them nicely, and you shouldn't have problems.  Do you plan to cover them with scenery, view blocks, or leave them open for easy access?  I'm full of questions, aren't I.

Originally Posted by mackb4:
Originally Posted by Al Galli:

I started the bench work on my second layout.  The first layout which is a prewar toy train layout is at the right of the stairs.  The second layout will be hi-rail  At this point it is a most wonderful layout because it is all in my head.  Reality might be quite different. I have been accumulating Gargraves track this week and next I need to gather some Ross switches.

new layout 6:14


   Just curious as to your room dimensions ? My train room looks almost identical to yours with the stairs being in the same location and all.


 Can't wait to see your progress as you go along,maybe stealing a few ideas from you !

Mack  The side of the room for this layout is 13 x 36 at its widest.  The layout will be 33 x 11.  That leaves me 2' to get to the furnace and the rest of the basement.  I will also have a 3' removable section at the door in the event I need to replace the furnace or the hot water heater

Originally Posted by Nicks Trains:

Will This thread ever die?


Not as long as somebody did something on their layout today!


I cleaned track, Set up a long freight on loop 1, and put a Williams passenger set on loop 2.  Getting ready for a family visit from the west coast - including a 3-year old nephew I haven't met yet!


Hello everyone. I finally had to like this post I don't think this post will ever die. this posting keeps me involved.  So here I go with a gripe about myself.   Well with it being summer out side I have not had the opertunity  to do much with the layout. It seems like there are projects all around this house. and with the loss of my right leg 3 years ago it seems to take me forever to do things. I have a few things that I'll have to get my sons help with. Then I'll have all the Bench work in place. Then I have all of the wire to run. and complete laying the track.  Now why do all the outside projects keep adding to the list of things to do?

I ordered in some wood siding and caboose roofing...and, while previously rooting

through junk boxes, found a small gas electric somebody had freelanced...looks like

it was in On3 or On30 or maybe S.  It was powered by a DC motor, but there was just

one truck frame hanging on by a wire.  I have emptied the motor compartment and am checking to see if it looks like it will accept 3 rail power.  If so, I will clean it up and repaint and letter it, if I get it running.  (it is painted with some shiny maroon paint)

OK, after getting some of Gunrunner's advice trying to figure out camera wiring I got back to the installation of the rest of Glenn Snyder shelves I received the other day.


Done, 28-  6' sections 168 feet with about 10 cuts for proper spacing. Finally get stuff out from under the bench and get ready for some very serious accessory wiring. Now back to rebuild mode.

Larry

DSCN2853

DSCN2854

Attachments

Images (2)
  • DSCN2853
  • DSCN2854

I had found this scratchbuilt gas electric in a junkbox while hunting parts for the

Mullet River kitbuilt caboose, and I removed what looks like an open frame HO

motor and wider guage drive train with the plan to finally convert it to three rail, and redo the body and paint.  While rooting through boxes I came up with other strays

picked up in shows: a number of scratchbuilt or kitbuilt side door and drover cabooses,

some the worst for wear, and all in need of paint and three rail trucks and couplers.

A couple appear to be good models of specific prototypes, which I will repaint and

reletter, as both paint and lettering appear beat up from use and handling.

Originally Posted by Mark Boyce:
Originally Posted by sp2207:

Thank You Mark. I know I am not as speedy as most of the forum  guys are but I have not given up on the layout. and I know it will still take time. Scot

Scot, I'm not that speedy either.  I do what I can, when I can, and have fun while doing it.

Mark and Scot, I never even think about speed or time spent because I am having such a good time of it. The creative adventure is so refreshing. Of course, I understand the urge and need to get it all accomplished, Scot, but I will predict that when it is "done," you will miss the creative process and the investment of your imagination. You may even be "sorry" it's done and find yourself looking for the next adventure with your layout - you may even find yourself thinking of changes that could be made further. My layout has been "done" a half dozen times and I still find myself considering "adjustments" here-n-there. Hhmmmmm, I think I'm going to head downstairs to the trainroom for a little look-around...

FrankM

FrankM   It all seems great when I do work on the layout. It just seems like I have been working on it for a long time. With me saying that its been 15 years ago that I got my 1st O gauge train. so with that then I got really sick and went through a loss of a leg. Then I had a kidney transplant. Then I had a 3 way bypass done.  then 2 years after that I had a valve replaced in my heart.  and hear we are now just 6 months past the last surgery.  I am feeling great and I just want to get some trains running. I was also on dialysis  for over 6 years.  So I hope you all know why it is important to me. And I am only 46 years old.  And the reason I went through all of this is because I have had diabetes for over 36 years.  And may I say with all the work around the house with cutting the grass and doing improvements it just dosen't seem to be enough time in the day to complete all of it.   Well sorry for the rant.    Scot

Scot,
Don't worry about the rant.  I knew you had been through some but not all those problems.  My father-in-law had a similar story with diabetes.  I'm glad you are feeling well and ae able again.  Now you sound like me, too many chores.  If you are like me, you are anxious to get trains running, then the buildings and scenery can go on until the cows come home.
Originally Posted by sp2207:

FrankM   It all seems great when ... it just dosen't seem to be enough time in the day to complete all of it.   Well sorry for the rant.    Scot

That certainly was no "rant." You sound like a strong and courageous man, Scot. I can see why you feel it is high-time for some play to come to fruition, too.

FrankM

Digging items out from the bench work finding some things I forgot I even had.


Placing some in this new area where the real train workers will be....someday.


I have more to add and probably will move these accessories  around a dozen times before I'm finished with the basic idea.


3rd picture same thing. Someday it's suppose to be a coal mine area.

Still having fun.

DSCN2864

DSCN2865

DSCN2119

Attachments

Images (3)
  • DSCN2864
  • DSCN2865
  • DSCN2119

Some one above mentions finding stuff they forgot they had...did that with the caboose kit I finished....finding a stash of Weaver couplers and several sets of

three rail caboose trucks and archbar trucks.  I also found six or eight builtup junkbox cabooses picked up in shows over the years, all side door or combine.  Maybe two are the Train Craft side doors, but one is certainly a kit I've never seen, with metal details like center steps, a side door that makes me wonder if it is the elusive kit from the 1940 Vandemboom catalog.  Really a solid, hefty caboose, with lotsa details, but just one grade above painted with a brush in bright red, chipped and dirty over the years.  Going to restore it to its prototype, which I am digging through books for a photo for.  It has platforms on the ends but no overhead "porch roofs".  Got in an order of milled wood caboose roof and scribed siding, for one I was going to start, but it looks like I

have been diverted for a while.

Hello every one.  Well last knight I completed laying out all of my track well 98% of it. And This evening A ran the 1st groups of wire. Well I have 33 turn outs on this layout so it will be some time before I get it all ran.  1 thing I do need to do is I need to do a bit of cleaning. So tomorrow 1st thing I  will do is grab a broom and clean. clean.  clean.    Scot

Add Reply

Post

OGR Publishing, Inc., 1310 Eastside Centre Ct, Suite 6, Mountain Home, AR 72653
800-980-OGRR (6477)
www.ogaugerr.com

×
×
×
×
Link copied to your clipboard.
×
×