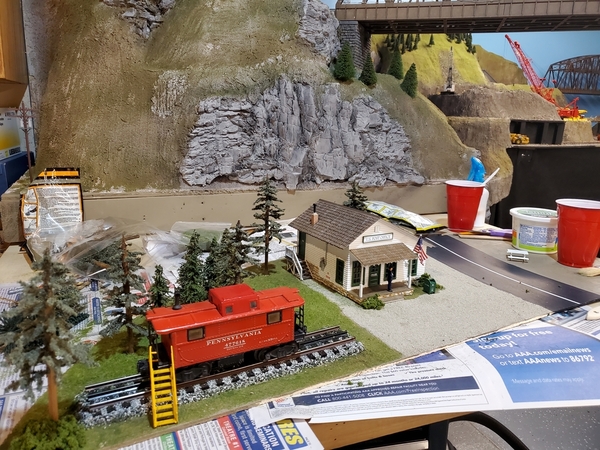
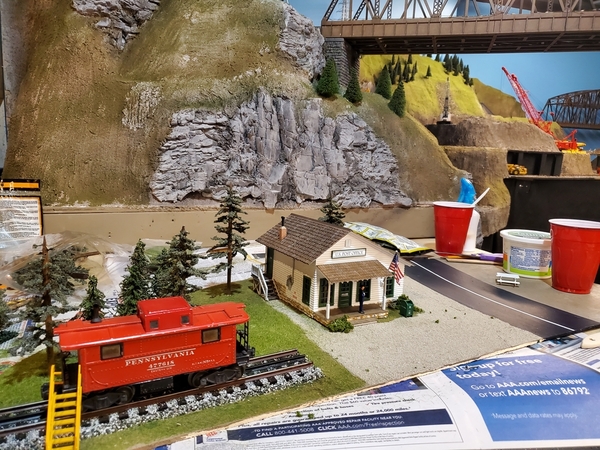
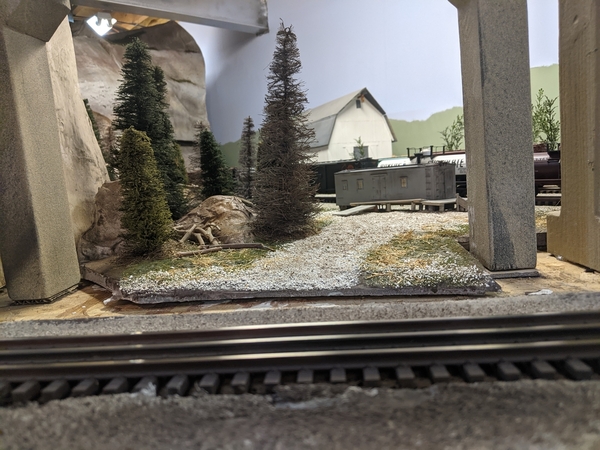
Dave, the gorge looks amazing! I bet it sure is fun to see a nice steamer rolling across the bridge!

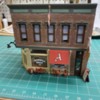
Seth, out standing job on the corner emporium!

Well I am headed to the train room soon to work on my fire engine and switching tower. Wish me luck! LOL

I hope everyone has a wonderful Saturday and finds time for there layout and train. But most of all I hope you all find time to have fun!

Hi romiller49, Rod Miller, thanks for asking, I’m trying to learn the trick to making videos, first, I set the iPhone to video, started the trains running, turned on the video, viewed the trains, watched the timer, stopped before 60 seconds. Posted on the thread by going to my photos, waited as they loaded in the que, when finished,the word successful appears, a little square box lights up,  I hit ad and hit finished. I have a long way to go, if I had a friend stop by I could do more. Thank you and Happy Railroading Everyone.

Attachments

Videos (1)
5F65D4C8-C5AC-4EF8-8AC2-1B4B46983322

Small progress was made this week, though, nothing yet ready for photograph or video. Yesterday, I took my MTH, DCS, TIU's and handheld controllers to Just Trains of Delaware to be upgraded. I also tested a replacement controller sent me by Miller Engineering for my Union Station sign, that, originally, only operated for about 2 weeks before failing. Miller Engineering was quite cooperative in working with me to identify the problem and stood behind their product by replacing the defective controller module. The sign now works well.

Last edited by Randy Harrison

Romiller49 :  let me add to my friend leapinlarry. You need to watch the upload indicators and be patient. I failed for almost a year because I was used to uploading pictures which are almost instantaneous whereas videos take time to reach successful upload. I am convinced that many of my early failures were  because I cut off the process too soon.

Best of luck

Don

I’ve been painting the little add ons for the Woodlands corner emporium for two days. So the little building is coming around now.

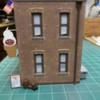
The emporium signs will become the Skating Rink up the stairs. And Stephens Barber Shop on the ground floor entrance. Just as it was in the 1950’s downtown Olive Hill...

I added a warm light LED inside tonight so I will complete assembly of the interior and exterior tomorrow.

This is the second of two buildings completed since the ice storm on February 14th... began the painting on building number one (Korber) due to the very thick once on top of the stairs steps to my train room.

I must say it’s been a different type of enjoyment for the layout. Each one a learning experience.

Attachments

Images (2)
  • 5E291770-0C0F-4F73-B14B-6FE2C0E82318: Skating rink upstairs
  • 05784CB9-225E-4E09-A83C-CBFAB0EC26FD: Rear of Stephens Barber Shop

Yesterday I did an exercise in insanity . I took my 9 lionel telephone poles and drilled out 10 holes in each , one for each glass insulator.  Then I strung them all with 2lb test monofilament.  It took all afternoon to complete. I know some of the wires are not taught enough but hey, I'll just look for some o gauge birds to roost on them.

20210320_20591520210320_205633

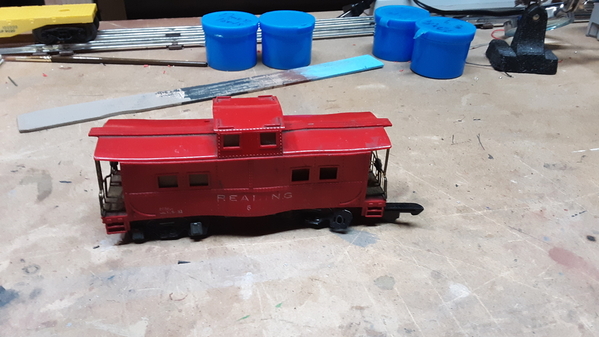
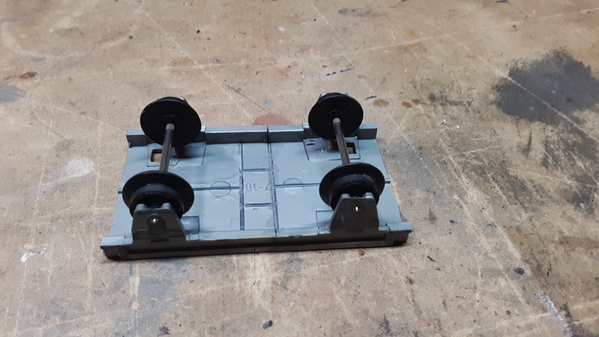
Today was a road trip day. My son and I went to 3 different hobby shops.  I bought 3 S gauge junker cabooses.  Just needed the wheels for one of my next projects,  a 4 wheel ingot buggy. Made from an 027 bobber caboose frame that was hacked apart and reassembled. I need to make a floor and sides for it.  Bought some kadee 806 short couplers for it.

20210320_21083820210320_21085620210320_210902

More to come as I progress on this build.

Attachments

Images (5)
  • 20210320_205915
  • 20210320_205633
  • 20210320_210838
  • 20210320_210856
  • 20210320_210902
@romiller49 posted:

Larry and Don. Thank you. I was hoping it was as simple as pictures but like you Don, I did not wait long enough on the download. Rich Melvin’s post on YouTube also sounded like IPhones would not work for videos.

Iphone movie: "Grandson turns 6 next month and I am egg-static that he has still has interest in running trains. Here we tested a small-scale layout in preparation for the 4x8 track setup"

Don, there are as many ways to do this as there are folks with phones. (Take the video in the landscape option). I upload video (watch lengths) to email. Automatically, Iphone will resize. (you can edit to length, save, then add to email as attachment). Send email to myself and save it to my download folder on the laptop. Remembering where it saved, I add attachments to post and the forum does the rest. <salute>

Attachments

Videos (1)
test-4x8-run

Morning guys I hope everyone is doing well!

Larry I think your doing great job with the video's, plus it give me and everyone else a chance to see your amazing layout in action!

Third Rail, Wires look perfect, remember that all wires have some sort of sag.

Miggy, wonderful job testing and getting things ready for your grandson! What a good grandpa!

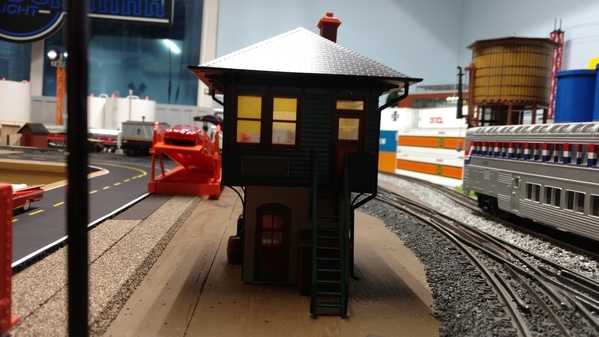
Well yesterday I did get out to the train room and worked on my fire engine and switching tower. I had to cut some plexi glass  for the windows on the bottom of the tower, I also added some lighting to both floors along with a worker in the window of the tower. I still have to put the electrical pipe and down spouts on before I can call it done. IMG_20210320_114247752IMG_20210320_114828110IMG_20210320_132616275

I think I am going to have to try and find a new location for my auto ramp and auto cars so they don't block this scene.IMG_20210320_132725566_HDR
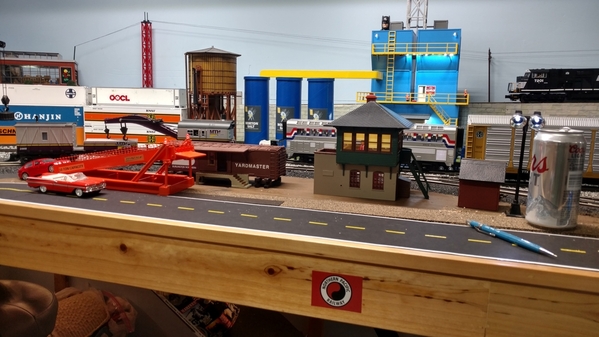
As for the fire engine I just put the chrome on the pump panel on the back of the engine and then the grill and headlights on the front. I am going to try and finish both project today.
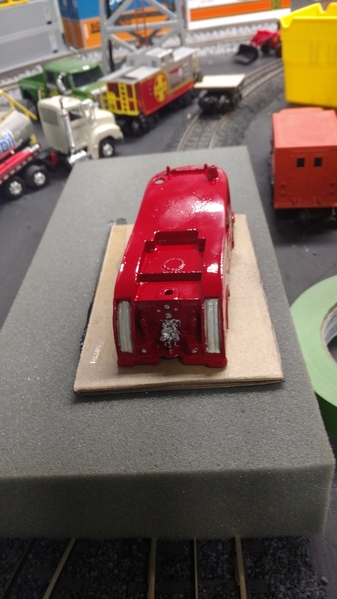
IMG_20210320_082155650IMG_20210320_082146713

I hope everyone has a wonderful Sunday and don't forget to have fun, spend time with your loved ones, and watch NASCAR! LOL Ok you don't have to do the last thing! Just have a great day!

Attachments

Images (6)
  • IMG_20210320_114247752
  • IMG_20210320_114828110
  • IMG_20210320_132616275
  • IMG_20210320_132725566_HDR
  • IMG_20210320_082155650
  • IMG_20210320_082146713

Hi everyone, just taking a break from projects to give you all an update.

The Switching tower and Fire engine are done! Now to do a little clean up and start on a couple buildings for flats. Here are the finished items.IMG_20210321_115131124IMG_20210321_115140590IMG_20210321_114621365

I take that back, I see I have to make signs for the building! LOL

Attachments

Images (3)
  • IMG_20210321_115131124
  • IMG_20210321_115140590
  • IMG_20210321_114621365
Last edited by mike g.

Today I made further small progress cleaning up my pig-pen of a workroom. Now that I have closed my business and am fully retired, I am trying to "shovel out" my work room which is in severe disarray. About 3 weeks ago, when I relocated a floor-standing cabinet, I found that one of the cans of MinWax wood stain had ruptured and leaked all over the concrete floor leaving a massive, for want of a better word, blob that was half hardened and partially sticky. Today, I finally made some progress at removing the mess so that the cabinet can be put back where the mess is. I poured oderless mineral spirits on the mess. In the past I was simply trying to wipe it up with a towel. That never worked well. Today, I again poured the mineral spirits solvent on the mess, let it sit for a few minutes and began scraping it with a wide putty knife. It had softened enough that I was able to remove a good bit of it with the putty knife. I will attack it again when my over-taxed back recovers.

I also drilled several pilot holes in the roof of my Union Station to secure, with screws, my now functioning Miller Engineering sign. Though it be in baby steps, I am moving forward. Stay tuned for another exciting installment later.

Thanks guys for all the nice words on my tower and fire truck! Yep Bob, there are there cause someone let there cat out and it got on the roof and the boss was worried for it! I asked him if he ever see a cat skeleton in a tree or on a roof! LOL

Randy, Congratulations on your retirement! Now that your out of work you have all the time in the world to take care of stuff like the  MinWax stain among other things that you probably have never thought about ! LOL I cant wait to see your station with the new Miller sign installed!

I was able to get started on my next project! Ameri Towne Skippey Gear Co. That I am going to make into a flat for in front of the window above the service area!

IMG_20210321_145347535IMG_20210321_145251550

I have already cut the back wall into 3 sections. 1 for a 3rd loading dock door and 2 building sides. I will have to scratch build 2 floors a roof and a back. Also install lighting on both floors!

I hope you all had a great weekend and found time to have fun with your layout and trains!

Attachments

Images (2)
  • IMG_20210321_145347535
  • IMG_20210321_145251550

Congratulations Randy!  Retirement is great!  Mike, if I wasn’t still building I would get out my Atlas tower kit and build it.

I positioned the limit switches so I don’t put a bridge through the ceiling.  I tested with alligator clips and tightened them down.  I still have to wire the power for the linear actuator permanently and track power on the bridges.

Spent the day adding ground cover to the "Charles Street Yard" attempting to duplicate the diesel covered ground of the '50's.  I recall visiting there with my grandfather on a few occasions...the smell of diesel from the ground and in the air...engines running at idle all over the yard.  I can't recall the number of stubs in the yard, other than there were too many to count.  With the 8' x 8' addition to my main layout, i'll have to settle for 9 stubs!

Finally placed the GGD coaling tower after being in storage for 6 years  Hope to wire it up tomorrow to bring a little lighting detail to that side of the yard...

Yard 6

Yard 2

Yard 3Yard 4

Attachments

Images (5)
  • Yard 6
  • Yard 2
  • Yard 3
  • Yard 4
  • Yard 3

Good Monday morning everyone, I see everyone has been working hard on there layouts!

Strap Hanger, looks outstanding and well worth the time and effort!

Farmer John, Nice work! You can see why you have one of the truly amazing layouts on the forum!

Seth Thomas, Great work, by doing it yourself you get the detail you are looking for!

Paul, what a wonderful job on the Charles Street Yard! At the rate your going I can tell your going to be done anytime and its going to be outstanding !

Pennsynut,I really like how you built this and worked on it away from the layout! You have less mess and less chance of damaging things on the layout. It really looks amazing and looks at it is going to be a perfect fit on your layout!

I hope everyone has a great day and has fun with there trains and layouts!

Looks like everyone had a productive weekend on their layouts except me. The CEO and I are designing a new kitchen so layout time was zero. I was hoping to work on my new switches for the yard project but the kitchen design is holding up roofing and siding so, priorities.

Mike G- That building looks vaguely familiar....should make a nice flat.

2020-02-09 12.33.00

2020-05-07 08.06.10

Attachments

Images (2)
  • 2020-02-09 12.33.00
  • 2020-05-07 08.06.10

Chris, Very nice power and control basics video.  You certainly have build a lot of versatility into your layout!!  It reminds me to mention here that when I wired all my blocks, I separated my mainline from my sidings with the mainline powered by one Z4000 output and TIU fixed output 1 and the sidings by output 2.  When I connected everything, I thought I had tested that the two were separated electrically.  I discovered a few weeks ago I have the two tied together somewhere.  I was concentrating on my lift up bridges when I discovered the problem, so I have put off trouble shooting for now.

@Chris1985 posted:

Morning all! Just signing back on this morning so looking forward to seeing all the updates. @RSJB18 - My wife is starting to design our new kitchen so I have a feeling I will be spending more time on that project as well! Good luck with the project!

I put together a second layout progress video highlighting power and control. Link is below:

Thanks Chris for making it so easy to understand! It can be a real pain in the rear for some of us that are slow when it comes to electrical! LOL

Well this is more on what am I going to do on my layout - TrainWorld is shipping my second MTH Illinois Central Gulf engine so I can duplicate the prototype photo I tool years (decades) ago.  The Orange and White paint scheme engine is due in a few days. I have had the ICG Blue and Orange for several months now.

Too bad its now Canadian National - not that it is a bad organization - just too much consolidation in the RR industry IMHO - fallen flags. My industry went from 11 competitors to 4 due to Ivan Boesky starting the M&A craze during my career. I was bought 2 twice and survived both - many people did not. Good - Bad - I don't know - but a lot of good people lost their jobs so VPs and shareholders made a lot of money on the mergers. Well the Fed approved it so it most have been in the best interests of the country and its citizens.

The image was shot (by me)  in Pesotum Illinois just south of Champaign. Notice the incredibly flat land - you can see the horizon in all directions from there if something is not in the way.  South bound freight.

img041

Attachments

Images (1)
  • img041
Last edited by ScoutingDad

I looked up ICG 8004 - the web data shows it is a GP10 built in 1968.  I think I took the photo in late 1990. Apparently ICG rebuilt GP7 GP9 and others and ended up with a different number (GP10) than the original EMD engine. I do not know enough about the engines to tell the difference.

I had a fraternity  brother who worked for EMD in McCook Illinois, who told me about the basic difference between the GE and EMD diesels - one was built from a casting the other was a weldment. Both had advantages and disadvantages.

@mike g. posted:

Thanks Chris for making it so easy to understand! It can be a real pain in the rear for some of us that are slow when it comes to electrical! LOL

Wow! I agree Mike g. As a carpet layout and now a 4x8-er, I am amazed at the larger layouts that the "Big Boys" build and model. Also, there is something quite daunting when the gathering of 3, expensive, ZW controllers set in the forefront. And apparently, just the amount of wiring is expensive. And, with the technology that is out there, what with remote control systems and Rail Sound Consists, the appeal will reach out to the younger generations, for sure!

I started using Bluetooth sound speakers with a Sound-of-trains app three years ago. I found small rechargeable speakers that look like a Crate-of-Freight on flatcars. That solved the lack of horns issue I have with several engines we run. Also, It keeps one engineer busy with the laptop selecting sounds, while the other makes the trains move. Technology! The kids soak it up.

That being said, a line of ZW transformers at the forefront shows how expensive it can get. And I again thank the leaders of this hobby, sharing selflessly, how to manage intricate issues we all encounter.

Great Video and thanks again!

Last edited by Miggy

Mark, you must have seen the NS 1072, the Illinois Terminal heritage unit. The IT was liquidated by the NW in 1982.

Rusty

Rusty, It is very odd.  I have seen this engine twice now.  It is not the heritage unit.  It is a smaller diesel, but I am not up on diesels after first generation.  It certainly wasn't green.  It was solid black with Illinois Terminal in white block letters on the side.  I have not found a photograph anywhere online, and wasn't able to get the phone out quickly to take a photograph.  It was moving and I was driving.  I am suspicious but don't know if it was something the CN or AK Steel bought or leased and wasn't repainted.  It also could have been something the Buffalo and Pittsburgh had because they interchange with the B&LE (CN) in Butler.  The B&P also have lots of diesels at their Butler Shop of various paint schemes.  Maybe I was delirious when I saw it. 

Last edited by Mark Boyce

Did it look like this one?  This set of rails runs east west through Champaign. This consist was making a delivery of stone and other materials to a concrete products company. I would see them about 3 times a week when I was driving to work - do not remember what that is like anymore - over a year now.  CN operates the track down here.  I thought about picking up this color scheme from MTH and decided not to buy.

IMG_20190618_112229329_HDR

Attachments

Images (1)
  • IMG_20190618_112229329_HDR
Last edited by ScoutingDad

Jeff, that is an excellent photograph!  That looks like what I have seen.  It looks like an SD or GP something or other.  I can't see how many wheels.  The last time was probably 6 months ago or so.  I didn't notice the yellow stripe, but it could have been blocked from view, or I was concentrating on the lettering and missed it.  That must be it!  Thank you!!

Mark what a sheltered life you must have led to not be up on Midwest railroads ; )

I didn't even know about Illinois Terminal until I saw the road name on an engine 2 years ago and I have been all over the Midwest. Still do not know anything about them.

Trains publishes posters of historical road names in the US/Canada and by current owner showing rights of way. I have several hanging in my train room.

For some fun look up "Chicago South Shore and South Bend Railroad" Quite a history and still independent.

@ScoutingDad posted:

Mark what a sheltered life you must have led to not be up on Midwest railroads ; )

I didn't even know about Illinois Terminal until I saw the road name on an engine 2 years ago and I have been all over the Midwest. Still do not know anything about them.

Trains publishes posters of historical road names in the US/Canada and by current owner showing rights of way. I have several hanging in my train room.

For some fun look up "Chicago South Shore and South Bend Railroad" Quite a history and still independent.

SD and @Mark Boyce- Virtual Railfan has a camera at Waupaca Wisconsin at a foundry. The line is owned by CN but they run locals with IT, and GT Geeps.

She will be setting on the layout the next time you see her guys... I can recommend this kit from Woodlands Scenics... the Corner Emporium. Precision cut and fits together well.

Next in the agenda for the DJ&C rail yard us streets and roads...

What is your normal width of your road way for the 1:48/1:43 ratio cars and trucks?

The yellow center line stripes, I cannot paint them on the roads.
What’s recommended?  
I know recently Mike g. has cut the strips from something. But please share with me again 🙄

I appreciate your interest and information 😊

Attachments

Images (4)
  • F9D861A8-E9AE-4E53-8FB7-219DB44098F7: Railroad street side
  • CBC1EAE5-F67E-47F5-A7AE-FE28D6027358: Left side with adjoining building
  • 335D1AA7-6079-4B63-8813-FDA9D2195930: Scott Street
  • 3B983676-9344-4784-8A78-9893D985EBA0: Alley

Seth Thomas...regarding yellow or white road striping, parking space marker lines, etc., I've had good luck with 1/8' auto pinstriping from the local auto parts store...not exactly in scale, but does the job for me...


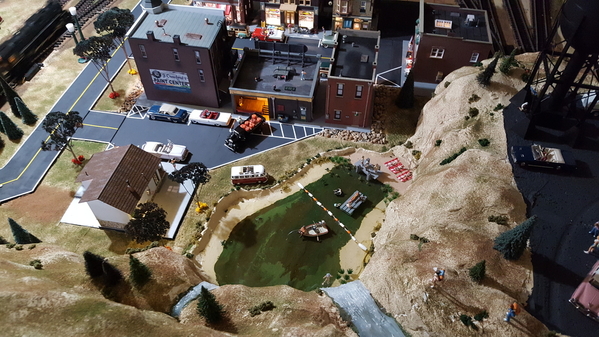
Pond Aerial 2

Capetrainman I appreciate the kind reply.

Since you supplied such nice streets tonight, how did you make your side walks...? Thanks in advance. 😊

While l was on a roll with the Nash Dealer structure, l decided to tackle this T. Yorke "Tony's Garage", as it is a dilapidated ruin and could have serviced cars in my ghost town.  With no instruction sheet, and several anonymous plaster cast walls and other parts, l conjured up a seat of pants assembly l am pleased with, a garage up on a stone walled basement where mechanic could work under cars, but gas was sold at bottom of ramp.  Building is done, but ramp and basement are under construction.

@Seth Thomas posted:

Capetrainman I appreciate the kind reply.

Since you supplied such nice streets tonight, how did you make your side walks...? Thanks in advance. 😊

Seth Thomas...by placing the buildings flush on a 12" x 12"  6mm "Foamie" pad with a setback of 1.5 inches or so, the sidewalk was created.  After painting the black pad gray, the sidewalk was there!  By using a 6mm thickness option, the curb was created by using a 3mm "Foamie" pad for Main Street...so the sidewalk height became 3mm.  I believe the 3mm sheet for the road was 12" x 18".  A 2mm pad was available also to create a little extra height for the sidewalk, if wanted. The pad for buildings and the road was secured to the plywood with a few dabs of construction adhesive...just because I had some on the bench.

The foam pads take paint well.  I didn't go to the extent of cutting lines in the foam to simulate sidewalk "cracks," but this could be done easily enough if you want the extra detail.  Hope this helps

Sidewalks 1Sidewalks 2Town Lake 1Town Lake 4

Attachments

Images (4)
  • Sidewalks 1
  • Sidewalks 2
  • Town Lake 1
  • Town Lake 4
@RSJB18 posted:

Looks great Mark. Your twice around plan makes for a nice run.

Bob

Thank you. Bob!  I have struggled with the grades on this layout more than I did doing something similar years ago.  In fact, at times I wondered if I would have been better just making two separate loops the one next to the wall higher than the other.  I'm glad I stuck with the 'original' plan.

Wow Mark! That looks great. It reminds me of a 2 Rail O gauge layout based on the L&N I saw in Model Railroader a few years ago. It was a multi deck layout and had a similar track layout. Nice backdrop too!

Thank you, Cody!  I have seen plans with the similar idea too.  Thank you for commenting on the backdrop.  I bought it from a Forum member and cut it some to suit my room.  There is still some work to do on it.


Capetrainman the streets in your town really look nice.  Thank you for the description of how you did it.

@Mark Boyce posted:

I finally got the contacts in to power the lift up bridges when down.  Here are two views, both about 2 1/2 minutes long.

@Mark Boyce posted:

Thank you, Seth!  Every so often someone refers to the ‘pink lady’ room!  It has taken over 4 years, but I am glad it is where it is today!

I tend to run them slow, but that makes the route seem longer, and it is a mountain railroad

BrILLANT!! Thats Fantastic..... and the slow run is really quite Dramatic, Mark. Amazingly, There was No Gomez Addams Crash!!
Well done. Proud, we are.


Seth Thomas...by placing the buildings flush on a 12" x 12"  6mm "Foamie" pad with a setback of 1.5 inches or so, the sidewalk was created.  After painting the black pad gray, the sidewalk was there!  By using a 6mm thickness option, the curb was created by using a 3mm "Foamie" pad for Main Street...so the sidewalk height became 3mm.  I believe the 3mm sheet for the road was 12" x 18".  A 2mm pad was available also to create a little extra height for the sidewalk, if wanted. The pad for buildings and the road was secured to the plywood with a few dabs of construction adhesive...just because I had some on the bench.

The foam pads take paint well.  I didn't go to the extent of cutting lines in the foam to simulate sidewalk "cracks," but this could be done easily enough if you want the extra detail.  Hope this helps

Town Lake 4

NICE, I especially like FRANKS!

Add Reply

Post

OGR Publishing, Inc., 1310 Eastside Centre Ct, Suite 6, Mountain Home, AR 72653
800-980-OGRR (6477)
www.ogaugerr.com

×
×
×
×
Link copied to your clipboard.
×
×