Finished packing everything up a few days ago from the old layout. Ready to tear up some old bench work and making a mess.


|
|
Finished packing everything up a few days ago from the old layout. Ready to tear up some old bench work and making a mess.
I removed my TIU from the layout and boxed it up to ship out. I have currently removed everything that is PS2, and will be staying with Legacy/TMCC only.
I looked around the layout half way through spending significant time underneath it rewiring accessory leads and dismissed the thought of continuing today. I looked at the projects on my table and thought "maybe tomorrow" I thought of going to Lowes for more wire. Nah..too cold out today. I ran trains instead. No wonder I have a backlog of half finished projects as I spend too much time playing with trains.
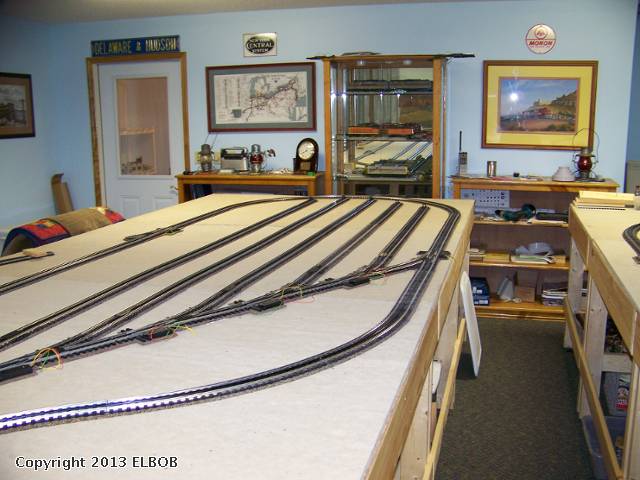
I just finished all the benchwork on my new layout. Tonite is cleaning all the table tops off so they can be painted. And starting to glue some foam down to prepare for roadbed laying.
will be staying with Legacy/TMCC only.
Good for you!
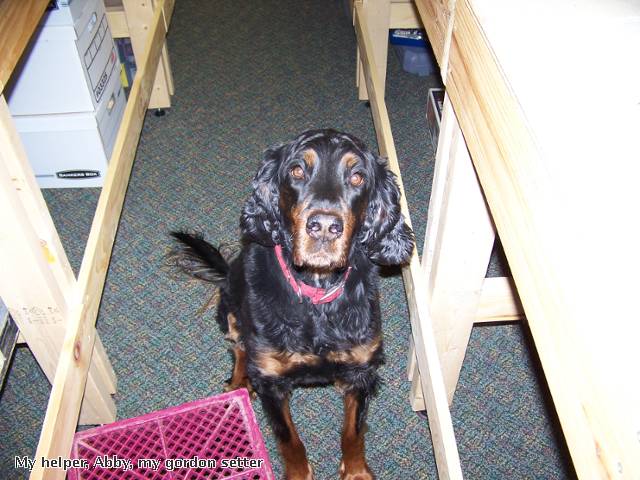
My dog, Layla and I have been building the Kenai Mining Company in honor of my dog Kenai who passed away 18 months ago.
Kenai,
Looks fantastic (talking about the dog)! ![]() More photos of the layout would be greatly appreciated!
More photos of the layout would be greatly appreciated!
I just finished all the benchwork on my new layout. Tonite is cleaning all the table tops off so they can be painted. And starting to glue some foam down to prepare for roadbed laying.
Bob, I loved all your You Tube videos of your previous layout. I'm really looking forward to seeing what you do this time!
I put Woodland Scenics risers under the loop on one side of my layout. The loop is O84 and O72 Fastrack. I raised the upper level on six inch blocks of styrofoam around to the other end of the layout and stuck a few pieces of foam under that loop. I test ran one diesel around the whole setup. I have a spot that I need to extend the benchwork so there is support under the track, and three corners that I need to fill in. I installed another O72 cross over, bringing the total to three, and installed a turnout for the yard lead. Yesterday evening I unpacked the Big Boy and tested the fit on the outsid loop. I needed to make a little clearence adjustments, but everything checked out OK. Now I need to finish the benchwork so I can start on the other side.
I looked around the layout half way through spending significant time underneath it rewiring accessory leads and dismissed the thought of continuing today. I looked at the projects on my table and thought "maybe tomorrow" I thought of going to Lowes for more wire. Nah..too cold out today. I ran trains instead. No wonder I have a backlog of half finished projects as I spend too much time playing with trains.
You sound like me. ![]()
Art
well let's see...planted about a dozen or so people last night as well as putting on/off switches to several sets of lights etc.
dusted off some of the bldgs and accessories.
also added more lights to some of the bldgs and hopefully will get them wired up later today.
thop......
Hi Everyone, Really enjoy this post! I don't have an Iphone yet, so I can't easily post during my daily comute. I hope Jumijo was kidding about putting a flat screen TV where his layout is located!
This is more of a "what i did over my summer vacation" than what i did today. My house was built in the 1960s and for lots of reasons I decided that the popcorn ceilings needed to go, unfortunately, one of the rooms had my layout in it, which needed to be dismantled. So, I am attaching a few pictures of that layout, which I had built on four kitchen cabinets in the bedroom of my oldest son, who finally moved out a few years ago. About 10 years ago, in a basement storage room, I had built a layout that has the look and feel of a Lionel Display Layout. It has Atlas track and the curves are not big enough for my bigger engines, so i will be adding a loop of track with 54 inch curves on extensions added on to this layout. Over the Christmas break, I added more storage, on a shelf in the storage room closet. Take care,Dave


Not strictly "on the layout", but built myself 2 rail cleaning cars (thanks Ace!), one for O-gauge out of a Marx tin caboose and one for S out of an American Flyer hopper. They have picked up an amazing amount of black crud.
I always get inspired after attending Trainstock. Have been working on my mountain and cleaning track and wheels.
I spent the morning before the kids got up cleaning out under the layout. I found a bunch of unused items that will go on the buy/sell forum. I also am looking at how I am going to design my pull out shelf for my transformer.
Wired my Gantry Crane (thanks, Doug!). Relocated the drum loader, to make it more accessible for reloading. Both working fine. Installed some new peripheral terminal strips to ease further accessory wiring.
Went to LHS (Klein's) and spent my gift certificate. All in all a fine day!
Wrapped up a major part of the panel relocation/re-wiring project so I can complete the area for the locomotive service facility and roundhouse.
Started out running a newly acquired post-war 2056; runs and smokes like new! Then did some ballasting and scenery details around the rural station corner.
I put up LED strip lights in two display cabinets.
Brewman.....where did you get that extra wide tunnel portal?
Rick
I purchased 4ea dz-100 switch machines and just dreamed about it. I was at the Big-E train show today. Maybe tomorrow I'll have a chance to work on it for a few hours.
Brewman.....where did you get that extra wide tunnel portal?
Rick
Looks like an extra piece has been spliced into the center. Not tough to do.
I fired up my new Railking New Haven Hudson.
I re-wired the inner loop at the far side of the layout (where I was noticing slower speeds).

I wrote down a plan of projects for the coming 6 weeks.....that is sure to be broken![]() at some point!
at some point!
Peter
I spent a long time planning my layout. I realy got into the layout construction phase after winter settled in here inNorthernNew YorkState (and after my wife threatened to use my train room for quilting if I didn't get moving!) My lower level basically consists of a folded dogbone with the right side containing a five track yard and a ladder track, and the left loop containing a reversing loop. I have plans for the upperlevel, but that part of the project is a long way off. I used Gargrave track and Ross switches. I installed Gargrave uncoupler tracks on all the yard tracks, and also on a siding coming off the reversing loop on the left side. Included are some photos. I have spent the last several days (including today) on my knees under the tables running and connecting the wires for the electrical system. I am learning to do the electrical as I go.
EL BOB

Started wiring DZ2500 switch machines - my goodness, that wire is tiny!
Finally got the 2nd attempt at the control panel to the point where it could be installed and wiring process began.
Did some of the wiring at the bench where it was easy to get to and work on.

Built the frame work for the panel and got it painted.

Started wiring up the Tortoise Switch Machine toggles with LED switch point indicators (green/yellow) for normal and diverging routes.

Brewman.....where did you get that extra wide tunnel portal?
Rick
Hi Rick and Harry, I used the heavy clear plastic container that the K-Line tunnel portals came in as a mold, which I then poured modelling plaster into. I made two and spliced them together. You can see from the picture that it lacks much of the detail, but it looked ok after painting. To give it extra strength, I added a wood brace on the back. If I had it to do over again, I would not have put the portal on a curve. I had to trim the sides a few times to allow for overhang from some of my larger engines.


I didnt do any actual work on the layout today, but ran trains with my son.
I also have started talks with Alex Malliae about building a new feature of the layout. This will require a large rebuild of the corner closet that cover the sump pump. It will also cut down on my asile space but I think the end results will be well worth it.
I worked on a vignette. A couple of guys cutting firewood.

Really worked on the railroad yesterday setting up a newly acquired ZW-L to replace my two ZW's. Had to run some new wire under the layout as I have the railroad divided into two power districts and the ZW's were in different locations. Now the ZW-L powers both districts. I was up until 3:30 this morning running trains. So I guess I did do something on the layout today! ![]()
Tom, like the new vignette. Well done!
Worked on my wesite this afternoon and wrote about the new ZW-L. Bo ![]()
Visit my website Bo's Trains at http://www.bostrains.com
I have decided to upgrade my layout wiring to operate all my switches and uncouplers using the MTH AIU. I have also removed my switches from track power and will be running them from aux transformer power. I am also adding track detection blocks by isolating one of the outer rails. This will allow for realistic block signalling.
I have rewired 2/5ths of the layout and have used up 800ft of 4-wire phone cable so far.
In the pictures below, I have mounted my AIU's to a movable pannel (1/8" plywood) so I can do all the wiring on my lap while sitting in a chair. This only requires that the wire runs have an extra 3ft length so I can pull the AIU pannel out from under the layout for easy access. I have found this very practical, since there are about 100 wires to teminate for each AIU.

Isolated outside rail by cutting rails and removing track pins on Lionel Fastrack, to create a train detection circuit. this will allow for block signals

AIU with extended wires, so you can do all the wire connections while sitting comfortably in a chair.

Wire labels and color codes, created using excel spreadsheet, allows for easy tracking of wire connections. Each 4-wire phone cable is labeled, and the colour codes indicate where each strand color for the cable should be connected.

AIU is hanging on 2 screws, under the layout. this view is in a closet, so there is no scenery and skirt. The AIU's in the rest of the train room are hidden by a skirt that hides the under table mess. In my train room, there are bankers boxes under the layout that store all our "stuff". This demands that the train table be as large as possible in order to store the many bankers boxes.


Still making a mess. But enjoying it.

I added four tunnel portals on the third level and finished laying the track on the fourth tier of my display. Hopefully I'll be able to crown it with a fith tier today.
I rewired 4 switches on the fasttrack and secured the wires under the layout. Today gonna do four more. Gotta get the switch wire under the layout so I can start doing scenery, and wiring the buildings,light posts,yard lights......
finished the roadbed on a 46ft long straight double track main. It is perfectly straight, thanks to a laser sight!
I fired up my new Railking New Haven Hudson.
I re-wired the inner loop at the far side of the layout (where I was noticing slower speeds).
I wrote down a plan of projects for the coming 6 weeks.....that is sure to be broken![]() at some point!
at some point!
Peter
I like your idea of the old rail line leading to the scrap train, I'm going to steal it!
finished the roadbed on a 46ft long straight double track main. It is perfectly straight, thanks to a laser sight!
Wow Bob, I wish I had the room for a 46long straight!
Started the morning gluing together a couple of crossbucks for a crossing and then worked on ballasting a yard area. Later plan to work on some more trees. There seems to always be a need for more trees. Bo ![]()
Visit my website Bo's Trains at http://www.bostrains.com
I painted up a few locomotives and will be decaling them tonight for a customer. I will be running trains this afternoon when my son gets up from his nap.
finished the roadbed on a 46ft long straight double track main. It is perfectly straight, thanks to a laser sight!
Wow Bob, I wish I had the room for a 46long straight!
this layout is long and skinny. It gets very hard to keep such a long straight perfectly straight. I set up a datum line with a laser and measure off that.
Gentlemen,
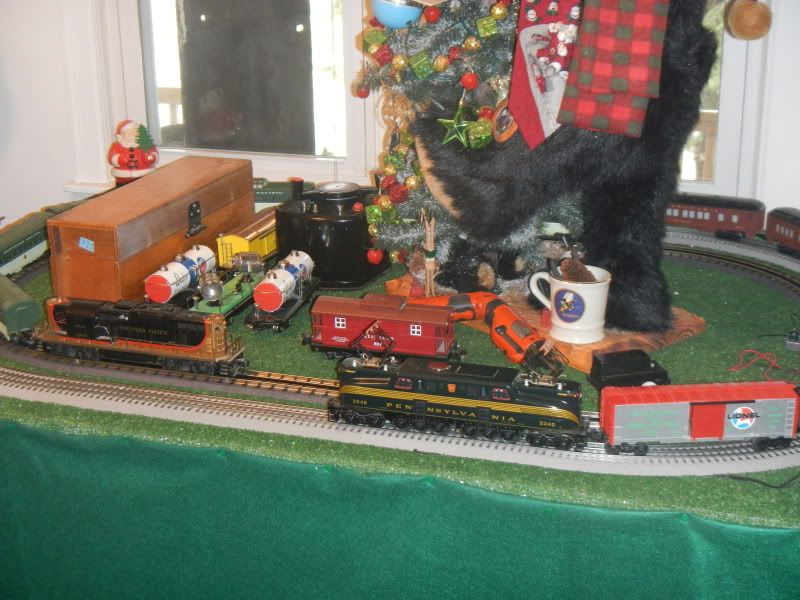
Christmas 2012 layout coming down, disassembling the layout in process.
Final runs with the Williams Pa Green GG1 & the Lionel Union Pacific GP7 engines.
PCRR/Dave
Last night I took my 30+ LEDs off the transformer and on a 12v 1 amp Wall Wart. I installed my Atlas O Oil Pump and luckily I still had an old HO DC transformer around to dedicate to that.

I Prepared the upper level and broke Ground for Pennsylvania Station.
Is my support stantion overkill?


I didn't work on the layout, but I did work on a Lionel GP7 that I am detailing and painting for a C&O GP7.
While I watched the Red Wings game I decaled a Legacy 0-8-0 for a Grand Trunk Western. I will clear coat it tomorrow, 1st witha gloss coat to hide all the decal edges and after that dries with a semi gloss or dull coat. Havent decided on that yet. Just have the front number board to do and paint the cab window frames red and it will be all done. Next up a Soo Line Mikado.
Yesterday I drilled holes in the platform to insert Christmas lights in the buildings on my layout. When my Dad gets a chance, he is going to build me a dimmer box for them (it's handy having an electrician in the family) so I can dim them.
Today, I used my rivet press to make the screw holes bigger for my American Flyer track. Tomorrow, I finish laying it out and securing it down.
I just ran trains. My layout is taking so long because I enjoy watching the "action" too much!
I spent some time making tree armatures and painted a couple of crossbucks. There are never enough trees or so it seems. Bo ![]()
It wasn't exactly on the layout, but it was in the train room. I finished the ramp that leads up to the raised floor. I didn't even realize that was the final piece until just now.

I always hated having to do that 12" step up. The ramp was always in the plan, and now it's done.![]()


Drilled some holes in the bench work so I can run wires for turnouts tomorrow.
I uprooted a bunch of my crappy pine trees and broke out the "Good Trees" finally and started to install them.

I wired up six Lionel yard lights. Slow and steady wins the race or gets the layout done?
Last night I plaster clothed part of my river and a hill that will go behind my grist mill. This morning I installed the motor to my Grist mill and the mill. I will do more plaster cloth this week when I get to the hobby shop to pick some up.
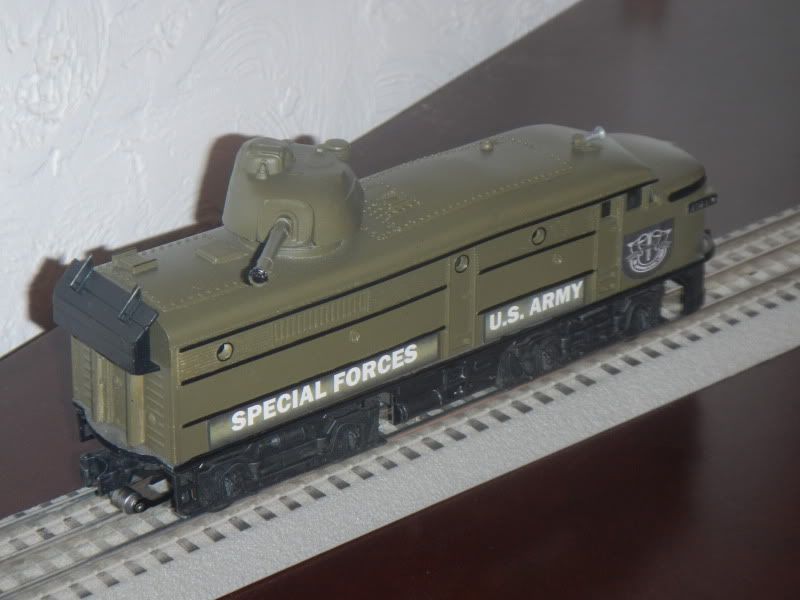
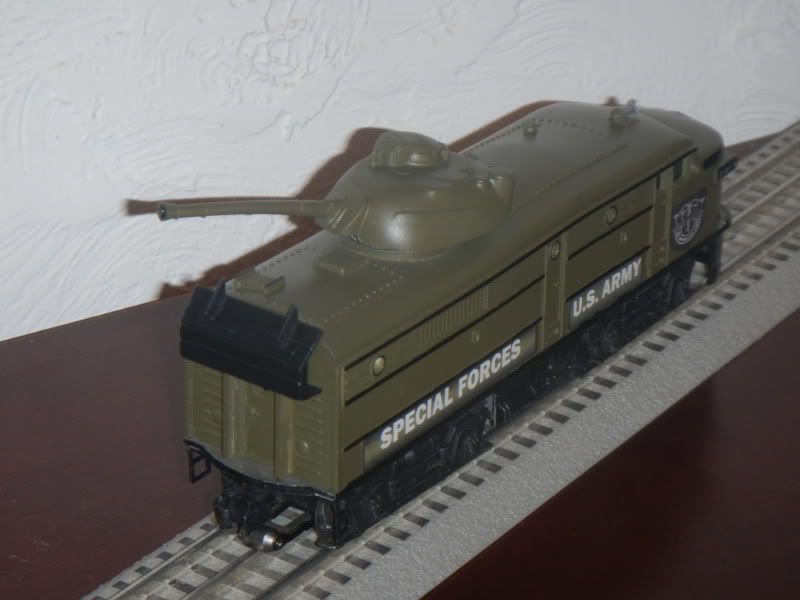
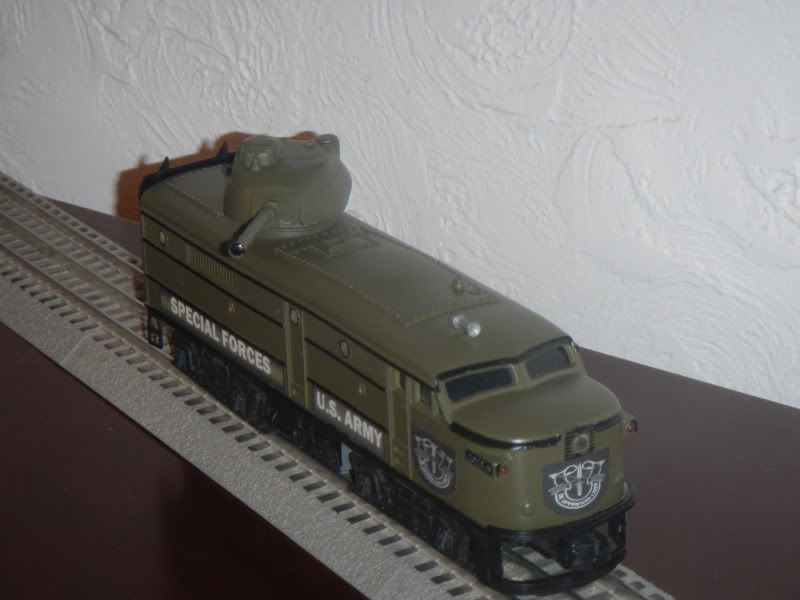
Did some measuring and planning for the new book shelf, ceiling layout, and tested my new Special Forces Shark Engine.
PCRR/Dave
I worked on my "control stand", and getting some RMT 70 ton hopper ore loads ready for repainting. For some reason they look uniformly pink/rust.
And I ran trains for a combined 1.5 hours.
I made a video using two new wireless mini video cams that I installed on my Grand Central subway station. The images are broacast to my TV and the cams can be changed by remote control. I now have a total of 4 cams in three stations.
Also added besides the two cams are a third rail right by the station track.

I worked on my country Superstreets road - the difficult part, on a section of the layout that is both challenging to access and that means while working I can run no trains until it is done. Didn't get it done, but the end is in sight.
Wiped down the track.
Ran trains for fun.
Worked on rrtrack yard plan for the modular group
Read up on the ZW-L threads.
I finally got out to my train room and did something! Painted all my fascia boards.
Installed the Lionel Legacy 1.5.1 Update on my Cab-2 and Legacy Base.
Another fun day but nasty cutting.

WENT NUTS!!!!!!!!!!!!!!!!!!!!!!!!!!![]()
Cleaning all my rusted Super O gauge and finally trying it out.
Tin
I am still wiring my layout. I am living under layou for about the last two weeks. I feel like the troll under the bridge from the story books. Part of my problem is obtaining sufficient supplies at my local stores. Radio shack only stocks a few of any itm I need, and ordering direct from their warehouse in Dallas takes forever. Because of where I live in extreme Northern New York, I am not close to the larger suppliers. But, I am making progress every day.
EL Bob
I almost chucked my CAB2 at the wall today! Again the screen went out and now it is "forgetting" my locomotives cab numbers! I purchased a Legacy Expansion 993 set off of a forum member so I have a working CAB2 while I send mine it for repairs to Lionel. I hope they dont make me send my legacy base also.
Took some photos for the "For Sale"
thread.
Hooked up my radar tower. Don't exactly fit in my hirail theme but I have always liked it. Pretty cool.
I spent 45 minutes running trains with my 22 month old son while his brother was at swimming lessons. My two boys giving me the energy to work on my layout, after they go to bed of course. Now I'm off to wire in the smoking switch tower the wife got me for Christmas.
nothing, waiting for first frost at ag hall to get me inspired. want to do a complete make over of my 4x8.
I stayed up late last night to work on a section of track that typically gives me derailments with my scale Legacy berk. I found that the track wasn't 100% level and it caused it to go out of gauge when the heavy berk went though it.
So I was using my Legacy ten wheeler pulling 3 MTH scale passenger cars though that section to test if it would stay level. The very last passenger car split the frogs on a switch not even near that section and the wheels came in contact with the center rail. The Legacy ten wheeler then went crazy and a bunch of static came from the tender for about 3 seconds before my MRC breaker tripped.
I think I fried the RS system. The loco runs normal but no sound except static! I tried a factory reset with no joy.
Guess it will have to go to Lionel for an out of warranty repair, since I am a 2nd owner of this locomotive. Frustrating since I only have had this locomotive for a week. I typically have good luck with electronics, train and non train stuff. Frist my CAB 2 goes nuts now this.
Yesterday was the official dismantling of my Christmas Layout. ![]() The good news is only 292 days til I get to put it up again!
The good news is only 292 days til I get to put it up again!
I used the platform as a surface to repair the landing gear mount of my Mini-Pulse XT electric powered RC plane. When it was done I ran some trains. Conventionally.
Don't understand why brushless motors, LiPo batteries and spread spectrum radios aren't used to power and control toy trains.
Pete
Pete
I don't understand it either but then again maybe an upstart from the G gauge world will enter the O market. Then again, maybe like the manufacturers I simply have too much already invested in what I have.. to begin considering reinventing my little O world if it were available unless I had bottomless pockets of disposable cash. Then again, I thought weather proofed outdoor O gauge trains were a great alternative to G and that was a decade ago. Of course I still haven't figured out how to keep critters from messing up my outdoor layout. I could see my lab walking away with an O gauge engine in it's mouth. I guess be careful what you wish for is still true.
The wide open floor look of the Plasticville Frosty Bar always kind of bugged me, so I made a few additions:
-Ice cream freezer and ice machine formed out of sheet aluminum (no painting) salvaged from a microwave.
-Table out of scrap plastic.
-Mop bucket sawn from a plastic Venetian blind cord end. With a thin wooden dowel stuck in it with white glue (which turned brown).
-Tile floor made from sheet plastic and painted in black and white squares.
Pictures Please!
I'd sure like to oblige but we had to replace our computer recently, and failed to notice that the new one has no slot for a flash card.
Installed 6 Tortoise switch machines
Nothing, again. I have been fighting a cold for the past week and have not felt like doing much on the layout. Last week I did cut some masonite to finish around the shelf I have my transformer, TIU, TMCC base, etc on. I need to now screw it in and give it the first coat of paint. Maybe I will be able to work on it later in the week.
Installed 6 Tortoise switch machines
I have 25 switches on my layout, and while I'd love to use torsoise machines and get rid of my DZ ones, I sweat when thinking about the pain involved in installing them. ![]() I'll bet after the first 6, the rest are easy!
I'll bet after the first 6, the rest are easy! ![]()
Forum member Raildog came by today to check out the layout and loan me his Legacy setup so I can ship mine back to Lionel to get the screen fixed.
I finished cutting all the lumber for my helix foundation. Some assembly required! Pics on Thursday.
Frank....don't tear that layout down!!! I think I am going to gather up a few hundred OGR forumites and we will hire an attorney to serve an injunction on you....got to stop you somehow!! Don't make us come down there and whop you!!![]()
Alan
More wiring... and more wiring. My Dad has been working on another acces hatch over at the engine facility and filling in the rest of the opneing on that end of the layout.
Installed 6 Tortoise switch machines
I finished my roadbed for the first two loops of track on my new layout. I also just got down about 75ft of track. I am about 40% done with the track for my first loop. Hope to have the first loop done in a week or so.
Too messy for pictures! Hopefully soon I will post some.
I did something really stupid today.
While cutting some foam with my big razor kniff i put a nice large slice in the top of my left index finger. Nothing that a few stitches won't fix but pretty stupid on my part.
Laid rail on my wooden trestle
Installed 6 Tortoise switch machines
I have 25 switches on my layout, and while I'd love to use torsoise machines and get rid of my DZ ones, I sweat when thinking about the pain involved in installing them. ![]() I'll bet after the first 6, the rest are easy!
I'll bet after the first 6, the rest are easy! ![]()
This six is part of the expansion. It is pretty easy went you do all the prep work right, only under the table 15 min. per motor. The hard part was finding the right size phillips head screw driver bit for the #4 mounting screws.
More wiring, installed more Tortoise switch machines, oh yeah, and ran more wires.
Encountered my first real DCS problem. Spent hour and half trying to solve. Ended up resetting TIU and remote. Removed TIU from layout and set up single test track from fixed output one. Powered TIU seperately with 18 volt AC transformer. Followed Barry's steps. still could not add any engines. Put project to bed and ran Legacy only for another hour. Nice to have separate systems when one goes down.
Continued a BCR and BCR2 battery replacement process for older MTH steam. Only problem encountered so far was a first generation Rail King Berkshire that appears to be locked into neutral. A battery set in a Rail King E-6 started to leak at the top but was replaced in time with a BCR2 before it could do any damage. More battery replacement lies ahead. Replaced some O72 Real Trax with O82 Real Trax. The Lionmaster Challengers and Rail King Alleghenies already looked good on O72 with minimal overhang and now look even better on O82. Long heavy freights are less likely to derail due to less tension on the broader curvature. Will continue to replace as many O72 with O82 as I can given space limitations but each new O82 installation helps the layout a lot. The CN Turbo will also look nicer on O82.
Ok I just got home from Menards And I picked up 4 sheets of plywood,5 sheets of quietbrace,some wood glue,and some nails.So tomorrow when my son gets home we will unload the 9 sheets and I will get back to building this layout.I would love to show all of you how I unload all this but I'll wait till I have help in the morning.Since I only have 1 leg ![]()
![]()
Ran trains for a bit with the kids, might do some plaster cloth in the morning on the hills along the backside. I also hooked up my Legacy #993 expansion set and updated the CAB 2 to 1.4. I plan to upgrade to 1.51 later this week when a forum member stops by. I also will pack up my legacy set and ship it off to Lionel for repairs. Hopefully it will not take to long to get back.
I finally got started on building the tunnel on one corner of my layout. I am building the tunnel first, followed by the mountain over it. I really don't like the look of "hollow" mountains seen through a tunnel portal. The supports are almost all in to be followed by the walls, tunnel portals, roof and ballast. Sorry the photo is of poor quality, my cell phone is old and shot.
Cobrabob.


Access to this requires an OGR Forum Supporting Membership


")

")


