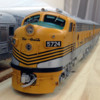
Laidoffsick....great work !! broke my ankle at the old RR yard a week ago so i get to miss the rest of the winter ! conrail john
Attachments
CentralFan1976 posted:Hello all...
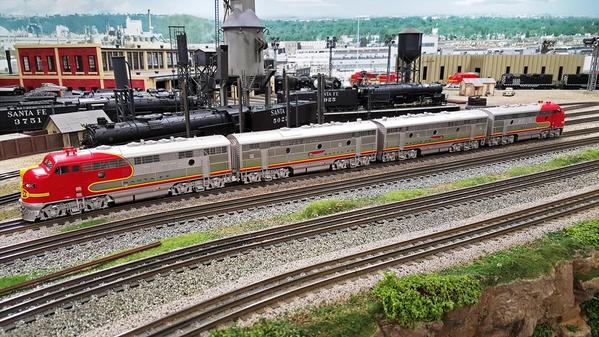
If you're wondering about how LOS' F7s turned out, check it out.
Actually I wasn't wondering, since that same photo is post just above, three days ago, by RON H!
Thanks for posting Ron H and CentralFan1976, very nice work LOS, and awesome photo too, nothing prettier than a set of ABBA warbonnet F's in my opinion!
Joe
Sorry, been travelling and a little behind the times.
No reason to be sorry, Doug (laidoffsick) has put a lot of time into these units to get them correct and the work deserves to be shown. If nothing else, it bumped the thread back to the top where people can see the work that might not have seen it before.
I am in the same process, but will not do as much as much as Doug. His units run fine, but I am having a few issues (wobble and noise) that have to be addressed before I move forward on the cosmetic changes.
Charlie
Charlie,
My A unit wobbles also and the pickups seem unreliable. Now I've detailed it and put cruise in it, but all the wiring seems copasetic. Why do you think they wobble on dead level track? Could a wheel be a tiny bit off center on its axle? I don't think it is that, maybe the truck where it mounts to the frame needs dampening.
Ron
Hello Ron:
Actually, Doug gave me some tips of where to start looking but I have not had a chance to do that yet.
In the video I posted above, you can see the wobble, but because its on a curve its not as noticeable. On straight and level track its pretty bad.
When I start the trouble shooting process I will keep you in mind.
Charlie
Video games and work have kept me away from my beloved trains, and I don't know if there is interest in reviving this thread but here it goes anyway....
What have you guys done? I'm working on the interior cab and whatnot, still care a great deal about this set.
Added the Grande signature side grabs to my set, couldn't leave them without... Bolts up as per Grande protocol!
Attachments
Great looking stuff
I also find it easy to get preoccupied from the trains.
Santiago,
Glad to see you posting again. Super work.
Ron
Ron H posted:Well,
I finally put a new cruise commander in my atsf frt. Don't know why the original burned .But, I got the chance to greatly reduce the factory wiring. Here it is with the front coupler and the lower fuel tanks .Also a picture of my soon to be assembled dummy A and B units for this Frt unit. The A is a P&D F7 kit with oh so beautiful trucks and the B unit is one of my Lionel F3s . Both to be painted in the frt blue and yellow.
Wanted ya'll to know I'm still around and kickin. Finishing the SP cab forward is my next priority immediately after close coupling the 3rd rail B unit to this 3rd rail A. Then I'll finish the freight units.
Regards,
Ron H
Wanted to give Ron a a 'bump' for his excellent trackwork (in case you didn't notice) ![]()
Perhaps Ron can give us a quick discription for those who might not know how he accomplished this?
Hi Sam,
This is code 48 atlas O scale 2 rail track with an N scale third rail. I distressed the ties and weathered the rail. After I finish the cab forward I'm going to do a post redoing my railroad with this technique with some added twists. Marco, aka, Howard Shapiro tutored me on how to turn the two rail Atlas switches to 3 rail and I'll detail that as well. I'm afraid I have been taking a summer break from the trains, but will get back to it soon. Thanks for the bump.
Regards, Ron
PS I did a post on this 2 rail section last year on OGR.
Awesome photos everyone! Adding grab irons and lift rings are some of my favorite pastimes.
I was also thinking of building 3RS track, and this was my thread: https://ogrforum.ogaugerr.com/t...building-3-rs-track?
PS-Marker actually gave me a starter "seed" pack, a few feet of Micro Engineering track and an Atlas turnout, to get my beak wet. No we just need to convince Suzukovich to start fixing his pilots and we have a following!
More progress.... Sun visors (leading unit) and horn cords added. Got rid of the cab light housing and added minimal cabinet details. Hand painted the figures for a better look.
Attachments
Beautiful work....it's all in the details.
thanks, Chris!
That does look really good, and I love that scale 3 rail track. You guys do good work
The visors are a great touch. Are they scracth built? Styrene?
Thanks, L. They r scratch built, thin copper plate and enamel paint.
Santiago, Love the visors.
Did you just estimate a tinplate? Which glue to install?
Ron
Yeah just make one that works and make others that are the same, like I said I used a thin copper plate and enamel paint. The plate can be cut with scissors.
Fo glue I use a an all purpose yellow glue, it's tacky so I doesn't run and very strong. It doesn't fog plastic either, but be very careful with the windshield, they are very delicate.
SANTIAGOP23 posted:Yeah just make one that works and make others that are the same, like I said I used a thin copper plate and enamel paint. The plate can be cut with scissors.
Fo glue I use a an all purpose yellow glue, it's tacky so I doesn't run and very strong. It doesn't fog plastic either, but be very careful with the windshield, they are very delicate.
Gotcha ! thanks !
Santiago, What a great touch and a nice detail! The crew definitely appreciates the visors! ![]()
Hey SANTIAGOP23, Fantastic work, really impressive. QUESTION: Where did you get your grab irons and rails that you had on the Rio Grande ??
Greg, I apologize for the belated response.
The only grab irons I added were the cab side ones. I used .20 brass wire. If you wanna have bolt details, I modified a tiny part from the doors details on the Atlas 53 evans car. Cut, sand, and drill. Pics below... Also see the thread on my Milwaukee Road SW1200 here:
https://ogrforum.ogaugerr.com/t...ilwaukee-road-sw1200
Attachments
Attachments
Man those sure look good! Top notch work. Looks like brass quality models.
Santiago, No doubt some of the best detail work ever! Keep raising the bar! ![]()
Thanks mike!
I posted about my finished set over on the 2 rail forum... Link below if you are interested:


