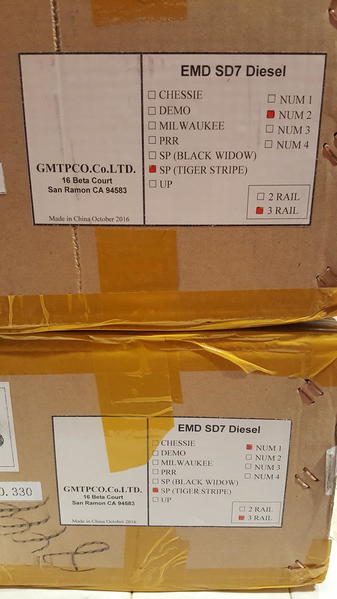
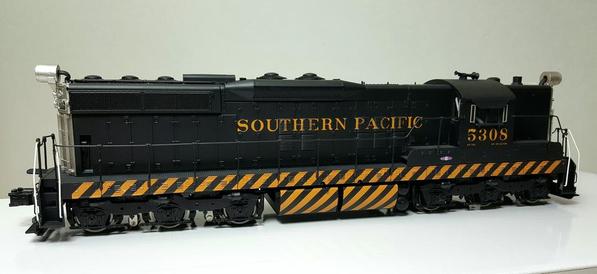
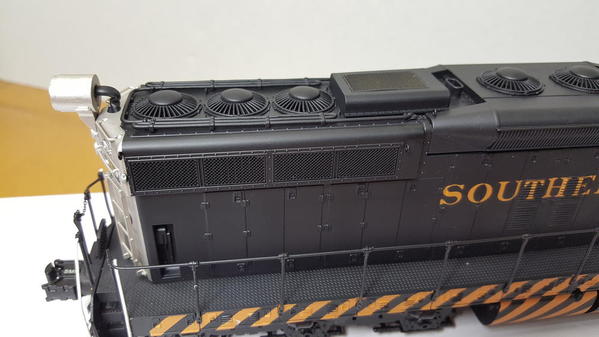
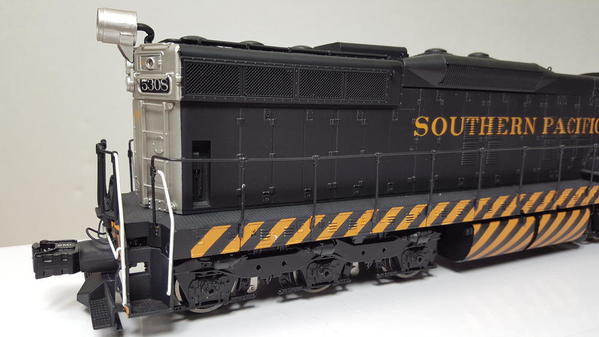
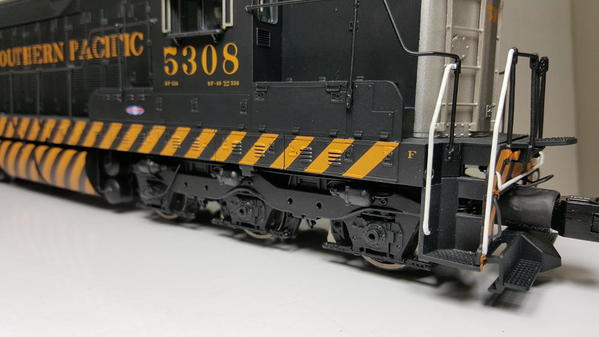
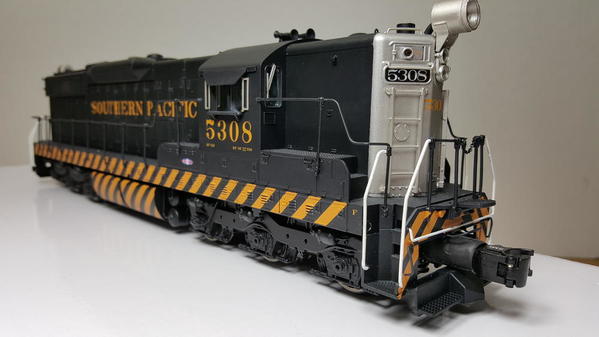
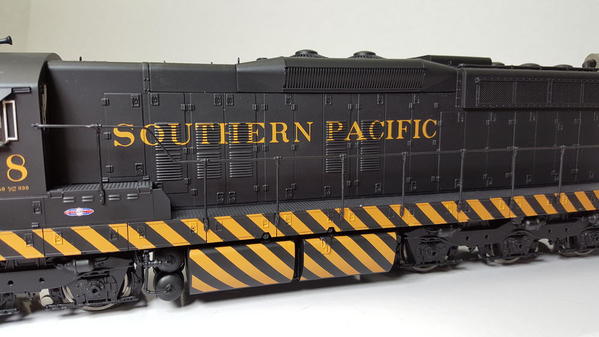
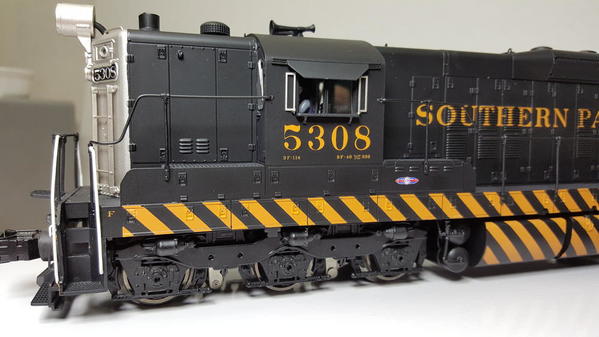
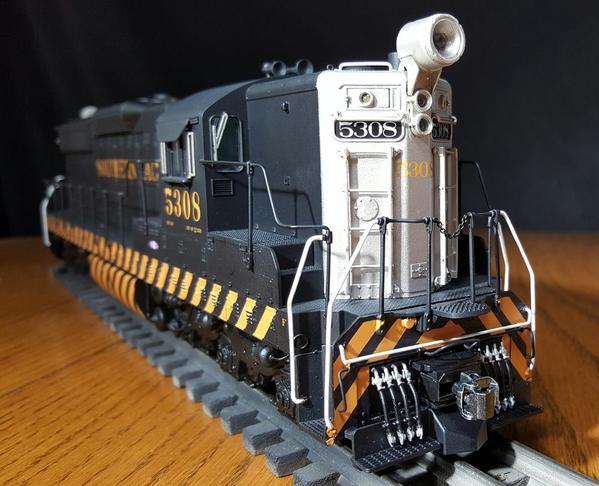
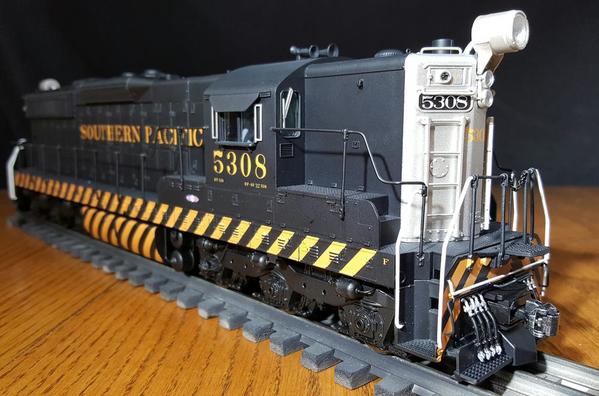
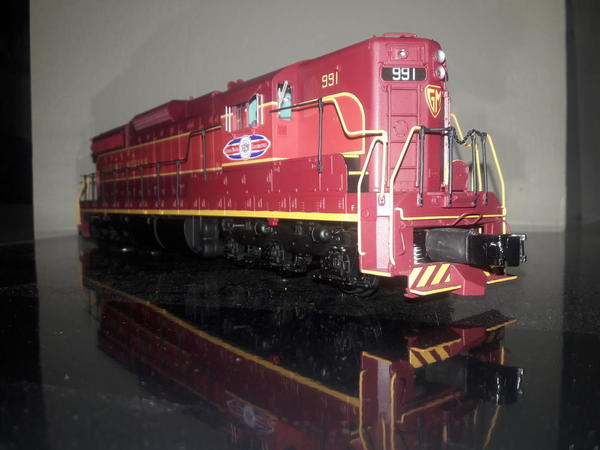
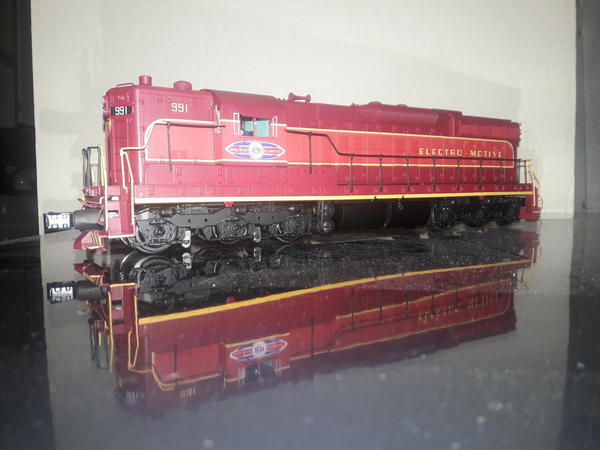
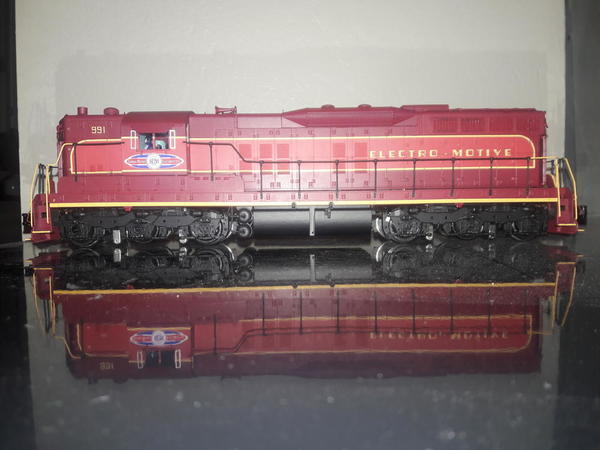
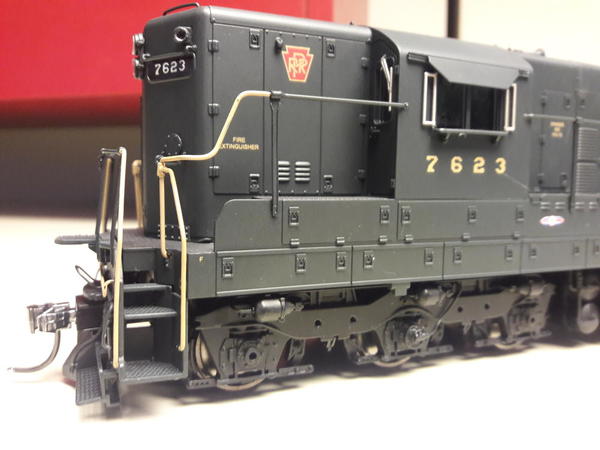
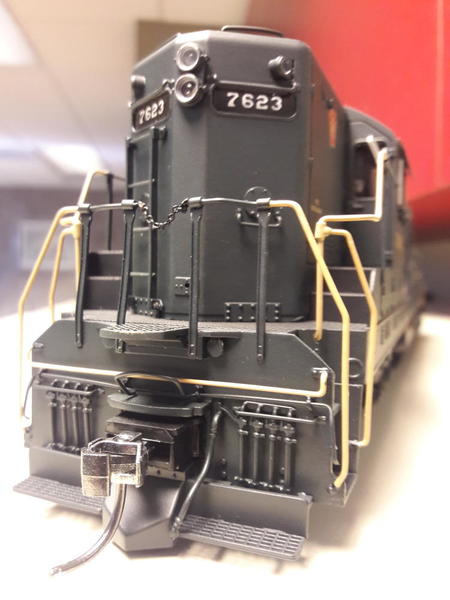
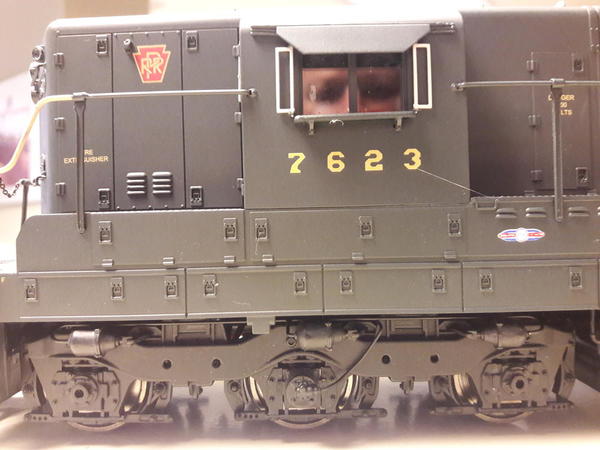
I woke up this morning to find an updated UPS email stating the delivery date from Susnet Models has changed. Theyll be at my door on the 29th. WHOO HOOO!!!!!! I cant wait
Replies sorted oldest to newest
Same here. Exciting!
Got the same update and date.
I thought I felt a little lighter when I got up this morning. After checking my email, I realized then that it was just my wallet that lost weight.
Mine will be here tomorrow ![]()
Laidoffsick posted:Mine will be here tomorrow
That figures. Special treatment for special people. ![]()
Laidoffsick posted:Mine will be here tomorrow
Doug,
Post some pics please! We have 13 on the way. 29th delivery date.
Dave
suzukovich posted:Laidoffsick posted:Mine will be here tomorrow
That figures. Special treatment for special people.
Yes. However, that "special treatment" comes with the loving added cost of CA. state sales tax. The government does not supply reach-around services either.
Attachments
Mill City posted:suzukovich posted:Laidoffsick posted:Mine will be here tomorrow
That figures. Special treatment for special people.
Yes. However, that "special treatment" comes with the loving added cost of CA. state sales tax. The government does not supply reach-around services either.
Mine is scheduled for tomorrow, but since I'll be at work I'm going to have to run to the UPS depot to get it. And that cursed Sales Tax is ridiculous. Thank goodness I don't live in Los Angeles County where it's over 10%.
Now it's on to seeing if we can get SD40-2's produced in CNW.
Yeah special alright. Almost an extra $80 per engine for the CA special delivery. I'll make sure someone is here to sign for them and get some photos out before I go to work.
I keep the short bus hidden from public view not sure where you found my ride.
It's so short it fits in my pocket
Ok guys, I'm more than willing to reship your locos to you to avoid paying the not so great state of California. Prolly cost you about $25 each instead of $80
California Emissions penalties get your every time. No waivers for SD9s. ![]()
I've got a demonstrator and a Milwaukee Road on the way. Can't wait!
Matt Makens posted:It's so short it fits in my pocket
Thats what she said!
I'll set em up and you'll knock em down. Well played good sir
Laidoffsick posted:Matt Makens posted:It's so short it fits in my pocket
Thats what she said!
Matt Makens posted:I'll set em up and you'll knock em down. Well played good sir
We play a lot of volleyball out here in So. Cal. You set one up over the center of the net and it's gonna get spiked. ![]()
Just got a UPS notification. They're here. Will pick them up Friday morning and should have some photos Saturday. I'm seriously stoked!
Attachments
Doug, your such a tease.
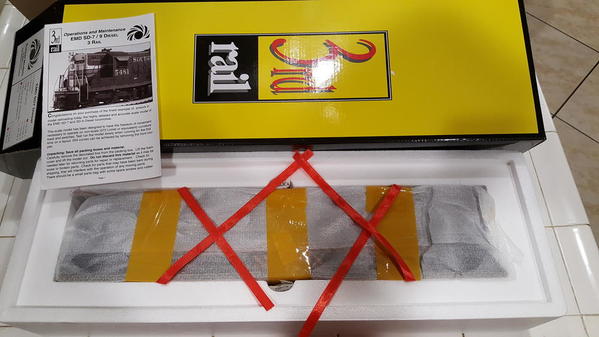
Nice boxes![]()
Attachments
Too many other things to do tonight so I don't have time to run them. I met the UPS guy in the garage and opened them right away. Back to holiday activities.
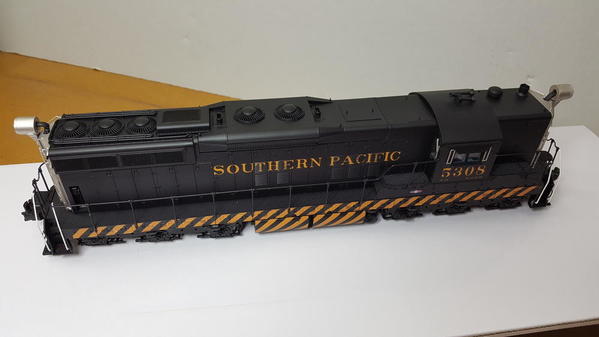
Nice looking unit you have there, Doug.
Looks good. I am glad about the inserts. As for the bladder issue, that's what they sell Depends for. Life's embarrassing moments.
Fantastic photos! ![]()
I had to look twice to see if Eric took them.
WOW, fixed pilots pits you into a bladder emergency? You've got issues but you've also got nice trains
Nice! Tuesday can't get here fast enough.
Matt Makens posted:You've got issues
Well duh! ![]()
BEAUTIFUL stuff Doug!
I can not wait till my Rio Grande set comes! Yahoo!
I think a little silver paint would make those headlight wires much less obvious but from what I see from here they look great
Yeah thats an easy touch up. Have to get the silver paint out for the glad hands on the mu hoses when I install the 2 rail pilots anyway.
Can't wait to get my grubby ten thumbs on mine Friday morning. I have a pair of MTH ScaleKing SD9's (old Premier Tooling) which I think I'm going to re-work into SD18's.
Which road name did you get Matt?
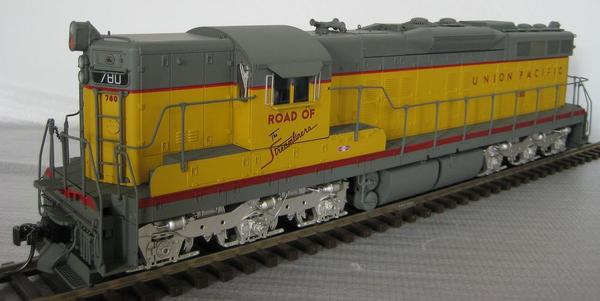
I got 2 CNW SD9's. I hop ethey have a "Route of the Streamliners" logo on them
with out logo's are you sending them back?
Nope, they don't have logos and I'm keeping em but I always hope they jazz it up with some of the nicer schemes
Unbelievable model. Congrats! This is the kind of detail 3railers deserve.
Attachments
Very nice, Doug. It's amazing what a few dabs of silver paint can do, coupler not withstanding.
Nice, the silver really does make a huge difference
That looks real nice, 3rd Rail sure did a fantastic job on these and your modeling touches added the correct amount of prototypical finesse. Totally nice!!! Great pics too!!
![]()
I was over there today and there are about 2 dozen models available. The remainder are all in process of waiting for final payment or being shipped. All the SP units are sold and a couple of people who waited too long found out non were available. I was pleasantly surprised to find out all the demonstrators were sold.
The mods look great, Doug. Going to put the Kadees on my units after doing some test running at the club Picked up one of mine Friday afternoon (had them re-routed and they ended up going to two different UPS drop centers). Going to get the other one Saturday morning on the way to the club. Will post photos when I get them on the club layout. Seriously considering a pair of SD40-2's.
Very nice, I would add lens to the "garbage can lites" as I believed they were called. JMO
It has a lens you just don't notice in the photos. I had to put my finger on it to make sure. The seam you see just inside the outside edge of the can is the lens and you can barely see the glue around the edge of the lens.
Doug I was watching the Jug Hauler video today. I still dont see a train in the video and I barely notice the box
Just got notification "Out For Delivery" woohoo!
Picked mine up Friday (1703 and 1704). Need to paint the air hoses on the Kadee pilots before I install Kadees. The detailing and paint are excellent on these units. Wish the budget had allowed for a couple of SP units. Sound and low speed running are great. Didn't really get much of a chance to do what I consider review level of testing. Hopefully I'll be able to do that this week.
Didn't see it in the instructions, but does the emergency light light up (which 3rd rail correctly placed on the CNW units)? The class lights are keyed into the directional headlights.
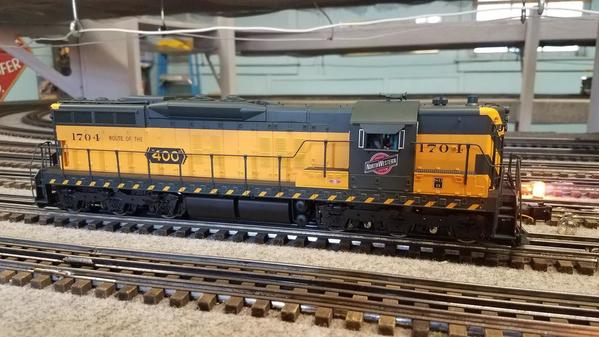
Attachments
AWESOME!!! It's got "The Route of the 400" logo. Matt, if I could like that a thousand times, I would. Love the engine and I can't wait to see mine tonight
That is beautiful Matt! Marvelous ![]()
![]()
Pre Kadee.
Overall, pretty good model. Not a TMCC fan.
The DM&IR Looks nice too!
I will post some photos of them later tonight.
Dave
Attachments
The UPS man just delivered my EMD demonstrator model (one day early), in the driving rain! Think I'll wait 'till tomorrow to open the damp box.
Nice model! Looks very comparable to my Precision Scale SD9. You all have some beauties.
No high water pants, yay!
Jack, can you wait that long?
Matt Makens posted:Jack, can you wait that long?
Sure can. I provided the original EMD Styling & Painting drawing for this model, and already have seen photos of the models, from Scott. Tomorrow, I'll open it and changeout the claws and pilots. This one might not get weathered.
Hot Water posted:Matt Makens posted:Jack, can you wait that long?
Sure can. I provided the original EMD Styling & Painting drawing for this model, and already have seen photos of the models, from Scott. Tomorrow, I'll open it and changeout the claws and pilots. This one might not get weathered.
I would suggest not removing the pilot to install the filler for the Kadee couplers. The pilot comes off easily with 2 screws and the pilot handrails separate at the tees. But, reinstalling the handrails to the tees can be annoying.
You don't like TMCC? Ahhh c'mon Dave ![]()
I couldn't get the pilot insert in without removing the pilot. Not to mention the electro coupler plug is under the edge of the pilot. I had to take the pilots off.
with kadees
Attachments
Doug. I was able to keep the handrails in tact and still remove the pilot just a little bit. Dave
Attachments
Very impressed with the Railsounds horn quality in the first video Dave Minarik posted. Lots of depth and presence to it -- MUCH more than prior Railsounds that Lionel would license to companies like 3rd Rail and Atlas-O. Very encouraging... can't wait to see and hear the E8/E9's which are due in March 2017. I have two Canadian Pacific units on order.
David
So envious Doug those BlackBirds are SWEET! I already have OMI brass samples factory painted; these I think are better!
If the smoke unit is used, the diesels can not be returned.
Who would actually want to return these SD7s and SD9s?
Andrew
Erik C Lindgren posted:So envious Doug those BlackBirds are SWEET! I already have OMI brass samples factory painted; these I think are better!
Thanks nothing to be envious about. I got lucky and picked up the second SP SD 7 when The C&S did not come in the Chinese red scheme( 1959 deliveries) as ordered and canceled the second CB&Q SD9. The good thing. The C&S SD9 survived in that scheme until a year after the merger.
The Burlington "blackbird" paint scheme is a real beauty. As an addendum, the SD9's/SD7's were ordered for Western service and for the "Q's" southern IL coal line. One or two SD's replaced one O1a 2-8-2 in mine run service, and 3-4 SD's replaced one M4a 2-10-4 on 8800 ton mainline coal trains. Note that Sunset is doing the O1a's - - would mate up quite nicely with the Burlington SD9's, as they worked side by side into January 1959, both on the coal line and leased to the Colorado & Southern, to replace diesels wrecked in September, 1958.
Definitely like the scheme and many were still in the blackbird scheme at the merger. Although I have only found a couple of 337 in the mid 60s. I have found both 336 and 338 in photo taken after the merger and can only assume that 337 also was in that scheme at the merger. Which is good.
Question.........and only a question (so Erik doesn't come back with I'm disrespecting Scott Mann), were the side mounted breather pipe on the Q units added post delivery?
A NOTE TO 3 RAIL CONVENTIONAL RUNNERS. WE TURNED OFF THE SOUND DURING INSPECTION AT THE FACTORY. THE RAILSOUNDS BOARD REMEMBERS THIS SETTING. WHEN ONE RUNS THE MODEL IN CONVENTIONAL MODE, THE SOUND REMAINS TURNED OFF. ONE MUST HAVE ACCESS TO A TMCC SIGNAL TO TURN THE SOUND BACK (AUX1 - 1,1,1,1) ON... SIGH..... IT'S ALWAYS SOMETHING.
I SUGGEST TO ALL THAT STILL ONLY RUN CONVENTIONAL, INVEST IN A CAB-1L OR LEGACY REMOTE. THEN YOU CAN FULLY ENJOY THESE MODELS.
Off to China. SP S-12 inspection, El Capitan 2nd Run Production and many projects in design.
Scott Mann
Chuck Sartor posted:Question.........and only a question (so Erik doesn't come back with I'm disrespecting Scott Mann), were the side mounted breather pipe on the Q units added post delivery?
Yes.
Beautiful models! Congrats guys enjoy them!
Thank you, Scott! Can't wait for my pullman hw and the RI rocket
By any chance, has any one opened one of these up? I would be curious if one could fit a DCS system in there.
John Sethian posted:By any chance, has any one opened one of these up? I would be curious if one could fit a DCS system in there.
John,
I will get on that. I really dig the sound in the board but I am not too crazy about lashup performance. TMCC seems pretty archaic (reminds me of writing a computer program with punch cards lol).
They are belt drive. Motor in the body, drive shafts in the fuel tank.
Dave
Scott,
Thank you for making these!
Dave
645, I forgot about that important detail until yesterday. Streamliners on the firemans side and 400 on the engineer side. Did the CNW only run on the left in Chicago or was the whole system set up that way
The C&NW units have the correct markings on each side. "Route of the 400" on the engineers side and "Route of the Streamliners" on the fireman's side when running long hood forward.
Received mine yesterday in Demo and PRR. Love them!
I could be mistaken but I'm fairly certain CNW didn't run long hood forward but was set up for left hand running not right hand running like most other roads
David Minarik posted:John Sethian posted:By any chance, has any one opened one of these up? I would be curious if one could fit a DCS system in there.
John,
I will get on that. I really dig the sound in the board but I am not too crazy about lashup performance. TMCC seems pretty archaic (reminds me of writing a computer program with punch cards lol).
They are belt drive. Motor in the body, drive shafts in the fuel tank.
Dave
Thanks Dave. I look forward to your photos. Drive shafts in the tank gives hope PS 2 (or 3) will fit.
NICE LAYOUT, by the way!
Matt Makens posted:I could be mistaken but I'm fairly certain CNW didn't run long hood forward but was set up for left hand running not right hand running like most other roads
The engineer's side of a C&NW locomotive was no different than the engineer's side of any other US railroad.
Rusty
Matt Makens posted:I could be mistaken but I'm fairly certain CNW didn't run long hood forward but was set up for left hand running not right hand running like most other roads
Matt I believe you are correct. Now I need to go back and look at the drawings I drew 6 months ago. I just remember we got the correct logo on the correct side.
Attachments
Are you sure about that? If the CNW was set up for left handed running all of the signals would be on the other side of the tracks
Ok, so a little homework does indicate the engineers sidecwas still in the right as all other roads at least as far as diesels are concerned. All my CNW books are packed up so I'll have to do some digging. It's been a while since I cared about such things
Matt Makens posted:Are you sure about that? If the CNW was set up for left handed running all of the signals would be on the other side of the tracks
Careful here Matt. Have you ever been over the C&NW main line from Chicago to the Missouri River? When the C&NW installed ATC (late 1920s?) the new system did NOT include wayside signals, except at control points (cross-overs, etc.). Since the UP/CNW merger, the UP is reinstalling double track, CTC, and full way-side signaling.
Jack I'm unbelievably rusty on my CNW facts as it's been some years since I did any reading on the subject and my memory isn't all that great. So I'm not making any statements as facts to any of these points. We both know that I sometimes speak without thinking and it's hard to have a leg to stand on with bith feet in your mouth. I want to know these things so I'll just engage in conversation and ask questions
Matt Makens posted:Are you sure about that? If the CNW was set up for left handed running all of the signals would be on the other side of the tracks
Matt
I grew up along the north line to Kenosha/Milwaukee. All the track signals were over head. Same as the northwest line. Can't say anything about the mainline to Missouri, but that the signals were also over head coming out of the Proviso yards.
I just recieved my UPS e-mail informing me of a delivery today. I sure hope the UPS guy delivers before I goto work, it's pouring out here!
prrhorseshoecurve posted:I just recieved my UPS e-mail informing me of a delivery today. I sure hope the UPS guy delivers before I goto work, it's pouring out here!
Unless you have made other arrangements, their delivery requires a signature. The upside is they won't be left in the rain (or stolen) should you not be present.
prrhorseshoecurve posted:I just recieved my UPS e-mail informing me of a delivery today. ...
Interesting... my UPS emails usually hit shortly after midnight and alert me to packages arriving the NEXT day. I like that timing, 'cause it allows me to divert the routing to a local UPS Store in town, where I can sign for it and pick up the package at my convenience if I won't be working at home that day.
David
Johnathan GG1 the SD7/9's are spectacular.
Thank you Erik. This project really turned out well. I can't take all the credit though. It's a team process and several people, you included, pull all the information together to get us started and I simply sort out the data, supplemented with the research I do for road specific details and finally produce the final painting graphics. As we saw from the F7s the hardest job is making sure the factory understands the drawings and Scott and the project managers at the factory get all the credit for that. Just like my architectural profession, the final product is judged by the attention to detail.
Yes kudos on the work. I had one of mine out for a few minutes last night and was nothing short of impressed.
Hey guys, Maybe I'm posting this in the wrong place. Help if you can.
When running in train mode, I lose headlight, bell and horn. Also sometimes the rpms do not change. What am I missing here?
Thank you in advance!
Dave
David Minarik posted:Hey guys, Maybe I'm posting this in the wrong place. Help if you can.
When running in train mode, I lose headlight, bell and horn. Also sometimes the rpms do not change. What am I missing here?
Thank you in advance!
Dave
OK, what is "train mode"?
GG1 4877 posted:Thank you Erik. This project really turned out well. I can't take all the credit though. It's a team process and several people, you included, pull all the information together to get us started and I simply sort out the data, supplemented with the research I do for road specific details and finally produce the final painting graphics. As we saw from the F7s the hardest job is making sure the factory understands the drawings and Scott and the project managers at the factory get all the credit for that. Just like my architectural profession, the final product is judged by the attention to detail.
Looks like Scott did a great job on these, Just curious as to how the orders broke down between 2 rail and 3 rail models. I have not seen any pics posted of the 2 rail version.
I don't remember the final breakdown, but somewhere between 60% to 70% of the models were done in two rail. My PRR one is a two rail model. The SP versions were the most ordered followed in no particular order by the usual suspects of PRR, D&RGW, and a few others. I'd love to see a picture of how the NS unit turned out. Along with the Black River and Western model, they are the only two to have ditch lights.
Here my CB&Q/C&S on maiden run after 2 hrs getting the lash up to work right. Only real issue was fit. One of the 2R inserts wouldn't align right and screw holes were to small. Simple fix. What nice runners. Also note the oscillating light Thanks Scott. Next in line the Black Widows.
Attachments
Well so much for that. Engine just shorted out. Just sound. No response in either Command or conventional. Will have to Email Scott. Not happy
Am I the only one not familiar enough with 3rd rail models??? (Even though I live 29 miles away).
Would have never expected them to do accurate stanchions for SD7 and SD9 as they are different, or SP lighting package. Sure, I saw the Huge Barrel Type and figured that would be used on the Black Widows as well.
How many reservations do they need to do a second run? Would really like to see SP Red/Gray and SP Kodachrome.
I haven't seen a 2nd run of anything besides the El Capitan cars.
Is it possible the CNW units had dual cab controls like the N&W did?
Lights working but doesn't run. Hmmmm. Both are controlled by the same circuit board. This is a new motor (needed to fit in the narrow hood) so hopefully not that
Most if not all the Black River and Western units were bought by the real Black River and Western folks. Kudos to them.
Minimum for a rerun? 300. F7s are in the same boat and after 8 months or so are at ~20% of the requirement, including potential additional roads. Reruns are just not in the cards for just about anything anymore. SP bloody nose was offered this time and the number reserved was right around zip. So for those two about the only way is to buy a couple and have them redecorated. I don't know if there are any undecorated available.
rdunniii posted:
Lights working but doesn't run. Hmmmm. Both are controlled by the same circuit board. This is a new motor (needed to fit in the narrow hood) so hopefully not that
.
This comment for me? Will email on the side Fuel tank hot and rear of shell Markers work, and sound. Head lights out. The first to go was the oscillating unit
I received my Milwaukee Road SD7 yesterday but wasn't able to open it up until today. This is my first diesel from 3rd Rail and it is a real beauty, thank you Scott and everyone involved with this project. I could only run mine on my 4 foot test track as I'm in the construction stage with my layout at the present. All seem to be working as it should, sounded great, smoke well. I too will be switching out the pilot and coupler as I don't care for the size of the opening the current pilot has. Here is a few pics:


Attachments
Laidoffsick posted:I haven't seen a 2nd run of anything besides the El Capitan cars.
The only second runs I remember were the E7s and possibly the RDCs.
F7's on the Empire Builder but that hasnt happened yet
rdunniii posted:Is it possible the CNW units had dual cab controls like the N&W did?
I cannot speak on the C&NW units, but, for those interested in the Q, the Burlington SD9's had dual controls, with No.6 air brake equipment.
Attachments
Attachments
Attachments
Not sure why youd want to go and put PS3 in a perfectly good loco
Matt Makens posted:Not sure why youd want to go and put PS3 in a perfectly good loco
Not gonna get into that debate here
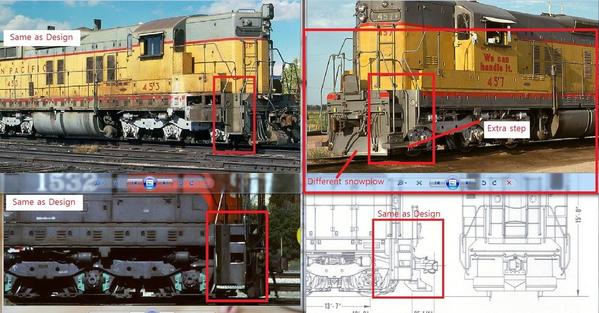
DaveJfr0 posted:So I just found a problem that may affect more than just me. The factory glued the middle step in the wrong place in all 4 locations on both of my SD9 models. I bet that others may have this issue too.
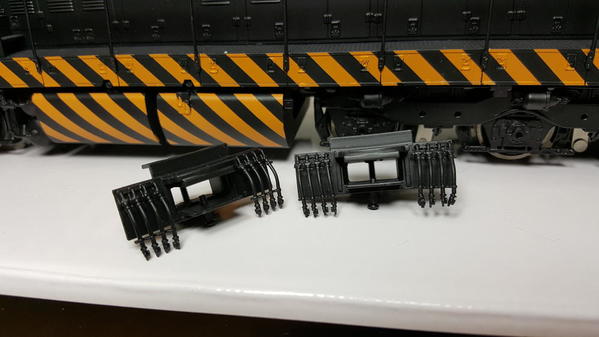
I pulled off one step to be sure it could be removed and it came off easily, but left glue residue on the pilot. It will be relatively easy for me to fix cuz I can sand down the residue, spray it black and weather my units, but everyone else may not be so lucky.
Here's a pic to show the problem: I believe you are correct based on all posted pics so far.
I'll have to check when I get home but it looks like my CNW units are missing the step all together
The second step is mounted too high giving the appearance of a missing step.
Attachments
Same issues
Will the Red Caboose GP kits provide a replacement step option? Or are they different?
![]()
![]()
![]()
Gentlemen, Many thanks for posting all the pics of these units!
Dave, those B&LE units are really nice.
I realize that most everyone is going the Kadee route, but were there any issues on an O72 curve with the Electrocouplers?
Also, has anyone tries these units on a curve less than O72?
For what it's worth, the end steps were apparently different on SD7 units, than on the SD9 units. It is also pretty difficult to find accurate photos of SD7, and/or SD9 units with "original" steps, since the FRA mandated "side footboard" requirement of the 1970s. As a result of that FRA mandate, any and all SD and GP units HAD to have their side steps modified in order to comply with the FRA "side footboard" mandate.
DaveJfr0 posted:LOS - that is a SD7, SD7's had a different stairwell, so no problem there.
Yeah I know my comments didn't show up on my post. I just showed for ref. The spacing is correct, like stated, they just glued the step on the SD9s in the wrong spot. It just needs to get moved down. Should be an easy fix.
That step is still jsut way off and doesnt even look right. I'll add it to the list of sh** to do not likely Ill get to it anytime soon
Plucking them off is real easy ![]()
DaveJfr0 posted:Laidoffsick posted:Plucking then off is real easy
Yes, it surprisingly was too easy to take them off, but cleaning up the residue to the point of where it looks factory new may be tough for some of Scott's customers. I am lucky that these units were not considered brand new in my modeling era. Does anyone know if Goo-gone takes off paint?
Two words: Scalecoat Paint. ![]() Goo gone might attack the paint. You might want to try 1000-1200grit wet/dry sandpaper (wet) on a coffee stirrer to gently sand off the residue, then touch up the paint if necessary. That's what I use to remove/change numbers on MTH locomotive shells. If I ("Mr 10-thumbs") can do it, anyone can.
Goo gone might attack the paint. You might want to try 1000-1200grit wet/dry sandpaper (wet) on a coffee stirrer to gently sand off the residue, then touch up the paint if necessary. That's what I use to remove/change numbers on MTH locomotive shells. If I ("Mr 10-thumbs") can do it, anyone can.
Anybody have jerky low speed performance?
David Minarik posted:Anybody have jerky low speed performance?
Yes, as in the infamous Odessy lurch? Engine that fried had it real bad in reverse. On other engines At 32 hardly noticeable. At 128 up until about 7 smph. I found on the unit that's dead, that in reverse it seems to be binding.
Doug
Dave if you are using the Cab2 Legacy remote, change the mode to RC100. I think Cab1 mode is default, then TMCC, then R100. The ERR boards run much better with the Cab2 that way.
My FP7s run great in any of the 3 modes, but I had to change my 4 F units to R100 for the smoothest 4 engine consist.
Well, since I purchased 3 of these-2 B&LE SD9's and 1 DMIR SD9- all 3 rail models, I may as well chime in with my observations on my particular models. (your engine/engines may or may not have correct details to your particular roadname). Overall, mine are great looking models and I'm glad that I purchased them. I'm not going to post pictures as Dave has already posted videos of both of his B&LE and DMIR engines in operation. I have not operated mine as of yet. As far as the details-the biggest thing that I noticed immediately at the front of all my engines is the bracket for the bell mounted on the high, short hood is completely wrong. Every photo of every B&LE/DMIR high hood SD9 that I have looked at from the 1960's through the 2000's(including my own books) shows the bracket being welded/fabricated solid plates on both sides, top, and rear, not the 2 arms sticking up with the bell hanging between them that came on my engines. So I'm disappointed with that. The other item, which has already been mentioned in this thread, is the number/positioning of the steps on the four corners of the engines. On my particular model roadnames, from many prototype photos, there appears to be a step missing. There should be 5 total steps on mine(counting the deck as the top step). So, on the models, where there appears to be a large gap between the first and second step as has been mentioned earlier in this thread, on my models, another step should be added between the first 2 existing steps, closing the gap and adding the missing step at the same time. Again, these are observations on the B&LE/DMIR models. Anyone else who has these-what do you think?
Nick
The discussion of engine/road-specific details made me thing of what happens to locomotives over their service lives -- they get modified/wrecked/repaired/upgraded. The reason I mention this is because if you look at an as-delivered photo of a locomotive and compare it to the last [known] photo before retirement/scrapping, they can appear completely different. Examples of things that happen include:
- Relocation of bells
- Relocation of horns
- Rebuilds/upgrades that impact the exterior. Don't get me started on CF7's and SD45B's.
- Addition/removal/relocation of lights (you find a lot of ATSF diesels with the headlights relocated from the top of the cab to the end of the short hood with a cover plate where the lights used to be)
- Cab changes (there are a lot of GP7's/GP9s in service with chopped noses or outright replaced cabs). Look up the original "Beep" on a Santa Fe site.
- Truck change-outs. Santa Fe had a C-30 that had a mixed pair of trucks.
- Addition of roof-top AC units.
The changes aren't necessarily to a specific model, but may apply to a single locomotive during its lifetime.
As to color, lighting when the photo was taking, exposure, paint fading, dirt/weathering, etc. can influence what you see. Don't get me started on CNW Zito Yellow.
I think 3rd rail did a great job on the units and the fact they've even gone for road-specific details is a big plus. Even MTH has done that one some models like the GP38-2's, but nobody's perfect.
Looking at the step issue now. I will review it with our design team and see if we can make some castings of this step, or an etched plate to show the additional step on the models. Sorry guys. Had many people looking at these drawings and no one spotted it. There is always something.
Scott Mann - China
In 3 Rail: If you have low speed jerky performance, try turning off the SPEED CONTROL.
[AUX1],[0], [AUX1], [0], [BRAKE] - 32 Step Speed Control
[AUX1],[0], [AUX1], [0], [BOOST] - 100 Step Speed Control
[AUX1], [0], [AUX1], [BRAKE], [7] ,[BRAKE]- Speed Control Turned OFF
[AUX1], [0], [AUX1], [BRAKE], [9] ,[BRAKE]- Speed Control Turned ON
For more information on Electric Railroad: www.electricrr.com
Received my Milwaukee SD7 and CNW SD9 Monday and I think they're terrific.
The step issue doesn't bother me, didn't even notice it, but I understand how others would feel differently,
I did have trouble with one unit stuttering around and discovered the electrical wipers on the wheels were not making good contact. A small tweak with needle nose pliers fixed it right up.
Really like the sound of the horns and maybe someday will add tmcc to take advantage of the other sounds and maybe a better cruise function.
All in all I think Scott and the crew did a great job.
Dan
Before I go, would putting in a battery do anything for conventional running?
Attachments
GG1 4877 posted:
Well I'll be darned! I didn't realize you guys were going to produce BOTH road numbers of the EMD demonstrator units. I would have preferred the 991, as it was the "east coast" demo, while the first unit, the 990 went west. Guess I'll stick with the 990, that arrived two days ago.
Hot Water posted:GG1 4877 posted:Well I'll be darned! I didn't realize you guys were going to produce BOTH road numbers of the EMD demonstrator units. I would have preferred the 991, as it was the "east coast" demo, while the first unit, the 990 went west. Guess I'll stick with the 990, that arrived two days ago.
Jack, I thought you knew? If you want to do a trade, I'm not concerned on the number. Just send me a note!
how bout some extra steps, can you get em in cnw green?
sdmann posted:And.... on the SD9s the 2nd step is too high. That was a factory error, design and our revierers got it right. We will make new steps (the individual step that one can glue in). The step section on the pilot is part of the pilot, all soldered together. That's what I know. Scott - China
I was looking through the drawings to find one the same as built and they all looked correct to me. What is strange is the exact same thing happened to Atlas on the GP60s.
Hot Water posted:GG1 4877 posted:Well I'll be darned! I didn't realize you guys were going to produce BOTH road numbers of the EMD demonstrator units. I would have preferred the 991, as it was the "east coast" demo, while the first unit, the 990 went west. Guess I'll stick with the 990, that arrived two days ago.
Wwwhhhhhaaaaattttt! I remember noting at the time that there would be 10 of each number. To make it easier to make the minimum I hoped demo fans would order both numbers; like me ![]() .
.
suzukovich posted:David Minarik posted:Anybody have jerky low speed performance?
Funny thing. On a whim I oiled with Labelle the axles where they met the side frames. Ran for awhile. This morning when started up, in 128/100 There was no jerking of the SP SD9/7 lash up at 1 Smph. Still had slight issue in revers with the SD7 which is the trailing unit. Will oil it again and see what happens.
You just need to stretch their legs to give em a bit more hitch in their gittiup
Matt Makens posted:You just need to stretch their legs to give em a bit more hitch in their gittiup
Did that, put down track in my drive way and hooked up my wife's van. Neighbor thought I was crazy until it pulled the van 10ft.
rdunniii posted:sdmann posted:And.... on the SD9s the 2nd step is too high. That was a factory error, design and our revierers got it right. We will make new steps (the individual step that one can glue in). The step section on the pilot is part of the pilot, all soldered together. That's what I know. Scott - ChinaI was looking through the drawings to find one the same as built and they all looked correct to me. What is strange is the exact same thing happened to Atlas on the GP60s.
What was the issue with the Atlas GP60 steps, I have a CSX 2rail version and have never picked up on a step problem, just curious.
breezinup posted:
This is what you wanted.
Attachments
More SD9 "selfies". My PRR in 2 rail. The color is a lot darker than the cell phone shots would make it appear.
Attachments
Jonathan,
Thank you for the photos. I have yet to take mine out of the box and check it out. Tonite,maybe......
Norm
Did anyone reserve the UP SD7 version or were there insufficient reservations to get it produced ?
OK, besides Doug, how many of you have been able to get that Kadee "2-Rail scale pilot insert" to fit properly?
hibar posted:Did anyone reserve the UP SD7 version or were there insufficient reservations to get it produced ?
I took delivery of two.
Other than having to enlarge a hole no issues at all.
Hot Water posted:OK, besides Doug, how many of you have been able to get that Kadee "2-Rail scale pilot insert" to fit properly?
No problem getting them to fit. Bend the hoses out a bit.
David Minarik posted:Hot Water posted:OK, besides Doug, how many of you have been able to get that Kadee "2-Rail scale pilot insert" to fit properly?
No problem getting them to fit. Bend the hoses out a bit.
The "hoses" do not appear to be the problem. I've been filing on the sides of the brass "scale" insert/adapter and still can not get it to fit properly in place in order to insert the two small mounting screws. I'll get back to it tomorrow.
Suzukovich, nice video. I love that song too. "I'm a rocker dude, thru and thru. Here's some of my favorite bands, AC/DC, Van Halen, not..." Joe Dirt!!!
So what exactly is the deal with the step, are they missing a step or is it just in the wrong place?
On the SD9's the step was placed in the wrong location by the factory. It is correct on all the drawings but was installed too high. Scott is making replacement steps for anyone who asks for them or Dave has already posted how he repaired his. The SD7 is different in that as delivered they didn't have true steps, but cutouts for someone's feet.
Ill have to pop one off and see how it looks, maybe the glue residue wont be so bad or some CNW green will cover it well. I didnt even notice it until somebody said something but I'm not that hard on details now I kinda wish nobody said anything
GG1 4877 posted:On the SD9's the step was placed in the wrong location by the factory. It is correct on all the drawings but was installed too high. Scott is making replacement steps for anyone who asks for them or Dave has already posted how he repaired his.
Hi Jonathan,
So, the proper procedure for obtaining the 12 missing steps on my 2 B&LE/1 DMIR SD9's would be to email Scott directly and ask for them? Thanks for your help.
Nick
Nick, I'd send an email to Scott. He's in China now so he might respond at some odd hours but he will respond.
Are the steps missing or merely in the wrong spot? Wrong placement is the issue that we've seen so far.
Jonathan,
As I noted in one of my previous posts here, on my particular roadnames, the B&LE(especially) and DMIR there is a step missing. Prototype engine photos show nearly all of them with 5 steps(counting the engine deck/walkway as the top step). So, I will just add the replacement step in the large gap between steps 1 and 2(working from the bottom up). I'm glad Scott takes the time to listen and take care of his customers when situations like this occurs and I will send Scott an email tonight or tomorrow. Thanks for your work and help on these engines. Now about that bell bracket![]()
Nick
We actually have SD7 UP in 2R and 3R available to buy. Email me if you are interested. Scott
sdmann posted:We actually have SD7 UP in 2R and 3R available to buy. Email me if you are interested. Scott
Were these units delivered as pictured in your original SD7/9 announcement ad of UP model with vent pipe , pipe on rear air grilles and winterization hatch?
Thanks Scott for bringing us these beautiful models!
The following is a set of photos comparing my new 3rd Rail SD9 alongside an MTH version. There are also photos including an Atlas GP9 (with road specific detail, i.e. Pyle Gyralite) alongside a similar MTH.
Not long ago, we had a good discussion asking "does road specific detail matter?" To many of us, I say it does.
Attachments
Enjoying my long-awaited accurate SP SD9. Looks great--still runs a little rough in reverse and doesn't like one of my Scaletrax #4 switches (stalls on the straight section for some reason), but I'll get to work figuring those bugs out shortly. Wonderful engine--very grateful to Scott Mann & Co for pursuing this project and executing it so well!
Tony

Any word on if these units can negotiate a curve less than O72?
Many thanks
EMD posted:Any word on if these units can negotiate a curve less than O72?
Many thanks
060 is smallest you can go using the lobster claw couplers. Like Doug said earlier 072 is due to the fixed pilots and kadees.
Suzukovich, Many thank for the reply.
suzukovich posted:EMD posted:Any word on if these units can negotiate a curve less than O72?
Many thanks
060 is smallest you can go using the lobster claw couplers. Like Doug said earlier 072 is due to the fixed pilots and kadees.
I was in touch with Scott Mann during the production process to determine if the 3R SD9 would negotiate 054 curves. He let me know (while he was in China testing the models, no less) that the 3R version handled the Atlas 054 test track curves. I use solely Scaletrax on my layout and, after about 10 days of experience, can report that the SD9 is able to run through 054 curves (and the curved segment of 054 switches) without difficulty. Just to see how far it could go, I ran the SD9 through a small even-tighter section of approximately 042 curved flextrack--it negotiated that as well, though that's clearly the limit. This six-axle engine doesn't look great going though those tight curved, but it works. I am impressed.
I just received one of the left-over UP SD-7s and am really glad I treated myself to this locomotive. It is just gorgeous! However, I am having trouble getting it to accept any engine address except 1. I'm using the Legacy system and when I follow the instructions in the manual the engine doesn't take the new address. When I follow the instructions in the engine's manual the only address it will take is 1. I have the switch set to program. What am I doing wrong?
I'm also getting jerky slow speed performance (control is set to R100) and saw Scott's earlier post advising to turn off the speed control. I'm not sure how to do this with the Legacy controller. The instructions in the manual seem to be pointed to the Cab1 remote. I'm hoping that the slower speeds will improve after a break-in period.
Joe
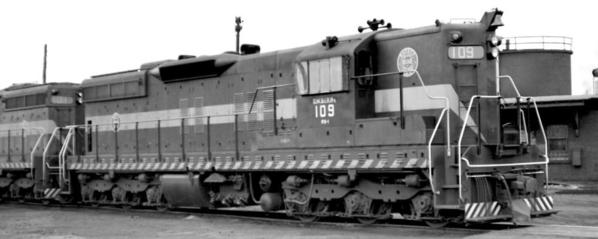
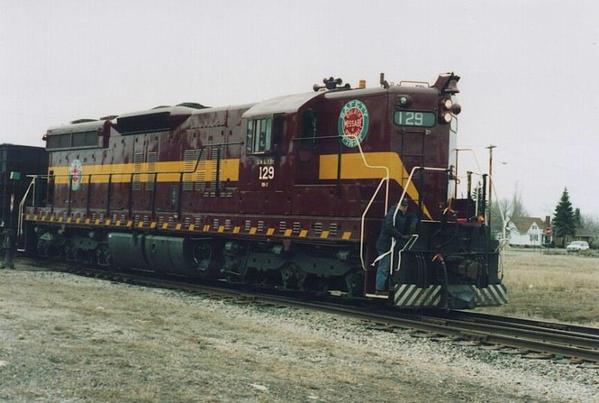
The Duluth, Missabe & Iron Range SD9 is going to need some logo decals, because a part protrudes through the MISSABE logos on the short hood. If only the logo would have placed in an entirely flat spot somewhere else on the short hood. I have to make decals, or have somebody custom make decals, since there are no MISSABE diesel decals available. The part did not protrude on the real DM&IR SD9s, so it has to be removed with a sprue cutter, but that will ruin the logo. Then a custom made decal can be placed on top. I was waiting to find a DM&IR SD9, now I have to correct this.
Andrew
Attachments
Here are my photos of the Duluth, Missabe & Iron Range SD9 diesel loco.
The Circular Missabe emblem looks smaller on the real hoods.
Perhaps the circular herald could not be duplicated any smaller.
Andrew
Attachments
The herald size was smaller in the original paint scheme.
The later circular herald looks twice as large.
My Missabe SD9 model does not have diagonal stripes along the side-sill. That will have to be added with decals if I want to have yellow stripes.
Andrew
The DM&IR SD9 #110 was one of the first built in 1955 as a demonstrator, sent to B&LE, and among the first to be scrapped.
If there is a second run I would have to get a much later road number from #160 to #165. The graphics feature the arrow.

Andrew
New power freshly delivered from EMD arrived on the High Plains Route this week. Ahem.. I mean Sunset .
Attachments
Erik C Lindgren posted:
Sales were provided by Caboose Stop Hobbies EMD sales division
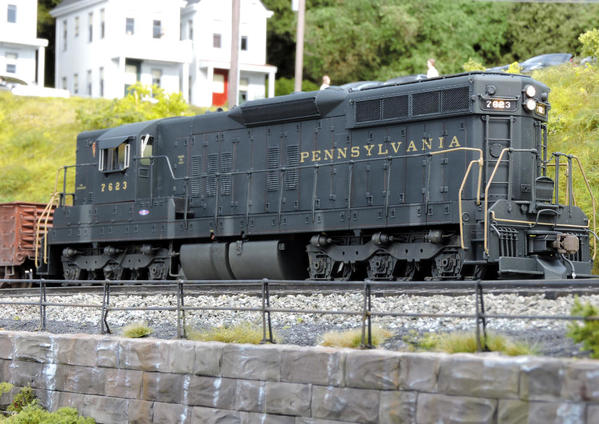
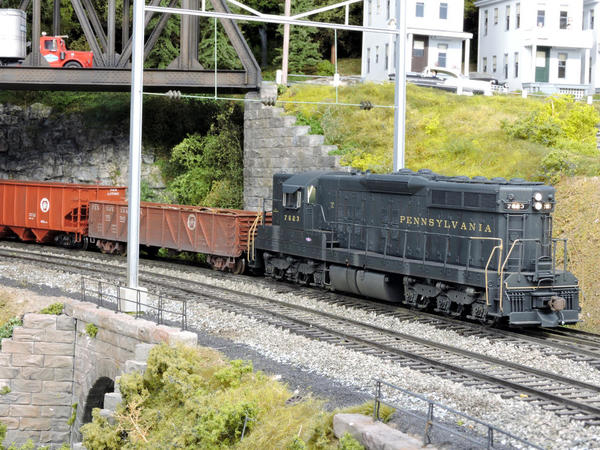
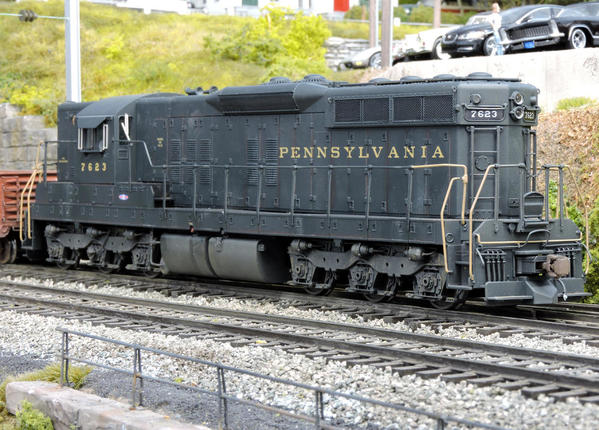
Spent the last few days modifying my SD9:
- Converted to PS3 (used a RailKing SD9 as the donor). Fairly straightforward, but you have to make sure no wires overhang the sides of the PS3 board, and alas, there is simply no room that I could find for the smoke unit
- Reversed the motor leads, so it starts long hood forward, per Pennsy practice
- Swaped headlight leads, so the long hood headlights light up first
- Reversed the engineer and crew, so they are looking in the direction the loco is going
- Fixed the steps. (Just broke them off and reglued)
- Weathered, using Prismacolors Soft Core pencils per Michael Gross’s article in the latest MRH, as well as with an air brush, some washes, and some pan pastels. These would be fairly new in the era I model, so they would be fairly clean
This has to be one of the smoothest running and quietest locos I own. Slow speed operation is excellent, and it also has quite a lot of pulling power. And with twelve wheel pick up (This is a 2 rail model, of course), if this thing stalls, its your trackwork.
Attachments
John Sethian posted:Spent the last few days modifying my SD9:
- Converted to PS3 (used a RailKing SD9 as the donor). Fairly straightforward, but you have to make sure no wires overhang the sides of the PS3 board, and alas, there is simply no room that I could find for the smoke unit
- Reversed the motor leads, so it starts long hood forward, per Pennsy practice
- Swaped headlight leads, so the long hood headlights light up first
- Reversed the engineer and crew, so they are looking in the direction the loco is going
- Fixed the steps. (Just broke them off and reglued)
- Weathered, using Prismacolors Soft Core pencils per Michael Gross’s article in the latest MRH, as well as with an air brush, some washes, and some pan pastels. These would be fairly new in the era I model, so they would be fairly clean
This has to be one of the smoothest running and quietest locos I own. Slow speed operation is excellent, and it also has quite a lot of pulling power. And with twelve wheel pick up (This is a 2 rail model, of course), if this thing stalls, its your trackwork.
Good to know conversion will work. Question.
What size tach tape did you use?
How did you secure the tach reader?
Did you use the headlights from the RK or were you able to use the ones that came with the engine?
Suzokovich
30 mm tach tape. Got really lucky, as the RK and SS SD9s have the same overall gear ratio of 10.5:1
The Tachreader was secured using the bracket from the RK model. I cut it out by removing the radial spokes, leaving just the holder and the about 200 degrees of the circumferential clamp. The clamp was used to locate it the thing. The holder is fixed to the motor with Goo and Gorilla Glue Super Glue Gel. I set my tach reader tape spacing to .060"
I used all the lighting (headlights, number board, cab light) that came with the Sunset engine.
Special Thanks to Dave Minarik, who several pages earlier in this thread opened one up and showed me the PS 3 would fit. It does, but as I said above, there is no room for any wires outside the PS3 board. Incidentally, I was able to use two convienient tapped holes in the chassis to mount the PS3 board mount. That, the gear ratio, and the lighting compatibility is almost as if Scott planned it that way ![]()
Here is another photo..I blended the weathering better. And fixed the fence!
Attachments
Nice John
thanks for sharing.
Nice work John, the light weathering sure makes all the details pop.
John,
That looks great! I thought I might want to convert to PS3 but I have been getting used to the ERR.
Did you happen to take any photos of the inside with the PS3 installed?
Thanks,
Dave
David Minarik posted:John,
That looks great! I thought I might want to convert to PS3 but I have been getting used to the ERR.
Did you happen to take any photos of the inside with the PS3 installed?
Thanks,
Dave
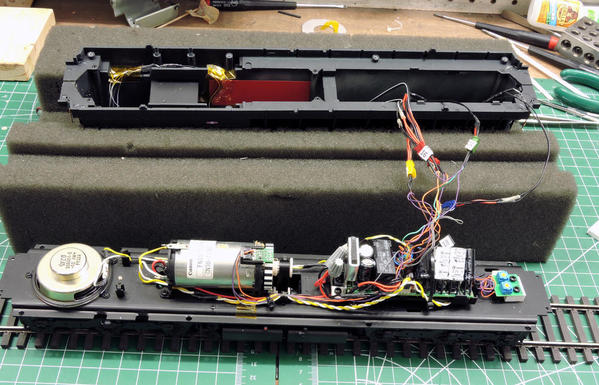
Here you go:
I kept the smoke and smoke volume control pots because they have wires in common, and I did not know if I would compromise the sound if I cut them out. I am an amateur on this. Also, I used the RK speaker, it fit right under the Sunset speaker clamp ring. I was originally concerned because there was no room for any kind of sound baffle. But Sunset has designed it so the floor and end walls of the cab interlock with the side walls of the shell to form a tight baffle.
For what it's worth, I really like the sound of this unit. As well as the way it runs.
And David, thanks for taking the time to talk to me on the phone about this!
Attachments
Any time John! The install looks nice.
Thanks for posting the photos!
Dave
Video...video....video!!!
Had a little time this weekend to run the SD9. The previously-mentioned problem with the Scaletrax #4 switch seems to be corrected, though there is still just a slight flicker when going through the switch--no big deal. One of these days I hope to get the SD9 weathered like several of you on the forum have done so nicely. But, in the meantime, I've included a couple of recent shots with the SD9 and the rest of the team.
Tony
Attachments
TWebSP posted:Had a little time this weekend to run the SD9. The previously-mentioned problem with the Scaletrax #4 switch seems to be corrected, though there is still just a slight flicker when going through the switch--no big deal. One of these days I hope to get the SD9 weathered like several of you on the forum have done so nicely. But, in the meantime, I've included a couple of recent shots with the SD9 and the rest of the team.
Tony
Nice. Like the backdrops and how you blended the trees into it.


