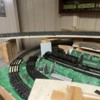
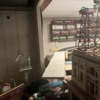
I originally posted some thing in the two rail section but felt my post really did not fit there since it was really two rail track with an outside third rail on the upper level and tinplate O gauge on the main level...  In additionI am not building to meet modern proto 48 or really even the common  scale intent of current times.  Since I collect old prewar kit built locos and cars I wanted the track to be built the same way it would have been in the 1930's. No right, no wrong, just what I chose to do.  FIrst I built a four foot section of track as an experiment and I liked it.  I'll post some of that here in this first post and then add other posts with progress. Ties are 1/4" square poplar I got from Menards.. No it is not cheaper than buying ROW ties.  Yes, the 1/4" sq ties are oversize for a prototype 9"X9" tie.  I used American Flyer S rail pulled from rusty track sections.  It has the same rail head as Gargraves and pretty close to code 148 plus it is basically free as I have a lot of it.  Also using ho 1/2" and 5/8" spikes.  They seem to work really well inthe 1/4" ties and hold the rail pretty nicely. I also played around with tie plates and took a very quick shot at cutting some from thin aluminum stock from pop cans, It works, maybe not with the best of looks, but after some consideration, I chose to omit the tie plates.  For tie stain I used Varithane light greg and then some black in the middle to simulate oil and coal staining.  I used Rustoleum Cammo brown spray paint for the rails before spiking them down. Just scrape the paint off the rail head and a light sanding makes them shiney again.  Yes, clean and protect the pins lol.

So again, First post really just rehashing what I had posted in the 2 rail forum.  I did not want to get in trouble by showing pictures of tinplate or outside third rail in that forum. 

1AC6E092-F986-4505-90EE-52BA5B7BE61C225CC146-EE70-4D05-9075-80FDE04D24FD62572D22-63E0-4573-9E26-2443D4A483A6351167332_2171266583079613_1895793202199347582_n351897016_2171266556412949_2760054145440756560_n352091089_2171266496412955_1207166462767238825_n352285134_2171266446412960_2005129248968351433_n352774551_2171266536412951_578579233596386039_n353009303_2171646339708304_2421894266395503050_n353011118_2171646409708297_8111742515824710358_n353024464_2171646363041635_9026462279339509957_n

Attachments

Videos (1)
352800957_684237663460823_6476268415599942953_n
Original Post

Replies sorted oldest to newest

Now that the test section is complete more or less, I moved on to thinking through how I want to layout the double track upper level loops.  I don't intend to change any lower level trackage.  I have had most of a single track upper level half built for probably 10 years. but never to the stage of running trains.  At first it was going to be 072 tubular then I thought Gargraves.  A while back I got hold of some Tru Scale roadbed from Carey Williams but it was not enough to build what I was after.  I do have a bunch of code 148 steel rail as well, but again not as much as I think I would need and I was really interested in seeing if I could make the Flyer rail work in this application.  So I got some 3/4" plywood sanded on one side and used the truscale roadbed to layout some double track roadbed sections on the plywood.  Inner oval is 48" radius and outer is 52 inch radius per the truScale roadbed.  This puts em on 4" centers.

361197493_2197568417116096_1638623528474817997_n - Copy

Here are a bunch of ties laid out on the curved roadbed sections.

361208642_2197568713782733_5086322379333218824_n - Copy

Below, I removed the older upper level plywood that had been in place in preperation of setting up the new double loops all the way around.

361574771_2197568910449380_7435963030483219953_n - Copy361605585_2197568927116045_8732176452020643507_n - Copy361889432_2197568787116059_8056177735607123093_n - Copy

The straight section here will cross the room entrance and go behind the tinplate station that sits above the lower level terminal tracks.  The intention here is to build a lift out bridge section.

361894209_2197568757116062_2197945900240324888_n - Copy

With the old upper level removed, you can see how the new upper level curves will sit above the lower level tracks.  They will actually be more open now than they were before. I'm thinking of building a cut down to the track on that curve and building a girder bridge section to span the lower level tracks.

361937232_2197568727116065_6345285154167251329_n - Copy

High angle view, the raw plywood curves are just sitting on my lower level mainlnes.  Too much stuff and not enough organization.362236856_2197568950449376_5337065281456397830_n - Copy362256343_2197569073782697_2943425774801279940_n - Copy

Attachments

Images (9)
  • 361197493_2197568417116096_1638623528474817997_n - Copy
  • 361208642_2197568713782733_5086322379333218824_n - Copy
  • 361574771_2197568910449380_7435963030483219953_n - Copy
  • 361605585_2197568927116045_8732176452020643507_n - Copy
  • 361889432_2197568787116059_8056177735607123093_n - Copy
  • 361894209_2197568757116062_2197945900240324888_n - Copy
  • 361937232_2197568727116065_6345285154167251329_n - Copy
  • 362236856_2197568950449376_5337065281456397830_n - Copy
  • 362256343_2197569073782697_2943425774801279940_n - Copy
Videos (2)
353857067_1743400732740863_2630702582454162367_n - Copy
356364187_247776137958660_4626497650928155694_n - Copy

Add Reply

Post
The Track Planning and Layout Design Forum is sponsored by

AN OGR FORUM CHARTER SPONSOR

OGR Publishing, Inc., 1310 Eastside Centre Ct, Suite 6, Mountain Home, AR 72653
800-980-OGRR (6477)
www.ogaugerr.com

×
×
×
×
Link copied to your clipboard.
×
×