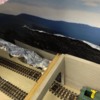
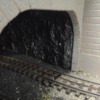
I've got this pretty large area inside my mountain that's currently just painted plywood. I would like to put some kind of a covering down in there and behind the tunnel portals so it's not so bare.

It's under the mountain so I don't really care what it is as long as it's cheap and does the job. I was thinking of using cat litter, as I've read on other forums that people have used this before?

Hobby lobby has a bottle of actual woodland scenics ballast for cheap but they only specify that it covers 21 square inches so I'm not sure how many bottles that would take. But if I can get away with one, I wouldn't mind to take that route.

Do you guys have a different or better solution? Thanks.

Attachments

Images (1)
  • 20170820_162109
Last edited by Babajaga
Original Post

Replies sorted oldest to newest

Ballast the first few inches to foot inside the portals. Why waste your time and money ballasting an area that, it appears, will be inside of a tunnel. 

On my old layout, which was fully "sceniked" (spelling?), I stopped the ballast right at the portal. You could see the foam, etc in there but I painted it a similar shade of gray as the ballast and left it. Doing it again, I'd have gone about a foot in the tunnel. 

Again, don't waste time or money in a spot you won't see and that will be in total darkness. 

SJC posted:

Ballast the first few inches to foot inside the portals. Why waste your time and money ballasting an area that, it appears, will be inside of a tunnel. 

On my old layout, which was fully "sceniked" (spelling?), I stopped the ballast right at the portal. You could see the foam, etc in there but I painted it a similar shade of gray as the ballast and left it. Doing it again, I'd have gone about a foot in the tunnel. 

Again, don't waste time or money in a spot you won't see and that will be in total darkness. 

I agree which is why I was wondering if there was a pretty cheap/free alternative. I will have viewing windows cut out in the plywood sides that support the mountain so I figured if I can glam it up on the cheap it would be nice.

I do have both play sand and cat litter but the cat litter is scented and the play sand is very light unlike the poster above with dark sand.

Last edited by Babajaga
Babajaga posted:
SJC posted:

Ballast the first few inches to foot inside the portals. Why waste your time and money ballasting an area that, it appears, will be inside of a tunnel. 

On my old layout, which was fully "sceniked" (spelling?), I stopped the ballast right at the portal. You could see the foam, etc in there but I painted it a similar shade of gray as the ballast and left it. Doing it again, I'd have gone about a foot in the tunnel. 

Again, don't waste time or money in a spot you won't see and that will be in total darkness. 

I agree which is why I was wondering if there was a pretty cheap/free alternative. I will have viewing windows cut out in the plywood sides that support the mountain so I figured if I can glam it up on the cheap it would be nice.

I do have both play sand and cat litter but the cat litter is scented and the play sand is very light unlike the poster above with dark sand.

It turns dark when you wet it with the glue mixture. Just like it would if wet with water, only it stays that way. 

TedW posted:
Babajaga posted:
SJC posted:

Ballast the first few inches to foot inside the portals. Why waste your time and money ballasting an area that, it appears, will be inside of a tunnel. 

On my old layout, which was fully "sceniked" (spelling?), I stopped the ballast right at the portal. You could see the foam, etc in there but I painted it a similar shade of gray as the ballast and left it. Doing it again, I'd have gone about a foot in the tunnel. 

Again, don't waste time or money in a spot you won't see and that will be in total darkness. 

I agree which is why I was wondering if there was a pretty cheap/free alternative. I will have viewing windows cut out in the plywood sides that support the mountain so I figured if I can glam it up on the cheap it would be nice.

I do have both play sand and cat litter but the cat litter is scented and the play sand is very light unlike the poster above with dark sand.

It turns dark when you wet it with the glue mixture. Just like it would if wet with water, only it stays that way. 

Ok I'll give this a shot. I've got a bag of play sand in the garage that I'll play around with. I think however it turns out it will look a bit better that just plywood.

PSU1980 posted:

SJC has it correct, put cork bed down to minimize the noise then ballast 6 inches into tunnel or to the point you don't see deep into the tunnel and scenic the tunnel walls and call it a day. No need to waste time or money on that.

You can't really see too far in from the one side but on the other side when you're sitting by the controls you can see all the way into the tunnel a decent amount. So it might need a little more covering there.

Attachments

Images (1)
  • 20170820_173033
Babajaga posted:
PSU1980 posted:

SJC has it correct, put cork bed down to minimize the noise then ballast 6 inches into tunnel or to the point you don't see deep into the tunnel and scenic the tunnel walls and call it a day. No need to waste time or money on that.

You can't really see too far in from the one side but on the other side when you're sitting by the controls you can see all the way into the tunnel a decent amount. So it might need a little more covering there.

Another alternative is to paint the wood flat black. It's amazing how that makes stuff disappear.  Example, my tree stand is on a plywood base painted flat black. Not very noticeable. IMO

IMG_3425

Attachments

Images (1)
  • IMG_3425
Babajaga posted:

That's nice scenery. What did you use for your water?

I bought woodland scenics realistic water cause I didn't know any better.  I think any clear acrylic will do the same effect and might be cheaper at the hobby or craft store.  The tip is to make sure you have your feature dam'ed up cause that stuff flows all over. Paint the bottom with a little darker color for depth first. 

Babajaga posted:
PSU1980 posted:

SJC has it correct, put cork bed down to minimize the noise then ballast 6 inches into tunnel or to the point you don't see deep into the tunnel and scenic the tunnel walls and call it a day. No need to waste time or money on that.

You can't really see too far in from the one side but on the other side when you're sitting by the controls you can see all the way into the tunnel a decent amount. So it might need a little more covering there.

Well, you sort of skipped the first step of tunnel building- the tunnel. Some use cardboard folded to a U shape upside down. others go to great extent to make it semi-round at the top. Just think of what it looks like after they actually bore, blast and cajole through solid rock.

The floor or track bed is usually just rock. As in, paint is black with gray blended in while it is wet.

There is a heavy brown paper used for walking areas for protection when an interior is under construction. You could crinkle that up and paint it for the interior tunnel walls.

Last edited by Moonman

Depending on where you live Tractor Supply sells bags of chicken grit.  Find the one that has no additives in it. It makes for terrific ballast at about $6 for a 5lb. bag that goes a very long way.   I use if for all of my ballast.  It is simply small granite chips with just enough different color variation to make it look real.

Ed

I agree with Ed, chicken grit works well and it's inexpensive.  Scrappy makes a good point also, regarding interior walls.  

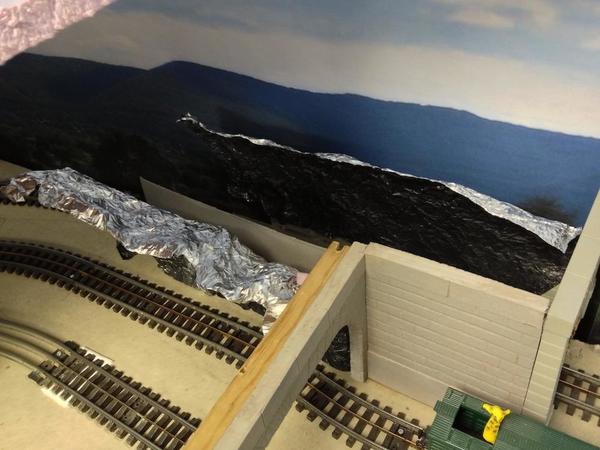
Another approach for scenic interior walls is to use crumple up heavy gauge aluminum foil for the first foot or so. First crumple the foil and semi flatten it out ( so there are still crumples ).  Spray paint the foil flat black and/ or brown.   The painted crumpled foil gives a blasted rock effect.  I used heavy gauge foil  for several feet inside a tunnel and the foil does not interfere with TMCC reception at all ... my TMCC locos work flawlessly while inside the tunnel. If you have TMCC or Legacy and decide to go the foil route, test your locomotives first before painting the foil.  Do this test by temporarily fitting the unpainted foil inside your tunnel .... then run all your TMCC/Legacy locos by running them through the tunnel several times.... being sure to stop/start/ reverse/ and use  tower com.  

Once you have done all the above; shape the painted crumpled foil and fit it to the inside of your tunnel.  Assuming you have some interior structural support, such as wood, use staples to attach the foil.... you won't need many ( and paint the staples too ).  If you have styrofoam interior support structure use foam tack nail to attach and hold the foil in place ... and again paint the nail heads with the spray paint.  

This is a relatively cheap, easy, and effective way to give tunnels a "real" interior look.  Don't forget to hit the outside of portals with a dash of flat black spray paint to show for years of locomotive exhaust residue. 

Good luck with your project whichever approach you decide to use!

Last edited by trumptrain

The foil technique looks great, I'm probably going to go ahead and do that along with a chicken grit floor.

Last night I cut out decent sized viewing holes for the kids and my wife said she's going to make a gold mining scene in tunnel.

So I'm thinking maybe little parts of foil that have no paint on it will shine a bit too making it look like gold nuggets.

Ed Walsh posted:

Depending on where you live Tractor Supply sells bags of chicken grit.  Find the one that has no additives in it. It makes for terrific ballast at about $6 for a 5lb. bag that goes a very long way.   I use if for all of my ballast.  It is simply small granite chips with just enough different color variation to make it look real.

Ed

Do I glue down the chicken grit like any other scenery, using diluted white glue and water? I have heard that rubbing alcohol also needs to be used before spraying the top of the scenery with the final layer of glue?

Last edited by Babajaga
Babajaga posted:
Ed Walsh posted:

Depending on where you live Tractor Supply sells bags of chicken grit.  Find the one that has no additives in it. It makes for terrific ballast at about $6 for a 5lb. bag that goes a very long way.   I use if for all of my ballast.  It is simply small granite chips with just enough different color variation to make it look real.

Ed

Do I glue down the chicken grit like any other scenery, using diluted white glue and water? I have heard that rubbing alcohol also needs to be used before spraying the top of the scenery with the final layer of glue?

There are several threads on whether or not to glue down ballast.  Your choice.

You DO need something to break surface tension when spraying on glue. Alcohol will work, but so will "wet water" (water with a few drops of dish detergent). 

I've been reading about it and many people use different techniques. But what I got from it is that you spread the wet water with glue mixture (scenic cement) on the area then you sprinkle on scenery, wait for it to dry then remove the excess.

And lastly you spray the white glue diluted with wet water over the top of the scenery. Is this basically right or am I off on something?

I think the most common technique is to mist with wet water (in a spray bottle) just before applying glue diluted with regular water. The wet water breaks down the surface tension and allows the glue mixture to soak in in a much more uniform way. A quick experiment with and without the wet water will quickly give you a feel of why this is important. 

I do not know whether or not diluting the glue with wet water will work--never tried it.

Beyond that, there are many techniques for glueing down lose materials, most of which work fine. Best to experiment a bit.

Last edited by Avanti

Follow the links to Eric's Trains from the previous post that I made. near the 3/4 to the end of the series on building a mountain or on the tunnel series he goes into great detail on some techniques.

After reading many how - to's and threads on this forum - I summarize it this way -

  1. make stuff stick to deck with brushed on 100% Elmer's - let dry - I think Lowe's sells it in gallon jugs
  2. reinforce or finish glue the stuck on material with 50/50 - water and Elmer's - get distilled water at the supermarket - tap water can cause color changes in the glue
  3. the "wet" water technique is for rocks, ballast and larger material as a finish application - I have used liquid dishwasher detergent and water and like it
  4. I see no reason to glue track ballast unless children will be playing trains on the layout or it will be transported like a modular layout. It requires a pretty good soaking with water to soften the white glue enough to scrap off the scenic material for changes or repairs to the track at a later date

Have fun! You are building a good layout and doing it will teach you your best way. I can say that it is prudent to listen to guys like Pete that have done it before. It definitely shortens the learning curve and will provide good results the first time.

Moonman posted:

Follow the links to Eric's Trains from the previous post that I made. near the 3/4 to the end of the series on building a mountain or on the tunnel series he goes into great detail on some techniques.

After reading many how - to's and threads on this forum - I summarize it this way -

  1. make stuff stick to deck with brushed on 100% Elmer's - let dry - I think Lowe's sells it in gallon jugs
  2. reinforce or finish glue the stuck on material with 50/50 - water and Elmer's - get distilled water at the supermarket - tap water can cause color changes in the glue
  3. the "wet" water technique is for rocks, ballast and larger material as a finish application - I have used liquid dishwasher detergent and water and like it
  4. I see no reason to glue track ballast unless children will be playing trains on the layout or it will be transported like a modular layout. It requires a pretty good soaking with water to soften the white glue enough to scrap off the scenic material for changes or repairs to the track at a later date

Have fun! You are building a good layout and doing it will teach you your best way. I can say that it is prudent to listen to guys like Pete that have done it before. It definitely shortens the learning curve and will provide good results the first time.

Good information, thanks.

SJC posted:

Ballast the first few inches to foot inside the portals. Why waste your time and money ballasting an area that, it appears, will be inside of a tunnel. 

Again, don't waste time or money in a spot you won't see and that will be in total darkness. 

Time and money - two excellent reasons to not ballast what can not be seen.

Also consider, anything that you do on your layout that you cannot see or gain ready access to will at some time in the future be the source of a problem. 

TedW posted:

Another alternative is to paint the wood flat black. It's amazing how that makes stuff disappear.  

Ditto this....

Folks who do theatrical stage sets have for decades used flat black for the very purpose of 'dismissing'.  The eye is drawn to color/light.  If the mind is to be distracted from an area/object, it's typically painted black.  'In the shadows' is another reason to 'fade to black'...the deeper recesses of a tunnel, for instance.

Ergo, layout track within a tunnel portal?...ballast and create natural or erected bore walls for the first few inches.  Then paint/transition everything beyond flat black.  

BTW....all of this is a good reason to avoid straight-through tunnel bores on the layout that are positioned so as to invite the viewer to look inside/through....IMHO, of course.  

KD

Moonman posted:

Follow the links to Eric's Trains from the previous post that I made. near the 3/4 to the end of the series on building a mountain or on the tunnel series he goes into great detail on some techniques.

After reading many how - to's and threads on this forum - I summarize it this way -

  1. make stuff stick to deck with brushed on 100% Elmer's - let dry - I think Lowe's sells it in gallon jugs
  2. reinforce or finish glue the stuck on material with 50/50 - water and Elmer's - get distilled water at the supermarket - tap water can cause color changes in the glue
  3. the "wet" water technique is for rocks, ballast and larger material as a finish application - I have used liquid dishwasher detergent and water and like it
  4. I see no reason to glue track ballast unless children will be playing trains on the layout or it will be transported like a modular layout. It requires a pretty good soaking with water to soften the white glue enough to scrap off the scenic material for changes or repairs to the track at a later date

Have fun! You are building a good layout and doing it will teach you your best way. I can say that it is prudent to listen to guys like Pete that have done it before. It definitely shortens the learning curve and will provide good results the first time.

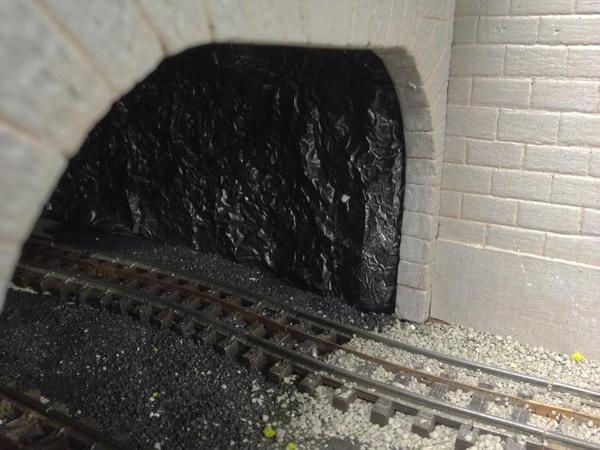
Good guide to follow, thanks. I finished the inside tunnel last night, it turned out pretty good and it only required me going out and buying a small bag of chick grit.

If anything it was good practice for moving on to the main part of the layout where everything will be very visible. 

Add Reply

Post

OGR Publishing, Inc., 1310 Eastside Centre Ct, Suite 6, Mountain Home, AR 72653
800-980-OGRR (6477)
www.ogaugerr.com

×
×
×
×
Link copied to your clipboard.
×
×