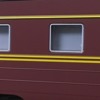
I opened my Lionel Station Sound Kitchen Car to replace a loose window and mask the wires that showed through the clear windows.

The first thing I saw was that the assembler did not run the wires properly through the floor and pinched wires under the floor edge and the body of the car.  I cut a channel-way by the light switch and correctly routed the wires so they would not pinch and short in the future.

I found the car had two similar floor pieces, those used in the regular Dining Cars for the sound section.  The hole in the floor allowed me to see that the factory "E-clip" was bent and about to fall off the car, dropping the truck.  I replaced it with a steel 3/16" "E-clip".

I decided to convert the second section into a Dorm Room for railroad employees.  Using "I-beam" plastruct, I created the platforms for the beds.  I made pillows out of two sheets of plastruct glued together.  I then sanded them to round the pillows.  I even made indents in them from a head resting on them.

I added crew members by shortening their legs.

The masking for the sound system is cut with notches that allow the wall to go back further and  is glued to the speaker shell and floor.  The kitchen side is painted silver.  The window side is painted "Sand" colored Flat Acryl paint by Testors.

I have bench seats from NYC ESE coaches that I bought two years ago.  I will located them among all my parts and create an employee/public lounge in the middle of the car, bridging the two floor sections.  The middle lounge gives the employees a place to talk while other crew members are sleeping in the Dorm room or when they get a break from the kitchen.  More pictures will be added after the lounge is completed.

Sincerely, John Rowlen

Attachments

Images (13)
  • DSCN4810: Lazy, sloppy workmanship pinching wires under car floor.
  • DSCN4813: Re-routed the two wires through the hole in the floor.
  • DSCN4815: Replaced loose and bent Factory "E-clip"
  • DSCN4816: I-beam supports for plastic bed top.
  • DSCN4817: Laying down another bed section.
  • DSCN4819: Trimmed walls will be used as a wall and a door.
  • DSCN4821: Laying supports for otyher beds.
  • DSCN4822: Using two trimmed walls as a wall and a door to room.
  • DSCN4824: Adding vertical walls. Restrooms of to left out of view.
  • DSCN4827: Painting sheets and blankets in contrasting colors.
  • DSCN4830: Adding pillows to beds and a few crew members.
  • DSCN4832: Crew members ready for work.
  • DSCN4833: Masking for the sound system in the kitchen.
Original Post

Replies sorted oldest to newest

I am glad you like the Broadway Limited Kitchen-Dorm Car.

I used the spare NYC ESE Interior I purchased to add a bathroom to the middle of the Kitchen-Dorm Car.  I also added a couch outside the Dormitory Area as a place to have conversations when other crew members are sleeping in the Dorm.  The restroom serves the Dorm and the Kitchen.  I left the hallway on the Kitchen side wide open for the loading of produce for the Kitchen.

When the paint and glue dries, I will close the car and take pictures.  I need to get one replacement window from the dealer.  There was a mark on one window glass.  The glass windows on one side are singles, not attached to each other, and prone to fall inward because of that.  The retainer pins above the single windows do not align above all of the windows to hold the tops in place.

Sincerely, John Rowlen

Attachments

Images (3)
  • DSCN4834: Restroom added to the middle of the Kitchen Dorm Car aligns with a window.
  • DSCN4836: Restroom serves both the Kitchen and Dormitory.
  • DSCN4837: Couch in the hallway provides a place for conversations when crew is sleeping in the Dormitory.

I had bathroom parts left, so I added a toilet and sink to the rear corner of the Dormitory near the end door. 

I re-thought the color of the window masking for the Kitchen Sound System and painted the masking red to match the other walls in the car.  The paint color is "Insignia Red" Flat Acryl Paint by Testors.  I may add a drop or two of blue to bring it closer to the spray paint the factory used when I replace the damaged window.

Attachments

Images (3)
  • DSCN4838: I added a toilet and sink to the rear corner of the Dormitory.
  • DSCN4840: The convenient toilet is good for night-time bathroom run.
  • DSCN4841: Red masking made more sense as I looked at the car.

I closed up the Broadway Limited Kitchen-Dorm and took a few pictures.  It looks good crossing my double Pratt Bridge by my control table.

My detailing looks realistic and I have captured my first "Ghost" riding my trains.  He is in the third picture shot through the middle bathroom. He is standing in the hallway, but there is no figure there.  I must be getting to the end of my bucket list when the supernatural begin to call on me.

Attachments

Images (5)
  • DSCN4854: Inside the Kitchen-Dorm.
  • DSCN4856
  • DSCN4858: There appears to be a man in grey slacks and black shoes.  He does not exist.
  • DSCN4859
  • DSCN4860: Interior of the Dormitory I created.

I had to repair a window on one of these for somebody else.  The 4 screws came out easy... after that it wasn't fun.

These cars are beautiful but there are definitely some issues Lionel needs to correct.  The adhesive issue is a big one. Anyone expecting to put people in these cars need to be aware of the issue with the adhesive tape. The cars I saw were other wise fine.  Your mileage may vary.  With patience you can get them apart.  Again I certainly won't defend this problem but it is something that can be overcome. 

I used small tooth picks to "break" the adhesive from the double sided tape they used for the windows.  Carefully using them to wedge the side so I could cut the adhesive between frame and body with an Exacto knife.  Be careful with the knife not to nick the car body.  Thanks to another forum for this idea on another thread.

IMG_2527

Once cut and both sides still wedged I was able to lift the shell carefully from the frame.  I started at the non electronics end and carefully lifted the frame from the body.  I would have preferred flat wooden coffee stirrers to use as a wedge but the toothpicks did fine.  There was a lot of adhesive so make sure you get it all.  Also be aware of the light connector on the end with the sound electronics.  The car I did, one of the 2 wires was shorter due to a routing issue which I also corrected.

IMG_2528

You can see the "sloppy tape work on these cars.

IMG_2532

The tape, if it ended at the bottom of the window insert would not have been an issue.  The tape could have been half the width and been more than sufficient.

IMG_2531


IMG_2530

Once inside the window was repaired and the wiring was neaten up.  I also inserted some  window "frosting" to hide the electronics. You get a few shadows but nothing that can be identified as wiring.  Since I was doing these for someone else, this is as far as I went.  The other end will be detailed by them if they want.  I carefully cleaned up the adhesive from the shell at the point where the frame meets so this won't be an issue again for this car.

IMG_2529

Finished product.  Hope this helps.  I can't emphasize enough, patience and being careful!

PRR Close

Attachments

Images (7)
  • IMG_2532
  • IMG_2531
  • IMG_2530
  • IMG_2529
  • IMG_2528
  • IMG_2527
  • PRR Close
Last edited by MartyE

Fortunately my Broadway Limited pulled apart more easily than the Dome cars.

I started in the middle, using my fingers, I pulled both side of the car away from the floor.  It slowly made a tearing sound as the tape released.  I moved up and down the car pulling gently. 

In the corners of the car, I used an excel #11 blade to loosen the tape into the corners.  

I carefully used the blade to enter the end of the car and loosen and lift the floor.  On the Kitchen car, I used the end with the full-width Diaphragm because it would hide any nicks to the paint. 

As soon as I had some movement upward, I pulled upward on the truck and separated the sides a little at a time.  (Another post shows coffee stirring sticks inserted to keep the tape from sticking again.)

When the car shell separated, I moved the wires out of the slotted floor to the side nearest the slot.  This gave me a little extra wire and more room to disconnect the lighting plugs.  I found the break between the plugs and used the excel knife to wiggle/pry the plugs apart. (If needed, remove the first light bar screw or two in the roof to give extra clearance to disconnect the plugs.) (Keep track of all screws removed.)

The light plug may need the pins straightened away from the plug face when re-attaching the plugs.  I used he #11 blade to straighten them, allowing them to line up and then connect.

Attachments

Images (1)
  • DSCN4860
John Rowlen posted:

Fortunately my Broadway Limited pulled apart more easily than the Dome cars.

I started in the middle, using my fingers, I pulled both side of the car away from the floor.  It slowly made a tearing sound as the tape released.  I moved up and down the car pulling gently. 

The car I worked on, the adhesive kept on reasserting itself when the sides were released.  There was no way even after the initial breaking of adhesive I could work the shell off without keeping the "wedges" in place.

Last edited by MartyE

Thanks John. I was able to get the PRR Station Sound car apart (and cleaned all the glue off where the frame meets the shell with a Q-Tip & mineral spirits)with not too much problem, but can't get the UP one apart. I'm having the same problem that Marty is having & worked on it for quite a while. With all the detail on the bottom of the car, it's hard to get a good grip in many places to spread it.  Almost seems like you need two people to do it with one spreading the body & the other one pulling up.

Here are pictures of the changes I made to the interior floor of the Broadway Limited Dining Car.

The car comes with two similar Dining car Seat Areas.  Unfortunately, the middle of the car has two tables against each other. I cut off one table from the middle and moved the floor to create a normal table seating arrangement.  (Please see pictures.)  I shortened the floor piece nearest the light plug and Full Diaphragm.  I used a Dremel tool to re-drill holes to fasten the shortened piece back to the car chassis.

This gives the car extra space near the Kitchen Car (Full width Diaphragm end) for food warmers and tray carts for dirty dishes.

I have also included pictures of the car in progress with the body on it.  This shows that the tables as I moved them, line up very well with the car windows.

Be aware that there are black spacers between the car body and the metal floor.  These spacers can fall off when you open your car.  They are necessary because the interior plastic floors were carved out for the spacers, and the floor does not elevate the car body.  You need the spacers.

This car will take several more coats of paint and several days installing Preiser 65602 Unpainted Seated People I painted.  It is an important car for the Broadway Limited with a view through the dining area, like a coach car.  Most of the sleepers do not offer clear-through views.  Their room walls obstruct the views.

Sincerely, John Rowlen

Attachments

Images (17)
  • DSCN4865: The origibal Dining Car with two Seating Areas.
  • DSCN4866: The cut off tables between pieces to be joined together.
  • DSCN4869: New seating arrangement, minus second table row.
  • DSCN4870: Extra area at Full Diaphragm Kitchen end.
  • DSCN4871: The new seatting arrangement.
  • DSCN4874: Roughly Painted interior needs several more coats of paint.
  • DSCN4875: The full view of the dining car.
  • DSCN4876: Other end of Dining car.
  • DSCN4877: Cut-oof Tables and beveled bit to drill new holes in floor that was moved.
  • DSCN4878: Looking inside the car.
  • DSCN4879: Tables align very well with car windows.
  • DSCN4880: Pretty good alignment of tables to windows.
  • DSCN4881: A full view of the Dining Car.
  • DSCN4882: A reak inside the car.
  • DSCN4883: The Kitchen end of the Dining Car.
  • DSCN4884: A Spacer still in place on plastic tab. One is loose.
  • DSCN4885: Four spacers help get the body shell to be the correct height.

John,

I had to use an Excel #11 Blade to run down the side of my UP Dome cars.  I did get a few nicks in the paint by running too deep into the car floor.  Cutting the tape with a knife was the only way to break the grip of the tape/glue.  Work the knife into the corners where you can pry the end of the floor up with the Excel #11 Knife.  Gently lift the end then rotate blade 90 degrees to help raise the floor.  

Once you have one end up a bit it becomes easier to twist the metal chassis left and right/up down, rocking it slightly up and out of the car.

I am making progress on the Broadway Limited Dining Car. I cut and glued seat backs to all the boxes on the floor, creating chairs.  There are three coats of paint on the tan chairs and six of flat white Acryl on the table tops.

I bought more AAA batteries for my work headlight that I use when painting the Preiser 65602 Unpainted Seated People.  The Dining Car will use many people. I am waiting for a replacement "Tower View" Observation.  It will be my next (third BWL) car to detail.

Attachments

Images (6)
  • DSCN4890: Original seat boxes before seat backs are added.
  • DSCN4891
  • DSCN4892
  • DSCN4893
  • DSCN4894
  • DSCN4895
Ray of sunshine posted:

I'm was not a Pennsy fan until recently. Your work is excellent and I like the detail you did to the interiors. What figures do you use for the diner? Are they O or S gauge and what brand do you use?

Ray


RJT posted:

John fabulous work what figures did you use?

He says: "when painting the Preiser 65602 Unpainted Seated People. "

Thank you everyone.  I use the Preiser 65602 Unpainted 1/45 Seated People that are now in-stock and the Preiser 68209 Factory Painted 1/50 Seated Figures that are currently out of stock.  The 68209 figures fit very well in the dining cars.  There are replicas of the 68209 from China that are light-orange.  They take more coats of paint and lack the finer facial details of the Preiser figures. 

As I looked at the car, I saw a void that needed to be filled.  I added an old lady with a cane and a man in a blue sweater.  I had to do serious "butt grinding" to lower their legs under the tables.  Some of the legs were removed so the figure did not bend the table tops.

I think the Broadway Limited Dining Car is finally finished and drying for assembly.

Sincerely, John Rowlen

Attachments

Images (3)
  • DSCN4906: Added woman with a cane and man in the blue sweater.
  • DSCN4907
  • DSCN4908

Here are some views through the windows of the Broadway Limited Dining Car.  It took three days to finish, starting with removing a duplicate table in the middle of the dining car and drilling new holes for the floor piece near the Kitchen Car (Wide Diaphragm side).

All table pedestals were painted.  The white table tops have eight coats of paint. Then chair backs were added and painted a tan made from White Flat Acryl and Earth Red Flat Acryl by Testors.

I painted the Preiser 65602 1/45 Unpainted Seated People and added the last of my Preiser 68209 1/50 Factory-painted Seated People.  It was a lot of fun, but I am glad this car is done.

Sincerely, John Rowlen

Attachments

Images (8)
  • DSCN4923
  • DSCN4924
  • DSCN4915
  • DSCN4917
  • DSCN4918
  • DSCN4920
  • DSCN4921
  • DSCN4922

Broadway Limited "Tower View" Observation

Opening Tower View Observation requires careful handling.  The roof antenna has very fragile eyelet supports.  First remove the rear two screws and the long metal center post that fastens to the roof of the car.  Next remove the two screws at the front of the car.  Unlike the SP Observation, the black support plate on the rear is glued to the end of the car. (See photo #1)

Carefully pull the sides away from the metal chassis.  Start lifting at the front of the car.  When you can reach the wire for the roof lights, take it out of the floor slot and move it to the outside of the floor edge.  (See photos 2 & 3)  This step is necessary to allow the chassis to slide out two inches from under the black rear support glued to the body shell of the car.  Once the chassis is removed, disconnect the light cable at the white plug.  I used an Excel #11 knife to wiggle the plugs apart.

Set the Body aside:  You may need to re-glue any loose windows because supports pins above the windows do not always line up properly.

I removed my interior floors to install new 3/16 E-clips that I purchased at Home Depot.  The factory clips were loose on my car and had opened up on two other cars I worked on.

Paint and detail the interior of the car, putting small screws and parts in a zipper plastic bag so they are not lost.

Reverse the steps described above to reassemble the car.

Sincerely, John Rowlen


Attachments

Images (11)
  • DSCN4935: Black plate is glued to the rear of the Observation.
  • DSCN4926: Wires for lights will be in the slot in the floor.
  • DSCN4927: Mone the wires out of the slot and to the side of the car.
  • DSCN4936: Disconnect plug.
  • DSCN4925: Paint and deatil the car.  I added Preiser 65602 Peple I painted.
  • DSCN4928
  • DSCN4929
  • DSCN4931: Observation rear of car.
  • DSCN4932
  • DSCN4933
  • DSCN4934

Joe,  These are the new 21" passenger cars from Lionel.

I added seven more Preiser 65602 Seated People that I painted today to the Broadway Limited Observation.  I am waiting for a new Body Shell and will then close the car.

I will pick another Broadway Limited Car and start painting the interior while listening to the Basketball games on TV tonight.

Attachments

Images (7)
  • DSCN4939
  • DSCN4940
  • DSCN4941
  • DSCN4942
  • DSCN4943
  • DSCN4944
  • DSCN4945

It’s interesting to see the internal layout of this car, which is very different from the UP Excursion dome observation car. This one has what look like a kitchen and a couple of parlor/sleeping compartments.

Some thought went into the design of both versions of interiors of these cars as they reflect some features of the real thing - much more so than the dining car interiors, which don’t look to me like any prototype I know of. 

But once you get the cars apart there’s a lot of scope to change them. That’s what I am intending to do with my Overland diner and both dome cars in the Excursion set.

College Creek 4-12 Duplex Sleeper

After looking at the interior Lionel provided and viewing pictures of the actual Duplex Sleepers, I cut out the middle six seats and rotated them 180 degrees.  I supported the seats with Plastruct sheet strips and re-glued them.  The original seats were facing the direction of the upper seats, not the direction of the main floor lower seats.  Now the seat backs are no longer in the middle of the lower windows, but in a position where passengers can see out the lower window.  I changed only the six seats in the middle of the lower floor.

Caution:  Do NOT glue plastruct seat supports over the Light switch in the floor of the car.  The extra plastic will prevent the interior from screwing back into place properly.

There is no upper floor or chairs for the upper duplex rooms.  I plan to create a z-shaped 1" seat that will glue to the back of the lower level room seats.  The seat will only cover 1/3 of the lower room to avoid blocking light from the LED Lighting in the roof of the car body shell.  Lionel put all sixteen of the room doors in the wall of the hallway side of the 4-12 Duplex car.

I also added steel 3/16" E-Clips because one of the Lionel Factory silver e-clips was loosening on a truck post.  I have replaced all silver E-clips on my cars when possible.  (Station Sounds Dining and Kitchen Cars were not changed on the end with the sound system.  I did not want to disturb the factory wiring.) 

I will post pictures of the Upper Level Duplex Seats after my construction is complete.

Sincerely, John Rowlen

Attachments

Images (7)
  • mceclip0: People looking out of windows provides clues to seat direction.
  • DSCN4952: Interior of changed 4-12 Duplex Sleeper. Seat backs are NOT in middle of lower windows now.
  • DSCN4950: Plastruct strips suupport seats after rotating 180 degrees.
  • DSCN4951: New steel 3/16" E-clip from Home Depot.
  • DSCN4946: New Duplex lower floor.
  • DSCN4948: I changed only the middle six rooms.
  • DSCN4949

Dear  John, Great work. Could you describe how you removed the seats? Did you just cut them out,(using an exacting knife?)) rotate them and then glue to the new supports?  Did you glue the new supports to the floor frame? Also, I am having a very hard time seeing the difference between the before and after pictures as to the seat  locations .Could you possibly repost the after picture with little arrows indicating exactly which seats were rotated. Thanks, Frank

Frank,

Unfortunately, I did not take a picture of the 4-12 Duplex before I rotated the six middle seats.  I do have another Duplex car coming to me and will take interior pictures at that time.

All work was done to/on the removable floor sections, so they could be removed if necessary.  Nothing was glued to the metal car chassis.

I used a sharp Excel #11 blade to score along the edge of the seat several times, using the seat joint as my guide until it cut through the floor.  The wall nearest the interior hallway room wall was cut from the bottom of the  floor piece by running the blade lightly several times in a line about 1/16" from the seat indentation.  I had to wiggle the blade into the corners to break the seat free from the floor.  I trimmed any bulges, bumps, burrs or boo boos from the seat piece and rotated it 180 degrees into the hole in the floor.  If it fit, I removed it, and glued the bottom braces into place.  I let the braces dry, then glued the seat into place on the new platform made by the braces.  (See picture of braces.)

Do NOT glue a brace over the area for the car's light switch.  This will keep the floor from laying flat on the chassis.

The seats rotated 180 degrees line up with the smaller windows of the car body.  Let the actual car body be your guide. The two end rooms with toilets at each end of the car do not get moved.  ( 4 rooms total )

I took a needed sleep break today.  The upper room supports require precision cutting.  I will design them within the next two days. There will be three each of two designs in mirror image.  The pieces will get glued to the back of the six rotated middle lower Duplex seats.  This will take some adjusting of the design to accommodate the Prieser 65602 and 68209 smaller seated figures in the six upper rooms.

Sincerely, John Rowlen

Attachments

Images (2)
  • DSCN4950: Scrape plastruct bracing. Do not put over light switch in metal chassis.
  • DSCN4952: Picture has six middle seats already rotated.

I was able to create a simpler structure for seated passengers in the Upper Duplex Seats.  The walls are 1 inch high and 1/2 inch wide.  The walls are glued to the seat backs that were rotated.  A bridge was cut to span the two uprights and travel through a notch in the red car wall.

I cut a narrower bridge in the middle of the seat pads spanning the two uprights.  The thinner middle section of the seat pad allows more light to reach the lower Duplex rooms.  I will use right angle Plastruct to fasten seat backs to each of the upper level seat pads, creating a bench seat.

I had to severely grind the upper people in order to lower them to window height. The grinding almost detached the legs hanging below the seat pad bridge.  If I had it to do again, I would make the upright 15/16" high, not 1 inch or 16/16".  The uprights are thicker stock .060 or larger. The seat pads are .030 or.020 stock.  Good luck with this project.

I still need to paint and add more 65602 Preiser Seated People for the lower level rooms.

Sincerely, John Rowlen

Attachments

Images (10)
  • DSCN4953: 1 inch high .060 walls 1/2 inch wide, glued to seat backs.
  • DSCN4955: Notch in red car wall to supprt Seat Pads.
  • DSCN4958: Seat Pads are narrower in the middle to allow more light into lower rooms.
  • DSCN4961: Seat Pads rady for Seated People.
  • DSCN4962: A peek into an upper Duplex Room.
  • DSCN4964
  • DSCN4965
  • DSCN4966
  • DSCN4971: Seay Pad Bridges after lowering figures a little more.
  • DSCN4972: Upper Duplex Room figures on Seat Pads. Seat backs will be added.

Frank,  The actual wall (from floor to top under Seat Pad)  is 1".  I now recommend 15/16" after installing my upper Duplex Seat Pads.  I also found that I need to grind the bottoms of the lower level figures more than the people in the four end staterooms.  The lower level Duplex windows are lower in the car, but the seats are the same height all the way across the car's floor. 

Sincerely, John Rowlen

Attachments

Images (1)
  • DSCN4953: Recommend 15/16" Wall height.

Add Reply

Post

OGR Publishing, Inc., 1310 Eastside Centre Ct, Suite 6, Mountain Home, AR 72653
800-980-OGRR (6477)
www.ogaugerr.com

×
×
×
×
Link copied to your clipboard.
×
×