
I am trying for a little elevation for one of our loops and thought I would try a little hillside,  I built a foam frame for the O48 curve, and made a hillside out of cardboard strips and plaster cloth.  Haven’t decided if I will continue the hillside below the tracks or make a retaining wall.

What are the next steps for the hillside I have already created? Do you paint over the plaster cloth when it dries or is there something else that can be put over it to cover the texture of the cloth which is still showing?

Thank you for your guidance -

93A9CA80-8E14-4C49-8ED1-8E822C91DFEB

   70701AB1-142B-4EB1-BC55-318DFDD2A705E7065B62-4887-44E2-93C4-B1F2908EF21E9344C9C6-8D75-4A83-9F3C-80199225C9C2CF5A02A4-B34E-4D48-B621-ECAF82905E0295333416-A0B0-4E89-A989-7AFFF7E64624

Attachments

Images (6)
  • 70701AB1-142B-4EB1-BC55-318DFDD2A705
  • 93A9CA80-8E14-4C49-8ED1-8E822C91DFEB
  • E7065B62-4887-44E2-93C4-B1F2908EF21E
  • 9344C9C6-8D75-4A83-9F3C-80199225C9C2
  • CF5A02A4-B34E-4D48-B621-ECAF82905E02
  • 95333416-A0B0-4E89-A989-7AFFF7E64624
Original Post

Replies sorted oldest to newest

There are two major things you could do.   You go back and spread fast drying plaster over the plaster cloth, and as it starts to set up, you could take a whisk broom and brush in a horizontal or diagonal texture.    Then  you get some earth town and dark green acylic paints and paint the plaster after it dries.    These are sold in tubes in cradt stores.    You use a about 1/2 round brush and and just dab on ground cover colers in random fashion.   I us burnt  umber, raw umber, burnt sienna, raw siena and Hooker's green.    Then for black or grey I use Paynes Grey.

A second approach wold be to paint the plaster cloth as it is again using some sort earth color but not so detail as above.    Then go to the local hobby shop and get some woodland "coarse" ground foam in earth and green colors.    after the paint is dry, you spray on a spray adhesive, mix white color and water and paint it on, then sprinkle the ground foam over the area to you liking.   I use old spice shakers from my wife for this.    The woodland scenic shakers seem too big handle.    Now if the texture of the clothe is too much, you may need to add more plaster.    I would do that anyway.

I would do the ground foam on the first way also, but probably not so much.

Do not bother with "fine" textures, they are too powdery for O scale.    Get a medium green, dark green, earth, soil and light green or burnt grass.    The soil could be fine texture   They also make "clumps" and "Foilage" which are much larger pieces  you can use for bushes.   

When doing scenery you can't screw up too badly.    If  you don't like the way it looks, just add some more different colors or textures.   

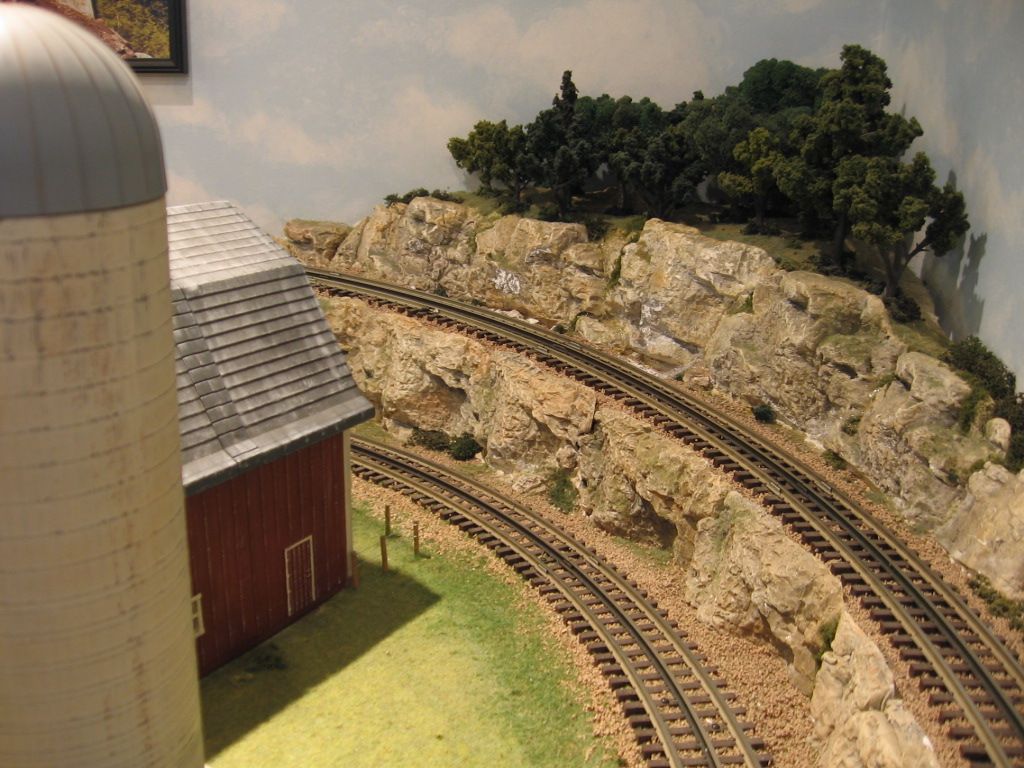
You never did mention what type if hillside this is, just rocks, or more eastern grassy or wooded slopes.

Before adding the final "earth" or "foliage" colors, you should paint the plaster shell solid flat black. I know that sounds counter-intuitive, but that will get you the nice deep "shadows" that you want in the inaccessible nooks and crannies where sunlight doesn't reach. Think of it as the opposite of the bright-white dry-brushed glints of sunlight that are the last thing you should apply. You have to think like an oil-painter--working in layers, starting with the backgrounds and working toward the foregrounds.

I wouldn't worry about the texture of the cloth. Combined with the ground foam and/or other scenicing materials you will add, it won't show much and will add nice texture where it does.

Last edited by Avanti

Thanks - these are great suggestions.  I think i will try a thin coat of some modeling plaster and the whisk broom suggestion especially on the cuts near the track level.  I also checked clearances with my longest engine (the LC+ Hudson pictured) and with my longest passenger cars.  I have clearance as long as the track doesn’t get set too far back.

progress will be slow since I really don’t get a chance to fool around with this until the weekends.  

Thanks for all the suggestions.

Walt

@Tom Tee posted:

Mike CT, How did you achieve the rock shapes in your hills?  Nice!!

Rock shapes are Woodlands Scenic, (3) Plaster (Hydrocal) /cast rock molds, fitted and positioned on a plaster cloth backing.  Look closely upper level, every other Hydrocal rock was positioned up-side-down. Lower level, the rocks were cut to fit the grade.

Last edited by Mike CT

Thanks again to all for the suggestions, tips and direction - I have done a bit more research as well and think I will do the flat black to start, then some highlights on the cut rock parts, and the ground colors / ground covers on the gentler slopes.

Is there any specific brand or brands of paint that everyone is using, or just whatever tubes of acrylic paints I can find on line at Amazon, or Michaels, or such?  As I said, this is my first attempt at this so I don't have high expectations.  Just having some fun.

Thanks again,

Walt

@D44 posted:

Is there any specific brand or brands of paint that everyone is using, or just whatever tubes of acrylic paints I can find on line at Amazon, or Michaels, or such?  As I said, this is my first attempt at this so I don't have high expectations.  Just having some fun.

I use the cheapest hobby acrylic from WalMart. Some tasks in this hobby call for quality paint. Mountain-painting isn't one of them.

Here's another sample. I used Bragdon models rock molds and also did some sculpting to produce my rendition of KY stratified limestone. Dark washes and then light highlights. This was the molded rock applied to the wing wall of a tunnel entrance. It's a sloppy job, but comes out good in the end.

Wing Wall install 2

Here's finished shots of other parts of the mountain.

IMG_0088IMG_0090IMG_0087

Attachments

Images (4)
  • Wing Wall install 2
  • IMG_0088
  • IMG_0090
  • IMG_0087

Add Reply

Post

OGR Publishing, Inc., 1310 Eastside Centre Ct, Suite 6, Mountain Home, AR 72653
800-980-OGRR (6477)
www.ogaugerr.com

×
×
×
×
Link copied to your clipboard.
×
×