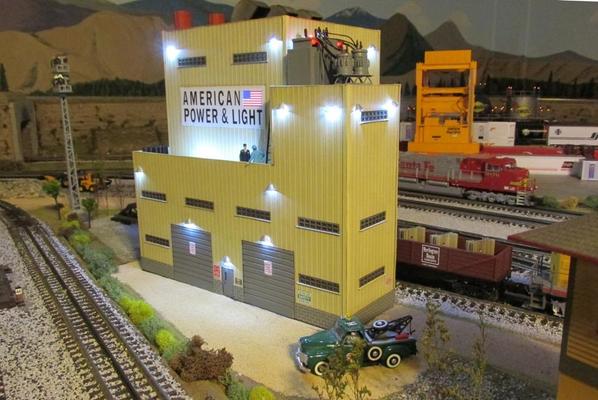
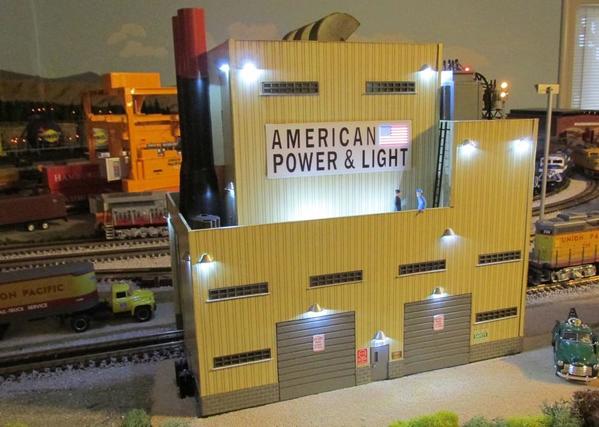
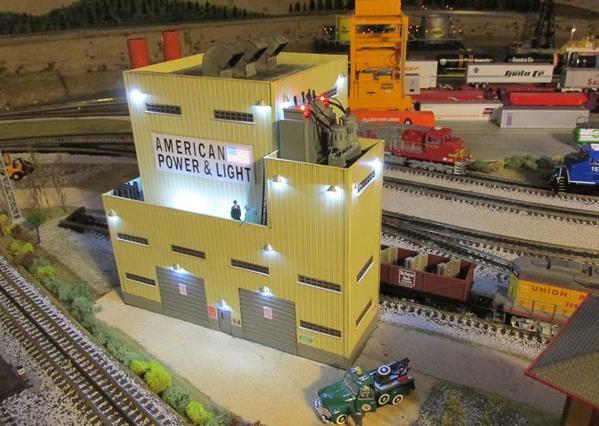
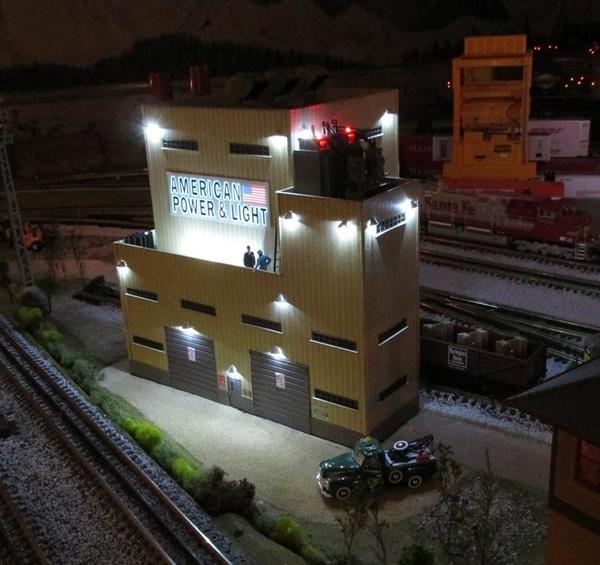
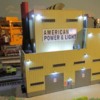
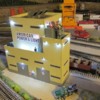
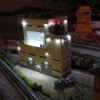
Ordered late Thursday and gt it today. Pretty good service all considered.

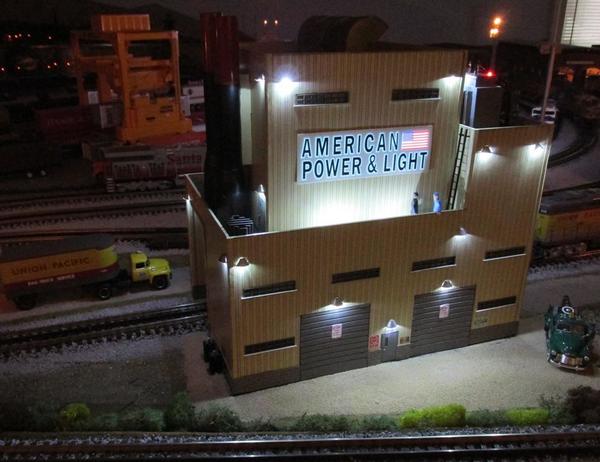
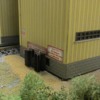
I really like this structure. It is a little modern for my mid 1950's era layout....but I'll say it's brand new!! It looks great although if you look really close you can see a few of the 'tab and slot' connectors....most are well hidden. I see them as I have designed structure kits and have a much more critical eye than 99.999% of people.  Once on a layout no one will ever notice!!  The design is very good with lots of visual cues that make the building look much bigger than it is. Details are well done.....TONS of LED's all over....I keep finding new ones!  It looks like the structure is mostly laser cut MDF and ply. This may be the first mass produced laser cut assembled building....at least this large in O scale. Some parts look like milled wood. The vertical lines in the siding are actually engraved too.......Between all the laser cutting and engraving there is a lot of time put into this building.

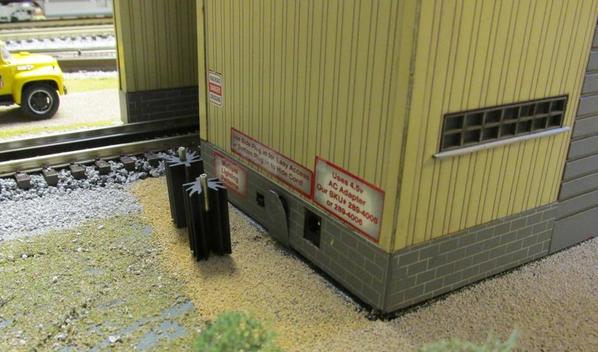
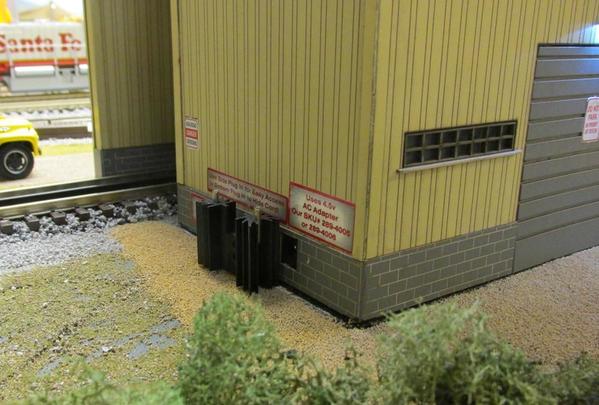
The bad???  One VERY  small section on brick foundation was loose, not falling off, just a drop of Gorilla Glue and perfect. I worried that the stickers applied to the building side instructing power, plug location and sign options would mar but I took my time and they came off cleanly. 

The only improvement to be made would be a terminal post for power in case you do not want to use a barrel plug.....but very minor.

Between the size, details, lighting this may be Menard's best yet....and maybe the best value in assembled O scale structures. I give the building a A- overall. Packing a A-, value a A+.  If this is a sign of the direction Menard's is going......I see them becoming a modern 'Madison Hardware' of sorts. Thanks!!power

Attachments

Images (1)
  • power
Original Post

Replies sorted oldest to newest

Mine comes tomorrow, excited, now more than ever after your great review! I think these buildings just keep getting better and they were very good to begin with! If I had the room I could picture a Menards only layout with just their buildings, their rolling stock, and their track, and just keep adding to it as they release more products! This would of course be in a separate building because my Dear wife would banish me from the house!! Lol
I have been checking my order status so much I wore out my keyboard. It was not that I am frugal and wanted to save shipping costs having it sent to the store. I thought one trip would be better then two but now that I see how long it takes to get to the store I think the next train order will be to the house so I can enjoy it more because I am jealous of those who are enjoying theirs now. But in the same vein I am so focused on Thursday for the next announcement..................Paul

AMCDAVE;      Did you ORDER the FREE Truck? It doesn't come automatically. It has to be ordered at the time the building was ordered. The cost is $14.99, but that gets subtracted when completing the order. My FREE trucks always come with the other item purchased and are in fact banded together so they are handled at the same time, and one box doesn't go one way and the other box another. If you did NOT order the truck, you are probably out of luck.

Hope that wasn't the case for your sake.

AMCDave posted:

It's on the invoice....we'll see....not a biggy.....thx

AMCDave,

Thanks for your review, we hope you thoroughly enjoy this building!
As far as the free truck goes, if it was on the invoice, it should be coming. Just let us know if it doesn't and we'll take car of it.

-Mark the Menards Train Guy

Got mine today as well.    Everything was perfect, no issues and the "Free" truck was "Piggy-Backed" onto the large box with plastic strapping material.  The building is very cool with plenty of LEDs for the lighting effect.   The Santa Fe truck was a nice "Perk" too.   This building will go very nicely with my Lionel Rotary Tipple, (actually, it's a Rotary Car Dumper).   Nice job Menards! 

Chief Bob (Retired) 

UnclePeteRR posted:

AMCDAVE, Can you peek at the neon sign please. Does it appear if you can gently

peal it off? I wanted to modify mine by putting on my own creation, I know some of the signs on the engine shop were removable. Thanks Chris

Looking at the sign it seems like it is surface mounted and would pop off if the edge was lifted. The thing is the replacement sign needs to be just slightly larger as there are engraved marks on the structure to help with location during assembly.....so those will need to be covered. thx

Hi all, Received mine yesterday in perfect condition and it's one nice building for sure.  Like Dave there was no truck,I opened the invoice and it was on there? There was no extra tape on the box or a mark from like a nylon strap to hold it.  

As far as adding the smoke the stacks sit on the roof with no hole which is no problem, the big thing I see is the stacks appear to be about 3/4" on the inside and would look silly (to me) if it only had a small wisp coming out of them.  I have to do some testing and see.

Doug

trnluvr posted:

Hi all, Received mine yesterday in perfect condition and it's one nice building for sure.  Like Dave there was no truck,I opened the invoice and it was on there? There was no extra tape on the box or a mark from like a nylon strap to hold it.  

As far as adding the smoke the stacks sit on the roof with no hole which is no problem, the big thing I see is the stacks appear to be about 3/4" on the inside and would look silly (to me) if it only had a small wisp coming out of them.  I have to do some testing and see.

Doug

My shippi ng box had no marks/tape that made it appear the truck was at one time attached.....so it sounds  like it happened more than just me.


GOOD thing is my truck is in the mail now...Menard's is first class.

Picked-up my Power & Light Building this afternoon at the local Menard's. I placed the order last friday and after some delay, I received notification yesterday, that it was in. Brought it home, unpacked it and using the adapter I plugged it in and turned on the switch. Only some of the lights came on...but I could get them all to light by playing with the switch and finding the sweet spot. The illuminated sign, however, does not work at all and when I checked for any loose wires the back side of the switch felt hot! I haven't read of anyone having any big issues with this release, so I was a little surprised when this occurred to mine. I have sent an email to Menard's CS and will see what they can offer as a remedy. The structure itself is quite nice overall and would be great addition when added to most layouts...

Last edited by UKE KAT

Got mine this morning. Had it sent to the store. That way I figured to kill two birds with one stone. I also needed lumber for my basement layout. That is where this building will be going. Did not open it till I got home but when I did the pictures do not do it justice. One heck of a building for the price. I cannot imagine what will be coming down the road but if this is a prelude then Menards I am ready to buy, buy, buy........................PaulDSCN2311

Attachments

Images (1)
  • DSCN2311

Just opened my Menard's Power and Light Building! Great looking building will look wonderful on any layout! One small thing, one of the roof vents was lose and tilted, but nothing a little glue cant fix. I still love the building and think Menard's is really showing how things should be made and for a fair price!

Just got home from a short stint in the hospital and there was a box waiting for me from Menard's with the Power and Light building.  What a great surprise.

In short, the building is terrific.  Well made, nice detail and a bunch of lighting.  I was pleasantly surprised at the size of it.  It is bigger than I imagined and it really looks like a big power plant building.   IMO another winner from Menard's.

The free vehicle is just icing on the cake.

Thanks,

Ed


Last edited by Ed Walsh

FYI.....

my missing Santa Fe delivery truck came today. Very nice little truck....a great bonus!!!!

But better was the super services by Menard's customer service folks.  A great deal all around!!  thx


PS...no one has talked about how the truck cab tilts forward like the real truck!!!!!

PPS.....nice little printed train catalog too!!!

Last edited by AMCDave

Ok. I got one and it's quite nice overall. The lighting system is pretty much worth the money. Out of the box, I have one building LED light out which looks prototypical actually. So I probably won't fix it right away...until OCD takes over. It's probably reverse connected or something.

Also I had to glue the side mirror back on the free truck.

But I like it. Good deal. Nice detail and safe shipping.

AMCDave posted:

FYI.....

my missing Santa Fe delivery truck came today. Very nice little truck....a great bonus!!!!

But better was the super services by Menard's customer service folks.  A great deal all around!!  thx


PS...no one has talked about how the truck cab tilts forward like the real truck!!!!!

PPS.....nice little printed train catalog too!!!

I didn't know about the truck cab tilting forward.. Thanks !!

Dale Manquen posted:

Is there any way to lock the big sign into a particular flash mode that will survive power-down?  I want to put my unit in a remote location on the layout where I can't reach it, and I would like one of the 2-phase patterns rather that the start-up default of just "ON".

Dale,

I have the same question, and not just for this Menard's Building, for other buildings of theirs as well. I hope someone (Menards?) chimes in.

Alex

drodder posted:

I got mine a week ago but haven't really played with it yet. I'll check this weekend if the pattern stays after powering down.

My sign resets to solid on each time power is cut. Make switch accessible or move switch if you want to use other light pattern.

If building is out of reach.....use a dowel to cycle button for sign.....

Mine is also inaccessible.  The button is inside the building with no easy access for soldering wires. 

A brute-force method would be to mount a small solenoid on the outside (concealed by a shed, perhaps) with a capacitor in series with the coil so that it only operates once on powerup.  I don't think I have any solenoids rated at 4.5V, but maybe a 12V would have enough oomph to push the button.

HELP....

Question on the 4.5V 2000mA White 3-Outlet AC to DC Power Adapter Model Number: EL4006WH  |  Menards® SKU: 2894006.  Menards site shows it as an 8.8’ extension.  Will someone, who has one, please measure it and tell the measurement between the point where the extensions branch out from the main wiring and the plug that goes into the buildings.  In other words, how far apart can the buildings be to use the three outlets in a practical manner?  Thanks in advance.

SURFLINER posted:

HELP....

Question on the 4.5V 2000mA White 3-Outlet AC to DC Power Adapter Model Number: EL4006WH  |  Menards® SKU: 2894006.  Menards site shows it as an 8.8’ extension.  Will someone, who has one, please measure it and tell the measurement between the point where the extensions branch out from the main wiring and the plug that goes into the buildings.  In other words, how far apart can the buildings be to use the three outlets in a practical manner?  Thanks in advance.

SURFLINER,

Each extension is about 30" from the branch. I hope that helps!

-Mark the Menards Train Guy

I posted this tip on the wrong thread:

The pushbutton has two sets of redundant parallel leads.  The bottom pair go into the circuit board, but the top pair just stick out into open space.  I used a dental probe to twist the upper leads sideways so that they touch, thus permanently closing the switch.  It isn't very secure or elegant, but it does the job.  Trying to get a soldering iron into that cramped space was more than I wanted to risk.Menards pushbutton 2

Attachments

Images (1)
  • Menards pushbutton 2
Menards posted:
SURFLINER posted:

HELP....

Question on the 4.5V 2000mA White 3-Outlet AC to DC Power Adapter Model Number: EL4006WH  |  Menards® SKU: 2894006.  Menards site shows it as an 8.8’ extension.  Will someone, who has one, please measure it and tell the measurement between the point where the extensions branch out from the main wiring and the plug that goes into the buildings.  In other words, how far apart can the buildings be to use the three outlets in a practical manner?  Thanks in advance.

SURFLINER,

Each extension is about 30" from the branch. I hope that helps!

-Mark the Menards Train Guy

Mark,

Thanks for answering - you solved my problem - now I'll await two more of your buildings that fit my needs.

SUELINER

imageimageimageimageimageimagejjmmagoo posted:

Just got my power plant.  Wow!  It is really well built.  My only issue is finding a place on the layout for the power plant.  It is pretty large.  I may have to post pics to get some ideas.  

Well, it's all setup.  Let's start off and say at least in my humble opinion this is a top notch model replica of a power plant.  It's heavy and has 22 led lights on the building alone!  When it's on it lights up the room.  The size is impressive as well. I only have a 4x8 layout with a desire to expand but the planning and doing is taking longer than expected.  Anyways the model fits snugly on my layout.  It's not too over the top and certainly not small.  I have to say I am impressed with this.  I have been looking for a power plant for a long time.  The only thing I wished for is possibly aviation warning lights on the smoke stacks and possibly the ability to have smoke come out of said stacks but I am one happy camper. 

Attachments

Images (6)
  • image: Snug fit
  • image: Inter-modal car fits through
  • image
  • image: Fits nicely on the layout
  • image: Love the lights
  • image: The coal line or fuel siding.  Whatever your imagination takes you.

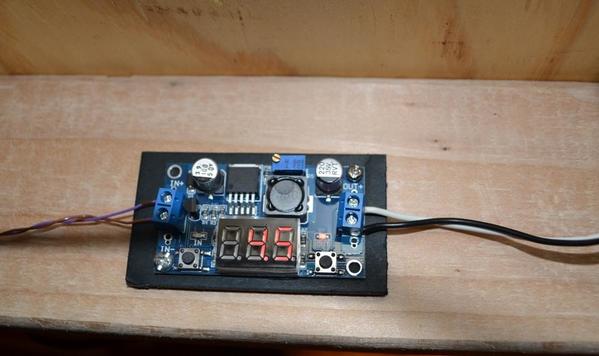
I wired it directly using the 12vDC I already had close by, and through a Buck Step-down LM2596 Power Converter Module DC 4.0~40 to 1.3-37V LED with Voltmeter ($2.45). Shipping was $2.80, but it covered all five units I ordered. Besides accepting various voltage levels and reducing them to almost any level you want, it will display the input or output voltages. BTW, I checked the voltage displayed for input and output using 12vDC as input and 4.5vDC as output, and as received it was off by just 0.1 volt - not bad; and yes, it can be calibrated as well.

Actual installation (under the layout):

AmrPwr Dc supply 0 DSC_2727

Alex

Attachments

Images (1)
  • AmrPwr Dc supply 0 DSC_2727
Last edited by Ingeniero No1
Larry Sr. posted:

Tricky to find space for it, though.

Very true. Mine is still on the shelf. May be a project waiting for next winter. I'll have a major project of land clearing a area.

BUT, it's going on this layout.

Larry

You wont be disappointed.  Would normally never say this but its going to be a long spring, summer and fall if you wait till next winter to install this!  Its that good!

Mine arrived!  It is awesome.  I just wish that there was someway to make the sign flash after the power supply has been turned off and back on again.  I was going to use a push button on my fascia to turn the building lights on and off as I do for every other building and now can't because I've got to reach the back anyway.  I placed it against a backdrop and cut out an access so one may access the button that makes the sign flash!  It's a great building! 

John C. posted:

Mine arrived!  It is awesome.  I just wish that there was someway to make the sign flash after the power supply has been turned off and back on again.  I was going to use a push button on my fascia to turn the building lights on and off as I do for every other building and now can't because I've got to reach the back anyway.  I placed it against a backdrop and cut out an access so one may access the button that makes the sign flash!  It's a great building! 

John,

On the second page of this thread, Dale Manquen posted (3/26 at 12:53 PM) how to modify the pushbutton switch so the sign will flash when first turned on. 

Also, on my post, above, I  wrote and showed how I  "Used an aluminum 'clamp' to hold the button." so the sign will flash when first turned on. Any method you can use the hold the button pushed in will work.

Alex

I have used a product called Stretch Magic for wires. Any craft store that has beading products should carry it. It does come in different thicknesses. It's proper use is for stringing necklaces and bracelets, but makes great wire and is stretchy so is forgiving. Here is some I strung for telephone poles, transformers, and buildings.

DSCF5901

Attachments

Images (1)
  • DSCF5901

Mike,

     The transformers are homemade. I took thick doweling and cut them to what I thought was proper size. I painted them gray and then took very small wood screws and screwed them in the doweling at one end. I then cut off the screw heads. The end result was good enough for my eye. The insulators are also from a craft store in the same section as the beading. I used two small beads for one insulator and chose colors that sort of matched what I remember the insulators to be. The telephone poles are homemade. I drilled small holes where the insulators were to be placed in the cross sections and stuck thin wire in the holes. I then slid the beads onto the wire held in place by a little glue. (Maybe all of that is overkill). Here is a better picture. You might also note that there is two different thicknesses of the Stretch Magic threading material. One I used for the electrical wires (smaller gauge) and the other for the telephone wire (thicker gauge). If you look closely too, you can see the thin wire protruding just above the insulators that I was talking about.  I know that you can buy transformers and probably insulators from vendors somewhere, but it is kind of fun using your imagination and making your own.

DSCF5900


Rick

Attachments

Images (1)
  • DSCF5900

Add Reply

Post

OGR Publishing, Inc., 1310 Eastside Centre Ct, Suite 6, Mountain Home, AR 72653
800-980-OGRR (6477)
www.ogaugerr.com

×
×
×
×
Link copied to your clipboard.
×
×