


Hello everyone,
Sorry I haven't been on the forum in a while life's been busy so I haven't a lot of time to spend on the trains. Now that I've got some free time I figured I'd give a tour of my layout, the Green Mountain & Adirondack Central Railroad. Without further delay let's get started.
The layout is located in my basement and measures 20 by 8 feet in size. Here is what you get when you walk in.

Here is the front side of my layout and this section is more of a yard scene. Here I can store passenger cars, rolling stock, and locomotives. There are 3 storage tracks and the inner and outer loups are connected by a set of crossovers. Gargraves Track is used along with Ross Custom Switches.

Here is another shot of the front side of the layout. I've always been talented at art so I painted the backdrops. I used Acrylics in case you're wondering. The red section in the corner will be repainted so keep an eye out for that.

The inspiration for the scenery on the layout came from fishing trips I've been on to Vermont. I go to Vermont every summer, North Hero to be exact which is on the northern end of Lake Champlain, and ever since my first trip I have fallen in love in Vermont. I wanted to have my own little slice of Vermont at home so I thought to myself what I could do to make that happen, so I combined my love for Vermont with my life long fascination with trains.
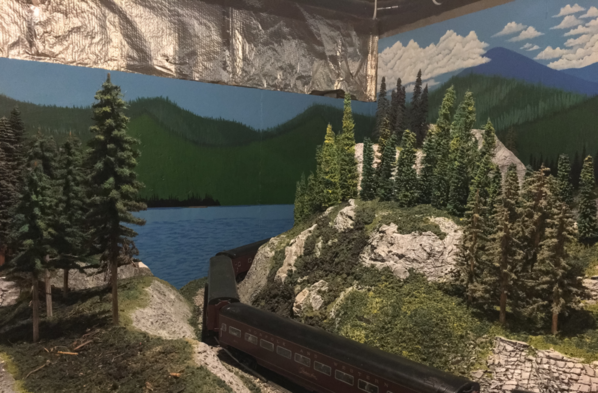
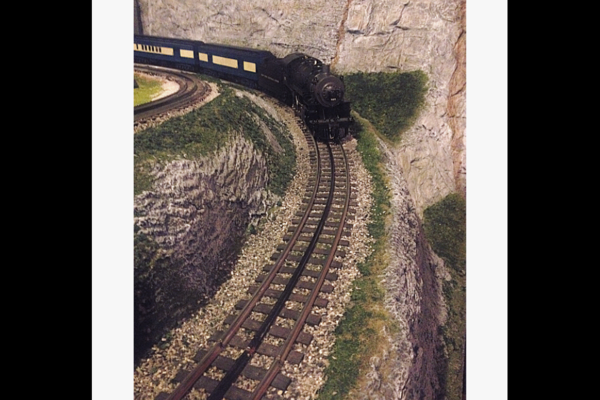
The scenery is constructed by using pink foam or plywood and cardboard strips covered with crinkled brown construction paper. This gives the scenery a basic skeleton and it allows me to see how it looks before applying 2-3 layers of plaster cloth. On the outside edges of the layout there are 3-5 layers of plaster cloth. As we know when guests come visit your layout sometimes they tend to lean on it. Last thing I want is to have someone lean on the scenery and collapse it. Once the cloth dries I carve rock formations out of dental plaster and use Sculptamold to tie it in. After drying I paint the rocks with acrylics and from there I add various ground covers to bring the scene to life. The trees in the mid ground and background areas are made using the bottle brush method while the trees in the foreground are made from wooden dowels, twisted wire, and static flock. Keep in mind the scenery is not 100% complete so keep an eye out for new updates.


I hope you enjoyed part 1 of the tour and I should have part 2 up soon. Don't forget about the Green Mountain & Adirondack Central Railroad Website at https://greenmountaintrains.wordpress.com/
Happy Railroading.


