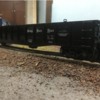
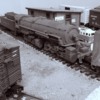
Relatively early MPC could be hit-or-miss with details, especially for units that weren't destined to be in the "collector" line. This pair of "bluebonnet" Alcos was meant to emulate D&H's ex-Santa Fe PAs in the same scheme. MPC fell a bit short, though, on the color scheme and left the pilot in blue and the trucks and stamped frame in black. And as always, the distinctive Alco grill around the headlight was just a raised pattern in the plastic.

So, after a bit of paintwork later, the FAs make a passable impression of D&H PAs, complete with hand-painted chrome "eyebrow" trim. I fond these used, at a train meet, and the horn was broken off -- which was no problem since it could be easily substituted with the nicer chrome chime horn part used on other Lionel diesels. Sharp eyes might notice the wiring going back to the "B" unit -- it's carrying power for a light bulb to light up the portholes (which were glazed with clear plastic on both units) and to power the MPC-era electronic horn that I added inside.P1030021

Attachments

Images (1)
  • P1030021
@Will posted:

I had to make a trip to Google because I always assumed that slugs had no cab. I see some did. Is it because they were converted road units?

Will, BN had these built from BN SD7/9's.  The cab was for the crew to be away from the noise in the powered "Mother" engine.

My cab is off of a Kline MP15 and BN used a cab more like a rebuilt IC SW1400.


          Running Both Lionel and Marx Cars on a Layout

These little modifications are big deal if you want to run both Lionel and Marx trains and cars and want to mix them up.

First to run Lionel and Marx cars behind a coal tenders will allow any brand steam locomotive with a coal tender to pull any brand cars.  Adding an Lionel coupling to a Marx truck with a Marx coupling on a coal tender is the best way to do this.  Many folks take a car and change out one truck or coupling of the other brand but this requires that car to operated on all the trains you make up.

Here is how to modify a Marx coal tender by adding a Lionel coupling.

Marx coal tender and Marx truck with a Lionel coupling added.

IMG_1681


Bottom view of Marx truck and coupling with Lionel coupling added.  The Lionel coupling from older Lionel car with non fast angle wheels and coupling is just held on to the two axles with four bendable tabs, a real easy job.

IMG_1726


Picture of small Marx coal tender with Marx coupling showing.  I also added a hand railing made from music wire and small cotter pins for stanchions.

IMG_1686

IMG_1687


Picture of Marx coal tender with Lionel coupling showing

IMG_1688


It is easy to run Lionel and Marx cars behind a diesel switcher with a Marx coupling on one end and a Lionel coupling on the other end.  Just add a Marx coupling to a Lionel diesel switcher or vise versa.

Picture of Marx 1998 with cut down Lionel body, Marx coupling on front end

IMG_1706


Marx 1998 with Lionel coupling on back end

IMG_1704

Charlie

Attachments

Hide
Images (7)
  • IMG_1681
  • IMG_1682
  • IMG_1686
  • IMG_1687
  • IMG_1688
  • IMG_1706
  • IMG_1704

Attachments

Images (1)
  • IMG_1726
Last edited by Choo Choo Charlie


I don't think if posted these on page 1/2.   hopefully none are repeats.

the little crane is far more stable than you might think. Scrap or tounge depressors, tin can roof, copper or brass tube, alumium channel boom and a broken zipper pull for a hook. It sits on one metal truck with bolster coupler, and an plate style electro-coupler is on the axles giving two couplers to one truck +added weight to counterbalance the boom. Behind it is a flipped florescent lamp shade for a girder bridge I never finished painting, etc.. If you ever stood under a metal bridge with a train overhead, you might imagine waht this sounds like.  I used to fish under one (DTI too), so it stays .20180814_183547~2

toy tender with new truckshot rodded 15buck special-1_zpsdnvv1jdv

I got an atomic Kusan reactor car and put it behind a steamer for instant steam, I painted a taker for water, and wanted something in between them to pump, process etc.. The red bulb is a lit fishing bobber, GI joe scuba tanks, and an oddball Lego assembly (not yet painted & attached wood gauge section, and some brass plumbing fittings/valve.IMG_20191210_072429A mine engine, on hold.

IMG_20170624_225335~2

Some stainless packaging wire , popsicle stick and scrap roof, staple ladder, and lionel trucks under a toy bobber .

GreenDoorRed2b

This one melted. I repaired the motor and bashed it into a shortie. Lots of extra weight on one end. a 1x1x2¼ ingot cut and gound to a frame width T  bottom, slides in like an e unit, an the T top cross a tall pilot beam.IMG_20200405_021212

Attachments

Images (6)
  • 20180814_183547~2
  • hot rodded 15buck special-1_zpsdnvv1jdv
  • IMG_20191210_072429
  • IMG_20170624_225335~2
  • GreenDoorRed2b
  • IMG_20200405_021212

Retro B&W.

Did this about 20 - maybe 15 - years ago. NYC 0-8-8-0 hump switcher. RK 2-8-8-2, AHM tender w/scratch built frame, cylinders enlarged, details added/deleted (the dome is shaped lead). Old Train America Studios TMCC w/Railsounds. (I sent it to Train America - after customization, before final painting -  who installed it for me - I was just starting out in this "upgrade kit" experience.)

Crude - I could do a bit better now - and that original RK-width pilot has to be replaced with a 1:48 one. It really needs cruise control - runs well enough but won't creep like a big 0-8-8-0 switcher should. No ERR Cruise Commander at the time. Working front E'coupler. I love it, but I need to attend to the upgrading. "One day".

The RK 2-8-8-2 approximated the size of the NYC 0-8-8-0 prototype. The RK 2-8-8-2's are great project fodder. I've done 3, and I have one left "in inventory". They got kinda cheap some years back.

DSCN0065bw

Attachments

Images (1)
  • DSCN0065bw
Last edited by D500
@third rail posted:

A couple of gondolas I modified from O-27 to scale width.  Basically I took 2 gons and cut them lengthwise and spliced the halves together.  Added diecast trucks,  weighted them, then painted the shells.  I made decals for my home steel mill company on Microsoft Word. Then a heavy dose of weathering. 20190501_114712Overbeider gondola [1)20190501_114755

Looks like the real thing Bill,  super job.

How did you print white decals? I WANT your printer.


@Lionelski posted:

Looks like the real thing Bill,  super job.

How did you print white decals? I WANT your printer.


I used Testors white decal film . Just made a word pdf, determined the size I wanted and used either railroad Roman or gothic fonts in black color

 Then using the edit button I changed the settings to outline and also filled in the spaces between the letters with black.

I made sure the letters were spaced so that they would fit in between the ribs on the car sides. 

Everything is done on a standard HP inkjet printer.

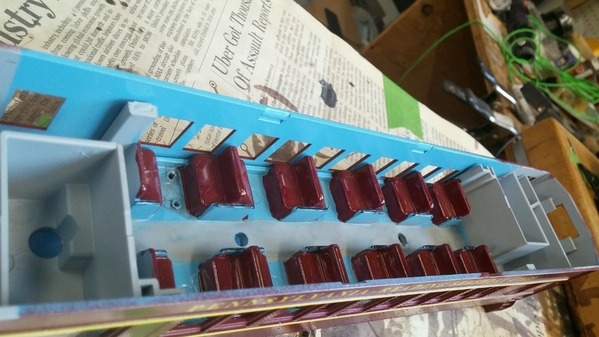
This MTH Rugged Rails, O-27, Madison Passenger Coach conversion is not yet finished but in process.

082120162608212016270821201627a

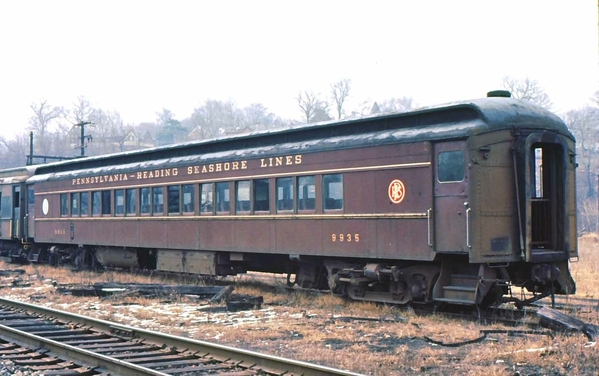
Here are 2 prototype photos of the coach I am trying to emulate.

PRSL_P70_9935_1P70 Coach Interior

Now that my uncle is successfully through his cancer surgery, I should have a bit more time to continue work on this car. I have 2 more to complete when this one is finished.

Attachments

Images (5)
  • 0821201626
  • 0821201627
  • 0821201627a
  • PRSL_P70_9935_1
  • P70 Coach Interior
Last edited by Randy Harrison
@third rail posted:

I used Testors white decal film . Just made a word pdf, determined the size I wanted and used either railroad Roman or gothic fonts in black color

 Then using the edit button I changed the settings to outline and also filled in the spaces between the letters with black.

I made sure the letters were spaced so that they would fit in between the ribs on the car sides. 

Everything is done on a standard HP inkjet printer.

Thanks for the tips Bill, I'm filing this away for the next time I need white lettering on a black car.

Stay creative!

@Lionelski posted:

Thanks for the tips Bill, I'm filing this away for the next time I need white lettering on a black car.

Stay creative!

Just remember to use decal fixative or setting spray on them. I used several coats to prevent the ink from running or smearing.  Paint your car or whatever with gloss paint, then an additional coat of Testors Gloss Coat.  The glossy finish prevents air from being trapped under the decals making a hazy finish. After all the decals have dried thoroughly then you can hit it with Dullcoat. 

Just because I'm selling some Great Northern Railway rolling stock does not mean that I no longer like that railway.  One of the cars I'm selling is a GN caboose from the 1980's, just because it does not have the PostWar "look" that I like:

IMG_6247

My solution was to print some decals and paint a PostWar Porthole style caboose into one that is more to my liking:

IMG_6250

Attachments

Images (2)
  • IMG_6247
  • IMG_6250
@pennsynut posted:

Bill: That gon is great. I can only imagine trying to cut one in half by length and splicing. What a challenge. Have you done a lot of kitbashing? Your tips would be valuable. 

Thanks for the compliment.  I used a band saw to cut the 2 gondolas.  The O-27 cars have 2 longitudinal spines running down the middle.  If you measure from one side of the car,  the second spine is 5 scale feet away.  Cut the car leaving both spines intact.  You will then have 2 parts 5 feet wide, sand the spines smooth and glue the 2 cars together.  

The toughest part was drilling a new hole to attach the diecast trucks.  I used a 6x32 threaded insert epoxied to the car floor. A piece of things styrene covers the screw head. 

@third rail posted:

Thanks for the compliment.  I used a band saw to cut the 2 gondolas.  The O-27 cars have 2 longitudinal spines running down the middle.  If you measure from one side of the car,  the second spine is 5 scale feet away.  Cut the car leaving both spines intact.  You will then have 2 parts 5 feet wide, sand the spines smooth and glue the 2 cars together.  

The toughest part was drilling a new hole to attach the diecast trucks.  I used a 6x32 threaded insert epoxied to the car floor. A piece of things styrene covers the screw head. 

Thin styrene.  I hate spell check. 

Early gonzo bashing effort. (2000 or so?)

Louisville and Nashville K-5 4-6-2.

Brass Samhongsa (Williams) Heavy Pacific; 1930's Lobaugh cast brass tender; almost correct. Tender re-trucked; scratch built "stream styling" on loco. Brass skyline casing hammered into shape over a wooden buck. L&N had 3 Pacifics like/similar to this. One an ex-3-cylinder. Headlight shroud turned on a lathe from clear plastic rod and painted black except at the end. The whole thing is a "lens" . Lighted.

Old installation of TA Studios TMCC and Railsounds. One of my first; no ERR at the time.

(The yard it is in has been almost completely re-done scenickly this year, part of an on-going layout rejuvenation.) 

DSCN3343

Attachments

Images (1)
  • DSCN3343
Last edited by D500

5D78D205-1B56-486B-A137-E5ADB3A6049910B26345-C084-4150-BCBF-E4FA3AB29AABBD6EF1D8-AAD0-4FE8-ADBB-818018DAFF3DEC0C825F-447E-4A20-BDC9-BF40A75922A9151ED0FC-8747-40BC-A46B-BA4212533ADF9D7B6278-4318-4D84-9BAE-89EEF55EF8A4C72DB90C-A057-48B5-9446-1A37D5AC8BF401C6AAAB-EF08-44C8-B319-CFE0C59BA6B47D0DB93A-608C-4787-AE99-F83E6F2789BD6AA2892F-5B2E-4A9B-B9BC-460F30302042These are some O scale AHM I’ve been working on.  The Lackawanna I painted/decaled last year with Tichy Train Group decals today I put a new floor in it and added some Lionel sprung trucks which I drilled out all the ones I have and removed that pin/ button.  Next was a Union Pacific car I used some old left over Microscale decals I had I also made a new floor for that. I’ll be adding some On the carriage detail like crossmembershon the carriage detail to these and some stirrups. 

Attachments

Images (10)
  • 5D78D205-1B56-486B-A137-E5ADB3A60499
  • 10B26345-C084-4150-BCBF-E4FA3AB29AAB
  • BD6EF1D8-AAD0-4FE8-ADBB-818018DAFF3D
  • EC0C825F-447E-4A20-BDC9-BF40A75922A9
  • 151ED0FC-8747-40BC-A46B-BA4212533ADF
  • 9D7B6278-4318-4D84-9BAE-89EEF55EF8A4
  • C72DB90C-A057-48B5-9446-1A37D5AC8BF4
  • 01C6AAAB-EF08-44C8-B319-CFE0C59BA6B4
  • 7D0DB93A-608C-4787-AE99-F83E6F2789BD
  • 6AA2892F-5B2E-4A9B-B9BC-460F30302042


Building a Lionel 6407 Flat Car with an Improved Rocket

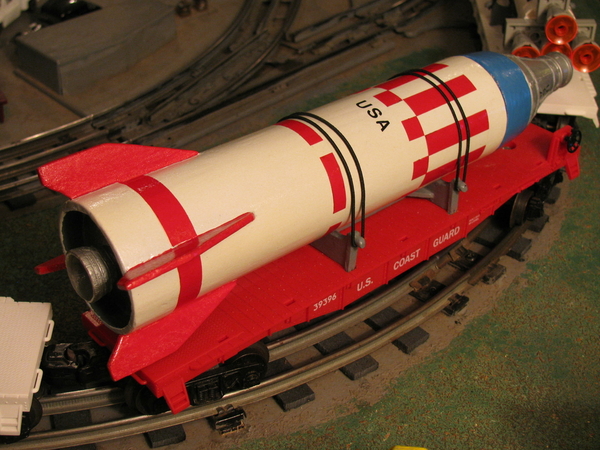
Lionel took a red unpainted flat car, with no number but the word LIONEL on the sides, classified as 6407 and mounted a gray cradle from a boat carrying car and bought a No, 529 rocket missile pencil sharpener from Sterling Plastics for a dollar or so.  The rocket has blue plastic Mercury capsule with pencil sharpener at its tip.  Lionel mounted the rocket to the flat car with elastic bands. 

Picture of Lionel 6407 from Internet.

This car was made only in 1963 and is the rarest car in the space and military category.  The original 6407 flat car with the original rocket missile has sold for hundreds of dollars as most are found with missing or broken rockets.  The Lionel 6407 flat cars, with reproduction rockets, sell for less than $50.

The Lionel 6407 with the white oversized rocket always attracted my attention.  I got more interested when I found out the rocket had a Mercury capsule on top of since I recently built a Lionel 6413 Mercury Capsule transporting car, which was the first post on this topic on page one.  The Lionel 6407 would fit into my space train very well.  Then I found out how rare and hard to find they are so I decided to build one.  I had a new red flat car body minus the trucks but I had some Lionel trucks as well. 

All that was needed was to make the Rocket using a card board mailing tube.  I reinforced the mailing tube with Popsicle sticks.  Fins for the rocket were from balsa wood.  
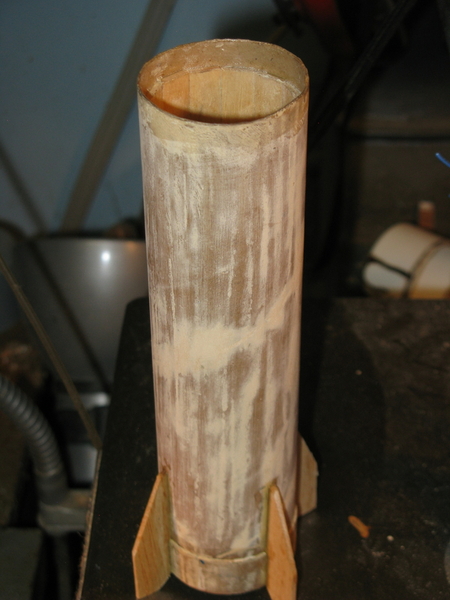
IMG_4002


Bottom of rocket and rocket engine nozzle
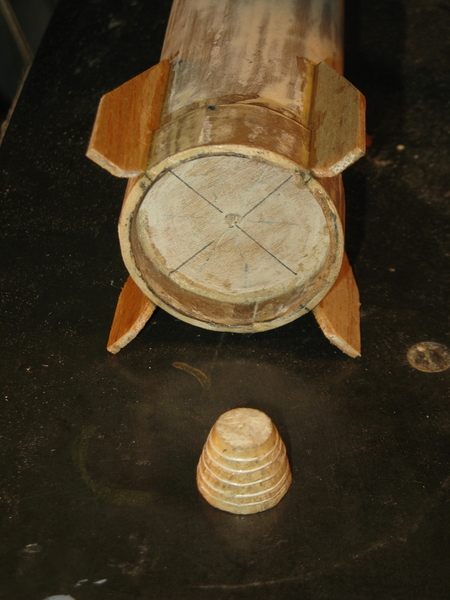
IMG_4003


A transition section between the rocket body and the Mercury capsule was made from balsa wood and painted blue latter. 
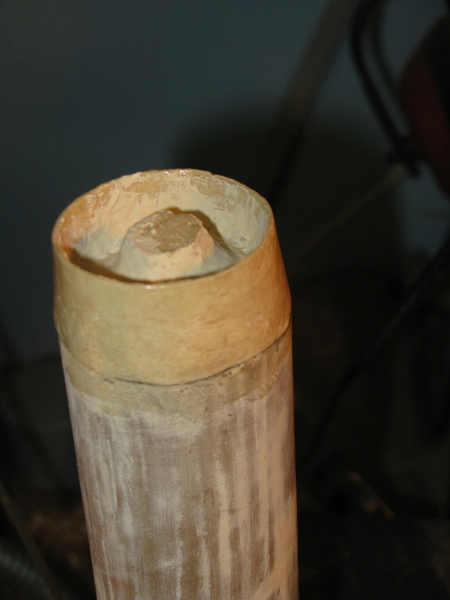
IMG_4001


I spray painted the rocket white and painted the fins red.  Red plastic colored tape was used to add designs on the rocket body and black press on USA letters were added. 

I improved the Lionel's plastic toy pencil sharpener rocket by making mine support a Mercury capsule on it's tip.  The Mercury Capsule is one I made for my homemade Lionel 6413 Mercury Capsule transporting car, written up on OGR forum in a prior topic.  A false bottom was added to one of my Mercury Capsules to allow it to be stuck on to the blue transition piece with double sided tape. 

The Mercury Capsule is show on the rocket tip in photo below.
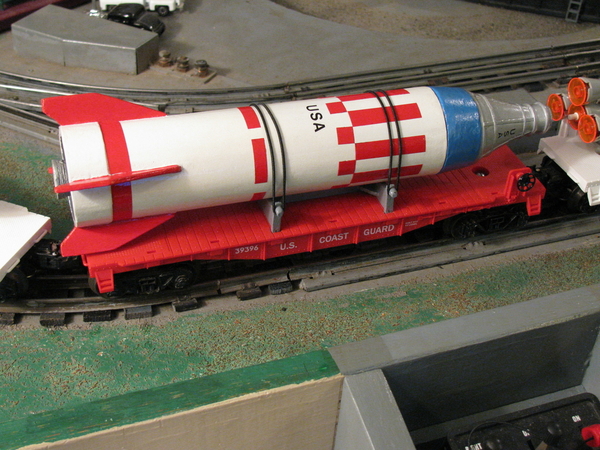
IMG_1891

IMG_1894


The rocket can be transported with or without the Mercury capsule attached.  Real rockets would not be transported with the Mercury capsule attached.        

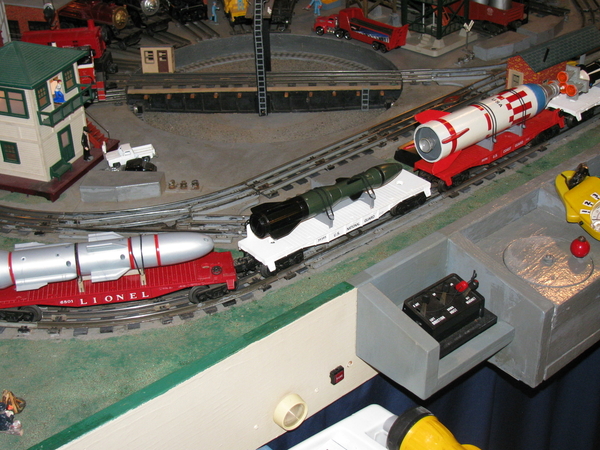
Picture below with recently built a Lionel 6413 Mercury Capsule transporting car
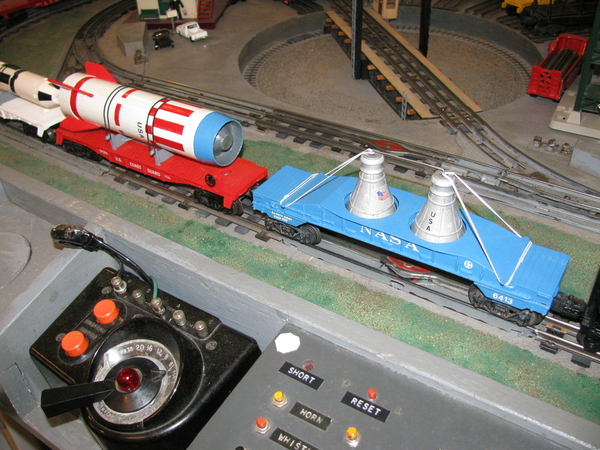
IMG_1915


Cradles for the rocket to be held on the flat car were made from hard balsa wood, shell lined with Popsicle sticks, 1/8 inch dowel pieces and painted grey.  A total of three cradles were made with two for other flat cars.
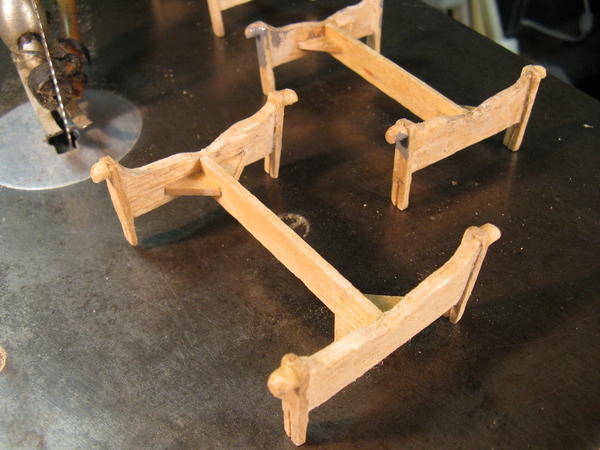
IMG_4051


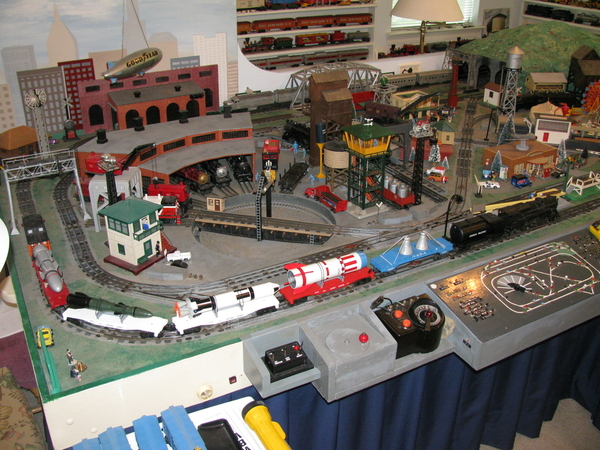
Pictures of Rocket Train

IMG_1899

The white rocket is a Lego toy.

IMG_1923

I like my fat rocket and flat car and it shows out well. 

Perhaps I will letter it FAT BOY !

Charlie


Attachments

Images (9)
  • IMG_4002
  • IMG_4003
  • IMG_4001
  • IMG_1891
  • IMG_1915
  • IMG_4051
  • IMG_1894
  • IMG_1899
  • IMG_1923
Last edited by Choo Choo Charlie
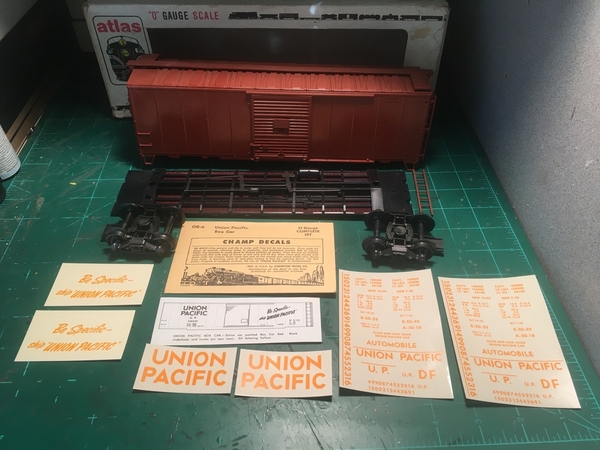
Here is a Lionel Atlantic that I added detail parts and a new coal load to, painted for the Pennsy and weathered about 15 years ago. This was a great and affordable offering from Lionel back in the early 2000s. ( originally lettered AT&SF 1491). I think is it close to scale.pennsy-atlantic
Attachments

Images (1)
  • pennsy-atlantic
Last edited by Will

Great thread that shows how much creativity is out there! Amazing!

Here's a series of Gilbert cars.   First, a double done tank car, which Gilbert never made.  I did this one by cutting up a couple of junk tank cars, and painting the resulting car like it would have been in 1946.  I gave it a plausible, unused Gilbert number.  No way it could be confused with a prototype since I included a more modern "built" date:

Then a 52' in scale lengthgondola made in a similar manner using junk bodies.    Again, assigned a plausible Gilbert number that was never used:

A double door boxcar similar to automobile transport cars.  Gilbert never made these:

Finally, a combine to match Gilbert's Silver Bullet train:

Last edited by poniaj

Add Reply

Post

OGR Publishing, Inc., 1310 Eastside Centre Ct, Suite 6, Mountain Home, AR 72653
800-980-OGRR (6477)
www.ogaugerr.com

×
×
×
×
Link copied to your clipboard.
×
×