I am going to be in the process of installing LED lighting in my passenger cars. I bought the kits from Hennings Trains ( gunrunnerjohn). He does not do kits for the back of Observation cars. The kits Gunrunner sells are great oply two wires to hookup. My kind of kit. I did swing by the Dallee Electronis booth he did not do any but told me I could with LED lights and a tranistor make it work and gave me a wiring diagram too. Not 100% sure on this because I am not a good solderer. So are there any kits out there for three lights on the end of the observation car. Any help appreciated. Thanks Paul
Replies sorted oldest to newest
Transistor?
Is the third light directional?
I'm sure GRJ will stumble on this later for a best answer considering the strips are his baby
But soldering issues are mostly: not enough heat, not correct (plumbing or mix%) or poor quality solder, or not enough flux/dirty surface. With enough flux (cleans) and enough heat, solder runs to the heat. You just need some clean metal to practice on without worry. Once you see it happening as described, it's pretty straightforward. The real skill is achieving heat transfer and some patience. The first dab of solder is all about helping speed heat transfer. Once heated, solder tip goes to the piece, not the iron. I personally prefer a very hot iron and speedy withdrawal. Once I got a very hot iron and learned flow, it became easier to use the low heat irons.
Good luck.
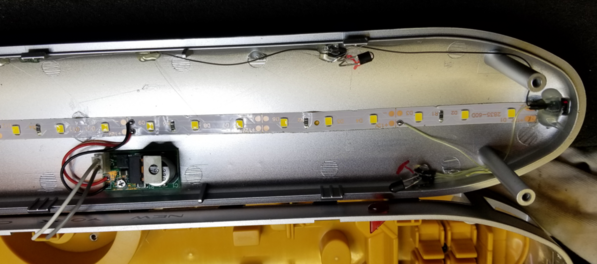
Well, given the fact that each type of passenger car is unique, it's pretty difficult to put a "generic" kit together that doesn't require soldering. Funny thing, I just finished a set of passenger cars for a customer, these happen to be the Railking cars. This may give you a little insight as to why I think making a generic kit for observation lights will be difficult. For the RK cars, the observation sidelights are on the body and the rear light is on the roof. Other makes and models have a different arrangement. I Install the main lighting strip like any other upgrade. Then I tap off from one of the solder pads on the strip to power the observation lights, in this case I have three in series with a balancing resistor.
Here's this upgrade in pictures. Yes, I did pick the hot glue residue off before assembling. ![]()
Here's an overall view of all the wiring.
This illuminates one of the side markers, note the covering to limit incident light scatter.
This illuminates the other side marker.
Here's the rear marker.
This is the resistor added to balance the lights
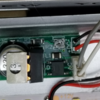
The lighting regulator, I added the connector set so that the roof could be separated for maintenance.
Other observation light installations take a much different path, it really depends on the design of the car.
Attachments
The closest thing you might find that would not involve soldering together any electronic components are the track-powered LEDs from Evan Designs; here are the basic details including all the colors they offer: https://www.modeltrainsoftware...eds-for-transformers
They also make a 4 LED unit with one rectifier unit. It only comes in white but if you already have red lenses in the side and tail lights on your car mounting these behind the lens will of course show red through it and you have one spare for the drumhead at the back of the car: https://www.modeltrainsoftware...trains-and-buildings
It's not hard to connect these to track power through the wheels and pickup rollers of most passenger cars. You might need to rig up the wires from the truck to a connector in the car so you can separate the frame and car body more easily.
I have stuck with the smaller size lights, either the 1.8 mm "bulbs" or the smaller flat "chip" LEDs.
That's starting to sound as complicated as my solution. ![]()
This site may give you some ideas. www.royztrains.com. If you have an idea of what you want. Roy is easy to deal with and will answer your e mails.


