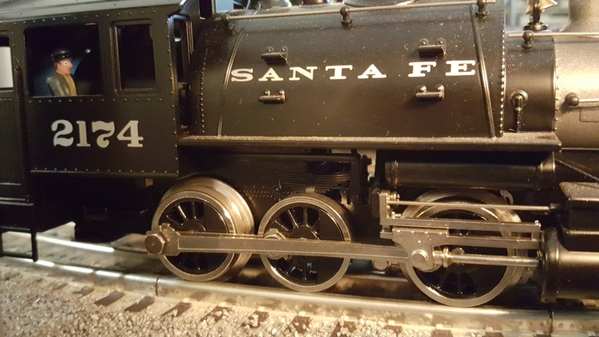
I have the Alaska #71 docksider that I picked up for free - it didn’t take long to find out why. The electronics were stripped out, motor was gone, no smoke unit, speaker, etc.

It is still a nice little locomotive shell and chassis so I ordered a new motor, pick-up rollers, light board, and a reverse board that I thought would work (it didn't as the molex connectors were the wrong size) from S&W Parts - great to work with by the way.

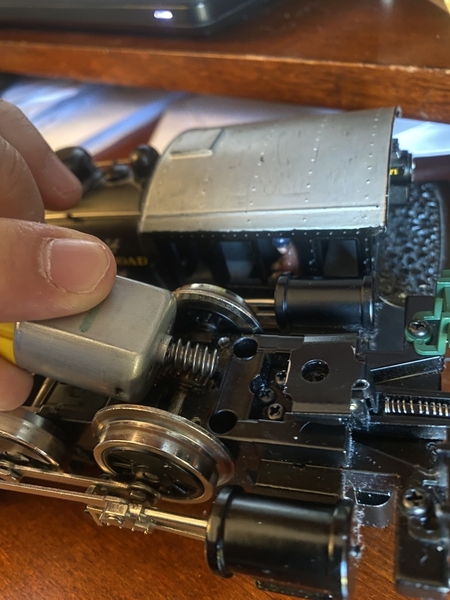
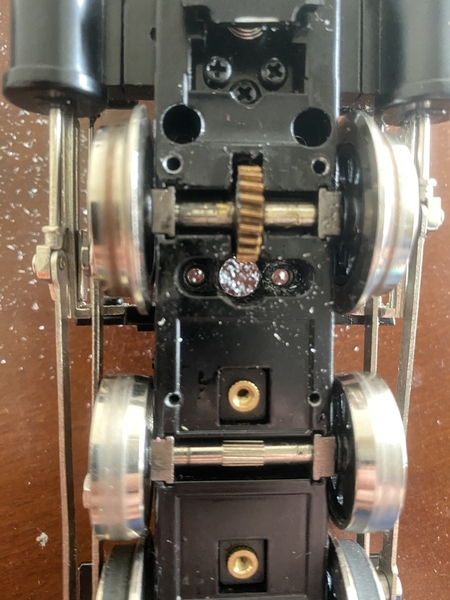
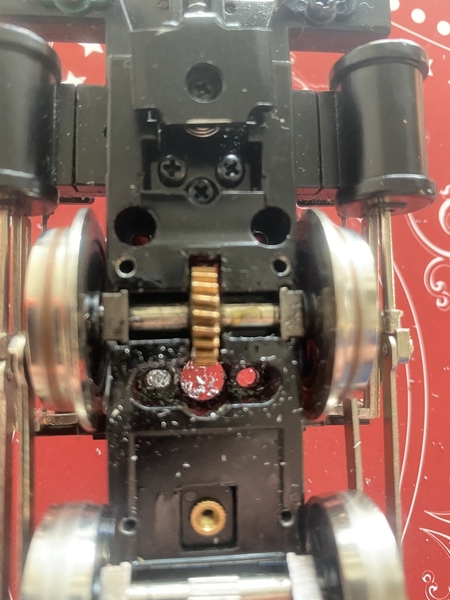
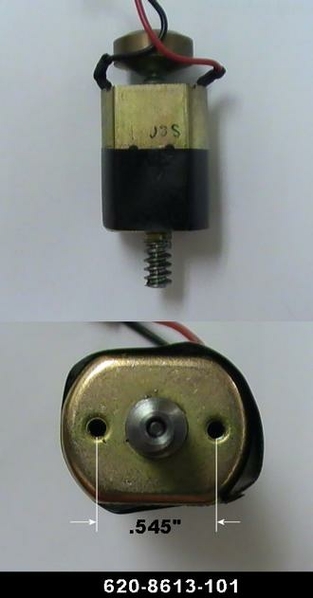
I began to learn that there are critical parts that have either changed or are now obsolete on these nice little switchers. The Alaska version (6-38622) has a Series 1 frame, but the Series 1 motors are no longer available. The Series 2 motor will fit into the frame, but the distance between the screw holes is different between the Series 1 frame and the Series 2 motor.

I am planning to drill out the frame holes to accept the new motor and will update once that is done.  Has anyone had success doing this? I am trying to decide between a drill bit or perhaps a round file to expand the frame hole?

I haven't yet located the proper screw for the motor in my box of miscellaneous screws.  The long frame screws that hold the frame to the shell are the right diameter and thread.  I probably just need to go hunting at the hardware store, but does anyone know the proper screw size for this series 2 motor?

SERIES 2 MOTOR

Series 2 motor

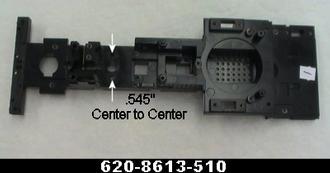
SERIES 1 FRAME

Series 1 Frame


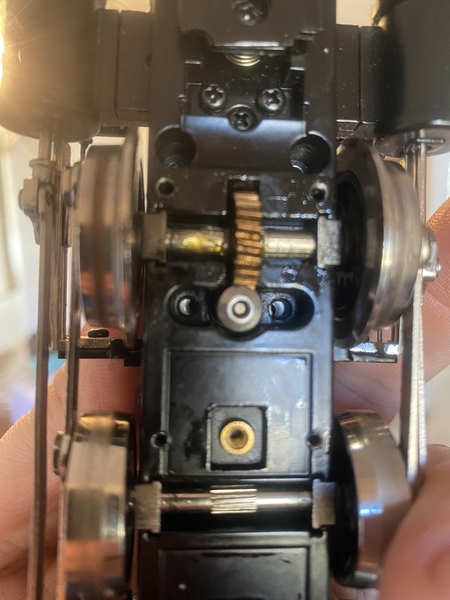
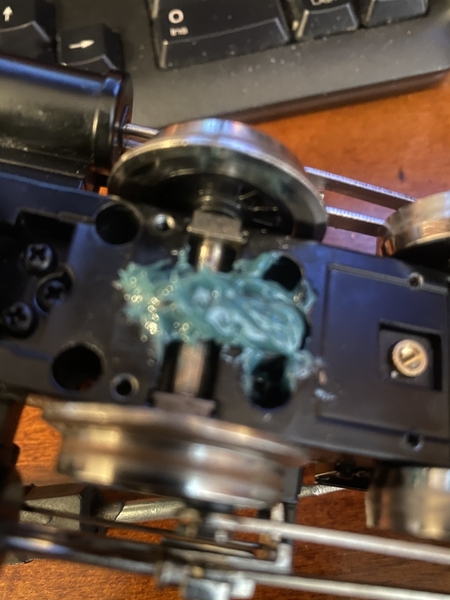
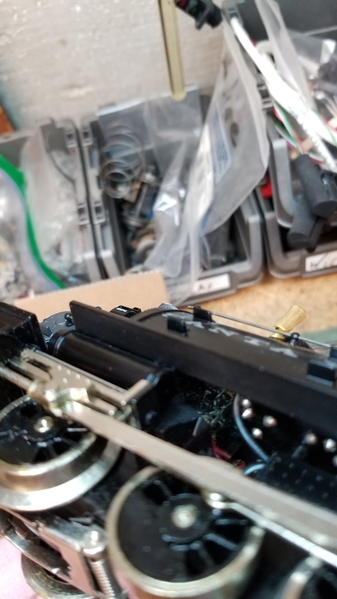
Attempting to show the gear mesh is correct:


379210F3-A274-4DFD-9EAB-ABFCC71F67FA

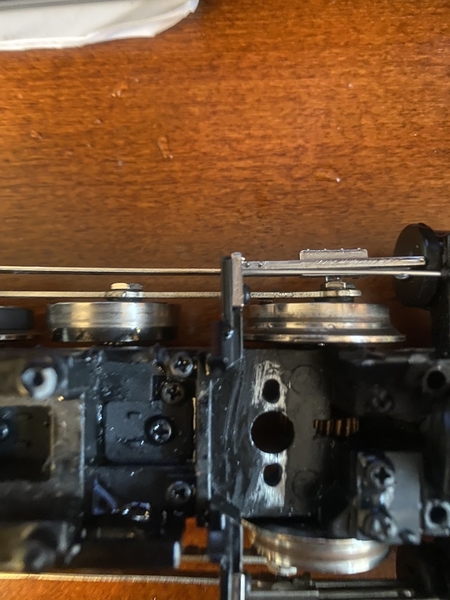
Showing the frame and motor mounting holes not lining up:

0F63BDE9-4FFE-4E20-8F9F-664173D23A47

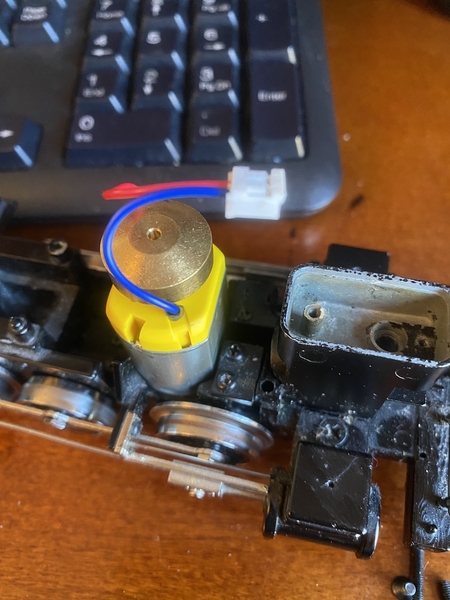
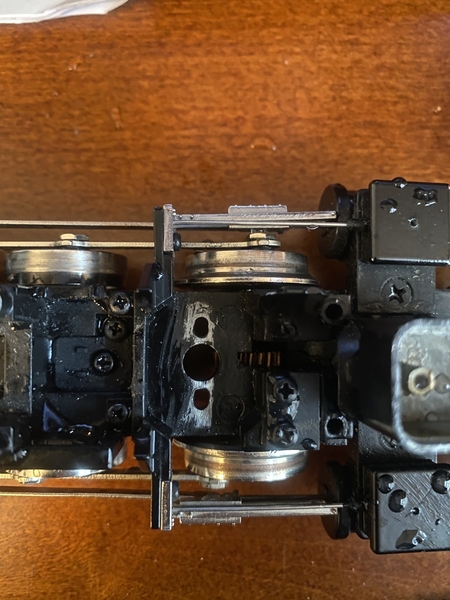
Motor sitting in the frame:

EAA583C1-8D77-4344-AA0B-86D70940435F

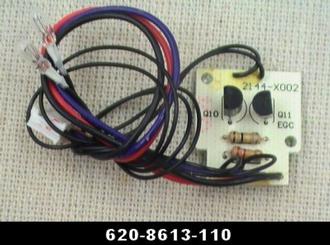
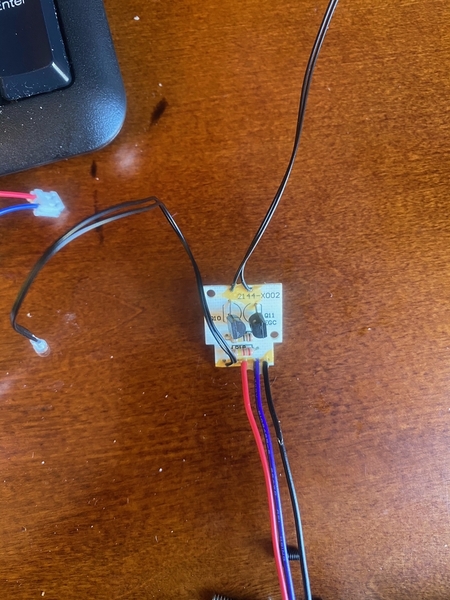
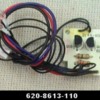
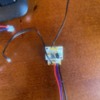
I also picked up the constant light PCB 620-8613-110 (see below).  1. Can I still use this without the main PCB? how would hook it up?  2. There are 2 small incandescent lights on the board, is one for the headlight and one reverse light?  or is one for the cab light?

light PCB

light pcb 2


Sending notifications out to @brianel_k-lineguy , @gunrunnerjohn if interested.  Thanks!

Attachments

Images (7)
  • 379210F3-A274-4DFD-9EAB-ABFCC71F67FA
  • 0F63BDE9-4FFE-4E20-8F9F-664173D23A47
  • EAA583C1-8D77-4344-AA0B-86D70940435F
  • Series 2 motor
  • Series 1 Frame
  • light PCB
  • light pcb 2
Last edited by JD2035RR
Original Post

Replies sorted oldest to newest

JD, your "experiment" is already showing me some things. Your photo of the series 2 motor sitting in the series 1 frame shows the issue I guessed before (without seeing photos) would be the case. But it also shows there is the potential of being able to alter the frame to accept the new motor.

Must be Lionel could no longer get the first motor. I know Mike Wolf talked about having to make tooling revisions to accept new motors as prior motors were no longer being manufactured.

I went to the Lionel parts site and looked up one of the newer Docksiders with series 2 components.

https://www.lionelsupport.com/...c3-b151-4216a0903607

The screws you'll want are shown as part #58 on the list. It's a 2.5 mm x 6.0 mm x .45 thread screw.

I can't offer any insight on the PCB board. I'll leave that to gunrunnerjohn.

-----------------

I've always been a fan and defender of Lionel starter products. I've never had any trouble with them. BUT I do find what I'm hearing about some of the newer starter products sort of unsettling. Changes being made, much smaller motors, unavailability of parts. @Chuck Sartor might be interested in this thread also. He had previously posted about doing a repair on one of the new starter set Tier 4 diesels, dealing with the unavailability of motors. Again, motors too small for such an engine.

While unavailability of parts is upsetting to anyone, it is especially damaging to Lionel's reputation when those products are starter set ones. Especially since those products could be going to first time beginners in Lionel trains. Also that these products are made in much larger quantities than other sorts of higher end products, so more extras should be ordered to have parts on hand.

I’ve done this swap bunches of times.....just drill it steps, creeping up on the drill bit size till you reach your new motors mounting points....take the motor mount screws down to your local ace hardware, and find some appropriately sized washers to make up the hole size difference.....it’s very simple...not a big deal at all....you’d be there for quite some time trying to wolller those holes out with a tiny rat tail file.....

Pat

I should have added, either way you do it, you’ll have to set the gear lash, best trial and error, tighten screws and turn the flywheel by hand through one full rotation forwards and backwards...adjust as necessary till it’s smooth....loosening the screws, and shifting the motor, then retightening them...but again, it’s fairly simple....just don’t get the gear in a bind against the worm wheel...

Last edited by harmonyards

Brianel, thanks for going the extra mile to get the screw part number for me.  I had looked all over the series 1 diagrams, but didn't look at the series 2 - seems obvious now thanks!
Pat, thanks for tips.  After seeing your 773 Pittman swap thread, I guess I'll take your word for it.  That was fun to see the work you do!

No problem JD, ....and thanks for the kind words....there’s a whole slew of that type of chassis that suffers from that ailment, ....the local club in my area swears by those, and those berk Jrs, .....I must have done that swap a half dozen times now...the wonderful big L, and their superseded parts....”we don’t have that part anymore, but if you’re handy with a pick ax, we have this one” ....wish I had a nickel for ever time they did that.....geeeeeezzzzzz....lemme know if you run into a jam, I can help you...but I suspect you’ll be fine, you’re asking the right questions.....

Pat

@JD2035RR posted:

So is the original motor in these a dud?  I read somewhere on the forum that the circuit boards might be causing the problem?  Any guess at the life expectancy of the series 2 motor?  Are they better in anyway than the originals?

I’d bet Chuck could answer that better than I can......I’m not a 100% repair shop, I mostly do mods & upgrades.....I just chip in some free labor for the local clubs.....I know they ran the death out of them before they croaked...

Pat

So far the vast majority of defective motors has been from the earlier series engines. The newer all metal cased motors last a lot longer than the earlier plastic top motors. That is the white top. The yellow top seems of better quality also. Whether the original style was discontinued or Lionel decided to up-grade the quality I'm not sure, but the ones they are using now in these engines seem to be of better quality.

Last edited by Chuck Sartor
@johnstrains posted:

So, does this portend problems with the soon to be delivered LC+ 2.0 0-6-0s?

Guess we'll know soon.

I almost pulled the trigger on one of these, but then this "great deal" of a free docksider that I'm working with now fell into my lap.   I still think the LC+ 2.0 0-6-0s look to be one of the best deals in O gauge, if they deliver everything as promised in the catalog.

John - The shell does go on with the new motor...although you had me sweating because I hadn't tried it until this morning.

Billy, good idea.  I think I am just going with a bridge rectifier to get it moving for now, but I'm thinking about either a BlueRail board or an electronic e-unit.

This thing was totally stripped out, so I need to install some lighting, and possibly a smoke unit.  I know I can get parts to rebuild the original puffer, but would like to explore some fan driven options if they would fit.  Royz Trains has a blower smoke unit that runs off of track voltage that looks like it may fit.  Although all of these add-ons make the $200ish LC+ 2.0 docksider that much more attractive.  This may stay more bare bones, but glad I reconciled the Series 1 frame and Series 2 motor.  I hope that helps others that just need to replace the motor in a worn out but complete series 1 docksider.

@JD2035RR posted:

...

Although all of these add-ons make the $200ish LC+ 2.0 docksider that much more attractive.

That's a bummer but makes sense. I have two conventional docksiders that I would love to upgrade to be similar to the LC+ 2.0 version that I ordered. But a fan driven smoke unit plus electrocouplers plus the upgrade boards...sounds like I won't come out any much farther ahead. Especially when you toss in my position on the learning curve.

Pretty awesome that you made it fit though! It's good knowledge to have stored here.

@JD2035RR posted:

John - The shell does go on with the new motor...although you had me sweating because I hadn't tried it until this morning.

You can probably guess why I bring this up.  Been there, done that, kicked myself after mounting boards and smoke units and finding out not all the clearances are what they looked like!   Now I do a mount of any parts, then drop the shell on to check clearances, and then proceed.

@BillYo414 posted:

That's a bummer but makes sense. I have two conventional docksiders that I would love to upgrade to be similar to the LC+ 2.0 version that I ordered. But a fan driven smoke unit plus electrocouplers plus the upgrade boards...sounds like I won't come out any much farther ahead. Especially when you toss in my position on the learning curve.

I can assure you, you can't buy the parts to upgrade the conventional Dockside switcher for the money you'll spend buying a couple and ready to run LC+ 2.0 version.  That's why I have two of them on order.

I can assure you, you can't buy the parts to upgrade the conventional Dockside switcher for the money you'll spend buying a couple and ready to run LC+ 2.0 version.  That's why I have two of them on order.

I ordered mine a few weeks ago. I'm wondering if I should have ordered a second one. As I saw you pointed out in another thread; they're running out of December to deliver them in! I'll have to find something to do with the other two.

A few days ago I greased the gears and tried to install an electronic e unit, but the board was too big/not the correct shape for this locomotive. I could have cut some parts off the frame, but I decided to get a bluerail Bluetooth board instead as it is much smaller, and should fit. I measured the stall current at 1amp with this motor, so the smaller 2amp board should be fine.

Just to get it rolling, I threw in a bridge rectifier and away we go in forward only - for now.  

106B9A74-308C-4DFF-9553-9A5F39E2A66B

Attachments

Images (1)
  • 106B9A74-308C-4DFF-9553-9A5F39E2A66B
Videos (1)
trim.105E83F6-6427-4682-8468-088433D1D0A3

Any reading on reliability between the two motors?

So far the vast majority of defective motors has been from the earlier series engines. The newer all metal cased motors last a lot longer than the earlier plastic top motors. That is the white top. The yellow top seems of better quality also. Whether the original style was discontinued or Lionel decided to up-grade the quality I'm not sure, but the ones they are using now in these engines seem to be of better quality.

Per Chuck, the yellow capped motors seem to be more reliable.  Which is good news to those with the new LC+ 2.0 Docksiders

@JD2035RR, I'm glad this project worked out. This should be of great assistance to those who wish to save an original Dockside switcher.

I believe I'm the first person to have caught this change to the motor and the frame of the Dockside, and to have posted it here. When I looked over the parts photos, my thought was maybe the holes could be enlarged to accommodate the new motor, to save from not only having to buy a new motor but an entire new frame as well. But as I have learned the hard way from my many alteration projects, sometimes things are not as easy as they appeared to be.

Of course, I caught this change because I now seldom purchase any locomotive without first consulting parts diagrams, and then checking parts availability. I also try to make things easy for myself by purchasing locomotives that use as many shared parts as possible. OR locomotives that sold in such large quantities that buying a second one to cob for parts isn't going to be financially foolish. The Lionel starter set Dockside falls into this category. On the other hand, the WBB scale proportioned 44 ton switcher - already discontinued - does not! Any one who likes that engine had better buy two of them right upfront, as parts will probably be next to impossible to get (the production run wasn't that large).

And THIS is an issue for ALL of us, not just high end product operators. A recent thread asked where a basic smoke unit could be found for a Lionel starter set 4-4-2? I checked all my parts dealers and not a single one of them had those anymore. Thank goodness last time I got one, I changed my mind and got several.

Yes, it does put limitations on my choices - part of the reason I do so much customization to my trains - but it does make it much easier to make occasional repairs when I need to. And another reason why my layout has the option of running on either AC or DC current.

Anyways, I'm really glad JD that you tackled this project as I think it will potentially be for the benefit of many.

Last edited by brianel_k-lineguy

That was one of my big worries about picking up the LC+ 2.0 Docksiders, I was hoping for a better motor.

I don't think these motors will blow up like Canon motors. You just have limit their loads. They will pull above their weight class likely due to their traction tires and weight. It would have been better if they had no traction tires to save the motor. A plate on the bottom holds the wheelsets in so the traction tire set could be swapped for a set without tires easily.

Pete

That might not be a bad swap Pete, it would also give you more wheels to contact the outside rail.  When you have insulated rails and switches, sometimes two wheels doesn't get the job done.

I wonder if the new model has the same wheelsets?  If so, it would be easy to grab a part from the older one and swap them out.

Last edited by gunrunnerjohn

Add Reply

Post

OGR Publishing, Inc., 1310 Eastside Centre Ct, Suite 6, Mountain Home, AR 72653
800-980-OGRR (6477)
www.ogaugerr.com

×
×
×
×
Link copied to your clipboard.
×
×