Thanks Tom, It's 1/8" Masonite, and is very easy to cut and bend.
Andy


|
|
Thanks Tom, It's 1/8" Masonite, and is very easy to cut and bend.
Andy
Great Andy. Looking good. Just didn't want you to get too far like I did. Had to adjust later on as I got more into true O, no fun.
Hope to see more!
LIRR
Steamfan77 posted:645,
I wish I had the room to include more stations on the layout. East Williston, Roslyn, Sea Cliff, Glen Cove, and Mill Neck, would all be great additions. All are architecturally unique, and filled with history.
Andy
I used to work for the LIRR. Spent many days maintaining/rebuilding stations and bridges on the Oyster Bay Branch.
We had this nutty plumber foreman. When sent to a complete a work order at Sea Cliff, he would ask you......."Why should I go to Sea Cliff when I can go see Roslyn" .... good memories.
Keep up the good work.
Paul
Thanks Paul. Very interesting that you worked on the OB branch. Any other stories or memories that you would like to share? When did you retire?
Andy
I painted the fascia, and in the last picture I added the arch and railings to the turntable.
Andy


the layout is really coming along nicely! Well done!
Thanks JJMMAGOO
Andy, The turntable looks great. Nice progress on the RR.

Steamfan77 posted:I recently installed some girder bridge sections to span the main line East, and also what will be a two or four lane road. I spray painted the sections a flat gray, then used some Pan Pastel powders for some weathering. I will add more weathering when I do the scenery around that area. For comparison, the second picture shows a closer view where the left section is weathered, and the right section is not. The bridge abutment under the track is temporary, and will be replaced by something with more visual interest.
Andy
I spent most of my childhood in Bayville, so this picture clearly reminds me of the train girder bridge we would drive under to get to/from Bayville via Oyster Bay. I found an old picture of that one for you with a steam engine:
Link here (old bridge) and I found another picture of the replacement girder they did a few years ago, which finally allowed taller rigs to drive to/from Bayville via Shore Road (without mashing their rigs on the girder bridge - which happened more often than most folks would think). Link here (new bridge)
This layout and thread are super enjoyable for me since this is essentially where my love of trains began, so thank you for sharing it with us.
Best...Rich
Outstanding work .
I'm a follower and a liker.
Roo.
Thanks Al, the turntable is a beauty! I appreciate your support Roo! Rich, I was just around the block from there last week working on a cell site. Our trucks barely fit under the old bridge. The bridge on Shore Rd and the one spanning Jericho Tpk in Mineola are both plate girders. Of course the Oyster Bay branch doesn't cross the main, but I had to do that to make the layout fit into the room! I'm working on connecting the switch controllers and will post some pics and a video when I'm done.
Andy
Andy, I love the eye for detail and your artistry and workmanship. They look so authentic! Great work!
Andy
i used to live about 5 minutes from the Albertson Station and took the Oyster Bay line through Jamaica into the city often as a kid. One of my friend's dad was a conductor on the line. A favorite site was the station in Williston Park.
Your work is outstanding and I would love to see the finished product. Keep sending the pictures.
Marty
Thanks Fitz. Marty, that station was a beauty! Thanks for the kind words. I'll keep them coming.
Andy
I cleaned some of the junk off of the benchwork, and don't you know it, there's a layout under there! I started to get a little more organized today, because I'm having company in a few weeks, and we'd like to see what we're doing when we run some trains ![]()
Andy


That there is some nice work.
Thanks NECRAILS
I set up some of my switch controllers using touch toggles by Berrett Hill Shops with Tortoise motors. Works as advertised, and is very easy to set up. A video was posted on the forum a while back with Joey Ricard and Kevin Hunter demonstrating the product. You can find Kevin's site here: http://www.berretthillshop.com/#site-wrapper.
Andy

Just came across your post. Awesome work Andy. I live near Mineola and can hear the Oyster bay trains when they approach and leave the station heading north. Great piece of LIRR history you are building.
My kids both did a train trip to Oyster Bay when they were in Nursery School, what a great spot. Keep up the good work. Can't wait to see the finished product (well, we never really finish, do we!)
RSJB18,
Thanks for the kind words. I grew up in Mineola, and always had the Oyster Bay trains going through our village. Progress is slow, but I'm moving forward!
Andy
I had to replace two Atlas undermount switch machines with two Tortoise switch machines between the main and staging yards. The space is 6" high, and about 18" back from the edge of the layout. I knew it had to be done, but I wasn't looking forward to it. I took my time and got really lucky, because I didn't have a great view, and had a heck of a time getting my hands in there. In the end it was worth the trouble. Both switches throw very smoothly.
Andy


Steamfan77 posted:I had to replace two Atlas undermount switch machines with two Tortoise switch machines between the main and staging yards. The space is 6" high, and about 18" back from the edge of the layout. I knew it had to be done, but I wasn't looking forward to it. I took my time and got really lucky, because I didn't have a great view, and had a heck of a time getting my hands in there. In the end it was work the trouble. Both switches throw very smoothly.
Andy
You said it was tight and you were not joking. That is a small area to work with. Good job.
Mike
Thanks Mike. I'm still not sure how I did it, and I hope I don't need to do it again!
Andy
Just read this whole thread. As I live on Long Island in Huntington Station, the Model looks very authentic already. The girder bridge especially look like the many I have seen here.
Thanks for the kind words Borntman. I'm going to add as many realistic details as my skill level will allow!
Andy
I had manual throws set up on the four way yard switch in the staging area, but as I began to run trains more frequently, it became obvious that it was clumsy and inconvenient at best. This switch is used every time I bring a train into the staging area, so I went with adding more switch machines. I had access to the area from underneath, but had to do some surgery on one of the flanges on the benchwork. I went with the touch toggles as I previously posted for another switch, and used Tortoise switch machines.
Andy


I added some SPST toggle switches to kill the power on various sidings and yard tracks, so I can leave most of my engines on the layout when not in use.
Andy


This is is my first attempt at some ground cover. It's a minor area between the tracks.
Andy


Looks great Andy coming along nicely
Mike
Thanks Mike!
Andy
I've added a few streets and sidewalks. Need to finish the junction area in Mineola. I also added the signal bridge and connected it to the system.
Andy


Andy,
Looks awesome
Mike
I have a whole fleet waiting Steve! Thanks for the kind words Mike.
Andy
Hey Steve, you wanted some orange, here you go! ![]()
Andy


You are welcome anytime!
More roadwork from the highway department. The work is slow, but I work when I can...
Andy


I finished the Mineola junction. If you look at my post from 7/7, you'll see that the street over the junction is missing. I used joint compound mixed with black paint to get close to the shade of gray I wanted. To make room for the flanges, I carved the grooves out on the outside rails. A slow process, but I think it was worth it. I added some ballast on the sides of the road, and finished with weathering powders. Let me know what you think. Thanks for looking.
Andy


This is awesome! I have do redo one of my grade crossings because it didn't come out the way I wanted. The trains run over it ok but I am not happy with the visual. Yours came out like you were a 1/48 size construction worker.
So let me get this right, the roads are made out of masonite but the grade crossing joint compound?
Crossing multiple diverging tracks can be a challenge. This is about the best I've seen. The ballast blends in with the track and surroundings and doesn't look freshly laid. Just the makings of a great scene. Nice job.
Andy,
Truly amazing work, great scene!
Mike
Thanks for the kind words guys. Demtrains, yes the crossing is joint compound, and the roads are Masonite.
Andy
Hi Andy,
hows the progress been going? Any layout updates to share?
Hi Greg,
Thanks for asking. It's been a rough year. I'm slowly working my way back to full speed. Hopefully I'll post something soon.
Steve, #170 looks sweet!
Andy
This thread is incredible! I'm a former long islander and, this is very inspiring. Great work! Any further pictures/ updates/ videos?? 👍
Looks good Andy.
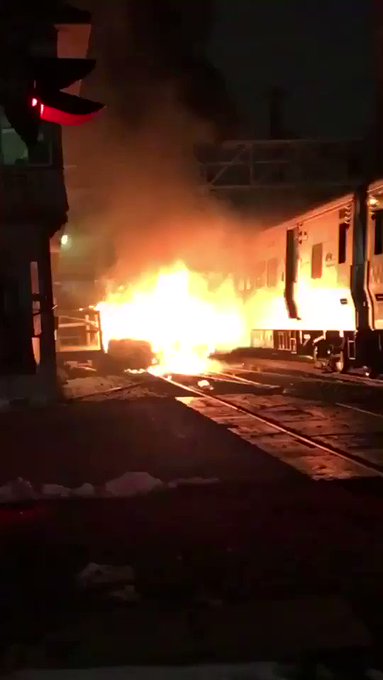
You will appreciate this since you are modeling the area- my wife and I were having dinner in Davenport Press a few months ago when we see fire trucks outside and smell smoke. A woman had turned onto the tracks at Willis Ave because she was following her GPS and it told her to turn..... this was what was left of the car. The driver was OK, she got out of the car before the train hit it.
Hi DJ,
Thank you for the kind words. I am currently working on a structure that will go in the industrial area known as "The Hole", in Mineola. It will be Kurtz Iron Works. RSJB18, I remember that fire. Scary stuff relying on technology instead of common sense ![]() . Attached are a few pictures of my progress. I used some lightweight joint compound to bring out the mortar joints in the brick wall. Next, I painted the cement areas. In the third picture I painted the roof with black latex paint, and then added some fine ballast for a gritty appearance. And yesterday I added the windows and doors. Soon I'll give the entire structure a diluted wash of black India ink. After that, I'll work on the loading docks. This kit is the Atlas Farmview Dairy structure, but I'm turning it into an ironworks. I'll add details in the surrounding area in the future.
. Attached are a few pictures of my progress. I used some lightweight joint compound to bring out the mortar joints in the brick wall. Next, I painted the cement areas. In the third picture I painted the roof with black latex paint, and then added some fine ballast for a gritty appearance. And yesterday I added the windows and doors. Soon I'll give the entire structure a diluted wash of black India ink. After that, I'll work on the loading docks. This kit is the Atlas Farmview Dairy structure, but I'm turning it into an ironworks. I'll add details in the surrounding area in the future.
Andy


Steamfan77 posted:Hi DJ,
Thank you for the kind words. I am currently working on a structure that will go in the industrial area known as "The Hole", in Mineola. It will be Kurtz Iron Works. RSJB18, I remember that fire. Scary stuff relying on technology instead of common sense
. Attached are a few pictures of my progress. I used some lightweight joint compound to bring out the mortar joints in the brick wall. Next, I painted the cement areas. In the third picture I painted the roof with black latex paint, and then added some fine ballast for a gritty appearance. And yesterday I added the windows and doors. Soon I'll give the entire structure a diluted wash of black India ink. After that, I'll work on the loading docks. This kit is the Atlas Farmview Dairy structure, but I'm turning it into an ironworks. I'll add details in the surrounding area in the future.
Andy
Very nice work!
Thanks DJ!
After some weathering and assembly, the building is on the layout. The weathering is pretty heavy, as this is a trackside ironworks facility. I'll set up the yard with equipment, etc., and lay down some ground cover to anchor the structure. I'm still deciding if I want to glue the building together, or leave it as is for easy breakdown.
Andy


That new building looks great! So happy to see your continued work!
Thanks Greg!
Andy,
Layout coming along Let me know when you want to come by and visit the TMB layout. Also I'd like to visit your layout someday as we are practically neighbors
Steve
Steamfan77 posted:After some weathering and assembly, the building is on the layout. The weathering is pretty heavy, as this is a trackside ironworks facility. I'll set up the yard with equipment, etc., and lay down some ground cover to anchor the structure. I'm still deciding if I want to glue the building together, or leave it as is for easy breakdown.
Andy
Heavy weathering on the LIRR.... naaaaaah, never! The building looks spectacular, the weathering is very realistic.
I remember riding the old diesel powered trains on the port Jeff branch in the mid & late 90's. Talk about rust buckets! Many ppl were glad to see their replacements slowly appearing on the rails; sleek clean & quiet bi-level cars.
Hope to see a video of some model oyster bay branch action soon!
Andy,
I just re-read you thread, and what outstanding progress! Thanks for sharing, fantastic work.
Thanks for the invite Steve. I’m available any time to see your layout, and you are always welcome to come here and see mine. I’d definitely like to set something up. Shoot me a pm or email. Thanks DJ, I’ll try to do a video soon. Thanks for the kind words Rich. I read and reread your build thread too. What an inspiration!
Andy
I just completed the Mineola sub station. I'll add equipment inside and fix up the grounds in the near future.
Andy


Steamfan77 posted:I just completed the Mineola sub station. I'll add equipment inside and fix up the grounds in the near future.
Andy
Looks great!
I’ve been working on this recently, and finished the kit today. It’s the Oblong Box Company from Dennis Brennan.
Andy


Just finished this today. It’s my first attempt with a plaster kit. It was an interesting project.
Andy


great work !!!!
Thanks Marty
Awesome work !
Thanks Kon
I just skimmed through the whole thread. Pretty cool. Looks like you have trains running and are building models. I’m kind of jealous. Have fun. I remember I built that same ramp and it was like $30 for a batch of wood and a pile of instructions for the simplest thing in the world to build. That is when I decided scratch building is a better option. I don’t need to pay an extra $25 for a six page instruction sheet for a simple loading dock. And I think it came with magnets for some ridiculous reason, like to square something up. Anyway, I digress. Nice layout. Have fun building and running it.
your work Andy never ceases to amaze us, truly amazing
Mike and Aidan
Thanks William. I’m enjoying building right now because I have the time! Thanks for the kind words Michael. I read your article, and it doesn’t get any better than you and Aidan working together. It was a pleasure seeing your layout in person.
Andy
Just finished this structure. It's the Wilson & Co. meat packing plant, located in Mineola on Main Street, right where the Oyster Bay branch line comes off the main. Thanks for looking.
Andy


Great work Andy. Just caught up on your thread. I was at Davenport over the weekend, right across the street.
Wondering if you are going to re-build now that the 3rd track is going in. ![]()
Bob
Thanks Bob, how’s the food there? I will not be adding a third track!
Andy
It's a great place. Food is excellent.
Should be interesting to see how the LIRR is going to rebuild some of the areas along the route.
Steamfan77 posted:Just finished this structure. It's the Wilson & Co. meat packing plant, located in Mineola on Main Street, right where the Oyster Bay branch line comes off the main. Thanks for looking.
Andy
Excellent work! Who makes the Wilson & CO. Reefer?
Thanks DJ, it's an Atlas product. Don't think they make it anymore, but I'm sure you could find it online.
Andy

Steamfan77 posted:Thanks DJ, it's an Atlas product. Don't think they make it anymore, but I'm sure you could find it online.
Andy
Great thank you!
I made an adjustment in the color of the plaster kit that I posted on 11/25. The color wasn’t as rich as I wanted, so I went over the building with full strength russet drawing ink. I’m happier with the color now. I’ll also go over it with a black wash now that I have the color I want.
Andy


Covering up the Homasote with some basic ground cover.
Andy


Very nice! Keep the progress photos coming.
Thanks DJ!
Making progress on a part of the layout I’ve ignored for too long. The first picture is a retaining wall next to the main line. After that, I put down some basic ground cover. The rest of the pictures are of the Jericho Turnpike underpass in Mineola, Long Island, NY. For the street supports, I made a template out of oak tag, then transferred the shape to some scrap 3/4” plywood. After cutting and a little sanding, I screwed the curved road supports to the benchwork. I spray painted some 1/8” hardboard (Masonite) flat gray. I’ll follow up on the road with some weathering powders. I cut the walls out of the same thickness hardboard, and after priming with the gray, I sprayed on some Rust-Oleum Desert Bisque. For the folks that are familiar with the area I’m modeling, this is the underpass on Jericho Turnpike in Mineola. For those not familiar, this is a four lane road, and one of the main thoroughfares in the village of Mineola which passes under the Oyster Bay branch line that I’m modeling. The underpass is in progress, so more pictures to follow. Thanks for looking.
Andy


Great work on an interesting layout. I really like the quality of the buildings. Nice crisp corners, colors, good track work and the grider plate bridge is special.
Thanks Pennsynut! Thank you for the kind words. The progress comes in spurts, but I’m happy with the overall look of the layout. I’m leaving the scratch building to the end. That will be a tall order, but enjoyable.
Andy
Andy,
Very nice. I was catching up on some of your recent posts. I like how the girder bridge came out. Also, good to see your B6 get some track time.
Tom
Thanks Tom, I’m happy with how the girder bridge came out, it’s a nice scene with the underpass. That Lionel b6 is a good puller, especially backing a long cut of freight or passenger cars out of the yard on that curve.
Andy
I added the sidewalks and cement cap/end pieces for the underpass, along with some ground cover. I installed more retaining wall pieces and some ground cover behind the girder bridge, and installed a cement retaining wall in front of the higher level industrial area on the layout known as “the hole”. I’ll add the street portion to connect that area with Jericho Turnpike (underpass) soon. I also put in a layer of some 1/2” Homasote in the corner and up the side of the grade. I’ll paint it earth brown and put down some ground cover and trees. I think it’ll be nice to give this area a little elevation. Thanks for looking.
Andy


Andy, your Jericho Turnpike girder bridge is in much better shape than the real thing, just drove through, it needs a good scraping & painting.
Art
Thanks Arthur! They repainted a few in Freeport, and they look much better.
Andy
Andy your patience and your attention to detail is remarkable on this layout. Cant wait to see it finished, truly unbelievable
Mike and Aidan
Mike, thanks to you and Aidan for the kind words. I'm really enjoying working on the scenery and structures.
Andy
Steamfan77 posted:Thanks Arthur! They repainted a few in Freeport, and they look much better.
Andy
I was on 135 yesterday. The bridge between Farmingdale and Bethpage is in sad shape.
It sure is Bob! I think they need to invest in infrastructure a little more.
Andy
I made some progress with the corner I started, and with the street connecting the upper and lower levels. I put down basic ground cover on the edges of the Homasote that are next to the walls before I put it in place. It just made it easier than having to reach and be fairly precise. After attaching the Homasote, I taped the near edge and ends to form a gentle taper. I’ll continue with the ground cover tomorrow. I’m happy with the look of the ramp between the two levels. I cut some 1/8” hardboard (Masonite), and painted the road surface a flat gray. I’ll paint the rest of the structure Rustoleum Desert Bisque for a concrete look. Maybe I’ll give it a dark wash afterwards. Thanks for looking.
Andy


Added some basic ground cover to the recently installed elevated area. The first three pictures are the ground cover, in the last four, I added a little greenery. Trees/bushes/trackside debris to follow in the future.
Andy


Excellent looking ground cover.
Thank you Arthur. The products are from Dennis Brennan at https://brennansmodelrr.com
Andy
Andy, Just started reading this thread, Who makes the building kit below, or is it scratchbuilt ?
I just completed the Mineola sub station. I'll add equipment inside and fix up the grounds in the near future.
Andy
Hi Chris,
This is a kit from Altoona Model Works. They call it the Power/Boiler house.
Andy
Continued with some ground cover, and started another elevated area. I wanted to use irregular shaped pieces of Homasote, because it’s what I have on hand.
Andy


Andy:
Your layout progress is inspiring and brings back memories of my redo. As you know, PRR owned the LIRR at one time and being a Pennsynut, I was curious about what locos you would be running. I looked up LIRR on American Rails.com to see what steamers would have been on it's roster. AM Rails listed four H6 Consolidations; 19 H10 Consolidations; four Atlantics; three G53 ten wheelers; 31 G5s ten wheelers; thirteen PRR K4s; two B8 PRR 0-6-0 and eight 0-8-0 switchers as of 1949. Wondering what your roster of steamers and other locos will be.
Sorry about my last post Andy. I see that a while back that you listed your locos and I missed that somehow.
Not a problem at all Pennsynut! I’m modeling 1948-1957ish, but I also have an Alco C-420, a GP38-2, and an MP15-AC that I run every now and then. But mostly I stick to my original roster. That time period has a nice mix of steam and diesel.
Andy
Nice mix. Can't wait to see more.
As an ex-Long Islander I marvel at your layout!
Great stuff Andy- keep up the good work.
To add to what Pennsynut wrote- I found this image of 4 locos at the turn table in Oyster Bay. Don't remember the date on the photo but it right in your period for sure.
Bob

Thank you both for the kind words! Thanks Bob(Bwana) and Bob(RSJB18)! I’ve seen that picture before, I think it was right before the end of steam in 1955.
Andy
I painted and installed the retaining walls that connect the upper and lower levels. To the left of the short wall, I’ll build, paint, and install the remaining retaining wall for the grade sometime in the near future. I was also able to cover the newly created elevated section with some basic ground cover. I only created this area to break up all of the flatness. Plus, I wanted to get rid of the odd pieces of Homasote I had hanging around ![]() . Thanks for looking.
. Thanks for looking.
Andy


I haven't seen updates on your layout for a while, sorry I missed them. You are making awesome progress. Everything just blends nicely together.
Regards,
GNNPNUT
Have to say your "newly created elevated section" is topographically spot-on for Long Island. There are no mountains around here to get in the way.
Nice scenery!
I am concerned that certain cars will not clear that corner. Pecos River box cars and some cars over 50'. Atlas T-MAN LIRR commuter cars are wide and might scrape as do the bay window cabooses. Diesel side railings are close too. Just a thought to check on.
Steve,
Always a keen eye! You were right! The engines were fine, but I have 18” long Lionel passenger cars that just caught the underside of the cap. If you notice, in the last picture I notched the corner of the cap. Thanks for the heads up.
Andy


A true test would be to run a string of cars. They will tilt inward on curves with the drag factor. 🚧
My bay windows have scrapes on them from the rock n roll along station platforms. I didn't know this until years later of operation. Oh, all the variations and sizes of O. 😵

I’ll do a test run like you suggested. I’ll report my findings. Hopefully all goes well.
Andy
Man I love the progress on you layout. It’s coming alive. I wish I had the space now to build my LIRR branch I grew up along side. Keep it up Andy. And by the way I found a K-line Wilson’s car lines wood sided reefer. I had no idea about that meat factory until you built it and posted the pic of your reefer.

Thanks DJ! Glad you were able to find the reefer.
Andy
Steve (SIRT),
I ran a string of my longest passenger cars in both directions, at different speeds, and it’s close, but not rubbing at all. The adjustment I made on the corner is sufficient for now. Thanks again for the suggestion.
Andy
Pennsynut,
Your post asking what motive power I’m running got me thinking. I’ve never posted my entire engine roster before. This is for you and anyone else that might be interested. Thanks for raising the question. First up is my favorite:
4-6-0 #35
2-8-0 #108
0-6-0 #2015
S-2 #447
VO-1000 #450
RS-1 #465
RS-3 #1558
H16-44 #1504
C-Liner #2404
The last three engines are not in the era that I’m modeling, but I saw them frequently as I was growing up.
C420 #212
GP38-2 #261
MP15-AC #163
Andy


Who made the "2404"? MTH?
Bob, you’re right, MTH. It’s a nice unit, and the engine has a nice “growl”. The 0-6-0, H16-44, and C420 are Lionel. The rest are MTH.
Andy
Just added some ground cover in the area in front of the recently installed retaining wall, and in the area behind the grade.
Andy


Nice collection of loco's Andy. I'm very jealous. Lucky for me some don't fit on 027 or I'd have gone broke by now.
Glad your corner clearance issues were minor.
Bob
Just an FYI -
I'm using 2r track on part of the sidings of my next build. Looks much better in spots where power units don't need to operate. You might want to think about that when you do some sidings.
Layout is much more realistic than that other toy one that posts every 5 minutes on here. He seems to think he's the only one that ever made a layout before. ![]() OK I guess if your not a period modeler.
OK I guess if your not a period modeler.
Love the layout, looks like the Long Island I remember. I lived two houses from the Patchogue station for years.
Are you going to pick one paint scheme, e.g. Good Fellow, Worlds' Fair or mix things up?
Thanks Bob, I’m happy with this fleet. This is what would be seen in that era (1948-1955). Thanks Steve, I appreciate the kind words especially from someone of your caliber. I’m doing a lot of these tasks for the first time, so there will be a need for a redo every now and then. Thanks for the idea about the sidings, I never would have thought of that. Thanks for the kind words Scotie. That must have been an interesting location to live, very busy, but fun. I’d like to change the paint scheme on the RS-3 to the orange ends to match the other diesels. I’d also like to get rid of the Dashing Dan logo on everything. I wouldn’t mind making one of the engines Goodfellow gray. I think that’s sharp looking. And to have the right paint on the passenger cars. I think the Tichy scheme on the C-Liner is pretty nice too.
Andy
It is remarkable how far along you have come since 2013! Amazing job Andy
Mike and Aidan
Thank you Mike and Aidan! It’s been six years already! Wow, where has the time gone?
Andy
I'll have to check this out thoroughly. Just saw a link post here, can't wait till I get home to see.
Thank you Dave! I hope you enjoy it.
Andy
I’m working on the long retaining wall between the grade and the industrial area above. As with the small wall I recently posted, the wall and vertical pieces are 1/8” Masonite (hardboard) and the cap is 1/4” MDF. I’ve already glued the cap on, and today I’ll glue the vertical trim pieces in place. Then I’ll break all the edges (lightly sand) to get it ready for primer. The paint will adhere better than if all the edges were sharp. After that, I’ll spray paint it with the textured Desert Bisque I’ve been using and install it. Then I’ll give it a dark wash. It’s all one piece, and measures about 81” in length. The last picture shows where the wall will be installed. After the wall is in, I’ll put some basic ground cover down.
Andy


Excellent craftsmanship as usual.
Thank you Arthur!
Andy
Retaining wall is primed and ready for paint.
Andy


The retaining wall is now painted. I’ll let it dry thoroughly, and install it.
Andy


Looks very nice Andy. Are you using Rustoleum textured paints? I've used the gray/ black for my roads and it gives a nice finished appearance.


Thanks Bob. Yes I’m using Rustoleum Desert Bisque. I like your roads, the paint gives them a nice texture.
Andy
STEAMFAN77, Andy, I began at the very beginning of your post, from an empty room, to where you are at this time, Amazing. I like your bench work, your trackwork, your use of Signals, your Turntable, (is it a Millhouse?) Your sidings, your ballasting, your structures/buildings, and your fleet of motive power. What Control System or systems are you using? Lionel or MTH? It appears that your using Atlas O track, which turnouts are you using? Thank you for the pictures as they allow us to share in your progress of a fantastic layout. That’s why I really like this OGR Forum. Happy Railroading
Wow, Larry, thank you for the kind words. Good eye, yes, it is a Millhouse turntable. I’m using both MTH DCS, and Lionel Legacy. I’m using Atlas track and most of the turnouts are Atlas too, but where there are curved turnouts or the four way track in the staging area, I opted for Ross turnouts. I’ve learned so much from you and members like you. There are a lot of firsts for me when I started this layout. I’d never done many of these tasks until I built this layout. The benchwork, wiring, ballasting, buildings, and scenery are all firsts for me. I had an N scale layout on a 3’x7’ bench some years ago, and an HO layout when I was a kid, but nothing this large and with this much detail (the layout is 21’x32’ in an L shape). I’ve always been a big fan of the Long Island Rail Road (I grew up in Mineola), and certainly enjoy the history of the LIRR, and the Oyster Bay Branch.
Andy
I installed the long retaining wall and put down some basic ground cover. I made this wall the same as the small one I installed recently, because they are one continuous run. The last picture is an overhead shot, and shows how the two walls meet towards the top of the picture. I’m glad I finally got an opportunity to do this project, it’s been a long time coming. Thanks for looking.
Andy


Very nice work on all of it - retaining wall, ballast, ground cover, railroad right-of-way, upgrade and s-curve. I grew up near Mineola and rode the LIRR as a youngster, so I'm waiting to see your completed version of Mineola Junction and Nassau Tower. Your power plant model is superb.
MELGAR
Thank you for the kind words Mel. Mineola, Locust Valley, and of course the Oyster Bay yard had some pretty unique structures. I grew up in Mineola, and hope to do it justice as I bring it to life on my layout.
Andy
The wall looks great Andy. How did you do the curved section?
Bob
Thanks Bob. The wall is 1/8” Masonite, and bends very easily. I glued it in place, and for some extra holding power around the curve, I tacked in some finish nails.
Andy
I missed seeing your progress over the years. Retired now but work used to keep me away from home days on end. That's my excuse and I am sticking to it. Anyways impressed by your skill, talent, and vision. ![]()
Thank you Jackie, that’s a big compliment coming from someone with your abilities.
Andy
I finally got around to addressing the lift out section on my layout. I wasn’t happy with the fit, and decided to go with a hinged lift up section instead. I used some hinges I had hanging around, mounted on 3/4” blocks of plywood. The shiny track sections will be painted, ballasted, and then I’ll put down some ground cover. I’ll also paint the blocks to help them blend in a little better.
Andy


Andy,
That looks like you did a pretty nice job. the fact that its on a curve did not make it easier for you. One thought...maybe you can disguise your hinges with gluing piles of railroad ties as though the railroad was renewing ties and piled them in those three areas.
Tom
Thank you Tom, that’s a great idea!
Andy
I installed a short retaining wall on the other side of the lumber yard property. To the left of the notch in the wall is where the lumber shed will start. The first few pictures show the wall installed, then show it with some ground cover. The last two pictures indicate where the office and shed will be. The shed will be 8" wide by 16" long. The office and shed will be built sometime in the future.
Andy


Hey Andy, what is the material that leads up to where the lumber shed and such is(the Greg surface), foam board painted Greg or some other material?
Hi Dave,
The gray surface that is flush with the track height, and where the lumber shed will sit is Masonite spray painted flat gray. I'll do some weathering once the shed is built and installed. The material between the rails is joint compound dyed with black paint. Hope that answers your question.
Andy


Yes you did. Always good to find out what people use. Thanks Andy.
Andy, the quality of your modeling is top notch. I just discovered your layout thread and really appreciate the detail and regularity of your progress posts. I would love to see a layout plan with room dimensions so that the track work photos have a bit more context. If you did post a plan please provide a link. Or perhaps an overview video? Thanks in advance.
Ken
Glad to help Dave!
Andy
Ken,
Thank you for the kind words, especially from someone with your talent. My first post on the first page gives some background. My room is 21 feet by 32 feet. The track plan is attached to my first post, but I'm also attaching it here. If you have any other questions, I'd be happy to answer them.
Thanks,
Andy
While I was spray painting the newly installed track for the lift up section, I painted the hinges and mounting blocks, just so they don’t stand out so much.
Andy


Steamfan77 posted:Ken,
Thank you for the kind words, especially from someone with your talent.? My first post on the first page gives some background. My room is 21 feet by 32 feet. The track plan is attached to my first post, but I'm also attaching it here. If you have any other questions, I'd be happy to answer them.
Thanks,
Andy
Andy,
Thanks for sending me the .PDF of your awesome layout. I have a much better understanding now of the layout pictures you've posted. You and others like Norm C. and Craig Greathouse have inspired me to complete/improve my scenery. I especially appreciate that you are modeling real locations in O. Part of the reason I've been reluctant to finish my scenery is that Realtrax simply doesn't give me the scale look I want to see on the bridges and trestles that exist in Harpers Ferry. I'll be switching to Atlas O once I enlarge my train room (still working on getting a permit from the zoning commissioner (wife) ;-).
Here is a 1931 Harpers Ferry Aerial:
This is a RR-Track 3D render of my future Atlas O plan:
Ken


Ken,
In the planning stages, it took me a while to decide on the type of track. I chose Atlas, and I’m still happy with the decision. As far as the layout, a lot of these tasks are the first time I’m doing them. But through the talent on this forum (you included), books, videos, I’ve been exposed to many different methods and ideas. The only thing holding me back is my own abilities or lack there of. And believe me, not everything I’ve done has come out so wonderful the first or second or third try. But I’m persistent if nothing else ![]() . I think your new plan is great, and I look forward to seeing your progress. I hope you get approval from the zoning commissioner!
. I think your new plan is great, and I look forward to seeing your progress. I hope you get approval from the zoning commissioner!
Andy
I’ve come to the point of what to do about disguising the hinges on the lift up section. The photos below show newly installed, the hinges painted, and now disguised. I think it looks pretty good. I also put down some ground cover on the lift up section.
Andy


Andy,
I think that looks great. After I gave you the idea on the ties, I thought more about it that they would be banging against each other. The soft ground cover makes sense and blends in well.
Tom
Thank you Tom. And thank you for the suggestion about the ties. I like the subtle look of the shrubs. It doesn’t draw a lot of attention, just kind of blends in.
Andy
I made a few additions to the area near the lift up section. I disguised the hinges by covering them with some clump foliage. But per CSX Al’s suggestion, I added some variety to each area so they don’t all look alike. Below are some before and after pictures.
Andy


Steamfan77 posted:I made a few additions to the area near the lift up section. I disguised the hinges by covering them with some clump foliage. But per CSX Al’s suggestion, I added some variety to each area so they don’t all look alike. Below are some before and after pictures.
Andy
Looks fantastic! It’s been a wile... Any more progress on this layout?
Thanks DJ. Sadly, not much to report. I started a new job recently, and I’m getting that under control. I did buy some supplies for a scratch build I hope to start soon. I’ll post updates in the near future. Thanks for asking.
Andy
Steamfan77 posted:Thanks DJ. Sadly, not much to report. I started a new job recently, and I’m getting that under control. I did buy some supplies for a scratch build I hope to start soon. I’ll post updates in the near future. Thanks for asking.
Andy
Looking forward to it, congrats on the new job!
WOW, from beginning to Now, Fantastic work, Great trackwork, great scenic details, simply Amazing.....It takes a lot of time, work, Vision, and Patience, to do what your doing, Congratulations on the progress and folks should go back to page 1 to see how really far you’ve really advanced your Model Railroad.
Thank you DJ! Larry, thank you so much for the kind words. I have learned a great deal from you and so many other members. Inspiration, ideas, problem solving, techniques, and much more. I thoroughly enjoy this hobby. And thanks to this forum, I get to rub elbows with some of the best.
Andy
andy
Nice progress, One day I'll get there
Steve
Steve,
Sorry I didn't see this until now. Life events getting in the way for the past few months. In a few more months things should calm down. You are welcome here any time. I'm in the process of building my first scratch built structure. I'll post pictures soon.
Andy
Andy
I'll have a table at the Sept 22 Northern Spur swap meet in Lindenhurst. There is a thread and flyer posted on the main thread. We can arrange a time to visit your layout Steve
Sounds great Steve, I’ll see you there.
Andy
I started my first scratch build. It’s the Section Shanty that was in Mineola where the Oyster Bay Branch comes off the main. I’m using Styrene for this build. The first two pictures show the end pieces cut. The third and fourth pictures show the base trim added to all of the pieces. Progress is slow, but I’m making some headway.
Andy


Very nice Andy.
I'm going to try and stop by the show next week in Lindenhurst.
Bob
Great Bob, I’ll see you there. What time will you be going?
Andy
Not sure yet. Depends on what other plans the CEO has for me next weekend. ![]()
The top half of the walls are a cream color, not white. The bottom half is Hunter green. The cream color is on the left and unpainted white is on the right. I wanted to see how different the painted top section looked.
Andy

Andy,
It's hard for me (maybe only me) to see too much of a difference in the colors. Cream and green seem like good colors though. Thanks for sharing your progress.
Tom
Thanks Tom. The picture doesn’t do it justice. There is a decent difference in person.
Andy
I painted all of the walls before assembly. I thought it would make my life a little easier.
Andy


I agree, I like painting wall sections before assembly! I think it is looking good!
Thanks Mark! I think I should have painted the inside of the walls before assembly. Lesson learned.
Andy
I added the corner trim also painted Hunter green. And I made the roof trusses.
Andy


Andy you are making good progress. This is going to be a nice addition.
Do you plan to add lighting?
Please check your messages and get back to me when you have time.
Thanks
Bill
Thank you Bill. Yes, I do plan on adding lighting, but I’m not sure how to go about it. I’ll need to plan that out a little.
Andy
I had to add a heavier piece of styrene to the bottom of the trusses to straighten them. The original piece was too thin and as a result they were all bowed. I put some base molding around the whole structure to give it a finished look, but also to cover up a few goofs. In addition to that I installed the bathroom walls. I will add a simple sink and toilet with a door.
Andy


Isn't that the purpose of baseboard and moulding on 1:1 scale structures? To hide goofs. There are always places that need extra support on our model buildings. Looking good!
Nicely done!
Peter
Thank you Mark and Peter!
Andy
Andy I just thought about the possibility of light bleeding thru the styrene. Not sure if this would be a problem or not. We have only done one styrene building and painted the interior walls.
Looking good.
Thanks Bill, I’ll be doing just that. I was concerned about that too.
Andy
Any progress to report Andy?
Have a Merry Christmas and Happy New Year!
Bob
Thanks Bob, Merry Christmas and Happy New Year to you and your family. Small progress, I’ve been slammed at work. I painted the roof trusses brown, and made a smokestack from tubular styrene. I also painted the roof sections a flat black. I did cut, paint and made the mortar joints for the chimney. The mortar is dry on the two pieces on the right but still drying on the two pieces on the left. Not as much progress as I would like, but it’s still something.
Andy


Made some progress on the section house I’m building. I painted the inside walls, and I installed a few beams to stiffen the structure, and installed the windows and interior door for the bathroom. The notch in the base plate on the outside is where the chimney will go. I want it to for tight to the building.
Andy


Andy, The section house is looking great! I have always liked two tone siding on buildings!
Thanks Mark! I have a few more pictures to post over the weekend.
Andy
I installed the chimney and got the roof on. Also worked on a few detail items.
Andy


![]()
![]()
![]()
Nice work Andy!
Andy
Having lived on the Island from the 40's to the 60's I love your work. Really capturing the LIRR.
Andy, do you have a source for the chimney ? Or is it styrene cut into strips. I’m scratchbuilding a milk dairy. I like the look of yours hugging the building and the cutaway in the roof.
Thanks Bob! Scotie, high praise from a former Long Islander! Dave, the chimney was cut from strips. Plastruct item# 91613, backed with sheet styrene to add some stiffness.
Andy

Access to this requires an OGR Forum Supporting Membership


")
")