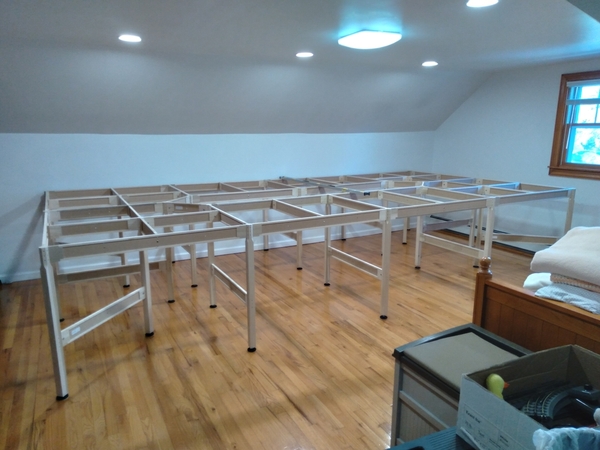
At the suggestion of others here on the OGR Forum, I will commence with a time-to-time update on the progress of my new layout. It is located in a second-floor, climate controlled shared room. The size is 8'x16', Mianne benchwork and will be Hi-Rail. From learning here on the forum, I have decided to use Baltic Birch Ply over homasote (thanks GunRunner John!) as the base material.

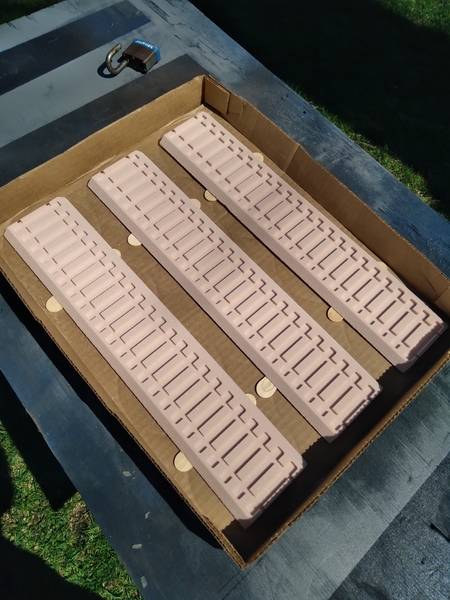
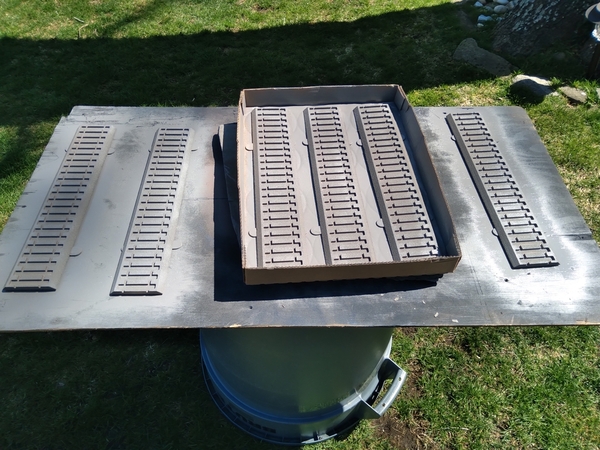
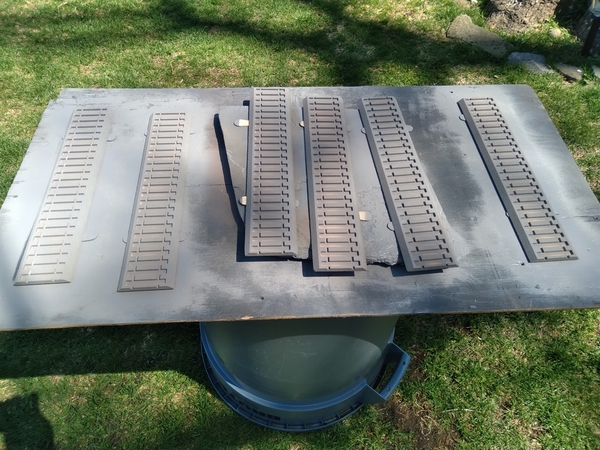
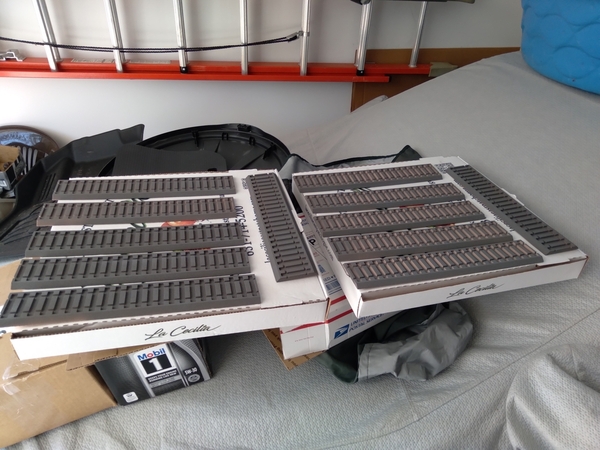
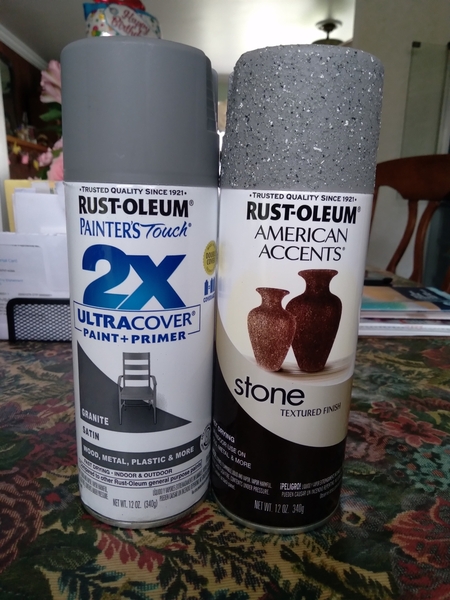
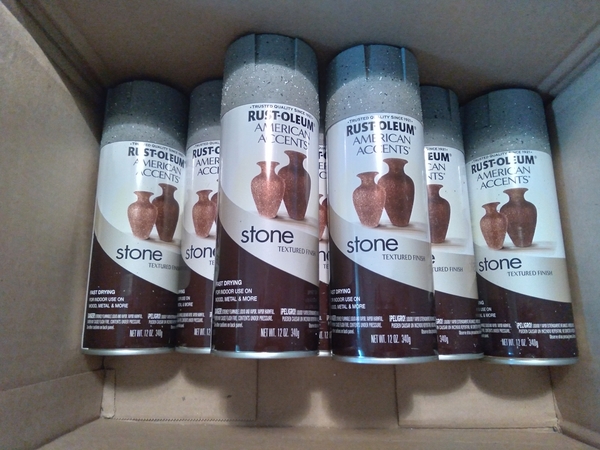
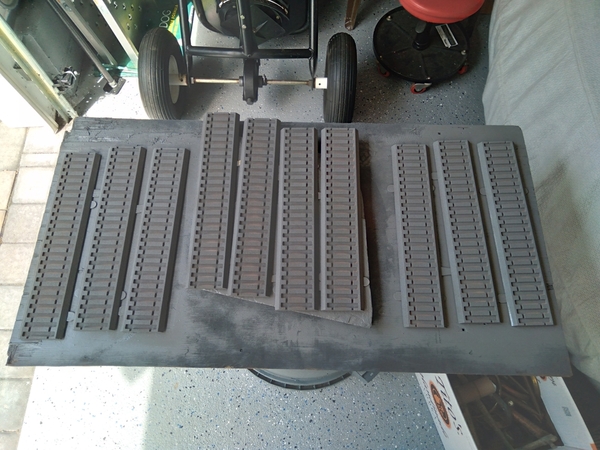
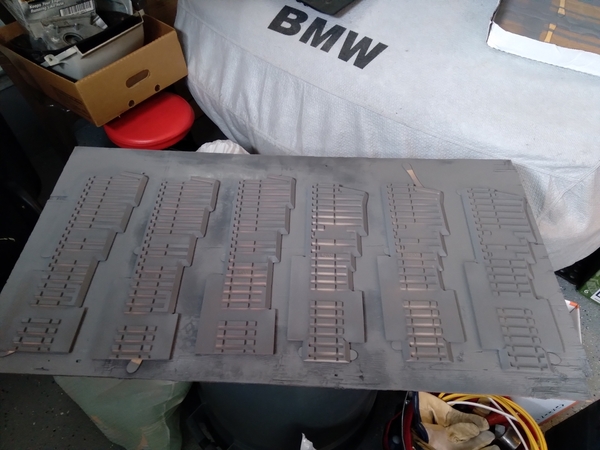
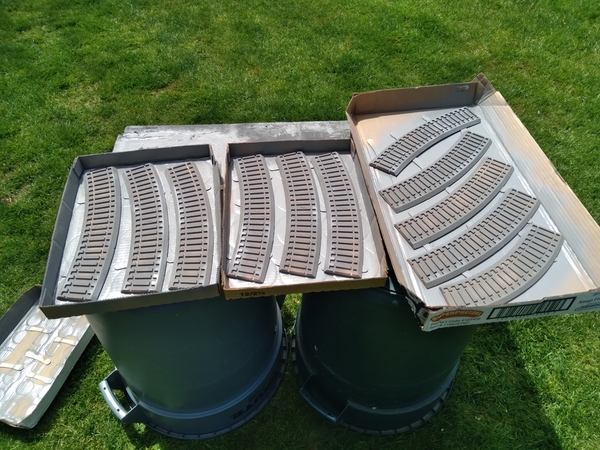
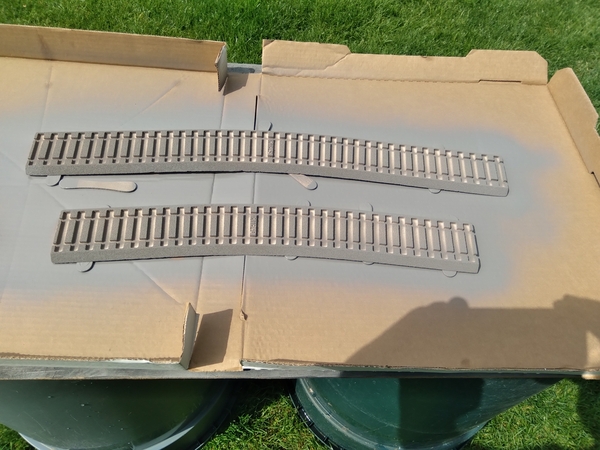
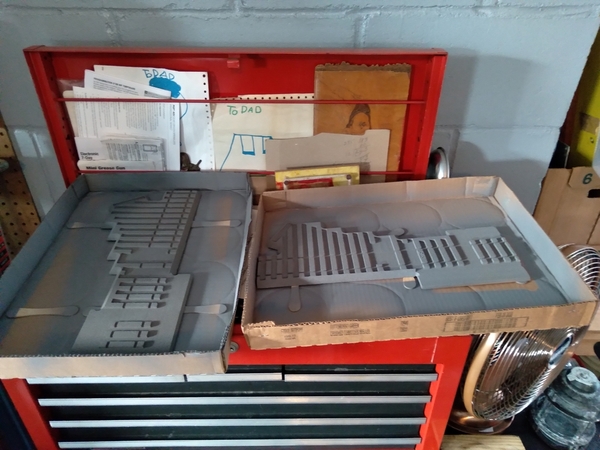
Track and switches will all be Ross over RossBed. From the experience of Putnam Division (thanks Peter!) I learned the best way to prepare the Rossbed. Base coat of grey primer, then followed by a topcoat of Rustoleum Stone grey for simulated ballast. All that material, except for the paint has been delivered. Still awaiting more primer and restocking of Stone grey for finishing. This will take time. Today I painted twelve more pieces of RossBed 14.5" straights using two methods learned here on another thread, and I have come up with the one I like best combining two styles into one.

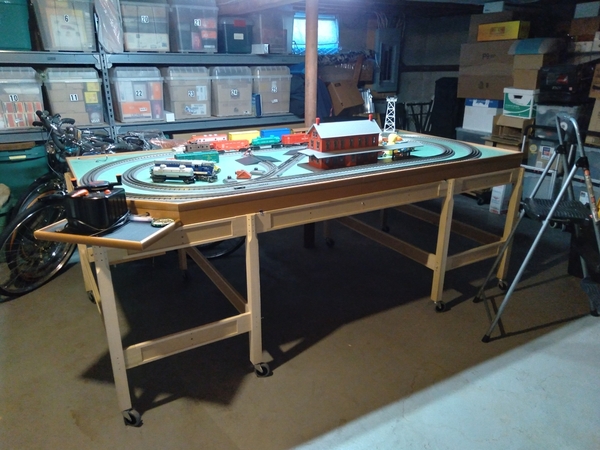
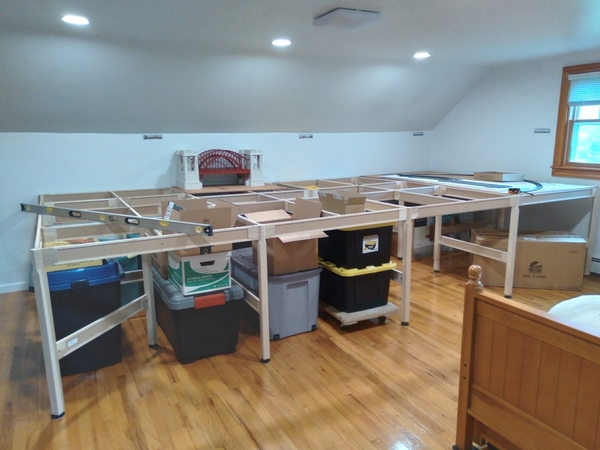
Here is the benchwork installed:

Sample For Emails

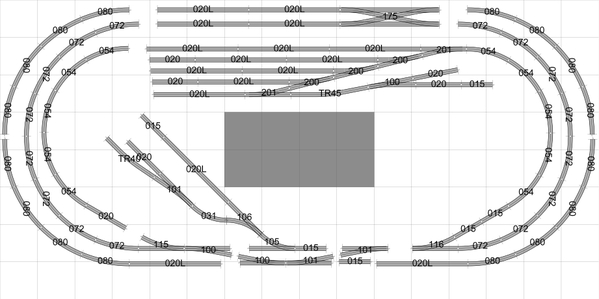
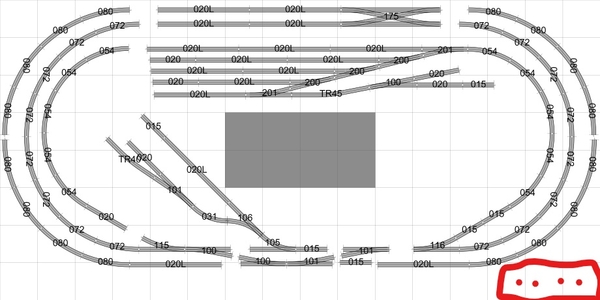
And here is the track plan, needs a brush-up to connect the loose ends:

Ross 8x16

Attachments

Images (2)
  • Sample For Emails
  • Ross 8x16
Last edited by 452 Card
Original Post

Replies sorted oldest to newest

Peter-

Last time I was at York was 2014. This might sound like heresy, but I think I have acquired all the locos and rolling stock I need. Here and there I grab an item, but my take on the hobby is to model the LIRR and PRR from the 30s to the 70s. So far I have all the psgr equipment I need to interchange engines between the eras while the coaches remained unchanged until the 90s. And since Mike Wolfe retired, there seems to be no one doing anything LIRR any more unless a local club car run that we never ran on the LIRR.

I have all the buildings I can fit in the open spaces on the track plan, and probably too many. I also stocked up over the years on "little people" and die-cast vehicles, signs, and who know what else is packed away. All of this was kept in mind over the years as I polished the track plan with nowhere to put it, so I was limited to a 4' x 8' layout until now.

The supplies I'll need to decorate the layout are really what I am lacking, such as walls, trees, shrubs, grass etc. But I am starting to see online "out of stock due to supply chain issues" a lot.

So, no York for me. I miss the bandit shows that were starved out, and I never went to the Billy Budd. I guess I have become an internet collector/operator now.

April 18, 2022:

The last painting session yielded sixteen 14.5" straight RossBed sections undercoated enough to be ready for their final coat. The rattle-can sounded almost totally empty so I stopped there with no more paint to follow up.....

Searched today online for store availability for the primer. Although the HD site says its in stock, it was not. HD ApronGuy in the paint aisle used his device on the SKU and reported that there is none to be had on LI and even Connecticut. Sooo..I guess its either discontinued or its "supply chain issues".

I can supposedly get it from Amazon if I don't mind paying almost double per can. I'm not that desperate yet.

Rare birds:

20220418_113214

Attachments

Images (1)
  • 20220418_113214

News update!

Just called Rustoleum to see if the primer has been discontinued, and found out it has been out of production for six months, and that it is a Home Depot exclusive. BUT: it is back in production and just re-released to stores. The guy told be to wait a bit and I will find it at HD soon. Yay!

Can't explain why WallyWorld had two cans to sell, however.

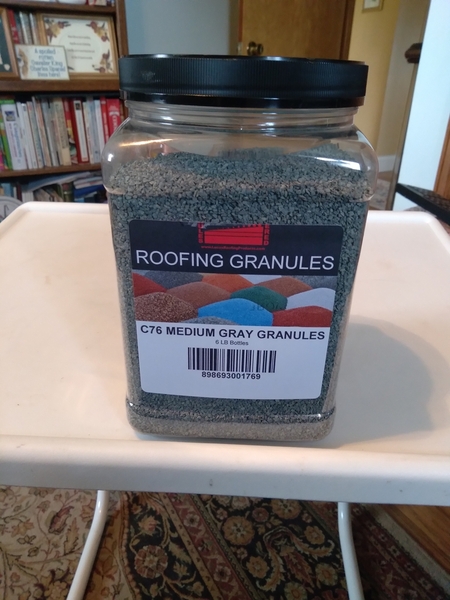
Just ordered 6 lbs. of roofing granules on Amazon to use as ballast. Lucas C76 matches well with the Rustoleum Stone gray topcoat for the RossBed. I don't need a lot because I will only touch-up the RossBed on the switches to lose the saw tooth look where the ties widen out. Its early in this project to buy this, but as everything else now, it may not be available down the road.

Now to find Baltic Birch plywood at an affordable cost- That is a challenge.

@452 Card posted:

At the suggestion of others here on the OGR Forum, I will commence with a time-to-time update on the progress of my new layout. It is located in a second-floor, climate controlled shared room. The size is 8'x16', Mianne benchwork and will be Hi-Rail. From learning here on the forum, I have decided to use Baltic Birch Ply over homasote (thanks GunRunner John!) as the base material.

Track and switches will all be Ross over RossBed. From the experience of Putnam Division (thanks Peter!) I learned the best way to prepare the Rossbed. Base coat of grey primer, then followed by a topcoat of Rustoleum Stone grey for simulated ballast. All that material, except for the paint has been delivered. Still awaiting more primer and restocking of Stone grey for finishing. This will take time. Today I painted twelve more pieces of RossBed 14.5" straights using two methods learned here on another thread, and I have come up with the one I like best combining two styles into one.

Here is the benchwork installed:

Sample For Emails

And here is the track plan, needs a brush-up to connect the loose ends:

Ross 8x16

Looks great!

Who makes that support you have there?

Last edited by Robert Cushman

Robert,

I think you mean the benchwork? Mianne Benchwork of Attleboro, Mass. Tim Foley is the owner and has been around for a while. It is a superb product made of poplar and can easily be added to, or taken down. Its pricey, and it also saves the pain of buying crooked lumber at the "box store", and maybe not sawing off your fingers.

I also recently bought from them a 4 by 8 frame to use on my former layout relocated to the basement. Tim worked with me to supply a different fastener on the bottom of the legs to support casters so I can move it.

Be advised- It will take 4 to 8 weeks for delivery. He is also a cabinet building shop.

20/20 Hindsight about Benchwork ...

I designed and built my 15x19-feet L-shaped layout with hollow-core doors (extended by one foot) covered with green patio carpeting and perimeter fascia.  The platforms are supported by SKIL plastic sawhorses. The three doors (plus a half-length door) worked for me, except ...

Now 82 years young, I'm thinking about what to do with the layout after I board the Finale Express for a one-way trip to Celestial Station. The layout platforms are clamped together in alignment (no bolts), but the tracks and underneath wiring paths cross all the joints. So taking it apart for delivery to the next owner and subsequent re-installation will be a challenge.

Which explains 20/20 hindsight. I should have purchased and installed Mianne Benchwork. When necessary, it's easy to separate, transport, and re-configure. At Joints in the tabletop, one could install terminal strips underneath at the boundaries for convenient disconnection and re-connection of wire paths at the new location.

When building a layout, probably the last thing on one's mind is ... what will happen to it after ...

Mike M.   LCCA 12394

April 21, 2022

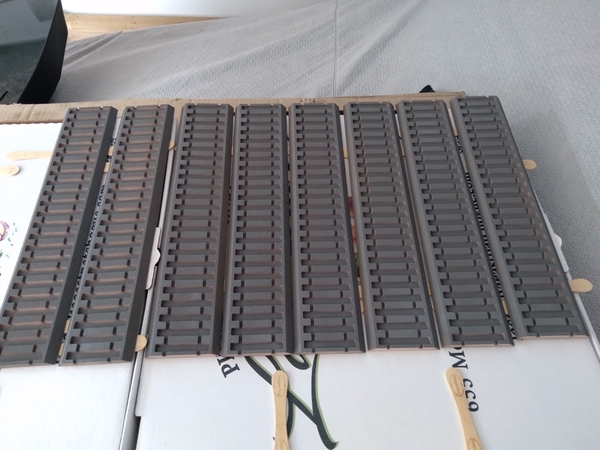
Prime-coated eighteen more 14.5" sections of RossBed this morning. Just a bit left in the can, it sounds pretty empty. The weather is closing in and that's it for today while the pieces dry in the garage. I'm glad I saved all those Haagen-Daz ice cream sticks. Sixteen more 14.5's to go next.

20220421_11274920220421_112807

Attachments

Images (2)
  • 20220421_112749
  • 20220421_112807
Last edited by 452 Card

Yes Peter,

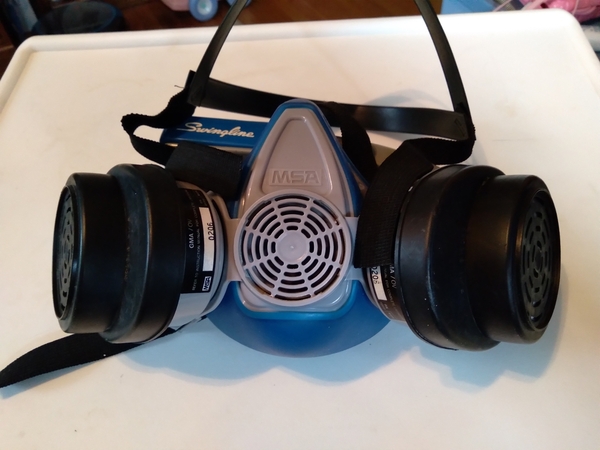
Its the only way I will use spray bombs, because the overspray and fumes just ruin everything indoors. The work is done on an old 1/4" piece of ply that I use for spraying on, over a waste can with a weight to keep the whole works from tumbling over when the wind kicks up around these parts. By noon spraying outdoors is not an option. AND- I'm wearing a respirator.Respirator

Attachments

Images (1)
  • Respirator

Ballast arrived today. 6 lb. jar of roofing granules from Lucas Roofing Products. If you buy it in the 5 Gal. bucket its much cheaper, but I don't need that much. Just doing the "sawtooth" edges of the RossBed for the switches, of which there are sixteen. I might mix it with a little white to break up the straight gray color to match the paint with the white flecks.Ballast

Attachments

Images (1)
  • Ballast
@452 Card posted:

Ballast arrived today. 6 lb. jar of roofing granules from Lucas Roofing Products. If you buy it in the 5 Gal. bucket its much cheaper, but I don't need that much. Just doing the "sawtooth" edges of the RossBed for the switches, of which there are sixteen. I might mix it with a little white to break up the straight gray color to match the paint with the white flecks.Ballast

Definitely interested in seeing how this turns out, especially if it's significantly cheaper than commercially produced & sold ballast.  Great luck w/the layout! 

- Neal

Neal,

The price was $40 for the 6 lb. container, which is higher than the 5 lb. price for Brennan's. But the shipping from Brennan's is $15.50, so I went the route of one more pound vs. cost to get the Lucas product on Amazon Prime. As far as I am concerned, the two products are the same thing, just different colors. I will not be using it any time soon, still have not found the Baltic Birch ply for the base, and family invasion this weekend stalls all progress because the room is shared with a trundle guest bed.

Painted twelve more RossBed units today. 60 more units to go for priming.

Bill,

No paint for the underside of the RossBed, its unnecessary. I don't get what you mean about sealing the plywood, it will have homasote over it. As far as securing the track/bed assembly- maybe a few drops of glue here and there under the RossBed, but everyone says it stays put once the area around it is sceniced. (scenicked?)

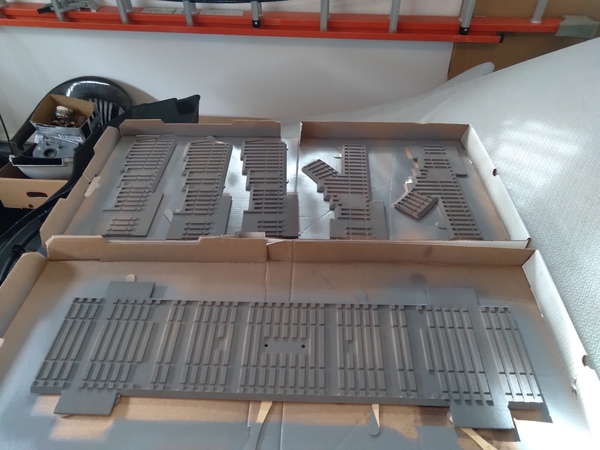
Finished painting the base coat on the RossBed for all the switches today. All the switch beds are done for now awaiting the top coat of the fleck paint, including the big daddy for the 175 X-over. Next are the curve sections.

So far, including the big piece for the 175 x-over, 80 pieces of RossBed have been prime coated. That is an average of 17 units per can of primer. 53 pieces for the curves await basecoating.


Switch RossBed1Switch RossBed2Switch RossBed3

Attachments

Images (3)
  • Switch RossBed1
  • Switch RossBed2
  • Switch RossBed3
Last edited by 452 Card

The latest-

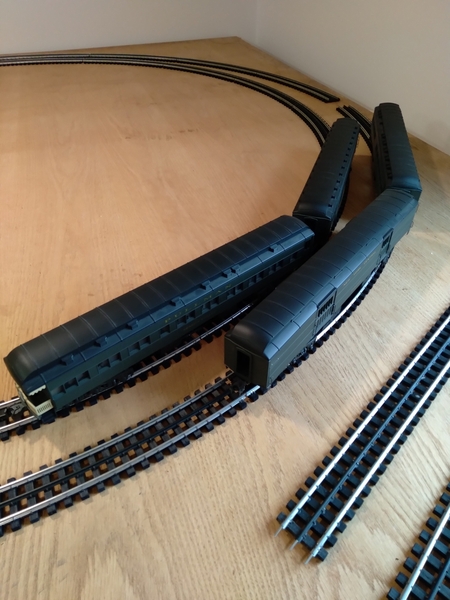
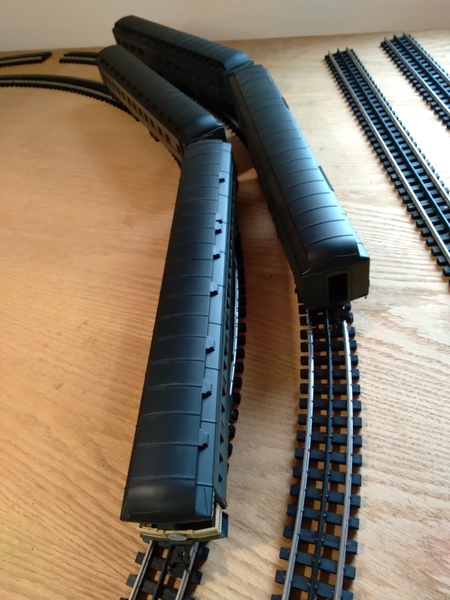
All 121 pieces of RossBed completed with base coat paint. Initial clearance testing on the 072 and 080 curves done today using Lionel 18" heavyweights. Next test is the Alaska Superliners, the K-Line scale aluminum NYC cars, then the Postwar Lionel 6518 transformer car. Yet to be temporarily put up is the 054 inner track, so all tests will be redone later. I would like to install the backdrop now that I have an idea of how it will look with the MTH HG bridge in a location near where it will permanently be. It looks so much smaller on the table out of the box.Clearnce 1Clearance 2

Attachments

Images (2)
  • Clearnce 1
  • Clearance 2

Nein,

2002 e39 M530i. Sport/Premium packages, and ordered way before the modern M430i and Mxxxxi etc. became the new nomenclature.

I guess I was ahead of the times in 2002 when it was delivered. M steering wheel, M-technik rotors and brakes, 2" lower with M-technik springs. No M engine. Even the shifter knob has an M on it. Who knew?

Given BMW has taken to call these cars M-Technik that are being sold now, I am using the M530i badge as a non-poseur. I created it.

@452 Card posted:

The latest-

All 121 pieces of RossBed completed with base coat paint. Initial clearance testing on the 072 and 080 curves done today using Lionel 18" heavyweights. Next test is the Alaska Superliners, the K-Line scale aluminum NYC cars, then the Postwar Lionel 6518 transformer car. Yet to be temporarily put up is the 054 inner track, so all tests will be redone later. I would like to install the backdrop now that I have an idea of how it will look with the MTH HG bridge in a location near where it will permanently be. It looks so much smaller on the table out of the box.Clearnce 1Clearance 2

Is that oak for your top?

@452 Card posted:

Nein,

2002 e39 M530i. Sport/Premium packages, and ordered way before the modern M430i and Mxxxxi etc. became the new nomenclature.

I guess I was ahead of the times in 2002 when it was delivered. M steering wheel, M-technik rotors and brakes, 2" lower with M-technik springs. No M engine. Even the shifter knob has an M on it. Who knew?

Given BMW has taken to call these cars M-Technik that are being sold now, I am using the M530i badge as a non-poseur. I created it.

Nice! I have a 2003 E46 330i I have owned since new. I have a similar cover and your car looked about that size and shape from what I can tell. Mine is Electric Red with Black leather, Sport Pkg, 6-speed and no moonroof.

Last edited by Randy_B

Robert,

Its an oak-faced 1/4" plywood sheet thats been kicking around here for the last 33 years. It was supposed to be used in a carpentry project that never happened. I'm using it temporarily as a tabletop to perform clearance tests and track layout measurement. The final tabletop will be 1/2" Baltic Birch plywood under homasote.

Back in the day when I bought it, it was $80.00. Seems like a pittance with today's prices. At some point it got wet, so now its just a work support.

Hi guys,

Please keep up the good updates on this topic.  I'm somewhat behind you guys.  Just started the base coat primer on my cork.  My Mianne is about 20% standing tall.  Plan on using Baltic Birch and Homasote as my two bases as per Gunner's suggestion.   My problem, got too many irons in the fire.  But I luv it, wouldn't have it any other way.

My Best Regards,

Tommy

From another thread on this forum I became aware of the GarGraves pigtails for connecting track power (thanks Peter!). Does anyone have experience with this product as far as wiring Ross switches? The mainline connections are no brainers, but looking at Steve's connection diagrams I'm a little confused since I don't have advanced electrical skills. This falls in the thinking ahead phase of construction.

I posted this on Putnam Division's new layout thread, but it also belongs here. This is the lighting arrangement installed by my son-in-law who is an electrician. Two banks of Halo recessed LEDs wired to be controlled separately or together, meaning each side or both. The existing "pillow" LED was in place originally. Material obtained at Home Depot in a six-pack. All are dimmable. HD didn't have a dimmable LED control, but I sourced it on Amazon, $67.

Lighting

Here is the control. Slider is for the pillow light. Sorry for the crummy pic.

Lt. Control

Attachments

Images (2)
  • Lighting
  • Lt. Control

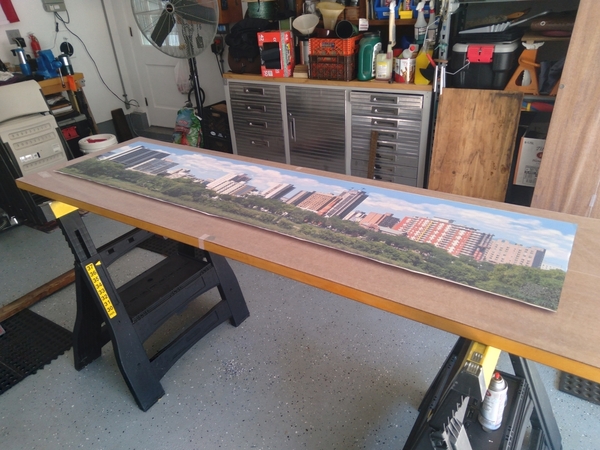
Planning the backdrop installation today. I am straying from convention by attaching the backdrop so it can be removed in the future. After checking all the sources for O-gauge backdrops, I settled with SceniKing from Ontario, Canada. Trying to find a continuous scene that would blend together, but also segue from city on the left to rural on the right over a distance of 28 feet was not easy. Les Mavor is the owner and has many available scenes in many scales.

My plan is to model the LIRR, condensed from NYC on the left out to the end of the Island at GY/MY on the right. Because there is a knee wall on the long side of the layout, I am limited to a height of 18" above tabletop and still have enough of the backdrop visible to provide the "looking into the distance" effect.

Five panels of the material that they make lawn signs with were ordered from a local sign shop. Each panel is 16" high and 72" long.

Backdrop stock

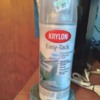
The SceniKing panels are 17" high and 72 1/2" long, allowing for adjustment to size needed. I plan to glue the scenes to the sign board using Krylon Easy-Tack 7020 repositionable adhesive as suggested by Les. Then, after the assembled panels have dried, they will be installed on the wall using clear mirror clips. This is all being done as the reasoning is that when we move (maybe 5 to 10 Years) I can remove the backdrop with not having to peel it off the wall and maybe damaging the drywall, with only having screw holes to repair and paint.

City Scene BD

Its been so hot and humid here, however and nothing as far as assembly of the panels has occurred. The work needs to be done outdoors to avoid overspray on the floor. Found the adhesive at a local Hobby Lobby.

Krylon

Attachments

Images (3)
  • Backdrop stock
  • City Scene BD
  • Krylon
Last edited by 452 Card

Its a year and six weeks later. Last years' 9-week drought, leading into winter and then a new kitchen have passed. The weather here is perfect for resuming work needed to be done outdoors (and in the garage), so its time to get the backdrop panels glued up and installed.

Test piece to get a feel for spraying the adhesive:

1

I used two perfectly flat doors as an assembly "press". Both covered in wax paper to prevent accidental attachment of the panel to the wood:

2

First panel glued up and centered on the backing:

3

Second door used to sandwich the glued panel. This ensures the scene is flat with no bubbles.

4

Added some weight to keep the pressure on the "sandwich":

5

And the next panel ready for the same operation. There are a total of five.

20230901_143739

I let the units dry for two hours, then move on to the next. I won't go on about the rest because its repetitive. After all the panels are prepared, the next task is to install them on the wall behind the gridwork. More later......

Attachments

Images (6)
  • 1
  • 2
  • 3
  • 4
  • 5
  • 20230901_143739
Last edited by 452 Card

OK, we have a setback. After the first two panels were done on the same day, they were both put in an air-conditioned room where the layout is. The next morning I found them with air bubbles all over them. I either used too much glue, or I did not leave them in the "press" long enough.

The third panel I did yesterday is still in the press in the garage. As of now, its dead flat. Its been there for 32 hours now and I will bring it in later tonight.

Luckily, I can slowly remove the first two panels from the backing to re-do them, but rain is coming so they will have to wait due to humidity factors.

Apparently, this part of the project will take a bit of time.

And I forgot to mention, the wife's car lives in the garage, which is why this is so weather-related.

Last edited by 452 Card

So on we go. I have learned to accept the bubbles in the panels, they only appear under lighting, but not in a darkness scene. I can live with that, and redoing the bubbly panels is not a good idea. Know what? Don't tell anyone unless they see it! Here is today's work with wifey, who is a great helper and idea maker. Starting to put up panels from left to right, with the scene overlap under the left panel as we go.

Left end panel that (kinda) represents NYC east manhattan to the east river:

005

Next panel is the one that will be behind the MTH Hellgate Bridge, that segues into a suburban scene. We have been using 1/4" mirror clips that capture the backing perfectly. The method we use is after the panels are prepared, we use a plastic tile end strip moulding that captures the assembled panel and holds the panels without any glue. here's a short shot of the assembly for the bottom panels:
002003

Hellgate panel section:
007

And the progress that ended today:

009011012

Getting there....

Attachments

Images (7)
  • 005
  • 002
  • 003
  • 007
  • 009
  • 011
  • 012

Thanks Mark. We cut and glued up the remaining three panels today. They are in the press in the garage for the next 24+ hours. Hopefully we don't get any more significant bubbling of the paper. I think I used too much glue for the first three and took them out of the press too early. Time will tell.

The weather here on Long Island was fantastic yesterday and today, so we took advantage of that. Rain coming soon, though. Next post will be final installation of the panels and viewing test with the HG Bridge in place to check perspective.

Add Reply

Post
The Track Planning and Layout Design Forum is sponsored by

AN OGR FORUM CHARTER SPONSOR

OGR Publishing, Inc., 1310 Eastside Centre Ct, Suite 6, Mountain Home, AR 72653
800-980-OGRR (6477)
www.ogaugerr.com

×
×
×
×
Link copied to your clipboard.
×
×