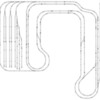
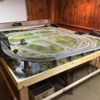
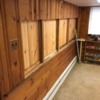
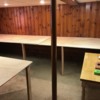
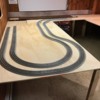
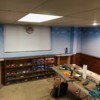
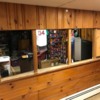
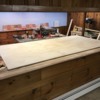
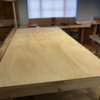
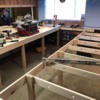
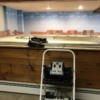
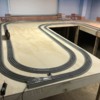
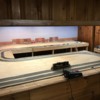
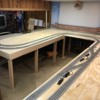
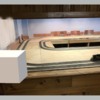
Starting demolition of my old table top track in preparation of a new around-the-room layout with a separate staging yard. The layout will be about 10' leg x 12' across x 14' leg and will be similar to the attached SCARM plan (thanks to everyone on the Forum who helped with the design). The layout is located in a "train" room in the basement and there will be a separate 4' x 10' staging yard on the other side of a wall that separates the train room from the rest of the playroom.

The wall is not structural and I will be cutting a large part out of it to be able to see from one area to the other. I'll be running Legacy (from the old layout) and adding DCS and Wi-Fi.

I hated to take the old layout down, but this one will be bigger and offer more "playability".  I will keep posting on my progress as we go along.


Last edited by Richie C.
Original Post

Replies sorted oldest to newest

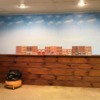
With deconstruction over, I was able to get one wall of the layout covered with my wispy clouds backdrop from Hobby Lobby.

Because the walls are tongue-n-groove knotty pine, I had to first cut and install 1/8" thick Masonite boards from Lowes, which have a smooth white surface on one side. I applied the paper cloud backdrop to the Masonite boards while flat on the floor using a "workable" spray adhesive and then tacked the boards up with a brad nailer using 1 1/4" brads at the top and bottom. The top will be covered by a 1" trim molding painted sky blue and the bottom will be covered by the plywood and foam layout base.

Hopefully, I can finish the other walls at night this week.

Attachments

Images (1)
  • CLOUDS

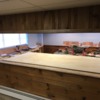
Got a little more done this weekend - the window in the wall is done and the cloud backdrop is all up. I also trimmed the wall cutout with some molding and tried to match the color of the old walls with some stain and polyurethane. The post at the far end of the wall is cosmetic only for now. The wall doesn't need any support at that end - it just sort of looks funny without any support. I may take the post out and put a cleat up instead.

I also bought some building flat sheets and glued them to 1/4" foam board to give them some depth. Right now they're just laying against the wall. I don't want to mount them permanently until I get the plywood and foam board down and can set them at the correct height.

Attachments

Images (6)
  • TRAIN ROOM CLOUDS
  • WALL PARTIAL VIEW FROM PLAYROOM I
  • WALL PARTIAL VIEW FROM TRAIN ROOM
  • TRAIN ROOM MOLDING
  • BUILDING FLATS - NOT HUNG
  • BUILDING FLATS II - NOT HUNG

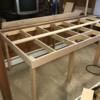
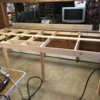
Got a fair amount of work done this weekend - basically building the bench work for the leg of the "U" next to the wall with the "window" I cut out. Basic construction was 1 x 4 with 2 x 4 legs, although I have quite a bit of scrap wood left over from other projects that I need to use up so there are some mixed 2 x 3 legs, etc.

Frustrating, because it's hard to find straight pieces of lumber at my local boxstores. Seems like I have to go through 10 pieces just to find one straight one.

The "left" side of the plywood will lay on the 3/4" thick ledge sticking out from the "window wall" so a ledger board was mounted just below that ledge and the cross-pieces mounted to that. The result is the benchwork is 3/4" lower than the ledge. In order to compensate, the legs were mounted 3/4" taller than the framework and 3/4" stock was added along the perimeter and a 3/4" thick 1 x4 was added down the middle. The plywood sheet will rest on all those (and the ledge) and makes a solid and level connection - almost like L-girder construction. Tough to see with the carpet, but the legs also have levelers installed at the bottom.

The cross-pieces were pre-drilled with 1 1/4" holes for wiring using a Harbor Freight drill press and Irwin auger bit. Other than that, it was pretty much straightforward construction and the other side of the "U" will be built in a similar fashion. Once those are done, I can finish whatever is left at the bottom of the "U".  

The wider "gap" in the two cross-pieces near the top is to accommodate an access hatch.

On the other side of the "window wall" in the playroom, another plywood sheet will butt up against the one in the photo to create  a 40" x 10' yard. The area on top of the ledge, itself, is about 8" wide and I haven't decided how I'm going to use that 8" x 10' space maybe grow spaghetti). I'll leave a gap in the plywood near the top at the window to extend wiring for the yard from the train room into the playroom, so I don't have to drill through the bottom of the wall. The plywood will be covered by 1" thick foam board, so the gap will not show.

Rich - I was lucky enough to get his autograph on the shirt a few years back, but never found time to get it framed. The rest of the playroom has similar stuff. I've been slowly getting rid of anything not autographed on e-bay and Craig's list.

Alex - I had thought of adding a reversing loop (see the attached SCARM file), but felt it took up too much room for the scenery and accessories I wanted to add. I am also changing the right side of the mock-up I posted to straighten out the run (it was too curvy in my opinion) and will add a couple of O-72 crossover switches there.


Attachments

Images (7)
  • FRAME -1
  • FRAME - 2
  • FRAME - 3
  • FRAME - 4
  • FRAME - 5
  • FRAME - 6
  • TEST SKETCH 2

Richie,

You're certainly make some good progress.  To alleviate frustration, I would suggest buying NO lumber from a "big box" outlet.  Find a local lumberyard if you have one near you, and look for 2x4s milled from Douglas Fir.   For your pine, go to the local guys as well:  cleaner, straighter, with better service and good advice.  I learned this on my first layout...

You may want to consider some additional sidings to accommodate switching/industrial sites, as your hobby interests may broaden over time

Don

Don,

You're right about the lumber. I do have Moynihan Lumber close by, but the convenience of the box stores and their prices and my 5% discount are always too tempting.

As to the additional sidings, I'll re-visit that issue once the benchwork is done and I can mock up a full layout and see what structures fit and where I can add an industrial siding(s) and maybe a coal tipple or something similar.

Thanks

Got most of the "right" leg of the U shaped layout done this weekend. Have to make the final connection at the end near the window and then will just have the small center section to complete. The area behind the diagonal brace will be an access hatch to get to the hard to reach places.

I was using a drill press and a new auger bit to pre-drill wiring holes in the cross-members. I used a scrap piece underneath to minimize chip-out and clamped each piece of wood down before starting.Once the basic framework is completed I will pre-wire from the top-side, which should be much easier than crawling on my back. For what it's worth, my experience is that the auger bit jammed frequently, just when the auger blades hit the wood, unless I went painfully slowly.  I next tried a hole saw, which cut great and had much less sawdust (because you're just cutting a circle and not the core of wood). The problem with the hole saw was that the core wouldn't come out easily and I basically had to un-chuck it and did-assemble it on every cut to punch out the core - very time-consuming. I finally settled on a spade bit which didn't jam and cut pretty quickly.

After the basic benchwork  is completed, I'll start on making a shelf and supports under the center section to hold all the electronics. Also, the wire spools and terminal blocks came in from Del City Electric.


Attachments

Images (3)
  • Frame - 7
  • Frame - 8
  • Frame - 9

BTW - There are two vertical 1" copper heating pipes (one on each side of the cut-out wall) about three feet tall that are visible in some of the previous pictures that I'm trying to figure out how to disguise (black foam insulation, pvc, wood box, etc.).

They are too tall and thin to be silos or water towers or tanks.

If anyone has any ideas, especially what to disguise it "as", it is much appreciated.

I know what you mean about big box stores, was in Home Depot this weekend and looked at pine boards I could use to build the layout I plan on doing and it was depressing, the lumber almost universally was warped and my layout will require long, straight boards, something apparently they don't know what that means. 1x4, 2x3, 2x4, same problem, warping all over the place, in large part because they likely got wet at some point.  When I get around to construction I am going to order from the lumber place close to where I live, it costs me a bit more but I get straight lumber in the sizes I need, including 10' pieces, and they deliver it for free over like 100 bucks which this easily will be. Just not worth my time trying to go through piles at Home Depot or Lowest, and then find that as much as I tried the boards either develop kinks or had them and I got too tired to notice. 

If you look carefully in the Frame 9 picture you'll see that I had to buy a white primed 1x4 at HD just to get another straight piece. At least I'm almost finished with the part of the layout in this room, but I still have a 4' x 8' module to build on the other side of the wall. Now that the weather is starting to warm up and I won't freeze in their outdoor sheds, I'll head over to the local lumber yard to order all the wood for that part.   

Richie C. posted:

BTW - There are two vertical 1" copper heating pipes (one on each side of the cut-out wall) about three feet tall that are visible in some of the previous pictures that I'm trying to figure out how to disguise (black foam insulation, pvc, wood box, etc.).

They are too tall and thin to be silos or water towers or tanks.

If anyone has any ideas, especially what to disguise it "as", it is much appreciated.

I only see one, in the corner to the left of the window.  I would try to cover it, with a piece of crown molding used vertically, instead of horizontally.  Crown molding can be found in some wide widths, I believe.  Then, stain/paint it, to match the paneling.

Never mind, that won't work.  They're not in a corner, like I thought.

Last edited by Richard Cuozzo

Made some progress over the last week and came up with a plan for locating the electronics. My plan is to construct two shelves under the middle of the "U" to house the z-4000; CW-80 and Legacy base, along with one or two power strips and a master switch. The top of the layout in the middle of the "U" will have a piece of oak to mount the FT switch controllers. Although all the switches will be command control, I like the visual aspect of the lighted switches and the idea of being able to "manually" control them if I want. I should also be able to fit in a control panel of sorts with the toggle switches for all the sidings mounted on it. I don't think I will use lights to show which sidings are "on" - I'll just use lighted bumpers at the ends of each siding to see which ones are powered.

As you can see, I laid out the full layout in the train room to see how it all went together. There's a switch at the top and bottom of the layout at the cutout wall that will extend into the other room where the yard will go. That should be pretty straightforward to build. There's a kink I don't like in the inner loop near the top right that I'll straighten out.

It's been so long, I couldn't resist hooking up the transformer and Legacy base and running the Rio Grande around for awhile to test everything out and get my fix for awhile. It ran great.

I'll disassemble everything and mark where all the FT pieces go and cut out the access hatches. Once I build the cabinet for the electronics, I'll take off the plywood and start pre-wiring from the top.

Don was right about having a lot of inside space for buildings, structures, etc., so I'm going to add two sidings to the layout for a loading dock and maybe a coal tipple or some other industry. I can't actually believe how much space there is. Menard's will be getting a phone call !! 

Attachments

Images (6)
  • NEW LAYOUT 3
  • NEW LAYOUT 4
  • NEW LAYOUT 5
  • NEW LAYOUT 6
  • NEW LAYOUT 7
  • NEW LAYOUT 8

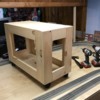
Wasn't able to make much progress on the layout this past weekend, but I did put together a custom rolling cart to house some of my electronics. The top shelf will hold the Z-4000, the CW-80, and the Legacy base. The bottom tray has space to hold whatever little things I might want to have on hand, like different smoke fluids, etc.

The cart measures about 28"W x 21"H x 14"D and was made from 1" x 12" pine board for the shelves and 1" x 4" pine stock for the bracing. I also used 3/4" x 3/4" stock glued and nailed into the inside corners to add some strength and structural rigidity. I couldn't find anything pre-made that fit what I wanted or my specs, so I decided to make my own. I took the inspiration from a similarly designed, but larger rolling cart from an episode of This Old House and just reduced the measurements down to what I needed. You can do it fairly inexpensively if you use a sheet or half sheet of 1/2" - 3/4" plywood to cut all the pieces out. Then you'll only need to buy some casters and the 3/4" re-inforcing stock.

I'll sand it down tonight (in between watching Red Sox-Yankees) and then put a few coats of poly on it and be done. Anyone have any experience using spray poly ? I might try that on the inside and use regular poly with a foam brush on the top and sides.

Also, the 22uh chokes and TVS suppressors arrived from Digi-key.


Attachments

Images (3)
  • CABINET 1
  • CABINET 2
  • DIGIKEY

Richie,

I cannot determine the route of track near the pipes and the support column. Is that a factor to just boxing them in?

One thought is to paint them the color of wall behind it to make them visually disappear or not be so obvious.

The heat pipes could be like radio towers -

Making the light to that area dimmer would also help hide them

Try some mock-ups or temporary ways to disappear them.

Mark - Thanks, that Z-4000 is pretty heavy. I guess I'd rather overbuild than underbuild !

Carl - yes, the track runs behind the pipes (see pic). I could box them in with 1 x 2's but not to the wall and just putting wood around them doesn't do much to hide them. I'd rather try and incorporate them into the layout like RSJB18 suggested.

WB47 - the switches at the top and bottom connect the main part of the layout to the yard in the next room which is not built yet. You can see it from the original SCARM design (attached). My plan is to get this part done first so I can use the extra space where the yard would go to reach in and finish the first part of the layout

RSJB18 - that's a good suggestion. At about 3' tall, those would be the largest cell towers to o-scale ever !! Either that or the largest Sequoia tree ever.

Attachments

Images (2)
  • TEST SKETCH 2
  • NEW LAYOUT 4

Make a foam hill there, stacked about 8"-10" high and then paint the pipes and pole.

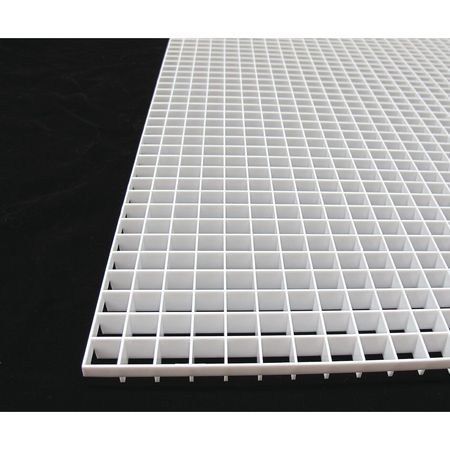
There is also a grid material at the home stores that could be placed like radio antenna in a triangle shape around the pipes and pole. Let me look through my notes. Someone used it for the sides of an elevated girder. The pipes and pole above the hill could then be painted black.

The hill would provide a visual break for the two sides of the layout.


Attachments

Images (1)
  • Richie_C_New_Layout_Hill
Last edited by Moonman

Thanks, Peter, looking forward to making more progress.

That's a good idea Carl, but since they are hot water heating pipes I don't know if I should be concerned about how the heat would react with the foam. Perhaps I could just paint them silver/gray and mount "antenna" type material around them like RSJB18 suggested.

If you think of the grid material let me know. I'll look the next time I'm there, too. I'll check out Plastruct, too, to see if they have anything.

I couldn't find it. I thought it was channel drain , but they are only sold in complete sections. This has a diamond pattern.

Oh well...

I think the Plastruct would get too expensive due to the length needed.

I painted my hot water heat pipes with regular latex wall primer and paint. No problems. They don't get hot enough to melt EPS foam.

Unfortunately, I haven't been able to get a lot done on the layout the past couple weeks due to family obligations and I also built a straightforward 4' x 8' layout in the basement of my daughter's house for my 5-7 year old grandson and granddaughter. Whenever they are at our house they run trains with me and my son-in-law bought them a Thomas Train starter set and asked me to put together a small layout, which I was happy to do. I'll post pic's later.

I did start to mock up the industry part of my layout and have attached some pic's. I'm still not satisfied for a variety of reasons with what I've come up with so far. For instance, I don't want one industry having to wait for another to clear track. Space, size, orientation, room for a roadway, etc. are all issues that have to be solved. I'll keep working on a viable plan and see what I come up with.

Attachments

Images (3)
  • INDUSTRY 1
  • INDUSTRY 2
  • INDUSTRY 3
Richie C. posted:

Thanks, Peter, looking forward to making more progress.

That's a good idea Carl, but since they are hot water heating pipes I don't know if I should be concerned about how the heat would react with the foam. Perhaps I could just paint them silver/gray and mount "antenna" type material around them like RSJB18 suggested.

If you think of the grid material let me know. I'll look the next time I'm there, too. I'll check out Plastruct, too, to see if they have anything.

Richie- the rigid foam will be just fine around the pipes. They do not get that hot. The should be insulated anyway to help conserve energy.

If you're still looking for the grid material Carl @arcticrail mentioned try this. It's known as egg crate in the building industry. It's used in suspended ceilings as a light diffuser or a return air grill.

https://cloudfront.zoro.com/product/full/Z2q11uocpEx_.JPG

Bob

Attached are pic's of the 4' x 8' layout I constructed for my grandkids and which has led to a delay (well worth it) in getting mine done. The roads need some striping, but otherwise their layout just needs some buildings and accessories to come to life. I bought them an aluminum platform with rubber safety strips on the top about 40" wide by 12" deep and 18" off the floor to stand on. It was a little pricey at Lowes, but was on sale from $44 to $34 and I get 5% off, so it was ok and does a nice job of letting them both stand on it at the same time.

I also added a Lionel Dinosaur car, which they love.

I should be able to get back to mine this weekend.


Attachments

Images (3)
  • J-TRACK 1
  • J-TRACK 2
  • J TRACK 3

Add Reply

Post
The Track Planning and Layout Design Forum is sponsored by

AN OGR FORUM CHARTER SPONSOR

OGR Publishing, Inc., 1310 Eastside Centre Ct, Suite 6, Mountain Home, AR 72653
800-980-OGRR (6477)
www.ogaugerr.com

×
×
×
×
Link copied to your clipboard.
×
×