Wow!  What a great layout, and you are blessed to have enough space to build such an empire.


I have only one thought that may, or may not, be useful to you.  And I can see that you are well along building the plan so I might be too late to be of any help.


Trains running clockwise on the outside loop can't enter the inside loop, and trains running counter clockwise on the inside loop can't enter the outside loop.  I would suggest moving the inside loop switch located at the duckunder to the left, so it is west (left) of the outside loop duckunder switches.  I think it would give you some additional operational flexibility.


I sure hope I'm making sense here!

Not only are you making sense, but you picked up an interesting error.It's not too late to change this.


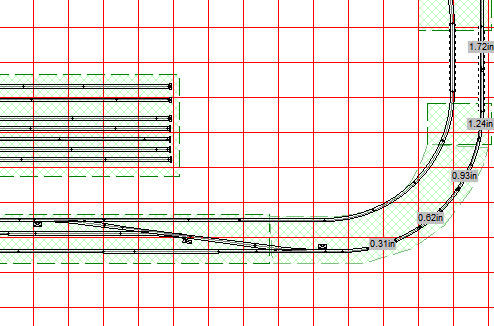
Your solution would work. Here it is with the change installed. Going from the outside to the inside when travelling CCW puts you into an interesting series of "S" curves which I am concerned about since I have long stuff, but it's really the only way to get in and out from both directions. Putting the cross-over in the back won't work now since they are on different levels separated by more than 5 inches. I also realized when studying the design that travelling the inner loop ALWAYS requires going through that switch in the turned position. That tells me that the inner loop is going to be the primary freight track with the high-speed through trains running on the outside. I attempted to change the alignment, but that didn't work either, so I think I'm stuck with this setup.


1408 New 5 Rev 3

Attachments

Images (1)
  • 1408 New 5 Rev 3
Last edited by Trainman2001

You certainly have an interesting problem on your hands!  I see two other options, both of which would certainly have their drawbacks.


1.  Have the right (east) side of the inner loop come off the third track from the bottom rather than the second, and maybe build a ladder from the outer loop switch up to the inner loop switch (if there's room) as this would eliminate your S curve problem.  But I'm afraid that this may reek havoc on your duckunder.


2.  Move the relocated switch back to where it was. Remove the left-hand switch on the second track on the lower left hand end of the layout (outer loop), and it's corresponding left-hand switch on the third track (inner loop).  Basically, the two tracks (second and third from the bottom) are back to where they were in your earlier drawings.  Then, put a right-hand switch on the third track (inner loop) coming out of the lower part of the reversing loop, and a corresponding right-hand switch on the second track (outer loop).  You are essentially "flipping" or "mirroring" the existing switches.


I hope this makes sense...it's tough to describe this clearly.  Anyway, hope this helps and best of luck with the layout. 

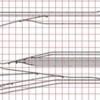
I think I understood what you wanted me to do. I realigned the tracks so the inner loop shoots straight through. I lengthened the distance between the cross-over switches and then added another #8 to rejoin that center track. I wanted this arrangement specifically so I could have trains either stop at the station that's going to be there or be an "express" that would pass the station without running next to the platforms (like the real trains do). It works nicely, changes the one piece of OSB at the new section. BTW: I'm completely eliminating the duckunder using the "swinging door" idea that Clem uses. The only drawback: I have to buy another #8 switch. I've got to buy a lot of additional track. Ross is going to love me.


New Lineup


As you can see, I just moved the curve upwards. I was hoping to have bridges on that end, but it's unwise to have curves leading directly into bridges...that is if you don't want wide-swinging big engines from taking down the infrastructure. I had to substitute another #8 because the 7.5º angle made using the #11 not work.


On another topic: This drawing is now from RR Track Version 5.0. Russ Becker outdid himself with this version. I just installed it tonight and it actually has a train simulator in it to let you run trains through the layout. It worked nicely except it seems to have a problem recognizing Ross #8s. It kept insisting that this was an improper track and crashed the train. I've been communicating with Russ to sort it out.

Attachments

Images (1)
  • New Lineup

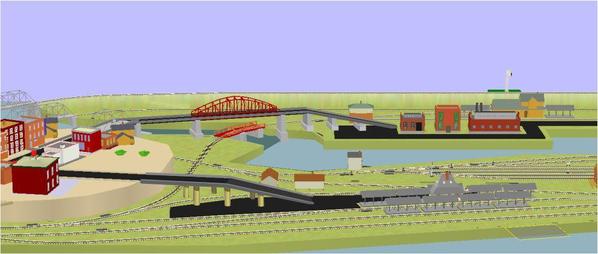
The RR Track train simulator function is working perfectly now. Russ Becker found the problem was with "old" switches in the layout. It had something to do with their lantern location. By deleting the troublesome switches and then reloading them from the library, the problem was solved. It not only lets you build trains and run them, but it also has a timer that runs which lets me know how long of a run can be had without retracing steps. I was able to size the sidings and passing sidings, plus it let me practice switch alignments which is some cases with this design can be tricky. I'll have several months to practice running before I have real trains on tracks. Here's a screen print of the layout with a passenger train with two FP40s on the lead. I gives you an idea of how tight curves and clearances will be.


RR Track Simulator Screen Print


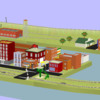
I did some playing around with the scenery. The town is elevated, but the station and factory area is not. I had to realign the main street that was going north. I had forgotten that the rear track is elevated 5" so the road would have to have risen 10 or more to give it clearance. This would have looked silly, so I rerouted the streets to quickly come down to the lower level. One street leads to the train station, and the other to the industrial zone. I may change this whole thing again. Other than taking some time, making at this stage costs nothing. I imported the RR Track bitmap into Coreldraw to draw the inclined roadways since I know of no way to do this in RR Track. Perhaps Russ will give me some pointers about how he renders inclined surfaces. 


Roadwork 3


Roadwork 1


Roadwork 2


The slopes are clearly too steep, but most of this is a fantasy since the whole layout isn't much more than a 1/3rd of a mile long. One loop around the outside is only 3/4 of a mile.


If you're interested, go see my post in the Real Trains forum. We were in LaGrange, KY today to go to an Arts Fair on the Courthouse Lawn. For those who don't know, LaGrange has the CSX mainline running right down the middle of Main Street. It's a rare thing in today's world. Rich Melvin tells me he's driven the 765 down that street. It's so cool that I may redesign the entire village concept and have the trains run down the middle of the street. It's busy... 3 trains in an hour. The roadbed is very solid... you don't feel vibration in the buildings.


photo [11)

Attachments

Images (5)
  • RR Track Simulator Screen Print
  • Roadwork 3
  • Roadwork 1
  • Roadwork 2
  • photo (11)

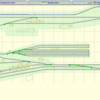
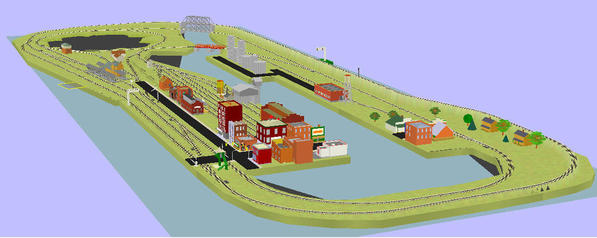
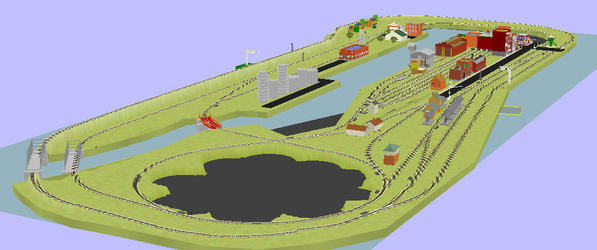
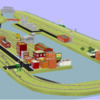
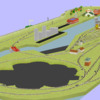
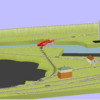
As noted yesterday, I've decided to scrap the "elevated town" scenario. It was a remnant of the RR when it was 11 feet shorter and was the only real estate that was big enough to hold a town. When I reset my thinking, I realized that I have a lot of real estate on the "east end" of the layout and could build a nice main street, and still leave a big space for entering the inside the layout to reach mostly everything. Here's what all this looks like. RR Track crashed on me several times, and of course it was after I'd done a lot of things and lost all of them. I started saving after doing anything. I don't believe it's RR Track's problem. I think it's my laptop's. Here's what it looks like now.

 1408 New Town 1


 1408 New Town 2


 1408 New Town 3


 1408 New Town 4


Where the town was is now either a quarry or a nice lake. The quarry idea gives me the opportunity to use some nice 1:48 construction equipment. Also notice I've moved some light industry to the front side of the layout and installed a chemical plant in the space. There's room for another spur or two on that side to service that plant and that will definitely be a Phase II project.

Attachments

Images (4)
  • 1408 New Town 1
  • 1408 New Town 2
  • 1408 New Town 3
  • 1408 New Town 4

Very nice layout plan


I presently have a 11.5x12 foot layout and I've found I have too many industries I'm trying to model.  I would be happy to model just 1 industry completely than the 4-5 industries I have now that are at most partial representations of the real deal.  I could possibly go to a 12x30 plan, but it would take up the entire upstairs space (I do have a plan already drawn, just in case ).


Seeing large layouts like this is just too cool.  I saw Ed Rappe's PRR layout this past February and was overwhelmed at all the work he put into it.

I feel your pain! The room comes with its own problems...$$$$ and time. I was playing with turning the upper level in the back into a series of masonry arches. Wow! It would be a huge task to make the entire run into an arch system. I draw these things out in CorelDraw using the 3-D pictures from RR Track as a starting point. Just drawing the arches was exhausting. Be careful what you wish for.


I did get back to putting up the ceiling. The right side room is fully Tyveked, but not taped. It instantly brightens up the room.
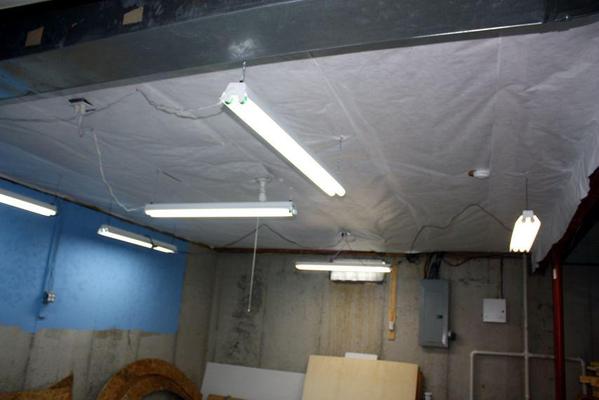
 

 Tyvek 6


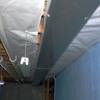
I've now started on the Left side room. This job is complicated by the heating duct and the PVC intake and exhaust lines from our high-efficiency furnace. I had to use narrower strips and the results aren't pretty, but after taping they'll be passable. Besides, no one's going to be looking at the ceiling.
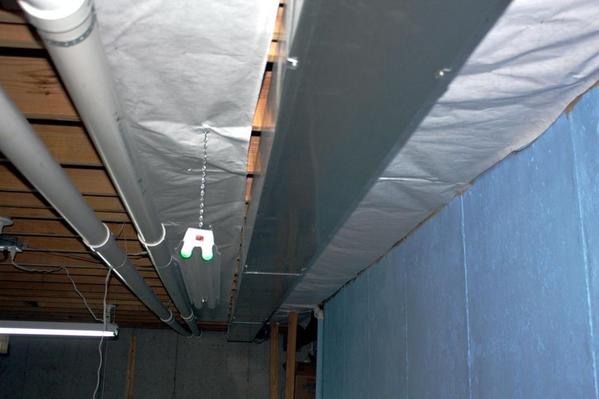
 

 New Tyvek 4


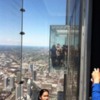
We took a nice three-day trip to Chicago in the mid-part of last week. We played tourists and even went to the top of the Willis Tower and walked out into one of the glass boxes that is cantilevered 1,300 feet above ground. The first step into the box is a bit disconcerting, but not as bad as if I were skydiving... which I won't do.
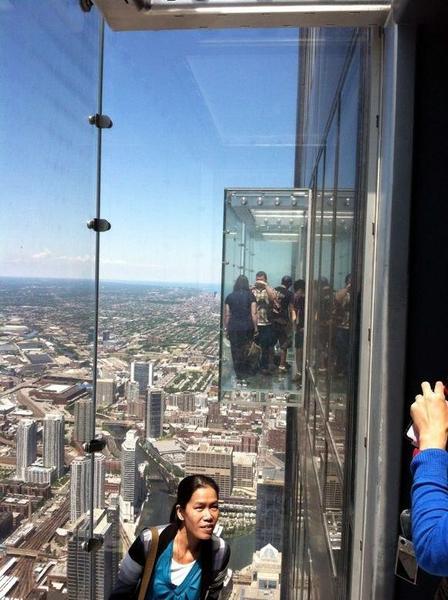
 

 Willis Skybox


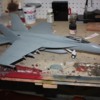
While I realize that the following isn't model railroading, it is modeling and it's with the younger generation. I've been working with #1 grandson (Alex) on his 1/32nd Super Hornet. Alex has inherited my sensibilities regarding machines and models. He loves trains and planes, and he and his younger brother are going to help build the railroad. But we're also working on scale models.


This model has detailed GE 414 jet engines that are completely out of sight now that the model is built, so Alex had me do a cut-away and I removed a vent area over part of one engine. We also opened up the nose cone to show the electronically scanned phased-array radar. The unfinished looking area on the nose is where the refueling probe is to be installed.
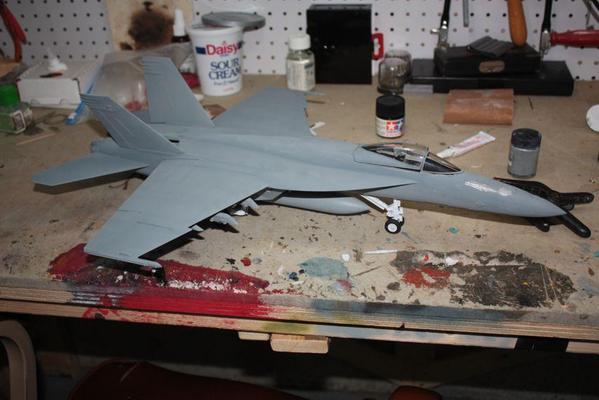
 

 Super Hornet Progess


It's a big, detailed model, but had some fit problems. Many Trumpeter models have those problems. They include many parts and details, but lack some of the fine engineering of Tamiya and Hasegawa. But the Chinese companies learn fast and they're getting better and better. Next we're going to coat the model with gloss Future Floor Wax to prepare the surface for decals. Decals adhere better to gloss surfaces than matte. Then Tamiya flat spray goes on to seal the decals and restore more-scale-like matte finish. Future has become a standard technique with plastic model guys. It's cheap, dries perfectly clear, and dries fast. It's even used restore finish to clear parts like canopies.


A few more days of work and the ceilings will be done. But first I'm taking Alex to the [U]National Museum of the United States Air Force[/U] in Dayton, Ohio, next to the Wright-Patterson AFB. It's only 2.5 hours from Louisville. Moving here has presented some interesting opportunities. We've been to Chicago twice (5 hour drive), two weeks ago I went to the Indy 500, and now the Air Force Museum. The last two are places I would not have gone to if I were still living in the Philly area. It's also gotten me closer to some fantastic train folks like Gayl, Bob and Bill in Cincinnati. You have to make your own opportunities.

Attachments

Images (4)
  • Tyvek 6
  • New Tyvek 4
  • Willis Skybox
  • Super Hornet Progess

Finished putting Tyvek on the 2nd half of the train room. Put two full strips of today to finish the job. Here's that half of the room.

Name: Tyvek 10.jpg Views: 2 Size: 79.7 KB

Then I was ready to tape all the seams and edges. I opened the first of three roles of Tyvek Tape only to find that it has "Tyvek House Wrap" text written all over it. This wouldn't work! So it was back to Home Depot. I had the original receipt and they took back all three roles including the unwrapped one. I then bought 3M White Duct Tape, which I then remembered I also used at the old house. It was much cheaper! I saved $33. So after that interruption I was back in the basement and taped one half of the train room before dinner. Taping goes much faster than putting up the sheeting.

Here's that half of the room:

Name: Tyvek 8.jpg Views: 2 Size: 62.1 KB

It's a bit wrinkly, but it works. It's bright and clean, and keeps dust and unwanted visitors off the trains. I chose not to entire cover the duct work. I did this in the old house and it was not worth the effort. Here, I just bring the Tyvek down a bit and tape across the edge. It dresses it up a bit and looks semi-finished. Those cellar spiders are going to have their work cut out for them when they want to drop down on my new layout.

I want to paint the clouds backdrop. I bought the Caboose Hobbies cloud templates, but am thinking about doing it more artistically. I did some research on painting clouds. There're lots of YouTube vignettes on cloud painting AND they led me to the website of the Cloud Appreciation Society. You read that right! The Internet has something for everybody even people who get off on clouds!


So I copied about 20 pictures of nice, white, puffy cumulus clouds that I can use as models if I decide to do it the old fashioned way. Here's the URL:


http://cloudappreciationsociety.org/find-a-cloud/#p=13&t=cloud71&i=0


They have pictures of thousands of different cloud types from all over the world.

I'm still here!

Summer travel kept me out of the basement, but I did do some stuff. I finished the taping of the entire ceiling so that's done. Yesterday I decided to add some lighter color at the bottom of the wall mural to make the sky look a bit more "natural". I could have even done more of this. I'm now ready to lay in the clouds and then onto constructing the platform itself. It's getting time to make some sawdust. Here's the wall with the added shading.

Name: Wall Adjustment.jpg Views: 1 Size: 78.7 KB

Next work session will have more interesting things to show. I realize that all this prep work is terminally boring.

As for the spiders & etc I use the 4" X 7" glue boards with the wax paper peel  off top protector for insect control. 


Placing about 20 of them around a 2k sq ft basement it is revealing of the assortment of undesirable visitors you have.  Every so many months I replace the glue boards.  Really makes for a greatly reduced bug environment.  Lining them along the floor/wall crevice seems to yield the most productive catch. 


I notice once a bug gets snagged on one board that poor stuck critter draws a crowd.  Not sure if it is for dinner, reproduction or just to laugh at'em.  In any event some traps only get a few, but the rest of the traps have a crowd.


Haven't found anything good enough to cut down on certain relatives. tt

Originally Posted by Tom Tee:

As for the spiders & etc I use the 4" X 7" glue boards with the wax paper peel  off top protector for insect control. 


Placing about 20 of them around a 2k sq ft basement it is revealing of the assortment of undesirable visitors you have.  Every so many months I replace the glue boards.  Really makes for a greatly reduced bug environment.  Lining them along the floor/wall crevice seems to yield the most productive catch. 


I notice once a bug gets snagged on one board that poor stuck critter draws a crowd.  Not sure if it is for dinner, reproduction or just to laugh at'em.  In any event some traps only get a few, but the rest of the traps have a crowd.


Haven't found anything good enough to cut down on certain relatives. tt

what a great idea!   I dont have an infestation by far, but just enough to give this idea a try.  Thanks Tom

Google Catch Master insect or mouse traps.  About $27.00 for a pack of 75. on Amazon.  I usually get them at Modern Exterminators in Holmes Pa. 


Very effective.  Just be careful when handling them.  They stick like a bad reputation.  The Terminex people around here will not sell them to you.  They want you to buy their periodic service.  Their service guys say that these things are the only thing that really works. 


To get more miles out of them I slice them in half length wise before I remove the wax paper.  Then place the raw glue edge against the wall.  Bugs can not go along the wall w/o getting caught.


They are ment to be folded up like an empty match box shell but I find their effectivity lessens that way.  I have caught a couple  of mice, lots of camel or jumping crickets and all kinds of spiders over the years.


Put them away if you are sawing.  The saw  dust cancels out the stickie somewhat. tt 

We have an exterminator and he puts these little cardboard boxes around that are sticky inside and serve the same function as the glue sticks. They do work, but don't eliminate the problem entirely. We also get the occasional water bug and centipede. The ceiling is working. The only place you run into webs is the places without the Tyvek.


I took the plunge yesterday and started painting the clouds on the wall. They're tougher to paint than they look. Here's the first attempts (I'm about 1/5th done).

Name: Wall Clouds 1.jpg Views: 2 Size: 109.0 KB

The lower clouds have a bit of sunset tinge to them. Kind of looks like the opening scene of the "Simpsons".

Then I decided to get cute and represent a thunderhead. I'm not so sure about this one and it's nothing that a swipe of sky blue paint won't cure. I'll see what my blog readers say about it before making changes. My wife thinks it looks just fine, but then she thinks this whole "cloud thing is silly and I'm wasting time that I could be using building a train layout". I explained that building a train layout is ALL these things, not just putting down track. I'm still not convincing her.

Name: Clouds 3.jpg Views: 2 Size: 97.1 KB

Name: Clouds 1.jpg Views: 2 Size: 90.8 KB

So... I need feedback. Lots of feedback.

Add Reply

Post
The Track Planning and Layout Design Forum is sponsored by

AN OGR FORUM CHARTER SPONSOR

OGR Publishing, Inc., 1310 Eastside Centre Ct, Suite 6, Mountain Home, AR 72653
800-980-OGRR (6477)
www.ogaugerr.com

×
×
×
×
Link copied to your clipboard.
×
×