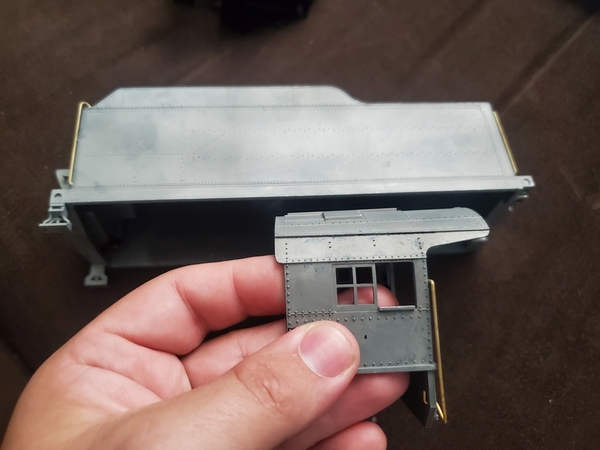
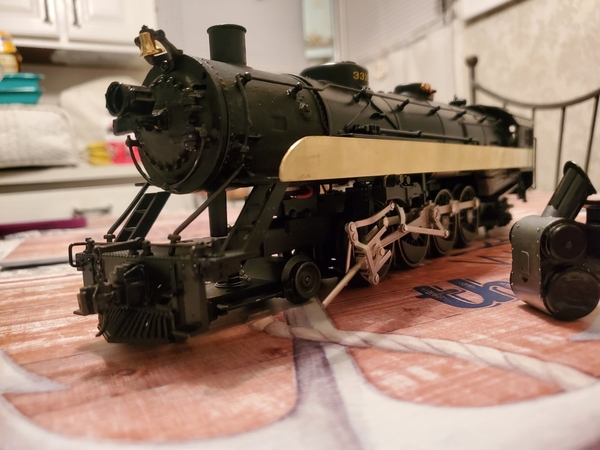
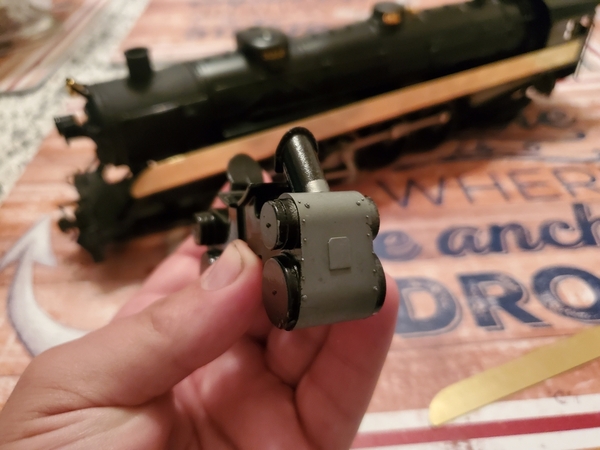
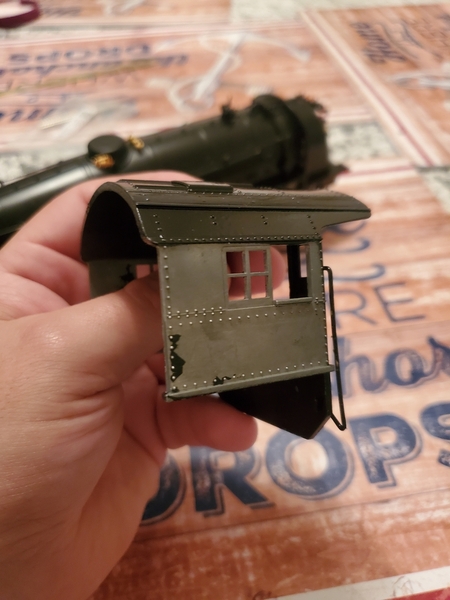
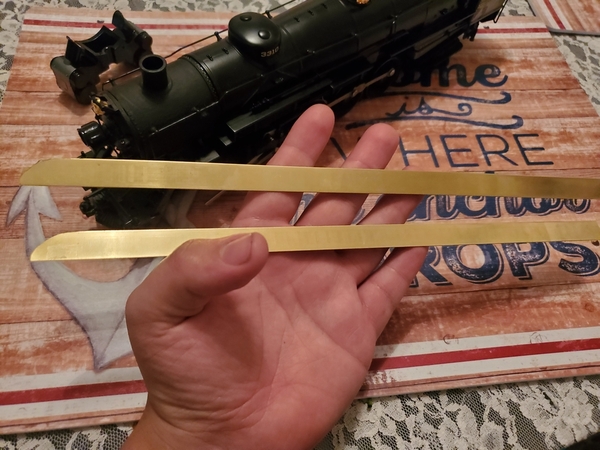
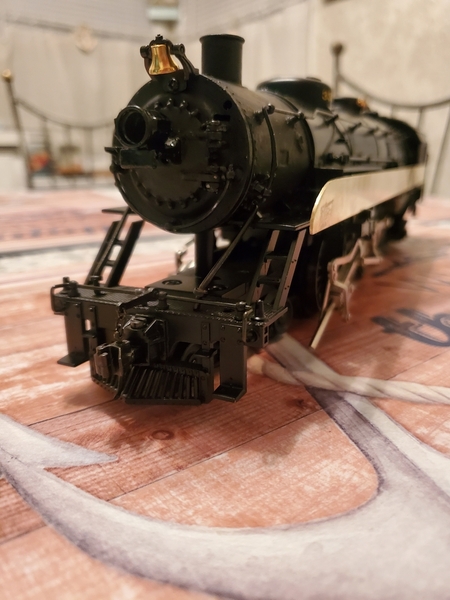
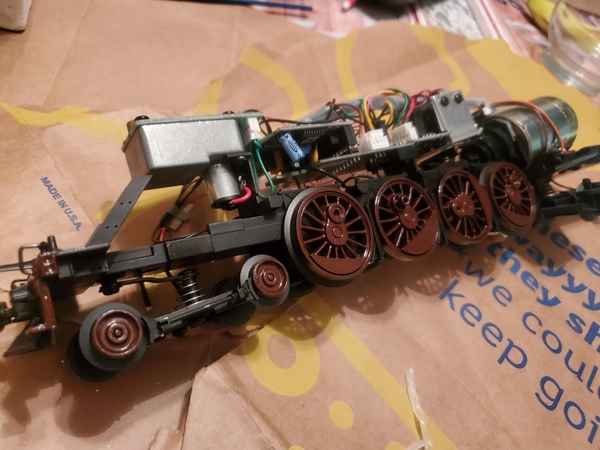
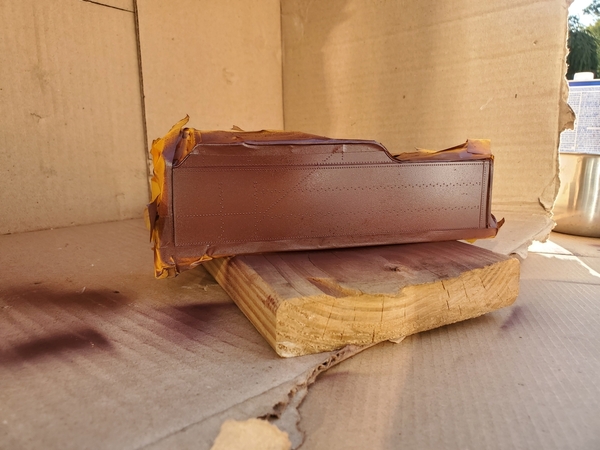
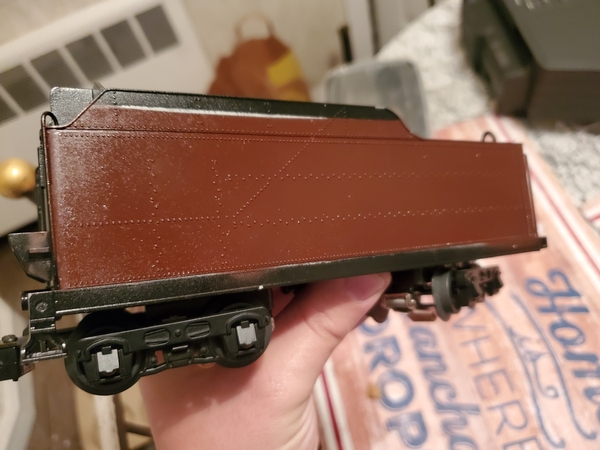
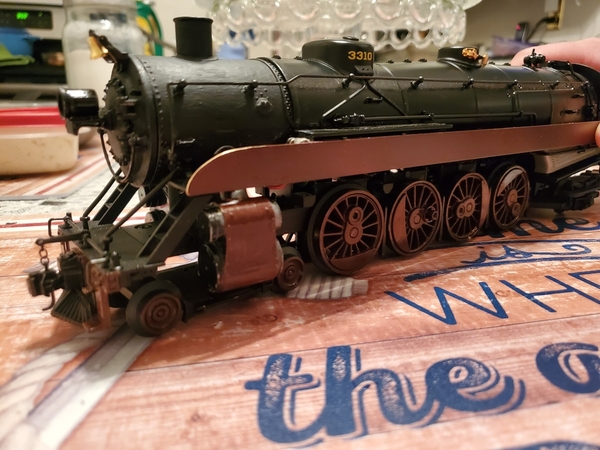
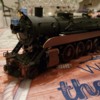
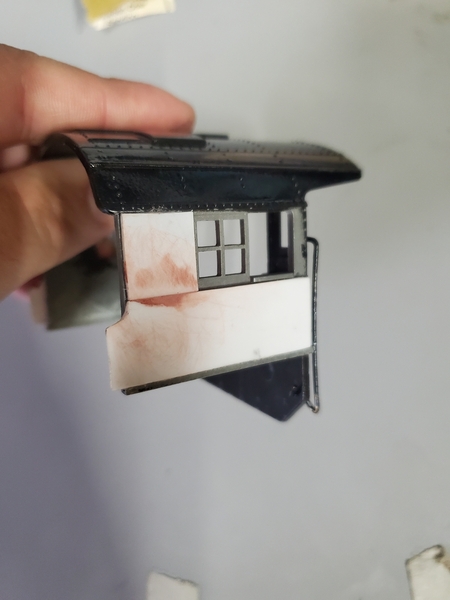
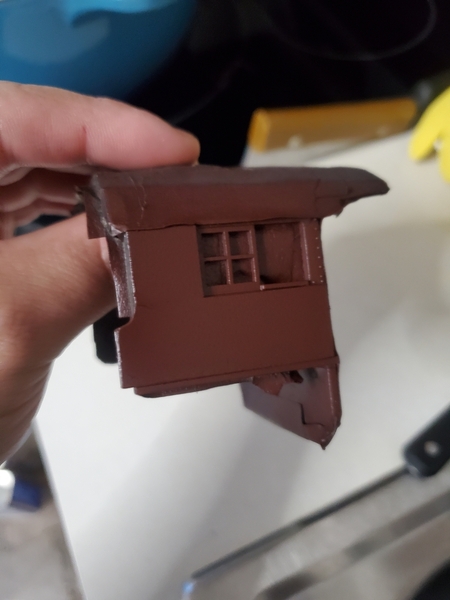
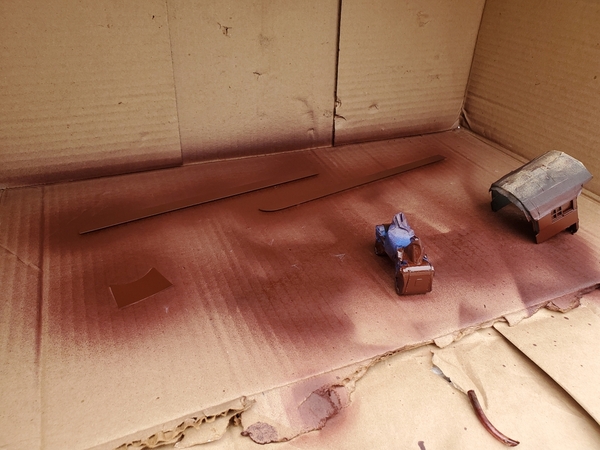
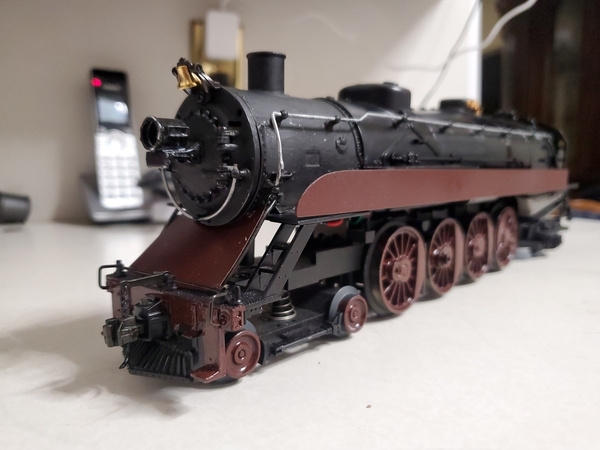
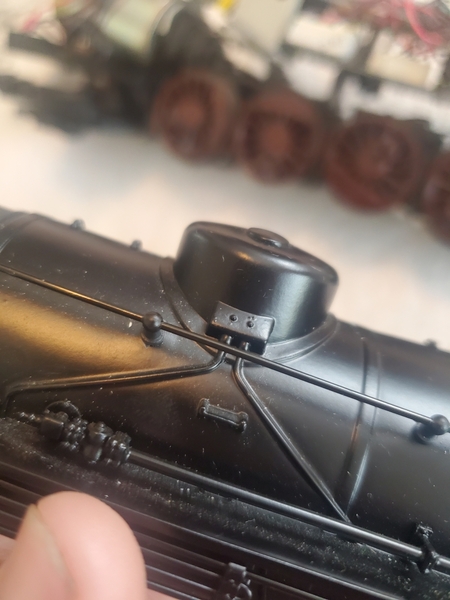
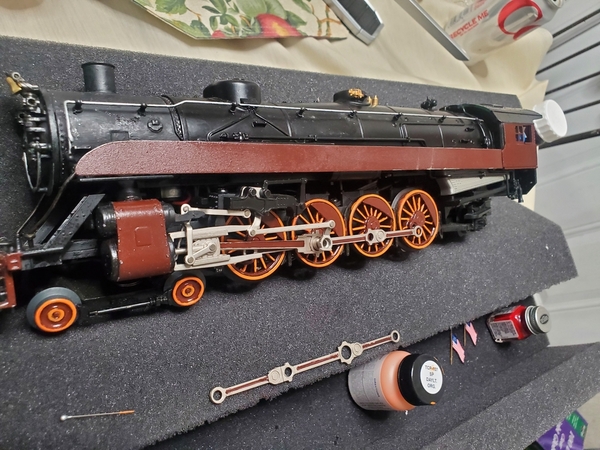
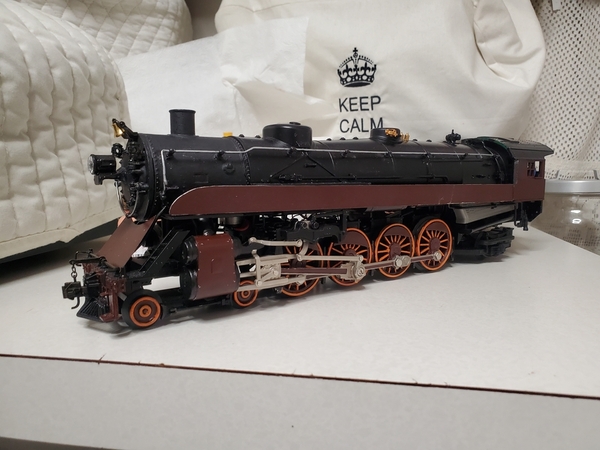
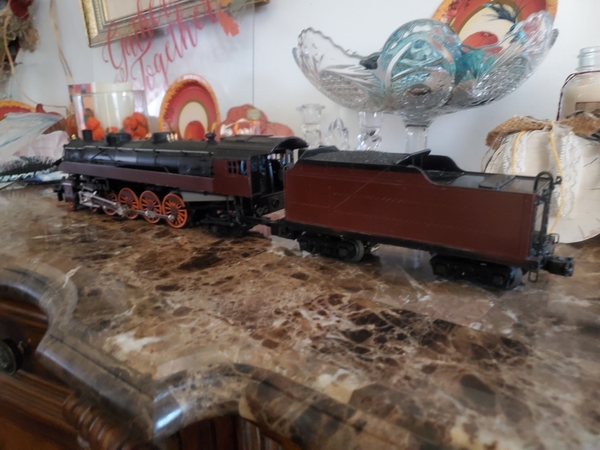
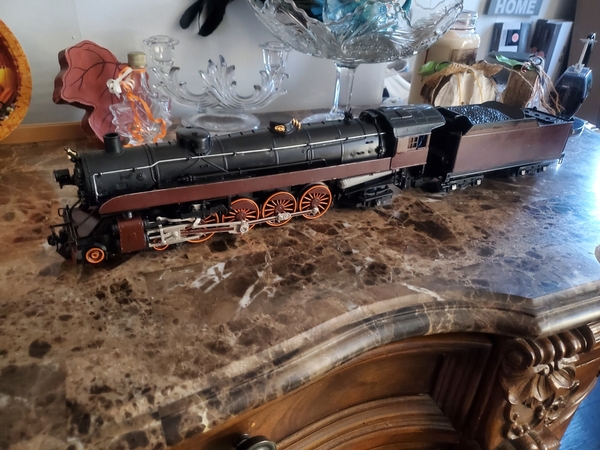
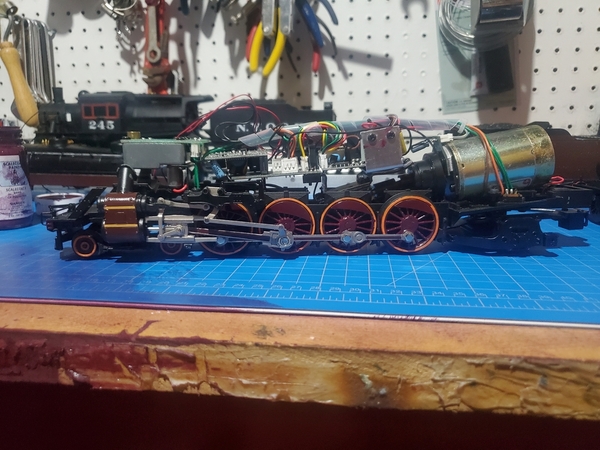
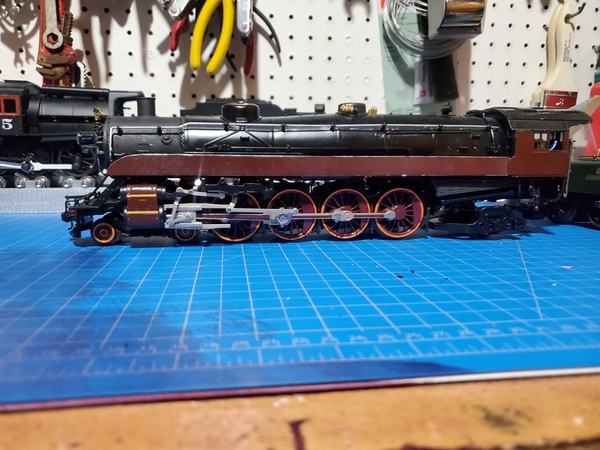
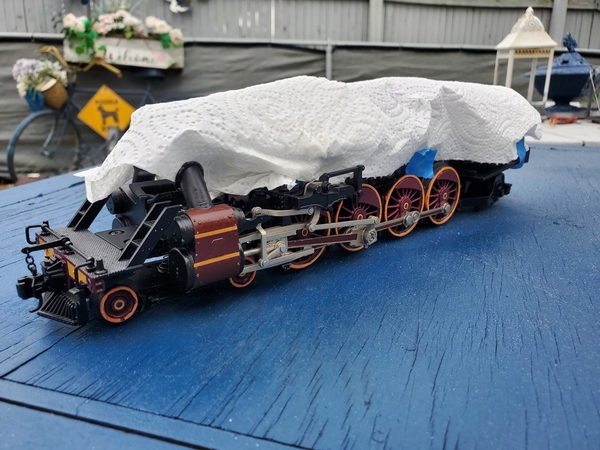
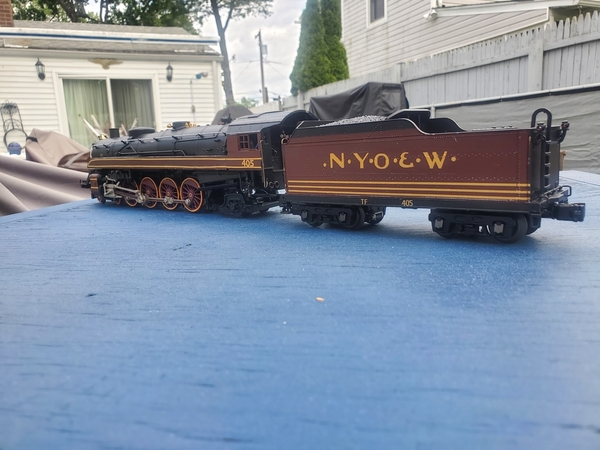
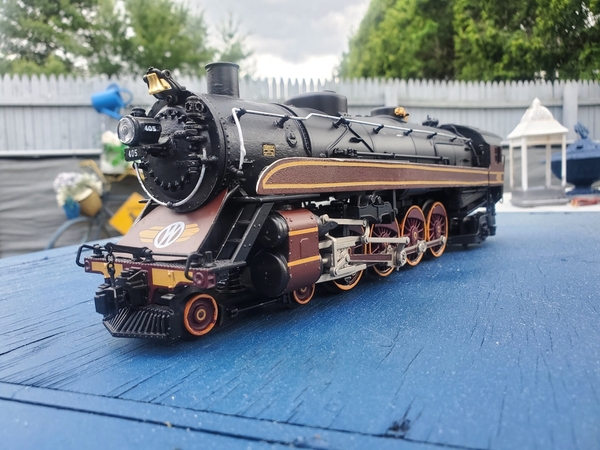
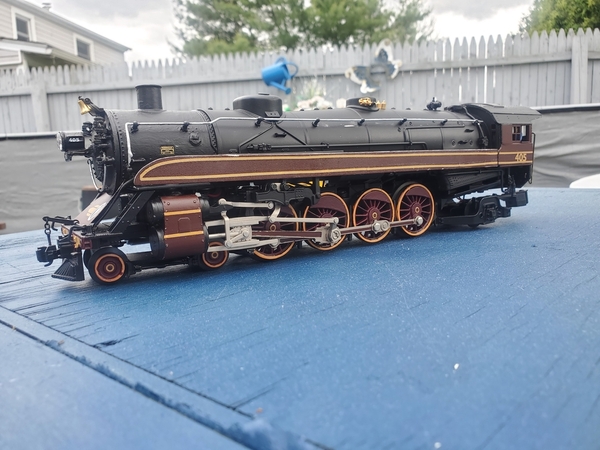
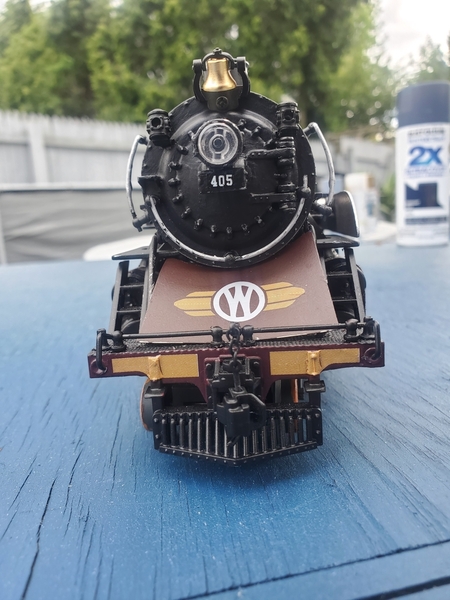
Hey all, wanted to share a new project I'm starting. I grabbed a Lionel USRA 4-8-2 locomotive recently for a cool project. I'm a huge buff of the New York, Ontario & Western and for years wanted a model of Y-1 4-8-2 #405, which in 1938 was redone with "streamlining" and maroon paint for the lines new "Mountaineer" train. I've already started stripping the paint on the cab, tender shell, and cylinders. The skirting will be brass sheets held on with magnets (tiny magnets will be on the skirting and attach to magnets on the side the locomotive) Stay tuned for updates on this transformation! 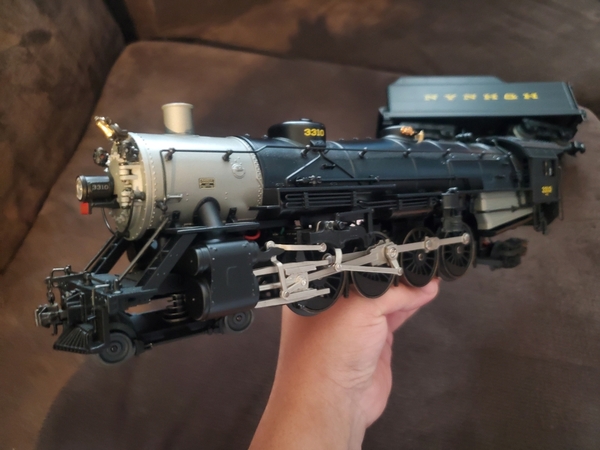

Replies sorted oldest to newest
Can’t wait to see this develop! Styrene can also be used to make convincing skirting. You can use a few dabs of silicone glue to attach (brass or styrene) skirting if you ever want to remove it. Magnets probably won’t work on brass. JohnA
@John A posted:Can’t wait to see this develop! Styrene can also be used to make convincing skirting. You can use a few dabs of silicone glue to attach (brass or styrene) skirting if you ever want to remove it. Magnets probably won’t work on brass. JohnA
Usually styrene is my main material I use in projects, but I wanted to try brass for this one. Two recent Lionel sets (Lehigh Valley Asa Packer and Lionel Santa Fe Valley flyer) have similar set ups with skirting. Magnets will be placed on the skirting. But styrene will be my backup if it doesn't work 😄
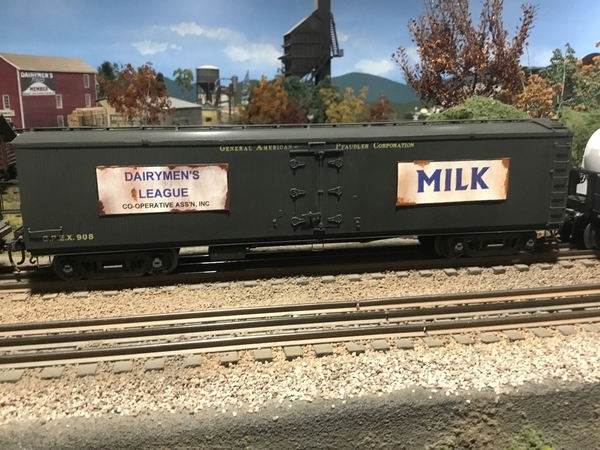
I’ll definitely be following this project. Really a sharp looking engine. As far as magnets go. I recently re did a brass milk car. Removed the factory lettering and added steel placards. This was a common practice seeing these cars were leased. I bought a very thin steel sheet. .005 thickness that can easily be cut with a good pair of scissors. Everything is easily removed if I decide to change it out. 4 magnets inside the car easily hold them on.
Attachments
Hi Blake, This sounds like a very cool project. I too am a huge fan of the O&W having visited most of the abandoned main lines at one time since 1980. Good Luck on it and be sure to keep us posted. My layout is based on a portion of the O&W and parts of the New Haven. Here is a picture of an NW-2 General Models Switcher I just had repainted in O&W livery. Bill
Attachments
Is brass magnetic?
@BenLMaggi posted:Is brass magnetic?
No, not at all.
@Hot Water posted:No, not at all.
It is not, I should have added magnets will be added on the insides of the skirting, these will attach to magnets placed on the locomotive
Unless just for the shelf, if this model is run much at all, that brass shrouding may vibrate down/off? and maybe self destruct and derail loco, and or damage rolling srock and scenery.
@colorado hirailer posted:Unless just for the shelf, if this model is run much at all, that brass shrouding may vibrate down/off? and maybe self destruct and derail loco, and or damage rolling srock and scenery.
I'm intending to run it like any normal locomotive. The mini magnets I have are pretty strong, Lionel used a similar set up on their Asa Packer set and Valley Flyer set (talked to someone who owns one) so it shouldn't be an issue. If anything I can switch to styrene or thin sheet metal. I'll find out once I start work on the skirting.
What did you strip the paint with?
Good luck with your custom project! I am following your progress. We came very close to doing a custom run brass locomotive with Weaver Models once upon a time. We did produce 2-8-0 consolidations with Weaver Models. Currently, we have custom run NYO&W double sheathed boxcars and F3 A-B sets coming in from MTH Electric Trains. We will be offering custom run O&W FT diesel locomotives, hopefully within the year.
@JR Junction Train & Hobby posted:Good luck with your custom project! I am following your progress. We came very close to doing a custom run brass locomotive with Weaver Models once upon a time. We did produce 2-8-0 consolidations with Weaver Models. Currently, we have custom run NYO&W double sheathed boxcars and F3 A-B sets coming in from MTH Electric Trains. We will be offering custom run O&W FT diesel locomotives, hopefully within the year.
Speaking of the NYO&W, Phil just shared a picture with the club of a formula for O&W gray as 50/50 "Accupaint" NYC light gray and charcoal, which matched the 1945 DuPont Toledo Labs paint chip.
Interesting build; can't wait to see it!
- Mario
I was in Syracuse today and stopped by the JR Junction Hobby Shop. The store has a very nice stock of O guage equipment. I purchased the new Woodland Scenics Hobby Shop Model along with a set of MTH electric gates and some brown roof paint and grease. There is a great deal of scenic materials along with some other hard to find items like a good selection of styrene supplies, wood materials for scratch building and a good selection of paint and those kinds of items. The owner was once an employee of K&K Trains in Utica and would be knowledgeable in helping you find special request items. On my next trip out there, I will be again stopping. He told me he has special order O&W box cars coming in along with special order O&W F3's. I would not hesitate to call if you need something and ask him to help you. Bill
@NHVRYGray posted:What did you strip the paint with?
Regular gel paint stripper from Ace Hardware, with help with a light nylon brush.
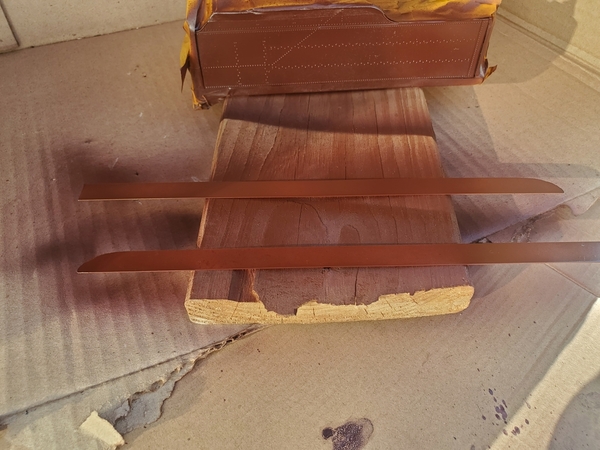
while paint prep work is underway, here are the sheets of brass that will be used for the skirting along the running boards. The sheets need to be trimmed on top slightly and the fronts will be shaved down to match the prototype. As stated previously these will have very small but strong magnets glued on, and will match up with magnets along side the running boards. 
Attachments
@JR Junction Train & Hobby posted:Good luck with your custom project! I am following your progress. We came very close to doing a custom run brass locomotive with Weaver Models once upon a time. We did produce 2-8-0 consolidations with Weaver Models. Currently, we have custom run NYO&W double sheathed boxcars and F3 A-B sets coming in from MTH Electric Trains. We will be offering custom run O&W FT diesel locomotives, hopefully within the year.
Thanks! I remember hearing the story on a proposed brass Y-1 locomotive, younger me was excited for it. I think I ordered my Lionel NYO&W F units with the "robins egg blue" paint from your shop a few years back (I'm going to have the shells weathered to tone down the color) definitely ordering one of those boxcars!
Worked has started on the smokebox, headlight relocated, smokebox painted and rough cardstock templates were made up of the front and skirting. A different headlight was chosen so the bulb can be installed from underneath. Void left by old headlight was filed in with epoxy filler. This will be sanded smooth when dried. 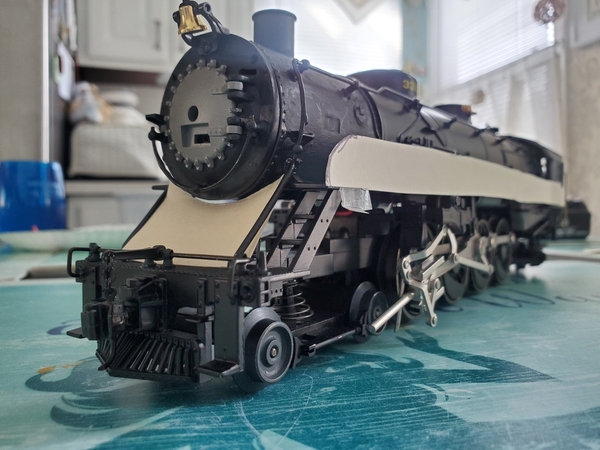
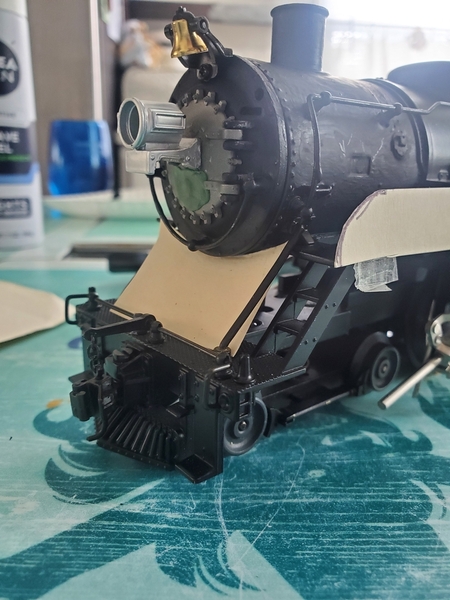
Attachments
Great progress, going to be beautiful when finished. Love following projects like this.
Neato
Excellent work!
Peter
Awesome MODELING! JohnA
The skirting was added with magnets, Magnets were glued on the boiler shell and onto the skirting itself, and it's holding really well. Also started painting the wheels. The color is Scalecoat CP Tuscan Red. Eventually the skirting, cab, and the tender will be painted. Please excuse the background, my new "workshop" isnt ready yet. 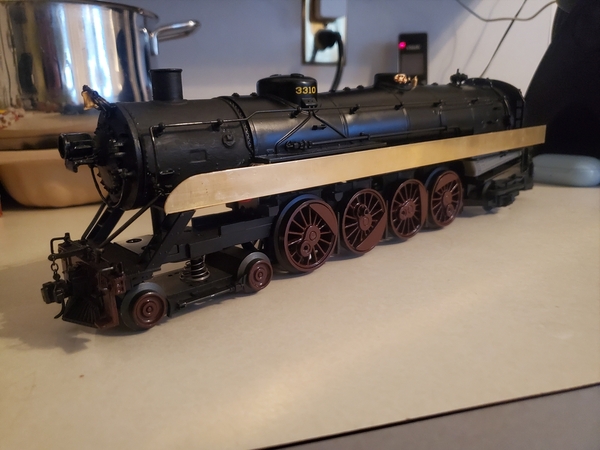


Attachments
Looking great! Love this project! JohnA
Looking Good. A couple of questions. What glue did you use to adhere the magnets on the brass and diecast ?
Is the Scalecoat Paint a recent purchase ? Still waiting on my order from 6 months ago.
@Dave_C posted:Looking Good. A couple of questions. What glue did you use to adhere the magnets on the brass and diecast ?
Is the Scalecoat Paint a recent purchase ? Still waiting on my order from 6 months ago.
Regular super glue was used, it worked the best. The Scalecoat I ordered 2 weeks ago and it arrived yesterday.
I've been enjoying watching this transformation! Great work.
For more on O&W F-3s Check RMC Jun Jul Aug 1970 1971 or 1972 Author detailed ALL NATION F-3s to the max for O&W including scale "Chicken Wire" screening where appropriate, proper paint masks and now semi useless Floquil formulas for O&W paint colors. I am sure MTH and Lionel could do a great job on the FTs Scale F-3s and NW2 switchers
Great Job on the O&W 400 series Mountain. Is there appropriate passenger cars to pull behind it? Baggage and Coaches for the most part. Note O&W was a road that served a good part of the "Borscht Belt" resorts in the lower catskills in addition to bridge line traffic and hauling Anthricite coal A good part of the ROW became Hwy 17 and possibly 17B in that oart of NY
My summer camp at TEN MILE RIVER was right on the Erie Main Line along the upper Delaware River I think Tusten was the station
Ed Samsen
Ed
Blake, what material is the brown on the tender sides etc.?….is that scale coat 1?
Pat
@Ed Samsen posted:For more on O&W F-3s Check RMC Jun Jul Aug 1970 1971 or 1972 Author detailed ALL NATION F-3s to the max for O&W including scale "Chicken Wire" screening where appropriate, proper paint masks and now semi useless Floquil formulas for O&W paint colors. I am sure MTH and Lionel could do a great job on the FTs Scale F-3s and NW2 switchers
Great Job on the O&W 400 series Mountain. Is there appropriate passenger cars to pull behind it? Baggage and Coaches for the most part. Note O&W was a road that served a good part of the "Borscht Belt" resorts in the lower catskills in addition to bridge line traffic and hauling Anthricite coal A good part of the ROW became Hwy 17 and possibly 17B in that oart of NY
My summer camp at TEN MILE RIVER was right on the Erie Main Line along the upper Delaware River I think Tusten was the station
Ed Samsen
Ed
Lionel and MTH both did F units and the NW2 switchers in the past , I have lionel's versions of the F3 with the very bright "robins egg blue" gray color. MTH's look fantastic. Thanks! I don't have cars right now, but I do plan to make a 5-7 car train. According to research, the train consisted of a combine, 4 coaches, and 2 obs. I'm having HO scale decals redrawn to O gauge for me as we speak for when I buy and repaint cars. I used to go upstate all the time with the family and my late dad would bring us along the old ROW, including rt 17.
@harmonyards posted:Blake, what material is the brown on the tender sides etc.?….is that scale coat 1?
Pat
It's Scalecoat 1 Tuscan Red.
@Blake posted:It's Scalecoat 1 Tuscan Red.
How did you apply it?….step by step if you don’t mind….
Pat
I have been thinking of doing something similar to what you are doing, geting a TMCC Mountain and re-detailing it as stand-in for a Norfolk & Western K2. The N&W used USRA Heavy Mountains for the K2 class, but I am not holding out hope that we will see Heavy Mountains in O scale, so the light Mountain would probably be the closest thing in O scale. Nice to see a similar, more-ambitious project getting done, gives me hope that I can get my humble idea done one day ![]()
I also love the creativity of using magnets for the streamlining, it's brilliant! Are you at all worried about a magnetic field impairing or damaging engine electronics?
Very nice!
Peter
Great progress!! JohnA
@harmonyards posted:How did you apply it?….step by step if you don’t mind….
Pat
Prime and lightly sand parts to be painted, mix the paint with laquer thinner , I usually do a 50/50 mix, or the thinner Scalecoat sells, and spray the parts you want to paint, and let dry. I use a siphon fed airbrush, so setup might differ slightly with a gravity fed airbrush. After everything is dried spray a clear coat to seal everything. If using decals, add decals first then clear coat.
@0-Gauge CJ posted:I have been thinking of doing something similar to what you are doing, geting a TMCC Mountain and re-detailing it as stand-in for a Norfolk & Western K2. The N&W used USRA Heavy Mountains for the K2 class, but I am not holding out hope that we will see Heavy Mountains in O scale, so the light Mountain would probably be the closest thing in O scale. Nice to see a similar, more-ambitious project getting done, gives me hope that I can get my humble idea done one day
I also love the creativity of using magnets for the streamlining, it's brilliant! Are you at all worried about a magnetic field impairing or damaging engine electronics?
Thank you! I've seen Lionel produce a heavy USRA 2-8-2, so maybe one day we will see a USRA 4-8-2, but a light mountain should be fine to use. The magnet idea I "borrowed" from Lionel, who used a similar method on two recent legacy sets (Valley Flyer & Asa Packer) as for the electronics I consulted a friend of mine who does electronic work and upgrades for trains, he said it shouldn't be a problem since the magnets are tiny.
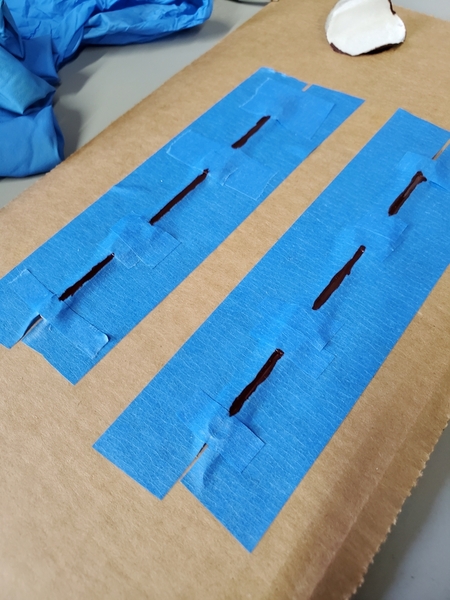
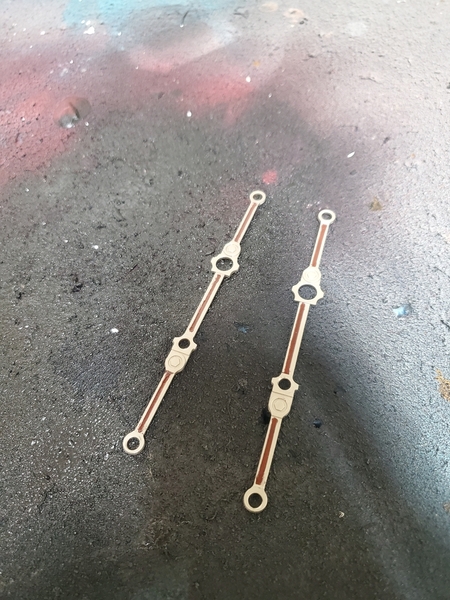
The drive rods recieved some painting, the reliefs on the prototype were painted, this was easy to on the connecting rods, but the coupling rods were more tedious as they didn't have the relief, so they were masked and carefully painted, the result was pretty good, I have to do some cleanup. 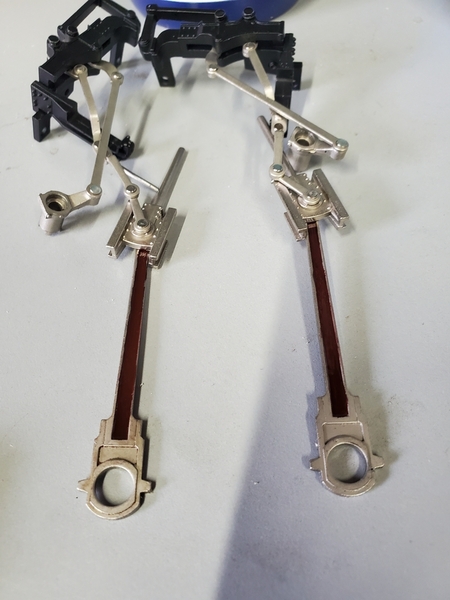
Attachments
I'm very much enjoying your work!
@Blake posted:Prime and lightly sand parts to be painted, mix the paint with laquer thinner , I usually do a 50/50 mix, or the thinner Scalecoat sells, and spray the parts you want to paint, and let dry. I use a siphon fed airbrush, so setup might differ slightly with a gravity fed airbrush. After everything is dried spray a clear coat to seal everything. If using decals, add decals first then clear coat.
That’s how it’s done, ….nice work!….soldier on,…😁
Pat
Been a while since I posted about this, after awaiting paint and having to find another brand, I started painting all the orange trim on the drive wheels! 405 left the shops in 1938 with all decked out wheels, orange pinstripes and all. This only lasted a year before the wheels were repainted, and the orange was never redone. This was hand painted using Tru-color SP orange. 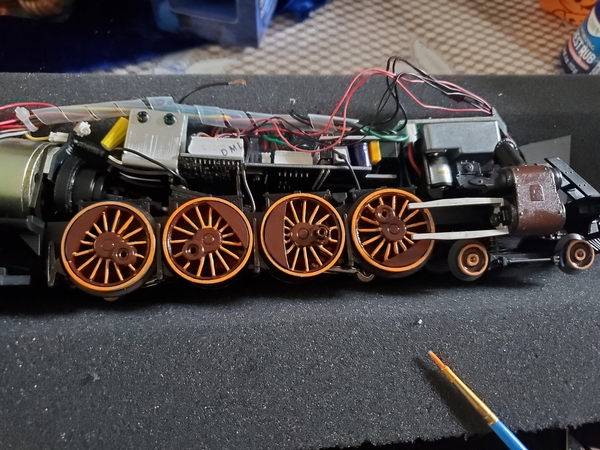
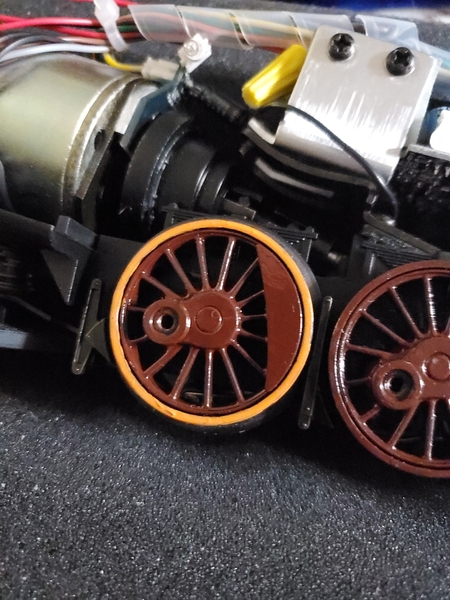
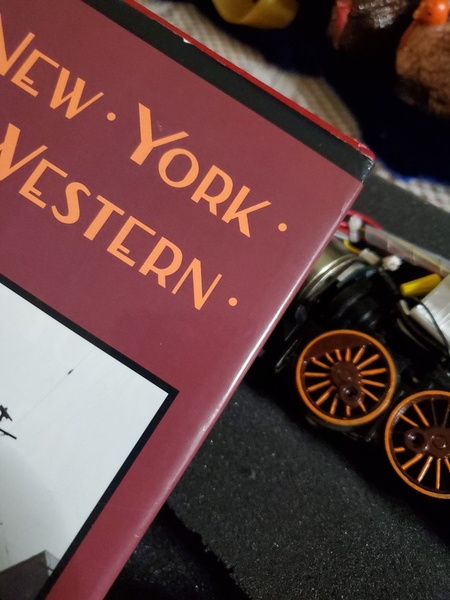
Attachments
Those wheels look great! JohnA
Ditto - that's not easy to do. Good work!
Wow!
Looking better and better! JohnA
Hi Blake, I've been following your work on the 405/Mountaineer locomotive. Although I'm not a modeler, I can admire excellent work.
My question is, have you completed this project, and/or could we see the progress?
Although I live in western Pennsylvania, I was always interested in the O&W. Thanks for your efforts.
Don Francis
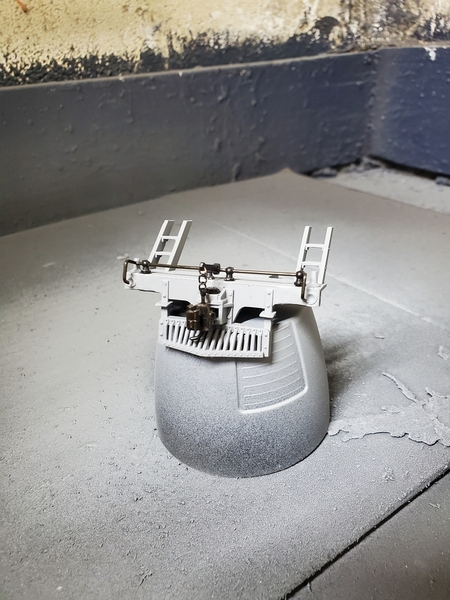
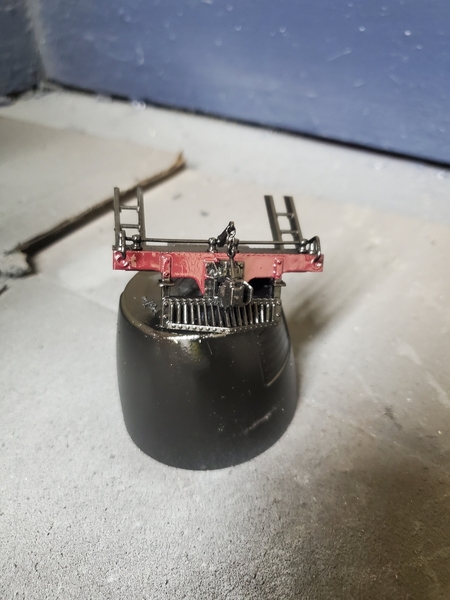
Hi folks, it's been a while since I last posted here, anyway work on 405 was at a standstill for a while, as I worked on other projects, and the matching passenger consist for the locomotive (that is a seperate post). Currently I am awaiting for custom decals to be finished for the locomotive, I also did some work to the pilot, I removed the cast on pilot steps (405 didn't have this, they were on the sides of the pilot) and repainted the entire pilot. 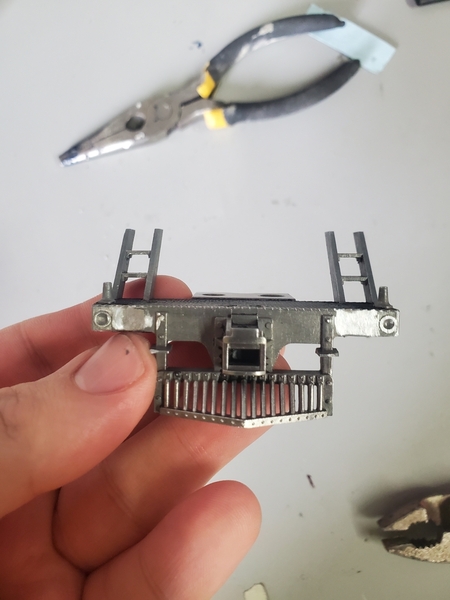
Attachments
Really enjoying this build. And, your painting is awesome! Re: wheels - if you think they look better with painted spokes, do that . We don’t know everything about every engine. It’s your model. JohnA
Well John A., I suppose if you think of it as his toy train, leaving the pinstripes on the driver's spokes would be alright. But if one is attempting to replicate an actual locomotive in model form, then it would be another matter. Don't you agree?
7- I do agree with you. I appreciate your knowledge and information about the O&W. While maybe not 100% prototypical, they look great. In the 3 rail toy train hobby, we often make compromises, enhancements, and approximations. I bet he put a lot of effort into those gorgeous striped spokes. John A
PS- you should consider writing for OGR or railroad books.
Thank you very much for the compliment John. I am most flattered!
Unfortunately, the effect of pin-striped spokes do have a bit of a "Circus Wagon Look", and that was quite antithetical to the "Speedlined" (O. Kuhler's term) Flash Gordon affect of the late 1930's "Art-Deco" approach he used. This itself, was garish in a differing way from the aforementioned. Large areas of solid color were used to de-emphasize the eye-slowing, (over the overly intricate, such as valve gear, boiler accessories, exhaust steam injectors, compressors etc.) and yes, even driving wheel spokes. Think "Scullin Disc" on a Dreyfus-N.Y.C. J3a and you'll see Kuhler's goal with only simple paint being available.
Here is a close-up of NYO&W No. 405 's drivers, taken when immediately moved from the "AV" paint shop in June 1938, it didn't even have a fire in it at this point in time. A late friend of mine, then age 11 was in the cab that day and was disappointed when he pulled the whistle chord, and nothing happened as there wasn't any boiler pressure.
The image is a contact print and was shot by O&W Engineman DeForest Diver on large format orthographic B&W film. This film renders the grays differently from how we perceive them. The deep and intense "Ontario Maroon" actually appears darker than the adjacent black painted areas of the trailing and tender trucks as well as the air tank etc. In this photo, it is very plain the tires had that one inch orange stripe around their perimeter as well as the small orange ring around each axle hub. But clearly, no spoke pinstripes.
The paint was there to give the illusion of a "solid disc". Even the coaches and twin observation cars had a black panel painted through their horizontal window areas with three one inch orange stripes over the maroon sides below the window areas.
As for 3 rail, I am aware. Just look at MTH's O&W "Mountaineer" cars as they do indeed match the above paint description reasonably well. I only wished they'd done an adequate job on an engine, hence my contacting Weaver. Decades ago, I personally handed Mike Wolf several sets of my own "Mountaineer" decals, which MTH based their artwork upon for their cars. And just as with Otto Kuhler's work on the Southern's 1941 "Speedlined" Ps-4 for the "Tennessean," I too didn't get paid! ---As for me writing books, well, there is that color one on the NYO&W. Thanks again.
@John A posted:Really enjoying this build. And, your painting is awesome! Re: wheels - if you think they look better with painted spokes, do that . We don’t know everything about every engine. It’s your model. JohnA
Thank you!! The painted spokes are nice (and honestly took a long time to paint by hand) but the goal was always to be as accurate as possible with this project, so I will remove the pinstripes on the spokes since the prototype doesn't have them.
@Super7 posted:Thank you very much for the compliment John. I am most flattered!
Unfortunately, the effect of pin-striped spokes do have a bit of a "Circus Wagon Look", and that was quite antithetical to the "Speedlined" (O. Kuhler's term) Flash Gordon affect of the late 1930's "Art-Deco" approach he used. This itself, was garish in a differing way from the aforementioned. Large areas of solid color were used to de-emphasize the eye-slowing, (over the overly intricate, such as valve gear, boiler accessories, exhaust steam injectors, compressors etc.) and yes, even driving wheel spokes. Think "Scullin Disc" on a Dreyfus-N.Y.C. J3a and you'll see Kuhler's goal with only simple paint being available.
Here is a close-up of NYO&W No. 405 's drivers, taken when immediately moved from the "AV" paint shop in June 1938, it didn't even have a fire in it at this point in time. A late friend of mine, then age 11 was in the cab that day and was disappointed when he pulled the whistle chord, and nothing happened as there wasn't any boiler pressure.
The image is a contact print and was shot by O&W Engineman DeForest Diver on large format orthographic B&W film. This film renders the grays differently from how we perceive them. The deep and intense "Ontario Maroon" actually appears darker than the adjacent black painted areas of the trailing and tender trucks as well as the air tank etc. In this photo, it is very plain the tires had that one inch orange stripe around their perimeter as well as the small orange ring around each axle hub. But clearly, no spoke pinstripes.
The paint was there to give the illusion of a "solid disc". Even the coaches and twin observation cars had a black panel painted through their horizontal window areas with three one inch orange stripes over the maroon sides below the window areas.
As for 3 rail, I am aware. Just look at MTH's O&W "Mountaineer" cars as they do indeed match the above paint description reasonably well. I only wished they'd done an adequate job on an engine, hence my contacting Weaver. Decades ago, I personally handed Mike Wolf several sets of my own "Mountaineer" decals, which MTH based their artwork upon for their cars. And just as with Otto Kuhler's work on the Southern's 1941 "Speedlined" Ps-4 for the "Tennessean," I too didn't get paid! ---As for me writing books, well, there is that color one on the NYO&W. Thanks again.
You have a very good point regaurding kuhler's use of paint, this makes sense. The goal was to make this train as accurate as possible using existing 3 rail equipment. I wish I could remember where I read it had painted spokes, but that's what I went with , I definitely agree the painted spokes give that look to them. I remember seeing the MTH Railking set years ago and passing on it, as I wasn't a fan of the locomotive nor the cars, as the middle sections of the cars were painted a dark green instead of black. I'm glad to see that black and white photo, somtime during the week I will update with repainted spokes.
I do understand your passing up on the MTH "Mountaineer" cars and (sorta) locomotive. I did too as I thought the paint in the window area was grey instead of the correct black (I've only seen online images of them, never seen them in person.)
Since you are making such an outstanding effort on your 405, would you accept as a gift from me a made to scale (1:48) 22-1/2" diameter (.469" o.d.) Mountaineer style, O&W herald engraved into .010" thick sheet nickel silver, for mounting on the front "bib" between the orange wings?
@Super7 posted:I do understand your passing up on the MTH "Mountaineer" cars and (sorta) locomotive. I did too as I thought the paint in the window area was grey instead of the correct black (I've only seen online images of them, never seen them in person.)
Since you are making such an outstanding effort on your 405, would you accept as a gift from me a made to scale (1:48) 22-1/2" diameter (.469" o.d.) Mountaineer style, O&W herald engraved into .010" thick sheet nickel silver, for mounting on the front "bib" between the orange wings?
I'd glady accept that! That's very kind of you, that would be fantastic for my model!
Good! ---P.M. me so I'll know where to send it. I will engrave it tomorrow and post a pic or two when done.
Lots of copyright infringement going on in this thread and so those pictures were deleted and accounts disabled. Our copyright policy is stated clearly in the TOS. Don't post pictures that are not yours...period UNLESS you have permission by the owner to do so! The next poster in this thread that posts a copyrighted image and/or does not follow our copyright guidelines will be banned from this forum. AND...don't change an edit that a moderator has done to your post otherwise we will delete the post completely. Finally, don't complain about our policy...contact us if you have a comment but be prepared to deal with an appropriate response based on your inquiry.
Really outstanding work @Blake This project is turning out beauitful!
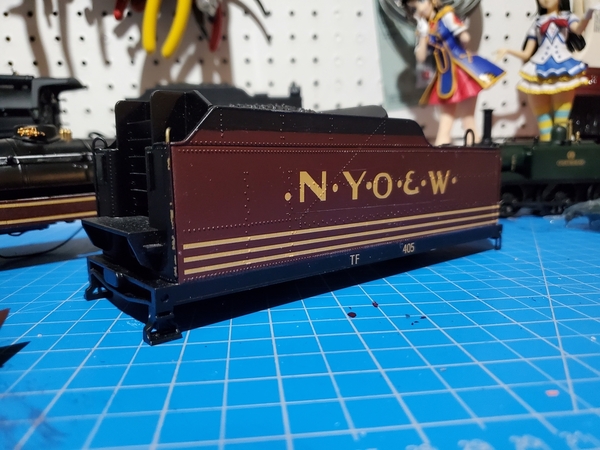
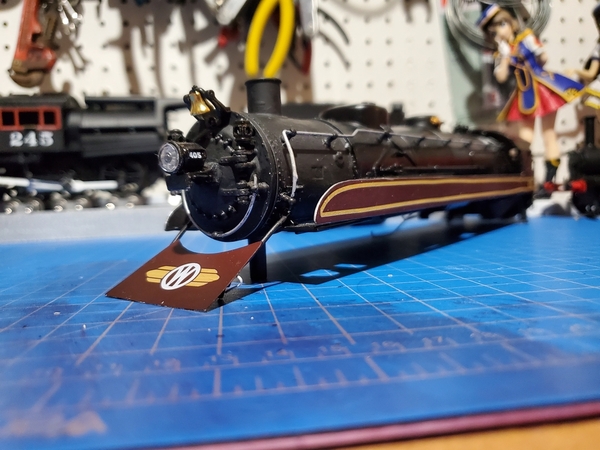
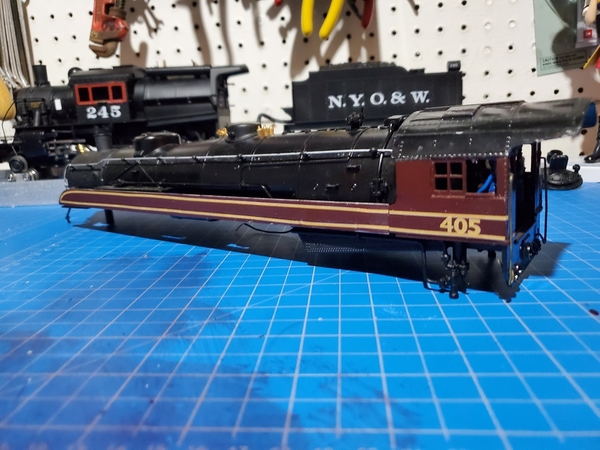
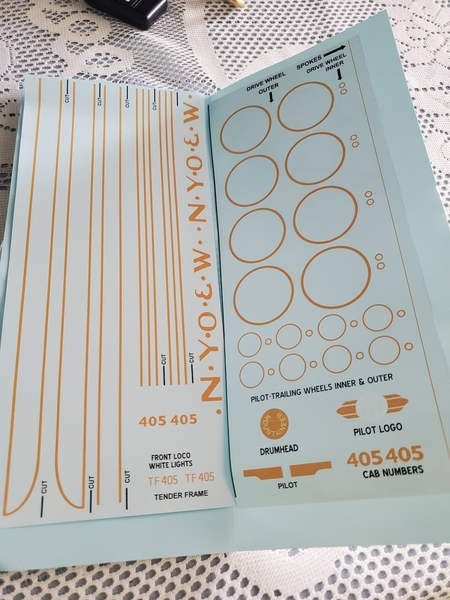
On Friday the decals from Ricky Rupp arrived for 405! Saturday I spent the morning putting all the decals on the locomotive shell and tender shell! Now my lighting makes it more yellow then orange, so do not worry. I helped Ricky make these decals over the course of a few months, and soon they will be publicly available. To keep the look consistent, I will also do the drive wheels and pilot wheels. 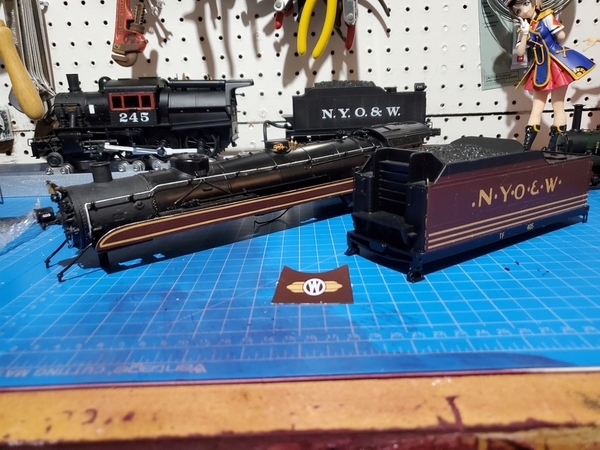
Attachments
Fantastic! JohnA
Think about a few more cab numbers for the other locos that had the "beauty" treatment
That came out really Nice. What a transformation from what you started with. I’ve been working on a similar project based on the same USRA Mountain. A bit of detail changes but a basic black paint job and re lettering. Yours is a lot more involved paint wise. Again. Nice work.
Outstanding, Blake! Worth waiting for! Don Francis
Beautiful work, thanks for sharing this process with us. Highball!
That thing is sharp beyond belief! I can't get over that paint job!
Well done sir! Always enjoy seeing people’s conversions/ modifications!!
JohnA
Downright beautiful. That’s what modeling is all about. Excellent work.
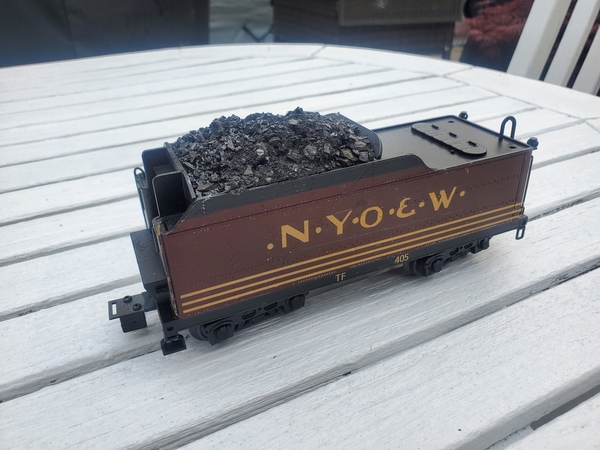
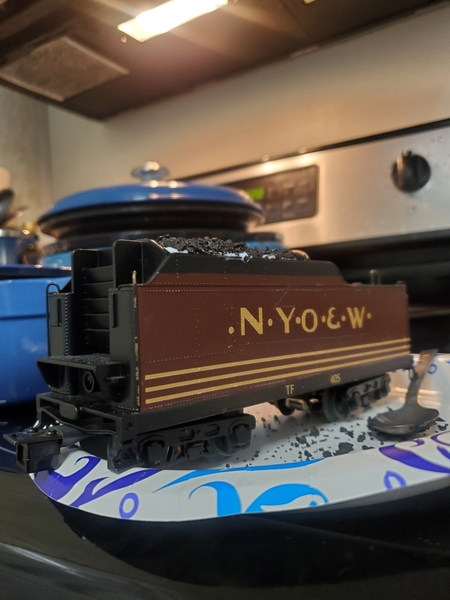
I thank everyone for the nice comments! This was a passion project and I'm finally happy to have made this locomotive in all its glory! Today I started adding a real coal load to the tender. This isn't just regular coal however, this is real O&W coal, given to me many years ago by a guy who actually worked on the railroad, he collected a bag of coal from the Middletown "AV" shops when steam was on its way out. That's story I was told so I'll stick with it! Anyway a few chucks of the coal was crushed into smaller pieces and sifted, then regular white glue was applied to the top and the first layer added. Probably will do another layer then add a very fine layer of "coal dust" to finish it off. 


Attachments
That's a cool back story! I always appreciate that kind of lore being built into something. It's adds so much depth!
May I make a suggestion concerning your coal load. Before you get too far along, you might want to look at photos of the real locomotive, in service, that you are modeling. Many folks tend to model a tender "completely full" of coal, but fail to understand just how the coal was loaded into the tender from the railroad's coal dock/chute. On the other hand, you might try having the tender coal load appear as the locomotive is out on the main line pulling a train, i.e. with the coal in the front of the coal bunker really low, which is where the stoker screw draws the coal.
One other point, having used "real coal" in a few of my tenders, plus on the ground around the coal dock, I began to notice over time that some of the coal was beginning to oxidize and turned to gray ash. Had to touch that up with black paint.
@Hot Water posted:May I make a suggestion concerning your coal load. Before you get too far along, you might want to look at photos of the real locomotive, in service, that you are modeling. Many folks tend to model a tender "completely full" of coal, but fail to understand just how the coal was loaded into the tender from the railroad's coal dock/chute. On the other hand, you might try having the tender coal load appear as the locomotive is out on the main line pulling a train, i.e. with the coal in the front of the coal bunker really low, which is where the stoker screw draws the coal.
One other point, having used "real coal" in a few of my tenders, plus on the ground around the coal dock, I began to notice over time that some of the coal was beginning to oxidize and turned to gray ash. Had to touch that up with black paint.
This brings up an excellent point, …..unfortunately, in Blake’s case, his tender is near flat across the top, ….on several brass engines, I’ve modeled exactly as you described, showing off the nicely detailed bunker walls, and sloping panels designed to aim coal towards the stoker, …..wish we could see more of the half empty tenders in the modeling world,…..good point Jack,…
Pat
@Hot Water posted:May I make a suggestion concerning your coal load. Before you get too far along, you might want to look at photos of the real locomotive, in service, that you are modeling. Many folks tend to model a tender "completely full" of coal, but fail to understand just how the coal was loaded into the tender from the railroad's coal dock/chute. On the other hand, you might try having the tender coal load appear as the locomotive is out on the main line pulling a train, i.e. with the coal in the front of the coal bunker really low, which is where the stoker screw draws the coal.
One other point, having used "real coal" in a few of my tenders, plus on the ground around the coal dock, I began to notice over time that some of the coal was beginning to oxidize and turned to gray ash. Had to touch that up with black paint.
Yup, very valid point and a look I'm trying to avoid. I am keeping that into consideration regarding how the coal looks, I only did one layer and will continue later on. Best part is if I add too much I can easily remove it before it dries (I'm using tacky glue) .
You might think about cutting the front portion of the tender's coal bunker out, and making a basswood insert, to hold the coal.
That thing really grabs the attention. It's dressed better than Joseph A Bank himself!
Very nice!
Peter


