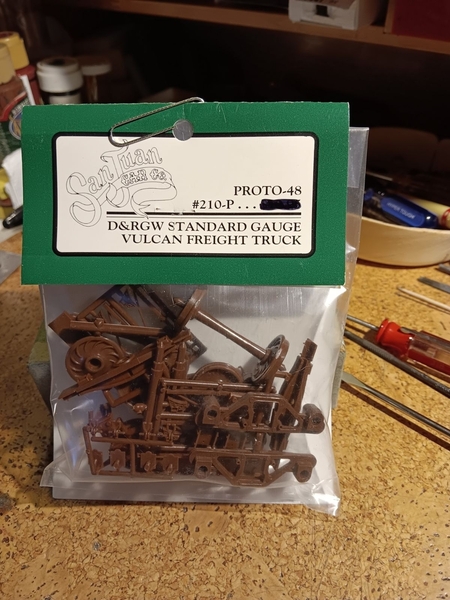
I recently picked up a couple of these, just because I've always been curious:

P-1

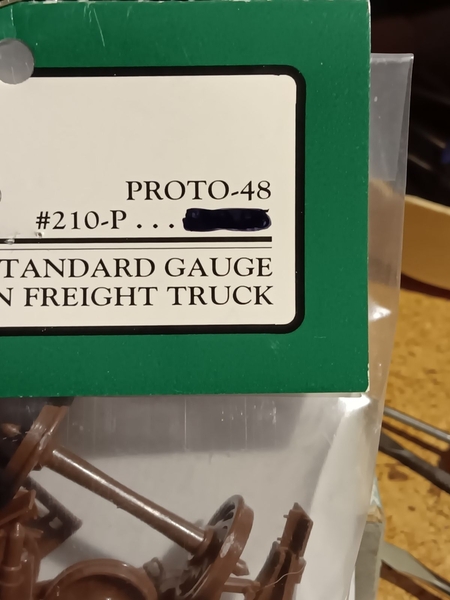
...as you can see, it's clearly marked "Proto-48":

P-2

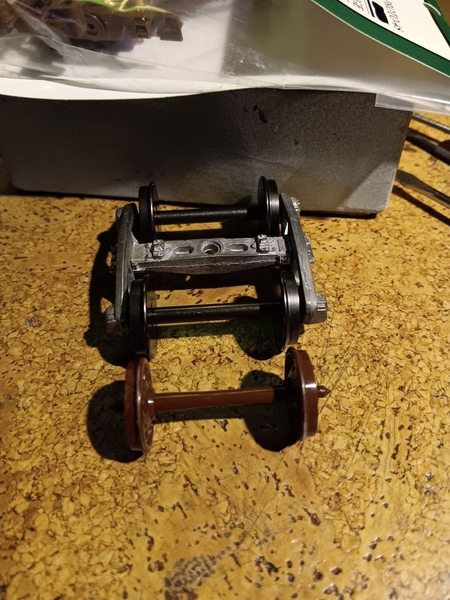
I assembled one of the wheels sets, but it looks like "regular" O scale 5' gauge. Here it is next to a truck with Intermountain wheels:

P-3

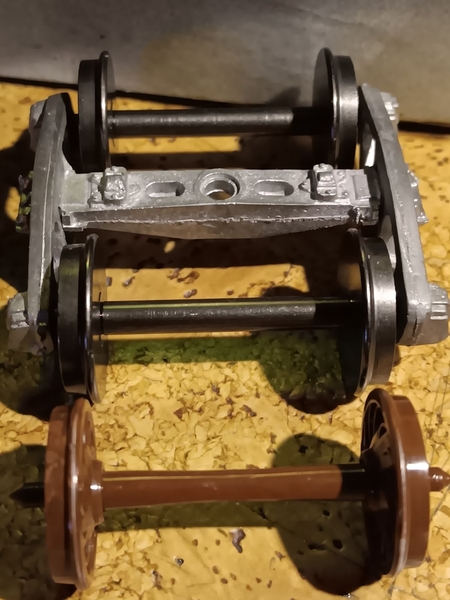
...and a closer look:

P-4

Although the wheels are certainly narrower, this a hair wide (I checked it against a NMRA wheel gauge).

There's only one way to assemble these, so it should be fail-safe in 4' 8 1/2" gauge.

So...what am I missing here? 

Mark in (chilly today) Oregon

Attachments

Images (4)
  • P-1
  • P-2
  • P-3
  • P-4
Last edited by Strummer
Original Post

Replies sorted oldest to newest

Your post peaked my interest, so went and looked up San Juan Car Co.  The image of the truck kit you bought shows the wheels and axles in pieces, but the ones in your kit are already assembled.  Perhaps in their change to putting the wheels/axles together in the kit for you, there was a manufacturing goof.  I noticed in the ad, the wheels have a recess on the inside the axle fits into, are your wheels fully seated so that the larger part of the axle is fitting in that recess?

I think as above you found a goof.   

3 things should indicate proto-48.    First the wheel gauge - and since yours fits the NMRA gauge which is scale 5 feet, it is not right.    the wheel gauge should be narrower approximate 4.177 inches, not 4.25 inches.

The second thing is the wheels should be narrower.   Not sure, but at least 30% I think.

The third thing is the flanges on the wheels should be smaller.   Again I don't know how much, but noticably so when compared side by side.

San Juan made both Proto48 and O Scale trucks that are close. First difference is the wheel width and axels are different. I think some modelers in Texas were using the Proto48 wheels on O Scale axels. Sort of a cross between the two.

Next difference is the backside of the side frames. The Proto48 side frame had more backside detail on the journal boxes and the O Scale were close to flat against the back of the side frame. The side frames in your photo look like Proto48 side frames.

There is a lot of repackaging by people who don't know much about the products on the secondary market. I've seen a number of Yoder Proto48 trucks listed, when they have really been an O Scale plastic truck in a Yoder box.

Thanks for the responses.

I assembled that one wheelset before I took the pictures; all of them (I got 4 kits) have the axles and wheels on separate sprues, needing assembly.

The flanges are noticeably smaller, with the wheels showing "whirly" detailed back and "Griffen" and "Denver" on the face.

They look to be really nice, and I  suppose if they all turn out to be 5' gauge, I  will end up with nice looking trucks in any case.

Will post pictures after I have assembled one...

Mark in Oregon

Mark,

A word of caution about San Juan trucks. The wheelsets need to be inserted into the tracks as you assemble the trucks. The plastic bolsters do not allow for twisting the bolster as a lot of modelers do with other makes of plastic trucks. Most other plastic trucks have a solid bolster, the San Juan bolsters are built up from thinner cast pieces.  If you want to change wheel sets out after the truck has been assembled, it is best to remove the springs and take off a side frame to release the wheels.

I've known some modelers who tried to twist the San Juan trucks and the bolsters do not hold up to that handling.

Thanks George

Yes, I'm finding these are quite the puzzle to assemble; there are no instructions, just a very simple exploded view.

I guess because they are particularly "realistic", the parts are very delicate and therefore need a gentle touch. I spent almost 2 hours last night on the first one...and only got as far as getting the basic parts (side frames, wheels, bolsters and springs) together. Haven't started adding any of the details yet.

I can say it rolls very nicely and looks good so far...at 5' gauge.

Mark in Oregon

Mark,

Depending on the type of truck the bolsters are slightly different to assemble. Most consist of four pieces, a top sheet, a bottom sheet, and two ends with spring locations that need to be glued together. The joints where the two ends attach is very important to make sure it makes good contact while being glued. Where the two ends attach is the weakest point of the bolsters, and where the are most likely to fail later.

Some modelers place a small tube (not a part of the kit) inside the bolster where the bolster screw will go through. It helps keep the bolster screws from going sideways inside the bolsters.

I normally build the brake rigging last, after the basic truck is assembled with springs installed. I found it tends to get knocked off it's mounts if I do that earlier in the build.

Just take your time and enjoy the build. They are very nice trucks when completed.

Add Reply

Post

OGR Publishing, Inc., 1310 Eastside Centre Ct, Suite 6, Mountain Home, AR 72653
800-980-OGRR (6477)
www.ogaugerr.com

×
×
×
×
Link copied to your clipboard.
×
×