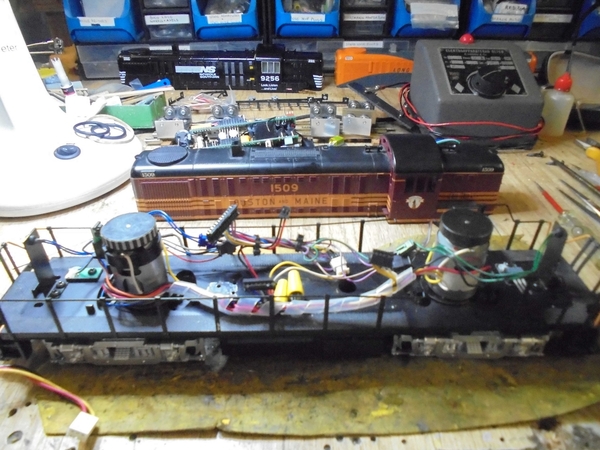
Just received my latest acquisition from a Cabin Fever Auction.....an Alco RS-3 in the Boston & Maine livery. It wasn't made clear in the auction description which model it was, so I took a punt and purchased it, without a box to indicate which model it was.....PS1, PS2 (3v or 5V), or PS3.

DSC03256

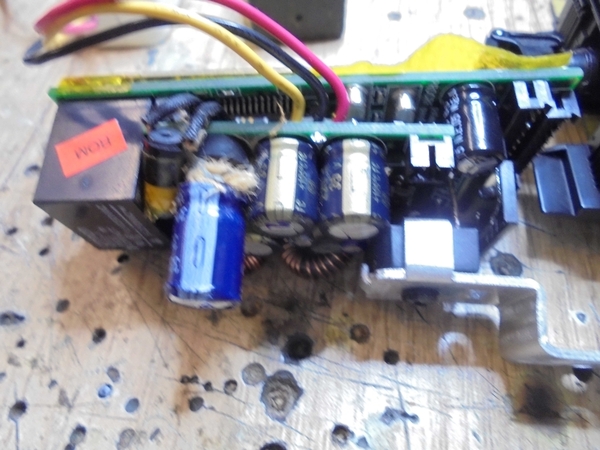
Turns out it is a Railking PS2 (5V), model No. 30-2207-1. I pulled the shell off to check the battery and speaker.....the usual suspects...and found this blown capacitor on the top circuit board.

DSC03257DSC03259

Never seen a capacitors blow itself apart from its base.....normally they bulge and blow from the top!!! Bits of paper everywhere!!! Would have made some noise when the explosion took place.

Question 1: Is it worth pulling the boards apart and replacing the capacitor, in the hope everything else will be OK, or do I just bite the bullet and order a new PS2/3 top and bottom board, and the new speaker and programming to match the upgrade???

Question 2: If I decide to go the repair method, how the he.. do you separate the top board from the bottom board???

Are they the same as my old faithful PS1 boards, where the multitude of fine prongs just pull out of their connection to the bottom board, and go back together with that all assuring "click", or is there some special word/action/tool I must use - apart from the profanity I have been using when trying to get these two boards apart???  They are stuck together TIGHT!!!!

Your help, guidance, and inspiration will once again be appreciated.

Peter.....Buco Australia

Attachments

Images (3)
  • DSC03256
  • DSC03257
  • DSC03259
Original Post

Replies sorted oldest to newest

She's done. You can try it you want, but I would bet that is already burned open circuit.

You also do not need to separate the boards. Especially since the cap already blew. You remove that rubber plug- it will pull off over the leads. Then use a soldering iron to heat the lead one at a time and pull them out. Leave your new capacitor with longer leads to leave a gap between the cap and the board, and use a fine tip soldering iron and you can solder a new cap back in place.

But honestly, again, ROI on that amount of work and effort, the board likely is dead.

I would not go that far to say not bidding on a 5-volt board engine but I would pay a low price assuming the board is blown and count on replacing the board if I can find a ps2 3-volt board or if I really like engine put in a ps 3/2 board and super cap and replace the speaker with a 4-ohm speaker!

I have purchased a ps 2 5-volt engine FEF which board had failed I found a ps2 3-volt and the engine is still running today!

Alan

Last edited by Alan Mancus

I'd certainly take a stab at replacing the cap.  Although Vernon could be right, I've revived a couple of boards with that cap in distress (not as bad as your picture), and they still live on.  FWIW, I've seen plenty of caps come apart like that.

FWIW, even without the cap being blown up, it's really not that hard to replace that particular cap with the right soldering iron and technique.   You need a long needle-tip iron that can reach in to the far side after wedging the boards slightly apart.

  • Using a wedge pry the two boards apart as far as you can without breaking anything.  Forget about separating them, that's a major PITA and usually results in board damage.
  • Trim the leads on the bottom of the cap as close to the board as you can.
  • Heat the far lead and rock the cap toward the outside of the board.
  • Heat the near lead and rock the cap toward the inside of the board.
  • Repeat the rocking a couple of times and the cap will be free.
  • Clear out the hole nearest to the edge with solder braid or a solder sucker.
  • Trim the leads of the new cap so they'll just slightly project through the board.
  • Position the cap on the near hole and the still soldered far hole.
  • From the bottom, heat the far hole until the solder melds and the cap lead drops in.
  • Solder the near lead.

When I get something with a 5V board, I check that cap.  If it shows damage or is the WINCAP brand, I replace it on the spot.  I still have a few 5V boards that have lasted for many years.

We've all been there Peter. I call it bidders fever! Another quick reference is to look for the charging plug on the bottom of the loco if shown in pix. The 5v used the external charger.
I'm with the others, give the cap replacement a shot. No harm no foul in a few hours and a 50 cent cap. If not then a PS/32 stacker install is quick and easy. Make sure you order the heat-sink kit too (don't ask me how I know).

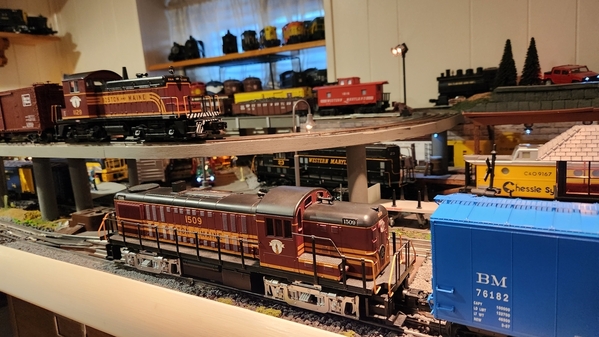
I like your choice of road names btw!

2023-07-22 07.52.27

Bob

Attachments

Images (1)
  • 2023-07-22 07.52.27
@Paul Kallus posted:

Am trying to understand all this. I have two of the original BiPolars with the 5 volt system, white battery. They haven't been run since first purchased ~ 20 years ago +-. Is there a method to prevent the cap from blowing or is it doomed no matter what?

Age kills them Paul,….not a whole lot you can do about it,….some survive, some die, and some explode ……and then die …

Pat

@Paul Kallus posted:

Am trying to understand all this. I have two of the original BiPolars with the 5 volt system, white battery. They haven't been run since first purchased ~ 20 years ago +-. Is there a method to prevent the cap from blowing or is it doomed no matter what?

Replace the battery with a new green one or a super cap before powering them up. The old batteries will kill them too.

@Paul Kallus posted:

Am trying to understand all this. I have two of the original BiPolars with the 5 volt system, white battery. They haven't been run since first purchased ~ 20 years ago +-. Is there a method to prevent the cap from blowing or is it doomed no matter what?

First, REPLACE THAT WHITE BATTERY!

Like I said, I check two things.

  • Check and see if there is any sign of swelling or leakage from the cap.  If the top is domed or there's any sign of expansion or leakage around the bottom, replace it.
  • If the cap is the WINCAP brand, replace it.
Last edited by gunrunnerjohn

Thanks John (gunrunnerjohn) and Bob (RSJB18) for the encouragement to give the cap replacement a go, and also to John for the excellent tutorial on removing and resoldering the new cap.....you make it sound soooo easy!!!

I'll let you know how it went in a day or so.🤞🤞🤞

Yeh Alan....I must admit I only paid $85.00US (about $145.00AU) for it, but the cost of the postage to get it to me here in Australia was way more than the cost of the loco, so it ends up still being an expensive exercise. And then to get a new PS3/2 diesel kit, and have it posted "down under" sends the cost into the stratosphere!!!

Paul: Take the good advice offered by the guys above......don't even think of applying power to those BiPolars without opening them up and replacing that crappy "white" battery, and inspecting that capacitor!!!!! These PS2 5V boards will commit "hari-kari", and you won't even know it until you power them up, and it will be "good night Gracie".

Peter....Buco Australia

UPDATE ON CAP REPLACEMENT

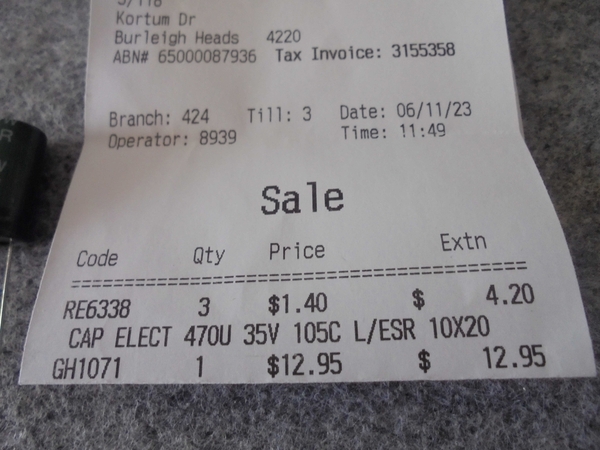
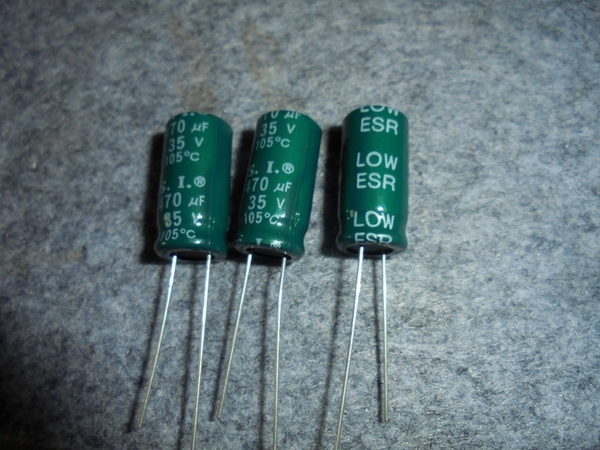
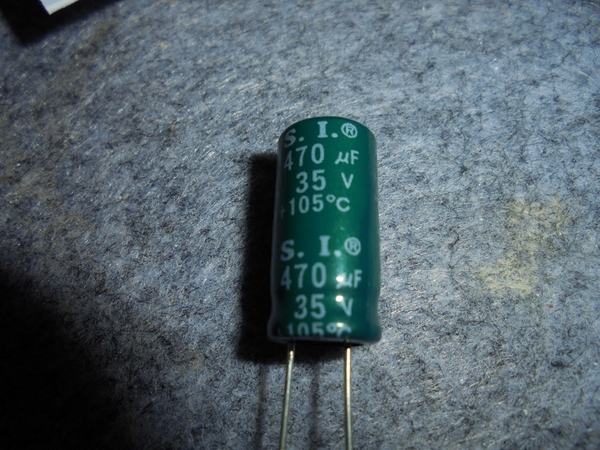
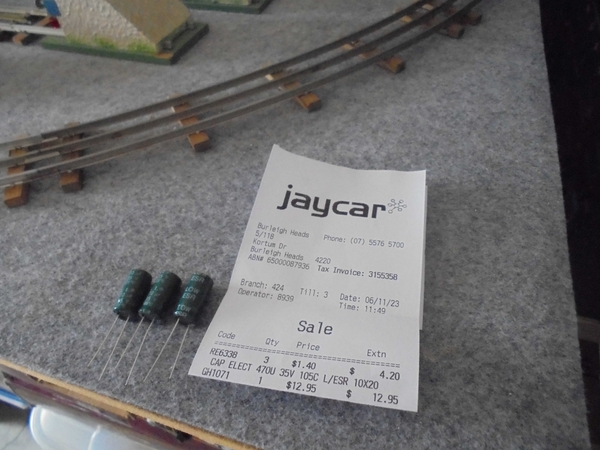
Well I went to my favorited electronic store (Jaycar) today to get replacement capacitors. The best they could do was these (see photos)

DSC03260DSC03261DSC03262DSC03264

The original crappy "Wincap" was marked at 330uF and 35V, but the closest Jaycar had are a Low ESR S. I. marked at 470uF and 35V.

Gunrunnerjohn, will these be OK as a substitute, or should I try and locate the exact type used by Wincap???

Peter.....Buco Australia
Attachments

Images (4)
  • DSC03260
  • DSC03261
  • DSC03262
  • DSC03264
@RSJB18 posted:

We've all been there Peter. I call it bidders fever! Another quick reference is to look for the charging plug on the bottom of the loco if shown in pix. The 5v used the external charger.
I'm with the others, give the cap replacement a shot. No harm no foul in a few hours and a 50 cent cap. If not then a PS/32 stacker install is quick and easy. Make sure you order the heat-sink kit too (don't ask me how I know).

I like your choice of road names btw!

2023-07-22 07.52.27

Bob

Bob to expound upon your post - both 5v and 3v PS2 systems were capable of external charging. 5v has the female barrel charging port, whilst 3v has the rectangular female charging port.

Last edited by Mark V. Spadaro
@RSJB18 posted:

I miss Radio Shack. I have a store called Micro-Center nearby. They have a decent maker and PC builders department with a good variety of components in stock.

Good luck with the install Peter.

Thanks for mentioning Micro Center.  They recently opened a store about 5 miles from me.  From their website, it doesn't look like they deal with small random individual parts (capacitors, resistors, switches, etc.), so I never considered them.  But if you've found parts there, I'll pay them a visit.

Obituary:  It is with a heavy heart I advise the passing of my PS2 5V board.

Resuscitation efforts with the capacitor transplant has failed to breathe life back into the old girl, and she was officially pronounced "DEAD" on Wednesday 8th November 2023.

There was a slight "SPARK" of life when the board/loco combination was disconnected from the Z4000, and an attempt to confirm a solid solder joint of the new/doner capacitor legs to the board was undertaken with a fine metal screwdriver.

Power was getting to the new capacitor, but the rest of the board's vital organs failed to respond. A small service will be held this coming Saturday, however the family have requested no flowers, but instead donations to the MTH PS3/2 replacement kit will be appreciated. RIP!!!!

Peter.....Buco Australia.   

Add Reply

Post
This forum is sponsored by MTH Electric Trains

OGR Publishing, Inc., 1310 Eastside Centre Ct, Suite 6, Mountain Home, AR 72653
800-980-OGRR (6477)
www.ogaugerr.com

×
×
×
×
Link copied to your clipboard.
×
×