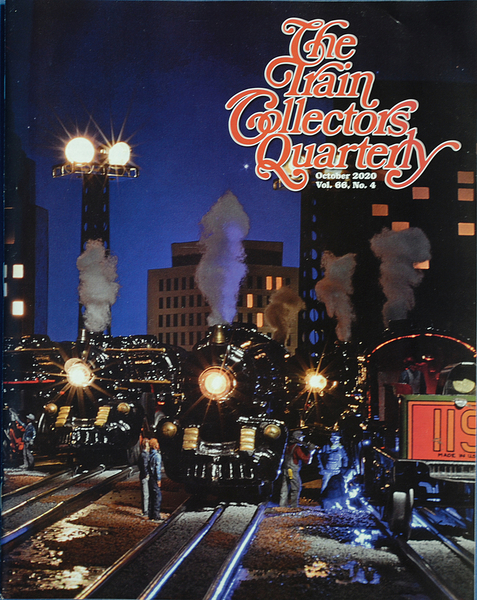
Robert S. Butler's recent TCAQ cover art recalls the whimsy the late Ward Kimball infused into his tableaus. The multiple loco headlights on in the night scene, smoke billowing from several stacks and a number of crew figures at work, including a welder all add to the art of this carefully posed photo. BRAVO, Sir for a great scene worthy of the legendary Kimball!
Replies sorted oldest to newest
Yes, RSB sent me a preview of the cover photo last week and my Quarterly arrived in the mail yesterday. It is a fantastic shot. I believe that marks 3 recent TCA Quarterly cover photos by RSB. Well done!
Yes, RSB is putting together some fantastic photos. There are some really good articles in some issues!
Thanks for the compliments guys - I had a lot of fun putting it together and I'm glad you like the result. Later today (the boss says we have to get the housework done first ![]() ) I'll post a couple of pictures and some text to this thread to give you some idea of the inspiration for the picture and the planning involved in the set up.
) I'll post a couple of pictures and some text to this thread to give you some idea of the inspiration for the picture and the planning involved in the set up.
An artist at work!
Great picture! Not a big tinplate fan but I was mesmerized by the story within the picture!
This post may fall into the category of Too Much Information so if it does, my apologies in advance.
I guess the first thing I should do is provide a picture of the current TCQ cover so everyone knows what I’m talking about.
The motivation for the picture were pictures of early morning ready lines on the real railroads with numerous engines of the same type steamed up and waiting to start the day’s work.
From the standpoint of creating something like that with old toy trains there were two problems.
- Where do I get enough locomotives of the same type?
- The pictures of the ready lines typically had one or two straight lines of track with the locomotives fired up nose-to-tail so, even with enough tinplate locomotives, a picture of this type would have way too much dead space. What to do?
My collecting interests inadvertently provided the solution to problem #1. I’m very fond of the second generation of cast iron superstructure steam locomotives American Flyer offered in the 1930-1931 time frame and, over time, I’ve acquired a number of sets headed by either a #3195 or a #3197 engine. These two locomotives share the same superstructure and differ only in internal mechanical features.
The second problem was solved when I found a picture of a huge, multi-track ready line assembly of locomotives in one of those coffee table train books. It occurred to me if I was standing directly in front of that assembly all I would see would be the first one or two locomotives on each track and lots of smoke plumes from the engines behind.
In order to see if the idea would work, I just pulled pull out some track and the locomotives and took a few pictures to see how things would look.
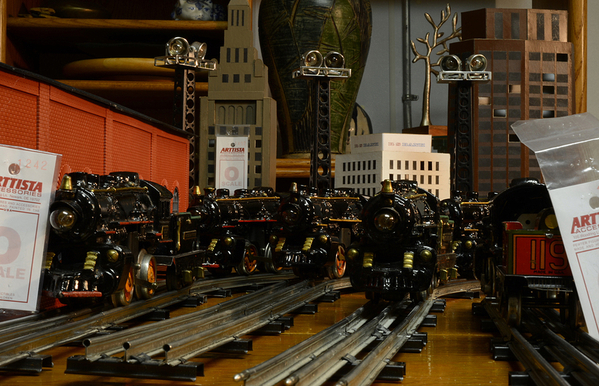
I liked what I saw so I went down to the basement, set up my diorama base (3 scrap kitchen cabinet doors resting on boxes of trains), brought the trains and the track down and spent quite some time moving the track and trains around until I had an initial train/track composition I liked.
While I was doing this, I was also thinking about the background. I didn’t want a generic city scene so I picked some of the landmark buildings of the Cleveland skyline.
My three sources of inspiration for the buildings were Terminal Tower, The PNC Bank Building, and the Huntington Building. I made these out of card stock, masking tape, and spray paint.
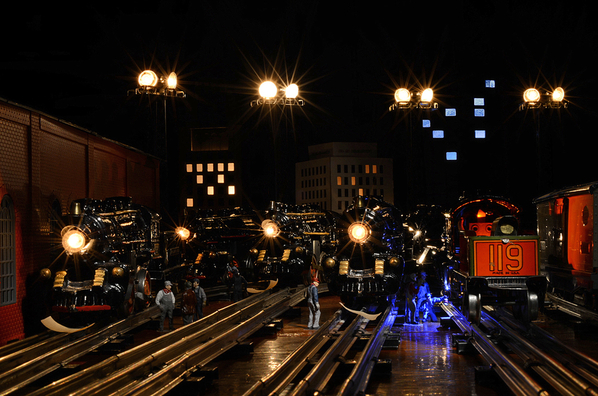
Once the buildings were in place, I spent more time working out track and locomotive locations, depth of field, figure placement, lighting and lighting control (there were about 13 separate switched circuits for the various lights and colored LED's ), ground cover, etc.
Depth of field check,
Lighting/Possible Figures/ Possible Figure Location/Locomotive Location
First Lighting Check with Ground Cover In Place
One of the many enjoyable aspects of diorama photography is that you get to do Hollywood in miniature – namely, if the camera can’t see it then it doesn’t matter what it looks like.![]()
Diorama overview
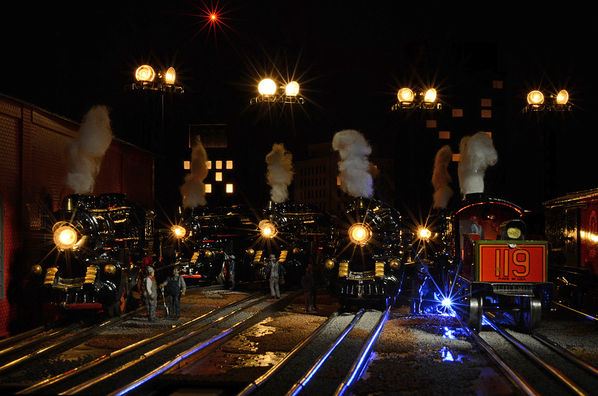
With everything set up and wired, I started doing test exposures on all of the separate circuits to work out the best times for exposure for each. I worked out a sequence of on/off switching on my control panel (lower left of upper picture) which allowed me to lock the camera shutter open (the whole basement was blacked out) and turn the lights on and off for the correct level of exposure. Oh yes, there was also the issue of exposure times for my mini-spotlight (a mini mag-lite) to highlight 10 various locations on the diorama to give the effect of yard light illumination.
…and 71 pictures later, with a dab of Photoshop for the stars and Venus, I got what I wanted.
One thing about the final picture – obviously it is too big for a magazine cover. I knew this before I started and planned accordingly. There’s an old adage: when it comes to submissions, editors like too much rather than too little. So, in order to give the editor as many choices as possible, I deliberately positioned buildings, lights, and locomotives to permit multiple possibilities for cropping. I also made sure there was enough empty sky so, regardless of the final crop, there would be room for the magazine logo with a minimum interference from elements in the picture.
I think the Quarterly editor did a fantastic job with respect to choice of crop and it’s evident from the posts that many of you do too.
Attachments
WOWSA! THANK YOU, Sir, for your tableau modeling efforts as well as your photographer skills! GREAT JOB all around!
Great job on this. Thanks for taking the time to explain how you got this result.


