The layout is always on your left as you proceed from the bottom of the stairs and farther into the trainroom.
 That is, there is one viewing aisle, alongside the right of the layout, which I named "Moon Township."

The first neighborhood you see is the Andreano Village section of the township, featuring 3 mainlines and 1 trolley line, a closed-loop in the nearby Suburban Neighborhood....
Next is the suburban neighborhood.

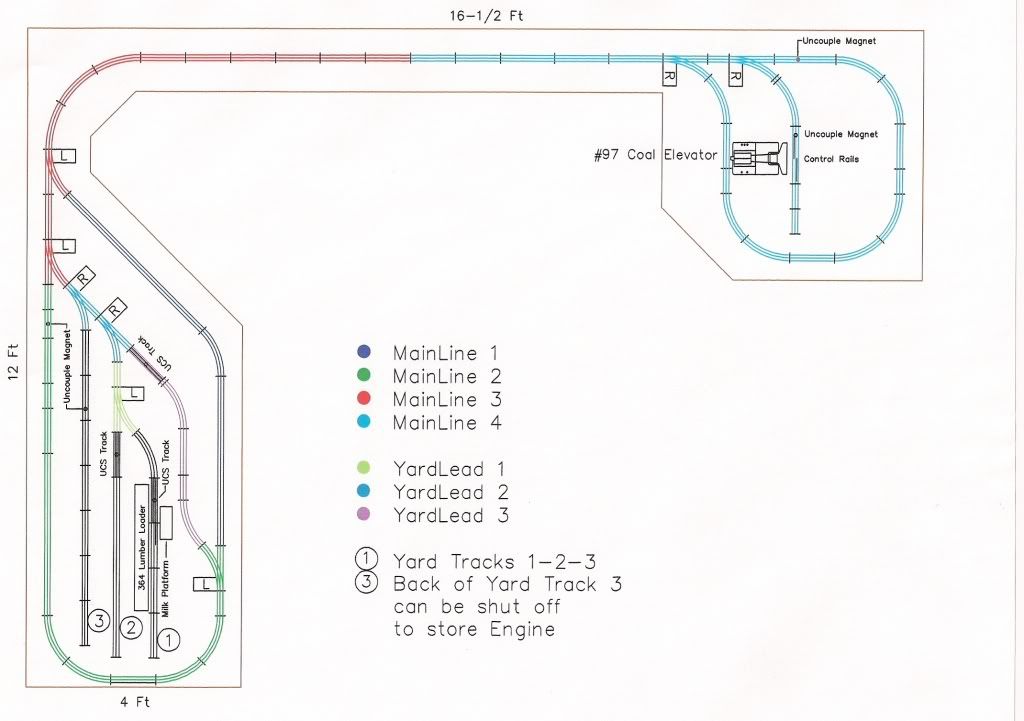
As you continue to walk further alongside the layout, the next area is the service yard for the trains,") which is accompanied by a working man's neighborhood of small businesses to serve a working man's temporary needs while going to or coming from work.
which is accompanied by a working man's neighborhood of small businesses to serve a working man's temporary needs while going to or coming from work.
A narrow section, mostly involved with track going to and from somewhere is next.
The 3 mainlines of Level One enter mountains that frame the "V-Valley neighborhood, on three sides, with 1 closed-loop of its own on Level One of the overall layout; 4 closed-loops on its second level, 2 of which frame the valley on 4 sides; a 3rd level closed-loop "dog-bone" is perched in its own neighborhood...
")
Continuing to walk through the trainroom, we come to the more rural neighborhood's country lane..
...followed by the newest section... ..established in space carved from the 2-car garage, requiring the removal of walls, building walls, raising a floor, and relocating the garage-to-basement door, which also became the location for the bank of ZWs that powers the layout.
 This part of the viewing aisle allows a left into that newer section, or return to the front of the layout, now on your right side, or you can exit the basement thru that door to the garage.
FrankM, Moon Township, USA


")


")


")


")


 This
This")

")


