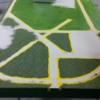
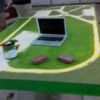
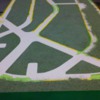
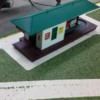
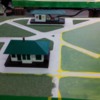
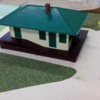
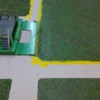
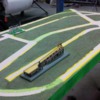
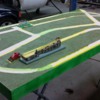
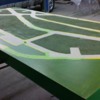
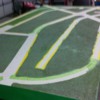
Hey all, a week or so ago I posted asking for info on the D-148 and got some great help on it. The plan was to work on building it in two weeks when my spring break starts, but I got an early start this weekend with an impromptu trip home.


After getting info on the D148, I decided to build a 106 because I already have most of the accessories that are found on the display. Then I went to Lowe's to get supplies with my father and realized how big an 8x8 is. I'm only going to be able to build one of these things, at least for a while, so I might as well go with the more appealing design in my eyes, so back to the 148 it was.


My father was a carpenter a good deal of his life and is a pretty good craftsman, so building the surfaces was a breeze. We went with 1x4s like the original designs had, but used 1/4 instead of the original 3/8s plywood in building the benchwork. This was done to provide a lighter set of benches for easily moving them, as I'll be all over the place the next few years between schooling and starting a career. I was concerned the 1/4" would be too flimsy, but he selected sheets he was happiest with out of the strongest affordable material they had in the store (don't remember the type of wood immediately). 


I bought a rattle-can green that we painted the trim on the benchwork with that is an astonishingly close match to the bright green used on dealer displays early in the postwar years. I like how bright and fun it makes the displays look, even if it isn't technically correct for the 148 (would have been if I stayed with the 106). We also built a control panel extension that is angled like found on the 106, rather than mounting all the transformers etc on a corner of the board like on the 148 originally. It makes the controls seem a bit more "official" in my mind, and gives me a corner on which I can mount an accessory (probably a 455 oil derrick my GF's father had that he gave me over Christmas holiday when I started getting back into railroading more).


The plan now is to paint the table tops, sprinkle the sawdust for "grass," and build the mountain over my spring break. And keep collecting accessories, of course. 


To guys that have built postwar layouts, what colors have you found closest to the original road surface or the green below the faux grass? I can't find a tan I'm happy with, and the grass green I'm iffy on as well. 


I'm sorry to say I failed to get pictures of everything, but this post will be ongoing with progress and pictures moving forward. Thanks for taking time to read it.

Original Post

Replies sorted oldest to newest

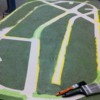
Got to work on the display this weekend since my spring break began Friday. The tan paint is a generic tan from Walmart and the green is Behr Dill Pickle from Home Depot. The 919 sawdust I bought is significantly darker than I thought it would be- hasn't faded since its been in bags 50+ years. Anyway, here's pics of the progress on one of the boards. as i said, the 919 is darker than I expected, but doesn't look as dark in person as in the photos

Attachments

Images (5)
  • image
  • image
  • image
  • image
  • image
Originally Posted by Moonman:


Andrew,

Since the #919 has multiple colors, did any of the brown and yellow settle?


It's looking nice. You can see the texture of the #919 easily in the photos. That's the different and '50's effect to my eye.


Keep us posted.


I have 5 bags of the 919, and all looked different. I put them all in a mixing bowl and stirred to get an even color. You can see the Browns more in person- these are cell phone photos, so the quality isn't great.

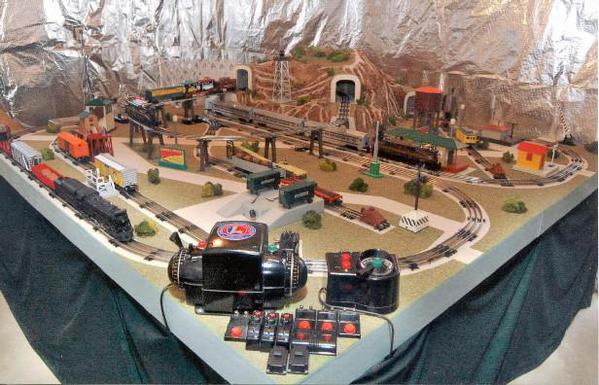
Nice job.  I like the way you made the rounded corners on the roads and track beds just like the original!  Attached is a photo of my replica D-165 (1956) that I built.  It is replica of the "Dealer Catalog Version" as the actual D-165 produced was rather different, but I didn't know that at the time I built this layout!  The grass is Lionel 919, and like Andrew, I mixed up all of about 9 bags of the stuff in order to get a uniform color.  The grassy areas were screened onto the boards, and I had to add an extender to the latex paint I used so that the paint would remain tacky long enough to sprinkle on the grass.  The mountain is made from special felt that was custom made for me that is similar to the wool felt in the Lionel 920 display sets.  It was soaked in hot "fish glue" and draped over a wire screen and wood frame.  It was then painted with casein theater paints mixed with the fish glue just like the original dealer displays.  Even the wiring is cloth covered wire where it is exposed.  I always liked these display layouts and remember very well seeing them in stores when I was a youngster in NYC.  Keep up the good work - you've made a great start!  

D165Layoutresized

Attachments

Images (1)
  • Frank G D-165: D165 Dealer Display Replica
Originally Posted by Andrew B.:
Got to work on the display this weekend since my spring break began Friday. The tan paint is a generic tan from Walmart and the green is Behr Dill Pickle from Home Depot. The 919 sawdust I bought is significantly darker than I thought it would be- hasn't faded since its been in bags 50+ years. Anyway, here's pics of the progress on one of the boards. as i said, the 919 is darker than I expected, but doesn't look as dark in person as in the photos

Be sure to update your progress..what a great project well executed!

Originally Posted by Frank G.:

Nice job.  I like the way you made the rounded corners on the roads and track beds just like the original!  Attached is a photo of my replica D-165 (1956) that I built.  It is replica of the "Dealer Catalog Version" as the actual D-165 produced was rather different, but I didn't know that at the time I built this layout!  The grass is Lionel 919, and like Andrew, I mixed up all of about 9 bags of the stuff in order to get a uniform color.  The grassy areas were screened onto the boards, and I had to add an extender to the latex paint I used so that the paint would remain tacky long enough to sprinkle on the grass.  The mountain is made from special felt that was custom made for me that is similar to the wool felt in the Lionel 920 display sets.  It was soaked in hot "fish glue" and draped over a wire screen and wood frame.  It was then painted with casein theater paints mixed with the fish glue just like the original dealer displays.  Even the wiring is cloth covered wire where it is exposed.  I always liked these display layouts and remember very well seeing them in stores when I was a youngster in NYC.  Keep up the good work - you've made a great start!  

D165Layoutresized

Frank G., I really like the look of your layout. Any further detail on the felt for the mountain? Also, how you worked with the fish glue? I'm struggling to get my layout as "authentic" looking as possible, and the original materials are appealing. I bought a 920 set on eBay, but obviously don't want to actually use it.

The felt was a custom product produced by a now defunct manufacturer.  There is nothing available today that will match the exact felt used by Lionel, which was a wool based felt product.  Kunin Felt used to make a acrylic felt in their "Rainbow Classic" line called "Greystone" that was pretty close, but it was lighter in both color and weight than the Lionel stuff.  Acrylic felt does not work as well, since it doesn't shrink when it dries like the wool felt.  The shrinking helps with getting all of the "nooks and crannies" that was the signature of these felt mountains.  Sutherland Felt makes ASTM grade gray pressed wool felt, but the thinnest thickness is something like 1/16", which is way too thick.  I have no further suggestions for you on locating the felt.  You would need at least two 920 sets worth of felt to make the mountain on a D-148, which is the same size and shape as the mountain on my D-165 layout, but mine was made in one piece.  After building a frame of different lengths of 1"X 1" vertical supports and cutting out the tunnel portals from either 1/2" pine or plywood (Lionel didn't use the molded 920 portals until 1958), wire screen was crumpled and then draped over the supports (this is consistent with the way Lionel did it up to and including 1954.  After that, they used brown kraft paper instead).  A scrap piece of cloth (like an old bed sheet or similar) was then draped over the screen and tacked in place, cut as necessary around the portals and the edges.  This was used as a pattern to cut out the felt.  Once the felt was cut out, it was dipped into a solution of "fish glue", which can be purchased at organ supply companies like "Organ Supply Industries", "Arndt Industries" etc.  It is mixed with hot water and used heated.  It is very sticky and has a "unique" smell.  But it is important to use this type of glue.  The reason is that the glue (which today is used to fasten leather bellows material to wood backings in organ mechanisms) crystallizes when it dries, so the resulting shell will become rock hard.  Another option if you do not have a large hot-pot is to use stabilized animal hide glue, which can be used cold.  It too has a rather unpleasant smell, and the resulting wool mountain will smell like a old wet dog!  Once the glue soaked felt is draped over the screen and tugged and pinched in place, use crumpled up newspaper here and there between the screen and the felt to build up humps and bumps as you like.  The felt will dry overnight to a surprisingly rock hard surface that is quite durable.  But keep this in mind - the glue is hygroscopic, meaning it will always take moisture from the air or elsewhere and may never fully "set".  This isn't a bad thing, as it will allow you to repair the mountain years from now in case it sags by re-wetting it with a spray bottle (this is one method used by restorers of original dealer displays).  If you live in a very humid climate, this may not be the best way to build a mountain if you don't have air conditioning available!  The paints I used were the same as what Lionel used - casein theater paint mixed with the hot fish glue. The paints can be purchased from Rosebrand as scenic paints.  The reason to mix it with the fish glue is that these paints don't have a binder and their colors will fade rather quickly if not mixed with the glue.  The usual burnt and raw umber as well as sienna brown or red is used.  The "rocky outcroppings" are picked out in the same tan paint that is used for the roads and track beds.  The best suggestion I have is to study a real Lionel display layout so that you can see exactly how the mountains were painted.  No art skills are required, after all, the real ones were painted assembly line fashion by college students working in the summer.  After everything dries, the same green paint is used for grassy areas, and the 919 grass sprinkled on.  If you are using latex paint, be sure to use an extender to have enough "open" time for the grass to stick.  The grass patches should not be put on willy-nilly, but should be placed on the flatter areas, where grass would grow in real life.  The usual lichen is used for trees and shrubs, and it is important to select good specimens that are plump and have good shape.  Out of a full bag of lichen from Woodland Scenics, I usually get only about 20% good clumps.  Mix the colors of dark, medium, light and spring green into nice clumps and attach them in a way that is more "vertical" than "horizontal".  That is is the way to get the original "Lionel" look.  Hope the forgoing helps.  Keep up the good work!

Attachments

Images (1)
  • Frank Gatazka D-165 Replica: Detail of felt mountain

I've been making some more progress. 


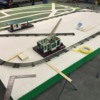
The first pic shows when we were drawing out what to mark as tan and what to paint green on the passenger loop. The rest show various stages of paint and "grass" application, as well as a few with accessories set in place for my own amusement- to see the "work in progress" I guess.

Attachments

Images (14)
  • IMG_3805 (1)
  • IMG_3806 (1)
  • IMG_3807 (1)
  • IMG_3808 (1)
  • IMG_3809 (1)
  • IMG_3810 (1)
  • IMG_3811 (1)
  • IMG_3812 (1)
  • IMG_3813 (1)
  • IMG_3814 (1)
  • IMG_3815 (1)
  • IMG_3816 (1)
  • IMG_3817 (1)
  • IMG_3818 (1)
Few tricks I've discovered so far: press the grass into the wet paint, let sit over an hour, then vacuum. I use a shop vac, but I've taped a funnel into the vacuum hose, and in the funnel I've taped a paint strainer. It collects the loose grass but doesn't suck it past. Allows it to be collected and put back into the pan I have it in. I've got washers taped around the edges, too, so it doesn't stick to the board, but instead gets really close with out suctioning down.

Radii are a roll of tape, a washer, a paint can, and a straightened hose clamp. Not the most extravagant tools to make a decent looking product.

Gap between the edge of the ties and the grass is the thickness of a paint paddle.

You've made a lot of progress. It's all '50's looking. Mom's rolling pin or a wallpapering edge roller would help pressing the grass into the paint. Maybe some plastic food wrap on a paint roller would work.


I like your grass recovery method.


Finish out the semester strongly! Don't coast. Good luck and stay in touch.

Add Reply

Post
The Track Planning and Layout Design Forum is sponsored by

AN OGR FORUM CHARTER SPONSOR

OGR Publishing, Inc., 1310 Eastside Centre Ct, Suite 6, Mountain Home, AR 72653
800-980-OGRR (6477)
www.ogaugerr.com

×
×
×
×
Link copied to your clipboard.
×
×