First, Happy New Year everyone!

Regarding the water you may model on your layout, I think there is a wide selection of  colors you can consider. Do you agree?

I seem to periodically change my mind about this. 

From my experience, the color of water we see in real life is a reflection of the color of the sky above it. So, if you have a backdrop and it is sky blue, like mine is, it's probably a good idea to have some blue in the body of water you are modeling. On the other hand, if your backdrop has a lot of clouds, it might make sense for your body of water to be more gray than blue. If you have no backdrop with the color of the sky in it, I believe you have more options as to what color to make your water.

During the last 2 days, I have changed the color of the water on my layout.

Here is what I had a couple of months ago:

20191208_172409

IMO, the above is not bad, but I decided it was a little too dark.

Here is another body of water on my layout with deeper water, so I made it darker:

20190710_161623

I decided the water in the photo immediately above was much too dark.

Below are photos over 1 year old that show a lighter shade of blue gray that I prefer:

20190112_082652

20190111_221510

The difference is subtle, but IMO this water is lighter than the water in the 1st two photos.

Later, I will take photos of my current water and post them after the acrylic paint and Mod Podge dries.

Although my current preference is a light slate (blue gray) color, I have seen excellent water on layouts that have completely different colors, such as various shades of brown, some darker, some lighter.

My approach to modeling water is simple:  to paint first, with the middle of the body of water darker for deeper water, and near the edges lighter for shallow water, and then after the paint dries, I apply multiple thick coats of Mod Podge, dabbing it on to create ripples. Then, depending on how happy I am with the ripple effect, I might also sparingly dab on some white paint to create a ripple/foam effect.

What is the color of the water on your layout and why?

Arnold


Attachments

Images (4)
  • 20191208_172409
  • 20190111_221510
  • 20190112_082652
  • 20190710_161623
Last edited by Arnold D. Cribari
Original Post

Replies sorted oldest to newest

I think your aquatic endeavors are outstanding and another Arnold classic topic.IMG_1869IMG_2632IMG_2631  You must stay up late to formulate new ones.
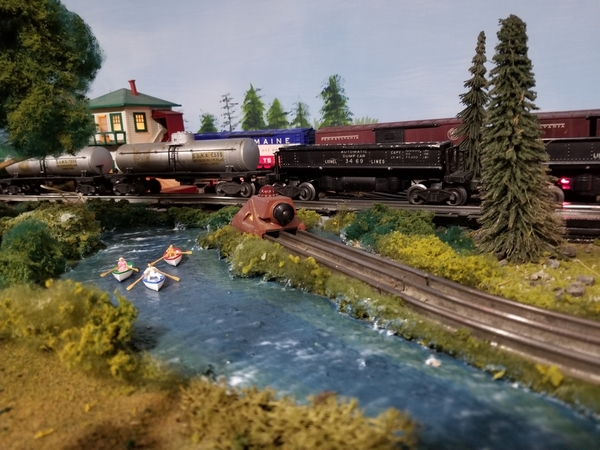
I don't have backdrops.  They are simply stucco walls that are painted the same as the bead board skirting on the layout.  Sort of like an off white picture frame.

I have three water features using different methods thought of at the time.  Two in blue another in brown mud puddle.

Fendermain

Attachments

Images (3)
  • IMG_1869
  • IMG_2632
  • IMG_2631

Arnold, it all depends on the time of day, weather and water conditions. Right now we are expecting thirty foot breakers where we live on the West side, so the water will be brown. I will stay out of the water today. In other words there are many different colors for water. LOL, if you have whales in the water who knows. Don1157447_586607108082546_1496368916_n 

Attachments

Images (1)
  • 1157447_586607108082546_1496368916_n
Last edited by scale rail
Arnold D. Cribari posted:

Fendermain, the topics mysteriously pop into my head. Your water looks great. I especially like your water under the red bridge. I have the same red bridge, which I think is Lionel pre-war. It appears on each side of my Erector Set bridge given to me by Leroof:

20191125_235607

Arnold
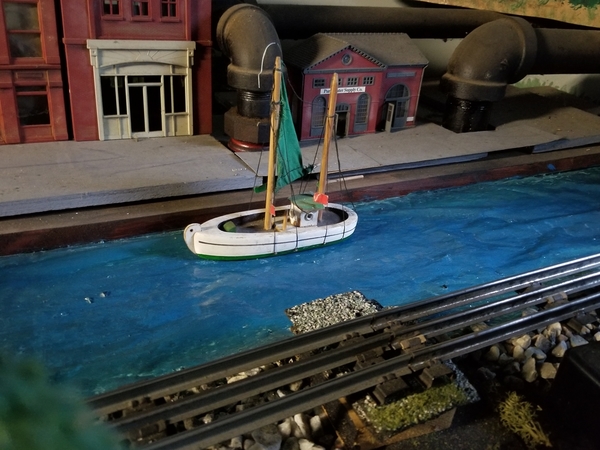


Yes.  I believe they are prewar.  My favorite bridge  although I wish I had room for a Hellgate.

Fendermain

My water feature rarely sees any overflow from the dam behind it or actual precipitation in the dry climate. This leaves the water in the cove usually muddy looking from the silt bottom.  Certainly not very attractive for bathers or boaters!

But the fisherman like it to hook one of the big "bottom feeders".

Donald

IMG_0199


Attachments

Images (1)
  • IMG_0199
Last edited by 3rail

Hi Arnold, When I have modeled water, places I have visited around Cortland, New York have been my references...IMG_0683IMG_0693photo 3

I enjoy modeling shallower streams, and even standing-waterIMG_48814IMG_5060

... more than large, deep expanses. Here are some of the results...IMG_5138IMG_4985_edited-1IMG_5162

Like you, I have painted the board with darker colors to model deeper areas, but I have also used some of the dyes available with some of the kits (purchased from Scenic Express) to assist in saying depth, as well as movement/swirling of the water over shallower bed areas.

FrankM

Attachments

Images (9)
  • IMG_0683
  • IMG_0693
  • photo 3
  • IMG_5138
  • IMG_4985_edited-1
  • IMG_4881
  • IMG_5162
  • 4
  • IMG_5060

Color is hard, but Mod Podge is easy. I agree with you that it is the best choice for most water applications. Cheap and easy, too.

I often use it to paint waves on the top surface of a sheet of pane glass--painting the color on the bottom. IMO it works as well as the old "shower glass" technique, but with more variability in the wave patterns.
modpodge 2

modpodge 1


Attachments

Images (2)
  • modpodge 1
  • modpodge 2

The water and riverbank scenery on my 10'-by-5' layout is modeled after train rides along the Naugatuck River in Connecticut on Metro-North Railroad. This river is very shallow in most places and the brown riverbed is visible. I made the river bottom using several shades of brown paint, several sizes and colors of ballast and talus, some real dirt, flooded with diluted yellow glue. When dry, I carefully poured a thin layer of Envirotex on top of the prepared surface. No tint to the water. Some Modge-Podge might improve the look but I'd rather leave well-enough alone...

MELGAR

MELGAR_2019_0702_WHALLEY_AVE_02

MELGAR_2019_0914_VIEW_FROM_BRIDGE

MELGAR_DETAIL_SHOT_01_10X5_UNDER_BRIDGE

MELGAR_2019_1231_WATER_04


Attachments

Images (4)
  • MELGAR_2019_0914_VIEW_FROM_BRIDGE
  • MELGAR_DETAIL_SHOT_01_10X5_UNDER_BRIDGE
  • MELGAR_2019_0702_WHALLEY_AVE_02
  • MELGAR_2019_1231_WATER_04
MELGAR posted:

The water and riverbank scenery on my 10'-by-5' layout is modeled after train rides along the Naugatuck River in Connecticut on Metro-North Railroad. This river is very shallow in most places and the brown riverbed is visible. I made the river bottom using several shades of brown paint, several sizes and colors of ballast and talus, some real dirt, flooded with diluted yellow glue. When dry, I carefully poured a thin layer of Envirotex on top of the prepared surface. No tint to the water. Some Modge-Podge might improve the look but I'd rather leave well-enough alone...

MELGAR

MELGAR_2019_0702_WHALLEY_AVE_02

MELGAR_2019_0914_VIEW_FROM_BRIDGE

MELGAR_DETAIL_SHOT_01_10X5_UNDER_BRIDGE

MELGAR_2019_1231_WATER_04


Very nice work as always.  It is interesting that both you and FrankM, being advanced modelers, utilize photos for hydro inspiration.

Fendermain

scale rail posted:

Arnold, it all depends on the time of day, weather and water conditions. Right now we are expecting thirty foot breakers where we live on the West side, so the water will be brown. I will stay out of the water today. In other words there are many different colors for water. LOL, if you have whales in the water who knows. Don1157447_586607108082546_1496368916_n 

That's not fair Don...... making me jealous......

Apples55 posted:

Obviously...

5C7A9ACC-A7F6-44C1-83DA-6D09500FC7DE

Sorry, Arnold... couldn’t resist!!! But seriously, basically water is clear (unless it is from the Gowanus Canal in Brooklyn), so really, the question should be “what is the color of the bed under your water”!!!

I wish our lake and river water looked like that.  Donald's water is closer to what we have and I may try to copy it.

Last edited by CAPPilot
Moonson posted:

Hi Arnold, When I have modeled water, places I have visited around Cortland, New York have been my references...IMG_0683IMG_0693photo 3

I enjoy modeling shallower streams, and even standing-waterIMG_48814IMG_5060

... more than large, deep expanses. Here are some of the results...IMG_5138IMG_4985_edited-1IMG_5162

Like you, I have painted the board with darker colors to model deeper areas, but I have also used some of the dyes available with some of the kits (purchased from Scenic Express) to assist in saying depth, as well as movement/swirling of the water over shallower bed areas.

FrankM

Awesome as usual, Frank, and thanks for sharing your modeling knowledge. Arnold

scale rail posted:

Arnold, it all depends on the time of day, weather and water conditions. Right now we are expecting thirty foot breakers where we live on the West side, so the water will be brown. I will stay out of the water today. In other words there are many different colors for water. LOL, if you have whales in the water who knows. Don1157447_586607108082546_1496368916_n 

Where you live, Don, probably has the most beautiful water in the world. It certainly appears that way in your YouTube scuba diving videos. Arnold 

For the time being I settled on using more gray than any other color for shallow water: blue gray in the middle and green gray on the edges. The green gray on edges is very subtle:

20200101_082643

20200101_082557

For deep water, mostly blue with some gray in middle, and I added some green to that blue gray combination on edges :

20200101_082946

20200101_082935

I can see myself periodically re-painting this water for the rest of my life. LOL. I enjoy doing the painting. Arnold

Attachments

Images (4)
  • 20200101_082643
  • 20200101_082557
  • 20200101_082946
  • 20200101_082935
Last edited by Arnold D. Cribari

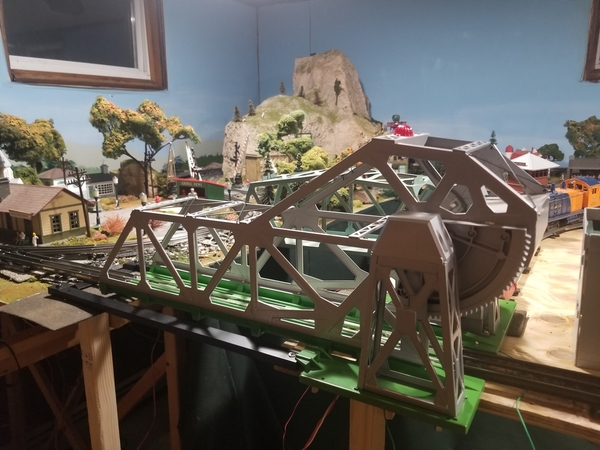
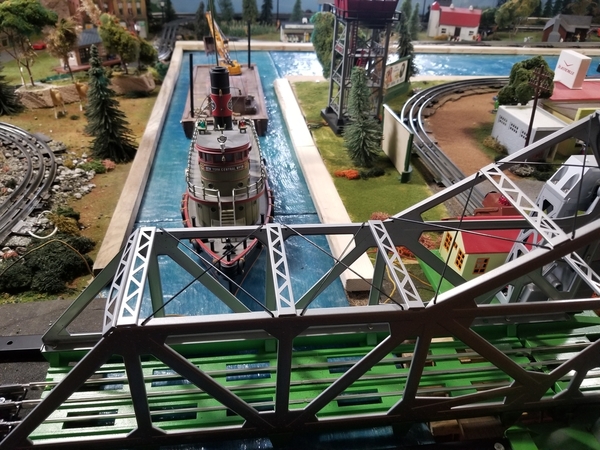
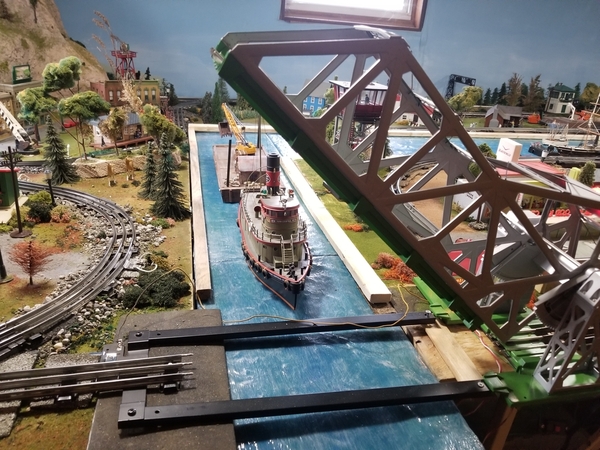
During the last 2 days, I took steps to make a removable river using 2 inch green foam board and L shaped braces screwed into the plywood boards to hold the foam in place in the aisle and gap between the back of the peninsula and main portion of the layout behind the peninsula where the bascule bridge is.

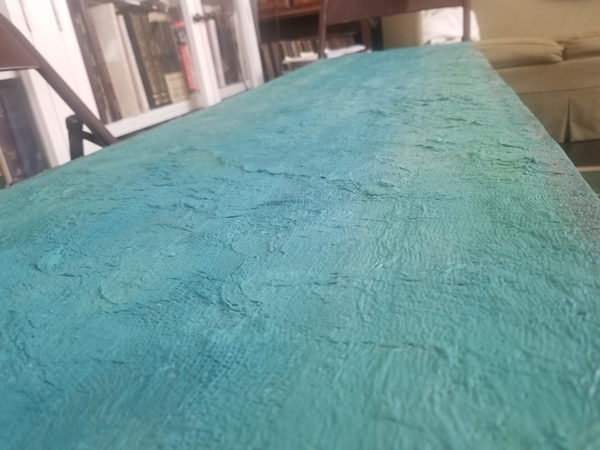
I'm also in the middle of using the process on YouTube called  Marklin of Sweden Toilet Paper Plus Glue equals Realistic Ocean Water. Today I laid the 3 layers of toilet paper and glue water mix, which, IMO, is an ingenious way to make ripples and waves. It is drying this evening, and tomorrow I will paint it with acrylic paints.

For me, the most fun part of a project like this is the painting. It usually takes me 3 or 4 stabs at the painting to get the colors to my satisfaction.

As Marklin of Sweden says in the YouTube video, after the painting is done, one must be patient and let it dry for 72 hours. Then, the layers of high gloss clear coat are applied, plus another layer of white glue to add depth, and then more layers of clear coat.

I have opted to use glossy Mod Podge for the clear coat.

I will post photos periodically.

If I get to the painting tomorrow, I will post photos of it.

It's been fun throwing myself into an all engrossing project like this. Arnold

River with shallow water:

20220226_133730

River with deeper water:

20220226_133724

The ripples were made using layers of toilet paper and Elmer's glue mixed with a little water, following the YouTube Marklin of Sweden Toilet Paper + Glue = Realistic Ocean Water method.

Paint is acrylic, I opted for brown on edges, green for shallow water, green gray for deeper water, and blue green and gray for the middle where the water is deepest.

There are numerous options that can work well for the color(s) of the water.

Now, I will wait at least 72 hours to let the paint completely dry before I apply the layers of clear coat as recommended in the YouTube video. I will use glossy Mod Podge for my clear coat. Once I do that, I will post more photos.

Arnold

Attachments

Images (2)
  • 20220226_133730
  • 20220226_133724
@c.sam posted:

I'd be curious to see how he brought that barge around the corner!  LOL

By having a terrific captain on that tugboat!

Believe it or not, one of my 3 roommates during my 2nd year of law school (we rented a house in Albany, NY) was very good with tools. His name was Dave Williams originally from Rochester, NY.

After we graduated, Dave worked in the fields of customs and admiralty law, and he and his wife lived on a house boat.

After practicing law for 30 years, Dave retired from law practice.

Guess what he did next.

He became a tugboat operator!

I've lost touch with Dave, but I wish I could connect with him and show him my Lionel tugboat, barge and the river on my layout.

Arnold

Last edited by Arnold D. Cribari

Add Reply

Post

OGR Publishing, Inc., 1310 Eastside Centre Ct, Suite 6, Mountain Home, AR 72653
800-980-OGRR (6477)
www.ogaugerr.com

×
×
×
×
Link copied to your clipboard.
×
×