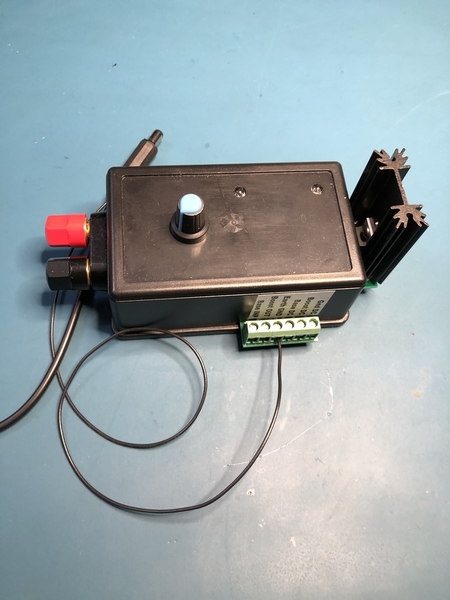
Here's another success story for Dale and John's buffer.  I run TMCC only on a very large layout with about 2400 feet of track.  I've added earth ground wires wherever needed so the layout typically runs very well.  In order to test the unit, I disconnected an earth ground above a track in a tunnel (where there are 2 overhead tracks).  A diesel with marginal antenna would run through the tunnel with headlight blinking wildly and would sometimes stop in the tunnel.

With the buffer up and running, both blue LED and green LED lit, that same diesel runs through the tunnel smoothly at any speed with an absolutely rock solid headlight.  No flicker at all.

My DC voltage measurements are 2.75 volts at the Base terminal and 3.86 volts at the Boost terminal.

Good stuff!

Last edited by Bob
Rayin"S" posted:

John, Just got my booster hooked up to the layout, I have been away for a while, so I don't know if this has been brought up before. I have a two rail layout and with the booster hooked up I have both the green LED and the red LED lit. Is this an unusual happening? Tried operating for a short time and things seem ok but I am wondering if this tells of a problem.

Ray

Green and red?  Are you sure you're not talking about the blue power LED?

What are you using to drive it, the original TMCC command base, or a Legacy command base?  The older TMCC command base doesn't put enough signal out to get the green signal indication.  If you're using the Legacy command base, it's not putting out a full amplitude signal.

John, I am using a Cab 1l system, I attached a pictures howing both red and green illuminated.

Ray

Attachments

Images (1)
  • _IGP4519

Ray, that is a good picture, it is exactly what mine first looked like. My advice is if the layout is working, ignore it. I still have some unexplained signal issues on my 2 rail layout but fortunately found a temporary fix that by all logic should not have any effect. My current thought is one of the AS-AR-AC boards is "defective." I am not sure if you have any of these on your layout. My illogical temporary fix is to keep track power on the Turntable pit rails which are fed through one of the AS-AR-AC boards. If I do this one thing the layout works perfectly, otherwise I have signal issues even with a solid green light on the Buffer.

Ray, if you will be at S Fest we could meet up.

Tom, As far as I know, I don't have any of those boards on the layout. I ran the locomotives that had problems for a longer period today, the problem surfaced when running as a consist. The two areas that were troublesum showed no problems now. S Fest, at this time I am not sure if I can make it but will keep this in mind.

Ray

I received my legacy control base back from Lionel today. It now has a bright green light 2.001 volts to buffer and 6.37 volts to track. everything works great. The only problem is my engine roster is gone  and the base is unnamed. I can view the list on my cell phone WiFi when not linked to base is there any way to restore roster to base?

Jprails posted:

I received my legacy control base back from Lionel today. It now has a bright green light 2.001 volts to buffer and 6.37 volts to track. everything works great. The only problem is my engine roster is gone  and the base is unnamed. I can view the list on my cell phone WiFi when not linked to base is there any way to restore roster to base?

Yes, but only if you had backed it up first.  I do this via the Windows Legacy System Utility.  If you're not familiar with this, I think you may have to enter things again from scratch.

DM TMCC Buffer kits are now available.  I've attached the kit instructions and the buffer user's manual to this post so you can evaluate your need and your ability to construct the kit.  Each kit contains all the materials you'll need to build one buffer.  Thru-hole construction was used to make the assembly easier.  Also, the cases were prepped with the holes and slots as without the drilling fixture, that would have been more time consuming.

DM TMCC Buffer Kit Documentation.pdf

DM TMCC Buffer Documentation.pdf

Contact me via my profile address if you want one of these kits.

Attachments

Been having problems with the two sensor tracks on my layout. Tried resetting them checking all the plugs. Everything seems OK. The only thing I changed was adding the booster. Disconnect the booster sensor tracks work. Checked the hookup wiring on the booster and they are in the right spots. Hook the booster back up and the sensor tracks stopped working.  The booster is about 16 inches from the Legacy base. Have a powermaster bridge nearby but I tried taking that out and it didn't make any difference.

Last edited by Gweedo

I cut the trace between R5 and C6, easy to do, and soldered a couple #24 wires to the edge of the chips. And then the other ends to a 1K potentiometer. I was looking in the junk for a 2K but the 1K, 1/8 inch mounting,  is adequate for a variable gain and takes up minimal space. Instead of 3.3 gain, it now varies from 3.3 down to 1.65 which is where I leave it. Modest layout, but I like having the booster and seeing the green LED since I am familiar with the broken Legacy base with the greatly reduced output.

Be cautious tack soldering the pre-tinned wires on to the edges of the chips, because too much heat will cause the chips to slide off their pads.

Last edited by cjack
cjack posted:

I cut the trace between R5 and C6, easy to do, and soldered a couple #24 wires to the edge of the chips. And then the other ends to a 1K potentiometer. I was looking in the junk for a 2K but the 1K, 1/8 inch mounting,  is adequate for a variable gain and takes up minimal space. Instead of 3.3 gain, it now varies from 3.3 down to 1.65 which is where I leave it. Modest layout, but I like having the booster and seeing the green LED since I am familiar with the broken Legacy base with the greatly reduced output.

Be cautious tack soldering the pre-tinned wires on to the edges of the chips, because too much heat will cause the chips to slide off their pads.

I like the idea of having the gain adjustment. Just a little paranoid about cutting the trace and soldering onto the chips. My hands not so steady when doing stuff like that. Think gonna try the resistors first.

Gweedo posted:

Been having problems with the two sensor tracks on my layout. Tried resetting them checking all the plugs. Everything seems OK. The only thing I changed was adding the booster. Disconnect the booster sensor tracks work. Checked the hookup wiring on the booster and they are in the right spots. Hook the booster back up and the sensor tracks stopped working.  The booster is about 16 inches from the Legacy base. Have a powermaster bridge nearby but I tried taking that out and it didn't make any difference.

The sensor track is sensitive to the TMCC signal if the signal has harmonics or high amplitude.  The TMCC signal can be too high, so keep that in mind.  If your sensor tracks stop working, your TMCC signal is definately too high!!

That's what I did John. The 1K, 1/4 inch mounting pot that I had on the top of the case. I think I posted 1/8 inch before here but that was the shaft diameter

The funny thing is I did not have a 1/8 inch shaft knob, so I went on ebay and found a brand new old stock one for $1.50 BUT the shipping was $3. I should have ordered more than one knob now that I think of it.

I see Digikey has pots for 79 cents, I think I'll get a few and try out a mod.  My idea is to just replace R5 with a 2K pot and a 1K series resistor.  That allows me to vary the gain from about 1:1 to 3:1.  This also preserves the input signal monitoring indicators.  What would be really cool is a graduated dial with the gain figures on it, but I think that's gilding the lily.

Attachments

Images (1)
  • mceclip0
SantaFeFan posted:
Gweedo posted:

Been having problems with the two sensor tracks on my layout. Tried resetting them checking all the plugs. Everything seems OK. The only thing I changed was adding the booster. Disconnect the booster sensor tracks work. Checked the hookup wiring on the booster and they are in the right spots. Hook the booster back up and the sensor tracks stopped working.  The booster is about 16 inches from the Legacy base. Have a powermaster bridge nearby but I tried taking that out and it didn't make any difference.

The sensor track is sensitive to the TMCC signal if the signal has harmonics or high amplitude.  The TMCC signal can be too high, so keep that in mind.  If your sensor tracks stop working, your TMCC signal is definately too high!!

OK thank you for info.

When my pots come in, I'm going to test a gain control mod to the buffer.  Shame we didn't think of it before they were all built!   It will be a knob on the top that will vary the gain from 1x to 3x.  Once I assure myself that nothing bad happens when I fit it, I'll offer it as a retrofit mod, you can either do it yourself or send it back and I'll add the mod.

If I could only find someone to silkscreen a nice dial with the gain calibration marked...

Last edited by gunrunnerjohn
gunrunnerjohn posted:

DM TMCC Buffer kits are now available.  I've attached the kit instructions and the buffer user's manual to this post so you can evaluate your need and your ability to construct the kit.  Each kit contains all the materials you'll need to build one buffer.  Thru-hole construction was used to make the assembly easier.  Also, the cases were prepped with the holes and slots as without the drilling fixture, that would have been more time consuming.

DM TMCC Buffer Kit Documentation.pdf

DM TMCC Buffer Documentation.pdf

Contact me via my profile address if you want one of these kits.

TMCC Booster Kit


Nice kit. Good pictures and choice of components. Easy to build. 1 hour or so.
Thanks,

Attachments

Images (1)
  • TMCC Booster Kit
gunrunnerjohn posted:

DM TMCC Buffer kits are now available.  I've attached the kit instructions and the buffer user's manual to this post so you can evaluate your need and your ability to construct the kit.  Each kit contains all the materials you'll need to build one buffer.  Thru-hole construction was used to make the assembly easier.  Also, the cases were prepped with the holes and slots as without the drilling fixture, that would have been more time consuming.

DM TMCC Buffer Kit Documentation.pdf

DM TMCC Buffer Documentation.pdf

Contact me via my profile address if you want one of these kits.

John,

Just checking, but these are now listed as "TMCC buffer" kits - I assume these are the same as the original "TMCC/Legacy booster"  items - just in kit form ?

Probably missed the post, but are these compatible with Legacy being run through a DCS TIU/WiFi/SER 2 system ? 

Cost ?

Thanks


These are identical in function to the first run of assembled units, I didn't think I'd be able to assemble enough orders to do another SMT production run, so I just changed over to thru-hole components to make the kit version.  The circuit and function is identical to the assembled version (at least after you assemble it).

These have nothing to do with the serial data from the Legacy, and they don't affect it either.

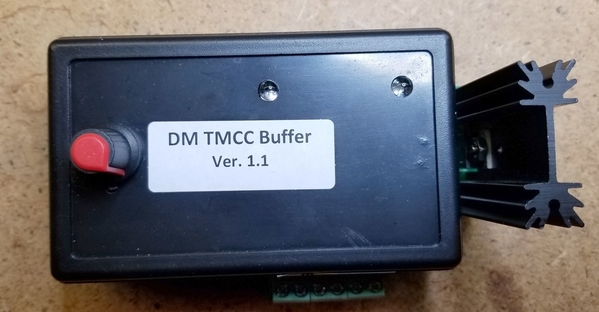
Just finished testing the signal amplitude mode, so far, so good.  It varies the output amplitude from around 1.1:1 to 3:1 from stop to stop.   Most folks won't need this, however if you're running LCS Sensor Tracks, or you have experienced DCS issues after adding the TMCC Buffer, this mod may be the ticket to the two systems coexisting.

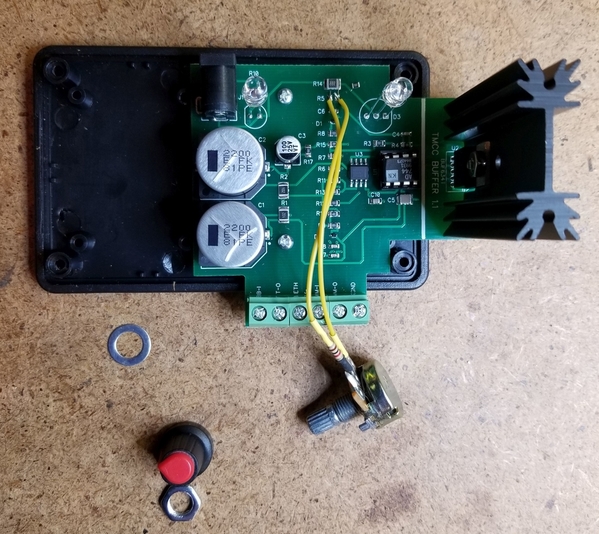
The installation is fairly simple, see pictures and description below.

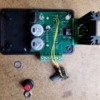
 Remove R5 and solder pot and resistor combination across the R5 connection

TMCC Buffer Gain Mod N1

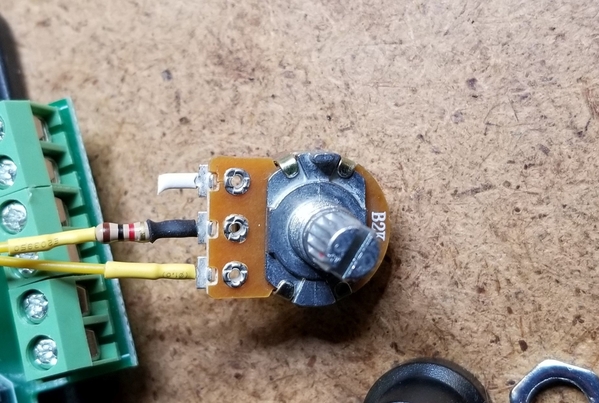
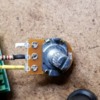
Close-up detail of pot and resistor assembly

TMCC Buffer Gain Mod N2

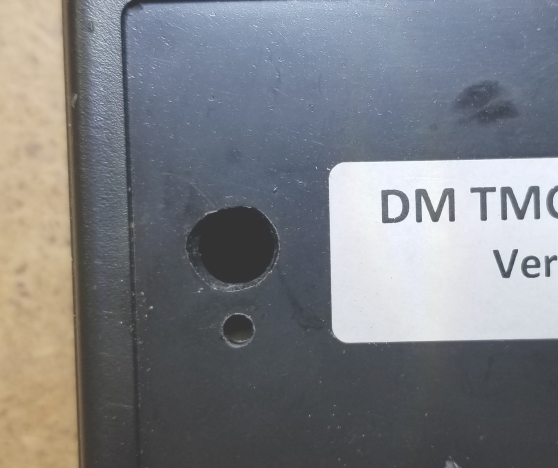
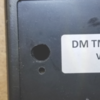
Drill hole(s) for amplitude adjustment pot

TMCC Buffer Gain Mod N3

Mount pot and reassemble case

TMCC Buffer Gain Mod N4

That's the installation process, so it's fairly simple to upgrade the box.

Attachments

Images (4)
  • TMCC Buffer Gain Mod N1
  • TMCC Buffer Gain Mod N2
  • TMCC Buffer Gain Mod N3
  • TMCC Buffer Gain Mod N4
Last edited by gunrunnerjohn

Hi...I know it has been a while since this topic was discussed, but, I need some help. 

When I first received John's Track Signal booster, I discovered I had an issue with my Legacy base not giving enough power (other people had this issue.)  I the legacy base back to Lionel and just got the base back which is now repaired.  

I am still getting a red light on the track signal booster.  I decided to disconnect everything and see if there a cross signal somewhere.  I did get a green light when everything was disconnected from the beginning, but notice that my DZ 2001 Data Wire Driver's red light started to glow brighter with each DZ 2500 switch machine I add to the daisy chain via the Data wire. 

I should also mention that have the driver connected to Dale's "Serial Booster", otherwise the data driver does not get enough juice from the Legacy base. 

Now, when I unplug John's track signal booster, the red light on the data driver goes out and only lights when a command is given...which is the way I think it is supposed to "behave".   

I am starting to get frustrated and am wondering if the track signal booster was a wise purchase for my layout or not.

Any advice would be greatly appreciated.

Greg

Greg, the amplitude adjustment mod may be of help here.  It allows adjustment of the gain from around 3:1 stock to around 1:1 at the low end.  This still keeps the low impedance drive but cuts the amplitude of the signal to about what the command base outputs. 

DM TMCC Buffer Gain Adjustment Modification.pdf

This may solve the issues you're seeing.  Jon Z. noted that the LCS Sensor tracks have a problem if they get too much signal, could be the DZ switch machines have the same issue.

Attachments

Last edited by gunrunnerjohn
leapinlarry posted:

I anyone reading this thread wants one of these TM Buffers, I have a brand new one Available..My Layout does not require it. See my email in my profile. It’s a great help on larger layouts.  

I was generally ok without it, but I like keeping an eye on my Legacy Base with the green LED.

Another happy owner chiming in.  I spent a little longer than Jack assembling my kit but it went extremely smoothly and worked as it should first try.  With highball signals of green and blue there was no more need for a ground plain I had previously hooked up to catenary.  I dare not comment on readings lest my novice grade talents show.  More importantly, the kit was a joy to assemble, a marked improvement on my 300 ft. layout and was worth ten times the price for anyone serious about flawless CC operation.  Best money I ever spent on the pike.  Thanks Dale and John.

Bruce

That isn't something that anyone has reported, but anything's possible.   You might consider the amplitude adjustment mod, that allows you to dial back the amplitude of the track signal while keeping the low impedance drive that helps drive high capacitance.

It's a pretty simple install, I can send you the parts for a self-install, or you can ship the buffer back to me for it to be installed.  The mod allows a gain adjustment from around 1.1:1 to the stock 3:1 amplitude.

Here's the mod in pictures.

mceclip2mceclip0mceclip1mceclip3

Attachments

Images (4)
  • mceclip1
  • mceclip2
  • mceclip3
  • mceclip0

John,   I would prefer to send to you for the mods. Would you please email me your mailing address?

Thank you

Tom, I get the static sound on both of my Berks, may be more pronounced because of the ERR Fat Boy speakers.  I put my GP7 on and can hear static in the back round, harder to pick out because of the diesel sound.  If I would not have gotten these hearing aids I, likely,  would not have heard it.

Ray

Sorry Rod, I packed two of them in a hurry and didn't stick the instructions in.  However, I can fix that right here.

Here's the kit documentation as well as the operational instructions for the finished product.

DM TMCC Buffer Kit Documentation.pdf

DM TMCC Buffer Documentation.pdf

Attachments

No I didn't buy a buffer john, I no longer can function well enough to operate the layout very well. Dale did me several favors and taught me a lot so I wanted to send a contribution to ACS along with yours. You have done a great service for OGR Members and I commend you for the hard work and time required. I will send you a check as soon as I have your Zip to go along with the address mentioned above.

Thanks

John,

I set aside a couple of hours yesterday and finally built the signal buffer kit. Haven't had time to test it over the entire layout but in preliminary  testing 3 locomotives responded well on different segments of the layout. I plan to add the pot and resistor modification and noticed the component layout is different on the kit PCB than the production unit PCB shown in the online picture of the modification. Is R5 the correct resistor to replace in the kit version PCB? Thanks for your help and all of your contribution to the Forum and to the hobby. 

All the component designations stayed the same between the SMT version and the thru-hole version, that was by design.  So, R5 is the correct resistor to remove on either version, the amplitude adjustment mod works exactly the same way for either.

All I did to do the kit version was take the SMT version and convert all the surface mount components to thru-hole.  For various reasons, the components aren't in the same locations on the PCB, but that doesn't affect what you're trying to do.

gunrunnerjohn posted:

I thought most folks liked the fact that TMCC worked all over the layout!

There is that, but I have experience with Legacy bases that have very reduced output. It's kind of like a motorcycle trip where the guy takes along one of every part that has failed before.

gunrunnerjohn posted:

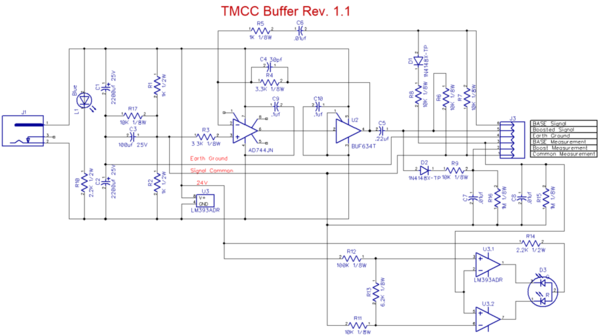
This is intended to be a continuation of the original thread for the TMCC signal booster to avoid confusion. I was working with Dale to create the "production" version of the buffer.  That involved creating the PCB and building some units.  Sadly, Dale passed away before we really got started, so without his input and documentation, the project languished for some time until recently.  I enlisted the aid of another forum regular, PLCProf, to assist in recreating the schematic and getting to the point of confidence that we had a working design again.

Here's a recap of where I started after Dale's passing.

As some of you may know, I was working with Dale on this project, my end was to be creating the PCB and packaging once the design was proven.  Due to Dale's untimely passing, the project was stalled.  Since I never got to actually receive the final schematic, I did manage to round up the prototype.  I enlisted some aid in reverse engineering and testing the prototype and the project is moving forward.  We have reverse engineered the prototype and are making some tweaks.  I'm hoping to maybe have a prototype PCB at York next month, however timing may be tight, so that's only about 50/50 right now.  However, rest assured that it's coming soon.

I have what I believe is a completed schematic and I've done a board layout that should work with the enclosure I've selected.  I haven't received the boxes yet, so there could be changes, one of the delays I mentioned.  The "production" unit will have an off-the-shelf 24V power brick that is detachable.  The terminal strip you see on the side will be the "Euro" style, but my 3D library didn't have those.  Those terminals are where all the connections to the buffer are made.  The board projection with the TO-220 package will have a heatsink mounted to the two large holes and also be outside the box, this is to allow air circulation for cooling the buffer chip.  The white line on the board is where the enclosure wall will be, a slot allows the board projections. There is a power LED that projects through the top of the case, and also some signal level LED's that indicate a poor or missing base signal and also a "good" base signal.  Connections are also provided that output a DC level corresponding to the signal strength of the input base signal and the output buffered signal.

Discussions should continue in this thread.

Thank you John for your note.  Through another referall I am on your list.

The last of my parts are in, and I have commitments for a number of them.  I still have about about ten more parts sets for the buffer.  I am offering them assembled for the original price, or I also am offering a kit of parts as well.  Please contact me using my profile email address for more information.  Assembled versions will be BTO (Built To Order) as the mass produced ones are gone, and I'll be hand assembling and testing the few that are ordered.  Obviously, that will also take a bit more time as I'll be doing them on demand.

Dale will be missed. I started all of this with the first  signal booster that was built with vacuum tubes. Solved all of my signal problems. I immediately published all of the data for that device on this forum.   A few more were built by others with totally unusable TMCC railroads to solve their problems. Many people requested a solid state device instead of the vacuum tube model I was using. Converting it to solid state to make it smaller and less expensive was not something I was willing to undertake. Dale stepped in and took that task on. Thank you Dale.  I have seen the diagrams of his units and heard good things about its performance. Both I, and I am sure Dale would agree, that what we have done to solve the perplexing problem on troublesome TMCC railroads is a contribution to the hobby that we all enjoy so much and we and those carrying on the effort to make thing run smoother and better are good for all. 

Jim, you are certainly to be commended for your first version.  I know the NJ-HR used that for years until they cooked it trying to get just a little more "boost" out of it.   I am very sad that Dale wasn't around to see the logical conclusion to his efforts, he was gone way before his time!  One of the brightest guys I ever met, he had a knack for building practical solutions to vexing problems.

As users of the tube and solid-state buffers, the NJ hi-Railers are very thankful to all the contributors of these devices. With our 30' X 185' (~7,500' of track) layout, these buffers have made a tremendous improvement in the performance of TMCC!

Thanks again to all the contributors, 

Bob D 

NJ Hi-Railers

Electrical Team


Add Reply

Post

OGR Publishing, Inc., 1310 Eastside Centre Ct, Suite 6, Mountain Home, AR 72653
800-980-OGRR (6477)
www.ogaugerr.com

×
×
×
×
Link copied to your clipboard.
×
×