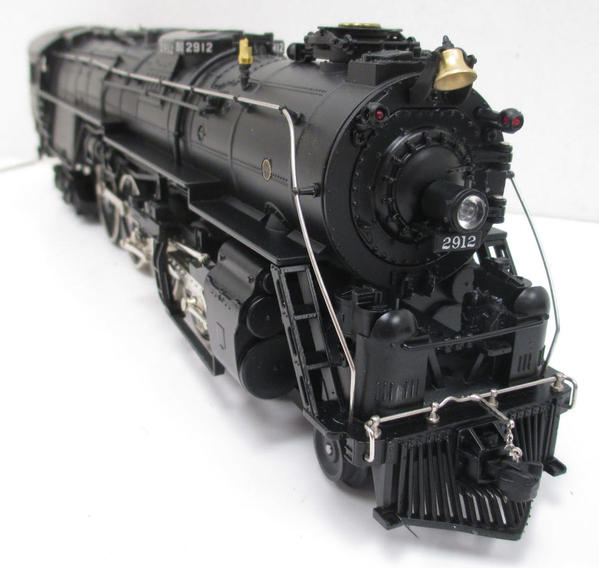
I always thought this was such a cool engine with that huge tender, but the class lights located on the front rather than the sides was always a turn off for me.
I ran into a fantastic deal a couple of weeks ago on a MTH ATSF 2900 from 1995 with most of the PS3 upgrade complete. The deal was so good, the slippery slope started with the idea of re-mounting the class lights (drilling holes in the boiler). Once that hurdle was cleared, I thought it would be neat to model it closer to the 3rd rail model.
Original Version below, (taken from web, not actual engine).

Holes drilled in boiler, then filling old holes for class lights. The mounts looked really bulky once manipulated for the new location, so I decided to cut the mounts off of the class lights and just have the wire for LED's support them.
Finished the class light move and front end throttle painting
I then decided to paint the cab and back head. I attempted to put some lit gauges in also.
Finished back head, with lit gauges shown below.
I also added a smoke unit. I used an old smoke unit from diesel, in which the legs were cut off ( an original, not modified smoke unit is also shown for reference) and modified with holes used to screw into an piece of wood epoxied in place.
I also used the existing seuthe smoke unit casing to help create a barrier to inside the engine. When cut to the proper height, it fits just about perfect over the brass unit on MTH smoke unit. Not sure if this is a good solution, as I do believe it will help prevent vapor from going inside, it does not prevent oil from leaking back in liquid form condensing in the stack. I would like to seal it, but it becomes problematic if I want to remove it in the future for service.
In order for the smoke unit to fit, I had to cut part of the weight shown on the chassis where it inserts into the boiler. THe cut weight can be identified by the two open holes in front of the weight no longer being used. I also shortened all the PS3 upgrade wires back to the harness.
Lastly, I painted the railings, put a new engineer in, used neo-lube on the wheels, and changed the class light colors out.
Finished version shown below:
I am still struggling with a transmission issue where the engine pulses at times (more pronounced in reverse), when traveling under 7 mph. I have looked at the worm gear and nothing looks obvious to me why this would be. I have taken the motor out and there is no binding in the wheel linkages. Also replaced the tack reader.
Initially it was violent thrusting. Changing the sound file to an ATSF hudson sound set and attempting to block one of the bearings on the worm shaft with wood to be supported better has helped, but not resolved it. The bearing on the worm shaft towards the rear of the locomotive is only supported at one point on the plain of the bearing (on the bottom) instead of at least two or more points. This looks like a design problem, but wondering if anyone else has designed a better solution or encountered the same problem?
I was surprised when the sound file announced KC in station sounds, finally one of my models stops where I live at!
Video attached
What a fun project. I am more inclined to change things on other engines now after going through this. Nothing is executed perfect, but good enough for me to enjoy them, Thanks for reading.
Mike


