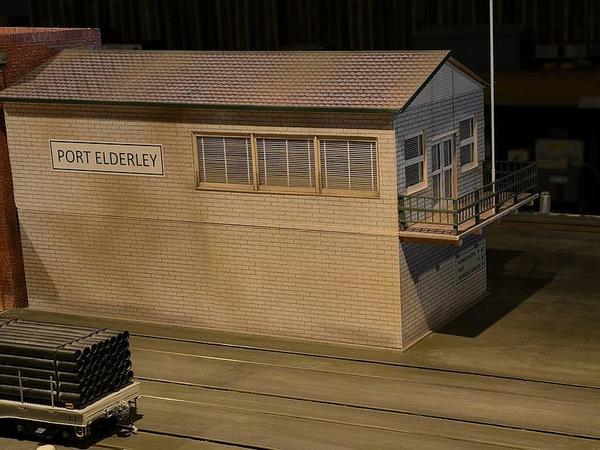
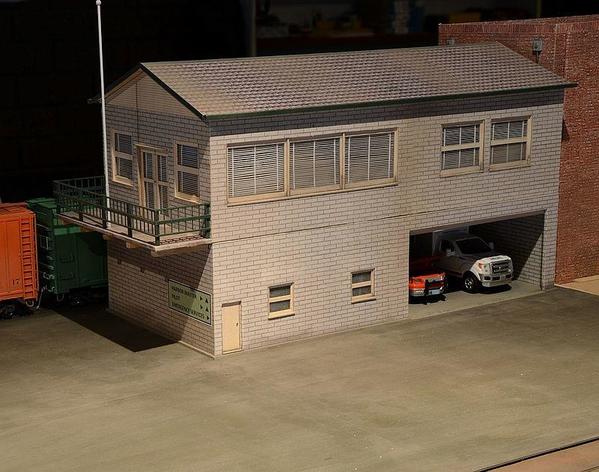
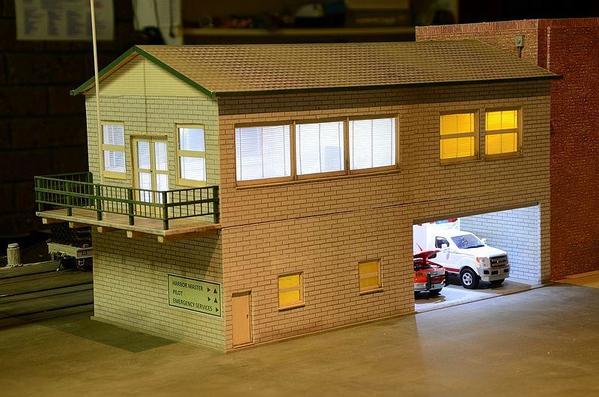
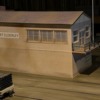
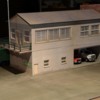
I won't bore everyone with the outlandish devices I've tried, trying vainly to fabricate venetian blinds.

I'm not sure what they are called in the US, but that's what we call them in Oz.

Now, I've looked in the index, and all I can find are stick-on pictures to go behind the glass.

No good for me.  No, no, no.  I have to be difficult because my rooms have people and furniture planned . . . 

So the slats have to have spaces so we can see the little people; like the venetians are open.

Has anyone made these blinds?  Or know of someone who has?  My ideas bucket is empty. 

Otherwise I'll just have to go with boring old curtains. 

Cheers

Original Post

Replies sorted oldest to newest

I believe Andre (River Leaf Models) also has Venetian blinds....etched paper/card stock.  

(Andre!....Your website is not showing this in the 'details' section.  I'm sure you sold me a pack of these at a York meet....some time ago.  Yes? No?)

Model Memories has HO brass-etched blinds, too.  I've used them in O gauge situations where possible.  For instance, if I'm not trying to have the see-through effect (lighted interior room), then I simply run a B-W photocopy (black background sheet placed over the brass strip) of the HO blind strip, scaled up to an appropriate width for the window and place it behind the window glass.  Works great!!

KD

Last edited by dkdkrd

Max posted:

"No good for me.  No, no, no.  I have to be difficult because my rooms have people and furniture planned"

Hello Max, you have no idea how long I have "parked" an observation car interior detail project because I could not find suitable blinds that actually looked like blinds and as you mentioned above, they need to be see through.

Roo, thanks very much for the link on these products, I had never heard of them before.

Charlie

MaxSouthOz posted:

Now, I've looked in the index, and all I can find are stick-on pictures to go behind the glass.

No good for me.  No, no, no.  I have to be difficult because my rooms have people and furniture planned . . . 

I haven't tried this, but:

How about printing an image of open blinds on transparency paper? Just make the parts you want to see through pure white. They will come out transparent, no?

MaxSouthOz posted:

I had a look at that link, Jeff.  Thanks, but the blinds appear to be closed.

I like your thought process, Pete.  It's on the list.

Hi

They are laser cut, so what you do is pull on each side, in opp directions, and they open up.  You can make them open as much as you like.  If I remember, I'll take a photo on one of my builds

MaxSouthOz posted:

Progress, chaps.

Roo is sending me his kits.

And I found Scotch strapping tape with dispenser at www.Stuff4Crafts.com  It may not be the answer, as the windows are already in place, but it could come in handy for later projects.

I'm looking forward to Andre's photos.

Cheers

If you are looking for thinner lines like open blinds look to the 3M tape like this one.. 3M 8934 Economy Strapping Tape. It uses thinner reinforcement and larger spacing. Most all stores will carry this kind of tape Lowes, Walmart, Staples, Kmart, You will notice the wider the tape the larger the lines will be as in the Heavy duty vs. economy tape.

The one thing I would suggest is do not buy the off brands of this tape, like purchased from the Dollar stores. Over time it will turn yellow and brittle. If you are looking for the illusion of the vertical strings use very thin thread placed on the tape before install.

Max...

Sooo....  How much patience do you have to get the effect in your sample image?

What I see there is a tedious effort to lay strips of very narrow tape (we...LHS...have such in our R/C airplanes dept.) horizontally across the back of your window glazing.  Then, make parallel cuts vertically across these horizontal strips to represent your strapping.  Remove the tiny pieces from the horizontal tape to give you the vertical lines.  Mask any bottom area representing the blinds being not fully extended, if desired.  Lightly spray paint the masked glazing with white....or off-white, if that's your preference.  Let dry.  Then, with a glass of fine wine, soft music, no distractions, etc., etc.,.....carefully peel the pieces of remaining tape to expose the Venetian blinds image.  

Still there?

Hint: Do this with the window glazing taped over a sheet of graph or fine-lined paper to help keep the tape strips spaced and aligned.  Also, fresh blades in the hobby knife are a must!

Hey, unless your making these for a full-scale model of the Empire State Building, it could be worth the effort to get that very special effect your striving for!

Then, of course........show us the results so we can fawn over your effort and heap copious amounts of accolades upon you!!!

KD

Last edited by dkdkrd
MaxSouthOz posted:

Thanks, Andre.

I've gone to too much trouble to create an interior, to cover it up with closed blinds.

This is what I'm after . . .

VBlind

Cheers

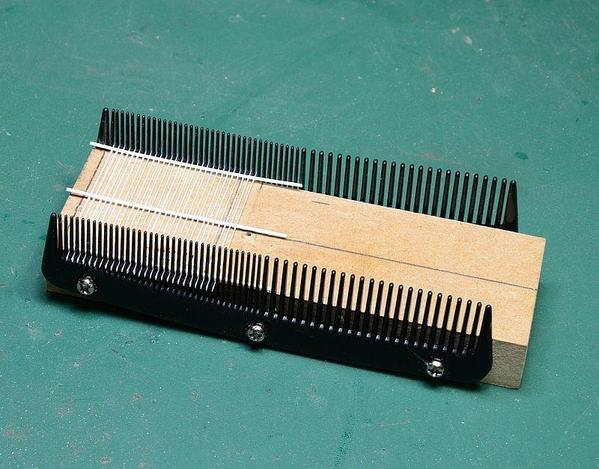
I made some like this using Evergreen .010 X .040 strips , I bought 2 cheap combs set them up parallel and hot glue them on cardboard with the teeth pointing up, this made a rack or guide to hold the "blinds "  . Slipping several strips thu the combs which holds in strips , then took .020 rod and use the Plastruct Bondene glue to attach them vertically , let them set that glue bonds the 2 and what you get is what you have in your photo.  

When I saw these photos, my first reaction was that I really need to get some ventian blinds for some of the structures on the layout, but I have a feeling those wouldn’t have been common at all in the Blue Ridge area during WW2. Yet again, my overall concept null and voids something I'd love to model, dang it!

I’d guess that cloth/lace curtains were what most folks used back then. Maybe even a solid pull-down blind on a roll? Nobody had electricity up there until well into the late 40s (and folks didn't use it for much for many years after that), so I'm not sure how big a deal curtains/blinds really were back then as you wouldn't be able to see inside a house back then unless you're standing right at the window.

OK  Roo's donated blinds arrived, but they are the laser cut twist type mentioned above.  They are only 25 mm wide, and my windows are 50 mm.

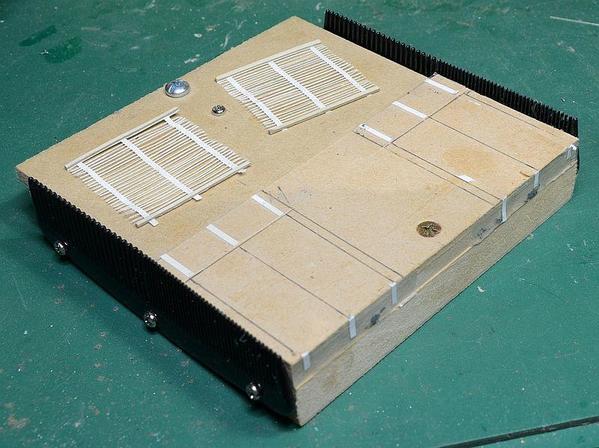
I'm working on Scratchbuilder's idea and I've modified the comb idea.

I've had to bin a few tentative tries, but I've finally come up with the answer.

Using the strips he described, I laid the straps on top of the slats - instead of underneath.  Success!

PE 165

As you can see, I've modified the mounting for the combs.  3 mm washers are inserted between the combs and the block until the outside dimension is 50 mm.  Once the glue has set up, the blind is simply lifted out and glued in place . . .

PE 166

Only eleven or so to go. 

Attachments

Images (2)
  • PE 165
  • PE 166

Bouquets to Scratchbuilder. 

I modified his method slightly, in that I used the .010" x .040" styrene for the straps.

PE 167

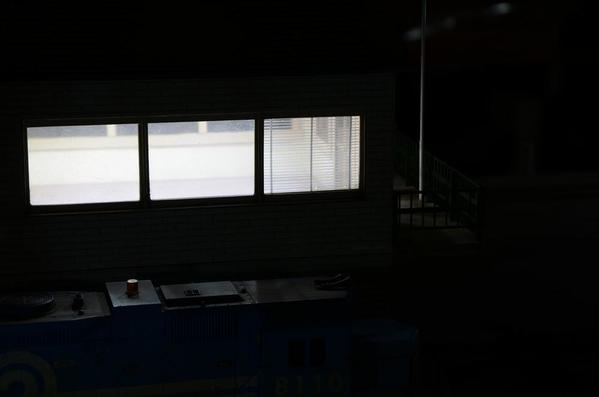
The camera confused the lines of the slats, but I'm happy with the result.

PE 168

The blinds look a bit the worse for wear - particularly in the public office; but that's where the building is going.

I'm going to slowly age it to match the effect I've got with the blinds.

PE 169

It's really difficult to successfully photograph them, but I hope that you can get the idea.

I'm really happy with them. 

Attachments

Images (3)
  • PE 167
  • PE 168
  • PE 169

Add Reply

Post

OGR Publishing, Inc., 1310 Eastside Centre Ct, Suite 6, Mountain Home, AR 72653
800-980-OGRR (6477)
www.ogaugerr.com

×
×
×
×
Link copied to your clipboard.
×
×