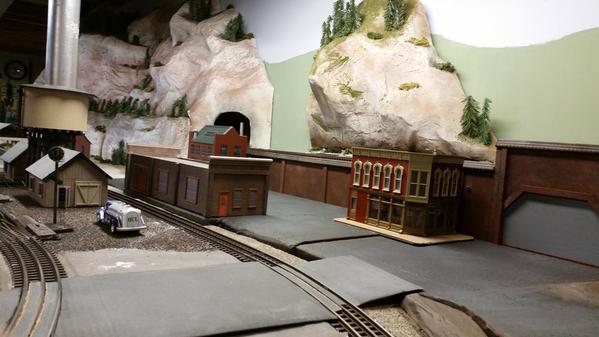
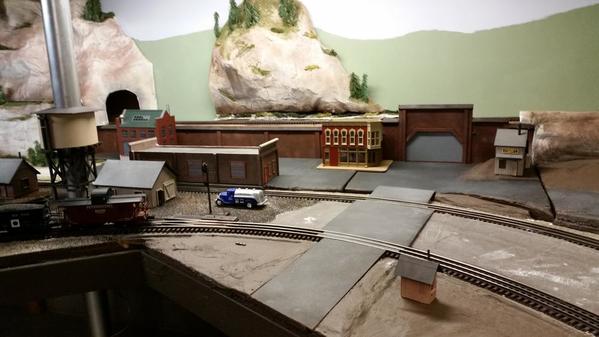
Barrett-Jackson Auto Auction Live

Watching the Barrett Jackson Classic Auto Auction - Live on the Discovery Channel or Velocity Channel or on their Web Page / You Tube

http://www.barrett-jackson.com/ - Link to live coverage.

Also repairing some die cast vehicles for the layout, vans and construction equipment.

                                                                  and  

Trainroomgary Pan Shot OGR Signature A               

Attachments

Images (2)
  • Barrett-Jackson Auto Auction Live
  • Trainroomgary Pan Shot OGR Signature A

A day well spent

Got the bulk of the trees in for the logging railroad and it only took a half a day (12 hours!).

Besides the 'furnace filter' and 'asparagus fern' pines I used the 'caspia' with it's own main stem as the tree trunk and used a lighter color foliage for the leaves.  Since they are sparse and thin, I thought they would be good for the rock cliffs where it would difficult for trees 'to make a living'.  Not sure if they look like trees but no harm in trying (plus it's cost effective!).

GN logging 19GN logging 20GN logging 21GN logging 22GN logging 23GN logging 24GN logging 25


Attachments

Images (7)
  • GN logging 19
  • GN logging 20
  • GN logging 21
  • GN logging 22
  • GN logging 23
  • GN logging 24
  • GN logging 25

Spent the evening trying to get another engine to run on my last mainline. First I had a MTH 3.0. Ran on all three mainlines but not on the fourth. So I got out another engine but it is 2.0. Same thing nothing. Hand held would not find it. After some doing I got it to sort of fire up. Sounds were garbled and all I got was smoke unit and lights. Took the top off and discovered that I had not changed out the battery for a BCR. So after putting one in I tried it again and I got it to run but no sounds. Tried to reset through the hand held but no luck. When I went to try it again it was not even found on the track. So rather then keep trying I'll call it a night and get a fresh start in the morning. Maybe while I am sleeping the good little fix it fairy will come and everything will be okay tomorrow.....LOL..........Wishful thinking on my part........Paul

Chugman posted:

Elliot - I love the pictures of the real area that you are modeling, it adds a lot to the appreciation of the finished model for me.  I assume that you will plan to cover the slope with vegetation for a summer scene?  If so, it will take a lot of it.  I am going to have some of the same issues.   We need to start a model nursery to supply our layouts with affordable foliage.


Art

Thanks Art. My whole railroad is a series of scenes from the real world, so there will be a lot more of this kind of thing as I start to get into scenery. There will be plenty of greenery, which I already have on hand. There are boxes full of Woodland Scenics trees under the layout, leftover from enterTRAINment. There are buckets full of ground foam down there as well.

Matt, I have thought about ledges and outcrops, that's why that that thin cap piece is still overhanging the slope. That section doesn't have much, but as I move further west (left on the layout) there are some rather spectacular examples that I will include. This is a favorite shot of mine, too bad it's summer in this scene. If I'm not mistaken, that is a limestone cap protecting the soft sandstone below. Water seeps out from between the layers forming those icicles in winter.

TRAINS_0388

Attachments

Images (1)
  • TRAINS_0388

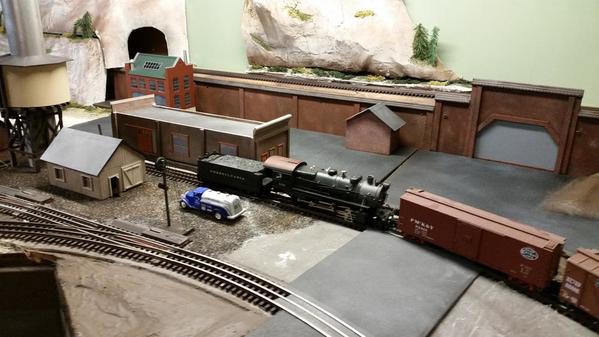
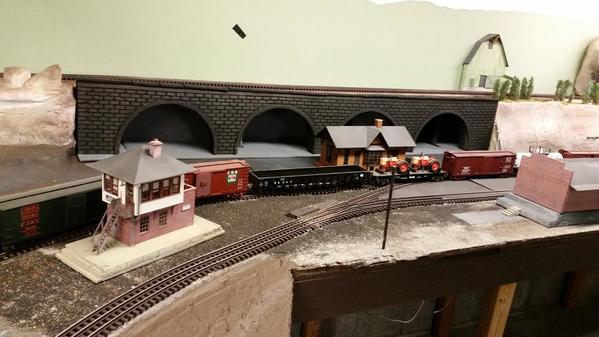
Elliot, you and Chugman and others are amazing with big layouts and the amount of work involved. Its taken me 6 weeks I think to just get to this point on the corner, 2 retaining walls, foam foundations and some new rock face and 5 bldgs. Seems like a full time job and no trains running forever. But this evening I spray painted some roads and added some color to the rock face and after the paint was dry inserted the panels and the bldgs.

The real treat was running a train. A consolidation switching some freight backing into my problem corner

20170121_23164620170121_23165520170121_231710

Attachments

Images (5)
  • 20170120_204542
  • 20170120_204551
  • 20170121_231646
  • 20170121_231655
  • 20170121_231710
pennsynut posted:

Elliot, you and Chugman and others are amazing with big layouts and the amount of work involved. Its taken me 6 weeks I think to just get to this point on the corner, 2 retaining walls, foam foundations and some new rock face and 5 bldgs. Seems like a full time job and no trains running forever. But this evening I spray painted some roads and added some color to the rock face and after the paint was dry inserted the panels and the bldgs.

The real treat was running a train. A consolidation switching some freight backing into my problem corner

20170121_23164620170121_23165520170121_231710

Pennsynut- Looks to me like problem solved . I just joined last Fall so I don't know the backstory to the "Problem Corner", but everything looks great.

Thanks RSJB18.  I have dubbed it problem corner because of the scenic deficiences it has had ever since I built this layout extension. The problem was the cardboard based prior scenic elements warped a bit and it was just another rock face without much life to it.  I ignored it while I improved other areas where I had already had imagined a plan. I have been redoing scenic elements for about 2 years now. Still have a lot of grass and other greenery to plant.

pennsynut posted:

Elliot, you and Chugman and others are amazing with big layouts and the amount of work involved. Its taken me 6 weeks I think to just get to this point on the corner, 2 retaining walls, foam foundations and some new rock face and 5 bldgs. Seems like a full time job and no trains running forever. But this evening I spray painted some roads and added some color to the rock face and after the paint was dry inserted the panels and the bldgs.

The real treat was running a train. A consolidation switching some freight backing into my problem corner


Thanks Pennsynut, your layout is coming along nicely too.

We should never lose sight of the fact that this is a hobby. Patience and persistence are rewarded with beauty, pleasure and satisfaction. You won't find that in a video game.

--------------------------------------------------

I didn't exactly get done what I set out to do yesterday. I got what I hope is the last of the mud up. I went to start the door trim, and found out that I was a piece of wood short, so it was off to Menards. When I got home, the phone rang, and it was my new train buddy. So he came over and we ran trains in an effort to try and smooth out the signal glitches.

Walt is an HO guy, but he is a fast learner. He had a great idea regarding why so many engines are having trouble in the big helix. He pointed to a bunch of unfinished wiring where ground leads are just hanging loose. I need to get in there and button those up to see if that's the problem.

More later.

Last edited by Big_Boy_4005
paul 2 posted:

Worked on an engine from last night to get it to run on the last mainline. Managed to get it to run but I had no sounds just a lot of garble coming out of the speaker. On top of that it threw a traction tire. Will work some more on the problem this afternoon................Paul

Most of our locomotives are "of age" now, and we're experiencing more and more thrown traction tires.  Looking at the black goo tire substitute method for ending the problem.  It got to a head when the active engine threw a tire and the next one out of the roundhouse to go fetch the train did the same thing.  The language which followed from the Head Mechanic wasn't pretty ...

Just finished removing TMCC from my 2343 Santa Fe F3. I had installed TMCC in about twenty post-war  engines many years ago and have been selling them off the last couple years. Unfortunately nobody wants to buy a TMCC capable post-war engine so I've had to remove the electronics. I still have four more to go- a 2360 GG-1, FM Trainmaster, and non post-war Susquehanna RS3 and a Dash 8. 

Just finished removing TMCC from my 2343 Santa Fe F3. I had installed TMCC in about twenty post-war  engines many years ago and have been selling them off the last couple years. Unfortunately nobody wants to buy a TMCC capable post-war engine so I've had to remove the electronics. I still have four more to go- a 2360 GG-1, FM Trainmaster, and non post-war Susquehanna RS3 and a Dash 8. 

     Elliot I don't know if you would be interested in trying something out or not? I was given this tip from a fellow model rail roader from a train club I belong to. He suggested using a straight 1in. long router bit in a drill and running it along the face of the foam board. I know I really liked it and that is what I am going to use on my tunnel walls and top to look like cut out stone. Give it a try on a scrap piece and see if it is the look you are going for. Hopefully you don't mind my 2 cents worth! Choo Choo Kenny

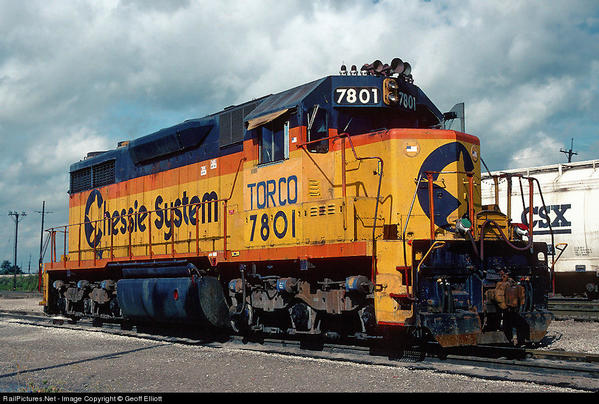
Didn't really get much done on the layout..kept looking at the micro engineering code 148 track I had laid and weathered...man those two rails look good before the 3rd gets spiked down...went on YouTube for awhile looking at 2 rail layouts....sighed...And bought a Atlas Chessie System SD35 in 2 rail to turn into a model of TORCO 78012462.1260667536

Guess that means I am joining the dark side.....

Attachments

Images (1)
  • 2462.1260667536

Got cork roadbed under about 2/3 of the track.  Only the left side loops remain.

Anyone else have an issue with their Midwest cork not being cut right?  One side ends up with a ledge hanging off and thus no nice bevel.  Fortunately, I only needed half the case to finish (I think).  I wrote a letter to them.  I'm sure I could shave it off but then I'll have a floor full of cork crumbles.

Once the cork is down, I'm going to either block the trolley loop or the middle loop with a siding.  I think I'm going to pack up my two Berk's and let the  little switchers run on the middle loop...one with all the Long Island cars and one with some new Beth Steel cars (slag or hot metal?).

Some great scenery pictures!  Samparfitt, love your trees!  I need to study your examples and learn how to do that.  I can't afford to buy all the trees I need ready made.

Mike, your rocks and scenery look great.  Very inspiring to me.

I am currently working on a new area on my layout.  My son, Jim, needs to have me get all my track finalized so he can install my new control panels when he gets them done.  He came over on Saturday and helped me redo the siding that I had and replace it with two sidings that will service my new flour mill.  I had an 072 left-hand switch left over that I wanted to use, but it made more sense to use a right-hand one.  So we worked through all the possible configurations using the left-hand and the Atlas short curve pieces I had left, and then bent the Atlas flex to make the rest work.  (Atlas flex track is a bit of a misnomer, particularly if it has been painted.  We made it work, but it wasn't easy.)

I plan to build a flour mill here and I needed to have two tracks: one to receive grain and one to load out finished flour.  My grand plan for this industry is to have local grain elevators receive grain from the farms, it is then sent to a large regional elevator, next it is sent to the flour mill, and then the flour is sent to my Wonder Bread Bakery.  Having spent 33 years in the baking industry, this is a natural for me.

(I feel that you can never have too many grain elevators on a model railroad layout.)

Art

Last edited by Chugman

I unboxed my new Atlas O Amtrak passenger cars to run them as I wait for my new Atlas O ABA engines #102, 105 and 153 to arrive.  One of the ten cars has a sparking rear truck, and my 3001199-1 "Silver Dove" 6-5 Sleeper caught fire, shorting out my new ZW-L transformer. The green LED board burned and melted the roof of the passenger car. The Preiser figures inside the car are all covered in a light brown residue.  Now the entire house smells of burning plastic.

Attachments

Images (3)
  • DSCN2400
  • DSCN2401
  • DSCN2405

Disguising a 24 tap MTH Expansion board.  I originally was going to mount this board under the table.  It's bad enough to run all the wires under the table, but connecting them to an expansion board while under the table on your back is no fun.  I'll let you know how this works out.  I have half of a Rico Station that I use as a warehouse for my Morrison Doors Company.  The space under the building will house one of these boards.

IMG_0560IMG_0561

Now I'm ready to run the wires out to all the buildings and only have to del with wire nuts under the table or possibly inside each building if there is room.

Attachments

Images (2)
  • IMG_0560: Now you see it
  • IMG_0561: Now you don't

John, that was terrible. The only good thing was it did not turn onto a larger fire with more damage. Were they new issue cars. Will you be able to recoup your money or get replacements for all that was damaged, The transformer was undamaged with it only tripping out, correct. Was it bad wiring inside the car or the electronics in them................Paul

Today I spent time looking for replacement tires for an engine to be able to get it to run. No luck so I called a friend in the train group to see if he might have any extras. He was out of them but may have more in a couple of days. So I went down to the basement and added some more shelving under the larger tables so I can got more things off the table top so I can start to lay out some kind of track plan............Paul

Paul, Thank you for your concern. The Atlas O 3001199-1 was a new released (1st release of 6-5 sleeper) in 2016.  It is not from the four-packs that Atlas O recently made.  The failure of board appears to be the problem.  I have not removed the light strip so Bill S. at Atlas O can see exactly how it was assembled.  Since this car has no dome in the roof, I never had a reason to remove the light bar.  I added Preiser figures that are now covered in a light brown residue.  The car failed instantly, popping the breaker in my new ZW-L transformer.  Any burning that occurred was driven by the burning of the materials used to make the light board.  Enough heat was generated to melt the plastic roof, causing the plastic to drop inward toward the board suspended under the roof.  My house still smells of the burning board materials, hopefully not cancerous.

The event has reinforced the warning to not only turn off your trains, but even unplug all toy trains to prevent fires in the case of a power spike or lightning strike. Whatever material Atlas O used in the manufacture of the boards had some excellerating, heat generating compounds in it.

I am waiting for a return call from Atlas O, but they are preparing for a weekend show.  Word from the west coast is that the F7 engines just shipped today, Monday, January 23, 2017, not last Tuesday as I had been previously told by Atlas O service.  I was putting my new Amtrak cars on the layout for when the Amtrak ABA F7 engines I paid for arrive from High Country Hobbies.


Attachments

Images (3)
  • DSCN2400
  • DSCN2401
  • DSCN2405

I was slightly sidetracked the last couple days. Still working in the train room, but not on the actual layout. I got all three of my doors trimmed out.

This door is the main entrance to the train room from the inside of the house. That is a bearing wall made from 2x6's, so the jamb needed extensions, since the door is made for a standard wall.

IMG_7252

This is the door to the utility room. It was the easy one, just simple trim.

IMG_7251

This was the most difficult one, with a slightly irregular opening made from pressure treated lumber. The door has oversized self closing hinges, because it goes out to my garage workshop. I had to notch the left extension to accommodate them since it was already up against the treated wood frame.

IMG_7253

When Patrick and I did the backdrop in this corner a couple years ago, I figured out exactly where the trim was going to come out to.

IMG_7254

Top and side trim were right on the money.

IMG_7255

There's just a little drywall sanding left to do in the dispatcher's corner, then the walls and the doors are ready for priming and painting.

I'll probably switch gears again tomorrow, and go back to working on the bluff.

Man of many moods.

Attachments

Images (5)
  • IMG_7252
  • IMG_7251
  • IMG_7253
  • IMG_7254
  • IMG_7255
Big_Boy_4005 posted:

I was slightly sidetracked the last couple days. Still working in the train room, but not on the actual layout. I got all three of my doors trimmed out.

This door is the main entrance to the train room from the inside of the house. That is a bearing wall made from 2x6's, so the jamb needed extensions, since the door is made for a standard wall.

IMG_7252

This is the door to the utility room. It was the easy one, just simple trim.

IMG_7251

This was the most difficult one, with a slightly irregular opening made from pressure treated lumber. The door has oversized self closing hinges, because it goes out to my garage workshop. I had to notch the left extension to accommodate them since it was already up against the treated wood frame.

IMG_7253

When Patrick and I did the backdrop in this corner a couple years ago, I figured out exactly where the trim was going to come out to.

IMG_7254

Top and side trim were right on the money.

IMG_7255

There's just a little drywall sanding left to do in the dispatcher's corner, then the walls and the doors are ready for priming and painting.

I'll probably switch gears again tomorrow, and go back to working on the bluff.

Man of many moods.

Looks good Elliot, the doors turned out looking great, I bet it is nice to have that done and marked off your list of things to do!

I down loaded SCARM two days ago and thought I would try it out. Still looking to build an elevated loop. This stuff is all new to me.

 Been plotting my layout in SCARM and like I thought, hard to do when the program will not bend and tweak track and it has no O27 profile 72R curves to work with. It sure would be nice if you were starting out fresh.
 
Working on this was like the old days in engineering at Cat when they used Pro-E. The hose calculator in that program was not good so it was go to the shop with some string and figure it out. Smile, Wink & Grin
Funny, it don’t look this complicated standing next to it running the trains, but this is it. Without the elevated loop I want to do.
 

This is as close as I can get to what I have today. It is all there just some curves are a bit off because I have a mix of K-Line R72" in there.

 This is a first shot at what I want to build for the elevated reverse loop to put on top.

Here it is with the upper level laid over the top.

Attachments

Images (3)
  • mceclip0
  • mceclip0
  • mceclip1
Last edited by KRM

More on my lighting project.

IMG_0564IMG_0565IMG_0566IMG_0567IMG_0568IMG_0569

Added a pilot light to the MTH expansion Board.  It doubles as lighting for the inside of the warehouse.  The Holy Grail Pub is in an old decommissioned Catholic Church in Epping NH, so I took some liberties using the MTH grain building.  Lighting in the Nicholas Smith Lionel Train Shop looks good and there is a workman using a jack hammer in the cut near the water tower.  15 buildings to go!  When that's done, I plan on painting the warehouse and putting panes in all the windows.  Rico Station just keeps on giving!

Attachments

Images (6)
  • IMG_0564
  • IMG_0565
  • IMG_0566
  • IMG_0567
  • IMG_0568
  • IMG_0569

I know this might not go over so well here, but my layout will be in two competitor hobby magazines soon. 
I have confirmed my layout will be in the On30 Annual for 2017! It's the "Tweetsie Inspired" layout mentioned in this pre-order form I decided on the annual as it's far better geared for On30 in general, though I agonized over more readily-found, less expensive and widespread magazines such as OGR...
Also, the online Model Railroad Hobbyist magazine will be running one of my photos of the layout in an upcoming issue. Their editor contacted me on that.

p51 posted:

I know this might not go over so well here, but my layout will be in two competitor hobby magazines soon. 
I have confirmed my layout will be in the On30 Annual for 2017! It's the "Tweetsie Inspired" layout mentioned in this pre-order form I decided on the annual as it's far better geared for On30 in general, though I agonized over more readily-found, less expensive and widespread magazines such as OGR...
Also, the online Model Railroad Hobbyist magazine will be running one of my photos of the layout in an upcoming issue. Their editor contacted me on that.

Congrats Lee! GOOD for you, you should be honored!

p51 posted:

I know this might not go over so well here, but my layout will be in two competitor hobby magazines soon. 
I have confirmed my layout will be in the On30 Annual for 2017! It's the "Tweetsie Inspired" layout mentioned in this pre-order form I decided on the annual as it's far better geared for On30 in general, though I agonized over more readily-found, less expensive and widespread magazines such as OGR...
Also, the online Model Railroad Hobbyist magazine will be running one of my photos of the layout in an upcoming issue. Their editor contacted me on that.

Congrats. Your layout is both unique and beautiful. It deserves to be recognized for the work you put into it. 

Nothing directly on the layout so far but the night is young.  I may clean some more track. Today on the way back from an appointment, I saw a Menards store that will open Jan 31 here in KC northland area. So, I guess I will open myself up to temptation next week.  I want to look for a couple of outdoor light fixtures as well. So it's not always about trains?

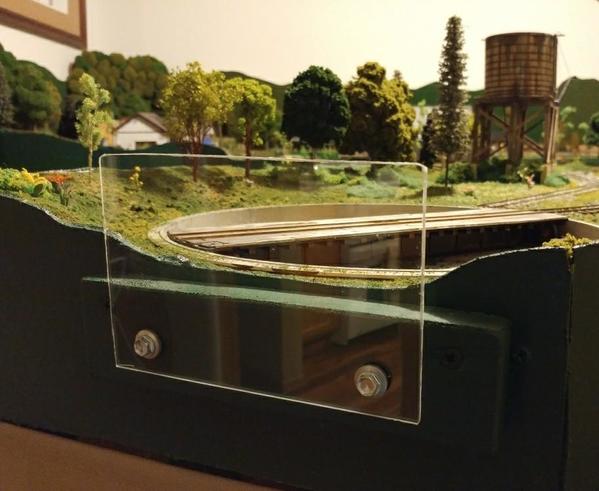
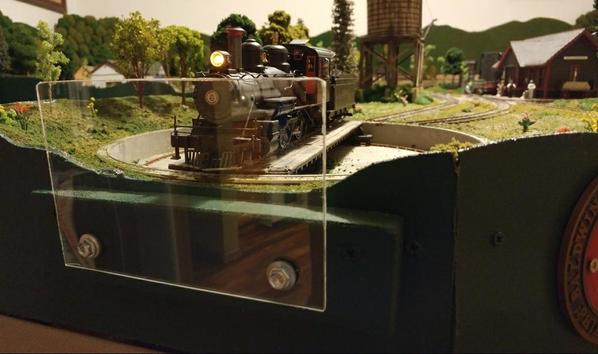
I added a Plexi piece at the edge of the turntable, to keep my locomotives from doing half-gainers to the floor. The Plexi was cut, drilled, and the mounts pre drilled and ready to go for quite a while. I just waited to mount them in place until after I took the other photos for my upcoming magazine article.0124171906_resized-10124171909_resized-1

Attachments

Images (2)
  • 0124171906_resized-1
  • 0124171909_resized-1

Got a few things done on the layout today.

I started with bluff construction. I trimmed the ends of section 2, then glued and braced sections 4 and 5.
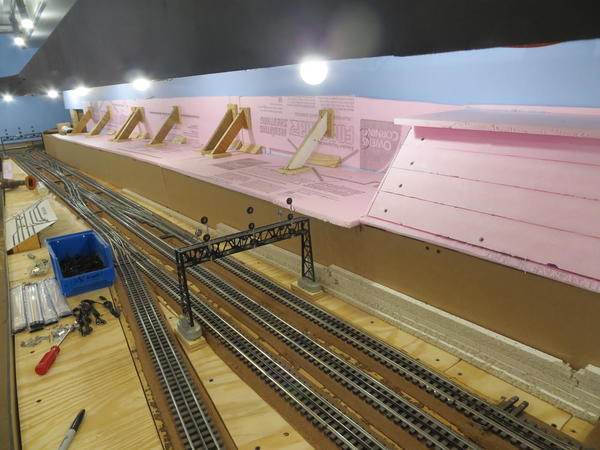
IMG_7257

Section 6 is going to be tricky, because the camera is in the mix, not to mention that the backdrop starts to curve just beyond to the left.
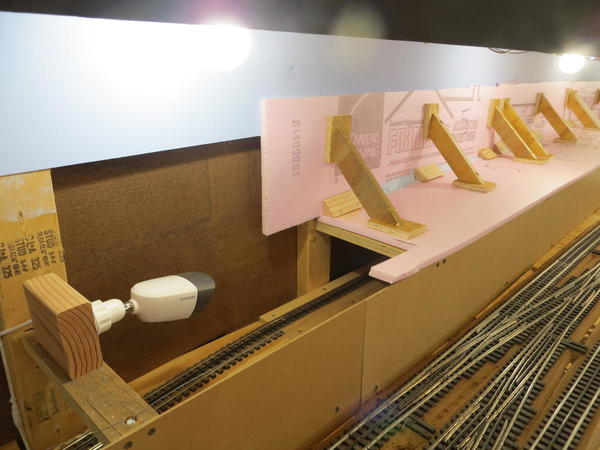
IMG_7258

You might remember that I had been searching for a dead short in the Roseville power district. I found it a couple weeks ago, but not before cutting a bunch of wires. Today I put everything back together with the blue and red butt splices.
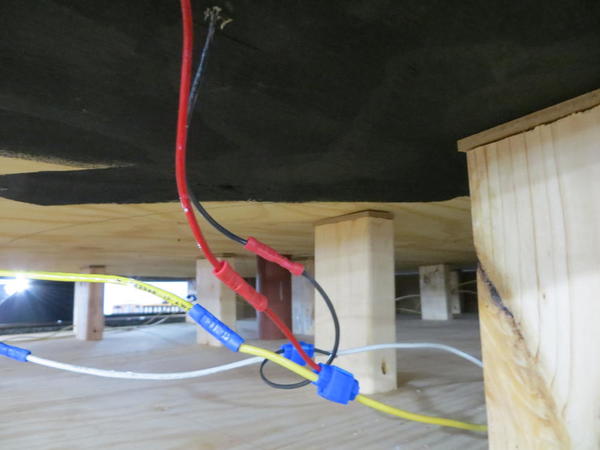
IMG_7259

This was the actual problem, and it was all my fault. I used a black feeder wire when it was supposed to be red. So when Joe did all the connections, he did them just the way he was supposed to, resulting in a dead short.

IMG_7261

Once that was resolved, I was able to take some Masonite, and cover up all the wires and supports. It looks much cleaner.
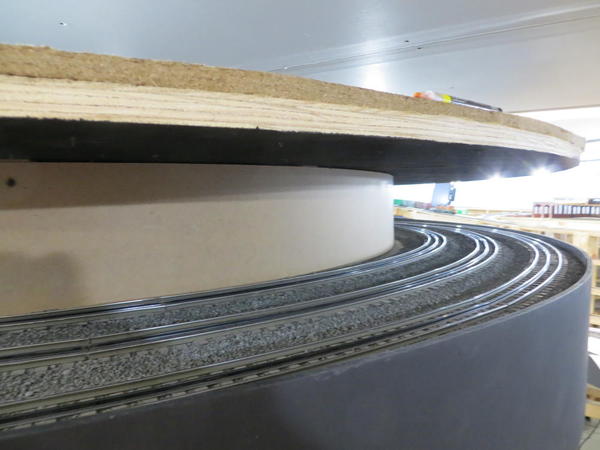
IMG_7262

I'm still not sure what I'm going to cover the Masonite with. Plenty of time to think about it.
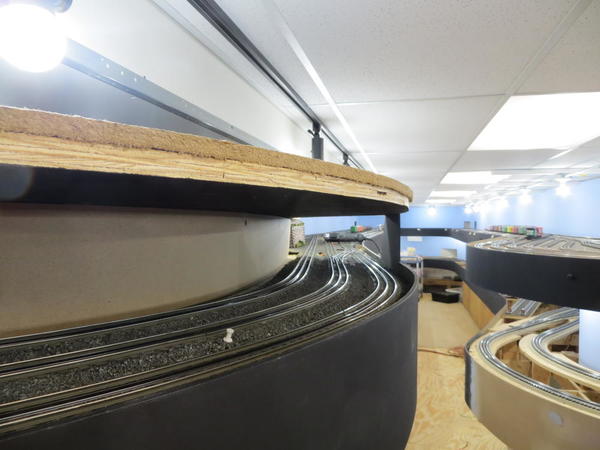
IMG_7263

Of course after I got the Masonite up, I realized that I still had to install and wire uncoupler magnets. I have a back up plan, I'll just run them over the surface and cover them with industries.

Attachments

Images (6)
  • IMG_7257
  • IMG_7258
  • IMG_7259
  • IMG_7261
  • IMG_7262
  • IMG_7263
Last edited by Big_Boy_4005

Thanks guys! I've been trying get a few hours in down there every day now. If I have to miss a day, I have a little trouble regaining momentum. I've got visitors coming in the morning, then forum member Chester7 (Chad) in a little over two weeks.

I want to get those walls finished and the TV's hung, so that when the counter tops come I can get them in, before he gets here.

Staying motivated!

Hoping to get a few things done today when my son, Jim, comes over.  Trying to get all the changes to the track plan completely done before he completes the new control panels.  Have some Tortoise machines to install, a faulty Atlas Non-derail board to replace, and want update the track plan in RR software.  Also would like to get started on getting more retaining wall completed, but I have to make much of this remove-able for access to switch machines and wiring.   

I posted a few pictures of last work session in my layout update thread.

Art

Well this morning while having breakfast Mr. Brown dropped off my package from Plastruct. So now I can get busy on the fence around the scrap iron yard. Gave up for the time being trying to get my last mainline to work with DCS. I have one more package with paint to paint my Coaling tower from Lionel. Got the paint from Minuteman scale models. I am sure glad they picked up the Weaver paint line................Paul

Pat Kn posted:

Congratulations Lee on your inclusion in the two magazines. 
Mark Boyce posted:

Lee, That is terrific you are going to have articles in those magazines!  Very deserving, and it will be good to show your skill and passion to a wider audience!  Congratulations!

paul 2 posted:

Lee, congrats. Have enjoyed the progress on your layout. You got it to the point where it will now be enjoyed by more them just us on the forum..........Paul

Thanks a lot guys! Like many modelers, it was always a dream of mine to not only have a layout anyone might think worthy of a magazine, but also to have an editor agree.

I would challenge the rest of you to think about doing this yourself. Your layout might not be what you envisioned, but what layout is? I have seen a lot of really good stuff here on the forum that I doubt has ever been in print. It's not that tough and you all probably have pals in the hobby willing to help out.

Get your work out there, as the internet is cool but nothing, to me, is as good as having it in print!

Shipping Test

I don't know how they met or even when for that matter. Somehow the universe introduced Dad to Gene Austin. Gene has done it all from running a printing press to defending our country. Somewhere in there Gene decided to try art. He likes to make little scenes and photograph them. When Dad started building his model railroad empire, Gene stopped by and was quite impressed. Inspired, Gene bought a Rico Station kit and bashed it into a railroad museum and a Dewitt Clinton Lionel train. After he took a picture, he gave it to Dad. That's where it all began. Gene suddenly became an O-Gauge modeler. He made a barn. He made a gravel pit. He made Jurassic Park. He started making it all and I got to see it all in cell phone pictures from Dad. Last week, in the middle of a training course, my phone rang...and rang...and rang. I guess it's an emergency. So I excused myself from training to answer the phone. It was Dad desperately trying to get my address. He made it all the way to UPS and forgot my new address at home. You see, he was in the middle of a Shipping Test for Gene. Last night, after a fun evening with my model train club ripping out the old coal mine and brainstorming some new buildings for the new citiscape corner, I got home to a rain-soaked box in my driveway.
1
A shipping test would soon be complete. On my best day I couldn't make something half as nice as this. The universe introduced my Dad to Mr. Gene Austin. The universe wanted me to have these.
23
They just barely fit on my temporary layout. I was more interested in getting track down and didn't worry about landscaping and buildings (much to my wife's dismay).
4
5
6
7
8
 
 Little did I know I had room for not just one, but two Gene Austin originals. I'd say it was a successful shipping test.
 
Post Script:
Apparently my dad made Mr. Gene a website where SO much more of his art is displayed:
 
I've asked Dad to implore Mr. Gene to tell me how he made these.  When I go to visit him this fall, I'm hoping for some hands-on demos!

Attachments

Images (8)
  • 1
  • 2
  • 3
  • 4
  • 5
  • 6
  • 7
  • 8

Today I split layout dusting, track cleaning and loco wheel cleaning in 2 sessions. Some of the track was cleaned with denatured alcohol and then wiped dry. But I noticed some residue. The track was dusty from recent scenic work. Dry scotch brite pads worked best today. I'll try to finish tomorrow. Finally ran a 4 passenger car train through the town tonight. Felt good. I need some traction tires for an Atlantic steamer. I'll call local store to see if they carry them. 

Spent the morning cutting the panels of corrugated siding to scale 8' high lengths. Sheets did not quite make four strips but the small bits left over will make another strip and give me enough to fence in the scrap yard. Worked on cutting the fencing that will go across the track. Not quite sure if I want two sections or one.  Now I have to cut the strips into  8' foot lengths and the tubing I bought into fence posts. On top of the posts I would like to string barb wire but I don't know if it is made in O gauge................Paul

Squared away some  wiring on my layout.  Had a short which was a nuisance which made tear apart some of my Standard and O gauge track.  I had bought some new, modern Lionel lock-ons because they are lighted and have posts to connect the wires to.  Found out they are really cheap, flimsy and the plastic is brittle. Broke one just snapping it on to the track. Got everything working OK and salvaged the busted lock-ons by gluing  sheet plastic to the underneath part.  Still have to nail down the track to keep it from shifting and reinstall the strips of carpeting between the O gauge rails.

Dug out my California Zephyr passenger cars and found three cars I had not detailed yet: a CZ "Silver Café" Diner and two dome Amtrak cars.  Finished the CZ "Silver Café" and took for a run with 14 Amtrak cars.  The Lionel GG1 #4935 did a nice job moving the string of 15 cars.

I bought an extra Observation, Baggage, Diner, and Dome Lounge for the CZ and Amtrak trains. I wanted a backup in case these important cars were ever damaged. I am impatiently waiting for the Atlas O F7 engines.

Attachments

Images (6)
  • DSCN2438
  • DSCN2434
  • DSCN2436
  • DSCN2440
  • DSCN2442
  • DSCN2443

Mike G. You are very observant.  I need some parked trucks and cars, and maybe a hot dog stand.

Trumptrain. What a fun train layout to watch! Busy and lots to view.

Tonight I finally got most of the track cleaned or so I thought.  There were a few areas where the track was still dirty and the pick up rollers really showed it.  Eventually I was able to make a continuous run with a consolidation pushing my track cleaning car without a hiccup. I guess I will disguise my track cleaning car a little better so I can run it with all my freight trains.  Probably a good idea to clean the wheels on my rolling stock as well.  

Last edited by pennsynut
KRM posted:

RSJB18, is that S-2 a K-line?

Still adding touches to the CAD file and waiting on stuff for the elevated loop.

Yes it is. I have a K-line MP-15 in PRR too. Very nice engine, its jack rabbit quick though. I am considering adding a string of diodes in it to reduce the voltage to the motor. I hope to get the S-2 cleaned up  and running today. I will post a video later if I am successful.

Thanks

pennsynut posted:

Mike G. You are very observant.  I need some parked trucks and cars, and maybe a hot dog stand.

Trumptrain. What a fun train layout to watch! Busy and lots to view.

Tonight I finally got most of the track cleaned or so I thought.  There were a few areas where the track was still dirty and the pick up rollers really showed it.  Eventually I was able to make a continuous run with a consolidation pushing my track cleaning car without a hiccup. I guess I will disguise my track cleaning car a little better so I can run it with all my freight trains.  Probably a good idea to clean the wheels on my rolling stock as well.  

I notice that you are using Atlas track also and seem to be battling the track cleaning problem.  I can't believe how often I have to clean my track.  I have a Centerline track cleaning car, but it does a fairly poor job.  I use a Scotchbrite pad to clean mine.  I have tried alcohol and etc. with poor results.  Is it the flat topped rail that causes it to get so dirty?  Did I overlube my engines?  Do traction tires leave gunk on the rails?

Whoever can design an effective track cleaning car for Atlas track will be a hero in my book.

Art

Art, I'm having the same kind of problems with GarGraves. I was thinking of creating my own fleet of track cleaning cars, using the very heavy MTH gondolas with scrap load as the base. The cleaning surface would just be a chunk of Masonite. As for mounting it, it just occurred to me, a piece of foam rubber cut to the proper thickness, might be the answer. I would keep them in trains at all times, letting them circulate.

Thoughts?

Big_Boy_4005 posted:

Art, I'm having the same kind of problems with GarGraves. I was thinking of creating my own fleet of track cleaning cars, using the very heavy MTH gondolas with scrap load as the base. The cleaning surface would just be a chunk of Masonite. As for mounting it, it just occurred to me, a piece of foam rubber cut to the proper thickness, might be the answer. I would keep them in trains at all times, letting them circulate.

Thoughts?

Elliot

I have a couple track cleaning cars with some real weight to them.  One is a depressed flat transformer car that rides low and the other I made from a chassis of a Santa Fe "B" unit chassis that uses velcro to hold onto a ScotchBrite pad.

IMG_1535IMG_1536IMG_1537

ScotchBrite works well for me on the tubular track.  Having the Velcro holding the ScotchBrite makes it easy to clean or replace.  Long wheel base cars work ok on 054 & up track.  I'm looking for a bobber caboose to make one for 031 & 042.  Whatever car that you use find some high density rubber to use a spacer between the car bottom and the Velcro.  Good luck with whatever you choose to do.  I run the depressed Flat car all the time as part of the consist on the main line.

PS  Working to achieve "hero status" for Art.

Attachments

Images (3)
  • IMG_1535
  • IMG_1536
  • IMG_1537
Last edited by decoynh
trumptrain posted:

Ran trains for about 30 minutes, replaced some MTH coal loads with new custom loads, crawled under the layout to organize and search through some boxes ( It seems I have an entire trains store underneath my layout&nbsp and having much fun while doing all this!!!

Pat: These are GREAT videos. The aerial view of Patsburg in the first video is superb. It shows off all levels of the layout including Mount Randolph. I also love the close up of the Maryland and Pennsylvania milk train in the second video. As always, your scenery is OUTSTANDING!

Yeah Matt, I've got a commercially available track cleaning car, that holds the pad by clamping it on the ends. I like the car, but it has design flaws. First the frame is too light. This causes a lot of derailments especially in push mode, which is the way I like to use it, since I'm cleaning the track ahead of the engine. Second is the couplers. they have no centering spring, so again it is problematic to push the car.

I like the Velcro idea, and had actually thought of that as an attachment method for the Scotch-Brite pads.

Nothing on the layout yet but after posting this down to the basement do something. Today I went to the TCA show in Parma Ohio. Didn't find anything off my list but managed to find these two items. An old Atlas Bobber caboose for ten dollars and a backdrop for the same price. The Bobber is on the light side so I will see what I can do with it and the back drop is going to go next to my Menards power station. Pics of the super buys. My kind of pricing LOL.....Paul

DSCN0131DSCN0132

Attachments

Images (2)
  • DSCN0131
  • DSCN0132

Well, Been a while since I could post anything constructive here, but in the last couple of days I cleaned most of the junk off my layout and also finished rebuilding a couple of old prewar AF locos and posted some video's of them running and pictures of the process.  I think I ran seven or eight locos today, which is pretty good for me.  Usually if I run at all it is one for a few minutes and then back upstairs for some reason or duty  


Well at least I got a little done, very little. I think I figured out a way to attach the fencing I bought to use as a gates in the scrap yard. I cut some pieces to hold the fence up with.  Those pieces will be glued to the fence post. If I am careful when gluing I should be able to swing the fence both directions. I had started to glue the pieces of corrugated siding together to make a larger panel for fencing but I ran out of glue so that stopped that project in its tracks. So I took the backdrop and cut off all the sky. So tomorrow I'll take a run to the Depot and get more glue a another piece of Masonite. Pics of the fence and backdrop..............Paul

DSCN0134DSCN0135

Attachments

Images (2)
  • DSCN0134
  • DSCN0135
paul 2 posted:

Well at least I got a little done, very little. I think I figured out a way to attach the fencing I bought to use as a gates in the scrap yard. I cut some pieces to hold the fence up with.  Those pieces will be glued to the fence post. If I am careful when gluing I should be able to swing the fence both directions. I had started to glue the pieces of corrugated siding together to make a larger panel for fencing but I ran out of glue so that stopped that project in its tracks. So I took the backdrop and cut off all the sky. So tomorrow I'll take a run to the Depot and get more glue a another piece of Masonite. Pics of the fence and backdrop..............Paul

DSCN0134DSCN0135

Looks good Paul, Just wondering where have you been getting your back drops from?

There is a house not far from here that appeared to be condemned. I got drawings and photos of it around Thansgiving. 

IMG_0543

Fortunately, I discovered last week that work is being done to restore it. 

I have taken some liberty with the paint scheme to model this house as a Victorian Painted Lady. I hope you enjoy it. 

IMG_1084IMG_1085IMG_1086IMG_1087

A view through the rear dining room window

IMG_1080IMG_1083

Attachments

Images (7)
  • IMG_0543
  • IMG_1084
  • IMG_1085
  • IMG_1086
  • IMG_1087
  • IMG_1080
  • IMG_1083

The dispatcher's corner is coming right along. I gave everything a coat of primer.

IMG_7264IMG_7265

I just got an email from Menards saying my counter tops are in. I may head back down and do the actual paint. It is going to look very different when the walls are black. Then I get to move and hang the TV's, then the counter tops. Hope to wrap all that up by Tuesday.

Attachments

Images (2)
  • IMG_7264
  • IMG_7265

Add Reply

Post

OGR Publishing, Inc., 1310 Eastside Centre Ct, Suite 6, Mountain Home, AR 72653
800-980-OGRR (6477)
www.ogaugerr.com

×
×
×
×
Link copied to your clipboard.
×
×