train running before work.....
Attachments
Videos (1)


|
|
train running before work.....
briansilvermustang posted:train running before work.....
That's the best kind!
I am working on foam core roads and crossings and building placement on the west end of the layout. These are WIP pictures. There's a long way to go but this is a start.


Scenery pieces are finally rolling out of the "paint shop"...
No, it's not a boa constrictor. This embankment will fit inside a curve which is also a 4% grade. Part of the tortuous upper route. This piece still needs a bunch of greenery and other minor tweaks.

Cap piece, new portal and small section of embankment. Just raw paint at this point - still needs the green stuff.

This small mountain module was rescued from the former layout configuration. It was nearly double this size but I cut it down to fit a corner section. Also lacking grass, turf, bushes, trees, etc.

This phase involves a lot of painting & gluing which take time to dry properly between sessions. It'll be 90 degrees here today so many of these items will dry more quickly.
-RM

645 posted:p51 posted:Just got the Whitcomb back together again after putting new decals and detail parts on and I still need to do some weathering with it, but I think it looks pretty good so far.
Looks good and I realize you did much research as you can for paint colors/markings to fit your layout's era. It almost looks "backwards" to have 'Transportation Corps' before 'U.S. Army' - would think 'U.S. Army' (cab) 'Transportation Corps' would read better.
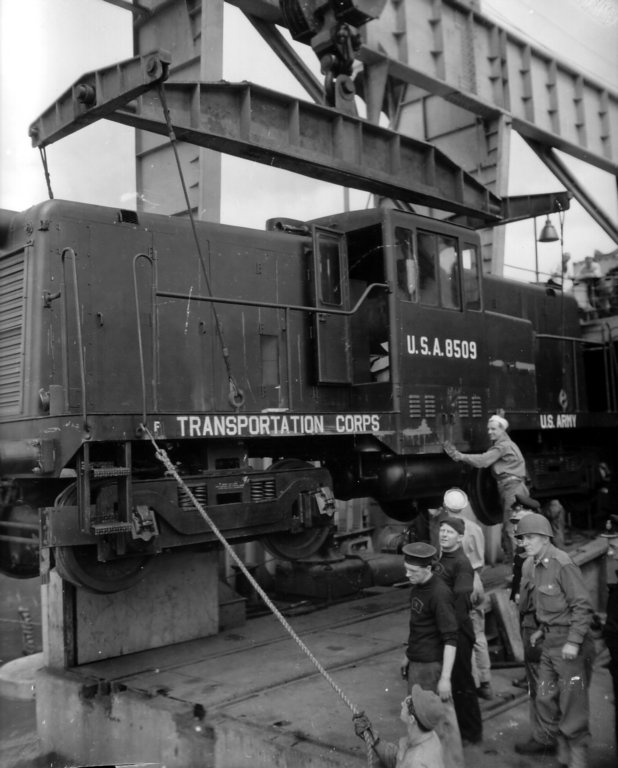
I did a lot of research on markings and Transportation Corps was often placed before US Army. That's a standard gauge Whitcomb in the above shot. I couldn't do the markings on the running board as I couldn't make white decals and nobody makes lettering in the correct typeface I wanted.
Diesels were painted black, OD green, grey and yellow. The stateside ones were sometimes lettered right off the production line when the engine was intended for another user. That was what I modeled here, as taking apart one of these locos to paint one would entail destroying a lot of detail I'd have to rebuild later and take part a lot of the wiring. It was never built to be repainted, that's for sure! Just masking the hoods off for dullcoat was a nightmare enough.
The markings you showed are for the late 50s. No yellow running boards on black units, no oversized Transportation Corps emblems on WW2 diesels. The problem with so many books on WW2 railroads is that editors and authors are lazy and they use the first thing they can find. Far more photos were taken of Army diesel locos in the 50s and 60s than during WW2.
Greetings Everyone,
This isn't exactly a layout but it's something I built that will eventually be added to the layout I AM working on. The base vehicle is a New Ray 1/43 snow plow. The emergency lighting is a rendition of the style used by The Ohio Dept. of Transportation. It is a combination of green, yellow and white strobes.
The light bar on top of the cab is scratch built using Plastruct "L" shape pieces for the brackets and a piece of Lucite square rod that was milled to size on a small hobby style milling machine. It has a total of 6 LED's (2 of each green, yellow and white) wired to 3 separate flashing circuits which provide a nice random pattern. Two "cool white" LED's for headlights complete the cab.
On the rear of the truck there are 2 (one on each side of the hopper) green and yellow triple flash strobes. The green and yellow are wired to flash independently of each other. These lights were custom built out of the same Lucite rod that was used for the Light Bar on the cab. There are 4 "wig-wag" style lights on the panel just above the rear bumper along with green and yellow "Hi-Viz" safety stripes. Two red tail lights are mounted in the bumper to complete the rear lighting.
All of the electronics, along with a 9 volt battery are housed inside the salt hopper which allowed me to employ several types of lighting to attain the effect seen in the video. BTW, there is a total of 18 LED's used in this project and they were purchased through Evan Design which is a Forum Sponsor. This is posted in "Scenery and Structures" as well. Thanks for Lookin'.
Chief Bob (Retired) 

Bob, that truck is really impressive!!
Wowsers! Great lighting job! ![]()
Added foam board under my town buildings and then placed the Lemax plaza pieces to make the sidewalks.


lunch time train run, trying new different lights for camera, now a little to bright....

I think the townhouses look the best there. ![]()
Pat Kn posted:I think the townhouses look the best there.
With a few family scenes this corner will look terrific!
AG- looks good. I liked the bail bondsman but this will be nice.
The "working townhouses" is another very handsome look, Andre. Bravo! The old pavement is an important factor in the success of that scene, too.
FrankM
All I did today was finally get the Menards car carriers out of the boxes I picked up a few days ago. They are really nice....and heavy too. I put my bridge in place to see how the cars would look. I only have a number of days till Tuesday night when I host the Tuesday night guys. So I have to make the extra effort to get things cleaned up by then. But here are a couple of pics of the cars.........Paul


WOW Paul, you must have bought all the auto's on the lot! LOL Looks great going across the bridge!![]()
Paul, Very impressive looking with the train on it! Neat with the Menards car carriers
I am researching building a Walthers gas electric kit in three rail for one of the Colorado prairie roads. I have done an American Standard Car Co. kit for the MoPac and was glad to learn those St. Louis Car Co. bodies in the Am. Std. kit were almost identical for a lot of roads. I have better understood that since researching rhe Walthers C&NW model which is of a very different EMC gas electric, but there were dozens of similar EMC cars built for a lot of roads, too. Often the difference was in makeup or exclusion of postal, baggage, or passenger compartments. I prefer all three in a car, and the Burlington had several, but l'd prefer its subsidiary, Colorado & Southern. However both C&S EMC's had no RPO compartment. Now it is easy to cut and solder Walthers kit sides....to take out the RPO section....but l hate to give it up. I found a photo of a Q lettered EMC on C&S track, but..no RPO. Quandary. Little interest in gas cars on here, except for Brother Love's Huckety-Buck, but this stalls me..guess should go on to another project...
That is a good thing, Paul. ![]()
Deck furniture - fore deck, anchors and traditional bumper . . .

After deck . . .

Fixed with epoxy glue.
Looking real good, Max. ![]()
Thanks, Pat.
Has anyone bought the Menards cars 1/48 dealer pack? Model Number: 2792658. I want to get these but I bought some Menards cars used off ebay and the seller said they were 1/48 but on the underside of one of the cars it said 1/43.
Sorry if this is in the wrong place but after seeing those Menards car carriers that Paul2 posted made me want to ask.
MaxSouthOz posted:Deck furniture - fore deck, anchors and traditional bumper . . .
After deck . . .
Fixed with epoxy glue.
Looking good Max! The next thing you know you will be out on the pond chasing the birds away!![]()
Max, this is like looking at the real thing from a Seagull's eyes. You nailed it .............Paul
OSCALERUBE, if you go to the Menards car carrier topic I am pretty sure Mark said the cars were 1/48....Paul
train watching....


Thanks, guys. ![]()
Colorado Hi Railer- Post all you can on your gas electrics ! Love them. Only G scale I kept was one I made out of a caboose and the front end of a Model A truck. Made an O gauge but scrapped the body when I moved but saved the frame and motor.
This photo is from last weekend. I finally got the bench work done. It is modular and will be easy to move or enlarge in the future.
I will be laying 2 rail flex track. The curves will be tight but I will only be operating small equipment. 
briansilvermustang posted:train watching....
Nice video- were all those diesels under power?
3 Williams powered, 9 MTH non power...
Today was not on the layout, but out in the carport. I've been giving some thought as to how to bring more action to the modules I use in National Capital Tracker club shows. I thought about including some back-and-forth action, so I purchased a Z-Stuff DZ-1240 AC/DC Auto Reverse Stop and Controller. To test it, I set up the 4 modules on the carport. Only place I had enough room to put them all in line. besides, it was a nice day. I didn't bother to fasten them. After one call to Z-Stuff, who helped me realize I needed to have power both to the controller as well as to the track through the controller, it worked well. See video. Now I can include some action cars, like the giraffe car and automatic brakeman car, and have lots going on.

Another day of just cleaning up and getting ready for the Tuesday night crew. This afternoon USPS dropped off a package. So let me start off by saying quests start when an item is no longer made or it is hard to find. Since Weaver closed one of my Weaver quests has been wood chip hoppers. And over a period of time I have been able to get most that were made. One I will probably never be able to find was a custom wood chip hopper for Brentwood antiques. An MEC one. At York I talked to a dealer who said he had the early wood chip hoppers in kits form. I told him to email when he got back home as to what he had. When he did I said I would take all five and I was able to get trucks and couplers for them too. The kits have to be put together and they came minus the trucks and couplers. Pics of the hoppers............Paul


They look good, Paul.
Were they expensive?
Max, I think when they were first released the price may have been 19.95. I got them for $25 each but finding Weaver trucks and couplers , when all added in was in the $32/$33 dollar range each..........Paul
Sounds like good value, Paul.
Ran trains tonight a bit while working on my newly installed spur. Had BIG FUN!!!
More wiring and a lot of cussing at the worn-out soldering gun. More wiring today for track power, then on to fixing up the wiring for the four turnouts which will use relays for bridging power to eliminate blinking car lights.
Today I added a new set of AA Legacy Sante Fe Blue Whiskers to the layout...Although they will have limited duty, they will be a back up to other systems already in place....Thanks to OGR Forum members...


I have to stick with my system on this part of the build.
The next step is to install the 33 LEDs inside the main superstructure.

They are pre-ballasted 12 Volt LEDs, which come in a roll and which can be separated into sets of three.
The device at the bottom is a resistor wheel. It's self explanatory, really. It's inserted in series and allows the operator to select a range of resistance between 5 Ohms and 1 Meg Ohm.
The LEDs in the bridge deck have been ballasted using the wheel to look "right" in terms of brightness, so now I bench ran the LEDs in the superstructure to match them.

It's a bit challenging to get all of the illumination right in the photo, but hopefully you can get the idea.
The additional ballast resistance required turned out to be 100 Ω; surprisingly the same amount as the bridge deck.
Funny about that. ![]()
rainy day, playing in the dark.....


It has been a kind of slow month working on the layout. It's been so nice having everything cleaned up, I haven't wanted to mess it up. I need to set my chop saw back up and start making sawdust again. In the meantime I've been working on a few "clean" projects.
For the last month and a half, I've been unpacking trains and adding them to the layout. This is my spreadsheet that I use to list the inventory. I printed the list and gave it to my wife, so she could write out the car cards. I just use the Micro Mark card system.

I painted a bunch of the card boxes. I'll be mounting them to the fascia very soon.

Here is the box for Pig's Eye.

The cards are all sorted and placed in order by track. That took a while!

All of this is prep operating sessions. It's coming together.![]()
Not a detail missing. Great as always Elliot.
Bob
Looking very nice Elliot! You and your wife sure are making thing run smooth around there! Have fun!![]()
#Elliot, I hope helper scott, won't tip those out onto the floor again..... ooooops
Did you happen to run any steamers in my absence? =-( ? i am putting my skillset to work on a Honey-do-list..... for THE boss, my sweetheart, cause she always lets me do what I want anyway..... she is just NOT into: Planes....Trains.....nor Automobiles..... I asked where WHY she married me, to which she responded: "I-Don't-Know.........." I know, Right! Hash-tag Just-Too-Funny-for- Words.
![]()
Deciding what to build next...so much on my "I want one o'them!" list. McKeen car and Mack railbus look difficult, a smooth-bodied Unit-Stanley steam car might be workable from a stream line O scale passenger kit but a Baldwin steam car would use a Walthers heavyweight kit. The U-S looks harder to get right. Small Baldwins carried the steam cylinders on the trucks. A lot else here needs doing besides rolling stock or structures, but building them is more fun for me...
Thanks guys!
Bob - Running a railroad realistically is all about the details. I'll be getting to some of the visual details later this year, but in order to operate this is what is needed. I find this stuff to be most interesting.
Mike - My wife has been very helpful with layout projects. The trick is to find things that she likes and does well. My handwriting is so bad! We're just about to head downstairs, and start the second and final batch of those signal cards. She is also very good at shopping on the net. She found me some real cool paper clips with numbers.

I plan to use these in my yards to hold the cards for the cars on a particular track.
Scott - No steamers yet. It always helps to have an understanding wife, and making her happy makes life much easier. Let me know when you empty the honey-do list.![]()

Great idea on the numbered paper clips!![]()
mike g. posted:Great idea on the numbered paper clips!
Didn't know such a thing existed until this morning. Not sure how she finds this stuff, but it's cool. I think they were $5.99 for three sets of digits, so 30 total clips, on Amazon.![]()
Fixed a wiring problem on the main line out loop. ( without any use of %$&##! language ) Powered up my new siding. Ran trains a bit and had fun!! All is well in Patsburg!![]()
![]()
trumptrain posted:Fixed a wiring problem on the main line out loop. ( without any use of %$&##! language ) Powered up my new siding. Ran trains a bit and had fun!! All is well in Patsburg!
Pat: Was the wiring problem that you fixed the lockon where the trains were stopping? Post a picture of the new siding.
Ran a train on my test oval this morning and this evening for a while. Maintenance of Way also got out for a while today, also. It was quite therapeutic. ![]()


Steamer posted:made smoke
Highball! Smoke is good!
Even though we are still working on the benchwork for the upper street level I put a Lion Chief NYC RS3 and a few cars on the lower level track and gave the remote to my wife to try. She th0ought it was fun.
Here's a few shots of my new siding .... all finished with ballast and scenery. This siding comes off the outer loop main. Eventual plans are extend this portion of the layout and make a 3 - 4 track yard. Right now though its a siding and increases the choices in switching operations which = more fun!! Siding is on the right side of these photos.


ChooChoo1972 posted:. . . . and gave the remote to my wife to try. She th0ought it was fun.
Where are the photos, Frank?
I need them for evidence. ![]()
trumptrain posted:Here's a few shots of my new siding .... all finished with ballast and scenery. This siding comes off the outer loop main. Eventual plans are extend this portion of the layout and make a 3 - 4 track yard. Right now though its a siding and increases the choices in switching operations which = more fun!! Siding is on the right side of these photos.
Pat: The siding really looks GREAT! I do see a yard in your future. Let me know when you are ready and I will give you a hand with the yard.
As I said earlier, I bought this kit from someone who started it and gave up. That meant that I had to disassemble his work to that point. Some joints were set up out of square and some had come apart due to poor glue selection.
The funnels were no exception. I finally got them looking close to correct.
Today I installed them. I'm having to make a completely new aft flying bridge.

The deck has sagged over time, but the screw which goes in the tab will pull it back up.
Both front and rear tabs on the superstructure will have lockers which sit over them to hide the screw heads.
Max,
That is a gorgeous piece of work. Look forward to updates.
Thanks, Randy.
Greetings Everyone,
Finally felt like working on the layout so here are a few pictures. Got all of the lower level track work finished so I decided to start on the upper level. As you can see I've started the raw plaster work to be able to identify any clearance issues before they became a problem. I'm using one of my 86' Hi-Cube Boxcars (just a tad over 21" long) which is the longest piece of equipment I currently own. I figure if it clears, I should be able to run anything that will negotiate the O72 curves which are


 the minimum on the upper level. Thanks for Lookin'.
Chief Bob (Retired)
Max, LOL, do you mean photos of the layout or of the wife?
MaxSouthOz posted:ChooChoo1972 posted:. . . . and gave the remote to my wife to try. She th0ought it was fun.
Where are the photos, Frank?
I need them for evidence.
Steamer posted:made smoke
Chief Bob,
The upper level is really taking shape! It looks like you will have a good run up there. I agree those long cars should give you a good idea of the necessary clearances! Thank you for sharing the photos!
Bob, the bench work is looking good!
Chief Bob, good to see you are working on the layout again. 0-72 will work but make sure you have enough center to center space on the curves if you are doing a double mainline. They do overhang on 0-72. I am running 0-89 and 0-96 on my upper level and they overhang on these too............Paul
ChooChoo1972 posted:Max, LOL, do you mean photos of the layout or of the wife?Frank
erm . . . both? ![]()
Paul,
Get off the forum and get that layout ready for tonight, fire up the grill, save me a prime seat, and a good parking spot. Don't be nervous about hosting it only hurts once.....t minus 9 1/2 hours until we all report.
Replaced a DZ-2500 switch machine I installed a couple of nights ago. when hooked up it made every other one on the layout non functional. go figure
just passing thru....


paul 2 posted:Chief Bob, good to see you are working on the layout again. 0-72 will work but make sure you have enough center to center space on the curves if you are doing a double mainline. They do overhang on 0-72. I am running 0-89 and 0-96 on my upper level and they overhang on these too............Paul
Thanks Paul,
The only double track mainline is on the lower level. The tracks are spaced approximately 6" center to center with O48 inside loop and O60 outside loop as minimums. The upper level is a single track mainline (O72 minimum curves) with a passing siding along the wall where the shelves are.
Chief Bob (Retired)
morning wake up run.....


Not what I di on the layout today, but what Paul2 did on his. Paul is a regular member of our"tuesday nite, roaming bunch of guys" and it was his turn to host the group. Paul (and Shirley) live in small but very neat and pleasant home in Cuyahoga Falls. He has literally made use of every square inch of this attic with four different mains on two levels. He owns over, 300 modern production model engines both command equipped as well as conventional. He has a good representation of Engines and he runs any or all of them, independantly regardless. of make, yaar or type.
And he and Shirley know how to throw a great little party. Thanx, again for the great evening, Paul & Shirley. Look forward to seeing you again, soon.
Paul Fischer (Paul #1)
fisch330 posted:Not what I di on the layout today, but what Paul2 did on his. Paul is a regular member of our"tuesday nite, roaming bunch of guys" and it was his turn to host the group. Paul (and Shirley) live in small but very neat and pleasant home in Cuyahoga Falls. He has literally made use of every square inch of this attic with four different mains on two levels. He owns over, 300 modern production model engines both command equipped as well as conventional. He has a good representation of Engines and he runs any or all of them, independantly regardless. of make, yaar or type.
And he and Shirley know how to throw a great little party. Thanx, again for the great evening, Paul & Shirley. Look forward to seeing you again, soon.
Paul Fischer (Paul #1)
Really, because this is the message I saw when I showed up last night.
Ok # ELI you are a rockstar
here is the "Before" photo
"tease"
#Elliot, Scott, you need to set a couple deadlines to get stuff done..". Ok, ok more to follow
briansilvermustang posted:morning wake up run.....
Brian how about this for a morning wake up. Latest video.
trumptrain posted:Here's a few shots of my new siding .... all finished with ballast and scenery. This siding comes off the outer loop main. Eventual plans are extend this portion of the layout and make a 3 - 4 track yard. Right now though its a siding and increases the choices in switching operations which = more fun!! Siding is on the right side of these photos.
Great Job!!! except for the turnout I cant even tell which is the new siding.
suzukovich posted:trumptrain posted:Here's a few shots of my new siding .... all finished with ballast and scenery. This siding comes off the outer loop main. Eventual plans are extend this portion of the layout and make a 3 - 4 track yard. Right now though its a siding and increases the choices in switching operations which = more fun!! Siding is on the right side of these photos.
Great Job!!! except for the turnout I cant even tell which is the new siding.
I agree, great job!! These pictures can give someone (me!) ideas for my own RR!!
My Marx display layout, avec The Little Engine That Could and, yes, a gi-raffe, has gone on semi-permanent display at the J. Reilly McCarren Transportation Museum at the Arkansas and Missouri RR depot in Springdale, AR...

Mitch
I think I now have the you will do list down to a managing size. I play on working on the rail road tomorrow planting tell a phone poles and some wiring of miller engineering signs. I'm trying to find a very small person to climb on the layout to finish glueing the bridge sides to finish the bridge. I wish I could attach pictures and profile picture. some day I will learn how to do that. In the meanwhile I will just be happy working on the layout. I did paint some people today.
G N Great Night running trains......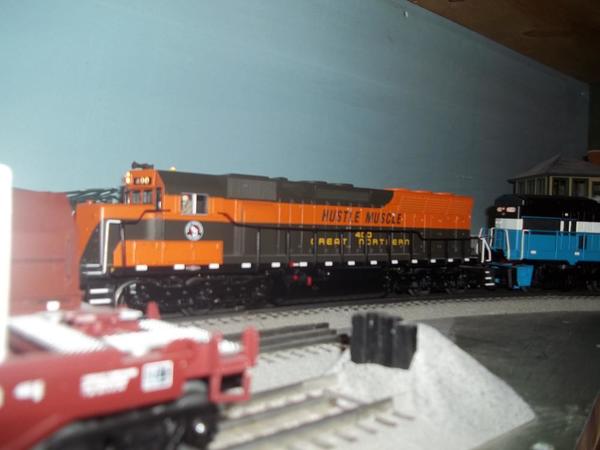


Paul 1, thanks for the kind words. Glad you were able to make it that night. Bryan, the next time I put up the sign your name will be off. You know I was just kidding. Anytime you're in the falls you are welcome to stop........Paul
paul 2 posted:Paul 1, thanks for the kind words. Glad you were able to make it that night. Bryan, the next time I put up the sign your name will be off. You know I was just kidding. Anytime you're in the falls you are welcome to stop........Paul
Its all good, it wouldn't be a Train Crew is we couldn't bust each others balls a little bit. As the youngest guy I know I get it more than the rest. My goal this summer is to find a younger guy than me to bring into the mix.
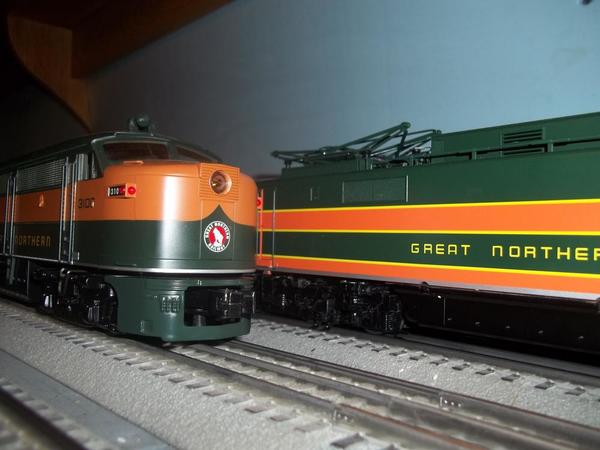
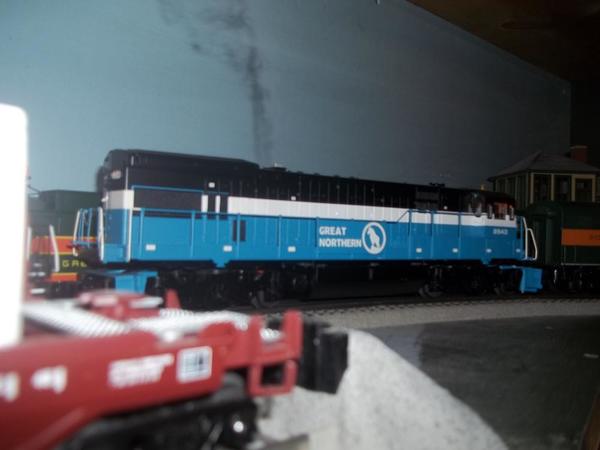
briansilvermustang posted:G N Great Night running trains......
Brian. It appears that you have the Lionel U33C MUed to the MTH SD45. So the question is.
Is the U33C a dummy unit?
or did you install EER into the MTH SD45?
Looked for a lost 2 bay hopper all morning instead of running trains. Found it, now I'm going to run trains.
Clem
the MTH SD45 is a dummy unit.....
Bryan in Ohio posted:paul 2 posted:Paul 1, thanks for the kind words. Glad you were able to make it that night. Bryan, the next time I put up the sign your name will be off. You know I was just kidding. Anytime you're in the falls you are welcome to stop........Paul
Its all good, it wouldn't be a Train Crew is we couldn't bust each others balls a little bit. As the youngest guy I know I get it more than the rest. My goal this summer is to find a younger guy than me to bring into the mix.
Paul and Bryan,
Your group sounds so wonderful, it is great to read about what you do! Too bad I live 2 hours away from Cuyahoga Falls; of course I don't think I fit in Bryan's criteria as being younger either! LOL
Please keep posting what your group does at each other's layout!!
MaxSouthOz posted:As I said earlier, I bought this kit from someone who started it and gave up. That meant that I had to disassemble his work to that point. Some joints were set up out of square and some had come apart due to poor glue selection.
The funnels were no exception. I finally got them looking close to correct.
Today I installed them. I'm having to make a completely new aft flying bridge.
The deck has sagged over time, but the screw which goes in the tab will pull it back up.
Both front and rear tabs on the superstructure will have lockers which sit over them to hide the screw heads.
Max Been following the build or should I say refurbishment of the Tug. It has come out really great so far and looks good. Defiantly like the harbor scene you have created and the Tug seems to be the icing on the cake.. You said that you had purchased it from someone and this was a kit. . Out of curiosity what did it look like before you started the rebuild?
Big_Boy_4005 posted:Thanks guys!
Bob - Running a railroad realistically is all about the details. I'll be getting to some of the visual details later this year, but in order to operate this is what is needed. I find this stuff to be most interesting.
Mike - My wife has been very helpful with layout projects. The trick is to find things that she likes and does well. My handwriting is so bad! We're just about to head downstairs, and start the second and final batch of those signal cards. She is also very good at shopping on the net. She found me some real cool paper clips with numbers.
I plan to use these in my yards to hold the cards for the cars on a particular track.
Scott - No steamers yet. It always helps to have an understanding wife, and making her happy makes life much easier. Let me know when you empty the honey-do list.
Eliot sorry I am late for the show. The cards are a great Idea, not so much about running realistically but from an inventory point of view. I wonder how many out there with large layouts can say they know what and where equipment is on their layout at any one time. The paper clips. Another great find from organizing view of things and keeps things neat in the trays, especially if one knocks over the trays. Save playing 52 pick up and then having to figure out what went where.
wrawroacx posted:Bryan in Ohio posted:paul 2 posted:Paul 1, thanks for the kind words. Glad you were able to make it that night. Bryan, the next time I put up the sign your name will be off. You know I was just kidding. Anytime you're in the falls you are welcome to stop........Paul
Its all good, it wouldn't be a Train Crew is we couldn't bust each others balls a little bit. As the youngest guy I know I get it more than the rest. My goal this summer is to find a younger guy than me to bring into the mix.
Bryan, don't I qualify for your group? I only live a half hour from your house. I do videos, train reports, and pictures. Here's a picture below of my old layout. You already saw my new one. We allowed you to come in and see it. I hope I'm qualified to be in your group. Tom Jr.
You guys crack me up!!!!!
Mark, two hours is a bit of a trip one way. For the last two years, almost, this has been a great bunch of guys to be friends with. And meeting every Tuesday from early fall to just after York I have put many miles on my truck, well spent miles I will add. I am one of the further members so depending who is hosting sometimes it is almost an hour one way for me. But if you are ever in or near Cuyahoga Falls give me a call and you're more then welcomed to stop. I just got done running some trains. Heading to the basement to start working on moving and adding light fixtures over the layout..........Paul
Tom Jr,
Your more than welcome to come to our Tuesday Night gatherings. Most are down in the Independence area but we have a few guys in Lake/Geauga counties. I'm sure the guys would love to have you and to see your layout also. Unfortunately the Tuesday group is ending our season until the fall. We usually do weekly hosting from Beginning October to End of May. Remind me as we approach the fall and I can let you know when the meetings are. Our coordinator Al usually sends out who is hosting and on what nights for the upcoming month a few days before the beginning of the month.
Mark,
It is really a great group that is just getting bigger and better each year. Honestly, when the weather is good it might be worth the drive over some night. I mean we are all kind of scattered and some of us do a 90 minute drive when we have to go to the west side or those guys coming to the east or southeast side.
clem k posted:Looked for a lost 2 bay hopper all morning instead of running trains. Found it, now I'm going to run trains.
I have a garage like that, too. Some days, I'm doing good to find the car. ![]()
Mitch
Access to this requires an OGR Forum Supporting Membership


