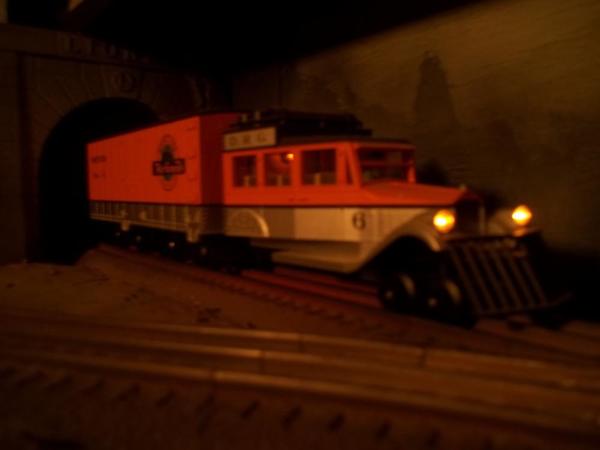
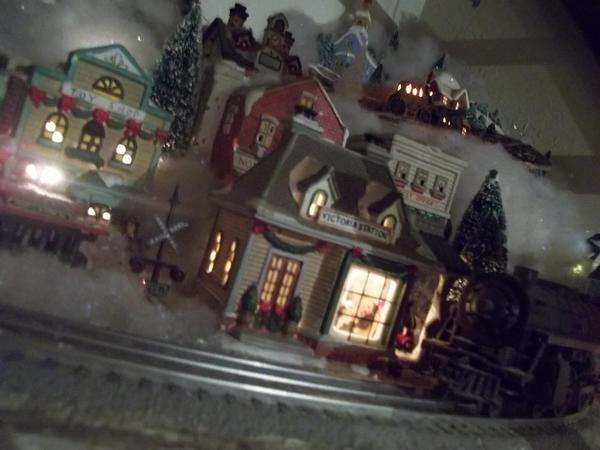
paul 2 posted:

I finally got to accomplish a little bit on the layout tonight. Wife was watching her Cavs and I got to work on a couple of things. Opening the package from Scenic Express I went to work coloring the river beds. After I did that I knew it would take a good while for the paints to dry. I placed my Morton Salt building and started laying cork down. I will eventually have the track connected at both ends of the siding so hoppers can be pushed through as if they are being loaded. On the side where they will be going in I am going to add two sidings for storing hoppers. I have enough real estate to make a small switching yard for empties. Tomorrow I can paint the cork, lay down some track and maybe even ballast. Also I hope to start adding the water as soon as I make sure I have sealed the ends so I will not lose any liquid water. Some pics..............Paul

DSCN0523DSCN0524DSCN0525DSCN0526DSCN0527DSCN0528DSCN0529DSCN0530


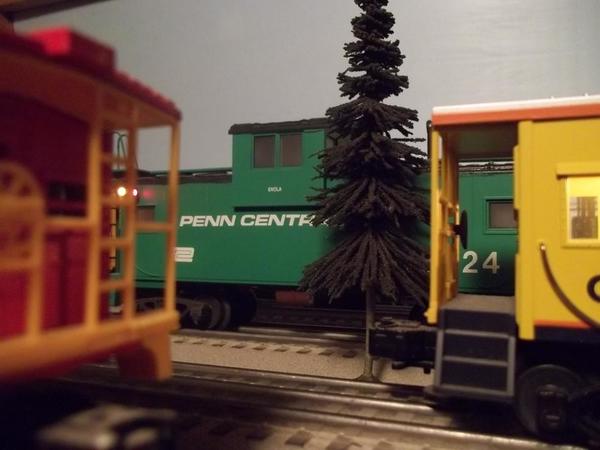
Hey there Paul, I really like how the stream is turning out and I also like the placement of the Morton Salt building. Your just moving right along with the roadbed and track! But I do have a question for you. In the sixth picture down you got me wondering what you use all those pennies for?

Mike, thanks for the compliments. I see I am going to have to police my areas before I take a pic. You are too observant LOL. I could say the pile of pennies are for the copper smelter I am going to put in but because I am like George Washington and cannot tell a lie the truth is months ago I spilled them and I have just been too lazy to pick them up and get them off the table...........Paul

paul 2 posted:

Mike, thanks for the compliments. I see I am going to have to police my areas before I take a pic. You are too observant LOL. I could say the pile of pennies are for the copper smelter I am going to put in but because I am like George Washington and cannot tell a lie the truth is months ago I spilled them and I have just been too lazy to pick them up and get them off the table...........Paul

Its all good Paul, I just thought it might be something for me to learn!

paul 2 posted:

Mike, thanks for the compliments. I see I am going to have to police my areas before I take a pic. You are too observant LOL. I could say the pile of pennies are for the copper smelter I am going to put in but because I am like George Washington and cannot tell a lie the truth is months ago I spilled them and I have just been too lazy to pick them up and get them off the table...........Paul

I thought you were leaving them there for visitors to toss into the river- or- for the wishing well where you can wish for more trains

Woodson posted:
Nice!! Do you know what the minimum track radius the ABA unit will handle??


No way to tell for sure since the tightest curve on both layouts is 072.  An S configured track of 054 might cause issues since you lose one pivot point between units by using a solid drawbar....just guessing.  Traversing a crossover S of 2 Gargraves 100 switches is no problem.  The nature of the F unit body end design and wheel base layout allow for tighter than usual curves without binding. 

Bruce

Half a good day today. The good half was getting the cork painted. I decided to paint the inside floor of the loading area black. Later I can start to put down some track but first I have to drill  hole so I can run the plug to inside the building. The other half did not go as well. I was unprepared for the water. I thought the tape, a lot of tape would hold but after a while the tape seemed to let go in spots. So before moving on to do the other side what can I use to seal the ends because I am going to have to put another coat on where I just did. All help is appreciated. This was my first try at water...............Pics.......Paul

DSCN0533DSCN0534DSCN0535DSCN0536DSCN0531DSCN0532 

Attachments

Images (6)
  • DSCN0533
  • DSCN0534
  • DSCN0535
  • DSCN0536
  • DSCN0531
  • DSCN0532
paul 2 posted:

Half a good day today. The good half was getting the cork painted. I decided to paint the inside floor of the loading area black. Later I can start to put down some track but first I have to drill  hole so I can run the plug to inside the building. The other half did not go as well. I was unprepared for the water. I thought the tape, a lot of tape would hold but after a while the tape seemed to let go in spots. So before moving on to do the other side what can I use to seal the ends because I am going to have to put another coat on where I just did. All help is appreciated. This was my first try at water...............Pics.......Paul

DSCN0533DSCN0534DSCN0535DSCN0536DSCN0531DSCN0532 

Hi Paul, things are looking great with the roadbed and the loading area is wonderful! Now as far as your water, here is an idea that just might work for you. You know the plastic that the Menards cars come in, cut a strip to the height that you need, it is flexable enough to bend around the end. You can then staple both sides and use duck tape to seal the bottom off. I hope this is a good idea for you!

c.sam posted:

I've been wanting to update the progress on our club layout for quite awhile but it's such a mess that good photos are almost impossible. A member from SC visited today and wanted to see the progress. I received a 'new' Lionel AT&SF E6 from LOS recently and decided to unbox it and try for a few pics.

Hopefully, you can get an idea of where we are in construction. The murals are almost complete and some scenery is well underway. Much of the track is ballasted and most has been weathered. We are striving to be open soon to the guests at our landlord's Vacation Rental complex.

Much to do!      Any of you guys who live in our region are more than welcome to visit and lend a hand if you'd like.

IMG_6525IMG_6532IMG_6533IMG_6552IMG_6553IMG_6565 

Wow, what a beautiful engine !  May I ask what you paid ?  I doubt I could ever afford one, but it's something to dream about :> Your layout is looking great !

chris a posted:

Finally finished putting up the baltic birch ceiling panels over the main layout area (15 x 30) and completed the new LED dimmable track lighting...    DSCN3476DSCN3480DSCN3483DSCN3487 

Very nice work. Installing LED track lighting made a world of difference in my train room. May I ask what material you have behind your puff ball trees?

Kittytrain1969 posted:

I can't do a darn thing on my layout until my foster cats are back home. Should be around August ?  One of them has taken up residency and shall not be removed. I had to set up an oval on the carpet so I could get my daily train fix!20170503_221446

TOO FUNNY! He's gotta get up occasionally to eat right? Build a quick platform above the tracks for him (her) to sleep on so that you can still run trains.

Thanks LUVINDEMTRAINS,  I use the 1 inch thick rigid pink foam board insulation for the shallow relief back drop behind the "puff ball trees"....   I paint it flat black with latex paint prior to attaching the trees.   This entire layout is built in modular form, so if I have to move again, I don't have to start from scratch.....  The rigid foam board is great for this as it doesn't weigh much, it easy to shape, is stable in terms of not warping over time and I can hold it to the masonite back drops with either "Velcro" or drive a small headed #6 trim screw through it to hold it in place.  Also, I much prefer to do almost all the scenic detailing work in the workshop, rather than in place over the track work.  The picture below is what the area looked like before the scenery was moved in place, and a couple of progress shots as the corner scene was being roughed in and built off the table.  


DSCN3436DSCN3435DSCN3445DSCN3460

Attachments

Images (4)
  • DSCN3436
  • DSCN3435
  • DSCN3445
  • DSCN3460
chris a posted:

ChessieMD Great looking coloring on the rocks and blending in the loose stones... Are you using the bottled dyes and stains from Woodland Scenics or making up your own colors ? 

Chris,

Used the Woodland scenic stains, Yellow Ocher, burnt umber, and black combined with a tube of watered down Liquitex, raw sienna, red oxide and white titanium. One thing with the washes is some colors pop a little too much like the burnt umber and red oxide wash.  After this wash the rocks came out a bit too harsh on the red side. The white titanium wash muted the colors and provided a nice blending effect on the stone and surrounding material. Thanks.

Last edited by ChessieMD

Okay guys, I am at a impasse. MIKE G gave me the idea of using part of the blister pack stapling it to the end then applying tape. After using a fair amount of duct tape and the ends still leaked I am somewhat leery of using it again. Max I am using Woodland Scenics Realistic water. So here is my thought now. I am looking into duct putty to seal the ends. My logic is it is pliable and it is suppose to stick to just about everything so I should be able to seal the ends up completely. Any help appreciated................Paul

paul 2 posted:

Okay guys, I am at a impasse. MIKE G gave me the idea of using part of the blister pack stapling it to the end then applying tape. After using a fair amount of duct tape and the ends still leaked I am somewhat leery of using it again. Max I am using Woodland Scenics Realistic water. So here is my thought now. I am looking into duct putty to seal the ends. My logic is it is pliable and it is suppose to stick to just about everything so I should be able to seal the ends up completely. Any help appreciated................Paul

Everywhere that the vertical elements met the horizontal surfaces, I heaped on the Liquid Nails; waited for it to dry thoroughly, painted the glue areas the colors I wanted for the dry land, and poured the same "water" product you are intending to use and had not one place where it leaked through.

IMG_4954

IMG_4991IMG_5137b4

IMG_4917x

I hope you may find this helpful, Paul2.

FrankM

Attachments

Images (5)
  • IMG_4954
  • IMG_4991
  • IMG_5137b
  • 4
  • IMG_4917x
Last edited by Moonson
fl9turbo2 posted:

IMG_0462More work on the bridge area

It looks great, nice work, and I like how the water looks, too. It's been a long time since I've done scenery (HO) that's why I like to watch and learn from others here, like yourself, and how to accomplish results like this. Many thanks to you and Ralph and others that post the progress made on your layouts, it's very much appreciated!

paul 2 posted:

Okay guys, I am at a impasse. MIKE G gave me the idea of using part of the blister pack stapling it to the end then applying tape. After using a fair amount of duct tape and the ends still leaked I am somewhat leery of using it again. Max I am using Woodland Scenics Realistic water. So here is my thought now. I am looking into duct putty to seal the ends. My logic is it is pliable and it is suppose to stick to just about everything so I should be able to seal the ends up completely. Any help appreciated................Paul

I'm Sorry Paul!

Diverging Clear posted:
fl9turbo2 posted:

IMG_0462More work on the bridge area

It looks great, nice work, and I like how the water looks, too. It's been a long time since I've done scenery (HO) that's why I like to watch and learn from others here, like yourself, and how to accomplish results like this. Many thanks to you and Ralph and others that post the progress made on your layouts, it's very much appreciated!

Thanks for comment The water was made with me painting the bottom and covered it with 2 part lacquer I purchased at lowes I sealed it with clear caulked I still have the other half I am making it in 2 parts so one half can be removed so I can stand up in the layout 

paul 2 posted:

MIKE G, nothing to be sorry about. I just met my match with water. I am now going to use duct putty making a wall at each end of the stream. This is a good learning experience for me. Heading down to the basement right now to do it. If it works I'll pat myself on the back LOL. If it doesn't I may just settle for dry river beds LOL............Paul

Well either way, let us know how it turns out! That how we all learn from each other!

paul 2 posted:

Okay guys, I am at a impasse. MIKE G gave me the idea of using part of the blister pack stapling it to the end then applying tape. After using a fair amount of duct tape and the ends still leaked I am somewhat leery of using it again. Max I am using Woodland Scenics Realistic water. So here is my thought now. I am looking into duct putty to seal the ends. My logic is it is pliable and it is suppose to stick to just about everything so I should be able to seal the ends up completely. Any help appreciated................Paul

Paul,

I used to use stuff called duct seal. It like silly putty and is easy to shape. Maybe try that and hold it in place with masonite screwed into the end of the table. I was an electrician so the supply houses had it.

Good luck,

Bob

suzukovich posted:
MaxSouthOz posted:

Still chugging along . . .

That scene is realy cool. Having seen similar at Navy Pier in Chicago as a kid. Now all you need are forklifts, crates, general dock clutter, and people. And of course video of someone having a surprise shower from the water cannons. 

Thanks.  Most of that stuff is inside the warehouses so far (see link to my thread below my signature), but what you say is right.  I'm just head down and bottom up trying to finish the darned tug boat. 

Dressing the scene is the real fun part. 

IMG_20160817_242240189RSJB18 posted:
Kittytrain1969 posted:

I can't do a darn thing on my layout until my foster cats are back home. Should be around August ?  One of them has taken up residency and shall not be removed. I had to set up an oval on the carpet so I could get my daily train fix!20170503_221446

TOO FUNNY! He's gotta get up occasionally to eat right? Build a quick platform above the tracks for him (her) to sleep on so that you can still run trains.

Lol ! yeah, that's an idea, she even wants to eat up there too. The biggest problem is that she constantly wants attention and she's so cute that it's hard not to pet her, which leads to my dilemma. Oh well, it will give me something to look forward to in the fall. 

Attachments

Images (1)
  • IMG_20160817_242240189: How do they get so cozy on train tracks?
Last edited by Kittytrain1969

The duct putty worked. Not one leak or drip. I now have a second coat on the one side and a first coat on the other stream. The only problem now is I should of order enough Realistic Water. So now another bit of limbo till I can order some more. Once I did that I worked on adding track to go to the Morton Salt building and added the siding next to that track. I had to stop because I have to drill a hole under the building to run the plug to the underside. So some pics of the work tonight.....Paul

DSCN0537DSCN0538DSCN0539DSCN0540DSCN0541DSCN0543DSCN0544

Attachments

Images (7)
  • DSCN0537
  • DSCN0538
  • DSCN0539
  • DSCN0540
  • DSCN0541
  • DSCN0543
  • DSCN0544

Stopped by Engine House Hobbies in Gaithersburg, Md. today.... bought a nice K Line scale Milwaukee Road boxcar and some figures.  Great shop!!  

Of course when I got home, I immediately had to cut the new boxcar into the B&O freight train running on my outer loop mainline.   Car looks great!!  I ran trains for about 20 minutes or so and really enjoyed every moment!!  

Jdevleerjr posted:

Nothing on the layout for the last month or so, but did some 12 inch to 1 foot railroading today with the Michigan Transit Museum.  

They run a short train just outside of Mt Clemens.  Here is a few shots I took including one of the all volunteer crew.   

18870302_1817249101625229_426904043_o18927325_1817256671624472_1034175421_o18947231_1817281741621965_1534175950_o crew.  

Nice but it sacrilegious to have the Baldy being pulled by a diesel. The South Shore unit I can understand. 

This weekend I finished mounting the military vehicles to my Menards Flatcars. I have a few additional tasks I want to do yet.
1. Add wheel chocks and chains for better realism
2. I mistakenly purchased two Russian Gaz "Jeeps" because I mistook them for US Jeeps. I either need to sell them or add US Star decals and use them anyway. (They look like US Jeeps.)
3. Find a way to store the flatcars. Only two of the six flatcars fit in their Menards boxes. Since I don't have a layout and run my trains at my club, I need to be able to store and transport the flatcars without damaging the guns on the attached cars.
4. Paint the Howitzers.

20170603_17062620170603_17063120170603_170621

Attachments

Images (3)
  • 20170603_170626
  • 20170603_170631
  • 20170603_170621
paul 2 posted:

The duct putty worked. Not one leak or drip. I now have a second coat on the one side and a first coat on the other stream. The only problem now is I should of order enough Realistic Water. So now another bit of limbo till I can order some more. Once I did that I worked on adding track to go to the Morton Salt building and added the siding next to that track. I had to stop because I have to drill a hole under the building to run the plug to the underside. So some pics of the work tonight.....Paul


Paul, that is just wonderful, I am so glad that Frank was able to point you in the right direction! Things are looking to be a beautiful river I can already see swimmers and floaters in the river! Question on the Duck Putty, does it come off easy?

The siding is coming together nicely! I really like seeing your post, then show that your progressing and still having fun doing it!

Mike and Frank, again thanks. The first hurdle was no leaks. As to your question I have not tried to take it off yet because I want to add a few more coats of water. I am hoping it will come off easy and if it doesn't it will be more on the edge so I can possibly just paint it black like I did on the edges of everything. I just ordered more water which get here till Wednesday. And after all these years I still have fun....................Paul

suzukovich posted:
Jdevleerjr posted:

Nothing on the layout for the last month or so, but did some 12 inch to 1 foot railroading today with the Michigan Transit Museum.  

They run a short train just outside of Mt Clemens.  Here is a few shots I took including one of the all volunteer crew.   

18870302_1817249101625229_426904043_o18927325_1817256671624472_1034175421_o18947231_1817281741621965_1534175950_o crew.  

Nice but it sacrilegious to have the Baldy being pulled by a diesel. The South Shore unit I can understand. 

The group owns another Diesel, an Alco S-1, along with another identical EL car.    They have it wired where the generator on the Alco provides power to the traction motors on the unit and they can pull the diesel along.  Unfortunately it hasn't ran in many years and is in very poor shape.  The Alco is in great shape but blocked on the track behind several cars and can not be moved at this time.  They no longer have access to a siding since they were removed from Selfridge ANG.  

They are hoping to get funding to build a siding right next to where the train in in the lower photo.  This will allow them to move cars around.  

Last edited by Jdevleerjr
chris a posted:

Thanks LUVINDEMTRAINS,  I use the 1 inch thick rigid pink foam board insulation for the shallow relief back drop behind the "puff ball trees"....   I paint it flat black with latex paint prior to attaching the trees.   This entire layout is built in modular form, so if I have to move again, I don't have to start from scratch.....  The rigid foam board is great for this as it doesn't weigh much, it easy to shape, is stable in terms of not warping over time and I can hold it to the masonite back drops with either "Velcro" or drive a small headed #6 trim screw through it to hold it in place.  Also, I much prefer to do almost all the scenic detailing work in the workshop, rather than in place over the track work.  The picture below is what the area looked like before the scenery was moved in place, and a couple of progress shots as the corner scene was being roughed in and built off the table.  


DSCN3436DSCN3435DSCN3445DSCN3460

Chris,

Thanks for the thorough reply. I thought it was foam board but wanted to make sure. I like that idea. I just started experimenting with puff ball trees and want to do a collage similar to yours.

Jdevleerjr posted:
suzukovich posted:
Jdevleerjr posted:

Nothing on the layout for the last month or so, but did some 12 inch to 1 foot railroading today with the Michigan Transit Museum.  

They run a short train just outside of Mt Clemens.  Here is a few shots I took including one of the all volunteer crew.   

18870302_1817249101625229_426904043_o18927325_1817256671624472_1034175421_o18947231_1817281741621965_1534175950_o crew.  

Nice but it sacrilegious to have the Baldy being pulled by a diesel. The South Shore unit I can understand. 

The group owns another Diesel, an Alco S-1, along with another identical EL car.    They have it wired where the generator on the Alco provides power to the traction motors on the unit and they can pull the diesel along.  Unfortunately it hasn't ran in many years and is in very poor shape.  The Alco is in great shape but blocked on the track behind several cars and can not be moved at this time.  They no longer have access to a siding since they were removed from Selfridge ANG.  

They are hoping to get funding to build a siding right next to where the train in in the lower photo.  This will allow them to move cars around.  

Hope they get the funding. Then maybe they could pair up the ex CTA cars.   It hurts my eyes to see them in that condition. As for the South Shore car. Even in operation they looked like that.

LUVINDEMTRAINS,

That's a Plasticville church I picked up at a local hobby shop years ago.  Only mod I made was to put some colored paper in the windows.  I've seen others on this forum who've really dressed these up with new paint, etc.

Here's a closer shot of the building from my old layout.P1010225

Attachments

Images (1)
  • P1010225

 A little pre-postwar action today:

GEDC3099

The 221 goes nicely with the prewar articulated train.  I'm seriously considering painting the whole consist into Razorback Red and lighting the coaches.

GEDC3101

The gi-raffe colored doodlebug is an eBay oddity.  Prewar Lionel/Ives 1691 coach mounted on a postwar Lionel Vulcan chassis.  Goes quite well, and I'll be installing roof headlights, pantographs and handrails from Train Tender in the near future.

GEDC3102

A closeup of the knuckle coupler I installed on the front of the consist some years back.  As you can see, the consist is in need of freshening up.

GEDC3103

Even Fortescue agrees!

GEDC3105

Parts shipment from the Train Tender included a replacement arm for this 77N crossing gate, now up and running in fine shape! 

Mitch

Attachments

Images (5)
  • GEDC3099
  • GEDC3101
  • GEDC3102
  • GEDC3103
  • GEDC3105
suzukovich posted:

We as usual a lot of great work posted. Not a whole lot on the layout. Went to the train show in Tampa Saturday and scored a few things but the big one was the MTH CB&Q F3s.  Still need to do Kadee conversion but ran them anyway.  So here they are in my latest video.

Nice video and some good tunes to go with it! So do you keep one transition car laying around for when you come across these great finds! Again Nice work, love watching your videos and rocking out to the tunes!

mike g. posted:
suzukovich posted:

We as usual a lot of great work posted. Not a whole lot on the layout. Went to the train show in Tampa Saturday and scored a few things but the big one was the MTH CB&Q F3s.  Still need to do Kadee conversion but ran them anyway.  So here they are in my latest video.

Nice video and some good tunes to go with it! So do you keep one transition car laying around for when you come across these great finds! Again Nice work, love watching your videos and rocking out to the tunes!

Thanks Mike about the music  It had just came out right before my 2nd trip to Afghanistan  by mid tour It was a huge hit in Europe and down range. Never get tired of it. This is the second time I have used it. In away it became my theme song for my last deployment before I was reassigned to Mac Dill (USCENTCOM)  in August of 2009 Almost 20 yrs in Germany Euro trash is well established taste music for me.  Probably the same reason for winter theme layout. Almost 15 yrs living on the edge of the  Schwarzwald (Herrenberg , in the State of Baden-Württemberg) or in Barvaria (Sulzbach-Rosenburg) has had its influence on me.. As for transition cars not any more. I just insure cars used to couple with the claws are cars equip with 804s instead of 745/743s.  Below is link to song. 

https://www.youtube.com/watch?v=6q08h98BLEE


Last edited by suzukovich
suzukovich posted:
p51 posted:
suzukovich posted:

Man, I never get tired of seeing video of your winter wonderland!

Great work, and I love the trees!

And I never get tired of your layout and the updates!!!!!!!  If all goes well I will be the owner of a HUMVEE by the end of the week..

Might I point out the mutual respect of two modelers with very different approaches to their layouts.  I enjoy seeing both very much!

A HUMVEE!!  We need to see photos of that when you get it, Lee!

Mark Boyce posted:
suzukovich posted:
p51 posted:
suzukovich posted:

Man, I never get tired of seeing video of your winter wonderland!

Great work, and I love the trees!

And I never get tired of your layout and the updates!!!!!!!  If all goes well I will be the owner of a HUMVEE by the end of the week..

Might I point out the mutual respect of two modelers with very different approaches to their layouts.  I enjoy seeing both very much!

A HUMVEE!!  We need to see photos of that when you get it, Lee!

Mark thanks. I am the one buying the HUMVEE. Soon as deal works out I post pics. Not many people have layouts that are historically accurate or darn close. That's what Lee has done with his. Like Frank Ms layout, it tells a story.

Today I got some more of the wall taken down and out for garbage pickup. Another panel of wood to take down and it will give me the room for a couple of tables under the stairs. Once I got that done I attached a plug and wires inside the Morton Salt building and set it in place. Now I have the track going through the building now. Finishing off the streams is still on hold till the water comes. So maybe tomorrow I'll mix up some plaster and fill in by the tracks I Set down. Pics...........Paul

DSCN0545DSCN0546DSCN0547DSCN0548

Attachments

Images (4)
  • DSCN0545
  • DSCN0546
  • DSCN0547
  • DSCN0548

Here's the 77N in action on my layout.  As near as I can tell, they didn't come with little drop rods on the tip, but I added one to add a little weight to the end and make it come down a bit lower...

According to this little plate I spotted on eBay, the original 77 crossing gate was patented on September 21, 1915: 

77-plate-lg

Some folks may like the newest in electronic gizmos and gadgets.   Me?  I like the idea that 100 year old technology can still be going strong in the 21st century...

Mitch

Attachments

Images (1)
  • 77-plate-lg
Videos (1)
GEDC3106
Last edited by M. Mitchell Marmel
suzukovich posted:
Mark Boyce posted:
suzukovich posted:
p51 posted:
suzukovich posted:

Man, I never get tired of seeing video of your winter wonderland!

Great work, and I love the trees!

And I never get tired of your layout and the updates!!!!!!!  If all goes well I will be the owner of a HUMVEE by the end of the week..

Might I point out the mutual respect of two modelers with very different approaches to their layouts.  I enjoy seeing both very much!

A HUMVEE!!  We need to see photos of that when you get it, Lee!

Mark thanks. I am the one buying the HUMVEE. Soon as deal works out I post pics. Not many people have layouts that are historically accurate or darn close. That's what Lee has done with his. Like Frank Ms layout, it tells a story.

LOL. That's what happens when I try to burn the candle at both ends!  Congratulations on theHUMVEE!!  I agree with Your assessment of Lee's and Frank's layout!  I have always tried that approach, but it seems my family has more interest in the whimsical and fantasy!  I have learned at the School of Hard Knocks to include their interests!

Mark Boyce posted:
suzukovich posted:
Mark Boyce posted:
suzukovich posted:
p51 posted:
suzukovich posted:

Man, I never get tired of seeing video of your winter wonderland!

Great work, and I love the trees!

And I never get tired of your layout and the updates!!!!!!!  If all goes well I will be the owner of a HUMVEE by the end of the week..

Might I point out the mutual respect of two modelers with very different approaches to their layouts.  I enjoy seeing both very much!

A HUMVEE!!  We need to see photos of that when you get it, Lee!

Mark thanks. I am the one buying the HUMVEE. Soon as deal works out I post pics. Not many people have layouts that are historically accurate or darn close. That's what Lee has done with his. Like Frank Ms layout, it tells a story.

LOL. That's what happens when I try to burn the candle at both ends!  Congratulations on theHUMVEE!!  I agree with Your assessment of Lee's and Frank's layout!  I have always tried that approach, but it seems my family has more interest in the whimsical and fantasy!  I have learned at the School of Hard Knocks to include their interests!

Boy I can understand the candle analogy. As for the HUMVEE ones an auction that's tomorrow, the other three are offers. Rather win tomorrow as it will be significantly cheaper. Funny my one daughter is unhappy with me as I had promised that once she got her license she could use the CUCV to drive to school. If and when I get the HUMVEE, I intend to sell the CUCV. 

suzukovich posted:

And I never get tired of your layout and the updates!!!!!!!  If all goes well I will be the owner of a HUMVEE by the end of the week..

suzukovich posted:

Not many people have layouts that are historically accurate or darn close. That's what Lee has done with his. Like Frank Ms layout, it tells a story.

That's cool, but I recall we had to do depot-level rebuilds on Humvees with a frightening regularity. My issued one had the engine torn down once and replaced once. My wheeled vehicle mechanics referred to it as, "Deadline 6". They all decried when we got rid of the CUCVs and M35-series trucks around 2000 as they only needed preventative maintenance.

What model Humvee is yours going to be, soft top, truck back or hard shell? I saw an impressive Humvee at the MVPA convention in Portland a few years ago, the owner went all out. It even had M-249 5.56MM brass and links scattered on the floor (and a dummy SAW in a turret mount), with MRE crates and random debris on the floors. Looked like it rolled out of a stateside gunnery exercise.

Thanks for the kind words about my layout. The funny thing is I never expected the overwhelmingly reaction I've gotten from most people on my layout. You build what you can and hope it turns out okay (but it never turns out exactly like you imagined, though). It surprises many when they find that it's the first layout I ever built, too. I've even had people asking for historical advice from this and a couple of other forums from some wanting to build WW2-era layouts. I like to give back to hobbies when possible, so I help out any way I can.

p51 posted:
suzukovich posted:

And I never get tired of your layout and the updates!!!!!!!  If all goes well I will be the owner of a HUMVEE by the end of the week..

suzukovich posted:

Not many people have layouts that are historically accurate or darn close. That's what Lee has done with his. Like Frank Ms layout, it tells a story.

That's cool, but I recall we had to do depot-level rebuilds on Humvees with a frightening regularity. My issued one had the engine torn down once and replaced once. My wheeled vehicle mechanics referred to it as, "Deadline 6". . I knew a commander that had that nick name when I was stationed at FT HOOD 

we They all decried when we got rid of the CUCVs and M35-series trucks around 2000 as they only needed preventative maintenance.

Draw down #3 1998-2001 Vehicles were becoming available from deactivating units or companies under the guess of the Force 21 program. Reality it was a manpower issue as most Battalions were short personnel. so start the limited conversion and the end strength starts to looks good

What model Humvee is yours going to be, soft top, truck back or hard shell?

Tomorrows  auction despite the some of the pics in in pretty good shape


photos & videos


I saw an impressive Humvee at the MVPA convention in Portland a few years ago, the owner went all out. It even had M-249 5.56MM brass and links scattered on the floor (and a dummy SAW in a turret mount), with MRE crates and random debris on the floors. Looked like it rolled out of a stateside gunnery exercise.

Thanks for the kind words about my layout. The funny thing is I never expected the overwhelmingly reaction I've gotten from most people on my layout. You build what you can and hope it turns out okay (but it never turns out exactly like you imagined, though). It surprises many when they find that it's the first layout I ever built, too. I've even had people asking for historical advice from this and a couple of other forums from some wanting to build WW2-era layouts. I like to give back to hobbies when possible, so I help out any way I can.


Last edited by suzukovich

Today I got a package from Mr. Muffins Trains. Over the weekend he ran a special on a building flat so I ordered it. It is at the point where I have to start  getting background buildings in one form or another to do the backdrop. I am still waiting for water to do the streams but this morning I mixed up a batch of plaster and filled in where I had just laid down track. I didn't quite have enough to finish so I stopped there until I have more area to plaster. I would of had enough but I had to fill in in front of the bridge abutment I had to move back. Maybe later today I can add ballast. Pics........Paul

DSCN0549DSCN0550DSCN0551DSCN0552DSCN0553

Attachments

Images (5)
  • DSCN0549
  • DSCN0550
  • DSCN0551
  • DSCN0552
  • DSCN0553
Mark Boyce posted:
suzukovich posted:
Mark Boyce posted:
suzukovich posted:
p51 posted:
suzukovich posted:

Man, I never get tired of seeing video of your winter wonderland!

Great work, and I love the trees!

And I never get tired of your layout and the updates!!!!!!!  If all goes well I will be the owner of a HUMVEE by the end of the week..

Might I point out the mutual respect of two modelers with very different approaches to their layouts.  I enjoy seeing both very much!

A HUMVEE!!  We need to see photos of that when you get it, Lee!

Mark thanks. I am the one buying the HUMVEE. Soon as deal works out I post pics. Not many people have layouts that are historically accurate or darn close. That's what Lee has done with his. Like Frank Ms layout, it tells a story.

LOL. That's what happens when I try to burn the candle at both ends!  Congratulations on theHUMVEE!!  I agree with Your assessment of Lee's and Frank's layout!  I have always tried that approach, but it seems my family has more interest in the whimsical and fantasy!  I have learned at the School of Hard Knocks to include their interests!

Its official I own a HUMVEE     

photos & videos

6.5L Diesel Engine, Automatic Transmission, 4x4, 7700 lb. GVWR, 4 Door, Soft Top, Cargo/Troop Carrier Body,

This morning I added plaster. Tonight got two coats of earth color on the plaster and laid down the ballast. After doing that I made up some glue and glued down the ballast. Can't work on the water because the water is bouncing all over the place. Now it is coming on Saturday. So I guess for the most part I'll run trains in the attic till the water get here. Pics..................Paul

DSCN0554DSCN0555DSCN0556DSCN0557

Attachments

Images (4)
  • DSCN0554
  • DSCN0555
  • DSCN0556
  • DSCN0557

We're making progress on the club layout with pressure from the landlord to get open SOON!

I'm working on a scene below the nice curved trestle that will depict the amazing story of how the RR climbed from Old Fort NC up to Swananoa (just east of Asheville) with an elevation gain of just under 1000' in only 6 miles. They used convict labor who literally carved out the roadbed by hand and cut tunnels with fire and cold water!

Last two are of Jerry's beautiful mountain and old coal operation. His textures and tones are really nice.

IMG_6646IMG_6647IMG_6652IMG_6656IMG_6657IMG_6659

Attachments

Images (6)
  • IMG_6646
  • IMG_6647
  • IMG_6652
  • IMG_6656
  • IMG_6657
  • IMG_6659

Add Reply

Post

OGR Publishing, Inc., 1310 Eastside Centre Ct, Suite 6, Mountain Home, AR 72653
800-980-OGRR (6477)
www.ogaugerr.com

×
×
×
×
Link copied to your clipboard.
×
×