


I do like those old billboard reefers!
it was a nice warm sunny day Sunday so I was able to get the 10 foot extension on my train table painted , I laid some track in order to determine what I needed to complete the circuit, then I put out a few items just to have an idea of what I could do 


Attachments
Images (5)
Mark Boyce posted:I do like those old billboard reefers!
Thanks Mark!
Today I procrastinated. Didn't do what I intended. I did measure for where I have to cut the hole in the tongue and groove for the track to go through under the stairs. Then I backed away and decided to put a couple of weaver wood chip hoppers together. While the glue was drying on those I started adding turf to another area. Pics of the area I started. Still have to glue it down.............Paul


Attachments
Images (4)
paul 2 posted:Today I procrastinated. Didn't do what I intended. I did measure for where I have to cut the hole in the tongue and groove for the track to go through under the stairs. Then I backed away and decided to put a couple of weaver wood chip hoppers together. While the glue was drying on those I started adding turf to another area. Pics of the area I started. Still have to glue it down.............Paul
Looks great!
Well this is where I stand as of tonight. Had a good day working on it. Had to put the legs on sooner then I wanted due to some side work coming in and was making the section on my welding table. But the basics are done waiting for the glue to all dry now didn't want to do anything else till then.
Attachments
Images (2)


I solved my final electrical problem as it regards all my rails. Turned out to be a pretty silly issue with a tap splice. Now to finish up the switch wiring on five switches and figure out why one is not powered.
Installed the automatic Trolley stop/announcement accessory from Z-stuff. (DZ-1220 with DZ-1205 in track sensors). It's an attention grabber! My 5 yr. old grandson thought I used magic...in a way, I did, well, to be fair, I used Z-stuff magic.
My YouTube channel: https://www.youtube.com/channe...2lyWjBzKnTw0_C4IIQCg
Trolley in action: https://youtu.be/NmxuCH1YGMI
(I've just begun experimenting with making movies and using YouTube...)I had to cut a hole in a sections of Fastrack to accommodate the sensors and brace them underneath to assure proper height.

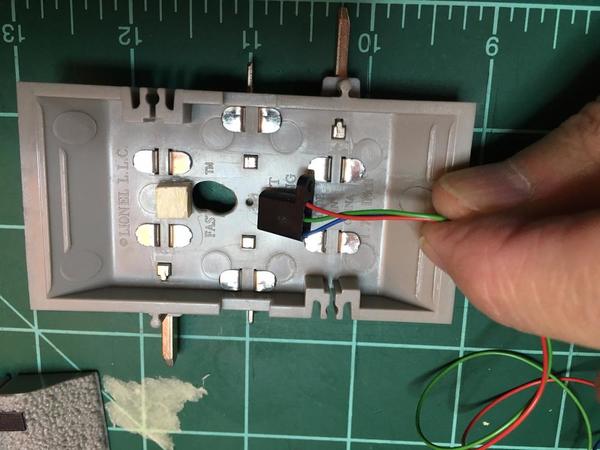
I secured the sensor with silicone. The sensors are 16' apart and one sensor is the same distance from the controller.


Attachments
Images (4)


Good work, Ed! Might wanna turn the trolley around so the doors face the platform, but that's a minor quibble... ![]()
Mitch
Ed,
Nice job, I'll bet your grandson loved it!! I'm not to experienced with videos and YouTube, either. I thought yours was great!!
Thanks Mark.
Mitch,
funny, those soldiers never complained. I wonder how they got aboard the Trolley? However, now I understand why revenue fell off. ![]()
Not much action on the RSJ&B. Putting the final coat of paint on the CEO's project today (WHOO-HOO!). I'm working on an idea to convert a short siding into a small engine service area with two tracks. Now I just need some free time to build it. I have a few short switchers that I need to find a home for since I run them a lot.
Want to wish everyone a Happy 4th. Remember to keep the coolers full, the grill hot, and body parts away from explosives. ![]()

![]()

Bob
Working on completing my coal mine scene... The kit bashing of the coal tipple with the Lionel Coal mine kit plus more hours than I care to admit to build the scratchbuilt trestle so that the On30 coal dump cars can reach the new hopper got completed last night.... Now back to the rest of the module.... Took some photos out on the deck this AM as the sun was shining. Happy July 4th.


Attachments
Images (5)


nate the tank posted:Well this is where I stand as of tonight. Had a good day working on it. Had to put the legs on sooner then I wanted due to some side work coming in and was making the section on my welding table. But the basics are done waiting for the glue to all dry now didn't want to do anything else till then.
Nate,
The module looks great and I really like your fall colored trees. Did you make the trees? If so, what materials did you use?
Thanks,
Howard
chris a posted:Working on completing my coal mine scene... The kit bashing of the coal tipple with the Lionel Coal mine kit plus more hours than I care to admit to build the scratchbuilt trestle so that the On30 coal dump cars can reach the new hopper got completed last night.... Now back to the rest of the module.... Took some photos out on the deck this AM as the sun was shining. Happy July 4th.

Nice work. Looks great outside and on the layout.
ToledoEd posted:funny, those soldiers never complained. I wonder how they got aboard the Trolley?
They infiltrated, of course! ![]()
However, now I understand why revenue fell off.
![]() It's true!
It's true!
Mitch


 Finished up the final stuff. Waiting on all the little extras for when I dig more boxes out of the basement when I need them. Starting the plans on the second one, which will be the the left side of the switch so I can actually use the siding.
Howard- the fall trees are science express tress not to sure on the name but it's a kit you just have to get the flok yourself. I just wish I painted the first round of them I got.
Attachments
Images (5)

WOW !!! them clouds are awesome !! very cool !
briansilvermustang posted:WOW !!! them clouds are awesome !! very cool !
Thank you, clouds are buffalo snow with $.99 cent cans of grey and flat black spray painted on. Did the grey first, then followed by the black. Hot glue gun to the wall to cover the LED lightning strips from the Broadway Limited kit.
Pete,
Now I see how this is intended to work! Very good, and I agree the clouds look great! Excellent effects!!
snmerr posted:Not much detail, but getting the plywood covered. New field, gravel lot, and hill.
The town is looking great!! What do you have planned for the field and hill?
Just finished. 
Attachments
Images (1)
DL&W Pete posted:Storm clouds painted and in place, lightning strips in place.
Very cool effect. I'm guessing that the barking dog heard in the background doesn't like thunder. ![]()
Alan Rogers posted:Just finished.
Lookin Good Alan! Question is that from molds or did you carve it?![]()
Small things done today. Worked on another wood chip hopper kit, glued down the turf I put down before, hung another LED shop light and got the opening for the washer dryer branch cut. Pics...........Paul


Attachments
Images (2)
Managed to get the timber retaining walls in, the mine track roadbed weathered and the scenery up there pretty far along, as well as started the main road into the mining complex.... Getting closer, plan to install lighting tonight and build one more staircase and railing (the last one, of each !).


Attachments
Images (5)


Looks like a lot of work there Paul, but your coming right along! Question what are you going to do above the washer? Does the door open up or out the front?
mike g. posted:
Alan Rogers posted:Just finished.
Lookin Good Alan! Question is that from molds or did you carve it?


Hello Mike!
Here are some pictures of the process. I used rock molds over a foam base.
Attachments
Images (2)
Looks very nice Alan, I hope you don't mind me asking where you got the rock molds from!![]()
chris a posted:Managed to get the timber retaining walls in, the mine track roadbed weathered and the scenery up there pretty far along, as well as started the main road into the mining complex.... Getting closer, plan to install lighting tonight and build one more staircase and railing (the last one, of each !).
WOW Chris your a man on a mission! Great looking work there!![]()
mike g. posted:Looks very nice Alan, I hope you don't mind me asking where you got the rock molds from!
Happy to, Mike
i got mine from EBay. They are made by Woodland Scenics. You might have a local hobby shop that carries them. I used lightweight Hydrocal for the medium and airbrushed acrylic paint.
Mike G. Thanks. Yes I was starting to feel like I was getting lost in the corn field scratch building mine track trestles, timber walls and mining entrances... But I have never taken on this much building from scratch and this module slides in a narrow space behind the layout up against the back drop, so once it is in, its not going to be easy to get to... plus I figured this was a perfect place to try some new skills.
If it didn't turn out just right, it's five feet back from the front edge and about 45 inches from the floor, so any learning curve errors wouldn't be too noticeable... Anyway it's been a lesson in perseverance but well worth it. Can't stop now, I have come too far. The good news is that now I realize there's alot neat detail work I can accomplish and not have to worry about the final build quality.
MIKE g, that is the dryer and it is a front load. The table going next to the dryer will be 7' X 20". I will be coming across at an angle to connect with the other table and it will be a lift out section..........Paul
RSJB18 posted:DL&W Pete posted:Storm clouds painted and in place, lightning strips in place.
Very cool effect. I'm guessing that the barking dog heard in the background doesn't like thunder.
The barking dog is part of the sounds from the kit.


chris a posted:Managed to get the timber retaining walls in, the mine track roadbed weathered and the scenery up there pretty far along, as well as started the main road into the mining complex.... Getting closer, plan to install lighting tonight and build one more staircase and railing (the last one, of each !).
Very nice! Mine is not as detailed as yours and is still a work in progress.


Attachments
Images (4)


DL&W Pete posted:Storm clouds painted and in place, lightning strips in place.
Ha! That works too! lol. Sometimes you just gotta like being jealous ![]()
Chris, who makes that On30 ore car. I ended up making a few crude ones but i'm always looking at new options. I assume it isn't always statically open, closing when going flat too...?
Last night I caught one one of my favorite Twilightzones "It's a good life". And that led to remembering another. Then I couldn't bring myself to finish putting fresh engines and cars on the track for "The Fourth".
Instead, I rerailed for turn of the century again, and I will enjoy the tranquility of a few more "Stops at Willoughby", while thinking of those tiny town squares I miss so much being in the city. The quiet, too often forgotten about, "perfect" slices of American pie.
Enjoy yours.
I found the On30 dump car from Bachmann, item # 29801 I think.... I found this set new on eBay for $45.00 plus shipping.... That's for a 3 car set.... They are really nice, die cast, tons of detail, chains etc.... A steal for 3 of them..... i think the orig list was around $95 or $100 for the 3 car set.... I couldn't justify trying to scratch build them at this price...
Gandydancer, thanks, I like the coal mine set up you put together, similar idea with the tipple in the back... the storage/silos to the right look good.... I wanted to have either a coal dust reclaimer, or a loader for waste ore & slate, but ran out of real estate.... Chose to have the power house on the left end, and I wanted the main store front, and two "company houses".... it's all about making choices and selective compression...
chris a posted:Working on completing my coal mine scene... The kit bashing of the coal tipple with the Lionel Coal mine kit plus more hours than I care to admit to build the scratchbuilt trestle so that the On30 coal dump cars can reach the new hopper got completed last night.... Now back to the rest of the module.... Took some photos out on the deck this AM as the sun was shining. Happy July 4th.
That is some tastic work, It looks like a Lionel coal station.....
Chris, you sure do good work! I cant wait to see whats next!
Paul, I just thought the washer was next to the dryer! LOL Silly me. I am looking forward to see the benches in the laundry room!
Alan Rogers posted:mike g. posted:Looks very nice Alan, I hope you don't mind me asking where you got the rock molds from!
Happy to, Mike
i got mine from EBay. They are made by Woodland Scenics. You might have a local hobby shop that carries them. I used lightweight Hydrocal for the medium and airbrushed acrylic paint.
Alan, thank you for the information, I will have to check the next time I go to the big city! LOL![]()
chris a posted:Gandydancer, thanks, I like the coal mine set up you put together, similar idea with the tipple in the back... the storage/silos to the right look good.... I wanted to have either a coal dust reclaimer, or a loader for waste ore & slate, but ran out of real estate.... Chose to have the power house on the left end, and I wanted the main store front, and two "company houses".... it's all about making choices and selective compression...
Thanks Chris, I know very little about the coal industry so I just went for a convincing perception.....
Thank Chris. That is just the first time I saw one dumped. I didnt realise they tipped and opened. With my style, I can easily live with crude and smile; but function gives me a bigger, toothy, grin, and they ARE usually priced nice. (your doing right, what I had to cram into 2ft. lol)
mike g. posted:
Alan Rogers posted:mike g. posted:Looks very nice Alan, I hope you don't mind me asking where you got the rock molds from!
Happy to, Mike
i got mine from EBay. They are made by Woodland Scenics. You might have a local hobby shop that carries them. I used lightweight Hydrocal for the medium and airbrushed acrylic paint.
Alan, thank you for the information, I will have to check the next time I go to the big city! LOL

Hey again Mike. This is Purgatory Springs at night....
Attachments
Images (1)
Thanks Chris. I still managed to sneak in a few company houses and a rural gas station. I call this place  Coalwood, taken from the movie October Sky.
Attachments
Images (1)

gandydancer1950 posted:Thanks Chris. I still managed to sneak in a few company houses and a rural gas station. I call this place
Coalwood, taken from the movie October Sky.
I like Coalwood, though I don't know the movie.
"Coalwood" is fabulous, Gandydancer. Very real and pleasant. Beautiful, actually.![]()
FrankM
Alan Rogers posted:Alan Rogers posted:mike g. posted:Looks very nice Alan, I hope you don't mind me asking where you got the rock molds from!
Happy to, Mike
i got mine from EBay. They are made by Woodland Scenics. You might have a local hobby shop that carries them. I used lightweight Hydrocal for the medium and airbrushed acrylic paint.
Alan, thank you for the information, I will have to check the next time I go to the big city! LOL
Hey again Mike. This is Purgatory Springs at night....
Nice Alan!
Mark Boyce posted:snmerr posted:Not much detail, but getting the plywood covered. New field, gravel lot, and hill.
The town is looking great!! What do you have planned for the field and hill?
Thanks Mark! Hill will just be tree, bushes...not sure about the field yet. Thinking cow pasture maybe.
Mark Boyce posted:gandydancer1950 posted:Thanks Chris. I still managed to sneak in a few company houses and a rural gas station. I call this place
I like Coalwood, though I don't know the movie.
It's a good movie Mark. A true story of a boy in the 1950's that lives in a coal town,"Coalwood", where the only future for most boys is working in the mines. Much to his father's displeasure this boy wants a better future and studies rocketry. He wins a national contest, goes on to college and ends up working for NASA. You may like it......October Sky.
Mike G.... You asked about rock molds.... I would also take a look at Sterling Models Rock Molds... I used about 4 molds from Woodland Scenics that I had for a number of years, and 2 molds from Sterling Models (Rock Mold #1 & #2) to build the mountain pictured below.... The sterling molds are the deep cut rocks lower left hand corner of the photo below.
The sterling molds are more expensive, but with the 2 different ones noted above, they have really deep depressions and can be broken into several pieces and moved around so you won't notice the repeating pattern.. The quality and flexibility of the Sterling Molds is clearly superior in my opinion.. The Sterling rock mold link is attached........ http://sterlingmodels.com/rock-molds/
Chris A")
Attachments
Images (1)
")
Been doing several things this week end besides a lot of running them. Finished ballasting track on the bridge ans lettering bridge sides. Clean track all over for better operation. Did some wiring under the layout trying to search for a small problem that keeps popping up. Planted some grass and weeds around the layout. Planning on more scenery work tomorrow. picked up new control panel this week end.


DL&W Pete posted:RSJB18 posted:DL&W Pete posted:Storm clouds painted and in place, lightning strips in place.
Very cool effect. I'm guessing that the barking dog heard in the background doesn't like thunder.
The barking dog is part of the sounds from the kit.
LOL- well it fooled me ![]()
Well done!
snmerr posted:Mark Boyce posted:snmerr posted:Not much detail, but getting the plywood covered. New field, gravel lot, and hill.
The town is looking great!! What do you have planned for the field and hill?
Thanks Mark! Hill will just be tree, bushes...not sure about the field yet. Thinking cow pasture maybe.
That's nice! Some open countryside!
gandydancer1950 posted:Mark Boyce posted:gandydancer1950 posted:Thanks Chris. I still managed to sneak in a few company houses and a rural gas station. I call this place
I like Coalwood, though I don't know the movie.
It's a good movie Mark. A true story of a boy in the 1950's that lives in a coal town,"Coalwood", where the only future for most boys is working in the mines. Much to his father's displeasure this boy wants a better future and studies rocketry. He wins a national contest, goes on to college and ends up working for NASA. You may like it......October Sky.
Sounds like my uncle, now in his mid 80s. He ended up with Boeing aerospace engineering, worked at Cape Canaveral for a while. Rubbed shoulders with Werner von Braun. Thank you for the tip.


Thaddeus posted:Been running trains quite a bit lately while wondering and contemplating how to start with some scenery. So I am making an attempt to make some tunnel portals. Here is my first try after putting some primer on the foam.
Very nice work, just watch your clearances when putting tunnel portals on curves!
Building with foam is almost "too much fun". Hard to screw up when most flaws just add character to the piece. Im proof, lol.
If you think your happy now, wait till you get some color going ![]()
Clearances I check for:
Inside curves; longest and tallest cars and locos. All side tanks/tool boxes/etc, giraffe car.
Outside of curves; cow catchers, cab roofs (this bit me a few times; and it's the swing, not the height), loco steps, giraffe car (actuator bars).
Height; Evans autoloader at the portals arch, raised rocket car, & pantographs.(7¼" here)
I find a chunck of rough cut 2x4 and if it's 2" side fits between O-27 ties and obstruction with some slop, I'm ok. 0-27 has the worst overhang.
(Your stock may vary, and at high speed my E-33 leans out in the curves slightly and barely bumps the walls with its railings, thats how close it is.)
I went for a walk today in hopes of finding more free " lumber" that had fallen from the sky. But either the birds are building nests with them, or someone in the neighborhood got up early and picked up all the spent fireworks in the area. There were hundreds right till midnight, but I found only one spent bottle rocket.
At east it was a "6x6" ![]()
Today I got the frame done for the table by the dryer. Tomorrow I'll cut the legs and cut the cross pieces top hold the legs at the bottom which will also hold my shelf. Pic................Paul

Attachments
Images (1)
took a few random layout photos.....


Attachments
Images (6)
The Cuyahoga Valley Short Line runs through a dandy looking town! I really like all your photos!
Mark Boyce posted:The Cuyahoga Valley Short Line runs through a dandy looking town! I really like all your photos!
Thank you Mark!
gandydancer1950 posted:took a few random layout photos.....
I really like this one . . . ![]()
Today I got the wood cut for the bottom between to the legs to hold the shelf. I got the legs cut and the leveling bolts put in. After doing that I painted all the wood that will be exposed. I have to cut the Masonite to fit and install it on the wall, paint it and when that has dried I can get the table in place. Pics.............Paul


Attachments
Images (2)
Ran out of screws to fix track down , so I decided to see if I had managed to make the extension large enough to accommodate my Speedway fleet


Attachments
Images (20)
paul 2 posted:Today I got the wood cut for the bottom between to the legs to hold the shelf. I got the legs cut and the leveling bolts put in. After doing that I painted all the wood that will be exposed. I have to cut the Masonite to fit and install it on the wall, paint it and when that has dried I can get the table in place. Pics.............Paul
They look good, Paul!!
Robert Macfie posted:Ran out of screws to fix track down , so I decided to see if I had managed to make the extension large enough to accommodate my Speedway fleet
Talk about a one truck mind!
Bruce
Robert Macfie posted:


yes well I only had room for my Speedway fleet on the extension ,
if the weather holds tomorrow they are announcing rain and thunder showers , I might set out the rest of truck and piggyback units but my sister had been after me to send her pictures of my Speedway units .... the trucking company started by my father in 1952 which he lost in 1973 , I mean after all she is my sister ..........
Robert Macfie posted:yes well I only had room for my Speedway fleet on the extension ,

Mitch
Attachments
Images (1)
Robert Macfie posted:Ran out of screws to fix track down , so I decided to see if I had managed to make the extension large enough to accommodate my Speedway fleet
To quote the late Frank Barone, "Holy Crap, Raymond!"
Robert Macfie posted:Ran out of screws to fix track down , so I decided to see if I had managed to make the extension large enough to accommodate my Speedway fleet
WOW! Impressive collection. Very nice.
Bob
Robert, that is one impressive Speedway collection. Really nice. And Lee those are great black and white photos. Today I got my Masonite up and painted white. Tomorrow I'll add the blues and when that is dry I can get the table in place and measure to see how long of a span I actually have between the tables. I measured real quick and came up with 66 inches. Anyways pics..............Paul


Attachments
Images (3)


The track is looking great, Pete!! I would feel like, now we are getting somewhere, with some track down!!
Paul, The Masonite looks good there! How are you going to treat the other side that can be seen walking down the stairs? Train pictures??
Mark, that's a really good question. I never gave that a thought. Another bridge to cross LOL. Oh well one table and backdrop at a time. Thanks...................Paul
paul 2 posted:Mark, that's a really good question. I never gave that a thought. Another bridge to cross LOL. Oh well one table and backdrop at a time. Thanks...................Paul
You're welcome. I just read an idea that I hadn't thought of on my layout design topic I have linked in my signature line! That is what we are here for, to give each other ideas, even if it is only by asking a question.
Mark Boyce posted:paul 2 posted:Mark, that's a really good question. I never gave that a thought. Another bridge to cross LOL. Oh well one table and backdrop at a time. Thanks...................Paul
You're welcome. I just read an idea that I hadn't thought of on my layout design topic I have linked in my signature line! That is what we are here for, to give each other ideas, even if it is only by asking a question.
First thing that comes to mind here is rolling stock display shelving. I wish I had built more of the same in my stairwell during room construction. I just never imagined the run away car population that began 2 years ago.
Bruce


Mark Boyce posted:The track is looking great, Pete!! I would feel like, now we are getting somewhere, with some track down!!
Thanks Mark, after track is done. Then on to wiring track for DCC only operation. Then wire the 9 switches to the control panel and install the tam valley frog juicers. Then build the building's and other structures to figure out how to layout the small town and add some industry to the yard tracks.
brwebster posted:Mark Boyce posted:paul 2 posted:Mark, that's a really good question. I never gave that a thought. Another bridge to cross LOL. Oh well one table and backdrop at a time. Thanks...................Paul
You're welcome. I just read an idea that I hadn't thought of on my layout design topic I have linked in my signature line! That is what we are here for, to give each other ideas, even if it is only by asking a question.
First thing that comes to mind here is rolling stock display shelving. I wish I had built more of the same in my stairwell during room construction. I just never imagined the run away car population that began 2 years ago.
Bruce
Run away car population is a problem I now have too. Not that I have a lot, but have acquired a number in the last two years myself!

Always a good feeling, Pete. ![]()
YAY!!! Looking mighty good, Pete!!

Ran the Lakeshore (Late for sure) Limited.....
Attachments
Images (1)


DL&W Pete posted:I have running trains....
That's great Pete. A huge milestone.
Bob
p51 posted:More cell shots...
Easy work when the subject matter is so perfect. Nice photos Lee.
Bob


P51 - nice photo work !!
Mark had brought up a good question of what I was going to do on the other side of the backdrop coming down the stairs. One suggestion was put in shelves for cars but unfortunately the spacing between the studs is not equal so on that I have to think about something else. And because Mark had mentioned that I went back and looked at how I did the backdrop and decided to fill in at the top where the studs were showing with Masonite. I was not able to get a perfect lining up of the two pieces so I had to resort to spackling compound to fill in the small gap. Waiting for that to dry and I can add blue to it. Hopefully before I have to go out later I will at least have all the blue done. Pic .......Paul

Attachments
Images (1)
Add Reply
Sign In To Reply
