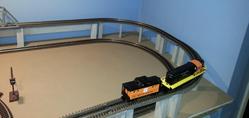
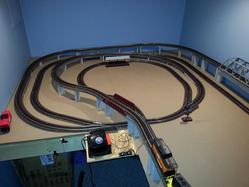
Wow. Two days in a row. That is good for me. I ran more wire so that the there is now transformer power to the barrier block for the top (3rd) level. I also ran leads from the middle level barrier block to the track. I hope to test the middle level soon. I am expanding DCS to the middle and upper levels of the layout that have, until now, been conventional transformer operation.
Ran some trains while organizing some boxes and throwing away some unwanted material in the train room.
added a few lights to the coal tipple..
Attachments
Patrick came over today. I thought we would tackle that pesky backdrop on the upper deck that we've been avoiding for weeks now, but we found a much more fun and interesting project to fill the afternoon.
The stub of track going to nowhere, in the lower left, is the Pig's Eye yard lead.
The yard itself is the last section of the lower level that needed plywood.
Now that I can see the exact space I have to work with, the track plan will follow quickly.
There will be 5 or 6 tracks, and that point on the left will be part of the engine service facility.
Tuesday we'll get the fiberboard down, that is if I don't work on it myself first.![]() I have to say, this is the most excited I've been in months.
I have to say, this is the most excited I've been in months.
Attachments
Finally got to test the lights on the Coca-Cola truck. They work! I took some photos but the cable from the camera to the computer is not working, so the pictures will have to wait for a new cable. What a difference between the factory lighting affect and the new LEDs.
Next step is to place the truck on the layout.
Started to install MTH 30-9173 Southern Operating Watchman's Shanty. Couldn't get the door to open. Wasn't sure how to wire the middle two terminals (NO & NC). Was trying to get it to work by having an open ground section of track and then closing the circuit when train wheels went over.
So, I tried to force door open.. Big mistake as the door hinge at bottom (just plastic) started to break. I thought, no problem, I'll just use some CA glue. Well the door pivots on a plastic shaft that is part of the door assembly. That shaft glued right along in place. Acetone did not help to release. I tried to loosen shaft with pliers and now have pieces of broken shaft and no way to turn the gears.
Live and learn.
![]()
Hey "Dude" sorry to hear about your luck. FYI, the COM, NC, and NO on electrical stuff usually stands for Normally Closed, and Normally Open, and refers to position of a switch, and exactly when NC or NO is connected to the Com.,(C, Common, 3rd post etc.) The Com. is always used.
NC= the NC is connected to COM (i.e. turned on, closed). Triggering the device, opens the circuit, disconnecting NC from COM. (turns device off).
NO= the circuit is normally open(off, disconnected) and triggering it closes the circuit turns it (on, connects it to COM.).
I didn't actually do anything on the layout, but I did support my LHS (AZ Train Depot) by purchasing an MTH DCS Remote with TIU today. I then added a temporary shelf to the legs on my table layout for it to rest on. I know this is overkill for my meager 6x8 single-train Christmas layout, but I wanted more control of the locomotive and now I have it. I'd connect it today yet, but I have to head to the airport to pick up my brother-in-law and then we're going out for some Mexican food, yum! I'll get it hooked up and set up tomorrow for sure.
Added some lights; more lights!
Finally overloaded the accessory transformer.
Transformers; more transformers!
I got the first sheet of fiberboard down in the yard. Just 2 more and some filler scraps, and we'll be ready for track. I tried out those knife blades for the jigsaw. Where have those been all my life? NO MESS!!!!![]()
I did some wiring on the upper level of my layout
Got some ground cover down behind the roundhouse. This had to be done before the RH goes any further because I had to sit on the RH floor to get back there.
Worked on getting the stall beams with roll up doors fit into place. Wanted to get them glued in today but ran out of time. Gotta go ride on a real train for 10 hours now.
Attachments
Best thread ever! ![]()
Best thread ever! ![]()
Theres is no doubt about this being a great thread! So much great stuff, from so many people!
Got some ground cover down behind the roundhouse. This had to be done before the RH goes any further because I had to sit on the RH floor to get back there.
My compliments to ya'. If I had to sit on the roundhouse floor to get a job done, there wouldn't be any roundhouse left standing. Alas.
Frank-the-unthin![]()
I got the first sheet of fiberboard down in the yard. Just 2 more and some filler scraps, and we'll be ready for track. I tried out those knife blades for the jigsaw. Where have those been all my life? NO MESS!!!!![]()
Is this similar to what you are talking about?
I got the first sheet of fiberboard down in the yard. Just 2 more and some filler scraps, and we'll be ready for track. I tried out those knife blades for the jigsaw. Where have those been all my life? NO MESS!!!!![]()
Is this similar to what you are talking about?
Yeah Dave, I think that's exactly where I got them. They are the 113A, but the picture is wrong, because this blade has no teeth. I don't remember exactly where I heard about these, but it was somewhere here on the forum.
So, whoever said it, THANKS!
Attachments
That's why I asked. There were several with and without teeth that were called "knife" blades. I'll check for the same ones you got. I tried the carving knife thing, but my blades are serrated and still made a mess and overheated. This looks more like what you have, but the review says they received something different, so I'll check Lowe's and HD. When I searched for the 113a3's, the blade with teeth came up, so I think Amazon has the wrong pictures for some items. I think it'll be safer to see what I'm paying for in a local store.
Now that it is raining, I'm back inside slowly changing over to Kadees. Got to put fixed pilots on my diesels, sure wish MTH would sell them separate.
Working on the layout. See my post on track plans and layout design. "Big foot coming to Western Pa.
Jack
Well, I may never be acknowledge for work quality but If one was given for who can make the biggest mess in a train room, I bet I would be in the competition. More mountain foam work.
Attachments
I connected my new TIU and programmed my Christmas 4-6-0 into the new remote. Having a lot of fun figuring things out. Next step will be to play with Record/Playback and get things ready for Thanksgiving visitors. The best part though was that the new tile we bought at Lowe's 2 weeks ago went on sale today and the refund paid for the Remote/TIU. How cool it that? ![]()
That's why I asked. There were several with and without teeth that were called "knife" blades. I'll check for the same ones you got. I tried the carving knife thing, but my blades are serrated and still made a mess and overheated. This looks more like what you have, but the review says they received something different, so I'll check Lowe's and HD. When I searched for the 113a3's, the blade with teeth came up, so I think Amazon has the wrong pictures for some items. I think it'll be safer to see what I'm paying for in a local store.
My Menards didn't have them, and I didn't try running around to HD or Lowes. I think the difference between the 113A and the 313A is the length. The 113 is a 4" blade and the 313 is a 6".
The material I'm cutting is soft, but the blade does tend to over heat and dull quickly. I wonder if I could put a new edge on it with a stone.
I was downstairs cutting and fitting more fiberboard this morning. I just have a couple pieces left to cut, then it has to be glued and screwed. I plan to hit it again this evening.
Elliott,
You're welcome.
Laidoffsick,
The roundhouse looks great! I can't wait to see its completion. Awesome job!
I just noticed that the blade pictured on Amazon for the T113A is actually a T341, obviously a totally different blade. ![]()
Painting the backdrop
today we worked on the facia for the double stack tunnel, more ballasting and admired the work on the double track trellis over Norris Falls…photos to follow shortly…
UGH! One strip of cork roadbed short of a full set...story of my life.
Ripped up everything I did yesterday, and started again today. New Plan!! ![]()
Well moving the layout might end up being something good. its going back together better than I thought and now I can finish the yard area finally. I painted clouds this evening. Cleaned the track. Put people and cars back on.
Attachments
Fixed a light in one of my houses and experimented with recording an operating session and running it for a friend who stopped by. Definitely need to learn how to heed the advice to remember exactly where it starts. ![]()
Oh, and based on the background in the photo in the post before this one, I decided I'm going to paint some sheets of 1" foam I have, so I can use them as a backdrop to hide the tools in our garage from visitors who are coming over on Thanksgiving.
I cleared buildings off of my platform and put them in a box temporarily in preparation for installing the track elevation from the second to the third level. I also cut about 1/3 of the wood necessary to build the elevation ramps.
Making about a 120 cantenary poll for the overhead wire system. Finally got a shipment of 1/16 brass wire for the cross arms. That's been holding me up. I did about 60 a few months ago. I'll try to finish this batch today. I now have enough wire to do about 80 additional poles if I need them. Hope that's enough, might order more wire to be on the safe side. Don
FINALLY finished the benchwork! Time to lay some track, run some wires, and run some trains!
TMack....that looks great!
I did work on the layout 5 out of the last 6 days. I don't do much each session, but I am persistent. Patrick and I did the plywood for the yard on Monday, and I spent the rest of the week cutting, gluing and screwing down the fiberboard.
When I was done with the fiberboard, I installed 4 ground throws. I use spikes to secure them to the ties, then I add 2 more spikes to serve as stops. This prevents the lever from being thrown too far, and shortening the life of the throw. I also add red and green paint for a simple position indicator.
I think the next project is going to be clearing off and moving some shelving in order to make room for a permanent workbench. It will be nice to be organized.
Attachments
i broke open my new polar express set and played for a while! I also started on a new "line" for another train
Making about a 120 cantenary poll for the overhead wire system. Finally got a shipment of 1/16 brass wire for the cross arms. That's been holding me up. I did about 60 a few months ago. I'll try to finish this batch today. I now have enough wire to do about 80 additional poles if I need them. Hope that's enough, might order more wire to be on the safe side. Don
Work continued on repainting the railings of the Hale Gate Bridge. The project is taking a long time. I guess that should be expected with those O-gauge sized paint brushes.
The painting on the Mackinaw Bridge never stops either. By the time one side is done, the other side needs repainting.
Since York, little was done until yesterday, when I discovered I had to completely redesign my logging and coal mine branch trackwork, as the grade into this "mountain
valley" was going to be 4% (7% works for Cass, but I understand 2% is better for
three rail?). All was printed out with the defunct Atlas program, so....now...pencil and
paper...
Had a whole weekend to work on the layout and with no Ohio State or Cleveland Browns football to distract got a lot done. Station 2 coming along got railing up, doors, lighted figure, wall advertising with light. Got 7 new signs hung in the train room and even hung a tv so now can watch/listen to games while working.
Attachments
I ran trains for the 1st time in weeks. It felt good and me and my kids had a great time with the 1225 pulling around an extra long freight train. She then did an excursion pulling some passenger cars near the lake front.
Got the retaining wall up, added ground cover and ballasted tracks leading into Kansas City Union Station past Signboard hill.
Attachments
Completed an upper level of 054 curves. I also ran trains on the new upper level with my son for an hour or so. Tomorrow I will vacuum and clean the lower level and run more trains. I can now focus on scenery!
Got rid of an O54/O72 switch on my layout. I got tired of not being able to run certain engines on my outside loop due to pick-up spacing.
Peter
Today, with graph paper, redrew track plan to double the original planned width of layout branch, for eight feet of it, to provide for an unwanted 42" radius U-shaped curve dropping six inches around the end of the "box canyon". Originally drawn as a dead end box canyon, like Telluride or Ouray...still a box canyon but now with this descending curve around one end...I don't like it! It loses some of the realism of a point to point, and may make branch that isn't a loop, look like a loop. There is no room to switch cars on the floor of the canyon unless....and most sidings and other trackage, structure locations, etc. have to be replanned, and logging branches eliminated, with just a track into a tunnel mouth for an imaginary route off into the woods (going to have to figure out how to save at least one logging extension).
I continued work on the apparently never-ending project of completing all my 1:50 scale 'Streets big rigs.
I played with smoke units and "odorless" smoke fluid some and will report on that - interesting stuff - when done in a few days.
I though about what to do with the ugly odd corner of the layout I have.
Fixed a turret on an Army tank car, fixed a Plymouth switcher that had hit the floor a long time ago and fixed quite a few other things that were broken and incomplete. However, best of all, I ran trains this evening along with streets. It was great! Terry
First time in a long time I got time to work on the layout. I added some street lights to my city but didn't get them wired in. Also planned how the next street will look and made a list of what buildings I will need to pick up. I also cleaned the train room a little bit. It got a little unorganized this summer.
I installed the final piece of plywood to the bench work top.
I finished clearing off and moving some shelving units, to make room for my new workbench. Pics tomorrow when Patrick and I are done.
In the last few days I finished and installed the remaining wall mounted brackets for the bench work and got about 70% of the lgirders installed. But alas, painting the living room prior to Thanksgiving company takes priority for a while and the train room becomes a storage bin. (I think I can find a way to spend a few cycles in the train room though late at night)
Nothing on my layout today, but, I wired my uncles layout with a new MTH Z-4000 transformer, a new loop of track and lighted buildings.
Full on disaster recovery. My 4 year old grandson spent last wekend with us. He always leaves my layout looking like a tornado hit. He has a good time doing it though!
Patrick was here this afternoon, and the space I cleared is now filling up with layout and workbench.
This may look a little strange, but when complete there will be a small yard up there.
Patrick assembles the missing piece of the upper deck.
I decided to go with the same LED lighting for the workbench as I'm using on the layout.
Patrick salvaged those cabinets from an old bank branch. I'm still pondering the best configuration for them. I think I'm going to move the one with the tools in it, to the right side.
Patrick will be back Friday. I'm going to try to build some toe kicks for the cabinets to sit on, and polish off the electrical.
Attachments
I am in the planning stages of building a new O gauge layout using old post war tinplate track, mixed with some gargraves straights....this will be my second layout. The first one I built back in 1991.
Got someone with a truck to come by, but bought foam because it was raining and snowing last night so Homasote would not have done so well on the trip home. Today- dragged my wet foam in the house, and unscrewed the temporary screws from the track. Took out the switched figure 8 from the center oval and toyed with the looks of a yard instead. I don't care for switching much, but I love yards. I think its gonna happen![]() .
.
I am in the planning stages of building a new O gauge layout using old post war tinplate track, mixed with some gargraves straights....this will be my second layout. The first one I built back in 1991.
the room is about 14 feet by 12 feet, and I want to build a perimeter layout so you can walk in the middle of the room.
Well, it’s taken me more time than I expected but the latest revisions to The Ironbound are finally complete, and TODAY, I posted some of the revisions on my website. Notice that I did a lot of work on integrating flat backgrounds with fully-dimensional foreground models, allowing me to squeeze more modeling into my limited space. More to come, but here's a quick look at a few of them.
http://trainutz.com/I-CNJSTAcu.jpg
http://trainutz.com/I-GEILINGCHEMcu.jpg
http://trainutz.com/I-WESTELEC.jpg
http://trainutz.com/I-shinermed.jpg
http://trainutz.com/I-BettysFSDinerNight.jpg
More can be seen on my website at
http://trainutz.com/ironbound.shtml
~Andy R!
I cut and fitted the plywood to level off my layout's top level so that we can put down the snow blanket, lay track and eventually install the Atlas O turntable.
This was really fun today. I dragged my pile of Greenberg reference books to the layout and spent a few hours finally identifying some of the plethora of various ancient tinplate signals and lights. Bing, Ives, Hafner, Marx, Flyer, along with all the Lionel stuff that I had pretty much already ID'd. It's kinda neat to find, 'yep, that's the one!' Often pinpoints the year they were made, too. Makes for longer entries in the inventory spreadsheet.
Also set up the Christmas trains on the tracks, I'm ready.
Just taking a break from wiring. I have a schematic all done thanks to Schemeit by DigiKey. The relays work great (6VAC DPDT relays). Got the banjo signal swinging. Made some last minute tweaks to the blocking. Just printed a revised schematic. Might have a piece of Halloween candy and then back to the basement!
Stayed up till after Midnight, but I got the basic blocking and automation done! ![]()
![]()
![]() Tested it out with my M&M's hand car and Strasburg #475. I'm a bit worried about longer consists skidding over the dead sections of track at higher speeds. Not much I think I can do about that with conventional control and relays.
Tested it out with my M&M's hand car and Strasburg #475. I'm a bit worried about longer consists skidding over the dead sections of track at higher speeds. Not much I think I can do about that with conventional control and relays.
Going to have a cup of coffee and then shoot a video.![]()
Then I'll have to figure out how to embed videos on this thing.![]()
I wasn't sure what the "Brotherhood of the Crappy Basement Layout" meant...is it a crappy basement, a crappy layout or both? I am a member now.
So, Last week I made repairs to the stucco that covered the block basement wall. Then I set about removing years of nails, old wiring hangers, screw eyes and anything else from the floor joists. I then installed some nice track lighting with daylight (5000K) CFL bulbs. What a big difference!
The crappy basement will have a somewhat crappy 12' x 12' train room. But, I suppose, since I'll still be in the basement it will be a nice layout in a nice train room in a crappy basement.
Modular wall panels(like theater or tv set) for the other two walls next, then sky and wall paint.
Attachments
Tested and ran equipment that will run on a Christmas layout that Im building at a music studio where I teach.
Also worked on my permanent layout today most of the day..... relaying some of the track work on my bottom inner loop, testing my one and only tight curve with a string of freight cars, installed a k line switch on the inner loop ... figuring out a wiring scheme for that same loop ... organized boxes that are under the layout.... repositioned locomotives on my wall storage shelves... lubricated some locomotives.... worked with my new dremel tool ... took some rolling stock off the layout and put it on shelving..... ran some trains ... did some general planning.
Attachments
Larry & Don, Looking Good! Im looking forward to similar fun.
Thanks for the photos.
Still changing over to Kadee's
- did some fine-tuning of a couple of my 18-wheeler "Streets trucks.
- played with the new MTH Galloping Goose some.
- worked on measuring out a new section of a town.
- started work on bashing/converted the Lionel 0-4-0 into a saddle-tank 0-4-0
Still having issues with the non-derail board any my conventional control layout. Got enough of the kinks worked out to post some videos. Next up are some accessories.
did some general planning.
Yes. Thinking is real work. Especially with the size of some of the layouts I'm seeing on here. I spent a lot of time this weekend checking and double-checking my schematic for my conventionally controlled layout with relay automation. The thinking is some of the best fun!
Nothing really to show at this point.
The attic layout is two halves. The benchwork and the room is on the "finished" side is done. I'm currently working on the "unfinished" side. Yesterday I bought the last of the plywood for the unfinished side. Took 7 4x8 sheets of plywood and turned big pieces into smaller pieces. Humped them up to the attic. I'll post some pics of this phase once the painting is done.
Gilly
Matt was over on Sunday, and we strung the detection wires for the section of the upper deck where he laid the track last month. All that's left to do is tie the ground wires together, and run everything back to the power supply.
I started to lay out Pigs Eye yard.
It was difficult to find a good "before" shot of the new workbench area. It seems that I always take pictures of what I am working on and not just random stuff. On the left side you can see the old plastic shelves.
The blank slate...
It's not done, but it's getting close.
I've been gathering tools and parts from all around the train room. It feels good getting organized.
Attachments
Tis the season to get the layout ready for Christmas and we got the scale PE train out from storage and placed it on one of the layout's main lines.
Tis the season to get the layout ready for Christmas and we got the scale PE train out from storage and placed it on one of the layout's main lines.
I would imagine that your beautiful, wonderful layout makes a visit to it feel like a holiday any time of the year. "Tis the season" touches must make the whole experience pure magic. Have fun, the best of health, and a joyful season all year long.
FrankM.
And congratulations on so handsome a presentation of your treasure in OGR, I am sure it is a Run many hobbyists will save.
I began cutting and fitting elevation piers for my top level around the new engine servicing facility and yard.
Patrick H made the grinder use for carving mountains look so easy...NOT but still having fun. Base painting getting closer.
Attachments
Installed a second light on my Lionel freight station. It's the one with that vibrates and the men ride the carts or trucks around a track that goes in and out of the building, and around the track.
The building is lighted, but the area where the men and their carts are most visable is dark. So it was a simple matter to install a socket and bulb to highlight their action.
Bill
Finally finished "enhancing" the bridge for the 132' ROSS turntable. Four weeks about 2-3 hours a day for my first attempt at this stuff. It was a lot of fun actually.
Next comes the arch when it drys then mounting in the pit.
Might even have it running in a couple of days!
Attachments
Today, I finished cutting and fitting the elevation piers and ramps for 2/3 of the descending track around my new engine servicing facility and yards.
Finished Kadee install on two tough ones. My K-Line caboose and a MTH coil car. Should have been easy but I just had to make them ride lower. Now that I done those once the other ones like them will be easier.
Pretty much finished the Christmas Carpet Central............this evening was wiring up the station platforms. darn if it doesn't look good.............I will post pics soon.
After down-sizing for my retirement layout, I created a new plan from re-cycled track and module sections to fit my 11' X 14' space. I just finished re-ballasting the Atlas"O" sections down each side and fully ballasted some new American Models flex track for my "S" line (formerly Gargraves); the AM flex is much better looking and electrical pickup is better on my new SD70ACe to boot.
Attachments
Well I'm back again............I went to the Train Meet in Westminster Md. Seems larger than in past years.....it was well attended. Scored BIG TIME with 4 MTH PRR Passenger cars. They were the right price and there at Lou's table at the right time.
So i guess these are additions to the Christmas Carpet Central. Now my K Line Mikado has passenger car company. And looks Tuscan GREEEAAATTT!
Attachments
Gentlemen,
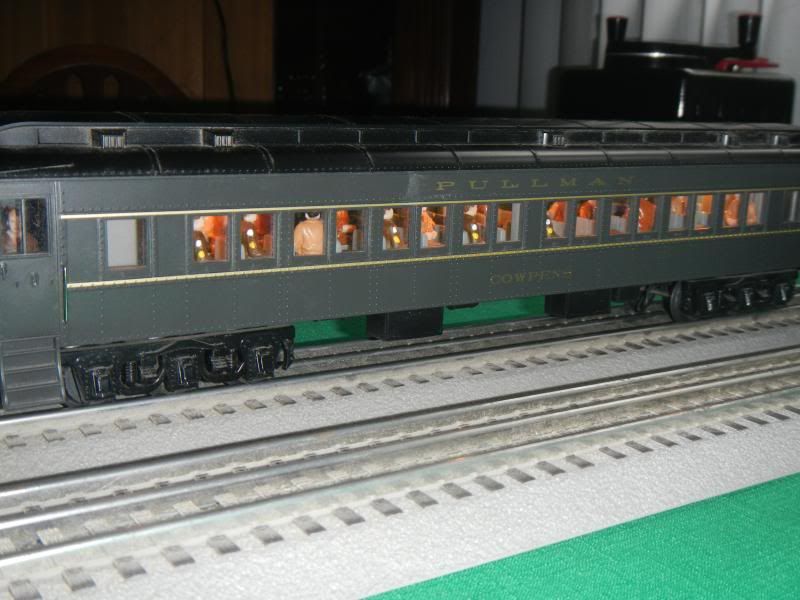
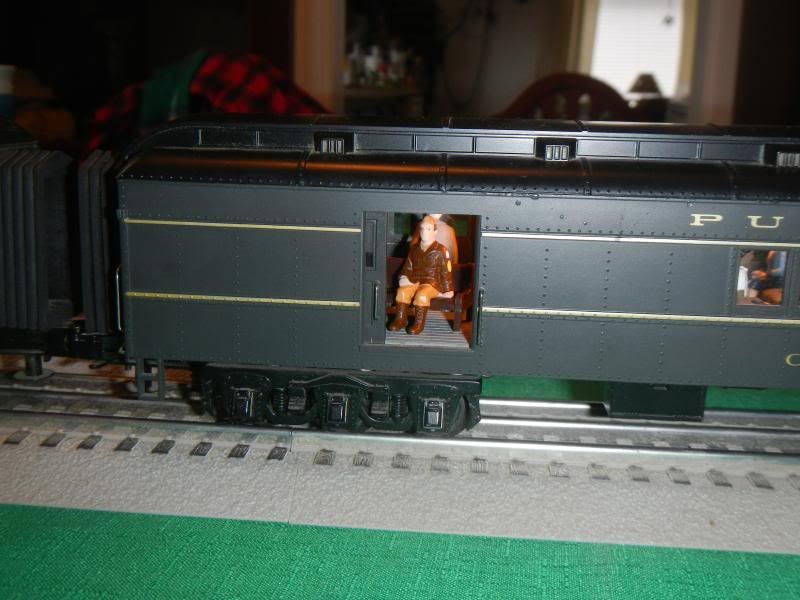
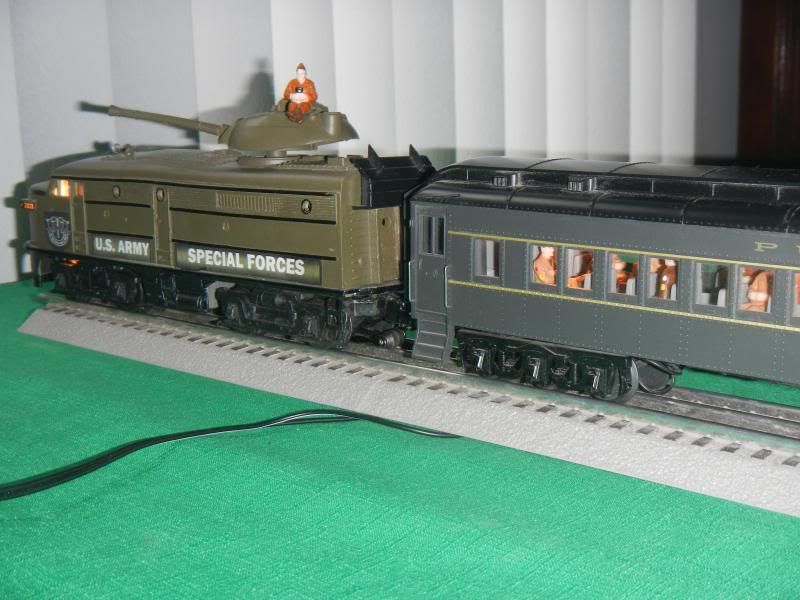
Put the final touches on the US Army Special Forces Passenger Train.
PCRR/Dave
Dave,
May I ask where you bought your figures? My wife would like some in our Christmas train. I saw some on the MTH site, but emails asking if they fit the 2012 Christmas passenger cars have gone unanswered. Obviously, I like what you've done with the cars.
I am going to put this signal bridge on the layout, but don't know what the maker is, or the connection sequence...anyone know anything about this bridge?
I just found out it is a "JUNIOR BRIDGE COMPANY" signal bridge!!!
Attachments
Didn't accomplish anything on either of my two "regular" layouts, but I did spend some time getting the around-the-tree layout partially ready. I just need to haul the tree out of its garage storage area (actually, I have several tress to choose from), and then drill a hole in the table top I use as a foundation for the tree, which is mounted on the top half of a whisky cask, so I can get the tree's light cord through the thing. That hole will also serve for the light cord from the half-dozen or so Snow Village buildings that will be placed around the base of the tree.
I test-ran the MTH PS3 tinplate Christmas train just to make sure all was well there, and also ran a second tinplate train on the inner oval. Control is with an MRC Dual-Power transformer with tethered controller. Works fine.
I guess I should admit that I cleaned my track and rollers and got my engine running again. I'm so embarrassed at how I over-reacted when it just quit running like it did and all it needed was a cleaning.
Finally took a photo of the scrap iron electromagnet I finished about a week ago. This is a Crow River kit I weathered and assembled. It will end up on a Lionel construction crane in the layout's Weirton Steel area.
George
Attachments
Finished wiring up sound for a helicopter with rotating blades and installed the speaker in an adjacent building. Ordered a sound module for my James Bond museum and installed small switches to control lighting and other accessories. Terry
The Boss granted me permission to bring the Christmas platform up early this year. I'm not setting the town or anything else up until we cut the tre down, but that woun't be for a couple weeks. I did have my 2046 and four 2400 passenger cars running today.


