
paul 2 posted:

Going down to check to see if the flats are dry so I can glue some more together. In the meantime this afternoon I got this in the mail today from forum member and friend Mark Boyce. Tomorrow it will join the growing line of Weaver TOFC's...........Pic.............Paul

DSCN2096

Paul, your flats along with your flat car from Mark are really going to add to your layout! I too just like Mark would like to see the fleet of TOFC's!

This thread has been a really informative and super fun to watch group of Wonderful Layouts, great conversations relating to the lives of fellow Modelers, and simply The Good Life. Mike G, has built an amazing train room, Elliot has also done amazing things and even hurt his foot in the scheme of things, (I am glad he is heeling good), and Bryan is Modeling the american sport of Baseball, Trumptrain, Briansilvermustang , Ted W, many others, Moonso, Frank M, has graced these pages with his Real to Life Model Railroad, Moon Township, and Chugman, oh what a display of hard and dedicated work, just to mention a few, and Paul 2—Wow. Great Modelers, I commend you all.... Well, yesterday, we ran trains. 18048621-E9B4-45CD-82A9-124B1998F885089F9605-0C28-4D33-AD55-5CA0ACCF69CB61D00CCA-DFEB-4B17-B1B7-A9EBC64D472896A917EE-FD9C-432C-863B-F6517F7227536C890957-30BE-4F50-94B0-135D459D520DC09AE8F6-4228-4C6D-BA8D-19AB8E24D94DA8F0182F-5B54-402D-B7ED-63CC7890671B12B935E9-0E23-4673-961E-076F25AC2040310F6CAC-ECFD-4B34-AF8D-ED681358C38716416E50-1DD5-49F7-A746-52AE64BA9D5CD345E13E-C1AA-4E2D-BDAD-A3E9F0C43ED692F40C1B-DAD8-490B-8F69-A612583A643A

Attachments

Images (12)
  • 18048621-E9B4-45CD-82A9-124B1998F885
  • 089F9605-0C28-4D33-AD55-5CA0ACCF69CB
  • 61D00CCA-DFEB-4B17-B1B7-A9EBC64D4728
  • 96A917EE-FD9C-432C-863B-F6517F722753
  • 6C890957-30BE-4F50-94B0-135D459D520D
  • C09AE8F6-4228-4C6D-BA8D-19AB8E24D94D
  • A8F0182F-5B54-402D-B7ED-63CC7890671B
  • 12B935E9-0E23-4673-961E-076F25AC2040
  • 310F6CAC-ECFD-4B34-AF8D-ED681358C387
  • 16416E50-1DD5-49F7-A746-52AE64BA9D5C
  • D345E13E-C1AA-4E2D-BDAD-A3E9F0C43ED6
  • 92F40C1B-DAD8-490B-8F69-A612583A643A
Last edited by leapinlarry

AND I agree with Bob and Brain about your layout, Larry, because it seems a cheerful, enjoyable place with a strong sense of playfulness and play. Every angle is a treat to see.

Thank you, also, for including me in that group of layouts you have enjoyed. I have certainly enjoyed all those layout photos too!

FrankM, Moon Township, USA

Last edited by Moonson

Wow guys, such an outpouring of warmth and concern for my situation. I'm overwhelmed. Thank you all so much!!! It's a bummer that we had to cancel the trip, but with the exception of the wedding and a soccer match, it can all be recreated. I still need to stay close to my doctors, til this thing is fully healed. It's just the prudent thing to do.

Brian - How far back did you go to dig up that picture? My guess is 2013. That's Patrick doing work over at Hoffman.

Paul - Thanks, and I will take it easy. I must be doing something right, because the doctor actually seemed impressed with my progress. Glad you finally got to Rochelle, Now you're hooked!

Pat - Thanks, it is. I was really dreading the prospect of having to pretty much stay in bed for two weeks post surgery. I like my freedom to work on the layout, among other things.

Bob - Thanks, that's what it's all about!

Pete - Thanks, typically I'm not a real believer, but things like this do give me pause. It's kind of like, "I'm going to put him through all of this first, to get his attention, then I'll make it OK in the end." It was that way with the cancer too.

The Dude - Thanks, I had a little celebration yesterday. I'll share that with everyone at the bottom of this post.

Bruce - Thanks.

Art - Thanks. Even though I hadn't contacted you yet, I had planned to stop in for a visit on our way through. When we get a new schedule, I'll let you know.

Mike - Apparently. I had an interesting experience many years ago, when I was driving as a courier. It's a long story of a strange day, but I'll make it very short. Something that happened first thing in the morning, haunted me all day, and came home to roost at the end of the day. Karma.

John, Jackson & Mark - Thank you.

------------------------------------------------------------------------------------------------

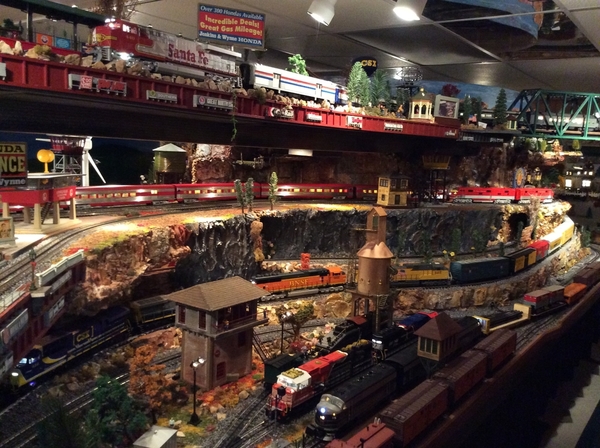
In spite of the good news, it took me a while to head downstairs after the doctor. I just wasn't feeling it. Maybe too much time off. It took me a while to get warmed up, but it kind of helped that I declared it Christmas in July. I spent seven hours opening boxes and putting trains on the layout. Most of the pieces were still in their shippers unopened. This happens all the time with me. I take the boxes downstairs, and just stack them up.

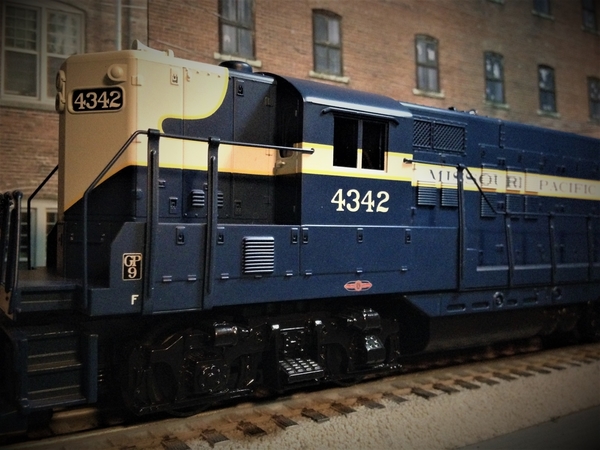
Speaking of stack, that was primarily what was in them, Atlas maxi IV's and all their containers. I unpacked four sets of cars, and still have six left. I also unpacked all but three cases of containers, and logged everything into the computer.

That process took seven hours. It's been a long time since I've done that, but I found my happy place, and the time just flew.

I'm actually working with a new handicap. In my haste to grab a bite before heading out to the doctor, I threw a Jimmy Dean's breakfast croissant in the microwave. My wife was rushing me a bit, even though we got there with ten minutes to spare.

I know those things are hot when they come out, I've eaten enough of them, and usually grab them by the corner, but apparently my middle finger got too close. The neuropathy caused me not to feel it happen. I even looked at the finger when we were at the doctor's office, and didn't notice the blister forming. When we got home, it was huge, and it took me a minute to figure out what happened. Sound familiar?

I tried desperately not to pop it as I unpacked trains, but my luck ran out late in the afternoon. My wife is getting used to bandaging me up. I CAN feel this! Owwww. This may be a second degree burn. It's pretty raw, and even bled a bit.

Back to the good stuff!!!

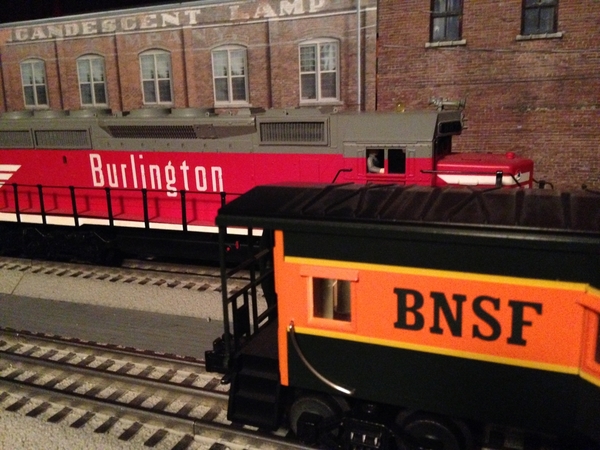
I repopulated Pig's Eye after moving a number of cars up to 35th Ave. All those Atlas flats with the light green pipes are new additions. Thought I had them all, then I found 8 more. It'll be fine, they just need to be distributed.

IMG_8544

I pulled the unwanted ore cars from the layout at Shoreham, then put a couple K-line containers in the lone Right of Way well car. Paul thinks Menards got a hold of that tooling, and is making them again. I plan to order some. I'm pretty sure it's scale, in spite of the fact that it looks small next to the MTH Husky Stack (the tallest car made).

IMG_8545

Here's one of the Atlas sets at Shoreham. It's difficult to be random when placing the containers.

IMG_8546

A few more Atlas flats added to the fleet of Lionel 66' mill gons at Western Ave.

IMG_8547

A few more of the Atlas stack cars over at Midway Intermodal.

IMG_8548IMG_8549

Attachments

Images (6)
  • IMG_8544
  • IMG_8545
  • IMG_8546
  • IMG_8547
  • IMG_8548
  • IMG_8549

Larry, you got a nice looking layout. Elliot, great pics again of the progress, FL9TURBO2, you have a nice looking layout too.  So I did not get to the layout today but for Mark and Mike G I added the Weaver TOFC I bought from Mark to the train. I took pics of all the TOFC's on the track. The last pic is of three I am trying to work on to make them whole. I have more Weaver TOFC's in the basement yet to be brought up to the attic layout.........Paul

DSCN2097DSCN2098DSCN2099DSCN2100DSCN2101DSCN2102DSCN2103DSCN2104DSCN2105DSCN2106DSCN2107DSCN2108DSCN2109DSCN2110

Attachments

Images (14)
  • DSCN2097
  • DSCN2098
  • DSCN2099
  • DSCN2100
  • DSCN2101
  • DSCN2102
  • DSCN2103
  • DSCN2104
  • DSCN2105
  • DSCN2106
  • DSCN2107
  • DSCN2108
  • DSCN2109
  • DSCN2110
leapinlarry posted:

This thread has been a really informative and super fun to watch group of Wonderful Layouts, great conversations relating to the lives of fellow Modelers, and simply The Good Life. Mike G, has built an amazing train room, Elliot has also done amazing things and even hurt his foot in the scheme of things, (I am glad he is heeling good), and Bryan is Modeling the american sport of Baseball, Trumptrain, Briansilvermustang , Ted W, many others, Moonso, Frank M, has graced these pages with his Real to Life Model Railroad, Moon Township, and Chugman, oh what a display of hard and dedicated work, just to mention a few, and Paul 2—Wow. Great Modelers, I commend you all.... Well, yesterday, we ran trains. 18048621-E9B4-45CD-82A9-124B1998F885089F9605-0C28-4D33-AD55-5CA0ACCF69CB61D00CCA-DFEB-4B17-B1B7-A9EBC64D472896A917EE-FD9C-432C-863B-F6517F7227536C890957-30BE-4F50-94B0-135D459D520DC09AE8F6-4228-4C6D-BA8D-19AB8E24D94DA8F0182F-5B54-402D-B7ED-63CC7890671B12B935E9-0E23-4673-961E-076F25AC2040310F6CAC-ECFD-4B34-AF8D-ED681358C38716416E50-1DD5-49F7-A746-52AE64BA9D5CD345E13E-C1AA-4E2D-BDAD-A3E9F0C43ED692F40C1B-DAD8-490B-8F69-A612583A643A

Larry, you are so kind to the rest of us! You have such an amazing layout that I know I only dream about! There may be others that dream about layout like yours and I know from this forum there are many who have made there dreams come true. But like me and others were still working on a dream, to someday to be able to sit back and run trains with friends and family!

Larry, its people like you on this forum that help keep the dream alive! I look at your layout and say I can never do that , then the next thing I have support from here and what do you know? I'm doing it! So all I can say is thank you so much !

P.S. LOVE THEM TRAINS!

Brian, You have to really like them Yellow  & Blue engines! But the Red & Silver are nice also! LOL

Elliot, I am so glad you had yourself a nice little Christmas in July! After all you have been threw and then this darn burn to the finger, Man you need a break from injuries. The Maxi stacks are sure looking right at home, I sure like the brown BNSF ones! LOL VERY NICE!

FL9TURBO2, just look at you go, first a great idea with the hwy bridge under construction! Mark is right Al did a great job on it. But then you turn right around and throw a building in and make it looks like its been there forever! Great Work!

Paul2, thanks for the pictures of the TOFC's great looking collection but I would have to say that the Auto Cars above really got my eyes! Very nice looking layout you have going there young man! LOL

Greetings Everyone,

 First, let me be Crystal Clear before the whinnin’ starts.   I am in no way, shape or form condoning, advocating, glorifying, Blah, Blah, Blah the practice of “Tag Art” so, please do not insinuate that I am setting a bad example for the young folks that may or may not decide to become a model railroader.   I was a policeman in the inner city for 30+ years and I’m pretty sure I know what vandalism is.   That being said, the intermodal car pictured is my interpretation of a common sight here in the Greater Cleveland area.  Like it or not, this is the face of modern railroading and if you model the current railroad scene as I do, one or more freight cars with “Tag Art” on them is prototypical and most appropriate.  This particular car started out as a MENARD’s Double Stack Intermodal Car with Containers.  If it’s not your “cup of tea” I total understand!

 GEDC0013GEDC0014

Chief Bob (Retired)  

Attachments

Images (2)
  • GEDC0013
  • GEDC0014

Thanks Paul.

Mark, my wife has given serious thought to putting me in a bubble for my own good. Just gotta find one big enough. Gonna be tough getting in the car though.

Mike, at first he unpacking of the flat cars was a bit tedious, but when I got to the stack cars and containers, the clock just flew.

Bob, I for one love what you did with that car. You and I are of similar mind when it comes to graffiti. While socially deplorable, it is both realistic and visually interesting. One small point of accuracy though, it is highly unusual to see graffiti on the containers themselves. It is typically confined to the cars. Beside, it's hard to reach that upper container. The weathering is great.

Big_Boy_4005 posted:

Thanks Paul.

Mark, my wife has given serious thought to putting me in a bubble for my own good. Just gotta find one big enough. Gonna be tough getting in the car though.

Mike, at first he unpacking of the flat cars was a bit tedious, but when I got to the stack cars and containers, the clock just flew.

Bob, I for one love what you did with that car. You and I are of similar mind when it comes to graffiti. While socially deplorable, it is both realistic and visually interesting. One small point of accuracy though, it is highly unusual to see graffiti on the containers themselves. It is typically confined to the cars. Beside, it's hard to reach that upper container. The weathering is great.

Hey Elliot,

Thanks for the encouragement!   Good point regarding the containers.  I guess I got a little carried away with the decals.  Actually I did the containers because I could use the larger decals without too much problem.   BTW, I really admire the work that you are doing on that enormous layout.   I have been following the progress but never posted.  It's gonna be awesome when it's done!

Chief Bob

Bob, it's easy to get carried away when you're on a roll. I'm always on the lookout for light colored cars when trying to apply commercially produced graffiti decals that are printed on clear film. It keeps the colors sharp.

I also tried isolating graffiti that was on real trains, from photos. That takes some time with a photo editor. As a test, I printed the images on some clear window decal material, not regular water slide decal film. The test was OK, and I stuck them to some cars with smooth sides. I have the water slide film, but have never tried printing on it. I have some ideas about getting the best results, including printing on white film, not clear for images that contain white, and also matching the color of the car for the edge background. Here are some of the ones I did:

justiceotherslike911kevin

Attachments

Images (5)
  • justice
  • other
  • slike
  • 911
  • kevin
I used to like graffitti more when I could read what was written. It was likely an influnce on my specializing in comercial art lettering vs other veins of the trade. "Mommy" and DST are ok, but the others may as well be fractile design. Pretty, but useless in conveying whatever it is they are trying to say. Which is (or was) the whole point to begin with; making a statement there because your voice isnt being heard by the powers that be....I had more to sat....say but composer is freaking onshzb oj ....out. (I love googleg stuff )qhf)+€#$(($#.€@.#$*,=_!)$!€$($'.$(-&!_$($! J

I finally received the special micro reed switch I had ordered, so I was able to complete my lit fire truck with automatic lights on and off on return to the garage as shown in the videos.

This project was inspired by seeing the video on Evan Designs website and the video made by  Bill Lowe and his creation. I think he must have used a different method to turn the lights on and off than I used, but the results I achieved made me satisfied and fulfilled a long time desire to add more action to this great MTH accessory.

Attachments

Videos (2)
fullsizeoutput_fd
IMG_1083
Last edited by N5CJonny

Paul, So I think I counted 47 of them!  Yes that is a lot, and maybe you are getting close to Elliot with his maxi stack cars as Mike said!  Thank you for taking all the great photographs to show us!!

Tom, The N&W A is certainly a wonderful addition!!

Jonny, the fire station is certainly a great looking and running building!

Last edited by Mark Boyce

"Jonny, the fire station is certainly a great looking and running building!"

Yes Mark, it is a great accessory, I only wish the firetruck went around the building and back in the garage through the back door. I suppose I could have a car blocking the way and that is why the firetruck had to stop where it does. (lol) Anyway I am done with all the led lights in vehicles for awhile. It sure has been fun working with them and thinking of ways to accomplish what I want.

Had a bit of time to correct a mistake I made gluing the angular building together. Made the mistake of taking the flats away from where they would be. I glued the shorter flat first then when it was dry brought it back to where it will be and glued the longer side on. That's when I realized I glued the short flat at the wrong angle. I debated for a few days how to go about separating it. So tonight I slowly started bending little by little to break it apart.  Well it worked so I cleaned up the edges and redid the wall. Now once dry I can reapply spackling to fill the gaps and redo the concrete paint. Pics..........Paul

DSCN2130DSCN2132DSCN2133

Attachments

Images (3)
  • DSCN2130
  • DSCN2132
  • DSCN2133

After opening up my package from Patstrains. It was another two sets of Weaver/MTH die cast trucks I went to the basement. I let the redone flat section dry all night. This morning I applied spackling to the two joints. When that dries I'll lightly sand them down and cover with concrete paint. Once I do that I canset it on some Luan board and trace for a bottom piece and a top pice for the roof. Pics....................Paul

DSCN2134DSCN2135DSCN2136

Attachments

Images (3)
  • DSCN2134
  • DSCN2135
  • DSCN2136

My apologies to Larry and Dave for not mentioning you by name in my last round of thank yous. Simply an oversight on my part, with so many comments.

Dewey - Thanks from both myself and my wife. I keep getting boo boos, and she keeps patching me up. Many of my injuries have come from working on the layout, but not all. Some of the most common for me are scrapes on my legs, from getting under the layout. She has an entire kit of bandages and topical treatments for every disaster that befalls me.

Adriatic - I actually have books on graffiti, even some "how to" stuff. Not that I would ever grab a can and go out and do it, but more to try and understand it, for the purpose of recreating it on my models. I may have my wife use gel pens to hand draw images based on photos of real cars, I have quite the collection. Much of the brightly colored stuff is just the tag of the artist, that has become very stylized over many iterations, in many cases to the point of illegibility. This is a 911 mural, along with the names of the artists. It takes a lot of planning and paint to pull this off. If you want to see it better, copy the image, and zoom in on it.

g1

I have images with political statements, and plenty of profanity, some with an interesting message, but also a lot of generic garbage. Of course I can't post those here, but I could email a few of my favorites if anyone wants to see. I even have 3 degrees of separation from a rather prolific artist, and yes, his work is art. He goes by the name "27". A train buddy of mine, knows his mother. I've never met the kid, but I'd like to. My buddy commissioned him to do his rendition of Milwaukee Road 261 on regular canvas. It hangs at the bottom of the stairs at Gary's house. I have a picture of it somewhere, but I can't find it right now. This one is a favorite of mine. Read the caption!

301524789_l

Here's more of 27's work. No message here, just pure art. I don't have a wall big enough. Take a boring brown car, and create this. I hope my wife can draw this, because a decal would be next to impossible.

377906709_l

Mike - That's not a fair comparison for Paul.

And on that note, in an effort to stay ahead, I unpacked more trains yesterday.

I have five of these Atlas Gunderson sets, and this is the first one out of its box.

IMG_8550

Unlike the 53' cars, the connection on these requires that these pins...

IMG_8551

be inserted in that hole. I can't get my sausage fingers in there, even a normal person couldn't. Fortunately, I have hemostats, and after a few tries, I learned the trick.

IMG_8552

It's starting to look like the real thing. The trains are the scenery! Just wish I had the ballast done. Oh well, it'll be OK.

IMG_8553IMG_8554

There are twelve 53' containers left, just enough to populate the two remaining car sets.

IMG_8555

I'll put them over at Shoreham.

IMG_8556

Pay no attention to my finger, this my container inventory / database. When we get to operations, the containers will stay in their cars. They won't have car cards, just the cars themselves will.

IMG_8557

This pile has been entered, but still needs unpacking.

IMG_8558

I had a couple loose 40' containers and threw them in. I have an even larger stockpile of these. I only need 50, but I have close to 100. More stacks to use as scenery.

IMG_8559

Attachments

Images (13)
  • g1
  • 301524789_l
  • 377906709_l
  • IMG_8550
  • IMG_8551
  • IMG_8552
  • IMG_8553
  • IMG_8554
  • IMG_8555
  • IMG_8556
  • IMG_8557
  • IMG_8558
  • IMG_8559
Last edited by Big_Boy_4005

I posted this under the wrong topic because I was not paying attention to what I was doing. Tonight I decided to add two braces to the back of the angular building I am working on. Once I glued them into place I turned the building on its side and used my trusty weight to hold them together till the glue dries. Mark you can see once more I was still too lazy to go use the table I built for this exact purpose. Still hoping sometime tomorrow to cut the roof and base and glue them into place. After looking the building I think I will add clear pastic to the windows on the inside. Pics.................Paul

DSCN2139DSCN2140

Been cutting down some large platforms for a smaller but longer portable switching layout.  Wanting to preserve the waffle bottoms I sliced the width reduction out of the middle of each module.IMG_8896

Strap gussets join like a clam shell bucket.

IMG_8899IMG_8901IMG_8902IMG_8903

Gusset joining the cross members together.

IMG_8904

Now a manageable series of 2' X 4' modules.

IMG_8905IMG_8909

The existing Homosote was sanded some of the high spots, then a skim coat of Portland surface leveler applied.

IMG_8910

Shot of the now four modules drying between coats.

IMG_8912

Attachments

Images (10)
  • IMG_8896
  • IMG_8899
  • IMG_8901
  • IMG_8902
  • IMG_8903
  • IMG_8904
  • IMG_8905
  • IMG_8909
  • IMG_8910
  • IMG_8912

Paul, the building is really starting to come together! If I used that work bench you do I would be living in the train room! LOL

Elliot, I sure like that new green color you brought out! It has a wonderful B on the side, I sure need to get some of then down the road, I don't think as many as you have but a good 10 or 12 would be cool!

Bryan, the fence looks great, are you going to carry it around out in the field like a home run fence?

Adriatic - Request noted, I'll get you some.

Bryan - The static grass looks so real, especially with the dirt mixed in. I have some, but haven't had the chance to try it yet. Are there any secrets you can share?

Mike - Sorry to say, but I think you're going to be hard pressed to find that BN set. That was produced about six years ago, and you almost never see any of those anymore. Atlas has moved on to do the 53 footers. Don't underestimate their size, they're huge, and they're HEAVY. Die cast, though they pull pretty smoothly. Even on my layout, there will be rules governing their use. Since I only run single, dual motor diesels, trains will be limited to two Atlas sets. The rest of the train will have to be plastic cars, Lionel or MTH, with a max length of 15 cars.

It's a little hard to tell because of a heavy layer of grime, but this is one of those beautiful green sets captured in the wild, Rochelle, Illinois back in 2012. They are getting more and more rare because they are a very early design. Many units have simply had their bulkheads cut off, making them easier to load.

IMG_6921

I had to look up these pictures to determine the order of the cars. The end units are A and B, with B being the brake wheel end. E goes next to A, then all the way down the line to B, so AEDCB. There might have been an instruction sheet in the box, but it was more fun to do it this way. BTW, Atlas packages these in two boxes, and they were sold separately, A & B in one box, and C,D and E in the other. Don't buy C,D and E without A and B, they are useless.

IMG_6924

Attachments

Images (2)
  • IMG_6921
  • IMG_6924
Last edited by Big_Boy_4005

Thanks everyone and to answer a few questions. 

Yes I am planning to run the fence around the outfield but make it a little higher since I am modeling this field after a combination of a few fields that I played at in high school.  The one field had a stone wall in left field and above it was railroad track.  The right field and center field had regular chain link fence but it was about 10 feet high.  I would have been able to finish that yesterday but ran out of the right size thickness dowel rods. 

As for scale it is a not quite major league scale with 90ft between bases it is roughly about 68 scale feet.  I really wanted this field to be a focal point on the layout and not an after thought used to fill in some empty space on the layout. 

As for the static grass I found more success flipping the turning the applicator upside down once in awhile to loosen up the contents; if not it tends to clog after awhile. Also I like to use school glue as my base since it doesn't skin over and allows me to work a larger area and have more working time.

Elliot, thanks for the information! You are right the BN  Cars almost look black from the grime! As for the set it will just be something that sits in the back of my mind for when I go to shows or check the local yard sales! LOL

Bryan, that is going to stand out on your layout its such great work done!

Detailing some diesel cab units is my new diversion from completing the summit forestation project.

DSC02548

All weather cab windows are as much an iconic detail as are high hood bells on DM&IR diesel units.

DSC02526

Shapeways LIC, sells a set of 4 laser printed window units which were designed for Atlas units but were easily modified to fit on my MTH SD24’s. 

99x74_9966425_1397554_1459337466.jpg

They also sell a variety of other detailing parts in O scale in addition to providing a custom 3D printing service.  Check them out.
https://www.shapeways.com/prod...8&li=marketplace

The first step was to remove the cast-in shade above the side window.  A sharp 1/4 inch chisel made easy work of that.

DSC02511

Next I had to file away the back side of the all-weathered window roof in order for it to fit flat against the locomotive cab just below the cast-in drip rail.  Note before and after pictures showing the back profile.  Left side: after

DSC02504

Test fit.

DSC02515

The windows were primed and painted.

DSC02532

I brush panted the aluminum window frame.

DSC02553

Another test fit before adding window glazing.

DSC02554

I still need to find a suitable (thin) window glazing material before permanently mounting the windows.
Cheers, Dave

Attachments

Images (10)
  • DSC02548
  • DSC02526
  • 99x74_9966425_1397554_1459337466.jpg
  • DSC02511
  • DSC02526
  • DSC02504
  • DSC02515
  • DSC02532
  • DSC02553
  • DSC02554
Last edited by darlander

Bryan - Thanks. Out of curiosity, which brand of applicator are you using? I have the $10 home made version with an electric fly swatter and a kitchen strainer.

Mike - You're welcome. Yeah, they do almost look black. The only clue that there's green under there, are those two spots where the grime has been cleaned off. That is my favorite color in my favorite shade. I was bummed when they merged and switched paint schemes. Best of luck on your quest to find one.

Bob - Short answer: YES, I save them. Long answer: When I was a kid, my mother threw away all my train boxes. After seeing what collectors were looking for and some of the prices that they paid for empties, I said never again. Then there's the more practical matter of resale and shipping. Not only do I keep the manufacturer's box, but when available I keep the brown cardboard outer shipper.

Dave - Very nice. You have more patience than I do.

Last edited by Big_Boy_4005
Big_Boy_4005 posted:

Bryan - Thanks. Out of curiosity, which brand of applicator are you using? I have the $10 home made version with an electric fly swatter and a kitchen strainer.

I have one of those also and it works okay but once I saw how much area and projects I want to do I upgraded to the Noch Grassmaster 2.0.  The one nice feature I like with that applicator is that is comes with some different attachments so you can cover more or less area depending on your needs.  The best part is my NMRA division does clinics and if you put one on they pay you a stipend for your supplies. I decided to do a demo on static grass so after 3 clinics that stipend paid for the applicator itself. 

Dave, great looking project on the DM&IR engine.

Bryan, great plan on the field.

Lou, the people make for a great scene.

I took the smoke unit apart on the SD70ACe and found it smokes but the fan motor won’t turn.  I unsoldered it and put a variable DC supply on it and it won’t turn wether the fan is on it or not.  I’ll have to get another motor.  In the meantime I taped the wire ends, put the shell back on, and ran it on the Ceiling Central Railroad 

8691A966-C0F9-449B-A21B-B9A42CB2B1BA

Attachments

Images (1)
  • 8691A966-C0F9-449B-A21B-B9A42CB2B1BA

This morning I took the angled building and penciled out the roof and base for the building. Bascially rough cut them in the basement and sometime I'll take them out and do the final cut with the band saw. Took a couple of pics lining up some of the other flats to start fitting them together. Where the two doors are will be a roof over an unloading platform for box cars. Still have to buy some plastic for the windows, blacken the walls behind the flats and also do some final cutting on them to make the fit better. I'm going to cut the siding in front and the space behind the end of track I'll be putting a few silos for grain storage..................Paul

DSCN2141DSCN2142DSCN2143DSCN2144DSCN2145DSCN2146

Attachments

Images (6)
  • DSCN2141
  • DSCN2142
  • DSCN2143
  • DSCN2144
  • DSCN2145
  • DSCN2146

"What did you do on your layout today?" 

Decided to replace the smoke element/resistor in my Lionel M1a. As luck would have it, years ago I purchased a brand new smoke unit top from Lionel just so I could fiddle with it before I messed around with the one that's in the loco. That way I can get it all ready with the new resistor, disassemble the loco, swap the boards, reassemble and go.  

If only it were that easy... 

First test with the new resistor the thing smokes but it's really lame. Took it all apart. Fiddled with it and tried again. No smoke at all. Took it apart, checked everything and "fiddled" with it some more. Nothing. After about the 4th or 5th time I realized I'd better take the loco shell off and leave it off until I get this figured out. Finally noticed that if I wiggled the power connector on the smoke unit top it would work and as soon as I released pressure it stopped. Every time I did anything with that connection the smoke would start or stop. After much more fiddling, it dawned on me that the connector on the board was bad - the BAND NEW from Lionel board that is (!). I tried everything else I could think of first before believing that a brand new part was defective. The last time I inspected it, the connector fell off of the board completely. Bad solder job at the factory I assume.

 I scrounged around my "model train junk yard" and luckily found some more Lionel smoke unit top boards. I picked out one that looked pretty fresh and again installed a new resistor and put this combination back together and VOILA! it works. Smokes SO much better than the original factory setup. Happy it's over as this procedure took about 10 times longer than it should have.

-RM

20180722_141010

Attachments

Images (1)
  • 20180722_141010
Last edited by Ralph M
Bryan in Ohio posted:
Big_Boy_4005 posted:

Bryan - Thanks. Out of curiosity, which brand of applicator are you using? I have the $10 home made version with an electric fly swatter and a kitchen strainer.

I have one of those also and it works okay but once I saw how much area and projects I want to do I upgraded to the Noch Grassmaster 2.0.  The one nice feature I like with that applicator is that is comes with some different attachments so you can cover more or less area depending on your needs.  The best part is my NMRA division does clinics and if you put one on they pay you a stipend for your supplies. I decided to do a demo on static grass so after 3 clinics that stipend paid for the applicator itself. 

Cool Bryan. It's nice that they pay you anything to give clinics. I just became assistant superintendent of our division. We are having terrible attendance problems, like 20 people a night, when we probably have a couple hundred in the division. With no specific responsibilities for my position, I'm going to see what we can do to drum up some activity. It doesn't help that when we do schedule a good clinic that either the presenter is a no show or we get locked out of our building. Both of those things happened to us last season. We also have a lot of members that are in operating groups, and meeting nights may conflict with that.

Do you want to come to Minnesota and give your clinic? In the winter of course.

A wrap for tonight. Got a couple of small things done. The loading dock platform for the building I cut a piece of Balsa wood I had. I was just going to stain the wood so I thought I would try a fine point sharpie to scribe some lines first then stain it. I also finished cutting the top and bottom for the building. Have to glue some supports around the inside to hold the roof and bottom in place. Pics.............Paul

DSCN2148DSCN2149DSCN2150

Attachments

Images (3)
  • DSCN2148
  • DSCN2149
  • DSCN2150

Brian, that was very thoughtful of you to share the Coors Light engine!

Ralph, way to stick with it! When things seam to go right its like a special Birthday Present! Nice work!

Paul things sure are looking good over at your place! I think the loading dock turned out GREAT! Just a thought about the roof and floor supports, next time you might glue them in before you glue the walls together to make sure you have them level, just seams it would be easier then. Just my thoughts~ LOL

Paul, The dock is going to look great!  Oh yes, the flats and Flatiron building are looking great too!  


As for me, I decided to list some of the many operating accessories on the For Sale Forum.  So, I spent a couple hours testing the accessories and cars I'm going to list for sale.  Check out the For Sale Forum to see what I have. For Sale Operating Accessories  For anyone who is wondering, I bought so many when I saw a good deal or exceptionally nice ones, I will never have room for them on the Blackwater Canyon Line.  And yes, I even bought some duplicates, forgetting I already had one.  

Elliot, what a coincidence I am the assistant superintendent of my division also.  We are about 80 members but most very active.  We are pretty lucky in that we haven't run into any of those problems.  We do a monthly clinic/presentation but the one I'm referring to is promo days.  In November we rent out the gymnasium at the local community college and open it up to the community to come in and see our clinics and ask questions.  It is usually very well attended (making it a free activity helps lol). 

Bryan in Ohio posted:

Elliot, what a coincidence I am the assistant superintendent of my division also.  We are about 80 members but most very active.  We are pretty lucky in that we haven't run into any of those problems.  We do a monthly clinic/presentation but the one I'm referring to is promo days.  In November we rent out the gymnasium at the local community college and open it up to the community to come in and see our clinics and ask questions.  It is usually very well attended (making it a free activity helps lol). 

That's a very interesting concept, I'll run that by the rest of the board when we meet. For the last four years, we've been doing what we call the Modelers Retreat in Feb or March, where we have clinics and show and tell Friday evening and all day Saturday. It is neither open to the public, nor free. I don't want to drop or change that event, because it really brings the members out of the "woodwork" (AKA basements), but adding a new event that serves the purpose of engaging the public could possibly bring in some new blood. 

------------------------------------------------------------------------------------

I've really been slacking off on layout progress lately. Been rather tired. I spent 6 hours on Saturday, unpacking and logging Atlas containers, and getting another one of those 5 unit Gundersons put together over at Shoreham. Two down and three to go. I keep picking up little bits in an effort to get cleaned up for the convention.

I ran up to Menards Saturday morning, and picked up my 4 pack of well cars. As Paul suspected, if it isn't the old Right of Way tooling from the early 90's, it's so close that you can't tell.

This is what the pile of inventoried pieces looked like before Saturday...

IMG_8558

this is what it looked like after. I crawled under the layout, and dragged all of that out.

IMG_8561

Here's the new set. It's a bit of work trying to pick containers to make it look right.

IMG_8563

Here's one of the new Menards cars.

IMG_8565

This is an old Right of Way, the only one I have. A couple K-line containers in it.

IMG_8567

Here's the new Menards.

IMG_8568

Here they are side by side. Looks like the Menards rides maybe 1/8" higher. A couple of the applied detail parts are slightly different, but other than that they're the same.

IMG_8566

Attachments

Images (7)
  • IMG_8558
  • IMG_8561
  • IMG_8563
  • IMG_8565
  • IMG_8567
  • IMG_8568
  • IMG_8566

Elliot, thanks for the small review of the Menards cars! I really like the way they look and most of all I love the price!

As for me, I got all the walls sanded and primer on them! No pictures, cause who wants to watch primer dry! LOL

I hope to get the celling sanded and primer this week, and have the room painted by the end of the weekend! Then add a few more lights, and the train room will be done and the real FUN can start!

Add Reply

Post

OGR Publishing, Inc., 1310 Eastside Centre Ct, Suite 6, Mountain Home, AR 72653
800-980-OGRR (6477)
www.ogaugerr.com

×
×
×
×
Link copied to your clipboard.
×
×