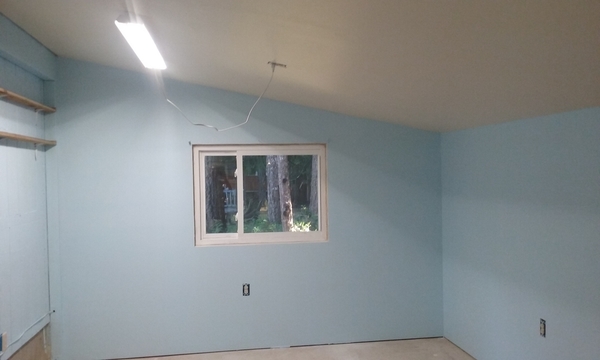
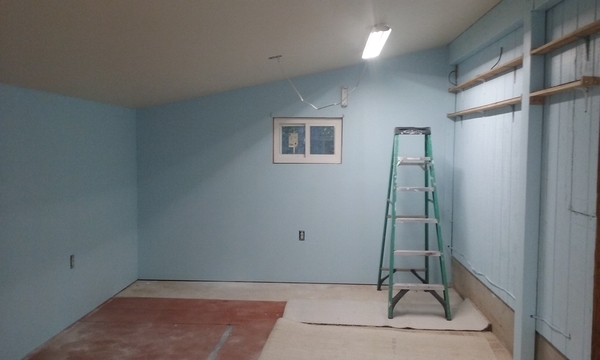
Ok Bob and Elliot, Just a little update! The sanding was a little hard with a Coors Light in one hand, but I got it done! I even had some energy left over so I deiced to go ahead and paint the celling. Celling is done except 4 more 4' LED Shop lights.

I plan to pick up the wall paint tomorrow and see where I get. I have to work tomorrow so I don't know if I will get to painting!

Finished the all weather cab window installation yesterday.   My “honey-do” house project: replace felt pads on living & dining room furniture, yielded the perfect window glazing solution for the AW cab windows.  The clear plastic packaging proved to be thin and sturdy enough to complete the job.   I love it when we can go shopping in the trash for modeling supplies!

DSC02563

DSC02564

Now the SD units are ready for any type of inclement weather and the little crew members will surely enjoy the improved comfort.

DSC02572

I'm back planting more trees and shrubs on the summit plus installing my Wi-Fi DCS system.   Our great-grandson returns August 3rd for some more train time with Great-Grandpapa Dave and I want to be I-pad ready.   Life is GOOD!

IMG_2307


Attachments

Images (5)
  • DSC02556
  • DSC02572
  • IMG_2307
  • DSC02564
  • DSC02563
Last edited by darlander

I actually had a window of opportunity to do a little something. The grand daughter and her father wanted to do a little shopping. So while they were out I glued the bracing for the roof on and once the glue dried I painted the roof again. When that dried I decided to try something. I took a black Sharpie and drew lines across the roof then I drew cross lines to make it look like a rubber or tar roof with seams then I glued it to the building. Until I can get some clear thin plastic to glue on the inside over the windows that it for this project. Pics...............Paul

DSCN2151DSCN2152DSCN2153DSCN2154DSCN2155

Attachments

Images (5)
  • DSCN2151
  • DSCN2152
  • DSCN2153
  • DSCN2154
  • DSCN2155

Today I'm in the "car shop" trying to remedy a Lionel C&O 50' box car. This box car is ill handling, shorts out Gargraves and Ross switches and in general doesn't seem to want to "play nice" with the other cars. There's something about the coupler-truck that Lionel uses that seems to have issues with my switches. My 1st fix is to replace the Lionel trucks with Atlas and voila!, no more issues with switches.

Next, it is obvious when you handle this box car that it is very light weight.

The questions are:   1) what does it weigh? 2) how much *should* it weigh? Using my trusty digital scale I weighed it and some other freight cars that *don't* have handling/tracking issues.

Freight Car Weights

Not surprisingly, the Atlas products are the heaviest AND the best handling. The Lionel box car is the lightest by far. Based on this I added a little over 2 ounces of weight to the Lionel box car which brings it up to 19 ounces which is right the ballpark compared to its peers.

CO 50 Box_20180724_165620987

It is now a "happy camper" and plays nice the other freight cars in the train.

-RM

Attachments

Images (2)
  • Freight Car Weights
  • CO 50 Box_20180724_165620987

Marc, It looks like a fine job you are doing!  The creativity abounds!!

Brian, Very nice CSX engines!

Dave, Great window material.  The DM&IR engine looks great!!

Paul, The rood looks great!  Maybe you need to do a lot of work like Dave did on his honey-do to get window glazing.  


Me, I ordered a fan motor for the NS SD70ACe I mentioned a few days ago.  Actually, I ordered 5, as that is the quantity MTH sells them.  I'm sure I will have need of some of the extras as time passes.

Darlander, Look at you go over there! I thought I was the only one that kept stuff from the trash for modeling! LOL Have a great time with your grandson!

Paul the roof looks great! You have gone this far why not add some floors and put some people in the windows! LOL Just kidding, looks great!

Ralph, its always nice to have a nice easy fix every now and then! I weighed all my cars a few years ago, and will do the same thing before going on my future layout!

Mark I didn't know you had that many diesel engines! LOL

BRYAN, The ball field looks just amazing! Congrats for having another project finished! GREAT WORK and LOVE IT!

I just worked alittle on the train room!

paul 2 posted:

I actually had a window of opportunity to do a little something. The grand daughter and her father wanted to do a little shopping. So while they were out I glued the bracing for the roof on and once the glue dried I painted the roof again. When that dried I decided to try something. I took a black Sharpie and drew lines across the roof then I drew cross lines to make it look like a rubber or tar roof with seams then I glued it to the building. Until I can get some clear thin plastic to glue on the inside over the windows that it for this project. Pics...............Paul

DSCN2155

Paul, another nice option would be to replicate a tar & gravel roof by covering it with some coarse sand.  Dave

darlander posted:
paul 2 posted:

I actually had a window of opportunity to do a little something. The grand daughter and her father wanted to do a little shopping. So while they were out I glued the bracing for the roof on and once the glue dried I painted the roof again. When that dried I decided to try something. I took a black Sharpie and drew lines across the roof then I drew cross lines to make it look like a rubber or tar roof with seams then I glued it to the building. Until I can get some clear thin plastic to glue on the inside over the windows that it for this project. Pics...............Paul

DSCN2155

Paul, another nice option would be to replicate a tar & gravel roof by covering it with some coarse sand.  Dave

I have always used individual pieces of 220 grit sandpaper glued in place. The building is a scratch built replica of the D&H freight station in Whitehall, NY. The original building was 120' long; IP1000162P1000163 reduced it by one freight bay to 80 scale feet. The original plans were in a very old copy of RMC. The building still stands after many reincarnations and is currently home to Warren Tire.

P1000164

Attachments

Images (3)
  • P1000164
  • P1000162
  • P1000163
Last edited by modeltrainsparts
mike g. posted:

Darlander, Look at you go over there! I thought I was the only one that kept stuff from the trash for modeling! LOL Have a great time with your grandson!

Paul the roof looks great! You have gone this far why not add some floors and put some people in the windows! LOL Just kidding, looks great!

Ralph, its always nice to have a nice easy fix every now and then! I weighed all my cars a few years ago, and will do the same thing before going on my future layout!

Mark I didn't know you had that many diesel engines! LOL

BRYAN, The ball field looks just amazing! Congrats for having another project finished! GREAT WORK and LOVE IT!

I just worked alittle on the train room!

Mike, I have two Premier Western Maryland H9s, one Premier B&O Atlantic, and one Premier B&O 0-6-0 switcher.  Then I have a B&O F7 set in the blue/gray scheme, and a B&O F3 set custom painted in the solid dark blue.  Also I have Western Maryland F3 set, two WM BL2s, a WM RSD5, They are all Premier or RailKing Scale.  That doesn't mention my Christmas engines, all traditional sized steamers.  I prefer steam, but Premier steam is costly for me even on the used market.  

So the SD70ACE is really an oddball for me.  I traded a Forum Member who has been looking for a Premier FA2 ABBA set for a long time, but didn't have the cash.  I finally contacted him back about a trade.  The ABBA set was just too long to look good in my small space, so I thought he should have it.  I know if I tire of the SD70ACE, there are lots of folks right here in Western Pennsylvania who would like to have it.  It is a really cool engine, but will look out of place in my 1950s era West Virginia layout.  It may just stay on the Ceiling Central RR, which will accept any era.  


MODELTRAINSPARTS, Wonderful scratch build!

Paul, I am the same way, I have one building I am going to try and put tables , chairs, a bar and some people in! Its the one I built and named it after Cabinet Bob!

Mark I totally understand!

So I woke up this morning at 3:30 AM went out to the train room at 4 AM and painted the train room! I will see when I get home from work if it needs another coat. if not its just a few more lights, rehang the TV and then it onto bench work! YEH!

I will post pictures later when I get home from work!

     "if not its just a few more lights, rehang the TV and then it onto bench work

          YEH!"

                                     trains will be RUNNING soon


   nmp...

                                          getting to the FUN part !!! 


                                                trains, pizza and beer


Attachments

Images (5)
  • mceclip0
  • mceclip0
  • mceclip0
  • blobid0
  • mceclip0
Last edited by briansilvermustang
Mark Boyce posted:

Ralph,

Yes, my Atlas cars are the heaviest along with K-Line die cast hoppers.  Adding some weight is on the back burner for some of my cars as well, but i'll wait until I get the layout built.  When one doesn't track well on the Ceiling Central, it comes down and sits on the shelf (Rip track) under the CCRR for now.

Mark,

I've added weights to cars before but it was always guesswork. Before I weighed the other cars I wasn't sure what the proper weight actually was.  The Atlas stuff is a little bit on the heavy side for me and they're not even diecast so the MTH weight was a more realistic target.

For my next trick I want to weigh all the cars in a train I'm pulling. Did you ever wonder just how much work your  locomotive is doing? One of my routes has a steep grade that makes me weight conscious when assembling a train to operate there. One solution is to run a lashup with at least two powered units - adding additional power just like the real railroads. With two powered units on the head end I don't have to worry about the train's makeup of cars.   If I run a single powered unit then I try to watch the weight. Because I like to let the trains run for a good while each session I try not to wear them out by overworking them if I can avoid it.

-RM


Mike, Wow painting before the rooster crows!!

Brian, so whose benchwork is that?  Yours?  I haven't seen that before.

Ralph, I know when I modeled in HO, the NMRA had recommended weights for cars.  I never bothered checking mine, because I had so little room, I ran short trains.  I agree, the Atlas cars seem too heavy to me, but my engines seem to handle trains with them fine.  Again, I don't run very long trains.  Yes, I think finding out how much weight our engines pull would be a good thing to do.  Another thing to put on the back burner until I retire.  

darlander posted:

Finished the all weather cab window installation yesterday.   My “honey-do” house project: replace felt pads on living & dining room furniture, yielded the perfect window glazing solution for the AW cab windows.  The clear plastic packaging proved to be thin and sturdy enough to complete the job.   I love it when we can go shopping in the trash for modeling supplies!

DSC02563

DSC02564

Now the SD units are ready for any type of inclement weather and the little crew members will surely enjoy the improved comfort.


I'm with you Dave. I scrounge up supplies from all over the place. I set up a new printer for my In-laws over the weekend. I walked into my house with the old one under my arm.....the CEO says "what are you doing with that, I thought it was broken".

As I descended down the basement stairs I mumbled something about taking it apart for the motors and stuff........

I came back up a little while later to a look of bewilderment. 

brwebster posted:
Ottawa_Marc posted:

Here's hoping it doesn't totally go up in flames....

I'll bite.  Using the torch to shape the styrofoam?  

Bruce

Wasn't fishing.......

Had heard about doing this before so thought I'd try it. Turned out OK..... kinda..... not really.... I put to much heat to it but oh well. Most of the individual brick outlines I carved melted.

It's supposed to make the extruded foam look more like brick/stone, if u do it right.

Just thought I'd share ideas.

Last edited by Ottawa_Marc
briansilvermustang posted:

     "if not its just a few more lights, rehang the TV and then it onto bench work

          YEH!"

                                     trains will be RUNNING soon


   nmp...

                                          getting to the FUN part !!! 


                                                trains, pizza and beer


Thanks Brian, but I think its going to need a second coat of blue!20180725_18151920180725_181528

Attachments

Images (2)
  • 20180725_181519
  • 20180725_181528

Mike and Mark,

My work table is a mess of open Preiser 65602 boxes that are now used to sort the 24 different 1/45 figures I have painted. Four more boxes arrived last week from Germany.  I painted those this week.  I added two packs of 48 of the Preiser 68209 Unpainted 1/50 Figures.  It is now time to re-group, clean up, and run the trains.

I added pictures of the Southern Pacific Dining Car that I installed seat backs and painted the interior in February of this year.  Tonight I finally decided to added people to this car, so all my 21" passenger cars would have passengers.  

Sincerely, John Rowlen

Attachments

Images (9)
  • DSCN5809: An Explosion of painted people.
  • DSCN5811: Interior was done on February 28, 2018.
  • DSCN5812: People were added July 25, 2018.
  • DSCN5813
  • DSCN5814
  • DSCN5815
  • DSCN5816
  • DSCN5817
  • DSCN5818
Ottawa_Marc posted:
brwebster posted:
Ottawa_Marc posted:

Here's hoping it doesn't totally go up in flames....

I'll bite.  Using the torch to shape the styrofoam?  

Bruce

Wasn't fishing.......

Had heard about doing this before so thought I'd try it. Turned out OK..... kinda..... not really.... I put to much heat to it but oh well. Most of the individual brick outlines I carved melted.

It's supposed to make the extruded foam look more like brick/stone, if u do it right.

Just thought I'd share ideas.

Marc,

you could try using lacquer thinner for a more controlled method of shaping the foam.  experiment with different applicators, such as a rag, brush or airbrush, in sparing amounts to see if you can get the desired effect.  As usual, apply thinners in a well ventilated area or take the work outside.

Bruce

John Rowlen posted:

Mike and Mark,

My work table is a mess of open Preiser 65602 boxes that are now used to sort the 24 different 1/45 figures I have painted. Four more boxes arrived last week from Germany.  I painted those this week.  I added two packs of 48 of the Preiser 68209 Unpainted 1/50 Figures.  It is now time to re-group, clean up, and run the trains.

I added pictures of the Southern Pacific Dining Car that I installed seat backs and painted the interior in February of this year.  Tonight I finally decided to added people to this car, so all my 21" passenger cars would have passengers.  

Sincerely, John Rowlen

looks fantastic.

brwebster posted:
Ottawa_Marc posted:
brwebster posted:
Ottawa_Marc posted:

Here's hoping it doesn't totally go up in flames....

I'll bite.  Using the torch to shape the styrofoam?  

Bruce

Wasn't fishing.......

Had heard about doing this before so thought I'd try it. Turned out OK..... kinda..... not really.... I put to much heat to it but oh well. Most of the individual brick outlines I carved melted.

It's supposed to make the extruded foam look more like brick/stone, if u do it right.

Just thought I'd share ideas.

Marc,

you could try using lacquer thinner for a more controlled method of shaping the foam.  experiment with different applicators, such as a rag, brush or airbrush, in sparing amounts to see if you can get the desired effect.  As usual, apply thinners in a well ventilated area or take the work outside.

Bruce

Morning Bruce

Thank you for the tip, I'll give this a shot next time. 

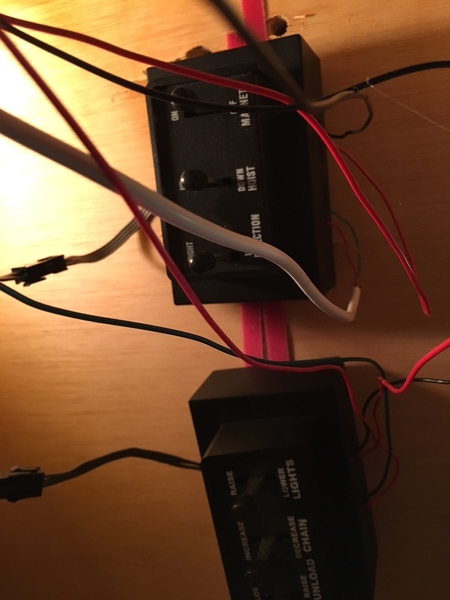
Finally got around to moving the box controllers for my ARC/Gantry and ARC/Lumber Loader.  When I first installed them I used the manual controllers but since then, I've moved to LCS ASC2 control. Originally I installed them on the top of my layout next to the milk platform:

I intend to scenic this scene so something had to be done with the controllers. A barrel loader is to the left so much to take advantage of.

The controllers:

I decided to use hook&loop to the underside of the table for easy access should I need them.

I tested super glue to fasten the strips but that didn't work so well.  Hot glue worked perfectly.  I attached two strips on the underside of the controllers and two long strips under the table.  I'm satisfied with the solution. The controllers do not get in the way of access to my stuff under the table yet they are readily available should I need them.

Now the fun part..making this scene come alive.... 

Attachments

Images (6)
  • mceclip1
  • mceclip2
  • mceclip3
  • mceclip4
  • mceclip5
  • mceclip6
John Rowlen posted:

Mike and Mark,

My work table is a mess of open Preiser 65602 boxes that are now used to sort the 24 different 1/45 figures I have painted. Four more boxes arrived last week from Germany.  I painted those this week.  I added two packs of 48 of the Preiser 68209 Unpainted 1/50 Figures.  It is now time to re-group, clean up, and run the trains.

I added pictures of the Southern Pacific Dining Car that I installed seat backs and painted the interior in February of this year.  Tonight I finally decided to added people to this car, so all my 21" passenger cars would have passengers.  

Sincerely, John Rowlen

Excellent looking vests with passengers and etc.  thank you very much 

More progress on the CCK Matter's Mill.  Put main building sections together, and finished roofing them.  At least one more overhanging porch roof to do, and will add various decks and platforms. Water staining the wheel spokes, of pressed paper, is not a good idea unless done before punching them out. Tried to put Weaver arch bar trucks on an ore car that came with modern trucks, and the metal crumbled.  Has been a year, but l thought these trucks were plastic. Two other sets were crumbled in the box. Zinc pest with Weaver metal trucks?

COLORADO HIGHRAILER, that is the first I heard of Weaver  die cast trucks zinc rotting. I have a number of them and have not had that problem. So today, which I wasn't expecting I got my package from PATS TRAINS. Ordered a few Weaver/MTH weaver die cast roller bearing trucks. Got that oput of the way and headed for the basement since the grand daughter and her father left yesterday. I decided to shorten the siding for the grain cars to one car. Taking up the track, cork and ballast I then painted the area black for the time being and glued some ties to make a stop bumper. I measured out the area and it looks like I can get at least 5 3 inch PVC pipes in there for grain silos. Still have to buy the pipe. Pics............Paul

DSCN2159DSCN2160DSCN2161DSCN2162DSCN2163 


Attachments

Images (5)
  • DSCN2159
  • DSCN2160
  • DSCN2161
  • DSCN2162
  • DSCN2163

As always great work everyone and this thread is real motivation to get things done and then share them. 

Marc, love the subway that is the next area on my layout that I am moving onto.  Hope to get it done before heading back to work in 2 weeks. 

Finished my shelving a few weeks ago but wanted to add some description tags so I ordered a bunch of shelf tags like they use in grocery stores.  Made up a bunch of labels for all the trains.

DSC_1278

I was also able to locate and correct a short in my wiring in the red light district so now all of the animated signs are working again.  Also personalized a building that I bought this past April in York.  Made some signage for the buildings, added interior lights, and interior scenery using Photoshop.  The part that really makes it stand out is I put a sign on the side that is supposed to look like a neon sign.  Before I put the sign on I drilled two holes in the building and used 2 blinking led lights inside the building so when I put the sign on certain parts of the sign would really stand out.  You can see in the video what parts that would be. lol

show bar [1)show bar [2)

show bar [3)show bar [4)

https://www.youtube.com/watch?v=3b6naY1OI8M

Attachments

Images (5)
  • DSC_1278
  • show bar (1)
  • show bar (2)
  • show bar (3)
  • show bar (4)

Bryan, glad you finally got time to put in some time on the layout. The corners of your layout are taking shape especially the red light district. Doesn't it feel good to find the power problem quickly so you can get to your other projects. Hope you get the time to work on the subway area before you head back to school. While finishing up laundry I decided to start adding ground cover at the railroad crossing area. Still have to add some trees and glue everything down. Pics.......Paul

DSCN2164DSCN2165DSCN2166DSCN2167DSCN2168DSCN2169DSCN2170

Attachments

Images (7)
  • DSCN2164
  • DSCN2165
  • DSCN2166
  • DSCN2167
  • DSCN2168
  • DSCN2169
  • DSCN2170

New addition received today via FedEx from Charles Ro...Lionel 6-84934 LionChief Plus NY Central Hudson with Bluetooth from 2018 catalog.  'Looks good, works great (with lots of sound and smoke).  The drive wheels do not have white sides as shown in the catalogs and there are crew figures in the cab on each side.

'Very happy with my first LC Plus engine.

Attachments

Images (5)
  • 105 Jul 29 2018
  • 106 Jul 29 2018
  • 107 Jul 29 2018
  • 108 Jul 29 2018
  • 109 Jul 29 2018

Today l did some more work on the mill, adding loading platforms and one kit hoist and another bashed one for a second on the rear deck. Trying  to decide how to install water wheel and direct "water".  Kit uses undershot wheel, l prefer and have built overshot mills with elaborate flumes. Kit requires a diorama with millpond..l leave that for later when scenery is done.  There are breastshot ones, too, but overshot is supposed to be the most efficient. It will demand a bashed flume, as will the breastshot.  I am really disappointed Weaver arch bars crumbled...l use a lot of arch bars for period cars, and had few sets left.  Is that outfit in Mo. who bought some of the Walthers and other parts offering them?

Hello to all, I have been recovering from major right shoulder surgery 13 days ago.....  Am just now able to type short messages.   Seems pretty successful so far, I am actually typing with both hands which I guess is miraculous...  Been to PT twice already, they seem pleased with my limited range of motion.... Now that my daughter is home for a month, I hope to go down and run some trains today.   

Mike G.   Your train room looks great !  Glad you're ready to get started building the layout.   

Chris A

Train time still is limited to almost none. Been a busy summer for sure. Bought my daughter a 2018 Honda Civic Thursday, her first car!

Everyone keeps doing great work. Paul-you are perfect- you always get it right the first time

Chris- I'm guessing rotator cuff? I know several people who have lived through that surgery, the rehab and PT are brutal from what I've heard.

Mike- She Shed ON!

Lou- Nice job on the sound boards. I have the same GP- maybe a future project.

Bryan- LMAO!

HMORGAN25- beautiful! The Hudson is my all time favorite steamer.

Put these together for yesterday's SWSat

2018-07-28 08.08.152018-07-28 08.08.51

Attachments

Images (2)
  • 2018-07-28 08.08.15
  • 2018-07-28 08.08.51

RSJB18 -   Actually 3 out of 4 rotator cuffs were 100 % completely torn and one of two bicep tendons dislocated, so that tendon had to be cut off and screwed into the humerus.....  Should be fun going through TSA screening with all the metal anchors!!! 

 It's going to be a long recovery, but I am trying to stay optimistic.... have to do like 4 weeks of stretching exercises so that as it heals and grows scar tissue, I can maintain as much range of motion as possible.   Then months 2,3 and 4 we start working on strengthening all the atrophied muscles....  

Chris, glad the surgery is done and over with. Now the word patience comes into play. What you went through cannot be rushed. Everything will be back to normal in due time. My wife went through the same thing. Eash passing day in between her PT sessions I had to work her arm not going past where the therapist told me to stop. It was a long time coming but rushing it would not of done any good. Before you know it Chris you will be back to a normal routine again........Paul

Chris, I sure hope things keep going well with the shoulder recovery! Thank you for the kind words about the train room, I hope to get some lumber next week to start on part of the bench work! At the same time I will pick up some lumber for the wifes She Shed! Picture below! LOL

RSJB18, the layout sure is looking great and a very nice set up! But most of it sure looks FUN!

JOESAGE, sure looks like you have a good start there, keep us posted. Question, where did you get the busses from?    

The beginning of the wife's She Shed! LOL                             


20180729_091726

Attachments

Images (1)
  • 20180729_091726
chris a posted:

Hello to all, I have been recovering from major right shoulder surgery 13 days ago.....  Am just now able to type short messages.   Seems pretty successful so far, I am actually typing with both hands which I guess is miraculous...  Been to PT twice already, they seem pleased with my limited range of motion.... Now that my daughter is home for a month, I hope to go down and run some trains today.   

Mike G.   Your train room looks great !  Glad you're ready to get started building the layout.   

Chris A

Chris, I hope you get better soon.

chris a posted:

Hello to all, I have been recovering from major right shoulder surgery 13 days ago.....  Am just now able to type short messages.   Seems pretty successful so far, I am actually typing with both hands which I guess is miraculous...  Been to PT twice already, they seem pleased with my limited range of motion.... Now that my daughter is home for a month, I hope to go down and run some trains today.   

Mike G.   Your train room looks great !  Glad you're ready to get started building the layout.   

Chris A

Chris , I’m sorry for your injury! Hope you are mending well. 

Sounds like a good case. HC ramps must be especially free from ice.  But I suspect your lawyer would be s lot happier for your sake if you declared a news blackout online. Insurance Co lawyers can’t twist your words if you don’t write them. A word to the wise.

chris a posted:

RSJB18 -   Actually 3 out of 4 rotator cuffs were 100 % completely torn and one of two bicep tendons dislocated, so that tendon had to be cut off and screwed into the humerus.....  Should be fun going through TSA screening with all the metal anchors!!! 

 It's going to be a long recovery, but I am trying to stay optimistic.... have to do like 4 weeks of stretching exercises so that as it heals and grows scar tissue, I can maintain as much range of motion as possible.   Then months 2,3 and 4 we start working on strengthening all the atrophied muscles....  

Chris,  I recall you saying the surgery was coming up.  I'm glad you are on the long road to recovery!!  I hope you can get to running some trains soon!  Please keep us updated!!

Thanks to all for fast recovery wishes.   Yes Jim, I did retain a reputable law firm to represent me.   Unfortunately, I have to finish all medical and PT treatment before litigation and negotiations begin, so I remain cautiously optimistic that there will be a favorable settlement in early 2019.   

Yes Paul, right now I have about 5 different stretching routines that I go through slowly at least 4 to 5 times per day.   It definitely helps, and keeps things from binding up and getting "frozen" as everything heals.   I am glad I got to PT for the first time within 10 days of the surgery, otherwise I think my range of motion would already be much worse.   I definitely don't heal as well at 59 going on 60 as I did even 10 years ago, but I am sure there are many of us here at the forum that have experienced that humbling reality!   

I did manage to go to train room yesterday and weather a WM 40 foot boxcar, it was great to actually do something productive.... I'll try to post a photo later today/tomorrow....   

Chris, I am glad your getting around! Take it slow and easy, weathering some cars sounds like a good idea to keep you into the hobby as you heal!

Paul, sounds like you had a good time with your wood chip cars! Question, are you going to have to bring them all back down when you finish the basement layout? Also you might have done it before but can you share some pictures of your attic layout?

Add Reply

Post

OGR Publishing, Inc., 1310 Eastside Centre Ct, Suite 6, Mountain Home, AR 72653
800-980-OGRR (6477)
www.ogaugerr.com

×
×
×
×
Link copied to your clipboard.
×
×