
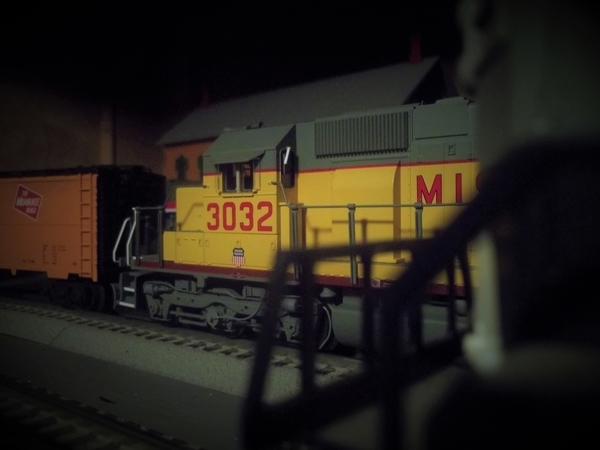
Cleaned track on a long siding and tested for contact conductivity, worked at realigning rails on Bollman bridge with rails exiting the northwest tunnel.  ( all this competed with the help of the MOW crew .. LOL ) Touched up some scenic areas at base of Mt. Randolph.  Changed out some locomotives.  Ran trains and most importantly had fun!!IMG_7485IMG_7484IMG_7477

Attachments

Images (3)
  • IMG_7485
  • IMG_7484
  • IMG_7477

Yes Paul,  all the foam eventually cures and gets hard.   By the time the paint dries and anchors down the dirt, and scenic materials, the foam is almost as hard as the pink insulation....  I used more spray foam on this one than the prior mountain....  Decided I was wasting my time cutting too many small pieces of foam.    I also tend to go back and spray the whole area down with a homemade mix of Scenic Glue.... I mix even parts of cheap elmers white glue,  Modge Podge Matte finish and 50% water, with some alcohol....  It will ensure everything stays in place and dries flat and clear.     

chris a posted:

Yes Paul,  all the foam eventually cures and gets hard.   By the time the paint dries and anchors down the dirt, and scenic materials, the foam is almost as hard as the pink insulation....  I used more spray foam on this one than the prior mountain....  Decided I was wasting my time cutting too many small pieces of foam.    I also tend to go back and spray the whole area down with a homemade mix of Scenic Glue.... I mix even parts of cheap elmers white glue,  Modge Podge Matte finish and 50% water, with some alcohol....  It will ensure everything stays in place and dries flat and clear.     

Chris, If a picture is worth a thousand words, a video is worth a million words or maybe far more.  Now I finally get it!  Skull gets thicker, the older I get!    Now I see how it all comes together.  On my last layout that reached this stage of scenery, I used spray foam for a removable hill (maybe 2 1/2' by 3') over a return loop.  I just sprayed lots of foam and let it rise.  I just cut off places I wasn't happy with.  Now I see the process of pressing down on the batting helps push the foam how you want it.  The pink foam provides support so you aren't pressing foam out the back side.  I do like the texture the painted batting provides before you place any dirt or ground foam on it.  I am also envisioning this same method for making a snow covered scene with white paint and something a bit sparkly like what I bought and just sprinkled on dry at Christmas time, and then just swept up afterwards.

I missed out on what you used for the block surface on the thin foam retaining walls.  Is it paper, embossed plastic, or some other material?

Thank you very much for taking the time and effort to make the videos!!!

The Razorback Traction Company has decided to go with traditional sized pantographs for the RDC to Silverliner conversion programme.   Said pantographs have been "borrowed"  from inactive fleet GG1s.

GEDC1128

In the background, Shop Superintendent Fortescue J.  Gi-raffe and Assistant Superintendent  Freddie Flamingo may be seen doing development work on an electric powered gi-raffe car cum jungle gym.    

Mitch 

Attachments

Images (1)
  • GEDC1128
mike g. posted:
RSJB18 posted:
mike g. posted:

Bob, Sorry you had to clean carpets yesterday! I had to sit out in our Gazebo with the wife, a fire, friends, a nice cold Coors Light, and Tank the inspector. Just because I have nowhere to go and truck is still in the shop for a new Clutch. No new building material for bench work, so it sounded like a good plan for Saturday!

Sunday it will be Seahawk's & the bronco's Oh and the wife is making Fresh Apple pie as I post here at 6:53AM! 

Sounds like a nice day Mike. Send some pie east when its done

Here you go Bob! LOL20180909_072333

YUMMY......Don't forget to send the vanilla ice cream too

I'll share with Izzy......promise!

Last edited by RSJB18
M. Mitchell Marmel posted:

The Razorback Traction Company has decided to go with traditional sized pantographs for the RDC to Silverliner conversion programme.   Said pantographs have been "borrowed"  from inactive fleet GG1s.

GEDC1128

In the background, Shop Superintendent Fortescue J.  Gi-raffe and Assistant Superintendent  Freddie Flamingo may be seen doing development work on an electric powered gi-raffe car cum jungle gym.    

Mitch 

UMMM.....Mitch.....better tell the boys to get down from there before it goes under the wire

Hey Mark:   Glad the video helped, sorry 2 of them ran so long... didn't realize how challenging "editing" would be.... thank goodness for the ability to fast forward...

The block walls are pink rigid insulation...   I knew I was going to need a bunch of them on this layout, so I started learning the best ways to make my own, as I would have had to spend way too much money buying commercial walls....   Pretty much found that scribing them with a sharp pencil, then using a large ballpoint pen to chamfer the joint, created the joint lines pretty successfully.   Found a knarly piece of broken granite and used it to create some random dents and reliefs in the face of the blocks then primed them with spray paint and weathered with cheap craft store acrylic paints.....  If I am making concrete retaining walls or concrete roads with the pink insulation, I have found that a great way to get texture on the foam is to roll a "wire brush" wheel like you buy for an electric drill makes thousands of tiny pin holes..     I have a 6 inch wire wheel that I bought ages ago, that I just roll over the foam surface...   instant fine random texture... 

I started with the 1 inch thick rigid insulation and then I ripped it in 1/2 on the table saw so it's less than 1/2 inch thick at which point I could bend it to fit curvatures like behind the MTH station below....   The curve above the station is 096, but once it's trimmed to a thinner thickness it's quite flexible...

DSCN3729DSCN3086

Attachments

Images (2)
  • DSCN3729
  • DSCN3086

Chris, I have seen people scribe like that on foam before!  I don't know why I didn't think of it when I asked.  You did a great job!!  Ripping it to 1/2" sounds neat.  I have never used a table saw, so I never guessed that is how the foam was that thin.  The ballast in front of the other walls you showed us a few days ago look great!!  Thank you again!!

RSJB18 posted:
mike g. posted:
RSJB18 posted:
mike g. posted:

Bob, Sorry you had to clean carpets yesterday! I had to sit out in our Gazebo with the wife, a fire, friends, a nice cold Coors Light, and Tank the inspector. Just because I have nowhere to go and truck is still in the shop for a new Clutch. No new building material for bench work, so it sounded like a good plan for Saturday!

Sunday it will be Seahawk's & the bronco's Oh and the wife is making Fresh Apple pie as I post here at 6:53AM! 

Sounds like a nice day Mike. Send some pie east when its done

Here you go Bob! LOL20180909_072333

YUMMY......Don't forget to send the vanilla ice cream too

I'll share with Izzy......promise!

Bob, I am so sorry! By the time I remembered that I was to send you some vanilla ice cream, it was GONE!

MarkStrittmatter posted:

Lifted up the drop cloth covering my layout because of some remodeling in the one part of our house and thought I can't wait for winter to get here so I have time to work on my layout. 

Not enough hours in a day in the summer months !!!!

Hey Mark!  Yes summer gets in the way of trains!  We haven't talked since York!  More remodeling!!  I won't recognize the house when I visit next time!!

M. Mitchell Marmel posted:
RSJB18 posted:

UMMM.....Mitch.....better tell the boys to get down from there before it goes under the wire

I did.  Fortescue and Freddie insist that you can't have "electric jungle gym" without "electric".   I suppose we'll have to wait and see.  ;D 

Mitch

YUMMMMM......YUMMMMM

Flamingo wings (AKA Buffalo), and Gi-raffe Ribs.........

RSJB18 posted:
M. Mitchell Marmel posted:
RSJB18 posted:

UMMM.....Mitch.....better tell the boys to get down from there before it goes under the wire

I did.  Fortescue and Freddie insist that you can't have "electric jungle gym" without "electric".   I suppose we'll have to wait and see.  ;D 

Mitch

YUMMMMM......YUMMMMM

Flamingo wings (AKA Buffalo), and Gi-raffe Ribs.........

With some fava beans and Chianti on the side??? Served in the dining car, of course...

Just a little bit of work tonight. I have spent a good portion of time on the net trying to find some doors to complete the building. I have gone to sites and found plenty doors but not the right size for the openings and of course the openings are two different sizes. For the time being I had some Balsa wood so I cut it to fit on top of the walls of the building, glued them down and when the glue dried I painted them aged concrete, Once I did that I glued the two chimneys down and then got the roof sign glued to a piece of plastic. Tomorrow morning out to Hobby Lobby. They have the thin clear plastic I want so I can cut strips and glue them to the inside of the windows on all the flats. Should be a good train day because it is suppose to rain all day here. Pics...........Paul

DSCN2326DSCN2327DSCN2328DSCN2330

Attachments

Images (4)
  • DSCN2326
  • DSCN2327
  • DSCN2328
  • DSCN2330

Wasn't till after dinner last night but I finally unpacked my new D&H passenger set. I gave each a quick cleaning and repaired a couple of lights. More detailed work to follow. They look really nice, I'm very happy with them. They just make it through 027 curves and the 5121 series switches. I need to check but I think they brush the corner of the switch motor covers.

Bob

2018-09-10 07.27.122018-09-10 07.27.212018-09-10 07.27.282018-09-10 07.27.45

Attachments

Images (4)
  • 2018-09-10 07.27.12
  • 2018-09-10 07.27.21
  • 2018-09-10 07.27.28
  • 2018-09-10 07.27.45
Videos (1)
2018-09-10 07.27.57
Last edited by RSJB18
Mark Boyce posted:

https://m.youtube.com/watch?v=_-Mnp6VAmEc

Branded.  I watched when I was growing up.  I’m sorry, I can’t see how to embed this on my phone app.

Stranded
Stranded on the toilet bowl
What do you do when you're stranded
And you haven't got a roll?
To prove you're a man, you must wipe it with your hand
Stranded-on the toilet bowl! 

Ah, schoolyard humor!   

Mitch 

Got home from Hobby Lobby with my black foam board. They didn't carry any clear plastic so I took Mike G's advice and went across the Plaza to Office Max and picked up a couple of packages of clear folders. Hit the basement and got all the windows covered. I'll let them set for a while so the glue will dry. After dinner I'll start laying out the cardboard buildings to start gluing them to the black foam. I am going to add them to the back of the building flats for the brewery. Pics...............Paul

DSCN2331DSCN2332DSCN2333DSCN2334

Attachments

Images (4)
  • DSCN2331
  • DSCN2332
  • DSCN2333
  • DSCN2334
M. Mitchell Marmel posted:
Mark Boyce posted:

https://m.youtube.com/watch?v=_-Mnp6VAmEc

Branded.  I watched when I was growing up.  I’m sorry, I can’t see how to embed this on my phone app.

Stranded
Stranded on the toilet bowl
What do you do when you're stranded
And you haven't got a roll?
To prove you're a man, you must wipe it with your hand
Stranded-on the toilet bowl! 

Ah, schoolyard humor!   

Mitch 

Thank you for embedding it Mitch!!

I never heard that one on the schoolyard.  Yes, that is a bad scenario for sure!!

paul 2 posted:

Mike I think your idea was great. I got all the windows covered and I still have plastic left over so if I get into more flats I'll have some to start with. With the money I saved from not buying the plastic I can buy more trains LOL....Paul

GREAT! I am so happy it worked out for you! Sometimes I don't want to say anything cause it might not turn out the way somebody wanted! I and very glad it worked for you! Now you can get a few TOF cars! LOL

Had a idea at work and had to wait to till I got into my shop. Wanted to add mile post markers even tho I have no where near the amount of track for it to be even close to scale. So as I was preparing the cleavers I’m making for heat treat was able to cut a couple of pieces. Sanded the tops once I started putting the edges on the cleavers. 6F994DED-CAD4-44A9-8C84-FC755D58C4B2

Attachments

Images (1)
  • 6F994DED-CAD4-44A9-8C84-FC755D58C4B2

Mike, the great thing about this hobby is the input of ideas plus if you are not happy with what you just did you tear it out and start over again. Trial and error. But I am quite happy with the windows and now I can buy more Weaver TOFC's LOL. Tonight I got the cardstock buildings I had cut out glued to the black foam. Won't get time towork on the layout tomorrow because having lunch with a bunch or retired TCA guys then Tuesday night it is the start of the Tuesday night group every Tuesday till spring York next year. Pics............Paul

DSCN2335DSCN2336DSCN2337

Attachments

Images (3)
  • DSCN2335
  • DSCN2336
  • DSCN2337
paul 2 posted:

Mike, the great thing about this hobby is the input of ideas plus if you are not happy with what you just did you tear it out and start over again. Trial and error. But I am quite happy with the windows and now I can buy more Weaver TOFC's LOL. Tonight I got the cardstock buildings I had cut out glued to the black foam. Won't get time towork on the layout tomorrow because having lunch with a bunch or retired TCA guys then Tuesday night it is the start of the Tuesday night group every Tuesday till spring York next year. Pics............Paul

Paul, the windows in the flats are good!!  Have a great time at the retiree TCA lunch!  The Tuesday night group is starting already.  It seems you just stopped meeting for the summer a couple weeks ago!  Have fun there too!!!

Paul, I am glad things worked out! The flat card stock buildings are going to be a nice addition to the layout!

Brian, Thank you for the nice Tribute! Never forget!

I haven't done much in the last few weeks do to lack of $$$, but I had to figure out how to get my track back u to the level I needed to get out the window to go out to the wife's garden area where she want a train to run around.20180911_15092320180911_16304820180911_16310420180911_16324120180911_164518

My bench work is 36" and the height is 42" so I added a scratch bridge to my other one that is a double track bridge. I set it at 1% and that will get me to the height I need. Here are a few pictures. Comments are always welcome.

Attachments

Images (5)
  • 20180911_150923
  • 20180911_163048
  • 20180911_163104
  • 20180911_164518
  • 20180911_163241

Comments are even more welcome when they are good!  

Mike, I know you have that bridge for the rise to the window just right!  You did a great job so far with the flip up bridges for the entry.  I can empathize with you about lack of funds.  The poorer of our daughters told me Lowes has a sale on until tomorrow.  I told her I didn't have any money, and she said they didn't either for the work they are in the middle of at their house.  We would all go to the poor farm, but they shut it down and built high end single level living senior homes there.  They start at double what our house is worth.  

Hi guys, looks like you've put on at least 10 pages since I last looked in. It's going to take me at least a week of dialysis to catch up with that. I've just been busy with the convention.

For those of you who haven't visited my topic recently, the convention was a huge bust from my perspective, with only 13 people over the four days of the convention. I'm analyzing the numbers, but I'm pretty sure I know what happened. It was a perfect storm.

We held our annual Wild hockey ticket draft party tonight. It was the first time I'd been downstairs since Saturday afternoon. I just ran the trains for a few of the guys. Last year they didn't bother to go downstairs, so it had been two years since they had seen it. They were quite amazed with the progress, and thought the security cameras were really cool.

I'm feeling a bit burnt out, but I'll get back in the groove pretty soon.

paul 2 posted:

 Tonight I got the cardstock buildings I had cut out glued to the black foam. Won't get time towork on the layout tomorrow because having lunch with a bunch or retired TCA guys then Tuesday night it is the start of the Tuesday night group every Tuesday till spring York next year. Pics............Paul


Paul, 

Its really coming together I see, so much so are you even going to let anyone upstairs to see the attic layout when you host at the end of the month.  lol

btw:  this Tuesday night group is starting to get expensive because once again whenever I am on the fence about buying something and then I see how great it looks in person at one of our members layouts I usually pull the trigger.  So of course this morning I pulled the trigger and ordered the mth c&o yellowbelly that Charlie had on his layout last night.  I think the compression is only about 2 inches but since MTH doesn't look like they will make a premier version of it I said just pull the trigger.....kind of like how I have you to blame for me switching over to the Lionel Auto Carriers because I saw them on your layout.  

Last edited by Bryan in Ohio
Mark Boyce posted:

Bryan,

Woah!!  Yes that Tuesday night group can be expensive, for sure! Maybe it is a good thing I live 2 hours away from you gents and don’t get sucked into the vortex!!  LOL

Congratulations on the C&O locomotive!!

No kidding Mark and in a few weeks we are being hosted by this one gentleman who has over 100 premier steam engines.  He double heads the mth premier triplex, which I have the railking version, but have always wanted to upgrade that engine.  Might need Paul to keep blocking my vision so I don't see that.

Last edited by Bryan in Ohio
Bryan in Ohio posted:
Mark Boyce posted:

Bryan,

Woah!!  Yes that Tuesday night group can be expensive, for sure! Maybe it is a good thing I live 2 hours away from you gents and don’t get sucked into the vortex!!  LOL

Congratulations on the C&O locomotive!!

No kidding Mark and in a few weeks we are being hosted by this one gentleman who has over 100 premier steam engines.  He double heads the mth premier triplex, which I have the railking version, but have always wanted to upgrade that engine.  Might need Paul to keep blocking my vision so I don't see that.

LOL, Yes it sounds like that fellow had an impressive collection to run!  Maybe Paul can get his SWAT team to run interference!

Bryan, LOL, as you grow older you will learn self control. Right now as our shirts say " I GOTTA HAVE IT " is you LOL. Good choice to get the railking version. As to the attic layout I am going to make up slips of paper with attic and basement on them. As the guys come in on my Tuesday night I will have them reach into the hat and whatever they pick that is where they will go. You however will pick from a separate hat which will just have neither layout on the slips of paper. So you might as well just sit in your car and listen to the radio .LOL .......Paul

Moonson posted:

BAR GP7#63, That whole scene is fabulous. You must be every satisfied with your accomplishment. I admire your artistic control and consistency.

FRankM

FrankM: Thank you very much. I am quite happy, but always can do it better and better. Right now we build four scratch build bridges, still need a lot some 3D print parts. After that Port of Shark Bay area looking little better.

Johan

nate the tank posted:

Had a idea at work and had to wait to till I got into my shop. Wanted to add mile post markers even tho I have no where near the amount of track for it to be even close to scale. So as I was preparing the cleavers I’m making for heat treat was able to cut a couple of pieces. Sanded the tops once I started putting the edges on the cleavers. 6F994DED-CAD4-44A9-8C84-FC755D58C4B2

Nice work Nate, they look just like this one.

Rusty729.0 Wood MP Marker 01729.0 Wood MP Marker 02

Attachments

Images (2)
  • 729.0 Wood MP Marker 01
  • 729.0 Wood MP Marker 02

Today I published a YouTube video. I have been working on this project for several weeks. In this video I will show you how to set up and use Z-Stuff for Trains, Crossing Gates & Block Signal Detectors (DZ-1010 Set).  These signals will look great on any layout. Available in G / S / O / HO & N Scales.  This is a complete tutorial.

https://www.youtube.com/watch?v=M4zHzmnurP4

I would recommend these Crossing Gates by Z-Stuff. Links to check out:

Z-Stuff for Trains • http://www.z-stuff.net/  • Dennis: Owner

Ross Custom Switches • http://rossswitches.com/ • Sells Z-Stuff for Trains • Steve: Owner

Gary

A while back I mentioned an old chopped up layout in the trash and wondered about the owner. Today at a garage sale I found out it was "the kids layout" and it had some O, HO, and N scale ....I had guessed S or ho. Anyhow, walking "Puppi" I asked about there being any model train stuff, and the ladies said there was a small box of "junk" which I bought; then listened to some stories and learned there was some O gauge to be looked at another day too, and we discussed one postwar engine she was interested in having checked out before she buys a new transformer; I offered my track and she will be by before the holidays. I grabbed my bag witbout really looking and left as I had other plans. ... and I'll need to post this and try again in a bit; no attachment tool is showing.
Adriatic posted:
A while back I mentioned an old chopped up layout in the trash and wondered about the owner. Today at a garage sale I found out it was "the kids layout" and it had some O, HO, and N scale ....I had guessed S or ho. Anyhow, walking "Puppi" I asked about there being any model train stuff, and the ladies said there was a small box of "junk" which I bought; then listened to some stories and learned there was some O gauge to be looked at another day too, and we discussed one postwar engine she was interested in having checked out before she buys a new transformer; I offered my track and she will be by before the holidays. I grabbed my bag witbout really looking and left as I had other plans. ... and I'll need to post this and try again in a bit; no attachment tool is showing.

That's nice you are able to help the lady with the postwar engine.  It will be interesting to see what "junk" is in that bag!!

I'm glad this has your attention Mark, I have an HO mystery you may be able to solve.IMG_20180912_213341

IMG_20180912_213412

But starting big, this O sized figure was on a table and though "expensive" I picked it up too.  Maybe I'll place them in "Swan Park" looking up at the water tower or El. IMG_20180912_231446

This is the HO piece in question. I have an identical flat(behind it), except the load jig differs. What was the load for this?IMG_20180913_020411~2There are a few repaints. Quality isn't great, but ok for the price...

IMG_20180913_020140

and this looked horse car is nice, but was missing its brake wheel...

IMG_20180913_020317~2

..or so I thought. It's never been run and the brake wheel is attached eleswhere

IMG_20180913_020330~3

It looks like the point to point HO will have some electrical work done soon too.

IMG_20180912_223240

And now for N scale, of which I only had and Alaskan F for display..

IMG_20180912_230254~2

there is about two ft. of track and a bumper.IMG_20180912_230329~2

This base has a similar square boss to the bumper, but I'm lost as to what it is as well. IMG_20180912_230315~2

The Atlas switcher. no telling if she runs. That will be project #1.IMG_20180912_230019~2IMG_20180912_230155~3IMG_20180912_230202~3

The trucks, plus about a dozen extra are hiding in the bottom of the boxIMG_20180912_231033~2

another repaintIMG_20180912_231038~2IMG_20180912_230144~3

More comming....

Attachments

Images (17)
  • IMG_20180912_213341
  • IMG_20180912_231446
  • IMG_20180912_213412
  • IMG_20180912_223240
  • IMG_20180913_020411~2
  • IMG_20180913_020140
  • IMG_20180913_020317~2
  • IMG_20180913_020330~3
  • IMG_20180912_230254~2
  • IMG_20180912_230329~2
  • IMG_20180912_230315~2
  • IMG_20180912_230019~2
  • IMG_20180912_231033~2
  • IMG_20180912_231038~2
  • IMG_20180912_230144~3
  • IMG_20180912_230155~3
  • IMG_20180912_230202~3
Last edited by Adriatic

IMG_20180912_231219~2IMG_20180912_231129~2IMG_20180912_230951~2IMG_20180912_230823~3IMG_20180912_230839~2IMG_20180912_231006~2IMG_20180912_231013~2IMG_20180912_230235~2IMG_20180912_230218~2IMG_20180912_230230~2

This is a nice heavy car with a  metal frame.IMG_20180912_230130~2

My "overnight N layout so far. I'll likely do a forced perspective point to point behind the Ho. But this works for now.IMG_20180912_225915~3

Now back to the box. I saw a few boxes of knick knack items and things were grouped by price on tables; my "expensive" O scale monk on the quarter table. The trains were on the dollar table.  ....or so I thought.

IMG_20180912_213412

The whole box cost me $1.32. All the change I had...$1.25 + 7 cents "tax" just because I wanted to close the deal with a pointed brow and gruffly saying: "Ok, fine...take ALL my money"!

So about a nickle each and a free engine and station; I can't complain

Today I'm stopping there again, just incase

Attachments

Images (13)
  • IMG_20180912_231219~2
  • IMG_20180912_231129~2
  • IMG_20180912_230951~2
  • IMG_20180912_230823~3
  • IMG_20180912_230839~2
  • IMG_20180912_231006~2
  • IMG_20180912_231013~2
  • IMG_20180912_230235~2
  • IMG_20180912_230218~2
  • IMG_20180912_230230~2
  • IMG_20180912_230130~2
  • IMG_20180912_225915~3
  • IMG_20180912_213412

Working on concrete roadway on the lower level,  figured I would shoot some "in progress" photos.   Somehow I ended up making the road in a "different way" again....    Hard to see the weathering in the photos, but I am pretty happy with the end result.... 

Primed the 1/8 inch  masonite light gray, sanded,  then shot it with the cheap flat spray paint from walmart,  then I sealed it with Rust O leum Matte Finish to seal it, just a safety precaution so that I wouldn't pull up the white with the masking.   Then used automotive pin striping (1/8") as the masking for the center and side lines, then weathered the lanes with a "concrete" color, and then finally a second light weatering coat in the lane centers with the same paint color I am weathering the track, ties and ballast....   The pin striping tape did make good "masking"

BAR GP7#63,  as many others have noted, that waterfront scene and the scratchbuilt crane are outstanding....  Very Inspiring !


DSC03023DSC03024 [2)DSC03026 [2)DSC03027 [2)DSC03029 [2)DSC03025 [2)

Attachments

Images (6)
  • DSC03023
  • DSC03024 (2)
  • DSC03026 (2)
  • DSC03027 (2)
  • DSC03029 (2): Pulling the masking to reveal the road markings
  • DSC03025 (2): Primed, sprayed white and sealed
Last edited by chris a

I was all set to go down and work on my control panel when the wife yelled up the stairs she got the mail and there was a package there for me. That had to take priority. I have a hard to find needle in the haystack bucket list and I can now cross this item off. A Weaver NYC TOFC done in silver. It was one of 23 made for the Metca Division of the TCA. Gosh I hope that is it for today on the packages I have to get some layout work done LOL. Pic.........Paul

DSCN2339

Attachments

Images (1)
  • DSCN2339

Just as I was going to try to go do something I found another package on the step. My wire and terminal jumpers came from WayTek. I did get down to the layout but I was suppose to work on the control panel but instead I glued a couple of buildings to the wall so I can start the walls of the Brewery. Came to a standstill ....couldn't find my roll of double faced tape to tape the flats to the Masonite. Guess I am being told to work on the control panel after dinner. Pics..............Paul

DSCN2340DSCN2341

Attachments

Images (2)
  • DSCN2340
  • DSCN2341
chris a posted:

Working on concrete roadway on the lower level,  figured I would shoot some "in progress" photos.   Somehow I ended up making the road in a "different way" again....    Hard to see the weathering in the photos, but I am pretty happy with the end result.... 

Primed the 1/8 inch  masonite light gray, sanded,  then shot it with the cheap flat spray paint from walmart,  then I sealed it with Rust O leum Matte Finish to seal it, just a safety precaution so that I wouldn't pull up the white with the masking.   Then used automotive pin striping (1/8") as the masking for the center and side lines, then weathered the lanes with a "concrete" color, and then finally a second light weatering coat in the lane centers with the same paint color I am weathering the track, ties and ballast....   The pin striping tape did make good "masking"

BAR GP7#63,  as many others have noted, that waterfront scene and the scratchbuilt crane are outstanding....  Very Inspiring !


DSC03023DSC03024 [2)DSC03026 [2)DSC03027 [2)DSC03029 [2)DSC03025 [2)

Chris A: Thank you, i like also your scenery work, very nice looking layout.

Johan

paul 2 posted:

I was all set to go down and work on my control panel when the wife yelled up the stairs she got the mail and there was a package there for me. That had to take priority. I have a hard to find needle in the haystack bucket list and I can now cross this item off. A Weaver NYC TOFC done in silver. It was one of 23 made for the Metca Division of the TCA. Gosh I hope that is it for today on the packages I have to get some layout work done LOL. Pic.........Paul

DSCN2339

Paul it looks like you have as many of these Trailer On Flat Cars as Brian has engines.  Very nice.  They must make quite a consist.

Adriatic, I have no idea what kind of load went on that flat car.  It looks like something snappend into place the way those prongs are made.  I would say you got your money's worth.  And then some for sure!!  

Chris, The concrete road looks great!  It looks like it was just poured a few months ago, got a bit of weathering on it, but hasn't seen a Pennsylvania winter and the overload of salt yet!  Excellent job!!

Paul, Are you going for the complete collection, one of each of the Weaver Trailer on flat cars that were ever made!  Good job!

Chris, excellant work on the road. When your done with it and the scenery it is going to make for one heck of a nice picture.

Mark, I don't know if I am on a quest for them all. They seem to pop up every so often. I managed to get 7 unpainted trailers that I would like to do in different Logos. Plus if I could find the parts I have numerous flat cars I could convert into TOFC's. I do have one more flat coming sometime next week. One word to describe "OBSSESION" LOL ....Paul

Adriatic, What a great find for the money well spent! I was looking at the flat car and to me it looks like it should hold 3 cars on it, as it looks to have molded in wheel chalks! I cant wait to see what you get from there next!

Paul, Look at you, you got some more Menards stuff with your new washer! LOL Great looking TOFC! You should let us know what your looking for so we can keep our eyes open for you! I am guessing that with all that wire you can now start on the control panel!

Chris, just like everything else you do the roadway looks great! I really like the weathering and the aged look! One thing though, I sure hope the timber holding up your wall is going to be relocated! LOL

Add Reply

Post

OGR Publishing, Inc., 1310 Eastside Centre Ct, Suite 6, Mountain Home, AR 72653
800-980-OGRR (6477)
www.ogaugerr.com

×
×
×
×
Link copied to your clipboard.
×
×