


Ive found the glow in the dark paints to be kinda weak. Using a white bottom coat helps. Plus there's there isn't much "white" out there, just yellow red green blue. (I had about 150 glow in the dark items at one time. As an printer artist I never found an ink supplier that carried it, just weak paints. (lower pigment count than paste ink which is super high pigment count)
*white wouldn't be bottom coat if it's on the backside of clear plastic. It would be top coat.
I don't think the light would absorb well for "recharge" behind a white foreground in an attempt to whiten it.
Id go with white and or cream, no glow, maybe half a drop of light blue or yellow in a jigger of white, doing rooms and or households/buildings in slightly different tones. Some folks like 60w, some folk 100w, others use florescent...etc
Grey to black/drk blue tints on a few unless everyone in town has the lights on.
Where the green might work out is industry. Id try "stoplight"or"clear green" to loose a bit more of the alien glow. But which color light recarges? Green is gonna filter the light some so..??
.Miller Engineering might have electrically illuminated sheets you can use...?
Butch, I should know you know all the ins and outs!
Johan, I agree with Matt on the realistic man. He fits well with the whole realistic scene.
Bruce that is a great looking yellow belly you are upgrading!
Carl, I like the bridge decorations by the MOW crew.
Mike, Don’t work too hard. You wouldn’t want to get hurt and not even have fun doing it! LOL
Mike,
The only difficulty I found was getting past the preconceived notion that the adaptation would be difficult and would require machining to accomplish.
The only undesirable trait so far is a slight hesitation on the first 2 speed steps. I'm hoping as the engine gets a few hours on it that it might smooth out. I bought the engine still sealed a couple of years ago and probably only put 3-4 hours on it due to its awful performance. I had already replaced its original TMCC guts ( I fried them trying to improve things ) with a new ERR A.C. Commander that did little to improve running.
These Faulhaber motors are super smooth. You feel no " cogging " if spun by hand and give the indication that a huge amount of torque is present even at low speed. Getting past the initial few ERR cruise commander speed steps the engine totally smooths out and is as whisper quiet as anything offered these days. The existing gearbox is sufficient as is, allowing the engine to roll by hand, so I didn't mess with it. The low top end is probably around a scale 60 mph which suits me just fine. Most importantly to me is the modification turns a sad shelf dweller into something worth running. Next, I plan on playing with the engine's weight balance to improve traction. I also have a Lionel Commodore Vanderbilt that needs the same treatment.
Bruce
Thanks Mark,
As noted above I got it NIB a couple of years ago. I recall it gave me trouble straight out of the box...A pinch antenna wire prevented it from working under CC. Other issues kept it constantly on the shelf too. I think I may have it cured for good!
Bruce


Bruce, the Faulhaber motor is new to me, but sounds like a winner!
Utowntech, Looks great! What turntable are you using?
Mark Boyce posted:Bruce, the Faulhaber motor is new to me, but sounds like a winner!
Utowntech, Looks great! What turntable are you using?
Mark.. I am using the Millhouse River Studio 34” turntable
Utowntech posted:Mark Boyce posted:Bruce, the Faulhaber motor is new to me, but sounds like a winner!
Utowntech, Looks great! What turntable are you using?
Mark.. I am using the Millhouse River Studio 34” turntable
That’s great! You will have smooth running service!
Mark Boyce posted:Utowntech posted:Mark Boyce posted:Bruce, the Faulhaber motor is new to me, but sounds like a winner!
Utowntech, Looks great! What turntable are you using?
Mark.. I am using the Millhouse River Studio 34” turntable
That’s great! You will have smooth running service!
Thanks Mark!
I applied conspicuity tape to an auto carrier and two wood chip gondolas which were all MTH cars. I cut notches in the “loads” in the wood chip gondolas to make the sit lower with the intention of eventually glueing real wood sawdust on the plastic loads.
Larry
Seated Figures
Today I started working on seated figures for a set of RailKing passenger cars. Here is my story. The day started out with a light snow just outside the train room. As the day turned to nightfall. Progress was being made in the warmth of the train room as I toiled at the workbench. The potbelly stove just like the ones in old cabooses kept the room extremely warm.

Photo 1: All the figures are seated in this sleepers coach. In the daylight seating arrangement. The train’s porter will be in later to set up the beds. The porters have all the luggage in the appropriate rooms. They are all held down with a secret glue to be named later.

Photo 2: On this coach we have several figures waiting by the exits.

Photo 3: Everyone has found their seats and the roof is going to be added with an overhead crane.

Photo 4: All aboard for the Chesapeake & Ohio to Chicago.

Photo 5: Now we will start work on the next car. C&O coach.

Photo 6: Check out the standing figures in this pullman coach.

Photo 7: The Redeye, Detroit to Chicago back in 1951. Leaves Detroit with a car full of plastic figures.
All the photos shot with a Canon DSLR, T6i with a18mm to 55mm lens at 35mm. The camera was set to shutter priority at 1/125 of a second. The lighting is from two color corrected lights. The images were processed and enhance using Adobe Photoshop.
Gary
Attachments
Images (7)


Apples55 posted:Those turned out quite nicely, Mitch. Instead of adding pantographs to everything, maybe you should consider designing a cat-catcher for the front,of the lead unit!!!
That would be a matter of 'catch as cat can', I think. ![]()
Moonson posted:Mitch, I really like that kitty ("Miss Kittah" ?) She has a wise look on her face, the kind that can say, when desired, "You don't like it? Sue me."
Wonderful personality.

Yeah, she's a sweetie. A) she likes trains, and B) she knows Daddy is good for some scritchies when she shows up during an operating session... ;-)
Mitch
Gary, Real nice job on the passenger car!!
Today was the annual Children's Christmas Train on the A&M. As usual, a bumper crop of adorable moppets was on hand, and, as usual, I was too busy to take many happy snaps, but here are a few... ![]()


Mitch
Attachments
Images (10)
Well, train and layout work had to be suspended for the past couple of weeks. There's been an unbelievable number of posts and great photos, way too many to start commenting on before turning in tonight.
Finally got my "budget" kit-bash gantry crane completed. Got pretty creative with some HO parts, the cross beam is an HO deck girder bridge, the crane dolly is the frame of an HO caboose, the supports are left over Plasticville signal bridge piers, and the winch is the most expensive item $6.00 Crow River white metal casting kit.
Went to the first train show I have been to in many months, and found a pair of Weaver B&O Wagontop boxcars that I have been wanting for a decade... Total irony, I found them on the last table in the last aisle, in the far back corner of the show... I had just about decided it wasnt' worth the 60 mile drive.


")
")
Attachments
Images (10)


")
")
")
Mitch, It’s great to see the fun you bring to the kids!
Chris, That crane looks great!! So do the wagon tops!
Mark Boyce posted:Butch, I should know you know all the ins and outs!
Johan, I agree with Matt on the realistic man. He fits well with the whole realistic scene.
Bruce that is a great looking yellow belly you are upgrading!
Carl, I like the bridge decorations by the MOW crew.
Mike, Don’t work too hard. You wouldn’t want to get hurt and not even have fun doing it! LOL
Mark: Thank you.
Johan
chris a posted:Well, train and layout work had to be suspended for the past couple of weeks. There's been an unbelievable number of posts and great photos, way too many to start commenting on before turning in tonight.
Finally got my "budget" kit-bash gantry crane completed. Got pretty creative with some HO parts, the cross beam is an HO deck girder bridge, the crane dolly is the frame of an HO caboose, the supports are left over Plasticville signal bridge piers, and the winch is the most expensive item $6.00 Crow River white metal casting kit.
Went to the first train show I have been to in many months, and found a pair of Weaver B&O Wagontop boxcars that I have been wanting for a decade... Total irony, I found them on the last table in the last aisle, in the far back corner of the show... I had just about decided it wasnt' worth the 60 mile drive.
Glad that Marlboro worked for you. I’ve been there before and got a few good buys, but last year it was 90% non O scale. Chose not to make the 1 hour drive from SNH.
Gary, nice job! Looks like the passengers are nice and comfy for there ride down the rails!![]()
Mitch, way to go! Looks like fun was had by all! Way to make some kids smile Big & Small!![]()
Chris a. wonderful kit bash! Way to think out of the box! I am also happy you were able to find your B&O cars!![]()
I will be sending time in the train room today and will post pictures if I get anything done! LOL![]()
M. Mitchell Marmel posted:Apples55 posted:Those turned out quite nicely, Mitch. Instead of adding pantographs to everything, maybe you should consider designing a cat-catcher for the front,of the lead unit!!!
That would be a matter of 'catch as cat can', I think.
 Moonson posted:
Mitch, I really like that kitty ("Miss Kittah" ?) She has a wise look on her face, the kind that can say, when desired, "You don't like it? Sue me."
Yeah, she's a sweetie. A) she likes trains, and B) she knows Daddy is good for some scritchies when she shows up during an operating session... ;-)
Mitch
Here you go Mitch. You could put this on the front of your trains. ![]()

Chris, great job on the gantry crane. Very creative use of easy to find parts. I've been wanting to put one at my team track for some time now. Scratch building was pretty much the only way to do it to fit a specific space. I'll be filing this info. away as there's some great ideas now on how to get started.
Dave_C posted:Chris, great job on the gantry crane.
I need new glasses. I read that as "gravy crane". ![]()
Which, in turn, reminded me of this Joe Doakes classic:
Mitch

sunny and 50's, need to rake leaves after work today... ![]()
![]()
well, maybe not this nice out...
but I know IZZY will have fun with playing in the leaves... ![]()
here was IZZY's thoughts this morning... ![]()

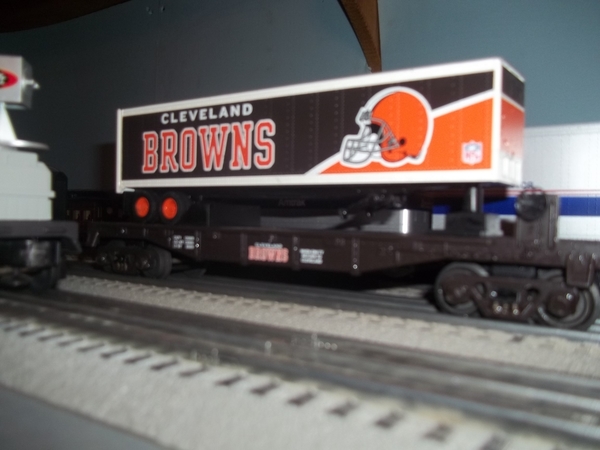
GO BROWNS ![]()

have a GREAT day everyone !!
SANTA, can you bring spring time soon !!!
Attachments
Images (7)


Attachments
Images (4)


briansilvermustang posted:
sunny and 50's, need to rake leaves after work today...
well, maybe not this nice out...
but I know IZZY will have fun with playing in the leaves...
here was IZZY's thoughts this morning...
GO BROWNS
have a GREAT day everyone !!
SANTA, can you bring spring time soon !!!
Nice shots Brian.
thanks Matt ! wish it was spring time... ![]()
LOL Brian, how did I know you would come up with the real thing!![]()
Well I am off to the train room, I hope to have pictures to post later today!![]()
have a great time in the train room today Mike !!
chris a posted:..........Finally got my "budget" kit-bash gantry crane completed. Got pretty creative with some HO parts, the cross beam is an HO deck girder bridge, the crane dolly is the frame of an HO caboose, the supports are left over Plasticville signal bridge piers, and the winch is the most expensive item $6.00 Crow River white metal casting kit. ....
This crane is awesome. I just wish you had done a step by step.
And why didn't you do this a few years ago so I could copy it? ![]()
I looked for ANY shots of something similar for an A frame & beam trolley but struck out.
Did you modelmodel some or use imagination?
![]()
What did I do today?
Installed an Azatrax MRD-1 unsuccessfully. Need to get with the folks at Azatrax to trouble-shoot.
And, I ran 4141 in honor of Geo Bush.
Thanks for all the positive feedback on the Gantry Crane. Adriatic: I hear you ! A few quick answers to your inquiries. I did some Google image searching, didn't come up with anything that's exactly like this. There are some "wood Gantry Cranes" out there, but I really did not want wood beam frames. This is going next to the roundhouse on some outside storage tracks.
Decided early in the project that I wanted to use the left over supports from the Plasticville signal bridge, I kitbashed 2 kits together to span 3 to 4 tracks, so I had the uprights leftover. I found a really common HO deck bridge - I see them all the time at local shows... The deck girders are 1 inch tall (4 scale feet).... I am pretty sure this one was a "complete" bridge, with square ends, and the track molded into the web between the deckgirders. So I cut off the deck girders leaving a 3/8" wide flange on the bottom to mount my wood supports for the rails. The overall length of the bridge (deck girders is 9 inches end to end (36 scale feet). Proportionally, it looks about right to me that is the depth to length ratio of girder
I installed HO track that I cut on the table saw into two single rail sections..... The distance between the Deck Beams inside to inside is 1 - 9/32", This dimension was mostly determined by the width of the HO Bobber Caboose frame that I wanted to use for the Gantry carriage. The Bobber Caboose frame is 3 inches long, and just under 1.25 inches wide. This worked out great as it only had 4 wheels total, once I broke off the body from the top... I did have to remove a plate from the bottom that was holding the axles in place so I could drill a large clearance hole for the cable, a few small strips of brass adhered with CA anchored the axles and freed up the middle of the carriage for drilling.
This all worked out really well with the top of the Plasticville support frames as they are about 1 3/16 inches wide... just have to file off the "steps" molded into the uprights at the top, a few plastice styrene or wood shims glued in makes the ends fit well and line up.
The overall outside to outside width of the spanning deck beams is 1 - 5/8 ".... I cut some pine parts (5/8" deep x 5/16" wide by 7 inches long) and epoxied them to the inside of the beams to support the rails. Make the 5/8 x 5/16 longer as they are also used on both ends to attach the two deck girders together....
To deal with the inside webs on the beams, I can't remember whether I shaved off the vertical webs, or took a hack saw and relieved the wood supports to go around the webs, or I did a combination of the two to get the wood support flat on the deck girder inside surface.
The Crow River Products 0-44 O Scale Winch Set with Spoked Gears is what I installed here
Anyway sorry for the long drawn out description. Here are a few more photos.... It really wasn't a tough project, and I don't think I spent more than about $15.00 in parts


Attachments
Images (3)
Inspired by Chris' work, I have fabricated a gantry crane from Popsicle sticks and wood glue:

This is, of course, an Elmer's Gantry crane.

I'll just shut up now. ;^.^
Mitch
Attachments
Images (2)
chris a posted:Well, train and layout work had to be suspended for the past couple of weeks. There's been an unbelievable number of posts and great photos, way too many to start commenting on before turning in tonight.
Finally got my "budget" kit-bash gantry crane completed. Got pretty creative with some HO parts, the cross beam is an HO deck girder bridge, the crane dolly is the frame of an HO caboose, the supports are left over Plasticville signal bridge piers, and the winch is the most expensive item $6.00 Crow River white metal casting kit.
Went to the first train show I have been to in many months, and found a pair of Weaver B&O Wagontop boxcars that I have been wanting for a decade... Total irony, I found them on the last table in the last aisle, in the far back corner of the show... I had just about decided it wasnt' worth the 60 mile drive.
Chris A: The gantry crane looking really good. Fabulous work. ![]() The wagontop box cars are also my needed list.
The wagontop box cars are also my needed list.
Johan
Chris, that's one nice score on those wagon tops. I always wanted them. Ended up with one at a good price but like you I have been waiting for a more reasonable prices. Great job on that kit bash. Going to look good on the layout.
Today I headed out early to the Medina train show. It's one of those shows that are hit and miss. Wel this time I manage to get a few die cast vehicles in my time period for 3 dollars apiece. And to top it off this afternoon my K Line reefer came from E***. Wasn't expecting it til Monday or so. But I finally got all the leaves to the street today so I can focus on putting a new rubber on the wheel. I need to cut some thin wood to finish the brewery area. So today there was no actually layout work done. Pics...............Paul


Attachments
Images (3)
I have been working to transform an orange "Baby Ruth" boxcar into a "Baby's First Christmas" car for my grandson. Water-slide decals with his photo in an elf outfit will adorn. When he is a tad older I'll make him a full train set. Photos will follow when the decals are set.
Today went to Paterson, NJ to the NJ High Railers Train Show. - first time there. I was blown away! Their "layout" is enormous. with coal ports, fuel refineries, trucking railheads, and subway systems to name a few. It looked like it took up at least a quarter of a football field.with over 300 switches. Rather than intimidate with its size, it is a great encouragement to strive. The Club's space also boasts a gorgeous theater organ, which played patriotic airs while I was there.
Some train nerds pray that when they die, they go to Paterson, NJ.
Made a leaf rake out of 3/4" and 1" plastic pipe to rake the pine needles and leaves off of the metal roof of my train building.
The home made leaf rake handle is three 10 foot sticks of 1" plastic pipewith threads on each end, so the rake handle can be 10 to 30 feet long. This way I did not have to get on the roof of the train building (wife said I did not need to climb on any roofs any more) to rake off the leaves.
Keith, I don’t see the photograph, but great idea! I’m not going up on the roof to put up Christmas lights this year. It has gotten harder in recent years. I do it for my wife, but with a bad knee and pinched sciatic nerve, she said no! Yay!!
CBS072 posted:Made a leaf rake out of 3/4" and 1" plastic pipe to rake the pine needles and leaves off of the metal roof of my train building.
The home made leaf rake handle is three 10 foot sticks of 1" plastic pipewith threads on each end, so the rake handle can be 10 to 30 feet long. This way I did not have to get on the roof of the train building (wife said I did not need to climb on any roofs any more) to rake off the leaves.
Well scrounged, and good work playing it safe! ![]()
Mitch
Mark Boyce posted:Keith, I don’t see the photograph, but great idea! I’m not going up on the roof to put up Christmas lights this year. It has gotten harder in recent years. I do it for my wife, but with a bad knee and pinched sciatic nerve, she said no! Yay!!
Mark, I goodness the wife wanted plastic siding put on the house this year. SO I could not drive nails into the bottom of the house like in the past to hang the Christmas lights. Stopped years ago putting the lights on the edge of the roof. So I laid them on the deck railing and plugged them in.
The plan for next year is to purchase new Christmas lights and just open the box and not remove them from the box and plug them in and put them in the front yard.

Attachments
Images (1)
Dr. Joe, don't worry John will take care of you just like he did me! He is understanding and willing to help The best he can!![]()
Chris, again Such very nice work, I am just wondering if your going to add a motor to it to run the hook up and down?![]()
Paul, you sure cant beat the price of $3 bucks each! Plus you scored a nice looking Kline reefer! Sure sounds like a good day to me!![]()
Pete, that sure sounds like a cool idea! What a great grandpa!![]() You sure are setting the line high for some of the rest of us! LOL
You sure are setting the line high for some of the rest of us! LOL![]()
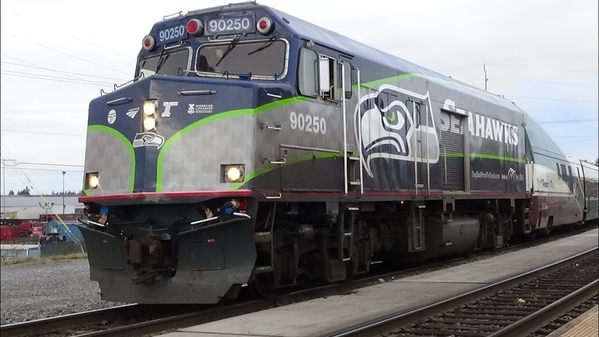
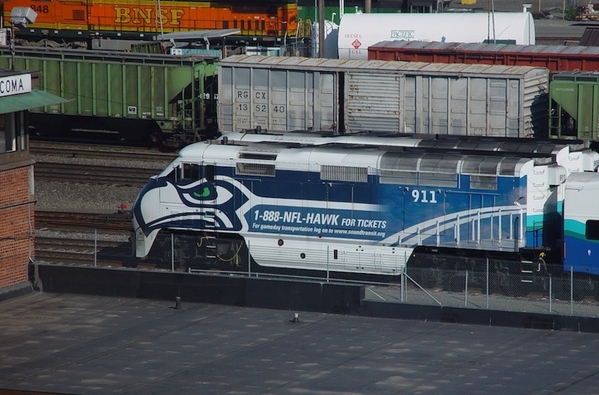
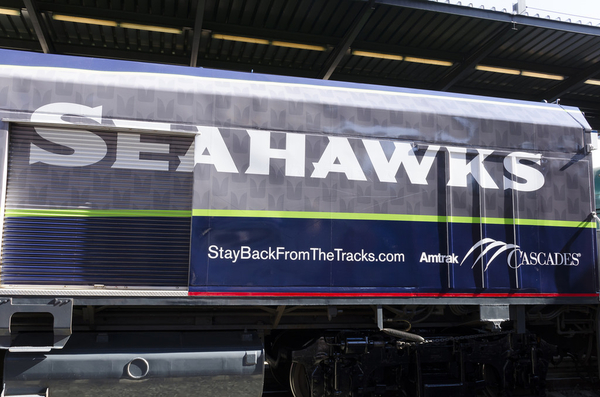
Brian, I had a wonderful day, it even got better with the Seahawks win! Look out Elliot! LOL![]()
So this morning I said I was going to the train room to work and would post picture if I got anything done.
Well here are the pictures. First off I wanted to add some extra support to the upper loop without having to add legs. I hope you all don't mind that I mixed Steel with wood, but it sure makes for a strong loop!
When I was done with that I had time to play a little with some 4" foam a friend gave me and this is what I came up with sofar! I am going to make it flat on top so I can still use my airfield that Mo and Larry Sr. helped me figure out! So sit back and enjoy the picture show! Please leave comments of what you think, either way!


Attachments
Images (5)

mike g. posted:So this morning I said I was going to the train room to work and would post picture if I got anything done.
Well here are the pictures. First off I wanted to add some extra support to the upper loop without having to add legs. I hope you all don't mind that I mixed Steel with wood, but it sure makes for a strong loop!
When I was done with that I had time to play a little with some 4" foam a friend gave me and this is what I came up with sofar! I am going to make it flat on top so I can still use my airfield that Mo and Larry Sr. helped me figure out! So sit back and enjoy the picture show! Please leave comments of what you think, either way!
Looking good Mike!! you'll have some track down and be running trains in no time!!
Mike G: Very impressive with the angle iron supports, I agree, legs just get in the way. I thought about a really small motor for the crane, but honestly I'd have to redo the gears, they are rough white metal castings. As it was I had to use jeweler's files to remove the casting flashing .... Not really dependable gear mesh.. but that's ok.
Many thanks for Mark, Mike, John, Johan, Matt, Dave C, Paul for all the positive feedback on the crane project. Sorry if I overlooked anyone.
Mike, You will be able to run the heaviest o Gauge engines ever produced on that bridge!! That’s what I needed for my Christmas layout upper level! Looks great!!
Mike, vertical seams are very hard to hide in anything but retaining walls.
If you can make them diagnal "bent" or jagged, it will help them hide. be it rocks or terrain.
Straight and plumb lines are just too rare for it to look "natural"....
oh; plumb....thin water falls would fill in at least one seam naturally


Attachments
Images (7)


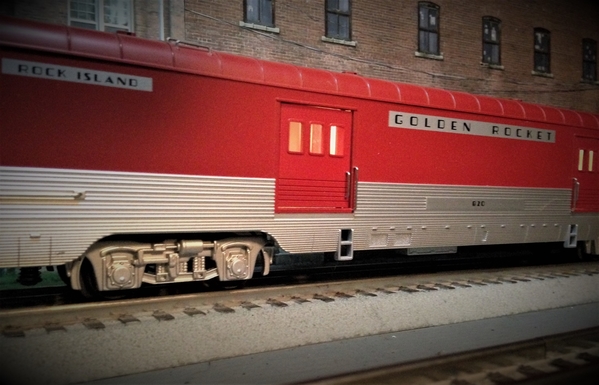
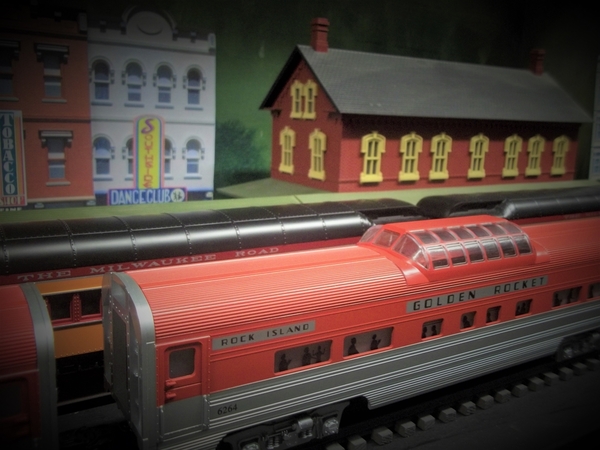
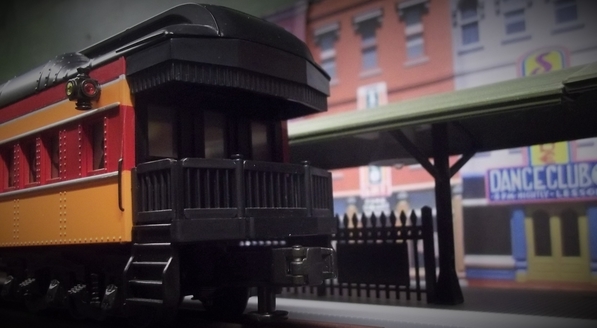
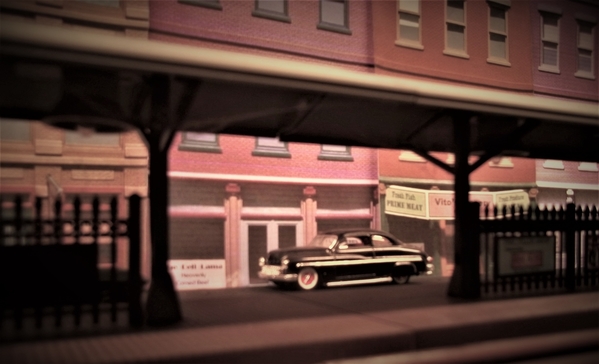
Like the Milwaukee RR cars. Is that an old Mercury in the background of the RR Station?
M. Mitchell Marmel posted:
OK- one of your better posts Mitch....I'm still laughing ![]()
![]()
![]()
An ode to the humble Popsicle stick ![]()
decoynh posted:Like the Milwaukee RR cars. Is that an old Mercury in the background of the RR Station?
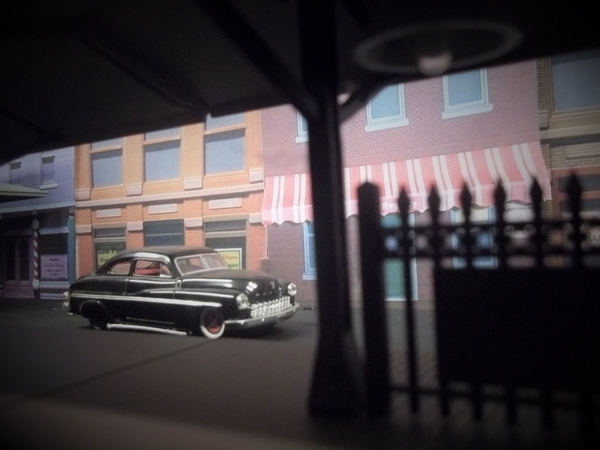
yes, close to the one I sold in 2005 when I ordered my Mustang...
a 1949 4 door, handles shaved, matte black, lowered the old way, heated front springs, lowering blocks in back, '48 Chevy headlight rings, painted black to look frenched in, flat head V-8, 3 speed on the column... dual exhaust, sounded good... really miss that car... a fun car to cruise in...


Attachments
Images (3)


Adriatic posted:Mike, vertical seams are very hard to hide in anything but retaining walls. If you can make them diagnal "bent" or jagged, it will help them hide. be it rocks or terrain. Straight and plumb lines are just too rare for it to look "natural".... oh; plumb....thin water falls would fill in at least one seam naturally
Stick an old sandwich there. The mold will soon cover the seams.![]()
briansilvermustang posted:decoynh posted:Like the Milwaukee RR cars. Is that an old Mercury in the background of the RR Station?
yes, close to the one I sold in 2005 when I ordered my Mustang...
a 1949 4 door, handles shaved, matte black, lowered the old way, heated front springs, lowering blocks in back, '48 Chevy headlight rings, painted black to look frenched in, flat head V-8, 3 speed on the column... dual exhaust, sounded good... really miss that car... a fun car to cruise in...
SWEET!
HCSader73 posted:Adriatic posted:Mike, vertical seams are very hard to hide in anything but retaining walls. If you can make them diagnal "bent" or jagged, it will help them hide. be it rocks or terrain. Straight and plumb lines are just too rare for it to look "natural".... oh; plumb....thin water falls would fill in at least one seam naturallyStick an old sandwich there. The mold will soon cover the seams.
LOL
Thanks everyone for the positive response! ![]()
Chris, either way its a cool looking crane and with it being a kit bash makes it even more impressive!![]()
Butch, thanks for the information on hiding joints!![]()
I hope to get my cork road bed this week sometime so I can start putting that down, then lay the track I have. Then it's going to be slow cause as you all know track is not cheap! and I have a lot of switches to get!![]()
But just like everything else there is always something I can do to keep things moving forward!![]()
What did I do? I finally started building the benchwork! ![]()

Attachments
Images (1)

gunrunnerjohn posted:What did I do? I finally started building the benchwork!
I've been wanting to follow a build using this benchwork. It looks like it should be fast work. Best of luck.
It's pretty fast, I only have less than three hours into it, the first was organizing stuff, once you get moving the technique gets "old-hat" and you can move right along. It seems very solid, and I've been told that the top adds a major amount of stability, so I expect this to be rock solid.
gunrunnerjohn posted:What did I do? I finally started building the benchwork!
Needs more popsicle sticks. ![]()

(Proving that popsicle sticks and gi-raffes go well together, here is Fortescue J. Gi-raffe getting ready to use his diving board into his private indoor pool!)
Mitch
Attachments
Images (1)
Hey...I resemble those remarks....the only thing I have against popsicle stick builds is they didn't have fudgesicle on the end ![]()
Think big Mitch

"I Fortescue will now dive three thousand thousandths landing on a block of cement...."On my head yet!"

Attachments
Images (2)
Adriatic posted:Hey...I resemble those remarks....the only thing I have against popsicle stick builds is they didn't have fudgesicle on the end
Think big Mitch
"I Fortescue will now dive three thousand thousandths landing on a block of cement...."On my head yet!"
![]()
![]()
![]()


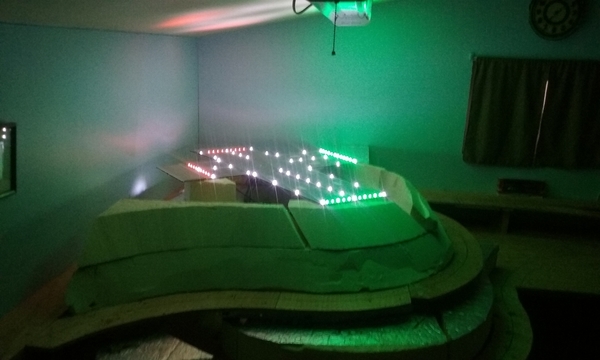
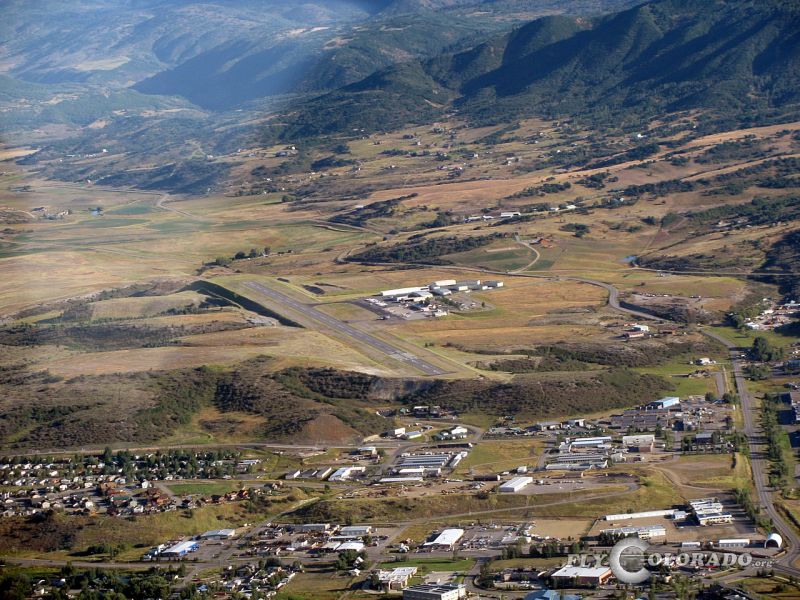
Mike - Excellent work today. In the words of late President Bush 41, “CAVU”, Ceiling And Visibility Unlimited. I’m about 7 hrs away at 450 knots.
Mike, great job on the mountain; the LEDs are terrific.
Lopping off the top of a mountain for an airport reminds me of the airport in Texarkana that I flew commercial in and out of many years ago--looked just like what you built. Every landing was on the front of the stripes and engine reverse was instant on touchdown; roll-out was on the stripes, too.
Painted an MPC era milk stand for the Christmas tree layout in Holiday colors--literally waiting for the silver paint to dry on the steps before reassembling the stand.
Have a few more items to paint in the same colors.
PS: When I saw the photo I thought I'd scratched the green platform, but it's just a reflection--whew!
Attachments
Images (1)

mike g. posted:Went out and played alittle in the train room today! Here are a few pictures of my day
Mike, that's a great Summit! Dave
Mike, what is that, a chopper field? ![]()
A for me, I ordered the last of the Woodland Scenics lighting plugs to get the last of my structures wired up. I love that they have dimmer switches on them, so when the two structures that need interiors are completed, I can crank up the lights to those.
Lee, Mike's airfield goes way on into the backdrop! ![]()
Hi Guys, I am glad you like the airfield! Lee don't worry there will be a chopper or 2 out there, maybe even more! Planes for sure!![]()
Matt, Carl, and Dave I too have flown into airstrips like this also! I am thinking about raising the back so it slops down towards the front to make it easier for people to see! Any thoughts?![]()
Mike, nice work so far. I think everything will tie in perfectly. The runway looks good lit up........Paul
Thanks Bro! I had to do some track rearranging to make room for this amazing train station I got from a wonderful guy!![]()
mike g. posted:Hi Guys, I am glad you like the airfield! Lee don't worry there will be a chopper or 2 out there, maybe even more! Planes for sure!
Matt, Carl, and Dave I too have flown into airstrips like this also! I am thinking about raising the back so it slops down towards the front to make it easier for people to see! Any thoughts?
Yes, slope the landing strip!
The air field is sharp Mike. I was wondering what that green glow in the western sky was coming from....
Very cool. I'd tilt it a little for better viewing.
Bob
mike g. posted:I am thinking about raising the back so it slops down towards the front to make it easier for people to see! Any thoughts?
Heck just do what these Germans did:
Adriatic posted:Hey...I resemble those remarks....the only thing I have against popsicle stick builds is they didn't have fudgesicle on the end
Think big Mitch
"I Fortescue will now dive three thousand thousandths landing on a block of cement...."On my head yet!"
Here you go Mitch- for your next project

I think it would hold a Big Boy and a Gi-raffe. I'll let the stick have the last word ![]()

Thanks Bob, I think it would be better for viewing also!![]()
I have seen that before Lee, But that is just to much for me! Plus I didn't see any trains in the video! LOL![]()
Yes, I think a tilt would be advantageous!
So Lee, now Mike would have to build another addition to house something like that German airport!
What did I do today on my layout?
Nothing, but I did finish reading all 629 pages of this thread! Especially impressed with the work of @Patrick H and @Larry Sr. over the past five years! Fantastic.
Whew!!
Whoops! My posting took it to 630 pages!
Joe, Patrick H’s layout was something to behold. I visited twice after he had pretty much finished it. He is a really nice guy too. His family business has kept him away from trains since his father passed.
Thanks Joe![]()
And like Mark said Patrick was as good a layout builder as you can get.
He was very helpful on providing me with information.
Both on the forum and by emails.
I keep waiting to see if he starts another build.![]()
Larry Sr.
Yes Larry, I would love to see Patrick build again!
A few months after I joined the Forum, Patrick held an open house at his home layout. I did not see the invitation here on the Forum. Patrick sent me an email, personally inviting me since I live a little over an hour away. Then local Forum members invited me to breakfast before going to Patrick’s. I just wanted to pass on how nice others were to me, fairly new at the time.
Those leds show up sooo bright on camera... ![]() ....
.... ![]() ......
......![]() .
.
Mikes last layout lacked something; he just wasn't sure what...
(also why he can't build inside anymore ![]() )
)


Mikes plateau, 48 hours from now ![]()
(viewed from the floor naturally ![]() ....I meant too ask how many beers it took to put you there for taking the brace shots
....I meant too ask how many beers it took to put you there for taking the brace shots ![]() )
)
Attachments
Images (2)
Adriatic posted:Those leds show up sooo bright on camera...
....
......
.
Mikes last layout lacked something; he just wasn't sure what...
(also why he can't build inside anymore
)
Mikes plateau, 48 hours from now
(viewed from the floor naturally
....I meant too ask how many beers it took to put you there for taking the brace shots
)
LOL
I ran my Crazy Eight Loco on the toy micro layout pulling the gondola of dice, operating lotto boxcar and Joker caboose while contemplating a shortened "go-fish-belly-flat" and Jenga load in a short bulkhead flat or as load cribbing under... say....a.. 🤔
...cribbage board load; girder style; 2 boards on edge...?
mike g. posted:Hi Guys, I am glad you like the airfield! Lee don't worry there will be a chopper or 2 out there, maybe even more! Planes for sure!
Matt, Carl, and Dave I too have flown into airstrips like this also! I am thinking about raising the back so it slops down towards the front to make it easier for people to see! Any thoughts?
Slope it a few degrees. I hate landing on a hill.
Mike - the air strip is a neat idea. You have been working behind the scenes. Lighting is very cool. Air strips on the edge of a cliff are ok on takeoff......
Oh yes Matt, a few degrees slope is all I was thinking. Of course if it is steeper that will help slow down Mikes planes if they are landing toward that two dimensional runway extension I mentioned last evening! LOL
Adriatic posted:Those leds show up sooo bright on camera...
Mikes last layout lacked something; he just wasn't sure what...
(also why he can't build inside anymore
Mikes plateau, 48 hours from now
(viewed from the floor naturally
For those of us who are married, this is our wives' greatest fear. LOL
decoynh posted:Slope it a few degrees. I hate landing on a hill.
Landing IN a hill is even worse, I wot. ;-)
Mitch
Arnold D. Cribari posted:Adriatic posted:Those leds show up sooo bright on camera...
Mikes last layout lacked something; he just wasn't sure what...
(also why he can't build inside anymore
Mikes plateau, 48 hours from now
(viewed from the floor naturally
For those of us who are married, this is our wives' greatest fear. LOL
LOL
looking good Mike !!

just passing by... ![]()
Attachments
Images (2)


mike g. posted:Went out and played alittle in the train room today! Here are a few pictures of my day!
Looks great, Mike! Like flying into Charleston, WV. Or you can put an ocean scene on the wall and turn it into a carrier flight deck. What that has to do with trains is anyone's guess.![]()
As promised earlier this week, here is an orange Baby Ruth boxcar turned into my baby grandson's "first Christmas" car.

When he gets a little older I'll make an entire train set for him.
Attachments
Images (1)

That car is super, Pete!! Such a great photograph of your grandson on it as well!!
Thanks, Mark! My daughter had to do 3 photo shoots in his elf outfit to get him to sit still long enough.
I know Pete! Photographs like that aren’t by accident! LOL
You want inclines on your runway, try flying into Steamboat Springs, CO, it's a significant grade! It's bad enough that you virtually always land uphill regardless of the wind and take off downhill for the same reason. ![]() I flew in there a few times years ago, interesting place.
I flew in there a few times years ago, interesting place. ![]()
There you go Mike! John has the prototype!! Is that a railroad I see winding off in the distance?? ![]()
Well last night I was able to install my weathered (not finished) and lighted Atlas O Switch Tower:


Also have a lot of the Ready Grass Down, just missing a few more areas and then adding some demension to the grass in some areas and gravel in others. Here is a shot I took this morning. (Bottom: Legacy Southern Heavy Mikado, Top: Lionel Legacy H10 Western Allegheny:

Still have a lot of work ahead of me but things are definitely coming together nicely.
Thanks!
Attachments
Images (3)
Add Reply
Sign In To Reply
