
Just "sweating the details" here in my engine service terminal....  Decided once the GGD Ogle coal tower was done that I'd alter the tracks beneath it, making the track under the tower the new "Arrival" track...

So today, I cut through the table top and fabricated a new ash pit for that track, as it seemed about as much work as trying to move the existing ash pit from the adjacent track...  Put concrete sidewalk around this one, using cork roadbed....  Got it done and the major painting and weathering of all the concrete work is done, track is powered, and anchored and now goes all the way to the turntable... (it used to be coal and sand service spur)...   

I have pretty well decided on rotating the ash pit conveyor 90 degrees and converting it to a "sand delivery conveyor"....

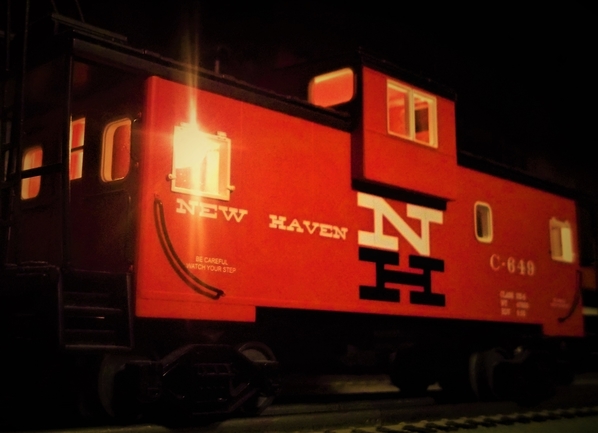
Also finished the 2nd BAR 40 foot boxcar and got them put back together after light fading and weathering. 

Hope everyone here has a Safe, Happy & Healthy New Year !!!!

DSC06755 [2)

DSC06755 [3)


DSC06754 [2)DSC06756 [2)DSC06757 [2)DSC06758 [2)DSC06759 [2)

Attachments

Images (7)
  • DSC06755 (2)
  • DSC06754 (2)
  • DSC06756 (2)
  • DSC06757 (2)
  • DSC06758 (2)
  • DSC06759 (2)
  • DSC06755 (3)

Mark, Thanks very much.... You're right, I was really busy.  Like most jobs,  I grossly underestimated how long it would take me to do this, but I am pleased with the result and glad I took about an hour searching Bing and Google images for ash pit photos.  I would have never done the concrete sidewalk pad around the perimeter until I started seeing both models and real pits with concrete pads... makes total sense once you see the prototypes.   Now I am really close to having a green light to finishing the ground cover in the yard.   

chris a posted:

Mark, Thanks very much.... You're right, I was really busy.  Like most jobs,  I grossly underestimated how long it would take me to do this, but I am pleased with the result and glad I took about an hour searching Bing and Google images for ash pit photos.  I would have never done the concrete sidewalk pad around the perimeter until I started seeing both models and real pits with concrete pads... makes total sense once you see the prototypes.   Now I am really close to having a green light to finishing the ground cover in the yard.   

Nice job!! Following!!

Mark Boyce posted:

Bob, I'm glad troubleshooting found the problem area.  Will the maintenance crew work on double-time tomorrow or wait for straight time?  Trains have to keep rolling!!

We will see how it goes Mark. The crew is always willing to work. Depends on weather the CEO will allow it

Chris- great job on the ash pit and detailing. The engine yard is going to look great. I like the weathering on the SOM cars too. Gotta give it a try one day.

Bob

mike g. posted:
geysergazer posted:
mike g. posted:

Johan, wonderful scene! Are those kit buildings in the background or is it just a backdrop? Either way it so real looking!

Mitch very cool with the tiplate!

Brian, very cool pictures for a Monday morning!

I plan on going out to clean more track today and maybe build that track cleaning car that I have been putting off! If I get it built I will share some photos!

Lew, Just wondering how you hide the control cable that goes to your crane?

Mike, I just drilled a big old hole in the deck and fed the flat cable through it and under the benchwork. Easy to do because there was no controller with this crane when I bought it so I just use toggle switches.

Lew, you wouldn't happen to have any close ups of the toggle switches you used would you! also how it come up from under the table?

Mike, here are a couple pics. This works with the Post War 282 but the setup would be different for the modern re-issue (because it uses two DC motors, one for lift and one for swing instead of one motor with a clutch).

A simple hole through the deck sized for a bit of a squeeze-fit for the flat ribbon cable:

         IMG_4532

The OEM Lionel ribbon-cable is so flexible no strain-relief is needed. The extra wire is power for the lights I added. Ground for the lights is taken from the OEM ground wire.


I used what I had on hand for control switches. The important thing is that a MOMENTARY SPDT center-off toggle switch is needed to run the motor in forward and reverse. I used a DPDT version just leaving one side unused. Two SPST toggle switches are also needed to activate the electromagnet and to operate the clutch (the clutch shifting between hoist and swing):

        IMG_4533

I have since acquired some nice SPST toggle switches and one of these days I'll replace those Lionel slide switches.


From the backside:

         IMG_4534

One side unused. The center post goes to ground and the outside posts connect to the motor field winding wires. The PW282 uses a double field winding with two ends in common then in series with the armature and the other ends going to the control box. For a PW Gantry Crane that does it. 

Attachments

Images (3)
  • IMG_4532
  • IMG_4533
  • IMG_4534

Bob, Dave and all those who hit the "like button"... thanks.   Dave, the DM&IRR pilot came out really great, you totally captured the proportion of the prototype...

I really share the photos and "how I did it" details here with the hope that it helps fellow members find some new ideas and ways of doing things.   For well over a decade I have been reading OGR threads/posts and studying photos and coming to the conclusion that if "they could do it, then I could probably do it also" if I keep an open mind, keep trying new techniques, and keep persevering.    Besides the 1121 in the photo above Dave, the track/ballast weathering and vegetation work in that scene is excellent....    Thanks for the very kind words. 

Along those lines:   I weathered a bunch of wheel trucks and other rusty parts lately, and didn't want them to all look exactly like the last batch of 20... so I ended up mixing my previous "go to" base coat color which is  Krylon Cover MAXX -   RED/OXIDE Primer with Rustoleum Camouflage Dark Brown (which the spray paint I always have on hand to weather Ross/Gargraves track.....   

I ended up spraying about equal parts of each into an empty tuna fish can and brush painting about 16 -  4 wheel trucks and wheel sets.    It is a really good likeness to rusty weathered cast iron.  What is also cool is since it's oil base flat, and really "thin" paint coming out of the spray can it flows well, dries fast and is chalky flat.......  I just spray it into the small can out in the garage then bring it inside to do the brush work.  

LEAPINLARRY:   HAPPY NEW YEAR TO YOU AS WELL!  Outstanding photos,  I need to start planning for "train watching recliner" in my layout room....  

Last edited by chris a

Guys:  Thanks for the pictures, I am currently involved in our "east coast" family holiday trip so I am 1,155 miles from my layout, but I will get back to work next week.  Chris, the coal tower and ash pit are just super, what real skills you have and it truly shows.  Scott...having lived south of Baltimore in St. Mary's County, it appreciated the "Old Bay" boxcar and your work on the sauerkraut factory. However I was also intrigued by the PCC car on the elevated loop in the background and the elevated passenger platform.  I remember the PCC cars that were still running on the "T" in Boston when we lived there in the early 80's.  Did you build the elevated line and station or did you find a source that made them?  gandydancer1950 thanks for identification of the 1936 set 297W, I also have a 238E and the freight cars but had no data on information as to what might have gone in an "outfit" as Lionel called them. Dave sent the catalog pictures and I can now see the full picture, thank you.

Well thanks everyone for their pictures, I try and stay connected through the site even when I am "remote"

Happy New Year

Don

Scott, nice looking urban scene.

Chris a, great work done on the coaling and sanding area. I like the idea with the lofting elevator for the sand.

Johan, you always post such great pics. You definately have a good eye for staging the pics.

Well I guess I have sluffed off through the holidays and time to get busy again. The project ahead of me is clening off the table so I can work on the area. Took pics of what I have to clean up. The biggest problem is figuring out where I can put ll the stuff. .....................Paul 2

DSCN0010DSCN0011

Attachments

Images (2)
  • DSCN0010
  • DSCN0011

Some may recall the back story, I wasn’t able to setup my regular Christmas layout because of recovering from knee replacement surgery.  Instead, I made this little diorama on my new layout that I started earlier this year.  I only got the last item on it Christmas Eve.  I haven’t had time to dig out the Polar Express, so this Western Maryland equipment is standing in.

And yes, I am going to PT as directed and am doing some exercises as I type on the phone.  :-)image

Attachments

Images (1)
  • image

Applied another primer coat to the five soon-to-be GN Empire Builder streamline cars and will examine them to determine where each requires more bodywork and undertake that this evening.

I have completed (ready for paint) two offset vista dome cars in addition to the continuing struggle to finish the current five cars' bodywork. 

The fact is I am awful at bodywork as attested to by the inordinate amount of putty, sandpaper, and primer paint I've used thus far.  When they are all ready for paint, I will post the total for each (as well as photos) used--it is a stunning quantity of each for such a modest project.


I just got the the weathering done on my new On30 2-6-2T "trench" locomotive, and put coal in the bunker and on the deck. 
I found a GI figure that actually fits perfectly, with a hand even reaching in the right direction for the throttle. For now, he'll do just fine.
I also put gloss over the area where the water tanks would have been field, to make it look as if the tanks had just been filled up recently.
0101201413a-010101201427-010101201428a-01
It was a lot of fun weathering this.

Attachments

Images (3)
  • 0101201413a-01
  • 0101201427-01
  • 0101201428a-01

Happy New Year once again!

Larry- One of the best train/ man caves on the forum.

Paul- looks like the days of moving the pile from table to table are over.

Mark- We will forgive the lack of a Polar Express Berk due to your physical condition this year. However, you do have excellent taste in alternate power.

Dave-  I hadn't commented before but the pilot turned out great. Looks like a factory original.

Johan- Agreed, your subject matter is always spot on.

As for me- the MOW crew was cleared to work on the Holiday so the track work on the main line was completed. The UCS track was reversed to create more live rail between it and the switch. Testing with the suspect engine was successful and the RS-3 runs through the area without shutting down.

Bob

2020-01-01 13.37.092020-01-01 16.50.17

Attachments

Images (2)
  • 2020-01-01 13.37.09
  • 2020-01-01 16.50.17
Videos (1)
2020-01-01 16.43.49
Last edited by RSJB18

Mark,  the Christmas diorama on the upper level looks great... Love the back drop !    Glad the knee is coming along.   We don't heal like we use to.  

Paul 2:  Thanks for posting the photos of the table top in disarray....  I am glad I am not the only one whose layout area looks like Ground Zero after the explosion when I am working.   I'm amazed how much stuff I can get out and create a disaster in just a day or two !   I never had the nerve to take and post a photo "before clean up".....

That "trench loco" is really cool.  I visited some narrow gauge RR's in Maine, but never saw an engine like that very unique.... Great idea with the gloss.  I was thinking about doing something similar in my engine yard with semi gloss black to represent oil spills.  

I ran trains last night, got so involved I never saw the ball drop.  Today I finished fine tuning the tracks leading into the turntable, ran the TT empty and then test ran my Berkshire on and off from both ends to ensure everything was lined up and running...  Just glued down a bunch of low loft batting in the engine yard, so once the glue dries i can start laying down dirt, cinders, coal & ballast in the wet latex paint.   

Last edited by chris a

Terrific work gentlemen.

I turned the heat on for the train building and I got hit in the head by an idea.  I recently purchased a 20 Amp meter and a 20 VAC meter.  I thought I would put them in the next control panel.  Today's lighting bolt said "Build a meter tower."  I took lots of measurements.  I put this together in three hours.

20200101_174258

Just before dinner of blackeye peas, greens, and ham, I built three more end bumpers.

20200101_181537

I'll stain them tomorrow.

I created a TO-DO list to keep work on schedule.  Next, replace two lazy switches.


Attachments

Images (2)
  • 20200101_174258
  • 20200101_181537

Went over to Harbor Freight to pick up some items for the impending rebuild of the JRM Museum layout later this month.  

NYE, I got a pleasant surprise from the A&M RR.  I was thinking I was going to curl up in an empty coach seat with a good book and be ready in case I was needed.  Instead,  I was firmly told I had a reserved table to myself in the dining car, so, after a good prime rib dinner, I toasted the New Year with bubbly...  

1231191926-00

(sorry about the blur; my flip phone doesn't do very good interior pics.)

Mitch 

Attachments

Images (1)
  • 1231191926-00
geysergazer posted:
Vincent Massi posted:

sniff   It's 7:26 PM   sniff   I've run out of excuses   sniff   I have to start dismantling my 2019 Disney Christmas lay-out   sniff

Awww! .....U could cheat a liddle bit.....

sniff Thanks, Lew.  sniff   But I have to set up a short-term Thomas the Tank Engine lay-out in order to see all the stuff I've been buying at yard sales and open-air markets for two years. Then I hope to begin constructing "The Knights of Atlantis" on January 10, the day after I (hopefully) buy a new diesel.

Mark Boyce posted:

Bill, the meter tower and barricades look great.

Vincent, so soon?  What will come after the Disney layout?

Galley Proof, That photograph of your grandson is priceless!  The layout sounds and looks great too

I'm planning to set up all the Thomas the Tank Engine stuff I've been buying on sale for two years because I honestly don't know what I've got. Then I hope to begin constructing "The Knights of Atlantis" on January 10.

M. Mitchell Marmel posted:

Went over to Harbor Freight to pick up some items for the impending rebuild of the JRM Museum layout later this month.  

NYE, I got a pleasant surprise from the A&M RR.  I was thinking I was going to curl up in an empty coach seat with a good book and be ready in case I was needed.  Instead,  I was firmly told I had a reserved table to myself in the dining car, so, after a good prime rib dinner, I toasted the New Year with bubbly...  

(sorry about the blur; my flip phone doesn't do very good interior pics.)

Mitch 

Sounds sweet, Mitch... Happy New Year 🎉🎉🎉 Hope you brought something home for the staff   

P.S. was it really your flip phone’s fault or was that a post-bubbly photo???

RSJB18 posted:

While technically not "on the layout", I consider any train time, layout time, so I put a shelf together yesterday from some scrap shelving I had laying around so I could display more engines. Since I'm not going to stop buying engines any time soon, more shelves were the only solution. The CEO doesn't want more shelves on the walls so I get creative. 

The wood is from an old pine TV stand that our neighbors were throwing out many years ago. We did use it for a TV stand for a while when my kids were little but I took it apart and kept the wood when it was no longer needed.  I'll take free 3/4" clear pine any day of the week.

2019-12-29 10.27.00

Nice collection, Bob, especially that lower shelf - can’t go wrong with PRR and D&H!!! Looks like you’re going to have to scrounge some more shelving material - how long is that M-10000   

Apples55 posted:

Sounds sweet, Mitch... Happy New Year 🎉🎉🎉 Hope you brought something home for the staff 

The kittehs got a nice chunk of ham each for their NYE treat.   

P.S. was it really your flip phone’s fault or was that a post-bubbly photo???

I refuse to answer on the grounds I mighta been slightly pixelated. 

Mitch 

p51 posted:

I created a number plate for my trench loco, now she's done...

0101202129-01

You may have answered this earlier on OGR, but for what is a trench loco used?  In NH and other Northeast logging areas, I've seen geared locos like Shays for use on somewhat temporary railways and even large 2-8-0 Consolidations on permanent railways.  Nice job with detailing.

paul 2 posted:

Scott, nice looking urban scene.

Chris a, great work done on the coaling and sanding area. I like the idea with the lofting elevator for the sand.

Johan, you always post such great pics. You definately have a good eye for staging the pics.

Well I guess I have sluffed off through the holidays and time to get busy again. The project ahead of me is clening off the table so I can work on the area. Took pics of what I have to clean up. The biggest problem is figuring out where I can put ll the stuff. .....................Paul 2

DSCN0010DSCN0011

Paul. Thank you.  I added a more green around the layout and try take a some pics, before a brand new backdrops coming. 🤝

Johan 


RSJB18 posted:

Happy New Year once again!

Larry- One of the best train/ man caves on the forum.

Paul- looks like the days of moving the pile from table to table are over.

Mark- We will forgive the lack of a Polar Express Berk due to your physical condition this year. However, you do have excellent taste in alternate power.

Dave-  I hadn't commented before but the pilot turned out great. Looks like a factory original.

Johan- Agreed, your subject matter is always spot on.

As for me- the MOW crew was cleared to work on the Holiday so the track work on the main line was completed. The UCS track was reversed to create more live rail between it and the switch. Testing with the suspect engine was successful and the RS-3 runs through the area without shutting down.

Bob

2020-01-01 13.37.092020-01-01 16.50.17

Bob. Thank you very much.🤝

Johan


Vincent Massi posted:
Mark Boyce posted:

Bill, the meter tower and barricades look great.

Vincent, so soon?  What will come after the Disney layout?

Galley Proof, That photograph of your grandson is priceless!  The layout sounds and looks great too

I'm planning to set up all the Thomas the Tank Engine stuff I've been buying on sale for two years because I honestly don't know what I've got. Then I hope to begin constructing "The Knights of Atlantis" on January 10.

Vincent, That all sounds like a great plan.  I’ll look forward to seeing both!!

decoynh posted:
p51 posted:

I created a number plate for my trench loco, now she's done...

0101202129-01

You may have answered this earlier on OGR, but for what is a trench loco used?  

This is gonna sound like a wise-acre answer, but for actual trenches.

Baldwin built almost 200 of these for the US Army (and many more of a 4-6-0 type that looked much like this for the Brits) to use behind the lines in WW1. As they were used somewhat near the trench lines, they of course got called, "Trench" engines.

The above engine is the first they built. They had white lettering until they got to France, which was painted over in black. They remained grey through the Great War and most stayed in Europe to be used up by civilian operators after the war.

Sadly, it appears that only one exists today (and only the running gear and frame), but it's been loving restored after being moved back from its Australian exile to a tourist RR in France:

Davenport, ALCO and other makers built copies of the Baldwin design, most of which stayed in the US. One is prominently displayed at the Infantry Museum at Fort Benning, though in a totally wrong paint color (the Army never painted these in OD green)…

My model is painted as a post-WW1 version, which really should be a Davenport, to be honest. They had all kinds of markings in stateside posts through to the late 40s in a few places. Getting the decals straight was an utter pain but it was worth the effort to me...

Hi everyone, I handed out a lot of likes for all the wonderful work being done! I wish I had time to comment on everyone's projects but I don't as I am still nursing a sick puppy!

Lew, thank you for all the great information!

Mark, wonderful winter wonderland! Nice work!

Chris, you sand pit looks great!

I sure hope to get time to tomorrow to comment more as my better half will be here with me to help with Tank! I hope you all have a great night and don't work to hard on your layout, instead sit back and enjoy your trains running!

Mike, Thank you.  I just shutdown from running the RS3 and an F7 AA set on the winter wonderland with Annie.

Annie joins Izzy in wishing Tank gets well soon.  Today was Annie's twice a week morning chemo medicine with Black Forest ham.  Black Forest ham makes all the difference.  The medicine makes her sleep most of the day, but she was alert for train running this evening.  She is doing much better than when she got the chemo daily.

Earlier today she went out and took her bone with her.

2019-03-12 18.02.07

Attachments

Images (1)
  • 2019-03-12 18.02.07

Thanks for all the likes on my previous reply showing the equipment shelf I added - much appreciated!

GeyserGazer - Controls for the 282 look good.  You commented on another thread about getting the spring collars back on the 282.  I got a pair of Bonney B21 pliers but they were too big - I have a set of smaller pliers somewhere that I use to open up E-Units - they may be a better fit.

Paul 2 - Seems I am in a constant state of bench cleaning!

P51 - thanks for the info on the trench locomotive - I was curious as to why made it a trench type as well.

Bill - nice work on the bumpers - that gives me a few ideas.

The new year is off to a good start.  New Years eve I soldered up some wiring harnesses / forks and ring ends and ended the evening enjoying some running time.

Yesterday I had a landmark day - with the wiring done I got three accessories on the layout by lunch!  The first is a 415 Fueling Station to keep my new LV ALCo fueled up and hauling freight.

IMG_0870

The ALCo was under the tree Christmas morning - a gift from my wife.

I also got an MTH semaphoreand the Lionel Bluetooth radio station installed.  I really like the radio station - I can stream from music from my phone while running trains. 

IMG_0871 

I wired the light for the 415 and the semaphore into the new AIU.   I started moving to MTH for motive power last fall and installed DCS over Thanksgiving.  I just added the AIU earlier in the week so this was my first attempt at adding accessories to it.  Installation went really well - I have been impressed with MTH's offerings.   I am using the semaphore as a train orders indicator.

Attachments

Images (2)
  • IMG_0870
  • IMG_0871
Last edited by Luther Stanton
Mark Boyce posted:

Lew, the iPhone 8 shows off your handiwork much better.  We have iPhone 6s which my wife complains about until I mentioned getting new ones, and she is fine with it again...for now! LOL

We had to do something because we no longer have a land line and the 5S had that bad battery issue and was shutting down at random times. Not good when you need to keep up with Dr appointments and that sort of stuff. The 8 is obsolete enough to be cheep enough....ish. It's all good because better model railroading pics. 

Last edited by geysergazer
geysergazer posted:
Mark Boyce posted:

Lew, the iPhone 8 shows off your handiwork much better.  We have iPhone 6s which my wife complains about until I mentioned getting new ones, and she is fine with it again...for now! LOL

We had to do something because we no longer have a land line and the 5S had that bad battery issue and was shutting down at random times. Not good when you need to keep up with Dr appointments and that sort of stuff. The 8 is obsolete enough to be cheep enough....ish. It's all good. 

We are having similar issues with the battery.  I was looking at the 8 also.  Enhanced layout photographs would be a definite advantage.  I’ll look forward to seeing great photographs of the Plywood Empire!!!

Ground cover, and more ground cover....  Spent most of the day covering the engine service facility tracks... Getting really tired of looking at painted plywood and cork roadbed.    I know the paint and glue is still wet, but couldn't resist the temptation to take a few photos.  

Nice work everyone !   Going to the recliner now.

DSC06760 [2)DSC06761 [2)DSC06762 [2)DSC06768 [2)

Attachments

Images (4)
  • DSC06760 (2)
  • DSC06761 (2)
  • DSC06762 (2)
  • DSC06768 (2)

   Long day on the BRM RR.  Early this morning I finished an upgrade to my control panel.  I added two more circuit breakers.  One is for separate track voltage for the future 3rd level.   Four outputs from a ZW and a VW are protected. 

control panel Jan 2020

   And then...  I put a front truck with coupler on a #1055 ALCO.  Next, I cut a close fit hole in the body.   I ran several laps to be sure the hole was wide enough.  I'm testing paint schemes on a computer.

20200103_124828Coupler truck installed.

20200103_174809Paint me!

Bill


Attachments

Images (3)
  • control panel Jan 2020
  • 20200103_124828
  • 20200103_174809

What'd I do? Figured out what's what with K-Line aluminum passenger cars. The PER just acquired a retired business car in PRR livery and management wanted the trucks switched out. It turns out these cars are the same design as Lionel PW extruded aluminum cars so its pretty simple to take one apart.

You just remove the 2 screws that attach each vestibule to the floor, remove the vestibules and slide the floor endways until it is separated from the extruded car shell:


           IMG_0035

           IMG_0034

The car interior is attached to the floor by tiny screws from underneath.

                       IMG_0032

The underside details must be removed (one screw at the left end in this pic) to access two of the interior retaining screws:

       IMG_0033


Here is the bare floor re-inserted to show the design. The ceiling indirect lighting can be seen as well as the wire that plugs into the floor wiring.

           IMG_0031


And there you have it:

          IMG_4537

Ready for dinner service.

Attachments

Images (6)
  • IMG_0031
  • IMG_0034
  • IMG_0035
  • IMG_0032
  • IMG_0033
  • IMG_4537

So I spent 8 hours redoing the industrial area on my layout today. It had a Lionel coal loader, saw mill, ice depot, and barrel loader. The coal loader was my least favorite and finicky. It didn't really fit on a layout where all the steam is oil fired. Plus the entrance to the area was some old Lionel 027 switches. I traded the coal loader and dump car (both late 40's pieces in EX- condition with original boxes and paperwork) for a couple Ross 031 switches. Ripped the area apart, redid the track work, wired, ballasted, weathered the rails, laid new parking areas for the buildings, and put down a groundcover base. I'll reinstall the accessories, old buildings, and a new building tomorrow. Should only take a couple of hours. Then it's done sans details (cars, figures, and such). Not bad for 8 hours of work today. 

20191229_15295020200104_211412

Attachments

Images (2)
  • 20191229_152950
  • 20200104_211412
RSJB18 posted:

Picked up this K-line Plymouth yesterday. I bought it from forum member Steve @L.I.TRAIN. I met him at his club, TMB Train Masters of Babylon and got a guided tour of the layout. It's a beauty for sure! They are having several open houses this month so check them out if you are in the area.

2020-01-04 08.34.292020-01-04 08.36.012020-01-04 08.37.38

Bob Thanks again and enjoy the Plymouth Switcher. Thanks for the kind words about the club.

Steve

Johan, wonderful scene! Love the worker out there busting his butt!

Brian, nice NH Caboose!~ I still think you have one of everything if not  more!

CGWFOREVER, What a great idea! You did a great job on your new load for you gondola!

Well this morning I went out to the train room and put together new to me a 1940's era crane! I really like it and think it will work great in conjunction track crane! Here are a couple pictures, The only thing is I am going to need to find a wiring diagram for it.


IMG_20200105_064559209IMG_20200105_065920861

Attachments

Images (2)
  • IMG_20200105_064559209
  • IMG_20200105_065920861
Lou1985 posted:

So I spent 8 hours redoing the industrial area on my layout today. It had a Lionel coal loader, saw mill, ice depot, and barrel loader. The coal loader was my least favorite and finicky. It didn't really fit on a layout where all the steam is oil fired. Plus the entrance to the area was some old Lionel 027 switches. I traded the coal loader and dump car (both late 40's pieces in EX- condition with original boxes and paperwork) for a couple Ross 031 switches. Ripped the area apart, redid the track work, wired, ballasted, weathered the rails, laid new parking areas for the buildings, and put down a groundcover base. I'll reinstall the accessories, old buildings, and a new building tomorrow. Should only take a couple of hours. Then it's done sans details (cars, figures, and such). Not bad for 8 hours of work today. 

20191229_15295020200104_211412

Lou, that is looking quite different already!  I agree if an accessory or building doesn't work out for you, do something else!

mike g. posted:

Johan, wonderful scene! Love the worker out there busting his butt!

Brian, nice NH Caboose!~ I still think you have one of everything if not  more!

CGWFOREVER, What a great idea! You did a great job on your new load for you gondola!

Well this morning I went out to the train room and put together new to me a 1940's era crane! I really like it and think it will work great in conjunction track crane! Here are a couple pictures, The only thing is I am going to need to find a wiring diagram for it.


IMG_20200105_064559209IMG_20200105_065920861

Mike. Thank you. 🤝

Johan

I've been contemplating a major change to my layout for a while. Well.....contemplation time is over....commence with the demo......

The grade up to my elevated loop on the right side is very steep. As a result I can't really run trains up and down around the oval unless I'm pulling only a couple of cars and manage the throttle the whole time. So I decided to remove the grade and convert the track to a freight spur that will serve a small factory building on grade level. The elevated section will become a spur to park a couple of cars or a short passenger excursion train along the cliff. I will keep the left side as is so I can still move trains up and down between the two levels.
This will give me another switching option on the grade level and more operational variety overall.

I pulled up the tracks and cleared the ground cover and started laying the new track this afternoon. I'll get the grade level done first and then work on the upper level which will be a bit more involved.

I ordered a Ameri-town building on the OGR site this morning. It will be set up next to the new spur.

2019-12-30 16.50.152020-01-05 15.26.18

Attachments

Images (10)
  • 2019-12-30 16.50.07
  • 2019-12-30 16.50.15
  • 2019-12-30 16.50.25
  • 2019-12-30 16.50.36
  • 2019-12-30 16.50.42
  • 2020-01-05 15.06.50
  • 2020-01-05 15.06.57
  • 2020-01-05 15.24.12
  • 2020-01-05 15.26.18
  • 2020-01-05 15.27.19

Add Reply

Post

OGR Publishing, Inc., 1310 Eastside Centre Ct, Suite 6, Mountain Home, AR 72653
800-980-OGRR (6477)
www.ogaugerr.com

×
×
×
×
Link copied to your clipboard.
×
×