
Johan, thaty is a great picture with the boxcar. You cannot tell where the real scenery ends and the backdrop starts. Well done.

Bob, your building came out very good. I have a question for you. Where did you get the pic of the old plank flooring from on the computer. That is the type of floor I am looking for to put inside the machine shop.

This afternoon a bit more done. The shed is done and put together. I put a different wash on the paper windows. After that dries I'll see how they look and if not satisfied I'll use a colored pencil to highlight the woindow frames. That only leaves railings for the building and a lofting elevator to add. I went back to the machine shop and glued in the windows on the one side. When they dry I'll glue in the other windows and doors...........Pics...........Paul 2

DSCN0176DSCN0177DSCN0178

Attachments

Images (3)
  • DSCN0176
  • DSCN0177
  • DSCN0178

The top of the plateau got a "little" structure....

IMG_20200229_074133~2

IMG_20200309_152901~2

I still have to add some backside detail and the top ⅛ of a lower tier &about 3 more steps to reach the "bottom".

IMG_20200309_133318

Last week I had a certain brand of cervesa in mind for this "Dusk til Dawn" cantina's signage; I have "C"-beer coasters.

. ..  It might just get a good old "Bud" sign until Halloween🤔 (The plateau will be year round; structure swap outs )

Attachments

Images (3)
  • IMG_20200309_133318
  • IMG_20200309_152901~2
  • IMG_20200229_074133~2

Got a few minutes last night to finish the floors.  I added floor joists to the bottom of the second floor too. Not sure if anyone will see them but I'll know they are there.

Paul- look for an email......

Lee- the addition is looking good. Love the RBBB wagon too.

Butch- nice work

Johan- that is a great shot!

Bob

2020-03-12 07.23.322020-03-12 07.23.42

(for some bizarre and unknown reason, these pix posted upside down)

Attachments

Images (2)
  • 2020-03-12 07.23.32
  • 2020-03-12 07.23.42

B&OFan:  what a great scene. I worked for many years at the Patuxent Naval Air Station on ASW aircraft ( my era was the P-3) but am familiar with Glen Martin (which was sort of local ) and the Marlin was legendary. I also recognize the building with the 4 smokestacks as being near the harbor. 

Thus is a great scene and super work. 

Regards Don McErlean

paul 2 posted:

Johan, thaty is a great picture with the boxcar. You cannot tell where the real scenery ends and the backdrop starts. Well done.

Bob, your building came out very good. I have a question for you. Where did you get the pic of the old plank flooring from on the computer. That is the type of floor I am looking for to put inside the machine shop.

This afternoon a bit more done. The shed is done and put together. I put a different wash on the paper windows. After that dries I'll see how they look and if not satisfied I'll use a colored pencil to highlight the woindow frames. That only leaves railings for the building and a lofting elevator to add. I went back to the machine shop and glued in the windows on the one side. When they dry I'll glue in the other windows and doors...........Pics...........Paul 2

DSCN0176DSCN0177DSCN0178

Paul. Thank you. You can send that beautiful building to Finland when it's ready.🤝

Johan


RSJB18 posted:

Got a few minutes last night to finish the floors.  I added floor joists to the bottom of the second floor too. Not sure if anyone will see them but I'll know they are there.

Paul- look for an email......

Lee- the addition is looking good. Love the RBBB wagon too.

Butch- nice work

Johan- that is a great shot!

Bob

2020-03-12 07.23.322020-03-12 07.23.42

(for some bizarre and unknown reason, these pix posted upside down)

Bob. Thanks.🤝

Johan

lee drennen posted:

AEA80745-8D06-4414-A482-5D78AA585D5C2A596E5E-8BD5-4F72-AD67-10772FE0EA7B486B9615-B4FF-4536-B7E6-B0B27845CF5E1BB8E2A6-4CE0-419E-9DBB-8F0A48D439D1Got some paint on the wagon and decaled it.  I didn’t like the way they turned out I may buy some replacements 

Lee,

I think the decaling looks good, but if you want an aged sign look, try this method I developed for weathered/aged sign on building walls.

I scotch tape a piece of tissue paper to a 8.5x11 piece of typing paper (so that it will go through my printer without ripping) and print my sign on it. Brush well diluted Elmer's glue on to the building's side and apply the tissue paper sign, it will settle into the building's (or, in your case, the wagon's) details with a little help of a soft brush. Don't fool  with it after this point, just let it dry. When it does it will look like it was weathered for many years. If ya don't like the result a little water will remove it with no damage.

Just a thought

Don McErlean posted:

B&OFan:  what a great scene. I worked for many years at the Patuxent Naval Air Station on ASW aircraft ( my era was the P-3) but am familiar with Glen Martin (which was sort of local ) and the Marlin was legendary. I also recognize the building with the 4 smokestacks as being near the harbor. 

Thus is a great scene and super work. 

Regards Don McErlean

Thanks Don, I wanted to tie in the Martin plant since they were nearby at Middle River. Searched for a civilian Martin 4-0-4 but no luck, so went with the Marlin since it started production in the late 40s.

Scott

The Other Guy posted:

Next up: …  mock up a tunnel covering the sidings, and test some new weather seal ideas.

Tunnels are mocked-up and new weatherseal tested and will work: foam gaskets on the border, compressed by a handful+ of toolbox latches around the perimeter. The plexiglass lids were initially too flimsy and need a frame added for rigidity. Lid frames are undersized by about an inch to give me "play" when setting/removing and, for now Kragle'd to the 'glass (will probably need liquid nails). Altogether, will simplify getting in/out of the box when stuff breaks and save me untold yards of duct tape.

IMG_2293

On a lark, printed some homegrown decals for the Menards billboard. Next round will be properly cut to size but, as a proof-of-concept, a home run.

IMG_2313   IMG_2314

Next up: finish framing out all the plexiglass lids (5 down; 1 to go), put some thought into what the scenics should be, and start wiring buildings with Miller signs/billboards.

- The Other Guy

Attachments

Images (3)
  • IMG_2293
  • IMG_2313
  • IMG_2314
Last edited by The Other Guy
B&O Fan posted:

Thanks Don, I wanted to tie in the Martin plant since they were nearby at Middle River. Searched for a civilian Martin 4-0-4 but no luck, so went with the Marlin since it started production in the late 40s.

Heh.  My mother's father worked at Martin about that time; she and her family grew up around Essex. 

Mitch 

My March Madness painting plans have changed.  There is no basketball to watch.  No baseball.  I may have to pay a couple of kids to shoot hoops outside my window, but that may be considered a crowd. 

Mom and I are staring at each other.  She is tired of watching me paint, so she is sleeping. 

I am glad I ordered the eleven Preiser 65602 from two stores in Germany two weeks ago, because the only store with five left will no longer ship to the United States as of today.  I am lucky that model railroading is a solitary hobby.

All alone in Cleveland, Ohio.  I will watch trains at Berea Station . . . with my windows rolled up.

Sincerely, John Rowlen

Last edited by John Rowlen

The new look through me too Bob. Quite different.

Today I added some brown color with a pencil to the windows then glued them all in place. Went back to working on my machine shop but when I went to glue the doors in apparently I must of clean too much off the sides and the doors had nothing to hold on to. So I took some Balsa wood and made trim wood for the inside of the building. Glued them on and then I stained the wood. When it all dries I'll glue the doors in place. Pics.........Paul 2

DSCN0181DSCN0182DSCN0183DSCN0184DSCN0185DSCN0179DSCN0180

Attachments

Images (7)
  • DSCN0181
  • DSCN0182
  • DSCN0183
  • DSCN0184
  • DSCN0185
  • DSCN0179
  • DSCN0180
B&O Fan posted:

These Glenn L. Martin fly boys are going to be catching some heat for putting a brand new Marlin through its paces over downtown. 

Scott 

20200311_16350920200311_16370120200311_163749

Scott:

The above are GREAT photos. I have admired your layout through your posts. I live in the eastern suburbs of Baltimore City and have a shop in downtown Baltimore. My current home is not far from what used to be the Glenn L. Martin plant. Do you still live in the Baltimore area? If so, I would love to see your layout in person.

Bravo, on your GREAT Baltimore scenery.

paul 2 posted:

The new look through me too Bob. Quite different.

Today I added some brown color with a pencil to the windows then glued them all in place. Went back to working on my machine shop but when I went to glue the doors in apparently I must of clean too much off the sides and the doors had nothing to hold on to. So I took some Balsa wood and made trim wood for the inside of the building. Glued them on and then I stained the wood. When it all dries I'll glue the doors in place. Pics.........Paul 2

DSCN0181DSCN0182DSCN0183DSCN0184DSCN0185DSCN0179DSCN0180

That really looks good Paul I like it 

John Rowlen posted:

Lee,  Have you thought about a reversing loop around your new table edge, back across the near side of the original loop and to the right on the back of the original loop. (Need a left switch on back loop, a 90-degree cross over, and another left switch immediately before the new switches and track you laid.)

Sincerely, John Rowlen

John

after I posted that pic I was thinking how I could connect it back to the original loop thanks for the idea and help I might try that 

Morning guys, everyone is doing such great work its hard to keep up! Paul, your silo build it really coming together! I like how your building turned out with the paper windows!

Lee your addition to your layout is going to add a lot of fun down the road, looking good!

I haven't done much, but am slowly getting the ballast down. Wish I had a ballast car and not a plastic cup and paint brush, but it is what it is! Yesterday I put some gray ballast down and realized it was on the siding track for my crane, so I have to vacuum it up, glad I figured it out before I put the glue to it! LOL

This morning I hope to get the black ballast down and clean the rest of the track where I put the glue down.

I hope everyone has a great Friday and gets some time for there trains and layouts!

A quiet day at home painting people.  I ordered more brushes and paint to mix my custom pastels in blue, green, pink, yellow and violet.  Have three shades of grey coming for men's suits too.

Checking on my China and Germany seated people blanks orders and things don't appear to be moving.  The German seller of the Preiser 65602 delayed shipping five days.  Feedback is in German, but it looks like the four packs are still in Germany.

Back to painting. Have a good weekend.

John Rowlen

DSCN6936

Attachments

Images (1)
  • DSCN6936

Not a lot of time spent but I did managed to get the doors glued in on the building that only leaves the big doors and roof to add.  And thanks to Bob ( RSJB18 ) showing me a site to get a pic of flooring I was able to rattle off a few sheets. Now I am asking for opinons. I am pretty certain that is the way I am going to glue them down. So how does it look as an older wooden floor...Pics......Thanks Paul 2

DSCN0187DSCN0188DSCN0186


Attachments

Images (3)
  • DSCN0187
  • DSCN0188
  • DSCN0186

Morning guys! There has been a lot going on here and some wonderful work! You all do a great service by sharing your work with the rest of us! It gives one a chance to broaden there minds!

John, Your people are looking great! But I am worried about what you are going to do if you run out of people! How will you relax?

Paul 2, Your building is looking wonderful and the floor looks perfect! I also like the site that Bob shared!

Ed, way to think out of the box! It is a great way to keep the boys interested in trains and something they just might carry with them the rest of there life!

Yesterday I was able to get a little more ballasting done and poured a concrete floor around where my crane with be located. This morning I plan to get out there and clean the groves for the wheels and do some more ballasting. I am trying to get as much done as I can before the next lumber package arrives today!IMG_20200313_154141985IMG_20200313_154156584IMG_20200313_154147610

I know the layout is a mess, but its hard to keep it clean when it also serves as your work bench some of the time also! It will get cleaned up some day! LOL

I hope everyone has a great weekend and finds time for there layout and trains!

Attachments

Images (3)
  • IMG_20200313_154141985
  • IMG_20200313_154156584
  • IMG_20200313_154147610

John. The figs look great as always the freight coming  from China is almost at a stand still most of the Containers I haul come from China and the BNSF looked like a Ghost town yesterday with just a hand full of containers. Things  are not looking good in the Over Seas Container world right now I’ve been hauling containers for over 20yrs never seen it this bad. 

Paul. The door looks good as well as the building

Ed. I like that idea with those clips

Mike.  your layout is really shaping up  and looking the part 

As for me maybe I can tidy up the first part of the layout so I can move on to the new. 

Last edited by lee drennen

Hi all

Paul- the floor looks good. Fits with the age of the building perfectly. Happy to share my source with you guys.
Lee- Before you know it the yards will be overflowing. Going to take a while to catch up. The new section of track looks great.
John- more people painting. Time to find some classic movies to watch.
Mike- a layout under construction is always a mess. No apologies necessary.
Ed- great idea. Hope the boys don't drop that crate on the livestock.

Painted the ceiling of the main floor for the building white yesterday. Hope to continue on my building today. Nothing else to do but stay home and play.....

Bob


Last edited by RSJB18

Paul2, I'm a big fan of printed surfaces and the floor patterns is a nice addition to the interior of the building.  My only thought, you might want to print it in a smaller scale, the boards look to be about 2' wide in scale.  Wood floors are normally constructed of boards between 2-6" in real scale.   I don't mean to be a nit-picker, but you asked, and I note that you consistently strive for scale and realism.  Reprinting the floor would be a simple thing to adjust.   

Cheers, Dave

Last edited by darlander

But not being a tech savy person how would I go about making the planks smaller. Thanks Paul 2

Paul, my friend , send me the link to the site where you got the flooring.  Since the schools are closed for the next 3 weeks at least, I have lots of time so I can shrink them to the appropriate size and print them out on card stock for you.  As for myself I have lined up lots of train projects to get done over the next 21 days now.  

Hi Guys, Its mid morning break from the train room as I have other things to do for a little bit.

But I did get something done this morning! This is for Lew, I did a little work on my drive motor for my yard crane. I hope you like it and when my yard concrete dries I will attempt to install it after I clean the tracks!

So Guys I went from this!IMG_20200314_061032571IMG_20200314_061043409

To this! I had to make it smaller as the crane is now right above my Z4000 and all the wiring coming from the control panel!IMG_20200314_091728757


Attachments

Images (3)
  • IMG_20200314_061032571
  • IMG_20200314_061043409
  • IMG_20200314_091728757
Videos (1)
VID_20200314_091732066

Paul 2:  I use Mac pages.  I drag the picture/document off the internet to a blank page.   I can then push the corners of the picture inward, making it smaller and thus changing the scale.   I would assume that a PC document would do the same.   In short, I am not printing the picture directly off the download, I am attaching the print to a page that allows me to adjust the scale or size to suit my needs.   Hope this helps and look forward to other suggestions from other members.

Cheers, Dave

Dave- I sent Paul the file for the floor and had the same issue. I printed mine as a 5X7 image and it came out OK IMHO. The printed boards are 3/8" wide which scales to approx 18" 1:1. Not realistic for a wood plank floor but I'm OK with it. I guess I could have gone smaller but I didn't want to glue a bunch of pieces together to cover the floor.

2020-03-09 07.12.14

Attachments

Images (1)
  • 2020-03-09 07.12.14

Using Bob's attachment, I reduced, copied and pasted several segments on a page.   I ended up with a print floor pattern 8" x 5" with a scale 6" (1/8' actual) board width.   A finished floor would require some cutting and pasting.  Doing this, you could produce a floor pattern with almost any size planking,   Since this is an interior area viewed through a window, it should pass an "eye test"!

IMG_1284

Cheers, Dave

Attachments

Images (1)
  • IMG_1284
Last edited by darlander

Hi Guys, Its mid morning break from the train room as I have other things to do for a little bit.

...............................................................................................................................

Mike, that is some nice work. How did you shorten the long shaft in this pic? Plus it looks as if the bearing is pressed on.

The video shows it works smoothly. Again, nice!

Last edited by geysergazer

..................................................................................................................................

John. The figs look great as always the freight coming  from China is almost at a stand still most of the Containers I haul come from China and the BNSF looked like a Ghost town yesterday with just a hand full of containers. Things  are not looking good in the Over Seas Container world right now I’ve been hauling containers for over 20yrs never seen it this bad. 

.................................................................................................................................

Lee, so sorry to hear this but not surprising. Our town and the town next-door are both college towns and both have sent the students home. The town next door is a ghost town. I don't see how many of the small businesses there can keep going. But we need to do what we need to do. There are C-19 cases in both towns and we must isolate.

Lee,  Good news.  The seated figures from China are coming by airplane into New York.  I am waiting on four more separate shipments.  Two have already arrived by USPS.  I started painting one of the 8406B 50-pack a night ago.  They take an extra coat of paint, but for $9.99 including shipping for 50 figures, (2 of each figure) you can't beat it.  See picture below.

I bought three more 8406B 1/45 scale seated people 50-packs just now.  When they all arrive I'll have eight 1/45 scale 50-packs, or 400 more seated people.

Two of the other 8402B 48-packs just arrived, two more arrived in New York, with three more in flight.  Another 336 1/50 scale seated people.  That is 736 more China figures to paint.  Of course I have eleven Preiser 65602 Seated People 24-packs to paint too.  Another 264 people to paint.  A total of 1,000 seated people to paint. 

OMG,  what have I done to myself?  I might reach 6,000 people painted yet.  I was 104 short of 5,000 last week.

It is true painting relaxes me from my caregiver tasks.  Unfortunately my bout with walking pneumonia a month ago and severe fatigue has beat me into the ground,  I have also lost significant hearing in both ears and cannot hear Mom when she calls to me.

Ordered the Canadian Pacific FA AA engines to pull the Canadian Pacific seven-car passenger train.  I am placing people in the Dining Car and two coaches this coming week.  Hopefully I'll hear the difference between the main FA a unit and the Bass FB unit.

Going to make another pot of Kona dark roast coffee now.  Have a gggg-good weekend

Sincerely, John Rowlen

IMG_1736

Attachments

Images (6)
  • IMG_1736
  • IMG_1737
  • IMG_1738
  • IMG_1739
  • IMG_1740
  • IMG_1741
Last edited by John Rowlen

Glued the first two panels of the shop together. I needed to get a couple of walls set so I can figure out some other details. I need to raise the whole building about 3/8" on the layout so that the door sills and loading dock are at the same height.

Fiddled around with an Atlas switch machine to see if I can use them to operate my old Lionel switches. They are strong enough to move the turnout but not sure if its worth the effort required.

Nothing ventured nothing gained......

2020-03-14 15.55.17

Attachments

Images (1)
  • 2020-03-14 15.55.17
Last edited by RSJB18

Lew. Sorry to hear that they closed my daughters college down she don’t go back to school till next fall or her work is done on the computer now

John. You are a brain child for finding that idea always like when we can use natural resources for a layout

John R. You were getting overwhelmed my friend you have a lot of painting to do

Bob. Great idea how to hold that building together

Hey RSJB18,

Here you go. On the original image, some of those planks were nearly 3 scale feet wide! That's some serious lumber you've got there. 

In the attached file, resized so that each plank is at or under 6" width. Repeated the image to cover a sheet of letter-sized paper. Print to your heart's content.

FYI for DIY - Either Adobe Photoshop or Affinity Photo make quick work of image resizing.

- The Other Guy

[edit - conversion to pdf goofed on first go; replaced]

Attachments

Last edited by The Other Guy

https://ogrforum.ogaugerr.com/...2#138682179732221272

Hi Lew, the steel rod was cut using a Metal cut off wheel on my angle grinder. As for the bearings they just slip onto the shaft, I had to grind the steel shaft on the end that I cut off on the bench grinder, the I finished it off with the dremil to smooth it out to sit nicely in the bearing!

Lew, how did you put the quote in the message you posted?

Last edited by mike g.

Bob, the building is looking great!

John, I guess you don't need to worry about running out of people! LOL

Lee, the wagon is a nice work of art! It really looks outstanding!

Well after my mid morning break, I was able to get out and get a little more ballast done and cleaned the train room some! It takes a while when you haven't done it in a couple of weeks! LOLIMG_20200314_151612112IMG_20200314_151626021

Attachments

Images (2)
  • IMG_20200314_151612112
  • IMG_20200314_151626021

Thanks for the re-formatted print @The Other Guy ! I tried some of the Windows photo editors but they only crop the image, not re-size.
Mark- moving right along I see.
Mike- ballast is a tedious process but worth every minute. Think of Elliot's layout....
John- that's a beauty in two rail. All hand laid track too. WOW
Lee D- love the wagon.

I've now got three walls glued together. More details to work on now. I decided that I need to raise the building 3/8" to have the door sills meet the car floors.

2020-03-14 20.40.31

Bob

Attachments

Images (1)
  • 2020-03-14 20.40.31
Last edited by RSJB18

Beautiful work being done.  I am grateful OGR Forum is here to let us communicate our projects on line, even if meeting in person or groups is currently frowned upon.

Wishing you the best of health.  Have fun on your railroads. 

Now we have the excuse to work on our model railroad, "the government suggests we stay at home".

Sincerely, John Rowlen 

Last edited by John Rowlen
The Other Guy posted:

Been having fun making more Menards custom billboards and have started going around to my local businesses to get their OK to use images/Trademarks (since they'll be displayed in public). Approved as of today:

- The Other Guy

- The Other Guy

Since you obviously love Katonah, have you tried to get Peppino’s in the old Harlem Line station or Pizza Station??? My brother lives just north of Katonah, so I’ve been there numerous times over the last 15 years or so - great small town feel.

Apples55 posted:

Since you obviously love Katonah ....

Appreciate the tip but you've got the wrong "Katonah."  These businesses are in my neighborhood (Woodlawn), on Katonah Avenue, in the Bronx.

Useless Trivia Time! Both share the name of a Native American sachem who ruled these lands, long ago. In fact, Katonah Avenue actually follows the original trail used to connect with his Lenape brothers and sisters down South, on (what's now) the island of Manhattan.

- The Other Guy

Last edited by The Other Guy
jgtrh62 posted:
RSJB18 posted:


John- that's a beauty in two rail. All hand laid track too. WOW

Thanks Bob! Just turnouts and bridge decks are hand laid, everything else is flex track. I'd go crazy if I had to hand lay it all. 

I'm hoping to finish building this remaining deck girder bridge span section today, it will complete the bridge span in my previous post.

IMG_0387

I will post a picture of it when completed.

Happy Sunday all!

John


John, Thank You for editing your reply.

Last edited by Pingman
The Other Guy posted:

Been having fun making more Menards custom billboards and have started going around to my local businesses to get their OK to use images/Trademarks (since they'll be displayed in public). Approved as of today:

- The Other Guy

Eight more approved today:

- The Other Guy

Six more billboards signed-off, including some local community groups:

LocalBillboard4   LocalBillboard5

- The Other Guy

Attachments

Images (2)
  • LocalBillboard4
  • LocalBillboard5
Last edited by The Other Guy
jgtrh62 posted:
CGWforever posted:

Cleaned up around a bit after completed wiring and signals set up and finally running eastbound and westbound C&NW trains on Central Division layout. Enjoy! 
Patrick 

I really enjoyed your video, Patrick, thanks for posting! btw, who manufactures that 2 bay engine house visible in the beginning of the video?

John

John, Thanks. Engine house was made by Proses Hobby at Turkey. It have two working overhead doors. Best money spent! 
Patrick 

IMG_20200315_001054IMG_20200314_111154~3sketch-1584248983027IMG_20200315_000754~2

IMG_20200314_111320~2IMG_20200315_004211~5

I found real life photos of very old stone structures that are VERY similar looking to the spherically textured foam. Seeing them has helped get right past "seeing foam" when really close up.   I still need to wash for stone detail, drybrush some matte highlighting colors for weather, plus carve some more Myan-ish detail under the "medallions" (the satin is for a granite, older than the elemental terrain it's buried in ) ...they are just foreign coins cheap asses passed off while tipping me long long ago. (I had a few hundred at one point)

I also stumbled on some Myan bat-man-god mythology that may change "something" after some more "digging" on the story 

.... but I don't own the images to share

There are 4 pieces. #1 plateau, #2 "pueblo", #3 pueblo foundation slab, then #4 the steps and lower pyramid.

Attachments

Images (6)
  • IMG_20200315_001054
  • IMG_20200314_111154~3
  • IMG_20200314_111320~2
  • sketch-1584248983027
  • IMG_20200315_004211~5
  • IMG_20200315_000754~2
Last edited by Adriatic

Hello,  Doing final inspection and touch up on ninety-five 1/50 scale seated women.  I am painting the hair in brown, blonde and rusty red.  I have done all painting except the hair on the figures in the plastic bags in the picture background. 

Still waiting for a German seller to ship four Preiser 65602 seated people I ordered on March 7, 2020, over a week ago.  Today Ebay says "Beladung" or "loading".  Figures from China are arriving faster than the orders from Germany and DHL Shipping.  I have a tracking number that does not register with DHL's website, but Ebay shows it has shipped.

I would order from another German seller, but the outcome could be the same under the current shut down of countries.

Mom wanted to get ice cream through the Dairy Queen Drive-through and they are taking credit cards only, no printed money that can carry the virus.

What a difference a week makes.  Still painting figures and trying to keep Mom happy.

Update: Unable to sleep, so I painted a few more figures after mixing a "Cherry" pink paint.  The cherry stands out a little better than the light pink.

2nd Update:  The figures in the last picture are 4802B China 1/50 scale unpainted figures from Evemodel on Ebay that just arrived today.  There are 48 seated people in a $9.99 pack.

Sincerely, John Rowlen

IMG_1743

Attachments

Images (5)
  • IMG_1743
  • IMG_1746
  • IMG_1748
  • IMG_1752
  • IMG_1749
Last edited by John Rowlen

Really not much done in the last few days. Mostly because I had to oreder materials to finish the projects I am working on. I did cut out the plastic for the machine shop roof. Glued the two pieces together and that has to dry. I laid out the track for that general area and figured out how many switches I need. I need three right hand switches and will have to add Z1000's to them because they are too far at the back to manually switch them.  I fired off a question to Steve at Ross and as soon as I get a reply I can order them..........Paul 2

Here's the "here we go, am I gonna regret this?" photo before anything started and the parts were stacked up (the little detail and other parts are already stacked in the plastic container).

0316200856

Yesterday, I took four of the IMAOn30 ET&WNC hopper kits on a mass assembly-line build. Man, those suckers take a lot of work! A long time back, I built just the one, as a learning guide (which is sitting on it's side to the right of the gorilla glue bottle). I’m glad I did and that I hadn’t painted the thing as I used it as a guide when doing the others. I got the frames and sides and ends done, but I ran out of time yesterday for the final assembly and details. I’d worked on them from about 9 to 4:30 or so. After getting one mostly together (which had a damaged end I couldn't fix, so it'll be finished as a damaged car that needs to be back to the car shop, I guess), I figured I was burned out and anything further I’d do after that would be half-buttocksed.

I’ll give them a few days before I do the final assembly. I have trucks and Kadees for them already, as well as decal sets just waiting. I’ve been wanting ET&WNC hoppers for a long time as they had lots of them but nobody makes a plastic version. There are two people who have 3D prints available, but nobody will make the darned things in O scale! One said it’d cost about $50 each, and I said I’d be just fine with getting two or three even at that price. Oh well, I’ll have them soon enough I suppose.

I did my first one with the full interior details, but I noticed the weights are going to be quite obvious as there's no place to hide those. So, the rest will be finished with no interiors so I can put loads in them, atop the weights they so badly need...

Attachments

Images (1)
  • 0316200856
Last edited by p51

Same here, in between getting my tax info together had to do something different. The hotel I'm working on needed a fire escape and I thought it probably wouldn't be feasible to try 3D printing it but decided to give it a try anyhow.

So built one in CAD  and ended up being able to print it to my surprise. Just need to glue it all together now.

Construction_43 Construction_42IMG_8805

Attachments

Images (3)
  • Construction_43
  • Construction_42
  • IMG_8805
sidehack posted:

Same here, in between getting my tax info together had to do something different. The hotel I'm working on needed a fire escape and I thought it probably wouldn't be feasible to try 3D printing it but decided to give it a try anyhow.

So built one in CAD  and ended up being able to print it to my surprise. Just need to glue it all together now.

Great job!

(Ray, your excellent photos/images edited out while using reply with quote.)

Finally got around to making and installing some trees - we used a Scenic Express "Super Trees Starter Kit" which came with everything we needed to build about ~20 trees (I say we, since the wife was integral in the effort!). We also started on our "Dog Park" with more Woodland Scenics fences. I spray painted the fences with Gloss Black spray paint and will likely order some Arttista dog figures this week to fill it out

Last edited by mattrain

John Roland,

I might have missed it, but did you ever post a layout pic showing where all of your figures live, work and play? If not, can you?

I did a census of Warrenville's citizens this morning, a rough count was 983, a number that I had thought was a lot. That is until I started following your fantastic posts.  Slow down John, I gotta go back downstairs to paint at least 5,017 more people to catch up with you. The problem is, where can I put them on Warrenville?

John, are you keeping your citizens 6 scale feet apart? Are you going to remove citizens from passenger car interiors? I read today that LIRR ridership is down by 67%, I'm guess that a similar situation applies to all passenger lines.

A note to my OGR forum friends, No, I am not taking the current virus situation lightly, so please don't flame me because of my tongue-in-cheek questions above.

Stay well all

Last edited by Lionelski

Lionelski,  (John),

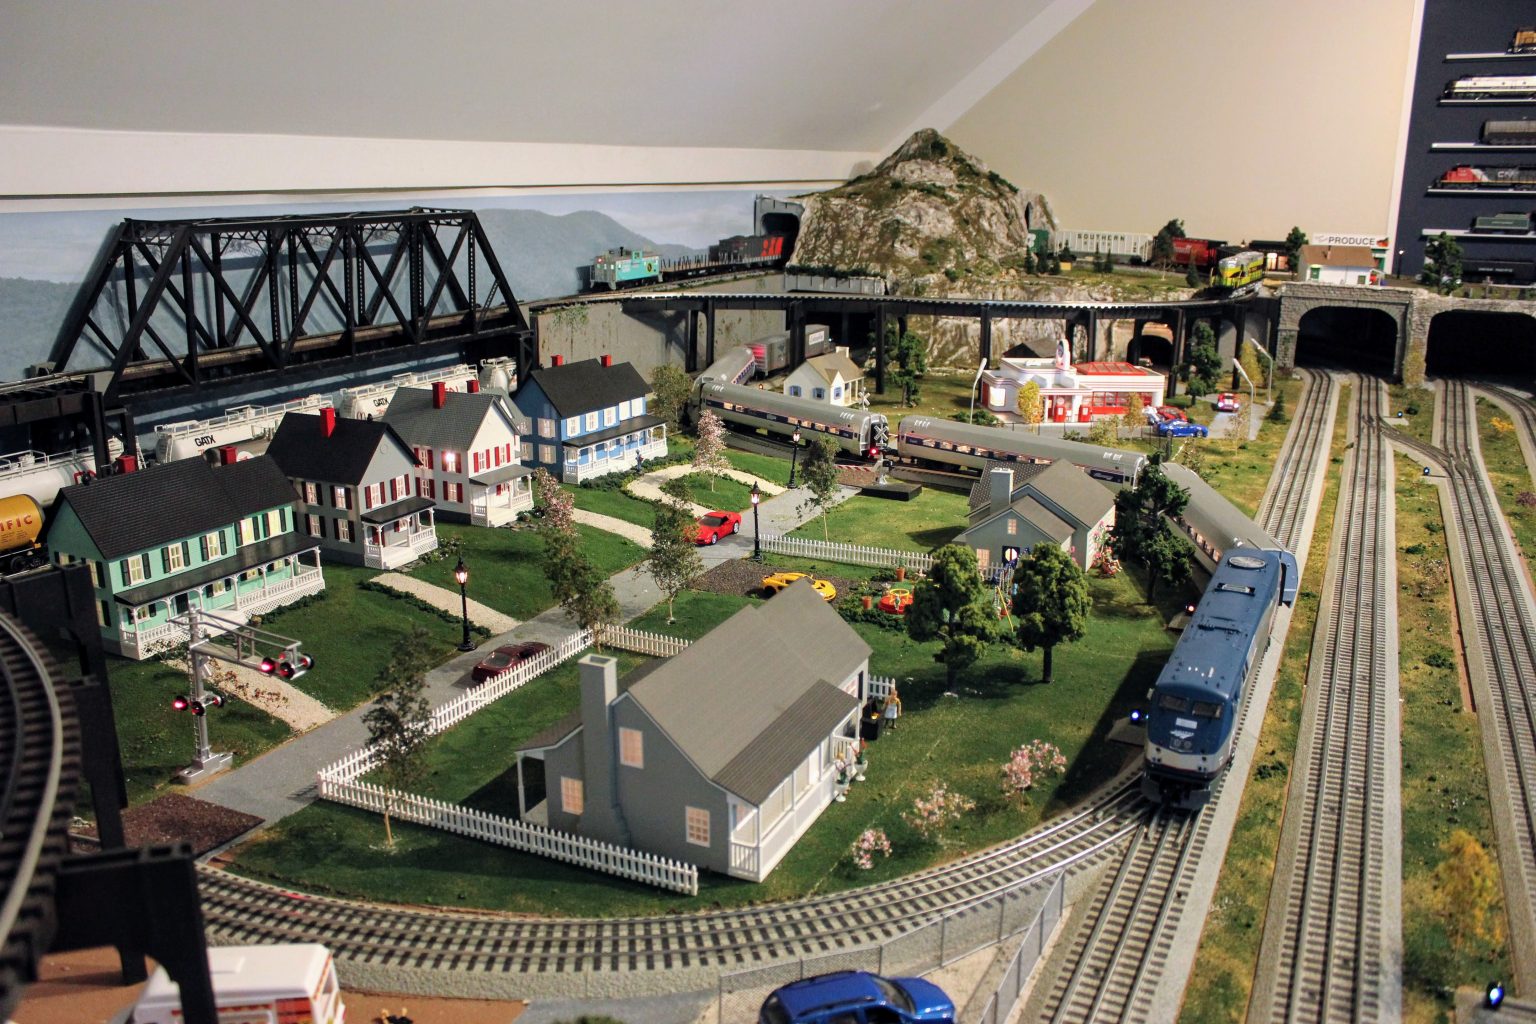
Most of my seated people are happily sitting in the passenger cars I have detailed.  The railroads represented are Atlas O California Zephyr D&RGW and WP full 12-car sets with 8 Atlas  F7 Rio Grande units.  Atlas O Amtrak Cal Zephyr 12-car set with 5 Amtrak F7 ABBBA units.  There are also about five additional Zephyr cars.

The Lionel 21" cars include two seven-car Chesapeake and Ohio sets. There are two NYSESE seven-car sets. (I bought a second 5426 engine and set to get the cars.)  Another two ten-car Pennsylvania Broadway Limited sets fully detailed with modified upper seats in the 12-4 Sleepers. (I posted pictures on OGR when I turned the molded seats the correct direction in the lower level floor and lowered them, and built upper seats.  I also put beds and sleeping quarters in the Sound Kitchen car with three crew members.)  

The other railroads include Penn Central, Southern Pacific, Union Pacific "Challenger" and "Excursion" sets, Amtrak, Canadian Pacific with ABBA, and the Santa Fe nine-car set in which I built a kitchen to fill the void in the dining car.  Sound is in the Large Dome car.  I probably missed a railroad, oh, CSX Executive seven-car 21" passenger set.  Unfortunately my F40PH #9999 was smashed in the three trips back to Lionel for service. I received a refund on the engine from Lionel.  I still am waiting for Lionel to remake the F40PH CSX engines in the new [CSX] Boxcar Logo.  

And an eight-car Wabash set of 21" passenger cars with two E7 Diesels.  As I left my den, I saw one of two Wabash Station Sounds dining cars. The first went to Lionel for a new body and came back with two more roof vents off the body shell, so I bought a second Dining car that arrived with a roof vent off the body shell.  (The pin for the vent has a molded notch in the post that breaks at the notch.)  Lionel ran out of replacement Wabash Diner body shells.

The interior painting and detailing is a six year project.  I did a lot of painting as I stayed up until 3:00 A.M. to care for my mother when she got out of the hospital twice, two years ago.  After her last bathroom break, I would go to bed until morning.

What is most remarkable is that I have no useable vision in my left eye that has a pool of blood and cholesterol deposit in the center.  I am fortunate that with my glasses off, I can see the up- close detail with the help of a battery-powered head lamp.  I use a lot of batteries and bought fourteen 8-packs to get me through this next batch of painting. -The cheap $1.99 packs of 8 AAA batteries from Save-a-Lot last longer than the 40 Duracell I burned through in February.

I will run the Canadian Pacific cars past my camera after I finish the two CP coaches and Dining car. 

Have a safe and healthy Spring.  This website has helped me get through a cloudy day on many an occasion.  Sometimes we must make our own sunshine.   A special thanks to all who contribute to this thread.

Sincerely, John Rowlen

Last edited by John Rowlen
Pingman posted:
sidehack posted:

Same here, in between getting my tax info together had to do something different. The hotel I'm working on needed a fire escape and I thought it probably wouldn't be feasible to try 3D printing it but decided to give it a try anyhow.

So built one in CAD  and ended up being able to print it to my surprise. Just need to glue it all together now.

Great job!

(Ray, your excellent photos/images edited out while using reply with quote.)

Thanks Pingman

Modified / upgraded the lighting on the standard, as-supplied Morrison’s Doors factory from Woodland Scenics. A great looking building as it is, but I hate the faux gooseneck lighting fixtures that this, and many other buildings, come with. I want them to actually work! So I repeated what I’ve done many times before, using the universal LEDs from forum sponsor Evan Designs, pre-wired with the bridge rectifier.

Drilled small 3/32” holes to pass the LED chip through from the inside of the building - remember these have the bridge rectifiers already on the wire. Bend the wire to match the contour of the gooseneck lamp. Then epoxy or superglue the LED and wire to the lamp. After glueing, paint the wire with matching flat paints to mask the wire. It’s barely noticeable to even to closest review.

BD73FF85-BC7C-42AA-BA85-59805915A49A

77A84EA6-9B1C-4E67-B7A6-CFF4684FB7AC

Still need to fill in those 3/32” drill holes on the roof where the LEDs passed through.

Here they are on, in a darkened room. I’m diggin’ it.

142DD502-C823-4FA9-8AD6-27CD06092ACA

Give it a try. Keep well!

Tom

Attachments

Images (3)
  • BD73FF85-BC7C-42AA-BA85-59805915A49A
  • 77A84EA6-9B1C-4E67-B7A6-CFF4684FB7AC
  • 142DD502-C823-4FA9-8AD6-27CD06092ACA

Add Reply

Post

OGR Publishing, Inc., 1310 Eastside Centre Ct, Suite 6, Mountain Home, AR 72653
800-980-OGRR (6477)
www.ogaugerr.com

×
×
×
×
Link copied to your clipboard.
×
×