Mike g., looking good, your large curve is going to be really nice. Keep us posted., Everyone has posted some really neat pictures the last few pages. Happy Railroading Everyone 

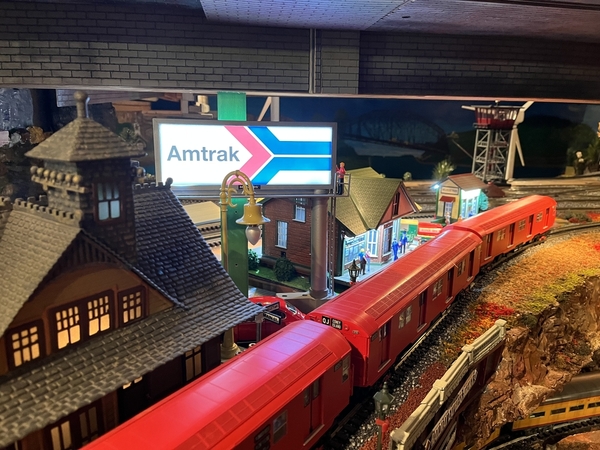
@leapinlarry posted:
You know Larry, every time I see photos of your layout I am so impressed of the detail! Love everything you post!
@Ian Y. posted:Finally got the last of the bench work made up, its now big enough for a dogbone with O-72 on each side. I can't believe the amount of space you need to runs Lionel's best engines but it will be worth it.
Looking good! Just think of all the stuff you get to put in the middle of the loops!![]()
@Jack Texas Special posted:Thanks. Any certain specifications I should look for?
Attachments
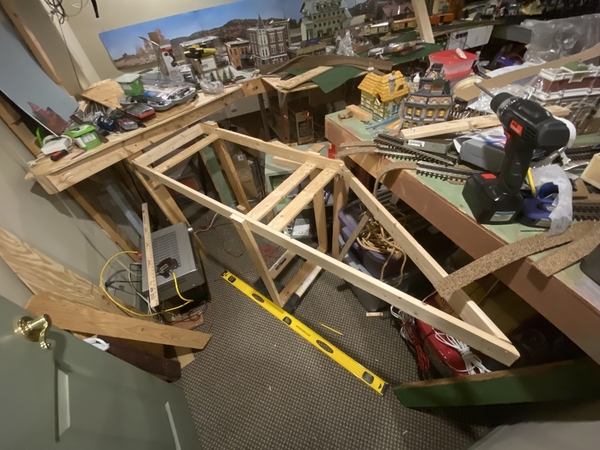
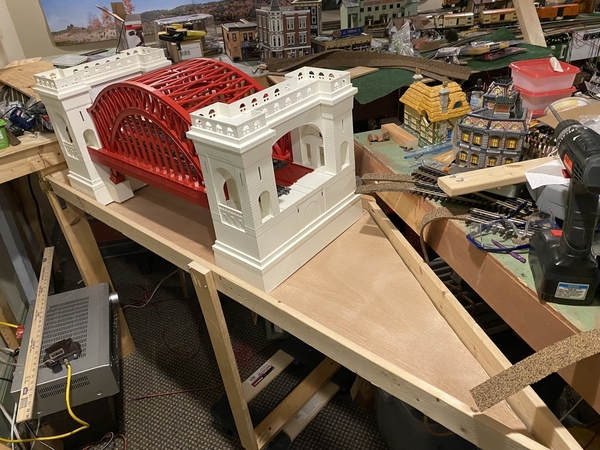
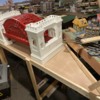
I finally got around to working on the swing gate to support the MTH He!! gate bridge (I put exclamation marks to avoid it being censored.) Here are some updated photos. I started with changing the shape of the rear layout to give me space. Than I started to build a support for the He!! Gate bridge.
The problem with the He!!gate Bridge is that it is heavy and bulky. I did not trust lifting or lowering it.
I decided to try a barn door approach with a hinge to swing it and wheels to support it moving back and forth.
I started with two by fours with single wheels which were more expensive than simply buying two dollies with larger wheels.
I than went with a 1x3 frame using cheap bed slat wood and measured from there. It was challenging as I was dealing with multiple angles.
I did have a good friend who turned me on to Kreg screws which made the project easier but I could have used an extra hand or three.
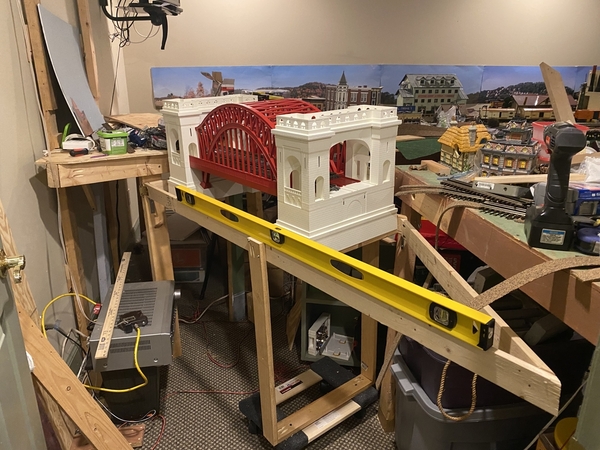
As you can see in the above photo, I started with one dolly in the front. Then I decided to get rid of the extra 2x4 support in the rear and have the gate more self supporting and added a second rear dolly.
The dollies rolled a little stiffly and placed pressure on the frame.
I was required to add some metal framing to give the gate some support. It now moves smoothly and I will start to improve the framing now that I know what sizes work. I realize that this is "cut twice, measure once" but it works. I start with cheap wood and can than determine what fits. Than I can rebuild my prototype. Heck, if it works for Menards . . .
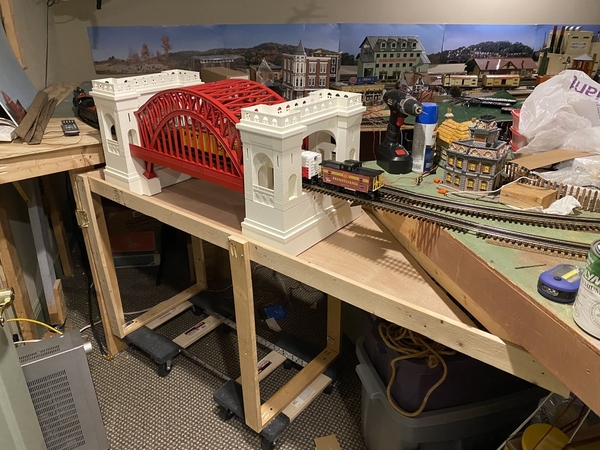
If you look closely, you can see that my base is actually two small Harbor Freight dollies to support the swinging gate. I have placed track in the bridge to test it to make sure it is level and electrically connected. Now I have to figure out the best way to split the track at the tables and have the track mate when opening and closing.
Any thoughts?
Attachments
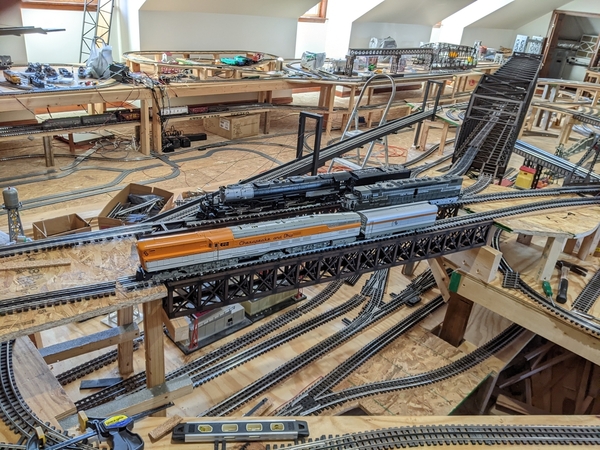
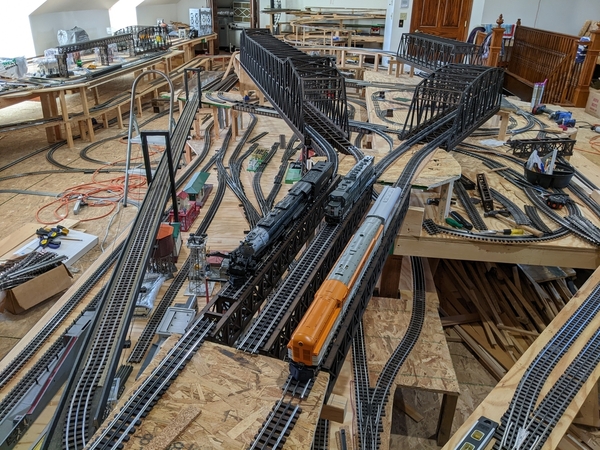
I finally finished my truss under bridges today and got them set in place. They 48" in length. I placed some engines on the bridges to check perspective.
Thanks;
idea-thinker
Attachments
That M1 looks soooooooo cool! And the layout looks amazing too.
Ideathinker, your layouts looking great, the long bridges look beautiful, the M1 looks right at home to. Your so creative. Happy Railroading Everyone
@idea-thinker posted:I finally finished my truss under bridges today and got them set in place. They 48" in length. I placed some engines on the bridges to check perspective.
Thanks;
idea-thinker
Wow IT. Tracks unlimited. I get dizzy just trying to figure out how you can put this together.
You deffinetly have " something to do on your layout "
Love the bridges. Bookmarked the page for future reference.
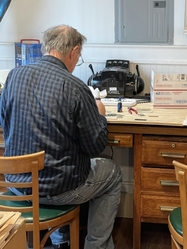
Rich came over this afternoon and worked on building one of Al’s Transfer Table Manager’s offices as a part of completing the table.
He is a retired orthopedic surgeon who builds cabinets so this would be a breeze… right.
He studied the plans like a good student.
Then he completed the roof like a champ. Rich was quite complimentary about Al’s design skills.
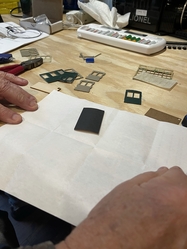
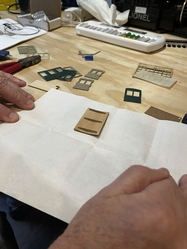
Then he worked on **** winders (windows for most of us), and finally completed ten of them and a door. Al’s name did not fare too well here. (Big fingers and poor eyesight notwithstanding).
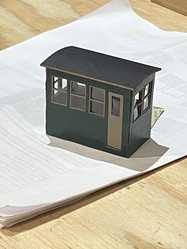
Finally the building was glued together. To be honest, Rich did it his way by then.
Actually it turned out looking good.
The proud builder had a big smile.
Attachments
Mike, I can picture the flextrack in place right now.
Ian, the table looks great! How large is it?
Larry, great photographs as always!!
EML, the support for the bridge looks great. I built a lift up, and have seen roll out bridge track where it meets the table, but can't offer any thiughts on it.
Ideathinker, those bridges are really great looking!
Bill, Rich did a great job on that transfer table office.
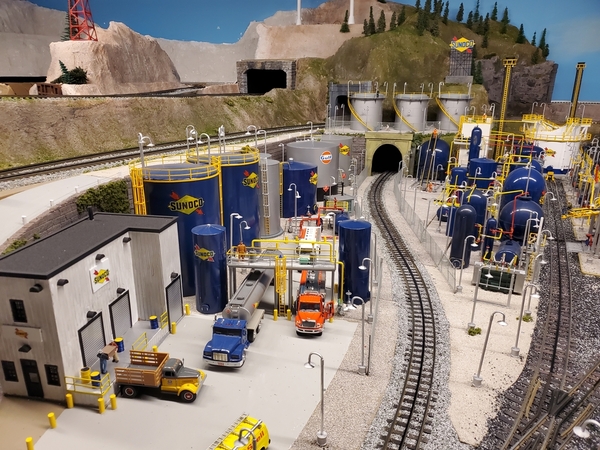
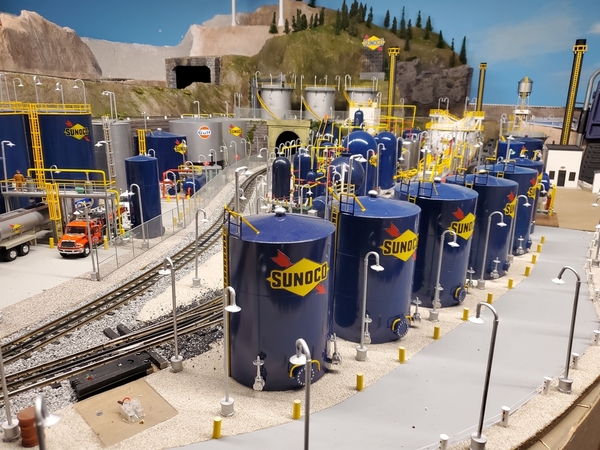
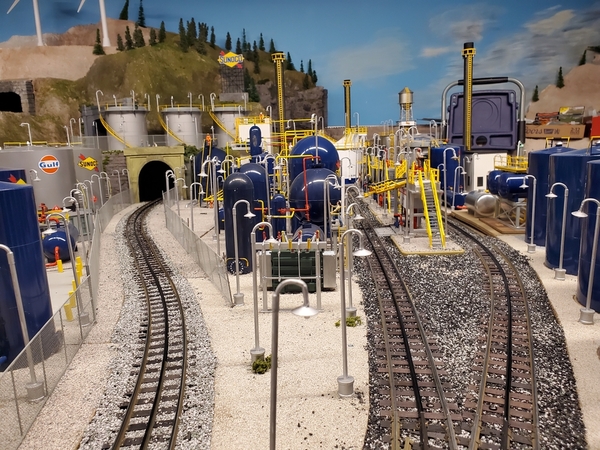
John, the refinery is coming along great. It sure looks bright with the blue compared to the Pennzoil refinery north of Oil City, Pennsylvania that I used to drive by often.
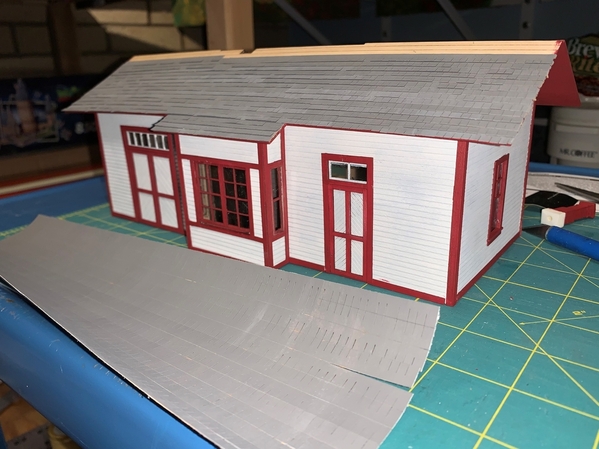
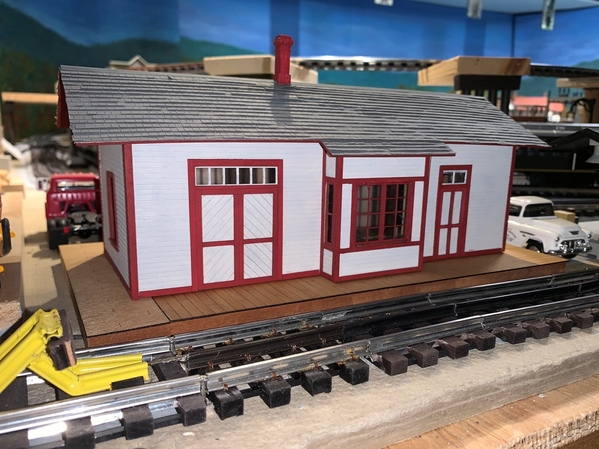
My station kit is coming along. The walls, doors, windows, and trim are done. I started shingling the roof with the peal and stick shingle strips that came with the kit. I painted them gray to look like slate before hand, and will dry brush a bit when done. The roof panels are just sitting on the building for the photograph.
Attachments
I’m figuring out how to best fit my Valley Motors on the layout.
Thanks to my wife who bought me this for Xmas. ❤️🎁
Attachments
Wow had to go back two pages to get caught up. Glad I am not the only one hibernating in the basement, working many hours, what great work by all.
Got the Pennsy Block wall done, finally !!. Took out the new to me for Christmas, video camera from my son, and on the third video attempt finally started producing a result worth publishing... No talking in this video, just trains running in 4K.
Nothing level, nothing plumb. Nothing straight, everything crooked and warped. At this point my OCBDds everything had to be perfect has worn off. After this adhesive has cured Ill fill and paint to a level my blind self can’t notice.
Attachments
Idea Thinker,
What a great layout. I was working on one bridge and I count eight bridges and at least two levels of track. What a great space.
Please keep us in the loop. Would you share your layout plan?
Chris, that truly is a work of art that you have created. The wall turned out great and if I didn’t know better, the backdrop and scenery look so realistic. That is a nice video and you let the operation and scenery do the talking. That’s going to get a lot of “likes”. Great job.
Man- Now I'm falling behind. Nothing new to report on my layout. I was going to work on some details for the caboose office last night but my butt hit the recliner after dinner and the rest is history as they say.......![]()
Lot's of great pix everyone and a great video Chris. ![]()
Bob
Nothing wrong with recliner therapy Bob.
@RSJB18 posted:Man- Now I'm falling behind. Nothing new to report on my layout. I was going to work on some details for the caboose office last night but my butt hit the recliner after dinner and the rest is history as they say.......
Lot's of great pix everyone and a great video Chris.
Bob
Sometimes I do my best work coming up with ideas while in the recliner. Then I wake up and forget half of it!🙄
Love your layout Chris A. I started to watch your video on my phone. Then I remembered I could just subscribe to your channel and watch it on a big screen.
The recliner doesn’t work well for me with my back and sciatic issues, but I do come up with great ideas and forget half of them. That is a big reason why I get ahead of myself and have to redo things.
@obxtrainman posted:Love your layout Chris A. I started to watch your video on my phone. Then I remembered I could just subscribe to your channel and watch it on a big screen.
I forget to do that too, OBX.
Chris, good start on using the new camera!
@obxtrainman posted:Nothing level, nothing plumb. Nothing straight, everything crooked and warped. At this point my OCBDds everything had to be perfect has worn off. After this adhesive has cured Ill fill and paint to a level my blind self can’t notice.
@obxtrainman That's what carpet is for, if one leg isn't level, the carpet soaks up the difference!
George
After a bit of a hiatus, I've started work on the layout again. It's been fun watching all the great creative work being done.
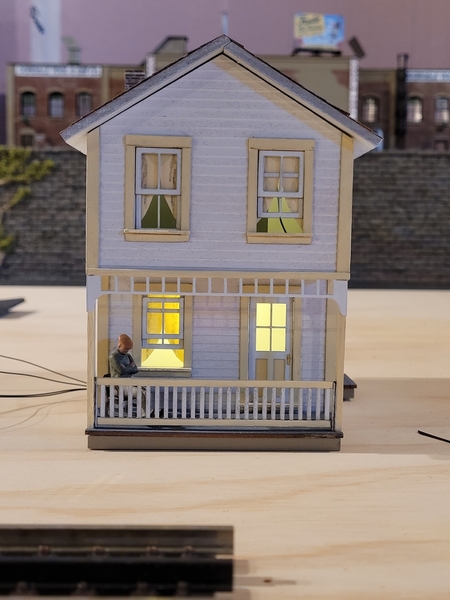
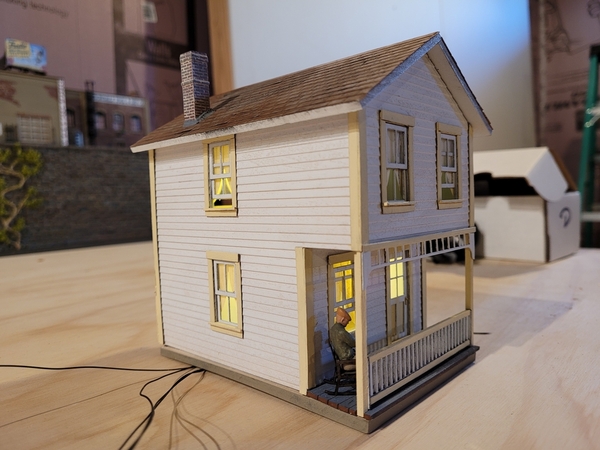
I've Just completed a house for part of my yet to be built coal mine scene. Thought this might make a good company house for a miner.
Stay Safe,
Scott
Attachments
@chris a posted:Took out the new to me for Christmas, video camera from my son, and on the third video attempt finally started producing a result worth publishing... No talking in this video, just trains running in 4K.
Thanks Chris, I really enjoyed watching that video! ![]()
George
@idea-thinker what an amazing room full of trains n' bridges n' tracks! Do you have a track plan you could show? Or are you just wingin' it? That would be a LOT of wingin'! More pics, please! ![]()
George
@Mark Boyce posted:The recliner doesn’t work well for me with my back and sciatic issues, but I do come up with great ideas and forget half of them. That is a big reason why I get ahead of myself and have to redo things.
Well Mark..... what do you do that helps instead of the recliner ?
I noticed the same issue. The recliner seems to help but only when I am using it.....when I get out of it there is a renewal of discomfort. ![]()
Maybe we should start a Post on this issue so that all the ' mellowed adult ![]() ' forumites might be able to continue to build all these amazing layouts. !?!
' forumites might be able to continue to build all these amazing layouts. !?!
To catch my ideas I do it the old fashion way; I keep a note pad and pen next to the recliner.
@Tranquil Hollow RR posted:Chris, that truly is a work of art that you have created. The wall turned out great and if I didn’t know better, the backdrop and scenery look so realistic. That is a nice video and you let the operation and scenery do the talking. That’s going to get a lot of “likes”. Great job.
Gonna second that . 😉
@EML posted:Idea Thinker,
What a great layout. I was working on one bridge and I count eight bridges and at least two levels of track. What a great space.
Please keep us in the loop. Would you share your layout plan?
EML;
The layout is for the most part a total 5 and in some places 6 levels total. I will be posting additional pictures and a short video demonstrate a train running on the bridges.
Thanks;
idea-thinker
All;
I have posted a short video of a Lionel Big Boy running through our new bridges which posted a few days ago. It is exciting to finally be able to run a train through the bridges and across the girders. It took a long time to create the bridges and girders.
Thanks;
idea-thinker
Attachments
@GeoPeg posted:@idea-thinker what an amazing room full of trains n' bridges n' tracks! Do you have a track plan you could show? Or are you just wingin' it? That would be a LOT of wingin'! More pics, please!
George
GeoPeg;
It started off with a plan but there have been many changes to date to accommodate the trains such as wider turns, more distance between tracks for larger bridges and the like. I will likely be posted additional pictures as we make progress. I did just post a video of one of our Big Boys pulling a train through the bridges and across the girders. Finally able to run a train.
Thanks;
idea-thinker
Evening guys, I have to say this is getting wild! I commented yesterday and its taken me a while to get up to speed on whats going on!
@EML Your swing table looks just fine, you might think about cutting your track at the same angle as the main table, that way you have no track just hanging in the air waiting to get caught by something!
@idea-thinker The truss bridges look perfect! Also, what an outstanding run with the Bigboy running across them! Very nice video!
@Bill Webb Bill the office looks great and it's nice to have a friend like Rich around!
@farmerjohn John, WOW what an Amazing refinery! But then again, your whole layout is AMAZING!
@Mark Boyce Mark, Your station is looking wonderful! Great job!
@ChiTown Steve Looking good, but I do have to say I think Vally Motors is going to need a little bigger parking lot! LOL
@chris a Chris, Nice job on your first video! The Pennsy block walls look outstanding!
@obxtrainman Looks good from here! Just remember that all it has to do is work as planned!
@B&O Fan Scott, Nice job on the house. It will look perfect on your layout as an office!
Well guys nothing new from me, I talked to the company who sent me the wrong stuff and they were very helpful. The only problem is it will probably be 2 weeks before I get my flex track! Oh Well I have other stuff to do like build the steal support for under the floating area.
I hope you all have a great night!
Scott, that is perfect for a company house. Now you need a few more.
Idea-thinker, that is very impressive watching the Big Boy pull a train through and over the bridges!
@mike g. posted:@ChiTown Steve Looking good, but I do have to say I think Vally Motors is going to need a little bigger parking lot! LOL
Mike, I’m going to build an elevator parking lot like they did back in the 1930’s. There are pictures on the internet of all different ones the city dealerships used instead of huge parking lots. 😉
Attachments
Started mocking up a possible idea for new industry/factory in the open lot in front of the new retaining walls. Figured I needed to take some photos, step back eat some dinner and think about it. Right now it's a combination of the IHC Engine House kit end walls with sidewalls from some Lionel Factory buildings. Obviously, I had weathered them at two different times in the past, they'll get completely new weathering if I decide to go that route, for now I am just trying to determine whether it's the right
Attachments
That's a good approach Chris. Mock up, eat, rest, take a look, and go from there 👍👍😁
The track looks good Victor.
That’s a unique idea with that structure Chris. What’s the foot print of the building?
Jay, it's 10" wide x 28 " long x 10.5" tall to the peak. Over the years, I picked up 3 Engine House kits, and I accumulated 3 of the Lionel Factories and one of the "sister" engine shed kits ( basically the same building with different end ).
Poured concrete today, and it already looks old! Excellent job!
I now have everything I need to set up my Legacy 990 thanx to Mario’s Trains in Va. Kudos to the staff there. I received my items two days after ordering. I had conversations with two of the staff members. They were kind and courteous. I also made progress on the shelf for it. Waiting patiently on paint to dry to finish it. If anyone is interested, I made my joints with a biscuit joiner. There won’t be much weight to support so the biscuits and glue should hold nicely. Getting anxious about finally after a years work finishing the TT and RH area.
Attachments
@Mitchellmarmel
I think option A looks the best!
@obxtrainman posted:I now have everything I need to set up my Legacy 990 thanx to Mario’s Trains in Va. Kudos to the staff there. I received my items two days after ordering. I had conversations with two of the staff members. They were kind and courteous. I also made progress on the shelf for it. Waiting patiently on paint to dry to finish it. If anyone is interested, I made my joints with a biscuit joiner. There won’t be much weight to support so the biscuits and glue should hold nicely. Getting anxious about finally after a years work finishing the TT and RH area.
That shelf really looks sharp!!
Well tried a few more ideas for the scratch build, I think I am going to ditch the Engine House roof and add the roof from an old Korber small factory .. It's a "saw tooth" roof design that was made to let ambient daylight into factories.
Then waiting for the blizzard to show up I decided to open up my Lionel TMCC M1a Mountain 4-8-2. Bought it new and haven't had it out of the box in over a decade. Like Christmas on 1/28 ! Now I remember why this was only one of two steam engines I bought brand new. Of course I threw a traction tire within 10 minutes of running it, but fortunately I just got some from Lionel, so put on 2 new ones and it's running great.
Attachments
Attachments
Hello all,
Mitch, beautiful work on that conversion (caboose to boxcab)
Victor, the rails turned out great
Chris a, you're knocking it out of the park with your layout WOW!
Leroof, nice work
t8afao, your work is top notch . WOW !
obxtrainman, nice job on the shelf
samparfitt, turbine looks great
Alex
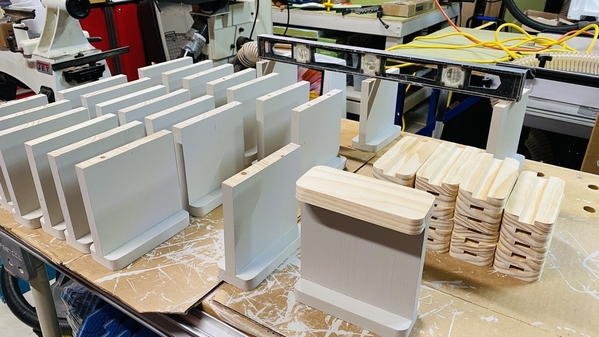
Wish the photo had some tracks in it, but these piers to support an upper level are what Iʻm working on right now.
Attachments
@Kelunaboy they look great! What kind of wood are you using?
Rick
Thanks Rick - the bases are poplar and hemlock and the uprights are finished spruce shelves.
I went with near finished lumber because Iʻm not thrilled about sanding. They are 8 by 6 and will provide 7 inches of clearance.
About a foot of snow has been deposited and removed from the necessary areas.
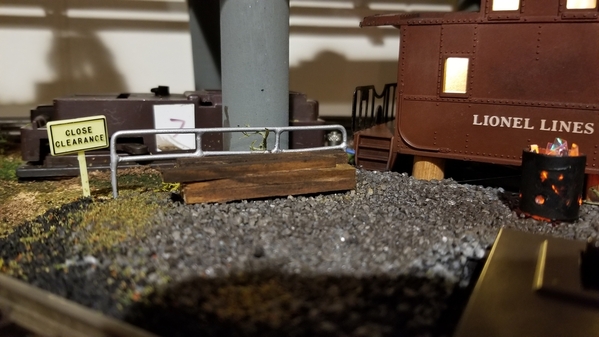
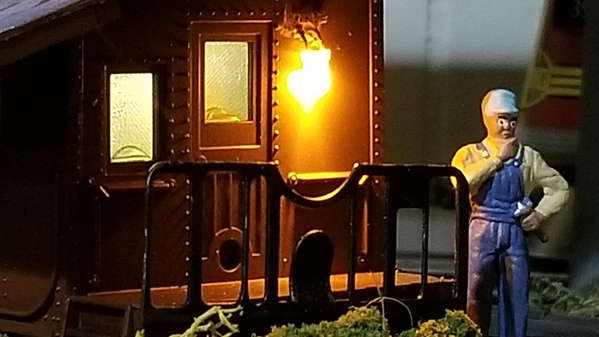
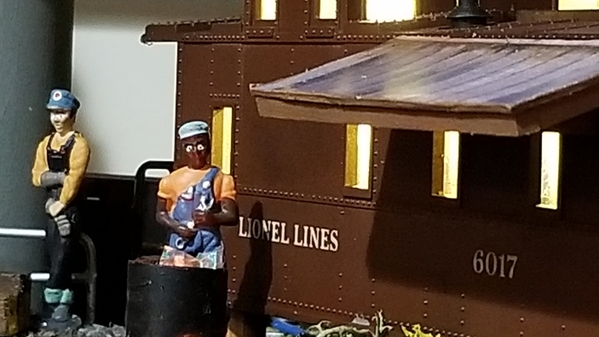
In between I started on a couple of details for the caboose office. I made a stack of lumber and I'm working on a short piece of track to put some wheels and an old truck on.
Bob
Attachments
Bob, research has indicated that, with that much snow, double malt is indicated.
Hired a conductor to work the new LS&I rs3.
Attachments
@Tranquil Hollow RR posted:Bob, research has indicated that, with that much snow, double malt is indicated.
1 double malt = 2 single malt 👍👍
I made sure that I maintained proper core temperature while dealing with the task at hand....🤣🤣🤣
@p51 posted:
Looks good Lee. I'm sure you will add your special touches.
Here is the Altoona Model Works Branch Line Station in place on the layout. I still want to streak the roofing some and tone down the wooden loading dock decking. I think this station is actually a small freight and passenger station. It will look pretty good there until I get LEDs and items to finish the interior and dock.
Attachments
@p51 posted:
I learned how to make gumbo in a spot quite like this in Louisiana back when. The owners were very happy to share their knowledge with me over some cold beers. It was better than hanging in bars while traveling. I had a train problem back then too,
Chris-The PRR M1a looks wonderful on your layout.
Lee-The hut is looking really nice.
Mark-You did a wonderful job on this kit. It looks really good in place.
Dave
@Mark Boyce posted:Here is the Altoona Model Works Branch Line Station in place on the layout. I still want to streak the roofing some and tone down the wooden loading dock decking. I think this station is actually a small freight and passenger station. It will look pretty good there until I get LEDs and items to finish the interior and dock.
Nice work Mark. 👍👍
Bob
@RSJB18 posted:Looks good Lee. I'm sure you will add your special touches.
Thanks!
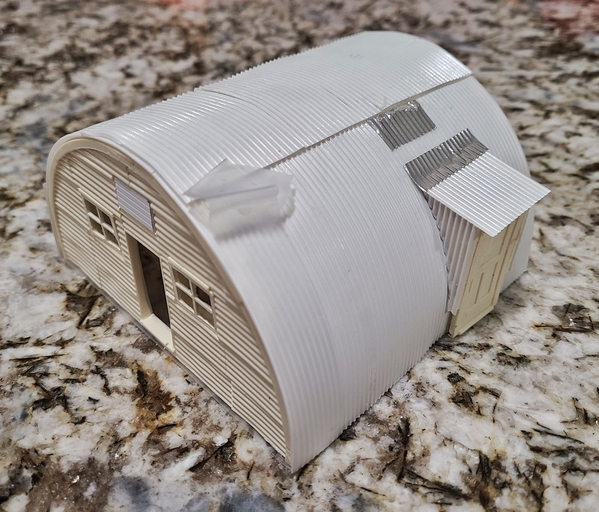
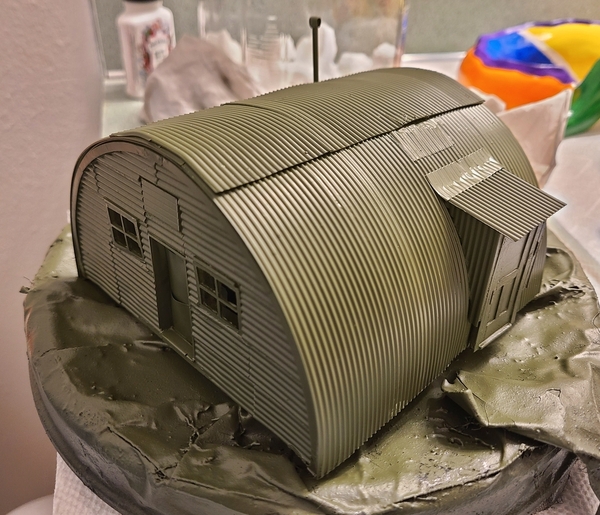
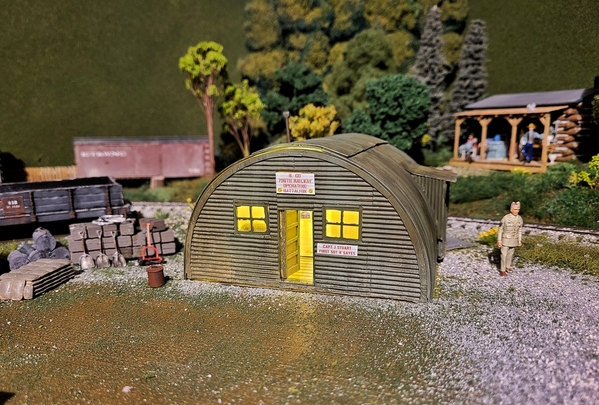
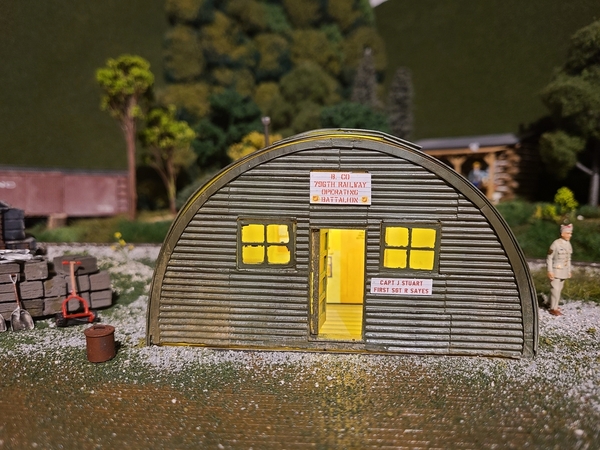
I got it all in place, but I found the roof is too thin for the interior lights, so I'll have to line the interior ceiling with opaque tape as well as hitting the interior with a blast of dull coat tomorrow. But for the most part, it's done:
If you notice, the CO and 1st SGT are named as they often would. J Stuart is my nephew's first and middle name. Like me, he's also an Army Captain but he's still in the reserves (whereas I resigned my commssion when he was still a kid). R Sayes is one of my best friends and the most imaginative model railroader I've ever known.
I consider myself the Battalion Commander, as it's all a fictional unit anyway...
The foundation was glued in place after the scenery was scraped to the baseboard. The hole is for the wiring for interior lighting, you won't be able to see it from the outside. I lined the interior with prints of plywood in scale.
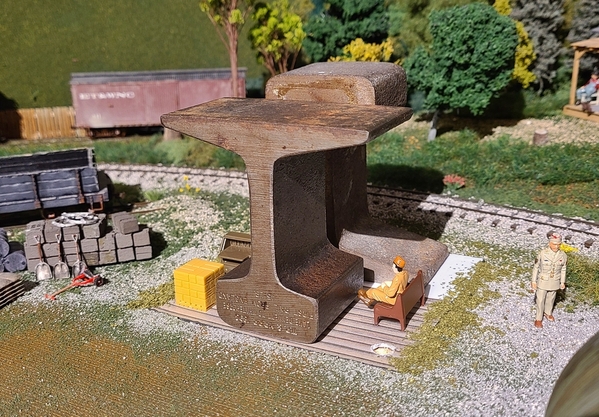
Note the weights, including a section of White Pass & Yukon rail...
Attachments
Thank you, Dave and Bob!
The Quonset hut looks great, Lee1
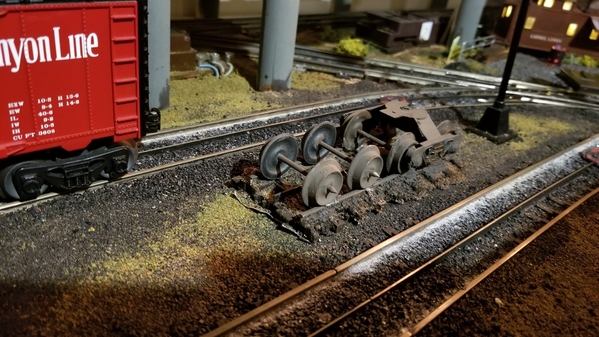
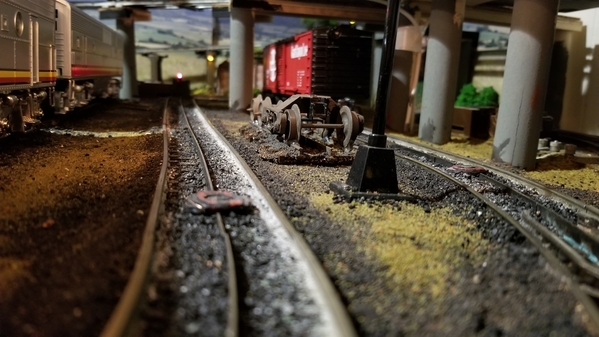
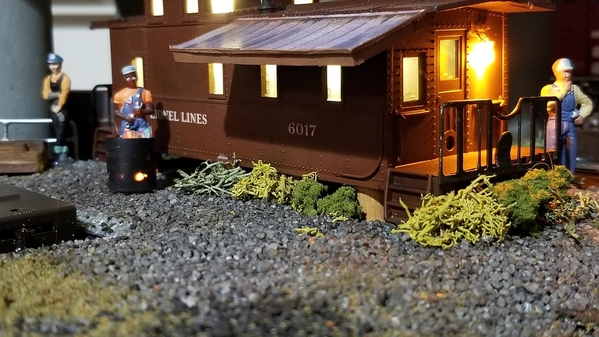
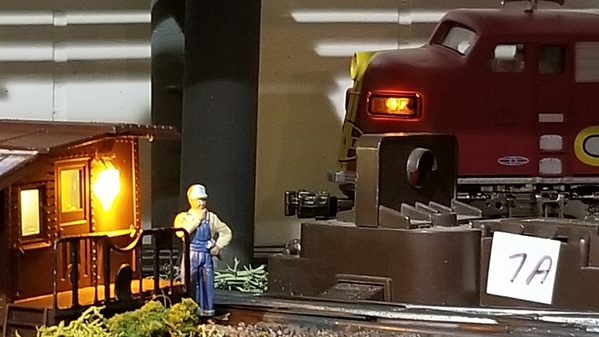
I finished the detail pieces and got them set on the layout. Still working on more "junk" to lay around the caboose. And the crew showed up to check out the new digs.
Bob
Attachments
That looks great Bob. The trucks, barrel, crew, and debris really enhance the area.
Given that you had to give time to your snow removal efforts, you had a very productive day.
@Tranquil Hollow RR posted:That looks great Bob. The trucks, barrel, crew, and debris really enhance the area.
Given that you had to give time to your snow removal efforts, you had a very productive day.
Thanks Jay. And just when I thought I was done for the night, the town plows came through again and buried the driveway and sidewalk. I'm covering 3 houses at the moment too. My in-laws are a house away and I always shovel them out along with my son. He's getting paid to do the neighbors in between who are in Florida until the end of February.
@RSJB18 posted:Thanks Jay. And just when I thought I was done for the night, the town plows came through again and buried the driveway and sidewalk. I'm covering 3 houses at the moment too. My in-laws are a house away and I always shovel them out along with my son. He's getting paid to do the neighbors in between who are in Florida until the end of February.
Same thing here Bob.
22.4 inches of snow, I cleared it twice yesterday in order to make it manageable for my blower. 10:00 PM plows pushed snow on my driveway skirt (which is 25 feet wide) 3 feet deep by 6 foot wide. I have a good neighbor who came with his tracked blower to remove it - or I could have never cleared it.
Plows came again this morning, but this time it was manageable with my blower.
I'm gonna spend rest of the day downstairs, after I dig a path in the back for my dog, the show is over her head!
Lionelski: Know this is not exactly trains...but take your time with that snow...22.5 inches is heart attack levels.
RJSB18 You too...keep safe and take your time don't overexert.
Keep safe, the snow will melt (eventually)
Best Wishes
Don
@Don McErlean posted:Lionelski: Know this is not exactly trains...but take your time with that snow...22.5 inches is heart attack levels.
RJSB18 You too...keep safe and take your time don't overexert.
Keep safe, the snow will melt (eventually)
Best Wishes
Don
Right you are Don! BTW, final local count came in at 24.7 inches.
My friend Mike C. was prepared - here is a pic from one of his layouts yesterday: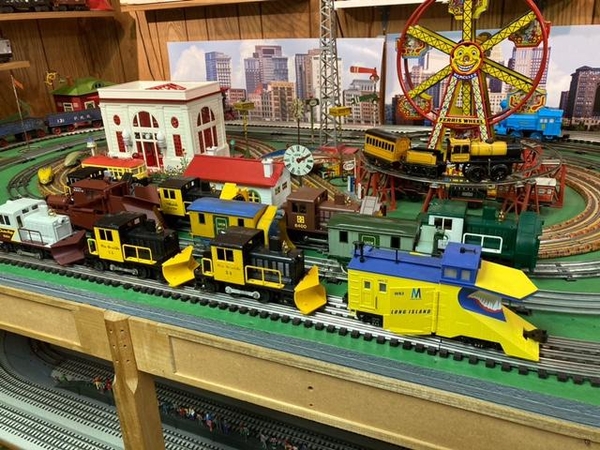
Attachments
@Lionelski posted:I'm gonna spend rest of the day downstairs, after I dig a path in the back for my dog, the show is over her head!
I'm glad that Warrenville's trackwork is straighter than this 75 foot path I dug for the dog!
Attachments
Bob, perhaps you should invest in a snow blower.
@Tranquil Hollow RR posted:Bob, perhaps you should invest in a snow blower.
Did that the year we bought our house. I have a 24" 2-stage Craftsman. Back up is provided by a Toro 15" electric. ![]()
OK- back to the trains
Finished blending the wheel track into the yard and ballasted the yard feeder. I'm debating doing between the rails. So far it's a no. Too bad I didn't paint the cork before laying the track.
I also made some pipe bundles and added them to the caboose. I used some frames (sprues?) that I saved from past model builds.
Bob
Attachments
@RSJB18 posted:OK- back to the trains
Finished blending the wheel track into the yard and ballasted the yard feeder. I'm debating doing between the rails. So far it's a no. Too bad I didn't paint the cork before laying the track.
I also made some pipe bundles and added them to the caboose. I used some frames (sprues?) that I saved from past model builds.
Bob
Really nice, Bob. That yard extension came out fantastic.
I started the day having a blast running trains. Then I began some track cleaning followed by routine maintenance cleaning up a couple of subway sets. Before I knew it, eight hours had passed. Man I love getting lost working on the layout. What a great hobby!
It’s looking real good Bob. I see what you mean about the cork. Perhaps, using tweezers, some carefully place ballast?
@Strap Hanger posted:Really nice, Bob. That yard extension came out fantastic.
I started the day having a blast running trains. Then I began some track cleaning followed by routine maintenance cleaning up a couple of subway sets. Before I knew it, eight hours had passed. Man I love getting lost working on the layout. What a great hobby!
@Tranquil Hollow RR posted:It’s looking real good Bob. I see what you mean about the cork. Perhaps, using tweezers, some carefully place ballast?
I can do the same Strap. It's easy to get lost in our little worlds.
I will leave it for now Jay. I'm sure it will get done eventually.
Bob
Rich completed the Transfer Table today by building and attaching the rail and the cab including figures. Then we placed the platform back in place.
It fit perfectly and no realignment was needed.
The lighted cab and buildings will be supplemented by floodlight towers, additional tracks added, and external scenery will be completed… eventually. A lot remains to be added and we need to place everything to see how it is going to look. Knee replacement is two weeks tomorrow and we need to have a plan on what to do while I can’t easily get on and underneath the layout to work.
While he built, I ballasted track, truly one of the joys of model railroading.
Attachments
Looks great Bill. I'm sure you will be up and around in no time. Just follow the PT and you will make a quick recovery.
Bob
Excellent looking details, Bob! I know what you mean about the cork under the switches. I learned the hard way trying to ballast around N scale switches; it was so hard not to get ballast or glue where you don't want it. HO was bad too. I'm glad I painted my cork, I'm not going near moving parts with ballast. I'm a lot clumsier now.
Bill, Rich did a great job on that transfer table! It looks great!
Tom neat idea.
“But Dad, I want to run your trains too.”
@Mark Boyce posted:Excellent looking details, Bob! I know what you mean about the cork under the switches. I learned the hard way trying to ballast around N scale switches; it was so hard not to get ballast or glue where you don't want it. HO was bad too. I'm glad I painted my cork, I'm not going near moving parts with ballast. I'm a lot clumsier now.
Good idea about the paint Mark.
Ballast and moving parts on switches and engines can test your temper .![]()
Happy 6th Anniversary to my layout. ![]()
Day one of track laying 1/31/16
Inaugural run
Fast forward to today.
Can't believe 6 years have gone by. Time flies when you're having fun!
Bob
Attachments
Happy Anniversary Bob, that’s quite an accomplishment. You deserve to enjoy a libation as you observe your operation today.
RSJB18: CONGRATULATIONS Looking good.
Tom M : Good idea, with my grandson at age about 1-3 I took a bunch of old Lionel track (came with some trains) and built a long "layout" on the floor. Then took some older cars and a "dummy" loco (so it didn't have a motor) and we pushed those around the layout. He really liked it...so I think you are on the right track (so to speak).
Don
Hi guys, I don't have a lot of time left after getting caught up on what everyone is doing! I do have to say there sure is a lot of great work being done by you all! I would comment on everyone's work, but that would take the same 2 pages I had to go over to get here! But do what to say once again OUTSTANDING work everyone!
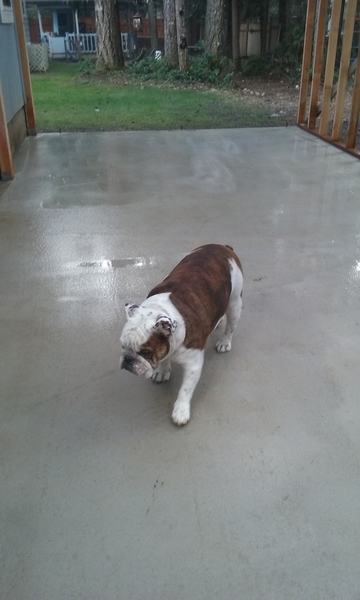
I haven't been to the train room for a while now as for you that have been fallowing my build from the train room addition to now know about Tank the Inspector! Well, he is not doing too well right now and the CEO and I have been spending all our time with him! We hope to know more about him tomorrow!
For those who don't know the inspector let me introduce you all, he has been there from the start!
Here he is inspecting the concrete and of course union break!
Attachments
@RSJB18 posted:
Bob have you considered using black paint and a small artist’s paint brush between the tie’s? Nevertheless the scene looks great.
@Rich Wiemann posted:Bob have you considered using black paint and a small artist’s paint brush between the tie’s? Nevertheless the scene looks great.
I have Rich......then I laughed for a while......![]()
I will drop some ballast in between just to hide the cork. I will leave it loose so the glue doesn't gum up the works.
@mike g. posted:Hi guys, I don't have a lot of time left after getting caught up on what everyone is doing! I do have to say there sure is a lot of great work being done by you all! I would comment on everyone's work, but that would take the same 2 pages I had to go over to get here! But do what to say once again OUTSTANDING work everyone!
I haven't been to the train room for a while now as for you that have been fallowing my build from the train room addition to now know about Tank the Inspector! Well, he is not doing too well right now and the CEO and I have been spending all our time with him! We hope to know more about him tomorrow!
For those who don't know the inspector let me introduce you all, he has been there from the start!
Here he is inspecting the concrete and of course union break!
Sorry to hear Tank is not doing well. Heres hoping he gets better!


