


Cleaned up workbench area. Had to relocate one row of shelves to put up peg board. Running out of room. CEO says can't lease anymore space😁.

@radar493 posted:Cleaned up workbench area. Had to relocate one row of shelves to put up peg board. Running out of room. CEO says can't lease anymore space😁.
Ralph , no matter how hard you try to convince these CEOs , they keep throwing up the problems with too much overhead. ![]()
On my layout today I continued work on the tunnel, I can’t believe I have so much time in this, but that’s ok it’s an enjoyable project/hobby
This may help others, the window and door expanding foam will hold boards in place very securely which is really good for select applications
Now with the added supports the tunnel is much more stable and hence easier to work on
The picture of the cardboard is the template for the snow shed to be added soon, I’m looking forward to starting constructing the snow shed
Attachments
Images (2)


2 new 'arrivals':
@radar493 posted:Cleaned up workbench area. Had to relocate one row of shelves to put up peg board. Running out of room. CEO says can't lease anymore space😁.

Looks like you can still go down to the floor. ![]()
@M. Mitchell Marmel posted:The museum opened a few years ago at the Springdale depot (north of Fayetteville). We'll be resuming excursion service in mid-March!
Mitch
Mitch, Ah yes; Springdale!! Thank you for the link as well!!
Paving is underway. Got all the track laid, power drops done, and ran the 0-8-0 yard goat through to make sure everything cleared. Temps hit 60 degrees today, so set up the temporary spray booth outside and painted all the concrete surfaces with Rustoleum Camo Khaki.
After struggling with 1/8" hardboard, decided to go back to my original idea and use standard O gauge 5mm cork road bed for paving around and between the tracks. Only one track in the entire section is straight, makes the scene look great, but it's no fun making templates and paving ! Good news is for between the rails, it's a blessing as it bends easily and is the perfect thickness. The first section is glued and nailed with 23 gauge pin nails, hence the 1/8" mahogany strips forcing the cork up against the center rail while the carpenter's glue dries. I'll have 1/8" clearance for wheel flanges, wish it could be smaller, but not all manufacturer's wheels are identical.


Attachments
Images (4)
Chris,
Things are looking good. You are moving right along with this project with regular progress. Good idea with the cork.
Dave
Chris, I agree with Dave, the cork would be much easier than hardboard with the curved track. So that's what the mahogany is for! ![]()
Thanks Dave and Mark for the comments, and thanks to those who left likes. Yes, Mark I am sold on using the cork, not just for the flexibility and easier application, but it has a very realistic "texture" resembling concrete. I have used it for sidewalks, curbs and cap stones on block walls in the past. Just went downstairs and glued and nailed up the next section. At least I can see light at the end of the tunnel, and no whistles, on this road and highway work anyway !
The museum's Santa Fe K-Line MP-15 had a missing coupler knuckle and broken steps. A new knuckle was installed, and Lionel GP-7 steps from the junk box spliced in at the RTC shops:

With a new parts box horn and salvaged metal bell, the MP-15 is ready to hit the tracks again!

Mitch
Attachments
Images (2)
Chris A,
Your brick detail is exemplery. I recognize your work all the time on various posts.
It was boxing day yesterday. I packed up the latest load of boxes from my recent purchases. I filled another 50 gal garbage bag and added to the pile in the attic. ![]() Surprisingly, I didn't get dirty looks and comments about having that many MORE boxes to put away.
Surprisingly, I didn't get dirty looks and comments about having that many MORE boxes to put away. ![]()
I tell the CEO that the are ready for the trash pile after I'm gone. ![]()
Then I was presented with a different "boxing" adventure. She's been re-organizing the basement and decided to tackle my son's Lego collection so we can pack them away. Most of the sets are 95% complete- but trying to find the remaining 5% is worse than the original build on Christmas day. ![]()
Bob
I finished a truck overpass, using black foam board road surface and spray-painted plastic mesh for railing. Rick


Attachments
Images (3)


Latest Coaling Tower kit bash pics.....


Peter
Attachments
Images (4)
Excellent work guys! The projects are amazing. I have a good amount of cleaning up to do, both on the layout and in my work area. When that’s done I can get back to my bridge project.
Andy
@Putnam Division posted:Latest Coaling Tower kit bash pics.....
Peter
Looks good Peter. What are those yellow and white braces? Magnetic Clamps?
Bob
@RSJB18 posted:Looks good Peter. What are those yellow and white braces? Magnetic Clamps?
Bob
Yes.......from the Kalmbach online store
Peter
@Putnam Division posted:Yes.......from the Kalmbach online store
Peter
Thanks- looks like they make life much easier when assembling buildings. Just checked their site, the set with the adjustable magnets for roofs looks like a winner.
@RSJB18 posted:Then I was presented with a different "boxing" adventure. She's been re-organizing the basement and decided to tackle my son's Lego collection so we can pack them away. Most of the sets are 95% complete- but trying to find the remaining 5% is worse than the original build on Christmas day.
Bob
Something tells me, Bob, that remaining 5% are the pieces you kicked into oblivion when you stepped on them in the middle of the night ![]()
![]()
I had a Williams F3 A unit motor go bad at a train show last weekend, today I replaced it with a motor and truck from the powered B unit. It’s an ABBA set.
Now, I would like to find a WBB power upgrade kit to put a motor back in the canabalized dummy.
I thought I would post an update on our layout progress. I have completed making my curved girders and switch girders. We actually ran a train across the Girders.


Thanks;
idea-thinker
Attachments
Images (4)
@idea-thinker posted:I thought I would post an update on our layout progress. I have completed making my curved girders and switch girders. We actually ran a train across the Girders.
Thanks;
idea-thinker
Wow. That’s awesome.
Love the Girder work! Did you make them yourself?
Rick
Fantastic job ! Thats a real eye catcher.
@Rixster posted:Love the Girder work! Did you make them yourself?
Rick
I did create the girders myself.
Thanks;
idea-thinker
@Apples55 posted:Something tells me, Bob, that remaining 5% are the pieces you kicked into oblivion when you stepped on them in the middle of the night

Despite the occasional scream when stepping on a wayward Lego piece, did keep close tabs on the pieces. I think we are missing a box at the present time 😀
Go Bengals!
@idea-thinker posted:I did create the girders myself.
Thanks;
idea-thinker
They really look great! I have a section of upper level track that is a turnback loop about 10 or 12 feet long that is temporarily supported by a set of K-Line plastic log piers. What you did is along the lines of what I was thinking of for a permanent trestle. Can you tell us about the materials you used?
@Mark Boyce posted:They really look great! I have a section of upper level track that is a turnback loop about 10 or 12 feet long that is temporarily supported by a set of K-Line plastic log piers. What you did is along the lines of what I was thinking of for a permanent trestle. Can you tell us about the materials you used?
Mark;
I use 1/8" Hard Board/Masonite and I cut it with a Laser cutter. I then use Super Glue to assemble it. It surprisingly strong when you turn the Masonite on end and use other pieces to keep it from flexing. I have a number of Girders and or Trusses that are 4 foot long with only supports at the ends. Beyond 4 feet I use an aluminum bar on the sides for support.
Thanks;
idea-thinker
Received an eBay purchase last week of two Weaver 3 bay hoppers so I'm continuing to reassign rolling stock to the DM&IRR. The process required amputation of the end peaks and a wash away of the C&O markings. Cars are completed now but are awaiting a Dullcote finish. It has been too cold to set up a spray booth in the garage. I’m still hoping to begin the weathering chapter in my train life but until then, it’s great to follow all the progress posts.
Cheers to all! Dave


Attachments
Images (5)
I finally finished my elevated platform that's going to hold my Lionel #129 terrace. It was a bigger job than I expected, but I'm pleased with the results. The billboards on the wall under the platform were my bride's idea, and I'm very glad I took her advice. This accessory takes up a lot of real estate, so having it above the 3 mainlines will allow space for a 6-track passenger yard.

Attachments
Images (1)
@SuperChief posted:Wow. That’s awesome.
That is AWESOME . Mesmoring to follow the loops
@radar493 posted:Cleaned up workbench area. Had to relocate one row of shelves to put up peg board. Running out of room. CEO says can't lease anymore space😁.
Ralph;
You obviously still have the air rights for that wall, so maybe you can replace the shelves with ones twice as deep and then you can use the current shelves as a step up at the back of the wider shelves giving you two levels of display ![]()
![]()
![]()
@idea-thinker posted:Mark;
I use 1/8" Hard Board/Masonite and I cut it with a Laser cutter. I then use Super Glue to assemble it. It surprisingly strong when you turn the Masonite on end and use other pieces to keep it from flexing. I have a number of Girders and or Trusses that are 4 foot long with only supports at the ends. Beyond 4 feet I use an aluminum bar on the sides for support.
Thanks;
idea-thinker
I thought I saw some Masonite. I also wondered about the nice cutting. Laser would do it. Thank you so much!!!!
@darlander posted:Received an eBay purchase last week of two Weaver 3 bay hoppers so I'm continuing to reassign rolling stock to the DM&IRR. The process required amputation of the end peaks and a wash away of the C&O markings. Cars are completed now but are awaiting a Dullcote finish. It has been too cold to set up a spray booth in the garage. I’m still hoping to begin the weathering chapter in my train life but until then, it’s great to follow all the progress posts.
Cheers to all! Dave
Excellent work Dave! What process did you use to wash away the C&O markings?
Andy
@Steamfan77 posted:Excellent work Dave! What process did you use to wash away the C&O markings?
Andy
Scalecoat II Wash Away. I have had this bottle for many years. I have also used acetone on other cars but you need to be very careful as it works fast.
Cheers, Dave

Attachments
Images (1)
Decided to use the day off I took for my wife's birthday (yes, her birthday is on Valentine's day) to install my new ZW-L Transformer I picked up this weekend. Of course, that led to me ripping out the solid wire I had wired some of my lines with and I replaced it with proper stranded wire. Amazing how much better the trains run with proper gauge stranded wire.
3 hours later I'm all done! Not 100% happy with the new set up but once my son is home from school he might have some other ideas to try.


Attachments
Images (3)
Been working on a wilderness model to go on top of my train lift. Finished over the weekend. Hoping the glue dries fully today so it can go up next to the first piece I finished last weekend.
Attachments
Images (2)


@ArtsModelTrains posted:Decided to use the day off I took for my wife's birthday (yes, her birthday is on Valentine's day) to install my new ZW-L Transformer I picked up this weekend. Of course, that led to me ripping out the solid wire I had wired some of my lines with and I replaced it with proper stranded wire. Amazing how much better the trains run with proper gauge stranded wire.
3 hours later I'm all done! Not 100% happy with the new set up but once my son is home from school he might have some other ideas to try.
That ZW-L is a beast next to the old ZW.
Looks like Papa Bear, Mama Bear, and Baby Bear sitting there. ![]()
FIREWORKS FOR VALENTINES DAY! lol
I added some more lighting and sounds to the recently released Sgt Stumpy's Fireworks building.
The building was hardly noticeable under the lighting of my train room so that lead me to these modifications. The addition of the multicolored leds on the building make the fireworks burst effects of the building more noticeable. Also, I should note that when I first hooked it up, I powered the building with 12v which resulted in anemic smoke flow, so my advice to anyone else using this building is to use 14+ voltes.
My iPhone dorked up the colors and contrast a bit. I like the guy saying "Am I a good demo man? If I weren't a good demo man, then I wouldn't be standing here, would I?" LOL. The music came to mind as soon as I saw the fireworks in action. ![]()
Overall its a really fun piece. I put it on a timer-relay that can be triggered from the remote as well.
Attachments
Videos (1)

Hilarious!!!
I’ve gotten some more shelving hung over last couple of days. I also got a new filter grill installed.
Attachments
Images (4)


Lots of excellent projects everyone. I started back in on my scenery bases. This Styrofoam is much nicer to work with than some of what I had before. Each of these three sections in the three photographs will be removable to work on without leaning over the track. Instead of gouging out the channel for the river near the rear track that goes up to the right as I did on the first try, I cut the foam so the basic channel is already there. I think it will be easier and not as messy.


Attachments
Images (3)


Hi guys, as Mark said some really great projects getting done here! I took the time to write a comment on everyone's projects but that was before I was a page and a half behind and if I write everyone down there won't be room for my stuff! LOL
But I do want to call out a couple folks! I did hand out a ton of likes for all you guys and the great work your doing!
@Lionelski John, outstanding idea for an old soup can! It really turned out great!
@chris a Chris, the paving looks wonderful Thanks for the detailed explanation on how you did it as I have a few track crossings to do and will be a lot easier your way!
@idea-thinker, WOW That looks AMAZING! Your skills are just outstanding! I was going to ask the same questions that everyone else asked and was hoping your answer was going to be a kit! LOL
@darlander Dave, the 3 bay hoppers look great! I never heard of wash away. Thanks for sharing the information.
Well guys I didnt do anything in the train room yesterday or the day before as the son was here visiting. I figure I better get out there today as the daughter and grandkids are coming tomorrow
Well I worked on some more parking and a elevated road between the 2 upper bridges. I also reused the foam rock wall I carved when I first started, I will probably change it out down the road when I get better at stuff like that! LOL Here are a couple photos for you guys.


I hope to get a little time in the morning to try and work on the sides for the upper loop and the new parking lot area. I don't know when I will get to the road going over the door opening.
I hope you all had a great day and found time to have fun with your layout and trains!
Attachments
Images (2)
Mike, I want to make more comments here too, but it is so easy to get behind on this topic; way behind! ![]() What you did today looks great! Have a good visit with your daughter and grandchildren!!
What you did today looks great! Have a good visit with your daughter and grandchildren!!
Can I get a #clearprop?
Mitch
Wow looking down this page , you guys do not disappoint ! Outstanding ideas , work , pictures , and video's. Like Mark said above it's hard to keep up with this thread, can fall way behind quick.
Thanks, Alex
Just got a call from Trainworld that my LIRR RS-1 (MTH PS-3) pre-order has arrived. I'll pick it up in Lynbrook soon. ![]()
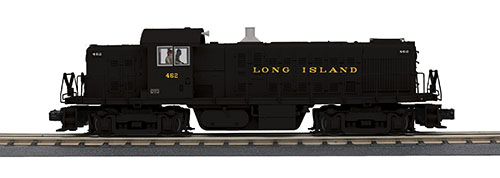
Going to need a caboose to pull behind it too.....![]()

Oh happy day!
Great work everyone, and thanks for all the "likes." Wow!! Now that I'm gaining some momentum on the construction of my layout, I will be posting on this thread a little more frequently.
@RSJB18 posted:Just got a call from Trainworld that my LIRR RS-1 (MTH PS-3) pre-order has arrived. I'll pick it up in Lynbrook soon.
Love those calls, Bob! I just received a call from Nassau Hobbies letting me know my Fish belly hoppers came in -
https://nassauhobby.com/produc...opper-car-pre-order/
Happy days, Indeed!
Edit: Even happier! Trainworld just sent me an email letting me know that the Nathan's woodsided reefers are in and shipping!
Those pictures from idea thinker of the bridges and towers are really fantastic.
I have not done anything on the layout proper but have been doing heavy maintenance on the collection of trains I received from a friend. I just finished a tender 2046W-50. It needed deep cleaned, some rewiring, and coupler spring replacement. Fortunately, there was no damage to the body and prior repairs did no harm! I attached a few pictures, It sounds


 pretty good now, not perfect but pretty good. I am also working on the 736 Berkshire. I have a lot of parts on order for that one.
Attachments
Images (7)


@idea-thinker posted:I did create the girders myself.
Thanks;
idea-thinker
Would like to learn more about your girders & elevated track construction: Kit bash, 3-D printed, plastic/metal, other??? They look great and would like to have you share more details. Thanks!
Cheers, Curious Dave
@darlander posted:Would like to learn more about your girders & elevated track construction: Kit bash, 3-D printed, plastic/metal, other??? They look great and would like to have you share more details. Thanks!
Cheers, Curious Dave
Dave;
I use 1/8 Hard Board/Masonite for the material. I design the pieces in Solidworks CAD software and then I convert the files and send them to my Laser Cutter Software. A little bit later I have a bunch of pieces and then I Glue them to together with Super Glue. All of the things I print have square holes in them and the adjoining part has pegs that fit into the square holes. I glue the pegs in place. It is amazing how strong the the finish item is. The longest bridge I have done to date is 10 Feet long. It is a dual track bridge with no supports under it other than the two ends.
Thanks;
idea-thinker


@M. Mitchell Marmel Great little video!
@RSJB18 Great looking engine, it's like Christmas again!
@Victor Bertolina Looks good and its nice your able to work on them, I have a friend giving me an old Lionel engine that needs new brushes, and he has them also! So, I hope it will be an easy fix!
Well guys not much from me today, I started on the sides for my upper loop, and I am trying to do something rustic, so I am using unsanded and unfinished wood. I have to make 24' of it, 12' per side and I only have enough clamps to do an 8' section at a time. I am trying to glue all 12' together on the bench as to make it bend seamlessly. Here is a photo of what I have so far.

I hope you all had a great day and fun!
Attachments
Images (1)
@chris a posted:Almost done with the paving, got an acrylic wash coat on the window frames and doors, and I received my new LED light strips in the mail, so progress can continue.
Chris, that looks Amazing! I really enjoy seeing what you're doing, it give's one so many ideas to try! Thanks for the photos and I will keep fallowing! I hope you get a lot done before the weather changes and the Vett comes out and takes over your free time again! ![]()
Mike, I had a long work bench like that once. Every time I would clean off a space to do something on it, I would come home from work and find it covered with 'junque'. It is amazing what the pixie could find to put there. I finally gave up, and that is why I am now using a metal cart and folding table that is put away after every use. sigh! ![]()
Chris, you have really accomplished a lot on that scene quickly. It is looking great!
Scott ( Western Pacific)
sorry I haven’t been on the forum for a few days. The epoxy floor in the basement was there when I bought the house. I put an epoxy floor in the garage. This is the second epoxy floor I’ve done in my houses. I used Rustoleom both times. The key is you need to really degrease the floor. I do it twice. Then I use a pressure washer to rinse it off. Then I concrete etch it twice and use the pressure washer again. Then I blow it off with a leaf blower and let it dry for two-three days with a dehumidifier running. Then roll it out heavy and I’ve never had a problem. Here’s pictures of both garages.
it’s definitely a lot of work but we’ll worth it when it’s done.
Mike R
Attachments
Images (2)


Mike, the way this winter is progressing the Corvette won't be coming out for a while. First day at the race track for 2022 isn't till end of April, so I should keep making some notable progress for while longer. I like the way your laminating that wood together it will make for a very smooth curve when you install it. I am not sure whether I mentioned it in this thread or the Sunday Scenic Showcase, but I found the best way to cut the cork (for the thin strips between the rails) was to run it through the table saw, with the smaller 7 1/4 inch 60 tooth blade and some 1/4 inch plywood clamped to the fence to keep the cork down on the table. My other Ah Hah moment was when I taped my curved templates down on the cork for cutting. The paper didn't want to stay put once I started cutting. Then the light bulb went on, and I realized if I used clear scotch tape to secure the "cutting edge" I could keep the template secured but still see through the scotch tape to follow the template.
Mark, thanks. It feels like this project is taking me a really long time to bring to fruition. Been putting in some long days, and on a few occasions, I didn't like the result, scrapped it and started over, but then again, it's right in the front and center of the layout room, so it's worth taking the time to make it "right".
Wish I could blame the horrendous condition of my work benches on someone, but I am the only one here !!!. Took several hours the other day to just clean up and re-organize, as it was getting embarrassing. After reading your post, I realize I need to clean up and re-organize my roll around tool cart and get back to using it as I intended to when I purchased it.
Congratulations Chris on your continuing progress. Also, you’ve turned us to page 1100 on this thread.
This is an outstanding model done by Woodland scenics. It will remain on my test layout for quite a while.
Attachments
Videos (1)

@Alex M posted:This is an outstanding model done by Woodland scenics. It will remain on my test layout for quite a while.
WOW! Exactly what I was hoping for. Thanks so much, Alex, for posting this. I have an N scale version on the way, but will probably change out one of my O scale buildings for this one. My parents owned and operated a TV sales and service shop for 40 years. i built a wood model of the building and used it on our old attic layout for many years. Like you, I will change the sign on this one.
Regards,
Jerry
Morning guys, I hope your all doing well!
I was able to get out to the train room this morning, glue hasn't dried yet on my sides for the upper loop yet so I worked on the lift road bridge.
@chris a Chris, thanks for the update and the information about the 1/4" strip on the fence, I need something to hold down the thin wood I am cutting!
@Alex M Alex that sure is an eye catcher! I can't wait to see it on your layout!
Well guys as I said I worked on the upper road bridge. I added my auto loader ramp so I could justify the 2 Auto cars I have. Here is a couple photos and a short video to show everything stays in place! LOL


I hope you all have a great day and find time for your layout and trains! Most of all I hope you find time to have fun!
Attachments
Images (3)
Videos (1)

Trying to hook up hobo camp after table was cut and moved.. Bad back, so help coming over…..
Been slowly converting the four Miller Engineering signs I have from battery power to a 4.5v bus I set up. Two down so far. Also running power to Lionel radar tower and oil pump accessories, controlled via toggle switches.
Have a Lionel double-track signal I'm still wrestling with. Electrical stuff always takes me awhile to figure out. Sometimes it's like finding that one pistachio nut that won't crack open.
No pics yet.
I’ve been playing around with finishing the TT scenics. I’ve been procrastinating about filling in the gap between rubber brick wall and the homasote. Anyhoo, after this round dries overnight I should be able to finish the fill and then throw weathering on it and some flock. My Evans parts came in today. Now I can hook up my two welders😁
@obxtrainman posted:I’ve been playing around with finishing the TT scenics. I’ve been procrastinating about filling in the gap between rubber brick wall and the homasote. Anyhoo, after this round dries overnight I should be able to finish the fill and then throw weathering on it and some flock. My Evans parts came in today. Now I can hook up my two welders😁
Be VERY careful handling the Evan's stuff. The wire is very fragile.
Don't ask me how I know......

Attachments
Images (1)

Lights , LED's and animation are my three sicknesses. I have bags of LED's , all different colors, brightness and flash rates. So here is my latest creation -

Here are a few construction shots. It was a royal pain cutting out the squares - would have been much easier with a Glow Forge like AlanRail has. Would have asked him to help me out but he is already working on another project of mine. 
 Sorry for the bad pics but cameras & computers are my enemy.
Attachments
Images (3)
JP, very, very nice.
@Bill Sherry posted:Lights , LED's and animation are my three sicknesses. I have bags of LED's , all different colors, brightness and flash rates. So here is my latest creation -
Here are a few construction shots. It was a royal pain cutting out the squares - would have been much easier with a Glow Forge like AlanRail has. Would have asked him to help me out but he is already working on another project of mine.
Sorry for the bad pics but cameras & computers are my enemy.
Very cool. is it animated so you can change the score?
Looks like it wasn't a good day for the visiting team.....![]()
@mike g. - there are lift bridges and then there is what you have. That is impressive.
@Bill Sherry - Sweet scoreboard. Way to bring a scene to life!
Rod - Thank you for the compliment. Appreciate it very much.
Bob - Lol sorry , it is static. Leave that up to GRJ or one of the other electronics wizards. JP
@SuperChief Thank you sir!
@Bill Sherry Looks outstanding! I think its cool the way it is, the home team is always winning! LOL![]()
Finished up another car with Carman repairs on it. Really enjoying these projects, changes up the normal weathered car. Plus half of my rolling stock will be done once i finish the basement.
@Trainwreck nate posted:Finished up another car with Carman repairs on it. Really enjoying these projects, changes up the normal weathered car. Plus half of my rolling stock will be done once i finish the basement.
SGT. I think the details you do are just wonderful!
Hi Guys,
Alex M that is one beautiful TV repair store.
Mike G that lift bridge is awesome!
Mike R
JPLoco. Wow. I don't comment on this site a lot but the score board is over the top. Man do I love it. To me the lights make a layout and when something is done as you have really brings you're talent and of course patience to light. Thanks for posting you're work.
Working on the modular layout earlier this week.....had to replace some ballast in the yard.....


Have a great day, folks....
Peter
Attachments
Images (3)
Don’t ya luv trying to solder three hairs and some air.
This could go into "what did I do today", "what did you buy", or "what is on your workbench".
Picked up this Western Hobbycraft Trolley a few weeks ago and finally got it out onto the layout. This just has the DCRU no sound. Long story short the neutral wire coming from the lighting had broken off a brass pickup. And the car would only run in one direction. Successfully soldered the wire back using a micro torch (to get enough heat). Back on the track and everything works including the F-N-R - too bad there is no directional lighting. The short video is run at 80% speed so the crossing sound is far more pleasant than normal speed. Sharp looking car. Has Morrellville on the signage at either end. Thanks to @M. Mitchell Marmel and @OddIsHeRU for their help in working this out.

Attachments
Images (1)
Videos (1)

farmerjohn - Thanks so much. I can't agree more about the lights. I can't tell you how many I have added here and there. If the scoreboard was a kit with the cutouts done already, you probably could build it in under 2 hours. If you want to talk patience, I upgraded Lionels Ferris wheel when it first came out with LED's. C'mon, a Ferris wheel with no lights at all ? It took me probably 2-3 weeks of nights at least to add around 400 LED's to all the spokes on the wheel and then figure a way to keep them lit as the wheel rotated. I'll dig out a few pics and post some later. JP
Oops - Mike G - thanks much !!!
@obxtrainman posted:Don’t ya luv trying to solder three hairs and some air.
![]()
![]()
![]()
@mike g. posted:SGT. I think the details you do are just wonderful!
Thanks brother just wait for the next one. Doing the Atlas one next so stand by.
@Trainwreck nate posted:Thanks brother just wait for the next one. Doing the Atlas one next so stand by.
Love your work Nate. Having real world experience certainly helps.
Thanks for your service too! ![]()
UP layout and S gauge NYC Niagara assembly.
Afternoon guys, hope your all doing well!
@ScoutingDad Jeff, that trolly looks great! I am glad you were able to get it fixed and seems like an easy one!
Well guys, my glued dried on my side boards for my upper loop so I took it into the train room to fit it and glue it in place. That's where the problem started, I glued a 1/2" wide strip on the top side of the strip to act as a guide for height about the decking. Well, when I went to flex it into place the upper section with the 1/2" strip worked great, the single layer below it broke away right down the grain of the wood.
I guess I could try gluing 2 full Pices together and see what happens, or just wait till next time I get to town and buy some Masonite.
Either way it was worth a try, now the wife has some kindling for the wood stove! LOL
I hope you all have a great day and find time for your layout and trains!
I finished removing the mth factory lettering under the cab window of my new RS3 and replaced it with more prototypical MTA signage. I dull/gloss coated it after drying and it looks and feels like factory new -

Attachments
Images (1)
Love your lift bridge Mike
@Strap Hanger posted:I finished removing the mth factory lettering under the cab window of my new RS3 and replaced it with more prototypical MTA signage. I dull/gloss coated it after drying and it looks and feels like factory new -
Looks good Strap. And no scratches from the handrails too! ![]()
My RS-1 and caboose are in Lynbrook. I'm going to pick them up next week.
Mike g- tried and failed is better than not trying at all. Next time try curving the pieces when you glue them up. This will get them pre-formed slightly before you wrap it around the curve. Soaking in hot water helps soften the wood too.
I finally finished cleaning the track last night. I'm also trying to find a way to kill the buzz (I used to hate being a buzz kill), from my 5121/ 2's. If I can just find a way to stop the vibration from the solenoid shaft without re-wiring I'd be happy.
I just need to hold each with my finger. As soon as I can grow a third hand I will have it solved. ![]()
Bob
@RSJB18 posted:Looks good Strap. My RS-1 and caboose are in Lynbrook. I'm going to pick them up next week.
You, my friend, have amazing powers of resistance. If it wasn't for your post, I would question whether you were still breathing or conscious. Hasn't it already been waiting there for almost a week? Even if I tried, my body would find itself compelled to use whatever means available (car, motorcycle, jetski, etc.) to pick up a pre order after a few days. I could not rest until it was in my possession. I tip my hat to you and your ability to manage this train addiction of ours, LOL!
@Strap Hanger posted:You, my friend, have amazing powers of resistance. If it wasn't for your post, I would question whether you were still breathing or conscious. Hasn't it already been waiting there for almost a week? Even if I tried, my body would find itself compelled to use whatever means available (car, motorcycle, jetski, etc.) to pick up a pre order after a few days. I could not rest until it was in my possession. I tip my hat to you and your ability to manage this train addiction of ours, LOL!
Not quite. They just called me today that they had arrived at the store. Yes- a week from Brooklyn to Lynbrook......![]()
Monday is the earliest I can get there.
slow and steady wins the race.
@RSJB18 posted:“slow and steady”
Isn’t that the motto of the LIRR??? ![]()
![]()
![]()
@Apples55 posted:Isn’t that the motto of the LIRR???
Slow...yes, steady?????? NOT! ![]()
@RSJB18 posted:Slow...yes, steady?????? NOT!
I don’t know, Bob... after listening to my former Lawn-guy-lind colleagues complaining for many years, I got the distinct impression that the delays, breakdowns, cancelled trains, crowded conditions, etc. were pretty steady!!!
@Apples55 posted:I don’t know, Bob... after listening to my former Lawn-guy-lind colleagues complaining for many years, I got the distinct impression that the delays, breakdowns, cancelled trains, crowded conditions, etc. were pretty steady!!!
OH- you were talking about THAT kind of steady.......![]()
Haven't done much since I went back to work January 3rd. I added a 4rth tree that to match the 3 that were there. I'm also still working on finishing the downstairs bathroom but will get it in gear soon. Sidewalk weathering, utility poles, parking and street lines, signs, signals, mailboxes and fire plugs are on my to do list. It's still a pleasure to see what others are doing so keep up the good work.

Attachments
Images (1)
@DaveRipp: Layout really looking good! Best Wishes
Don
@mike g. posted:Morning guys, I hope your all doing well!
Well guys as I said I worked on the upper road bridge. I added my auto loader ramp so I could justify the 2 Auto cars I have. Here is a couple photos and a short video to show everything stays in place! LOL
I hope you all have a great day and find time for your layout and trains! Most of all I hope you find time to have fun!
Nice Mike. ![]()
First that airport runway and now this operating bridge. Great operation on the bridge .
You just keep getting the layout progressing by leaps and bounds.
Scouting Dad: Loved the trolley cars. I am old enough to actually remember riding on such cars in New Jersey. Not "tourist" type rides but rides when the trolley was a real part of the public transit system. By the time I was about 5 (1949 or so) they were gone, replaced by buses...which I also remember because who can forget the wonderful aroma of burnt diesel in the NJ summer!! (no air conditioning then).
Best wishes
Don
When I added an extra siding at the back of the layout last year, I did not get the switch and surrounding track as level as it should have been. Part of this is due to building on layers and not stripping everything down. That was a dreadful thought as the ballast and detailing were already in.
Finally decided to fix the issue, with the thought that a Premier Big Boy should be arriving (someday soon), and it is unlikely it will like the dip.
While I can take the background scenery out (sectional), and pop up from behind, I decided to attack this by climbing onto the layout. The inch thick foam helps to distribute my bulk on the layout and it keeps the track from digging into my knees. I really wish I had built this section with an open grid. Trying to level this section of track is proving to be a challenge, particularly since it is on a curve and about 6 feet long. The shimming I tried previously did not work all that well. Plus the left side is about a half inch higher than the right side due to the grade needed. If I could I would lay in a 1/2 piece of plywood, but just do not have the clearance.
I don't know about you guys but working on my hands and knees anymore is really tiresome. Makes me wish I was back in my 50s again! Well 30s would be better but that really is wishful thinking.

Attachments
Images (1)

Add Reply
Sign In To Reply
