So everything under the snow is glued in place? Well done!
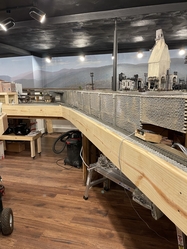
@Mark Boyce posted:Ran my fairly new RailKing B&O SD9 after doing some test fitting for the lower tracks and a completely rebuilt high line.
I agree with Dave Ripp about the SD9 AND the boxcars Mark. ![]() Looking at your video I wondered if the SD9 was the SCALE model RK . Looks like your layout is growing too .
Looking at your video I wondered if the SD9 was the SCALE model RK . Looks like your layout is growing too .
Sometime ago I picked up this RK GP7......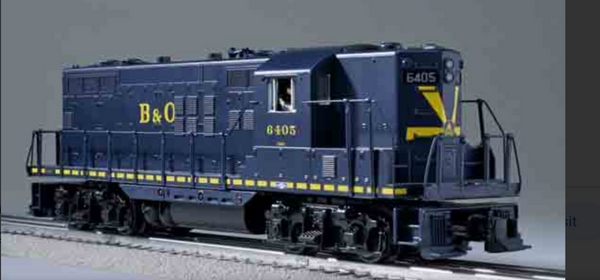
........I didn't realize it until much later that it turned out to be a SCALE RK. It didnt have the bells and whistles that the Premier has but it was larger.
Attachments
A couple small fun projects today.
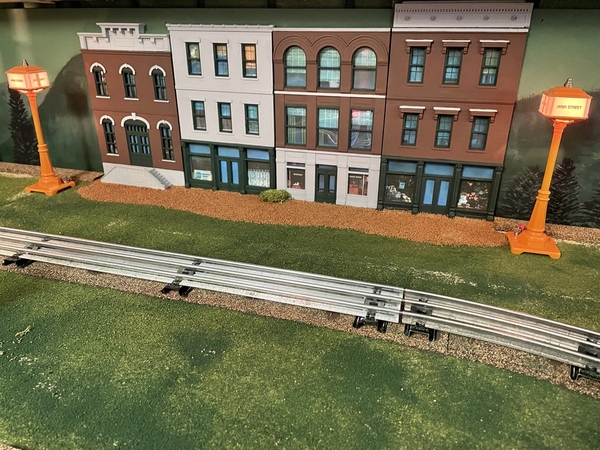
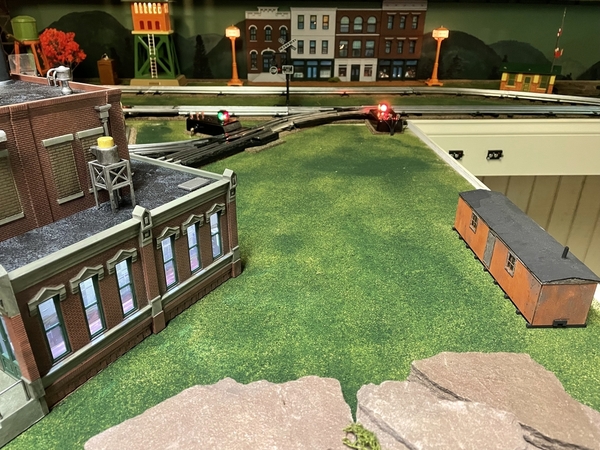
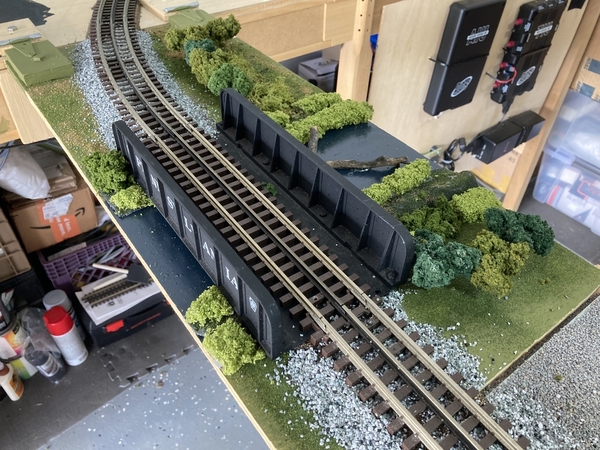
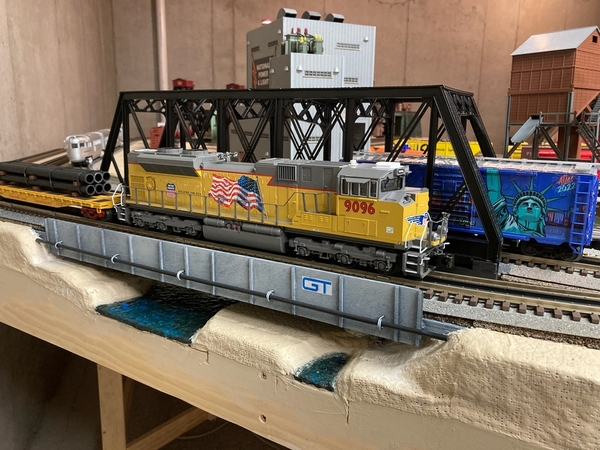
I balanced out an overpass area with a 2nd Lionel girder bridge. Here are the before and after pics:
Notice the small emergency water tower between the two girder bridges in the 2nd photo? I made it for free today. How? Find out how towards the end of this blog post: Free and Unique Stuff to Use: (warrenvillerailroad.com)
I also added guard rails to the top of my Lionel arch under bridge. I made these railings from plastic model sprues. Again, here are before and after pics:
Nothing compared with the great projects you guys have been sharing, but these kept me busy on this cold day on LI.
Attachments
@John's Trains posted:I just took a ride around my Whereazona Central Railroad layout. The engineer let me hitch a ride in the cab. I wanna go again!
A nice video looking out from the cab John. ![]()
That's a very interesting video . I'm used to seeing videos looking straight down the track ahead of the locomotive and this video certainly gave a unique and fun view of the scenery.
At first I missed " a ride in the cab " and thought you were in a passenger car. ![]()
@John's Trains posted:I just took a ride around my Whereazona Central Railroad layout. The engineer let me hitch a ride in the cab. I wanna go again!
A fun video John AND I love your pike's name!
@Mark Boyce posted:Everyone has great projects! I like the signal towers!
I ran my fairly new RailKing B&O SD9 after doing some test fitting for the lower tracks and a completely rebuilt high line.
Nice Mark, nice!
Thanks for sharing
@Dallas Joseph posted:A nice video looking out from the cab John.
That's a very interesting video . I'm used to seeing videos looking straight down the track ahead of the locomotive and this video certainly gave a unique and fun view of the scenery.
At first I missed " a ride in the cab " and thought you were in a passenger car.
Thank you, Dallas. You know what they say about necessity being the mother of invention. I don't have a caboose cam, so I rubber-banded my phone sideways to a flatcar. The phone is too wide to fit crossways looking forward or back because the clearances on my rr are 1/4" in places.
@Lionelski posted:A fun video John AND I love your pike's name!
Thank you, John. I named it the Whereazona Central in honor of the 49th state because, as the smallest of the 51, it doesn't get enough attention. But it's every bit as much a part of the Union as bigger states like Delaware and Rhode Island.
@Dallas Joseph posted:I agree with Dave Ripp about the SD9 AND the boxcars Mark.
Looking at your video I wondered if the SD9 was the SCALE model RK . Looks like your layout is growing too .
Sometime ago I picked up this RK GP7......
........I didn't realize it until much later that it turned out to be a SCALE RK. It didnt have the bells and whistles that the Premier has but it was larger.
Your GP7 really looks sharp, Dallas! Thank you! I really like the scale RailKing diesels. They are at a price that doesn't break the bank!!
@Lionelski posted:Nice Mark, nice!
Thanks for sharing
Thank you very much, John!
I painted and installed these Ameri-Towne flats. I wanted to draw semblance to the Morrison’s Doors factory, also pictured. Thinking about a couple leds on the flats as well.
John
Attachments
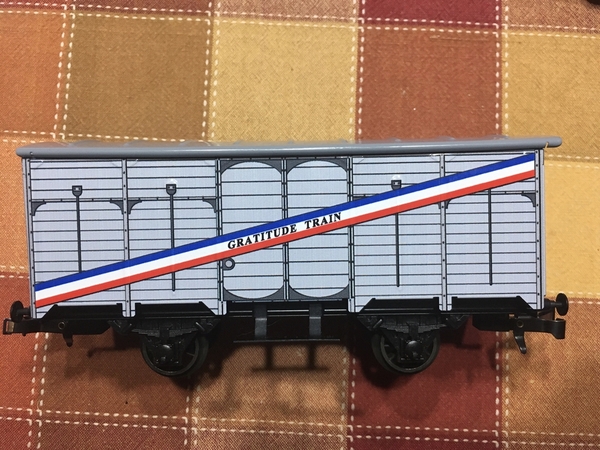
I promised to take a video of the Patriotic train that I displayed on Veterans Day. Here is the video taken on the in progress ETC Christmas layout.
Attachments
This morning I witnessed the first haul of crude iron ore. Spent the end of last week near Two Harbors, MN dog sitting. Had to visit the shore of the big lake (Superior) to collect some more sand and gravel that I needed to complete the new loads. It was icy cold but the lake kept the shoreline from freezing!
Cheers, Dave
Attachments
darlander - those ore cars look heavy moving down the rails. Nice modeling. You are much braver than I. The thought of Lake Superior in the winter makes me want to shiver. I'll take the 2 feet of snow we got in Grand Rapids - not the bone chilling cold.
Yesterday I acquired two Lionel vista dome cars, a GN 19181 Prairie View Vista Dome #1394, and a GN 19119 Vista Dome car #1322. One has the long dome and one has the short dome. The long dome is populated by a bunch of people, but the short dome has what appears to be a piece of white cardboard instead.
I would like to add some people to the short dome, but before I do anything stupid, I am wondering just what is the proper way to disassemble the car. I’d hate to screw something up through ignorance. Also, does anyone make an interior for this dome, or will I have to improvise?
Thanks in advance for any help you can provide. (I am posting on this thread because I couldn't get a reply when I posted it just by itself.)
@Fendermain posted:
Looking good John .![]()
I've never seen those good looking Ameri-Towne flats . They will go well with the Morrison Door Factory. That factory has been in my dreams for a long time........alas.....no room on my layout for it.
Its OK though.......I really enjoy seeing it on all the different forumites layouts.
@John's Trains posted:Thank you, Dallas. You know what they say about necessity being the mother of invention. I don't have a caboose cam, so I rubber-banded my phone sideways to a flatcar. The phone is too wide to fit crossways looking forward or back because the clearances on my rr are 1/4" in places.
Well John, the video was really special.![]()
@Fendermain posted:
I like those buildings and how creatively you painted them. They're varied like real buildings would be.
John
@ScoutingDad posted:darlander - those ore cars look heavy moving down the rails. Nice modeling. You are much braver than I. The thought of Lake Superior in the winter makes me want to shiver. I'll take the 2 feet of snow we got in Grand Rapids - not the bone chilling cold.
Actually, in winter, the lake provides a moderate temperate zone close to shore. It seldom freezes over completely and the lake temperature of 32+ degrees can provide some comfort when the air temp is much colder. I first stopped at Brighton Beach, that is where Dennis Brennan collects what he calls Superior sand, but it was difficult to get to the waters edge because of the park renovation that is taking place. Also some snow, ice and a steep bank made me think twice. I did my collecting at Stoney Point which is very close to Two Harbors and our daughter's home. The lake was as smooth as glass that day and the shore was easy digging! I also had my son-in-law and grandson along to do all the hard work!!! Mother didn't raise a fool!!!
Thanks for your concern!
Cheers, Dave
@darlander posted:Actually, in winter, the lake provides a moderate temperate zone close to shore. It seldom freezes over completely and the lake temperature of 32+ degrees can provide some comfort when the air temp is much colder. I first stopped at Brighten Beach, that is where Dennis Brennan collects what he calls Superior sand, but it was difficult to get to the waters edge because of the park renovation that is taking place. Also some snow, ice and a steep bank made me think twice. I did my collecting at Stoney Point which is very close to Two Harbors and our daughter's home. The lake was as smooth as glass that day and the shore was easy digging! I also had my son-in-law and grandson along to do all the hard work!!! Mother didn't raise a fool!!!
Thanks for your concern!
Cheers, Dave
Dave, the loads really look great! The next to last supervisor I had lives in Duluth. He loves the Big Lake, as he calls it. He was kayaking on it just a week or two ago. On the other hand, there was a day that week that the water was very choppy, so the seasoned veteran stayed on shore. Yes, my last four supervisors were located here in Northwestern Pennsylvania, central Illinois, East Texas, and Duluth. That company liked to shuffle the deck every 3 years or so. They finally shuffled this old guy out the door! ![]()
Attachments
@John's Trains posted:I like those buildings and how creatively you painted them. They're varied like real buildings would be.
John
Thank you very much John,
Fendermain aka John
@Dallas Joseph posted:Looking good John .
I've never seen those good looking Ameri-Towne flats . They will go well with the Morrison Door Factory. That factory has been in my dreams for a long time........alas.....no room on my layout for it.
Its OK though.......I really enjoy seeing it on all the different forumites layouts.
Thank you Dallas. It’s my first attempt with flats and Morrison’s Doors is indeed very special.
John
@darlander- The loads in both sets of cars look great Dave. I have some work to do to equal your work but you've set the bar for sure.
@Fendermain- The yard extension is shaping up John. The flats are nice and what can I say about Morrison's.....
@poconotrain , @Mick60- two excellent bridge jobs. ![]()
@RSJB18 posted:@darlander- The loads in both sets of cars look great Dave. I have some work to do to equal your work but you've set the bar for sure.
I am no longer using a form, I found it more work and not necessary. I paint the top of the insert with full strength carpenters glue. Then place it in an ice cream pail and dust the top with a layer of sand/gravel. Place it on a layer of paper towel and add the ballast set mixture and wet water. Blot up excess moisture along the sides and top and let it cure - simple! The process goes much faster with less mess. It's probably what most people have been doing for years but it took me a while to wise up! I may also have to make loads for my Lionel LV 25000 two bay hoppers that I have on display. Kind of fun to make the loads. Good luck with your load project.
Cheers, Dave
Attachments
@darlander posted:
Very nice work. I was about to respond asking why are you no longer using a forum. I’m glad I reread your post. Yes I have an eye exam coming up.
Started painting/weathering rails, small sections at a time so I can clean rail tops as I go. Just using a small brush and acrylic paint since I didn't have the foresight to paint them before I put track an scenery down.
Attachments
Looks pretty good to me. Curious as to color and brand. I tried a cheap rust acrylic which did not look like rust. Thanks
@RSJB18 posted:@darlander- The loads in both sets of cars look great Dave. I have some work to do to equal your work but you've set the bar for sure.
@Fendermain- The yard extension is shaping up John. The flats are nice and what can I say about Morrison's.....
@poconotrain , @Mick60- two excellent bridge jobs.
Thank you Bob.
Jeff G. - Thanks for the advice. I finally made it work. Wow...Things have sure changed since the last time I sold anything on Ebay!
@romiller49 posted:Very nice work. I was about to respond asking why are you no longer using a forum. I’m glad I reread your post. Yes I have an eye exam coming up.
I think the key procedure is a the first full coat of carpenter glue over the insert. It really holds the edges in place. I follow quickly by adding more material until I like the look. If careful, you can take the insert out of the bucket without loosing too much material. Another advantage is that the ore cars are short and the inserts for the jennies easily fit in the ice cream bucket.
Cheers, Dave
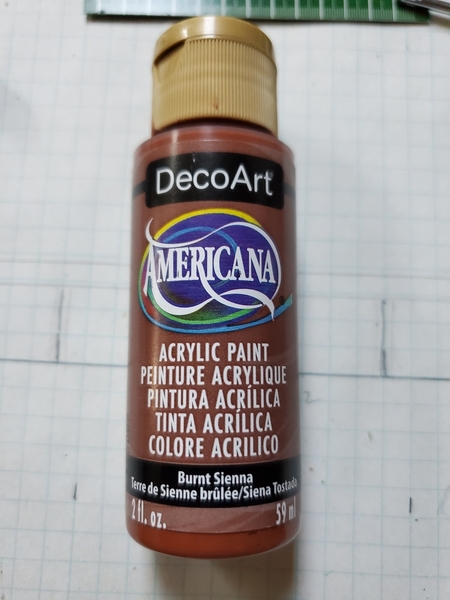
@ScoutingDad posted:Looks pretty good to me. Curious as to color and brand. I tried a cheap rust acrylic which did not look like rust. Thanks
I tried several colors, but as for now this is the best I've come up with so far.
Attachments
Lots of great stuff, everyone. Layout work for me has been slowed.....I'm watching my two grand dogs over the Thanksgiving holiday and we started 9 straight weekends of modular displays. This is such a great thread.....I love the ideas and techniques.....and, I "file" many of these for use down the road.
Happy Thanksgiving to all!
Peter
Attachments
Taking down the last of the old layout. The rebuild will start after Christmas.
Bob
@Trainmaster04 posted:
..........and a happy Thanksgiving to you Trainmaster and to all forumites from me and my stepdaughter from Rochester NY 's creation........
.........yum yum . 
Attachments
Cleaned up my layout for Thanksgiving guests, no scenery yet but I have plans once the turnout panel is done.
Attachments
Happy Thanksgiving to all !

Bob
@Farmall-Joe posted:Not to be "that guy", but being in the fire protection industry i thought i'd point out/inquire about your floor joist insulation...it looks to be paper side down when it should be insulation side down if its going to be left exposed. This is because the paper is more readily combustible than the fiber glass. If it is paper side exposed, (i cant quite tell from the pics) add it to the styrofoam insulation board on the layout, well...it'd be a bad day should a fire start in the vicinity. Before you get too far on the layout you might want to add a sheetrock ceiling or reversing the insulation. Sheetrock would be best for dust control too.
It does look like its going to be a great layout tho!
Regards
Joe
I saw what you saw re: the insulation.
Housekeeping wise I learned that unfinished basement ceilings result in excessive dirt/grit on the layout especially with older homes. My last home was built just after WWII, even with just two of us there the walking around on the first floor in addition to older insulation between the joists it all contributed to excess dust/dirt/grit on the layout. Best to cover that crap up now before the layout is completed.
@RSJB18 posted:Happy Thanksgiving to all !
Bob
Same to you and your family, Bob. Can’t believe they’re not showing Charlie Brown Thanksgiving this year ![]()
![]()
I repaired a Lionel set for a client earlier this year. Just got this video of it running around their Christmas tree.
Note the curious kitteh at middle left... ![]()
Mitch
Attachments
Happy Thanksgiving to all here and their families.
Andy
Happy Thanksgiving to all a day late. Family here yesterday.
I've been washing/cleaning my Plasticville station platform and reseating the figures, lampposts, phonebooth, etc. in addition to stripping my Marx switch tower completely, washing the plastic parts, lubing the gears, disassembling the solenoid (cleaning and oiling that) all in preparation for placement under the Christmas tree.
Additionally I mounted all the Walmart "Adventure Force" vehicles in/on my Lionel MPC-era two-tier auto carrier (using dabs of GOOP on the wheels) and still have to mount the vehicles on my three-tier auto carrier of the same vintage.
I'm waiting on a delivery of parts from East Coast Train Parts in Englishtown N.J. so I can rehab my recently acquired Postwar Lionel "Z" transformer, it's getting a new cord, rollers, and a circuit breaker.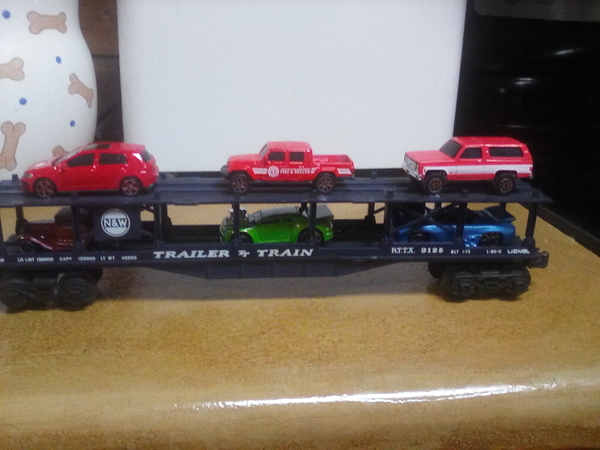
Attachments
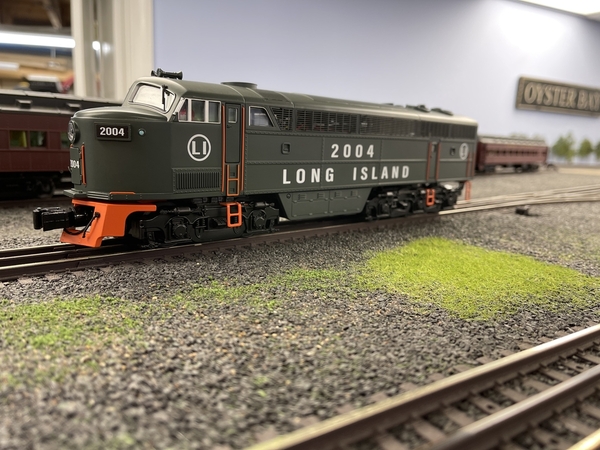
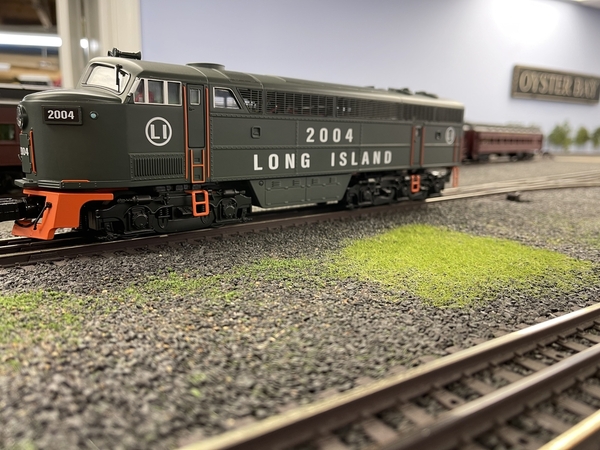
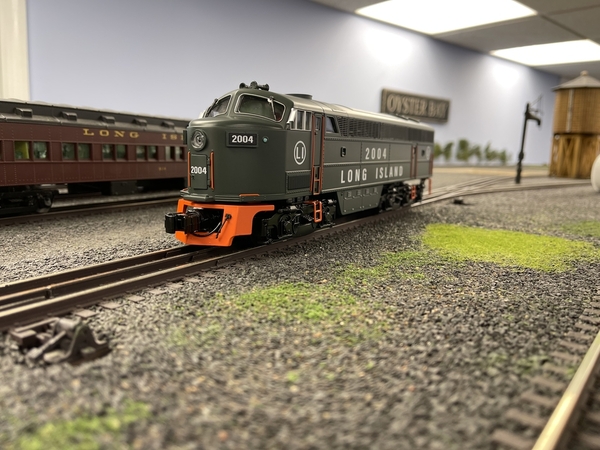
Picked up this beauty yesterday at Trainland in Lynbrook, NY. This paint scheme is known as Goodfellow gray, after Thomas Goodfellow, president of the Long Island Railroad from 1956-1967. I’ve been waiting to add this to my fleet for a while.
Andy
Attachments
@Steamfan77 posted:Picked up this beauty yesterday at Trainland in Lynbrook, NY. This paint scheme is known as Goodfellow gray, after Thomas Goodfellow, president of the Long Island Railroad from 1956-1967. I’ve been waiting to add this to my fleet for a while.
Andy
Andy, the gray and orange look fantastic together. Thomas Goodfellow had good taste. You should post this on Buy anything cool lately
Hi guys, WOW what great work being done!
Sorry I haven't checked in for accouple days as I have been working on Christmas lights so I can get back to removing more track and cleaning it as I go. I am almost done with the lights and now I have to get my tractor ready for possible snow! The way it is looking it might be tomorrow before I get back to the train room.
I hope you all had a great Thanksgiving with your family and are all doing well! I hope you all get a chance to find time for some fun on your layout and with your trains!
Great idea Dave, just posted there, thanks.
Andy
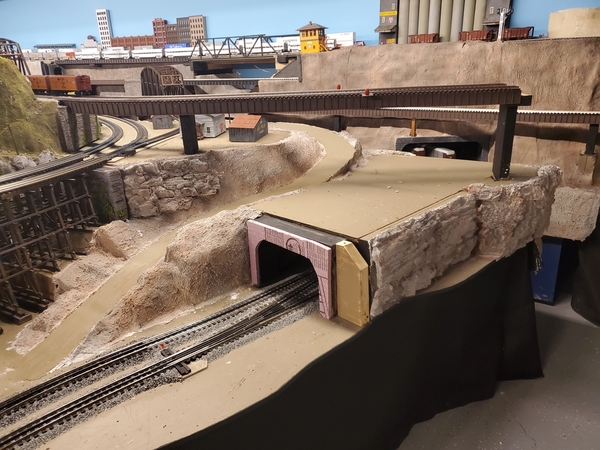
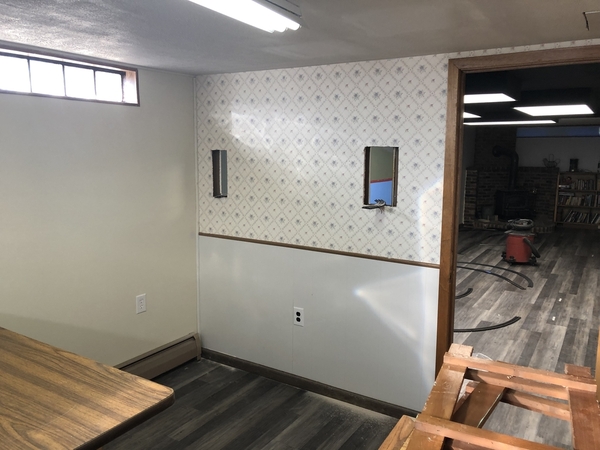 Started breaking ground on my layout, or more accurately, boring tunnel openings. This end of the layout will do a turn back loop in our shared “plant room” where my wife will start seedlings around February. Of course there was a water pipe in the 2nd opening - let the change orders begin !
Attachments
@Steamfan77 posted:
Is that the C-liner Andy? I like that paint scheme too but I've usually seen them with orange hoods.
Bob
@franktrain posted:
The super O is a big improvement over the FT Frank. Looks like your helper is having a ball too!
@trestleking posted:
Look on the bright side....at least you didn't cut into the pipe! ![]()
Bob
Andy that is a nice historical addition.
Frank the Super O looks quite different and far more realistic. Looks like you have good help.
Trestleking pipes are a hazard and include an automatic adjustment clause that allows you to relocate things without a penalty from the plant lady.
For weeks Paula has been working on Christmas decorating, Thanksgiving meals, and stuff. Speckled trout have interfered with daily routines and also created field trips from school for our grandson. So the layout hasn’t gotten as much attention as usual.
Rich was here yesterday and the three of us installed a portion of the Level one retaining wall and our first tunnel portal. It is far from being complete but we have to start somewhere and the scenery lady will handle the imperfections.
Paula sent an order to Scenic Express today for scenery supplies and took advantage of their Black Friday 15% off sale.
One of the photos shows wires in front of the retaining wall. These are for Millhouse turntable and transfer table controllers and each are about 4” X 4”. Any ideas on where to install them? I said on the wall and was chastised by the carpentry and scenery team.
Attachments
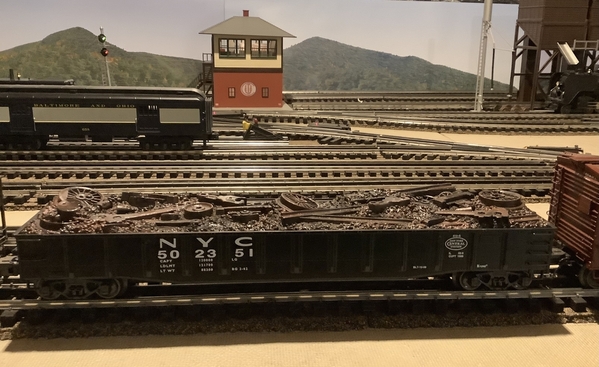
I finished weathering a scrap load today for a gondola I recently purchased. It is a K-line gondola with a heavy die-cast frame that is very well built. It rides so smoothly. The scrap load was originally all one color, black. My first attempt at weathering. Used a wide variety of paints and weathering powders to give it some realism.
Attachments
Good evening everyone! I hope you all had a great Thanksgiving. Things have been busy at home with high school and college tours/applications. Thankfully, I was able to get a break and made progress on the layout. Today, I added more ground cover to the front of the layout and got Christmas decor set up. I also got a wild hair and put up some telephone poles I had since I was 3 or 4 years old. It think they bring a new level of depth to the layout.
Any tips on telephone wire?
Thanks for reading, and happy railroading!
Attachments
Hi Guys and Gals,
I have been lurking and commenting here and there, but man there is some motivation in the last couple of pages that I missed. Great work all around. DD has taken over the layout. I was motivated enough to complete basic assembly of two more DD buildings. Now the fun begins.
Dave
Attachments
Finished up my first airbrushed engine. Also first engine I added some extra details to. Switched out the crew members, added some plastic rods inside the cab. To give the look of the values and gauges. Painted the boiler in the cab as well as the walls green. Can’t really tell unless you get really close. Topped it off with a string for the bell rope, at least the holes are already there.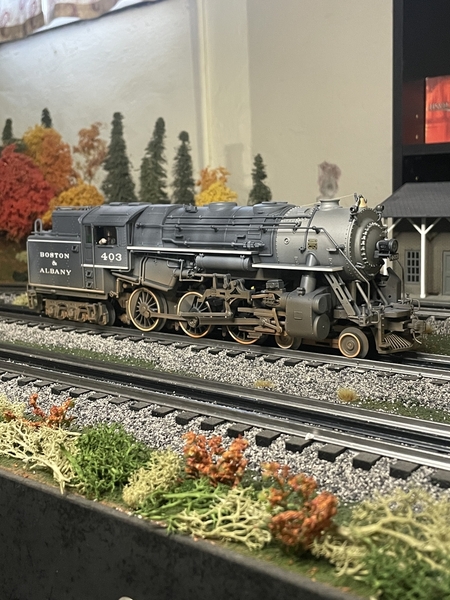
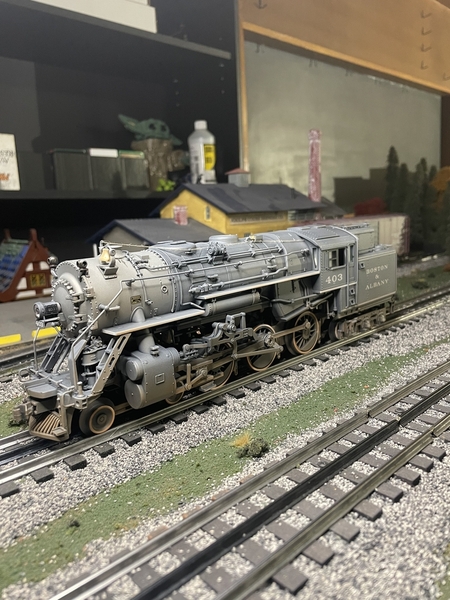
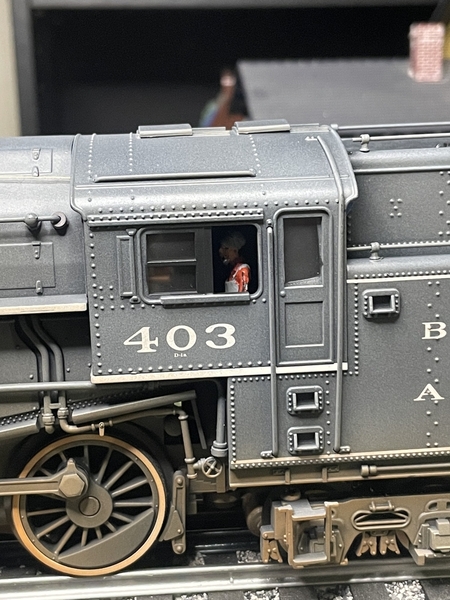
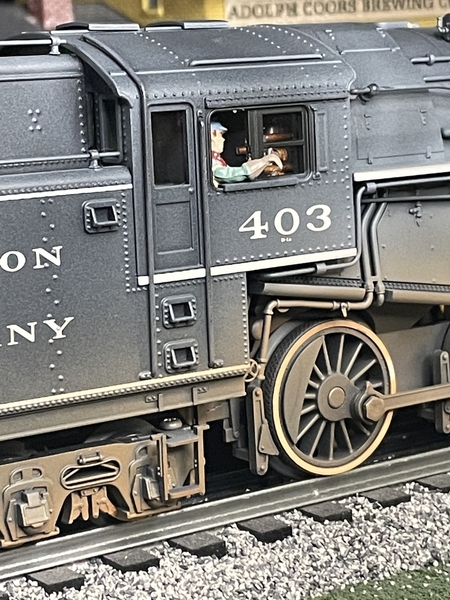
Attachments
@RSJB18 posted:Is that the C-liner Andy? I like that paint scheme too but I've usually seen them with orange hoods.
Bob
Bob, yes that’s the Fairbanks Morse C-Liner. The C-Liners were seen in the following schemes: Tichy, Goodfellow gray, or the Orange nose. The Orange nose was seen more in the late 1950’s to 1960’s.
Andy
Bill, can’t beat time spent with family. Nice progress too.
Cinci, the scrap load looks great.
Trainmaster, coming along nicely.
JD, the trees looks great.
Dave, the buildings are looking good, can’t wait to see.
Nate, the engine looks terrific.
Andy
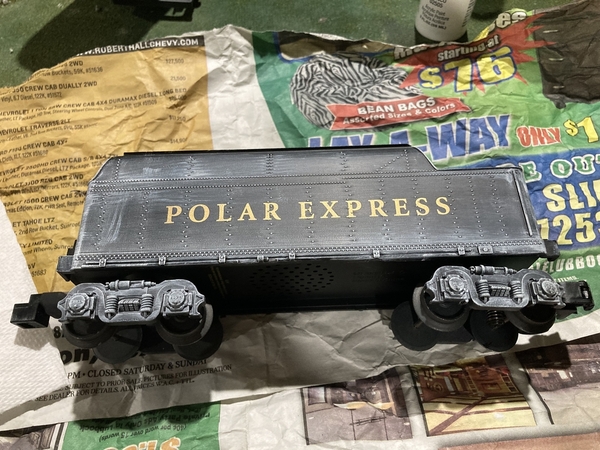
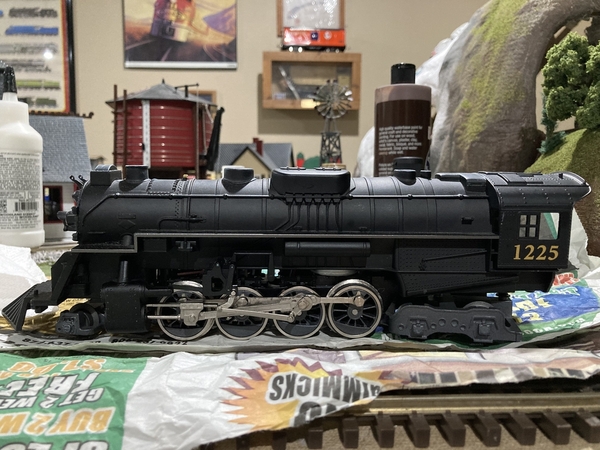
Good evening everyone! Things have been busy on the layout for the past two evenings. I started a new weathering project on a Polar Express set that used to be my cousin’s. I started with a clean tender. Since the engine runs through the snow I decided to make it look frosty. So… out came the white paint. I then moved over to the locomotive and gave it a similar white wash. Once I got them both weathered I moved over to adding rust onto the boiler bands and rivets. To top everything off, I added icicles on both the tender and locomotive. The Woodland Scenics water effect still needs to dry but it gives an idea of the final product.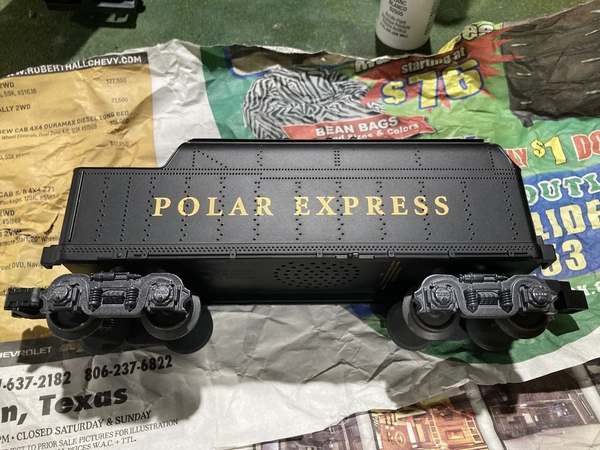
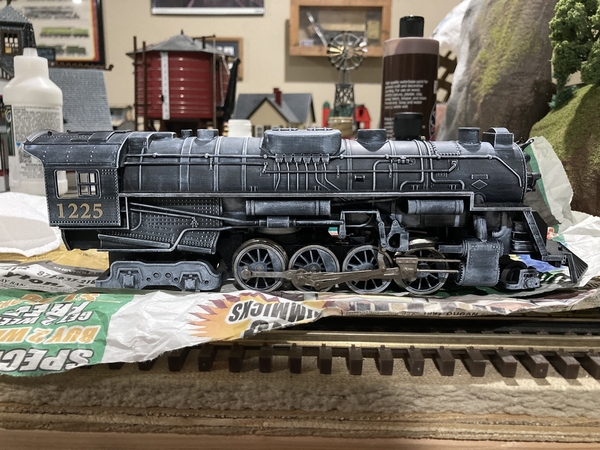
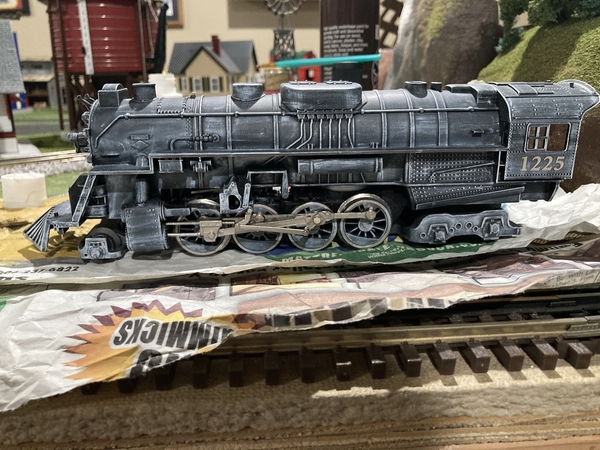

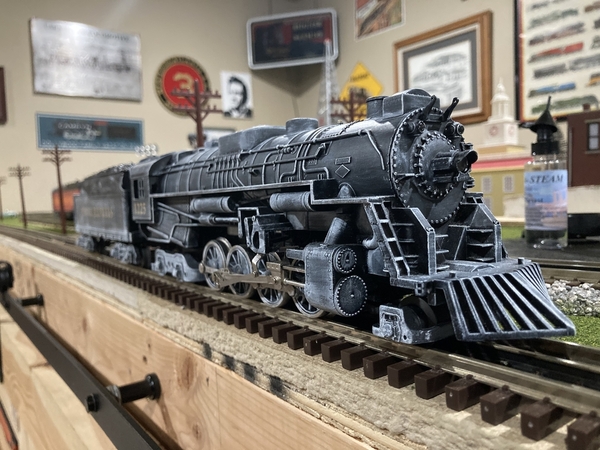

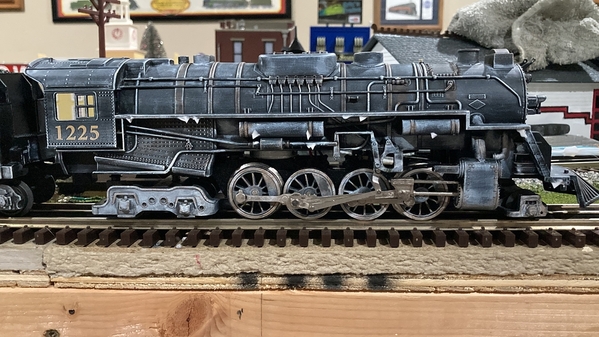
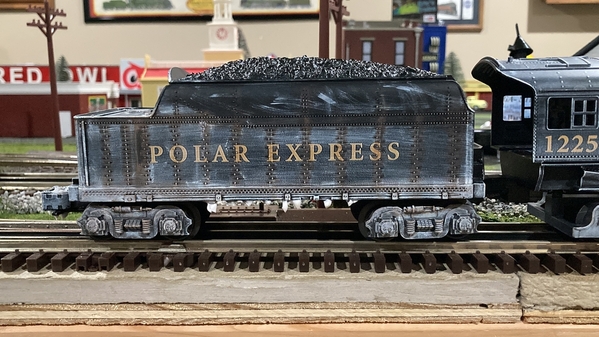
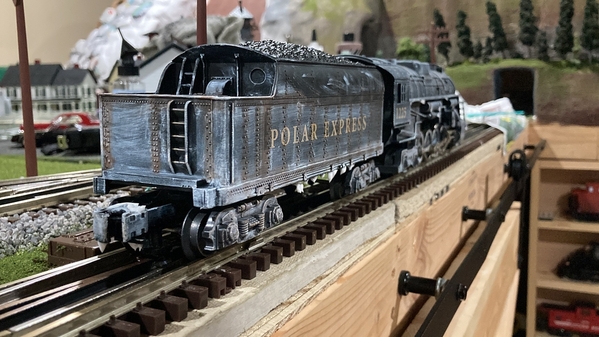
Attachments
@Trainmaster04 posted:I started a new weathering project on a Polar Express set that used to be my cousin’s. I started with a clean tender. Since the engine runs through the snow I decided to make it look frosty.
🥶🥶🥶🥶🥶❄️❄️❄️❄️❄️❄️
Trainmaster04, I really like the white. Looks perfect.
Nice job, looks really good. Not to heavy, just right.
Yesterday set up my Christmas layout featuring the AF 3 rail train Santa (my dad) gave to me the first Christmas after he returned from Germany in 1946. He apparently purchased one of the AF 3/16 3 rail O gauge sets built from prewar components. (the majority of 1946 AF production was 3/16 scale S gauge). The set in the photo is a reacquisition as I wore out the original. Subsequent O gauge Christmas layouts featured Lionel. I've been a Pennsy fan ever since that first train. Sixty plus years later I commissioned noted Philidelphia area scratch builder Frank Miller to create a 1/48 scale model of PRR K5 5698 which runs on my other layout.
Attachments
@Keystoned Ed posted:Yesterday set up my Christmas layout featuring the AF 3 rail train Santa (my dad) gave to me the first Christmas after he returned from Germany in 1946. He apparently purchased one of the AF 3/16 3 rail O gauge sets built from prewar components. (the majority of 1946 AF production was 3/16 scale S gauge). The set in the photo is a reacquisition as I wore out the original. Subsequent O gauge Christmas layouts featured Lionel. I've been a Pennsy fan ever since that first train. Sixty plus years later I commissioned noted Philidelphia area scratch builder Frank Miller to create a 1/48 scale model of PRR K5 5698 which runs on my other layout.
Very nice set up Ed, thanks for posting. On your Christmas display, are they Dept. 56 buildings?
Jay
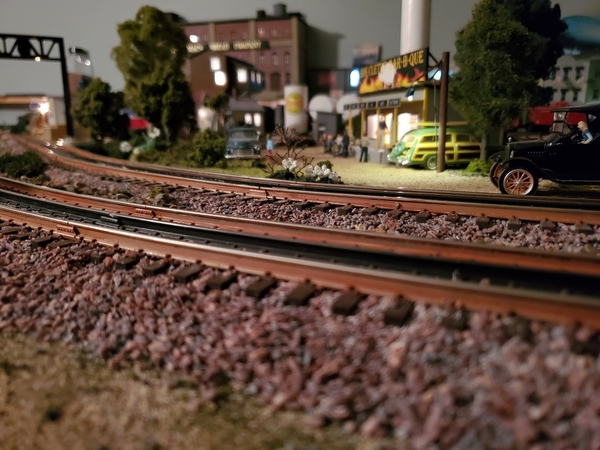
This past weekend I used a spare piece of plywood and track to practice my track weathering technique. @PRRMiddleDivision has been giving me some pointers here. I used Floquil Rail Brown for the rails, which I'm super happy with. However, I'm still trying to decide the color for the ties. The ties in this test sample is Rail Tie Brown by Mission Models. I'll try a few more options this week.
And yes, I know ballasting is the last thing to do on a layout. This is a test piece and I'm just trying to get an idea of what it's going to look like ![]()
- Jason


Pleasantly surprised with how close the color is to the real thing. This photo was taken at my favorite railfan spot, just West of Vermilion, Ohio on the Norfolk Southern Chicago Line.


- Jason
Another client has her Xmas AF layout set up and looking good! I'm proud to have helped produce this...
Mitch
Attachments
That is a GREAT layout! The scenery is fabulous!
@Randy Harrison posted:That is a GREAT layout! The scenery is fabulous!
Agreed! She does good work! ![]()
Mitch
@jdstucks posted:This past weekend I used a spare piece of plywood and track to practice my track weathering technique. @PRRMiddleDivision has been giving me some pointers here. I used Floquil Rail Brown for the rails, which I'm super happy with. However, I'm still trying to decide the color for the ties. The ties in this test sample is Rail Tie Brown by Mission Models. I'll try a few more options this week.
And yes, I know ballasting is the last thing to do on a layout. This is a test piece and I'm just trying to get an idea of what it's going to look like
- Jason
Jason,
Looks awesome. What did you use for ballast?
MERRY CHRISTMAS
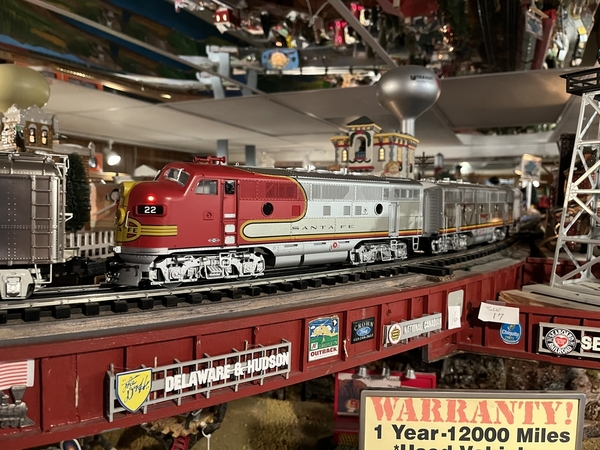
@M.Mitch Marmel, Mitch, great video, really nice train and the scenery is beautiful. American Flyer trains are cool do to the realistic two rail, thanks for the video. @jdstucks, Jason, that’s a cool ballasting job, your layouts coming along very nicely, and I like the beautiful Conrail diesel… @Trainmaster04, now thats a great weathering job on the famous Polar Express locomotive, cool job, it certainly has that Snow Storm effect…. Happy Railroading Everyone 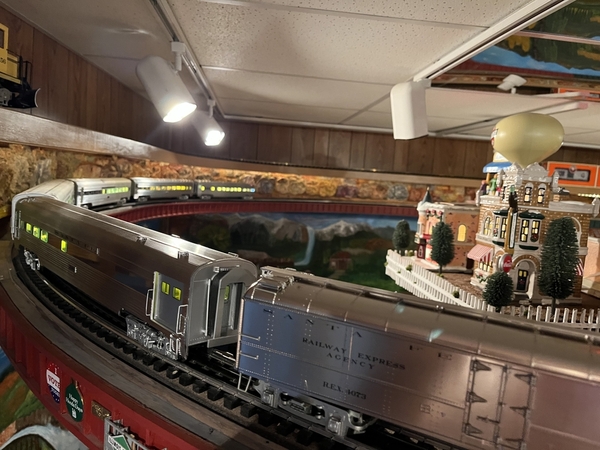

Attachments
@NJCJOE posted:Jason,
Looks awesome. What did you use for ballast?
MERRY CHRISTMAS
Woodland Scenics Coarse Gray Blend. I darkened it further with flat black spray paint. I think I'm going to try and darken it more with flat gray.
- Jason
Yesterday the carpenters installed the backdrops behind the Equestra Train Club Christmas layout today we installed all the amusement park attractions and incorporated that into the main table. I did a test run of all the tracks and while everything was running I took a couple of videos; one with the lights on and one with the lights off so I’ll show them here.
Attachments
@pennsyfan posted:Yesterday the carpenters installed the backdrops behind the Equestra Train Club Christmas layout today we installed all the amusement park attractions and incorporated that into the main table. I did a test run of all the tracks and while everything was running I took a couple of videos; one with the lights on and one with the lights off so I’ll show them here.
A great looking holiday display Bob.
You may want to have a chat with the motorman on the BUDD cars......he's about to run over Santa's elves....![]()
Bob
@RSJB18 posted:A great looking holiday display Bob.
You may want to have a chat with the motorman on the BUDD cars......he's about to run over Santa's elves....
Bob
Thanks Bob, yeah that bump and go provides some excitement for the kids.
Wow, so many folks working on their layouts, adding ballast to their track, even matching it to real railroad track, (@Jdstucks Jason) and seeing trains set up under Christmas trees brings back so many fond memories of yesteryear, (@M. Mitch Marmel with the beautiful American Flyer video, a Wow,) and so many others, @Pennsyfan, Great Videos, awesome work. Today I added the aluminum StationSounds diner to my B&O passenger train, the Colombian. Yes, we are into the best Holidays of all, Christmas. I wish everyone Merry Christmas and enjoy your families and of course, your trains. Happy Railroading Everyone 
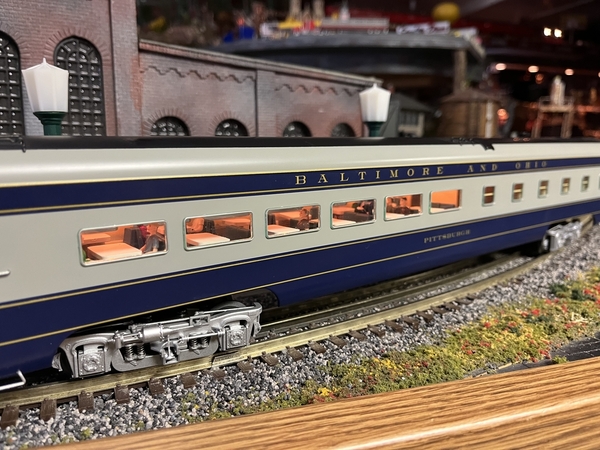
Attachments
@RSJB18 posted:I moved my PRR 0-4-0 consist out of harms way (don't ask). Otherwise layout time as been a big goose-egg!
@necrails- 2-rail shelf layout? Do tell.....pix to share?
Bob
RSJB18, here is the shelf layout so far, the cutout helps with storage. Wired for DC, upper left is a simulated car float, two sidings on the right will be a freight house, lower right siding will be locomotive storage.
Attachments
@necrails posted:RSJB18, here is the shelf layout so far, the cutout helps with storage. Wired for DC, upper left is a simulated car float, two sidings on the left will be a freight house, lower right siding will be locomotive storage.
Nice. Keep us posted as you put it together.
Thanks
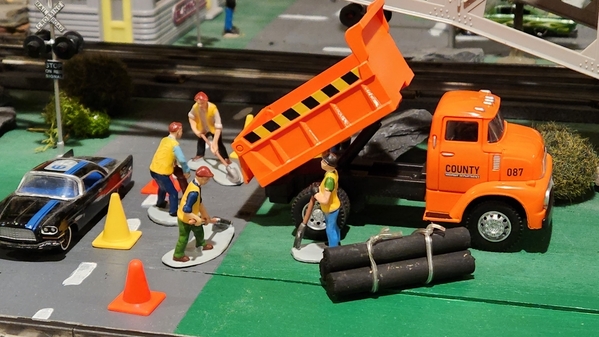
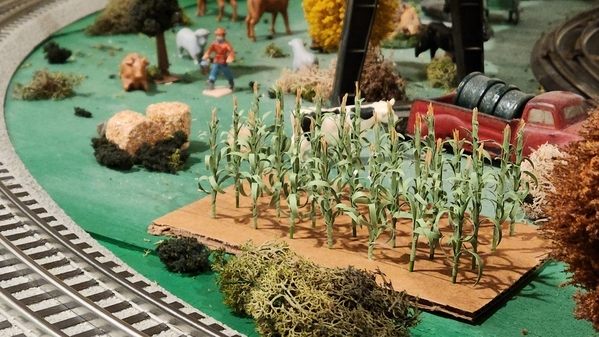
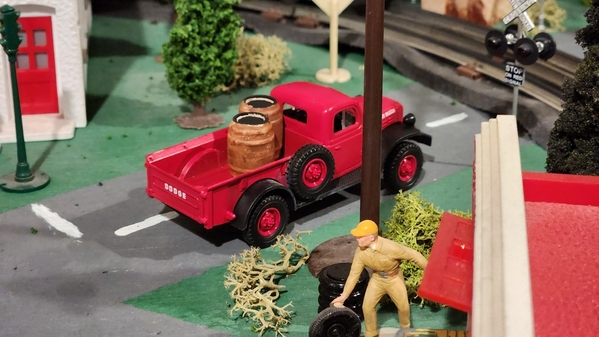
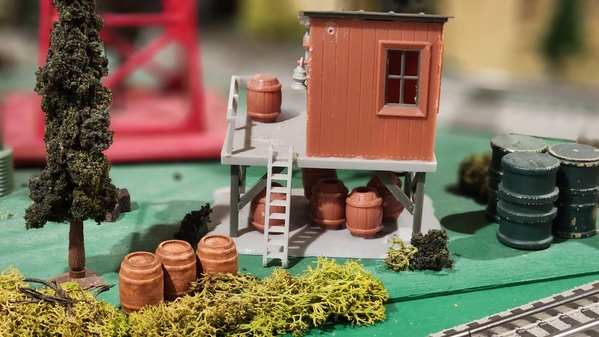
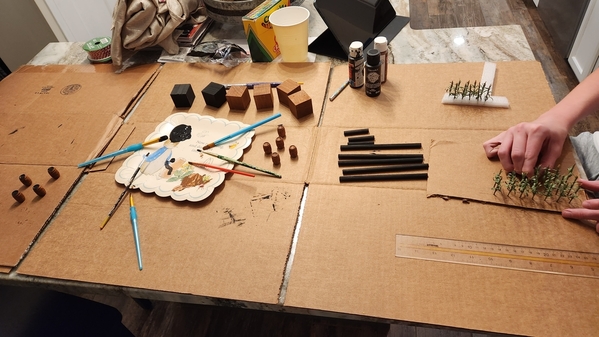
My boys helpd me paint some barrels and wood I cut into pipes for the layout. My older son also built a small corn field for the farm in the corner of the layout.
Attachments
@farmerjohn- welcome back. The new scene is coming together quickly.
@ArtsModelTrains- nice work by your boys.
Bob
I finally finished up building the passenger car lighting kits. I actually enjoy soldering and assembling kits. Still have one of my original Heath Kits from way back. Anyway, a big thanks to John for designing these in the first place.
Next comes the not to fun part - installing them in the cars. Oh yea...
Attachments
WOW guys! I have been so busy with non-train stuff I haven't been able to see what is going on. Seems like while I have been gone everyone has been doing outstanding work!
All I have been able to do is put up Christmas lights, shovel snow and use my tractor to dig people's driveways out. I was able to make a few bucks for layout money. Which brings up a question, how many of you use a MTH AIU on their layout and are they worth it or is it just more to worry about with the remote operation?
I see one for sale and have been thinking about it, just not sure. I would really like your thoughts!
I hope your all having a great weekend and finding time for your layout and fun with your trains!
Continued working on my "plant room" turnaround loop. If you've seen Jim Barrett's book, in the chapter titled "Run Around the Furnace", he makes a turnaround loop that's elevated. So, I too, am making elevated towers to carry the upper & lower turnaround loops. My woodworking skills are not on his level but they'll suffice. Wood was free, prior homeowner left lots of dimensional lumber in the workshop.
Rich in SD
Bill, looks like you will be busy until next year installing all of those. Great job, nice looking boards.
@mike g. posted:WOW guys! I have been so busy with non-train stuff I haven't been able to see what is going on. Seems like while I have been gone everyone has been doing outstanding work!
All I have been able to do is put up Christmas lights, shovel snow and use my tractor to dig people's driveways out. I was able to make a few bucks for layout money. Which brings up a question, how many of you use a MTH AIU on their layout and are they worth it or is it just more to worry about with the remote operation?
I see one for sale and have been thinking about it, just not sure. I would really like your thoughts!
I hope your all having a great weekend and finding time for your layout and fun with your trains!
I have been delinquent here as well because of non-train stuff, though I didn't earn any money doing it. ![]()
I installed AIUs on my layout to control power to track sections and switches. I find controlling the power from the remote to be convenient, but I ended up controlling the switches with the local pushbuttons or manual ground throws. I could use the AIUs to control operating accessories if I add them or turn lights on and off. Forum member Bill Webb shared how he wired everything, and I followed his method. I hope others answer your question, because like most things, everyone has a different experience.
Thanks Mark, I hope Bill Webb shares some input. I would really like to know if it hard to wire and learn!
@mike g. posted:Thanks Mark, I hope Bill Webb shares some input. I would really like to know if it hard to wire and learn!
Mike, they are pretty straightforward, but since a lot of the AIUs have relays only rated at 4 amps, it is advisable to wire in 10 amp relay boards to handle the potential load for controlling power to the rails. That adds another layer of complexity, but once you see what to do they are all the same. Wiring switches, accessories, etc is a breeze.
@farmerjohn posted:
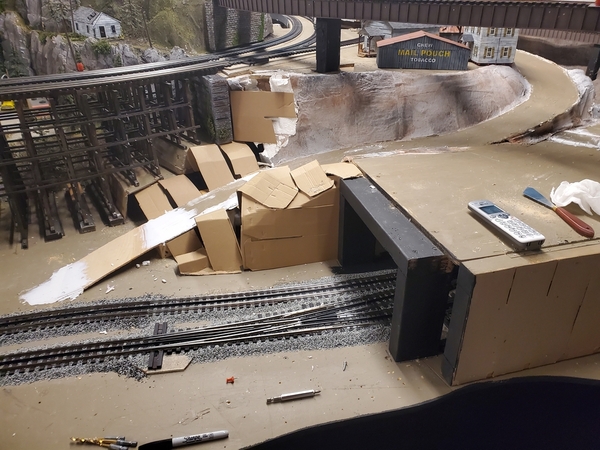
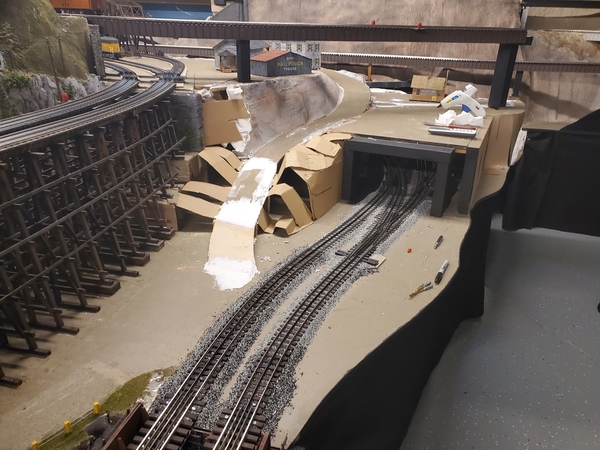
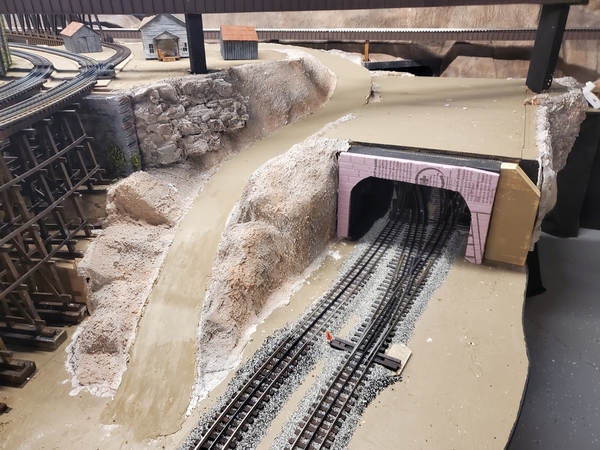
I like that road winding up the mountain, the rocks, and that Mail Pouch Tobacco building in the top photo looks very authentic!
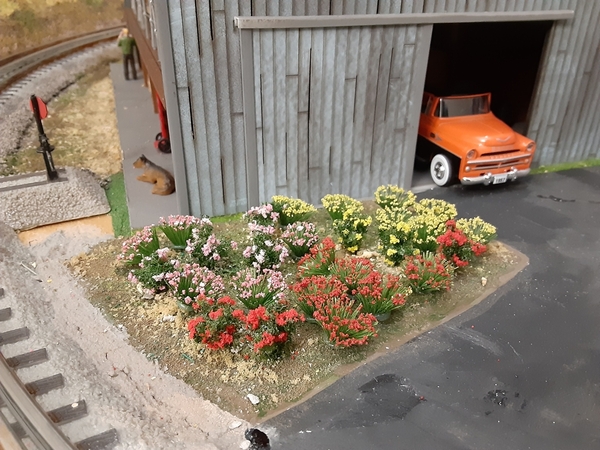
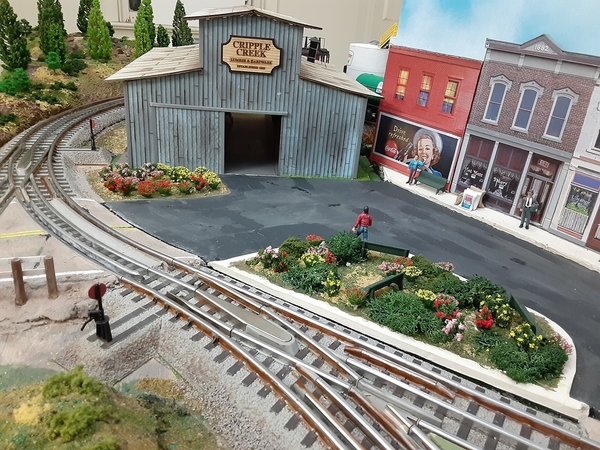
Nothing much compared to what has been accomplished by others above, but there is a new flower garden at what was a dull little corner of the Lumber & Hardware property. They didn't need the space, so they gave the Department of Park & Recreation permission to landscape it. (Nothing on paper, just a handshake agreement.) Park & Rec (it's singular) put in some nice flowers and made it an extension of Central Park.
Attachments
@John's Trains posted:Nothing much compared to what has been accomplished by others above, but there is a new flower garden at what was a dull little corner of the Lumber & Hardware property. They didn't need the space, so they gave the Department of Park & Recreation permission to landscape it. (Nothing on paper, just a handshake agreement.) Park & Rec (it's singular) put in some nice flowers and made it an extension of Central Park.
Really nice work - it fits!
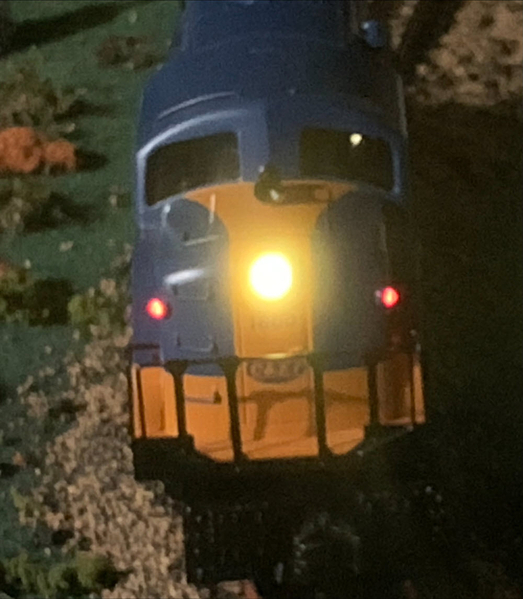
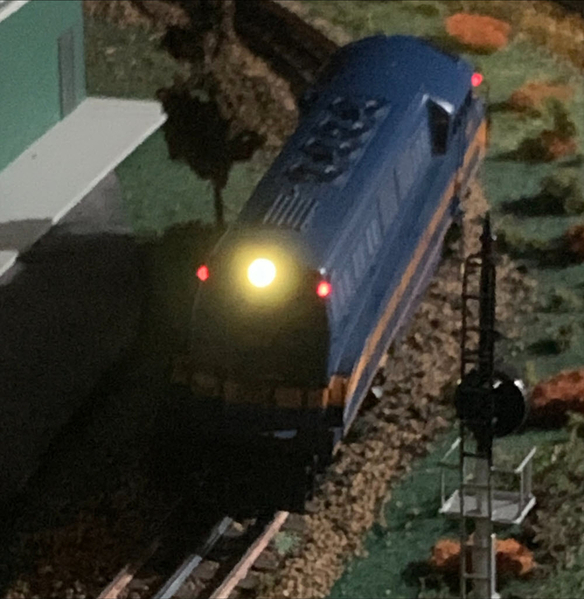
Today I officially start my semi-retired lifestyle. So I thought I would do a quick win project to kick things off. I went old school and bought a Williams BL-2. Which predictably runs great however the lighting from the headlight and markers lights was almost nonexistent running at 8 volts. So I added LEDs to brighten things up.
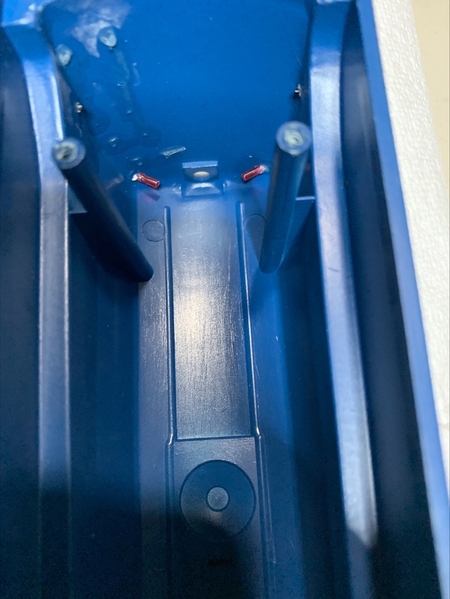
The original lighting arrangement is 2 12 volt bulbs and an open interior for the light to shine through.
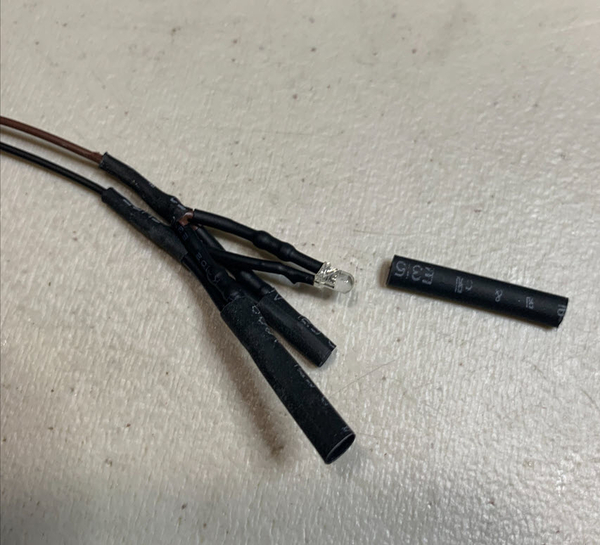
In order to direct the LEDs focus I encased them in heat shrink tubing.
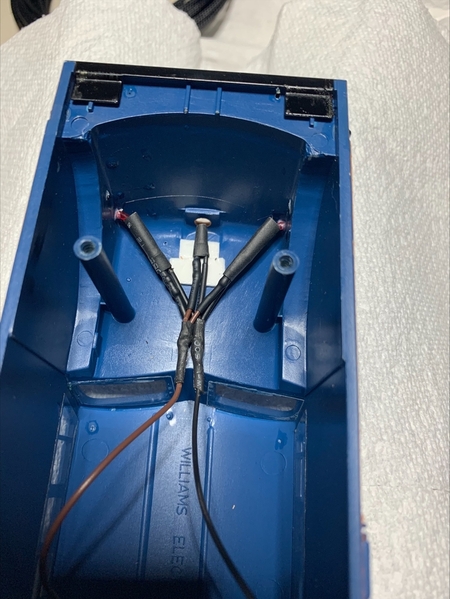
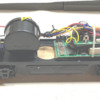
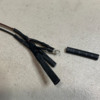
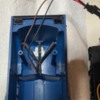
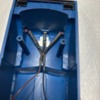
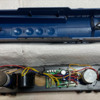
Here are the triple LED light sets installed in the engine. Note the tube completely goes up to or over the plastic lenses. This focuses the light out of the cab and not shining inside.
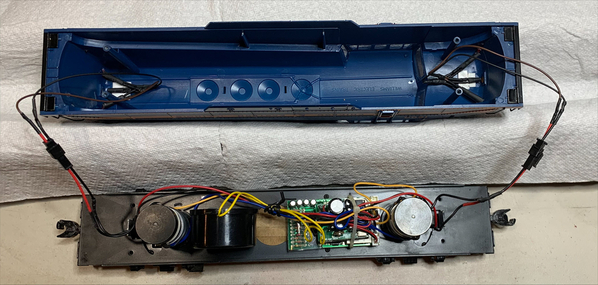
Here is everything connected up. I removed the 12 volt bulb holder and wired direct to the truck leads. There is enough wire length to comfortably open the shell from the frame. Not too much so that fitting it all into the cab when closed up is easy.
The final result is a focused headlight that shines forward about 6 inches down the track. The marker lights are now quite visible but not too much. The picture makes the headlights look blurry which they are not to the naked eye.
Attachments
@ChiTown Steve- nice step by step on the LED conversion. I have 2 Williams BL-2's that could use the same upgrade. Did you happen to wire the motors in series while you were under the hood? I've done my Williams and K-lines and it makes a big difference at the lower voltages.
@John's Trains- Your Parks and Rec Dept can stop by my house anytime. ![]()
Bob
@RSJB18 posted:@ChiTown Steve- nice step by step on the LED conversion. I have 2 Williams BL-2's that could use the same upgrade. Did you happen to wire the motors in series while you were under the hood? I've done my Williams and K-lines and it makes a big difference at the lower voltages.
@John's Trains- Your Parks and Rec Dept can stop by my house anytime.
Bob
Thanks. I’ve wired some proto 1 MTH in series before. TBH I don’t know if this really needs it. It runs smooth as it is with my Z4000 and track wiring. But since you mentioned it I’ll probably want to do it. 🤣
@ChiTown Steve posted:Thanks. I’ve wired some proto 1 MTH in series before. TBH I don’t know if this really needs it. It runs smooth as it is with my Z4000 and track wiring. But since you mentioned it I’ll probably want to do it. 🤣
I use a KW so that 6v jolt gives the crew whiplash!


