


Well said Bob, none of my K-Line die cast hopper cars are out, none of my K-Line Lionel stack or skeleton cars, none of the passenger car sets and just one of my engines out of 40ish - may have more. Now I am thinking 3 more shelf sets are needed as the passenger sets would take up an entire shelf set alone. (no space for that) I may have gone a bit bonkers buying stuff for my grandkids. O BOY
Jeff, the black and boxcar red cars are the more detailed steam era cars. Most of the cars on the shelves are Menards and RailKing.
Evening guys and gals I hope your all having a great weekend and Happy Father's Day to you Dads out there!
Well its been a week since my last post and it seems like that is how it is going to be during the summer. I want to say everyone is doing wonderful work and wish I had more to share with you.
@ScoutingDad Jeff, I am going to reach out on a limb and say maybe instead of more shelves. Maybe you need to part with some of your extra stuff! LOL
Just so you don't think I am here just to poke fun at Jeff I really haven't done much, but today I did get all my isolated track sections wired up to my AIU and tested and the AIU works great, the only problem I have now it that it doesn't seem like my watch dog signal is working correctly.
I am sure I will figure it out with all the great help here. But I also have to make time for the CEO as she has found out how much fishing can be! LOL
I hope you all are doing well and find time to have fun with your layouts and trains!
LOL Mike, get rid of stuff that will not fit on shelves? Why would I do something silly like that?
There is a plan. Most of the additional rolling stock will fit in the lower yard - maybe. Half of the passenger sets will also have a home there. Once I get started on laying out the buildings I have room for another 3 or 4 tier shelf. Things that do not fit from there may have to find a new home or I find a new home with a real train room space. Time will tell.
@ScoutingDad posted:LOL Mike, get rid of stuff that will not fit on shelves? Why would I do something silly like that?
There is a plan. Most of the additional rolling stock will fit in the lower yard - maybe. Half of the passenger sets will also have a home there. Once I get started on laying out the buildings I have room for another 3 or 4 tier shelf. Things that do not fit from there may have to find a new home or I find a new home with a real train room space. Time will tell.
Depending on the square footage you have available on your accessible areas why not have maybe three shelf suspended shelves on pulleys to drop down for engine and rolling stock storage !?! ![]()
![]()
![]()
Dallas, storage is really not the issue. It's about getting everything out of their boxes so they can be seen. Seems Everytime I take an Atlas Master series or certain KLine out of their boxes, I break some small part off.
Once I get the boxes squirreled away in the joists, I'll have an 80 car under table storage area open up. Most of the cars formerly there are on the shelves. Easier access but not out of box. I prefer to have anything out of box above four feet.
Hi Guys, my last post noted I was still awaiting my switches from Ross. Ain't got them yet but they're somewhere along the way. Working now on finishing up my Mianne lift that I waited until the top was done to finish up the bridge. Will be searching the forum soon for Mianne enhancement posts to upgrade my bridge as necessary. After that I'm not looking forward to the wiring start up.
Tommy
I made a list of items that need my attention. There are 20+ on the list.
I have to prioritize the list and separate engines needing repair from layout, storage of runners, raw materials, construction / paint supplies, project parts.
I’m tired already.
@pennsyfan posted:I made a list of items that need my attention. There are 20+ on the list.
I have to prioritize the list and separate engines needing repair from layout, storage of runners, raw materials, construction / paint supplies, project parts.
I’m tired already.
Last time I made a list, I stopped due to writer's cramps.....🤣🤣🤣🤣
@RSJB18 posted:Last time I made a list, I stopped due to writer's cramps.....🤣🤣🤣🤣
😆😆😆😆😆
I went up to the layout today with the intention of clearing a dead spot on the inner loop. Strange, but I just realized that the two items that were stalling are both Williams. A camelback from Williams and a trolley that I’m not sure if it’s Williams or WBB. I used a lighted caboose with only a pick up on one end. I rolled it over the “dead spot” and the light didn’t flicker. On the other side of the layout I had put a Kusan RDC car on the track last night for a picture. I had noticed then that when I applied power to light it up; it didn’t move; no matter how many times I hit the direction button on the ZW. When I applied power this morning, The RDC was lighted; but it suddenly came to life as I took the caboose off the track. I let it run and it made several loops. Then I added the trolley in the mix and they both ran fine; albeit it looks like the trolley needs the typical Williams wiring modification to slow it down. So a pretty successful morning chasing three gremlins.
Attachments
Videos (2)


Neat junk @SIRT
sunset salvage emblem reminds me of the current Chrysler emblem
I always enjoy seeing your photos


 Grabbed a few moments here & there -away from house remodeling & got a few things done. Made 2 roll-around storage platforms, put up a 1x4 led panel light as a trial, I like it, I’ll order more , and lastly fashioned a small work space under the stairs with a desk that was left behind.
Rich in WV
Attachments
Images (3)
Afternoon everyone, I hope your all having a wonderful weekend!
I see you all have been busy with great projects. I wish I had something to share with you all but life got in the way of my plans on picking up some plywood to start building my lower staging yard. I am sure it will be an adventure and I will make sure to post anything I might get done!
I hope you all stay well and are finding time to have fun with your layouts and trains!![]()


@p51 Lee, sorry for your troubles. The hobby and especially this forum has been a source of solace for me these past 2 years.
Those are great pictures!
Searching for Chinese spy balloons.....
Attachments
Images (1)

I've been doing a lot of cleaning up layout. I've got so many boxes under my layout it's hard to work underneath. Never good. Got some different engines and cars out the other day for a new video coming sometime soon. But, in the meantime, here is the latest from my channel. Hope y'all enjoy!
I realized I was not making much progress on the rebuild of Twin Pines Railroad because I am not super happy with the layout as planned. The 7 track yard is great, however it is completely covered by an upper level. I have to rethink the plan making no more than 4 tracks covered by the upper level.
In the mean time, I was testing how a small collection of 2 rail scale wheel engines and cars would operate on the new layout. Track is fine but the Ross switches are a problem at the frogs. I give up and have decided to sell them off. I really wanted to have an operating train using the fine scale wheel sets and European bumpers and couplers. Thought about a point to point layout ... I suppose it depends on whether I can come close to covering most of my buy in costs. I am astounded by how much more detail are in the European MTH versions than the US versions - both Premier.
Jeff, it is true when we realize our layout isn’t meeting expectations, we slow down. But that is good too. It doesn’t pay to keep plowing ahead; rather get thinking about what you don’t like. I agree, it would be nice to be able to see some of your fine passenger trains while in the terminal! I’m sure you will come up with something interesting.
I can see why the two rail scale engines would have problems with the 3-rail switches.
I think you all can see where this is going given the build of the shelving and the discussion of the quantity of rolling stock.
This is what I did on the layout over the last few days - creating an updated inventory. I knew I had some semi-scale stock I was not going to use so might as well sell off. Also had some duplicates and "auction purchasing mistakes" in the 3 rail scale area. I am considering selling this collection off "en masse" through one of the forum sponsors. I'll also post a list in the "For Sale" thread as a first chance.


Attachments
Images (2)


Jeff,
It sounds like you are a bit frustrated and I certainly can understand why. After the uprooting of Twin Pines 1.0 you had the excitement of rebuilding and incorporating what is to be in your next version. That in itself can be very exciting. You spent time planning it out just to realize you're not satisfied with it. Unfortunately your feelings are pretty normal. Give yourself a pat on the back because you stopped to rethink things before getting all the way to scenery and saying, "I wish I wouldn't have". As frustrated as you may currently be it could be a lot worse. You can now re-evaluate what you want and not have to take as many steps back to achieve it. We'll be with you as you continue figuring it out.
Dave


 The last several days I have been working on my Scranton coal facility. I have a lionel model coal breaker and adding a second mine. The second is a Martinsburg Coal Mine kit and it was assembled and weathered by Model Building Services of Massachusetts, Stu Gralnik. I used blue insulating foam on the divider, painted it and now adding a layer of sculptamold which will get a gray rock color painted on and some light bushes added. I also used sculptamold on the subbase plywood and kept it somewhat uneven like it might look around a breaker.The flat piece in the middle is a piece of sheetrock cut to size for the platform of the mattress factory and washed with a mixture of india ink and 90% alcohol. Eventually the sheetrock will lose some of the color and be just about the right shade for old concrete. Stui added lights for the mine and I added them for the factory. Once that work is complete, I will add ground cover and several bags of Brennan's real coal most everywhere around the coal equipment. I have until tomorrow morning to come up with a name for the new mine.Some one of my friends name's will adorn the mine. Once that is compete, I can ballast the tracks using Brennan's gray ballast. Hopefully there is a lot of coal left in the ground after
 all this.
Attachments
Images (5)


@John’s Trains
John here is the Plymouth switcher set running on my layout.
https://youtu.be/5HpPuEqsH38
I thought that I would show you my other K Line set with scale couplers.


Attachments
Images (3)
Videos (1)


As a followup to my post yesterday concerning finishing my Scranton Penn coal area, today we got the back rock divider painted and tinted. The mine and storage building foundations in and ground contouring using sculptamold, and setting the buildings. tomorrow will be grong covering and brush and scrub work, Track ballasting, coal groundcover and details added.


Attachments
Images (4)


Bill, you are making nice progress on the Scranton Penn coal area.
@Bill Park posted:As a followup to my post yesterday concerning finishing my Scranton Penn coal area, today we got the back rock divider painted and tinted. The mine and storage building foundations in and ground contouring using sculptamold, and setting the buildings. tomorrow will be grong covering and brush and scrub work, Track ballasting, coal groundcover and details added.
Love the entire scene! Great work that I hope to come close to doing eventually on my layout!
@Bill Park posted:As a followup to my post yesterday concerning finishing my Scranton Penn coal area, today we got the back rock divider painted and tinted. The mine and storage building foundations in and ground contouring using sculptamold, and setting the buildings. tomorrow will be grong covering and brush and scrub work, Track ballasting, coal groundcover and details added.
Lookin' good Bill. Just in time for the peak summer power usage too!
Bob
Gentlemen, Thanks to all for your comments. I hope to post some almost finished pictures late today. Bill
@Bill Park posted:As a followup to my post yesterday concerning finishing my Scranton Penn coal area, today we got the back rock divider painted and tinted. The mine and storage building foundations in and ground contouring using sculptamold, and setting the buildings. tomorrow will be grong covering and brush and scrub work, Track ballasting, coal groundcover and details added.
These buildings look fantastic! I can't wait to see more of the layout.
Good morning everyone, I would like to start off by saying I hope everyone dealing with the wildfire smoke is doing ok!
@p51 Lee what great B & W photos of your layout! I am sorry for the hard times you and your family are going threw, I hope things get better soon.
@gandydancer1950 Keep looking for those balloons! I am sure there are some still out there! LOL
@ScoutingDad Jeff I can see your problem with your yard tracks, I am in the same boat kind of, but I don't care about my yard being fully under the layout as it is really for storage and not show. I am sure you will come up with something you like. I applaud you for slowing down and rethinking things over!
@Bill Park The second coal mine is going to look great! As Mark has stated you are moving right along! Keep up the wonderful work!
@pennsyfan Bob what a great looking little switcher! I would have to guess that they don't come any smaller then that one! LOL
Well guys as for me I was going to get working on the lower staging yard, but thought I should put that on hold until I make sure I have everything wired up first as all the wiring runs above where the lower yard will go. That mean track power, switches, buildings, auto, and anything else I can think of. Plus I want to make sure I have the buildings where I want to keep them. So that is my plan this weekend.
I hope you all have a wonderful 4th of July weekend with your family and friends! Also I hope you find time to have fun with your layouts and trains!![]()
I personalized the station platform advertising signs.

After all Lionel; why would the home railroad advertise other railroads?

Attachments
Images (3)
I have started work on my scenery and decided to take some videos of how I am doing some of the work. These videos are how I made tunnel portals.
https://youtu.be/cTFJGIpwaYQ
https://youtu.be/lhsptNoFHFM
https://youtu.be/OzvDrAL_B1k
I hope you enjoy and provide me some feedback so I can do better in the future!
Subscribe to my channel! https://youtube.com/@pauldecker5861
Wow, this is one long running thread, full of great pictures, videos, an educational thread for any model railroader. Page “1204”, all fun to review. I’ve been working on my turntable which is 95 percent finished. Now, many folks know my layout is multi level, with twin helix’s allowing trains to go up and down to all levels. So, Lionel’s Cab 2’s, Cab 1L’s, (even the old Cab 1), has a unique button, RTE, which lets one align the turnouts to be programmed as a designated path with the push of 1 button, the route button. It’s fun to listen to the switches/turnouts click independently allowing the train to go up the hill, down the hill, effortlessly. Happy Railroading Everyone 


Attachments
Images (12)
Looks great as always, Larry! Your young friend looks happy!
@Mark Boyce, Mark, that’s Captain Will Porath, a great friend, who has helped me set up routes, make switches work properly and is also a Legacy enthusiast. If you go to YouTube, he goes by Will2926, check his videos out. Pictured is his 2-10-10-2 Sante Fe articulated steamer and other Big Boy locomotives… Happy Railroading Everyone 


Attachments
Images (6)
Larry, I will look up Captain Will on YouTube. Thank you!
@leapinlarry, Larry, glad to see things are running strong on your railroad! Will is indeed a great person to be friends with and a charm to talk to. Great asset to the hobby.
Greetings all- been lurking around lately. Nothing happening on the layout for the past few weeks. Outdoor chores have made spending hours in the basement hard to justify. The northeast has had a very dry Spring and early Summer so there have been few rain outs that promote cellar dwelling.
I've been working on my MTH S2's though. Parts are arriving from MTH this week so I hope to start putting them together soon.


@leapinlarry- nice to "pull back the curtain" and see how some of the magic happens. Besides being a beautiful layout, there's a lot of tech that makes it work.
@mike g.- good planning goes a long way. Just remember, there will be changes along the way so as long as you have a way to get wires run, etc in the future, then the hidden yard will be a success.
@pennsyfan- great idea with the signs.
@OhB1- Took a quick look at the first video, Nice work on the molds. I will have to watch the videos in full when time permits.
@ScoutingDad- sorry to hear you're having layout remorse. At least you owned up to it now. I'm sure you will figure it out.
Hope everyone has a safe and happy 4th!
Bob
Attachments
Images (2)


Afternoon guys I hope your all doing well!
@leapinlarry Larry what great photos of your layout! I am always at aww when you show the depth of your layout! If I would ever get a chance to visit your layout I would have to wear a bib! LOL
@pennsyfan Bob, nice to make the waiting area yours! It is always nice to have something that all can relate to while waiting for there trains!
@RSJB18 Bob, I hope you geter done soon, from the long range forecast I don't see much rain in your future! Either way enjoy what your doing and if it means trains that is just a bonus!
As for me I am still thinking over my industrial area, I am not sure I want it there and after I get some 2" foam I might move the town down to the lower area and have a small river, then move the industrial area to the upper level! Here are a couple of photos. I would like all your input!

In the lower photo the open area where the airport is will be filled with 2" foam so I can carve a small river to help justify the bridges in the foreground, if I do that I will probably move the airport.
I look forward to hearing what you all think!
Till then I hope you all have a great weekend and find time to have fun with your layouts and trains!
Attachments
Images (2)
Mike, I’m not sure I follow. In the first picture you say move the town. Is that just the buildings on the right; or does it include the bus depot and train terminal? I’m thinking that the industrial area would have sidings.
@mike g. Wow Mike, what a transformation, the layout looks so organized and neat, nice job! I just noticed the cool looking pedestrian walk bridge, did you scratch build it?
Gene
@Genemed posted:@mike g. Wow Mike, what a transformation, the layout looks so organized and neat, nice job! I just noticed the cool looking pedestrian walk bridge, did you scratch build it?
Gene
Hi Gene, thank you for the nice words!
As for the pedestrian walk bridge I did scratch build it to match the length of the RR Bridge. I came into a lot of balsa wood from my Mother when we had to move her to a care home and cleaned out her house. Plus at that point I had a lot of free time on my hands! LOL![]()
Mike, I’m with Bob thinking the industrial area would have sidings. However, I would think you would want the bus terminal near town. I agree the bus terminal makes sense near the passenger station, so your existing town buildings look good where you have them. I’m thinking the street could angle making for a more interesting scene. Or you could do something completely different! 🤷♂️ Just have fun moving things until you like it best. Take photographs before you move things do you can put them back if you want.
Mike nice progress. I used to have the Greyhound station. That thing is massive and consumes a whole lot of real estate - really sharp though. I ended up selling mine as I did not have the space nor did I really want to dedicate that much layout space to it. While it makes sense to keep it close to the train station, space reality may force a different location. Stacking them might work and make sense at the same time.
With regard to TwinPinesII layout. I always had it in the back of my head I was not going to have sheets of plywood stacked on top of another. The current build was just convenient to lay everything out to work out spacing. I think I found some extra usable space, not a lot, but just enough. Thought is to make the entire level over the yard a set of elevated trestles opening up the view to the yard below. With the extra "found" space, I can model building flats on both sides of the yard - starting at yard level going up.
Happy Rail Roading All !!!
Thanks guys for the input and I agree that an industrial area should have sidings, so I went to SCARM and added a couple. That would make 4 sidings on the upper level, here is a SCARM drawing for you all to think about.

Jeff, I agree about the Greyhound bus station, but it cost so much to ship it and I don't have the box anymore. I mean if someone wanted to make a good offer and pay shipping, I would find a box to ship it in! LOL
Attachments
Images (1)

Files (1)
Now you’re talking, Mike. You are getting good at SCARM. The Greyhound station is cool, but yes it takes space.
@Mark Boyce posted:Now you’re talking, Mike. You are getting good at SCARM. The Greyhound station is cool, but yes it takes space.
Thanks Mark, those plus the 6 tracks under the layout should hold all the trains I have right now! LOL![]()
@ScoutingDad- Jeff- I like where you are going with the tracks over the yard. On my fantasy layout design, I've considered the same solution to make the yard more visible from above.
@mike g.- The Greyhound station can still find a home. Add a single track spur to serve the bus station. You could run a local shuttle train from the main passenger station to the bus station. An Amtrak diesel and 2-3 coaches would look good.
Bob
A little out of left field, a trolley would make sense going back and forth between the 2 stations.
I was thinking an RDC

Attachments
Images (1)
@ScoutingDad posted:A little out of left field, a trolley would make sense going back and forth between the 2 stations.
@pennsyfan posted:I was thinking an RDC
Thought of both too but Mike is running modern Era so....😎
But it's HRR-HR.....😁
I'm partial to the BUDD cars....
The LIRR used to run "Scoot Trains" from hub stations to the ends of some branch lines. The Greenport Scoot was one such train running to the eastern tip of the north fork from Riverhead. 😉
Bob
Following up my post of Friday, the coal mine and storage building are set in place with sculptamold. The ground was painted a brown color before covering it with white glue and tile grout. I apply the tile grout with large salt and pepper shakers. Tile grout comes in many colors and is very fine. I think it makes good ground cover.I have added some clump foliage and lichen but will do more when all the glue hardens. I also have a lot of small details like mattresses for the mattress works and in general, junk and some worn mechanical pieces for around the breakers. I used Brennan's real coal in two sizes plus their ballast. I also need to add some people. My intent was to have the coal cover a lot of the track so I will apply another layer when this cures.


Attachments
Images (4)

@ScoutingDad posted:A little out of left field, a trolley would make sense going back and forth between the 2 stations.
I'm MMM, and I endorse this message. ![]()
Mitch
Hi Bill your coal area looks perfect!
Good evening everyone!
I have been busy the past few weeks with one project and another. Lately, I have been working on the standard gauge Chama coaling tower.
Work on the tower has been come and go as it has become quite a task to build. I started back on it by adding the two side panels and began work on the outer supports.


After a break, I turned my attention to the back. I at first was going to make a single coal elevator until I found a photo of a model of this tower. Instead of a single elevator it instead has two buckets. Wanting to make this model a fare representation of the prototype I decided to build two buckets.
This area took me the most time as it was a lot of wood to cut and paint.


I still have much to do but I am on the home stretch. Definitely has been a fun project.
Thanks for reading and happy 4th of July!
Attachments
Images (8)
You have a laser cutter machine?
No, all hand cut.
The coaling tower looks great, Trainmaster04
@pennsyfan posted:@John’s Trains
John here is the Plymouth switcher set running on my layout.
https://youtu.be/5HpPuEqsH38I thought that I would show you my other K Line set with scale couplers.
Very nice. Both of those little engines are perfect with trains of 3 or 4 cars.
John
I don't know if this qualifies as something I actually did on my layout today, but it is something that happened on my layout today. This story is still developing.
I hope the developments don’t include a train wreck!
@Mark Boyce posted:I hope the developments don’t include a train wreck!
Hopefully not, Mark. They've got everything shut down over there. At least that's what I'm hearing.
@John's Trains posted:I don't know if this qualifies as something I actually did on my layout today, but it is something that happened on my layout today. This story is still developing.
Must be the Nina, Pinta and Santa Maria. I TOLD that idiot Columbus he'd sail off the edge of the world... ![]()
Mitch
@Bill Park posted:As a followup to my post yesterday concerning finishing my Scranton Penn coal area, today we got the back rock divider painted and tinted. The mine and storage building foundations in and ground contouring using sculptamold, and setting the buildings. tomorrow will be grong covering and brush and scrub work, Track ballasting, coal groundcover and details added.
You, Bill, you will be getting coal in your stocking this Christmas!
Such a lucky guy!
LOL, Arnold
PS: Can't wait to see your gorgeous layout in person
I showed this on the Weekend photo fun on Friday; but I’m running the train again today.
Please take the time to remember and pray for our Forefathers that sacrificed so much to give birth to our great country!
Have a happy and safe 4th of July!
Attachments
Videos (1)

@M. Mitchell Marmel posted:Must be the Nina, Pinta and Santa Maria. I TOLD that idiot Columbus he'd sail off the edge of the world...
Mitch
Mitch, that was good!!
@M. Mitchell Marmel posted:Must be the Nina, Pinta and Santa Maria. I TOLD that idiot Columbus he'd sail off the edge of the world...
Mitch
Before watching your "Good Advice" video, I think the only Allan Sherman song I knew was "Hello Muddah, Hello Fadduh." That song I heard circa 1965 courtesy of my best friend who lived two doors down and who had all the good toys.
John

")
@Ron H posted:Ran this ATSF Hudson today.
Good looking photo Ron. ![]()
I wasn't able to view a video. Just a little static and then it stop after a couple seconds. Itmight be at my end.
Thanks Dallas. No problem on your end, just me fumbling with my I-phone.
Ron
@Ron H posted:Thanks Dallas. No problem on your end, just me fumbling with my I-phone.
Ron
No problem Ron. My fingers are too big for my phone. ![]()
( Just glad it wasn't a problem with the OGR forum and my end . ![]() )
)
@Ron H posted:Thanks Dallas. No problem on your end, just me fumbling with my I-phone.
Ron
Ron and Dallas, I certainly have trouble with mine as well!
For what its worth, I did not want to load another app on my phone so I bought a tablet to run the DCS app, Works great and is big enough for my sausage style fingers. Of course the table has other apps and connects to OGR. I like the smaller tablet which fits in my hand over my larger table which doesn't. Caution: Fire Tablets will not run the DCS app, which is really why I ended up with a Droid table.
Jeff, I have an old tablet I can use when the time comes. Yes, the phone is kind of small, but that’s good because I want it in my pocket. The tablet can stay at the layout.
Not really something on my layout, but something for my layout.
I have an around the room layout with an O gauge level and an upper G gauge level. There is virtually no space on the walls for shelves. And the few shelves that I could squeeze in would have to be from 6-8 feet off the floor.
When I had our detached garage designed, I knew the second floor would be a train room. I had the stairs come up about 5 feet from the nearest wall to allow the around the room layout. There is a knee wall around the stairwell. I am constructing this display case which will stand on the floor and be attached to the knee wall. It is 11 feet long and a little over 4 feet tall. It has 6 shelves that will hold 66 feet of trains.

Here it is almost completed. I have some major sanding and painting to do. Also, it is too big to get from the garage up the stairs to the train room. It is built in 2 sections each 5 1/2 feet long. Once it is painted, I will disconnect the 2 sections, bring them upstairs and reconnect them.
At some point I plan to build 2 more of these display cases but only about 9 feet long and they will stand back-to-back.
Attachments
Images (1)
@VinceL Vince since you appear to be reasonably handy, you may consider adding grooves in the shelving so that the wheel flanges set into the grooves preventing anything from rolling or vibrating off. I found a table saw blade is thin enough to "route" out the groove yet provides enough side to side play to easily get the rolling stock onto the shelves. I discovered 2 cars out of 80 were slightly out of gauge - a little too narrow - when putting them up on the shelves.
@ScoutingDad posted:@VinceL Vince since you appear to be reasonably handy, you may consider adding grooves in the shelving so that the wheel flanges set into the grooves preventing anything from rolling or vibrating off. I found a table saw blade is thin enough to "route" out the groove yet provides enough side to side play to easily get the rolling stock onto the shelves. I discovered 2 cars out of 80 were slightly out of gauge - a little too narrow - when putting them up on the shelves.
I was thinking about doing that. But, try as I might, I could not find enough perfectly straight 1x4's to do that. I should really find someplace else to buy lumber. All we have near me are Home Depot and Lowes, and, you have to sort through a lot of really warped lumber to find reasonably straight pieces. I'll be putting O gauge track on the shelves.
Painting (staining) begins tomorrow.....

Peter
Attachments
Images (1)
NMRA MCR DIV 7 monthly meeting:
Layout visits:
D&RGW HON-3 layout.
Hi rail O gauge layout.
Good morning everyone.
I have a small layout update to share. Last week @ScoutingDad posted for sale an MTH RK boxcar office and I was able to pick it up. It arrived safe and sound on Saturday and finally was able to open it up today. It is in great condition and I am glad to have purchased it.
Wiring it up was very straightforward. Four wires and a little power latter and it was alive!

It is placed near tunnel number one and across from the station. I plan on adding a number of trees and maybe a pond to this area and make it look like a hobo camp. Got to have one!


Thank you @ScoutingDad for selling me this wonderful little building.
Thanks for reading and God bless.
Attachments
Images (4)
After contemplating the task of weathering the turntable, I decided to do it on this rainy day. I needed to tone down the plastic looking light gray. I think it looks much better.
Gene


Attachments
Images (4)
@Trainmaster04 posted:Good morning everyone.
I have a small layout update to share. Last week @ScoutingDad posted for sale an MTH RK boxcar office and I was able to pick it up. It arrived safe and sound on Saturday and finally was able to open it up today. It is in great condition and I am glad to have purchased it.
Wiring it up was very straightforward. Four wires and a little power latter and it was alive!
It is placed near tunnel number one and across from the station. I plan on adding a number of trees and maybe a pond to this area and make it look like a hobo camp. Got to have one!
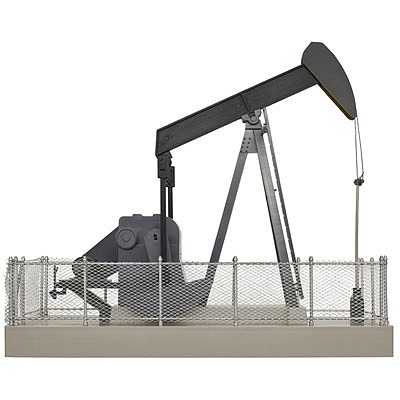
Nice unit! The only suggestion I'd offer would be to try to sink the base into the surface of the layout, if the top layer is foam and/or easily reworked. Then it will be a lot easier to blend the base into your landscaping and make it look like a scratch-built custom installation. I've done the equivalent with several pre-built units on my layout, and have always been satisfied with the resulting appearance especially the ones with really high bases like the Atlas oil pumper!
- Original unit -
- As installed with base recessed:
No crazy work happening today. Weathered my track by using Krylon “Satin Otter Brown” spray paint. Finished cleaning the rails today. Trains are running smoothly!
Attachments
Images (1)
@Genemed posted:After contemplating the task of weathering the turntable, I decided to do it on this rainy day. I needed to tone down the plastic looking light gray. I think it looks much better.
Gene
No plastic look there Gene. Nicely done sir. ![]()
@VinceL posted:I have ordered a 4' x 18' extension that will come out into the middle of the room. It will serve as a yard and also possibly for a track to make a reversing loop...will have to make a lift out section to avoid a duck under.
I am close to having all of the track and switches removed from the layout. I have done some design of sections of the new track plan in SCARM. Here are some pictures of the devastation that I have brought to my layout and trainroom.

The above picture shows where I have been clearing things out of the way in anticipation of the 4' x 18' extension of the layout. Two boxes were delivered today from Mianne Benchwork.
I'll post pictures after getting the new extension at least partially assembled.
Mianne boxes are so small when compared to how much layout that can be built with the contents. Looking forward to seeing the expansion!!!
@Dallas Joseph posted:No plastic look there Gene. Nicely done sir.
Thank you Dallas.
https://ogrforum.ogaugerr.com/...3#176694689112807793
I agree with Steve, accessory bases are much to high.
Here is a picture of my park accessories when I first got them.
I wasn’t happy with the appearance. Not having a foam base I had to cut out the 3/4 plywood table. I then used toggle bolts to level the platform in the hole. Then I used painters tape to close the gap and finished with ground cover. Here is a finished picture, notice how it blends with the walk and the adjacent part of the park.
Here is the latest addition under construction.
Attachments
Images (2)
Videos (1)


I need to get one of those selfie sticks also, Bob! Your photographs look great!
@Mark Boyce posted:I need to get one of those selfie sticks also, Bob! Your photographs look great!
Thanks Mark, next step is to put a piece of scrap wood on a stool. The stick comes with a tripod. I want to put it at table level to take some steady videos.
@pennsyfan posted:
Seems like you really have the hang of that selfie stick already Bob. ![]() Nice.
Nice.
( You do know the purpose of that selfie stick Bob !?!.......yet I'm not seeing " pennsyfan " images in these scenes. ![]() )
)
Yeah I know haven't been on the forum for quite a while... A number of life challenges have gotten in the way. Anyway, been down in the train room over the past 2 weeks. finished up the Kadee 805 couplers on the remaining H21a hoppers. Also picked up a really cool PRR N6a caboose on an O scale 2 rail marketplace. It's very cool, and old GloorCraft wood kit, I was able to change out the 2 rail wheels and keep the beautiful wheel trucks. Heck I didn't even know a PRR N6a caboose existed !
For the past 3 days I have had tunnel vision working on an MTH PRR Railking Crane and MTH Premier CNW Crane Boom Caboose car that's been sitting for a long time. Lowered both cars at least 1/4", installed Kadee's, managed to close the gap between the crane and the die cast car chassis and have done a bunch of repainting and weathering on the caboose which started it's life as a Black, Yellow and Green CNW . They're really pretty nice cars when they aren't sitting 1 to 2 scale feet to high off the rails.
Pretty happy with the results so far, am going to order PRR MOW Decal set for it tonight. Haven't applied a decal in over 50 years ! Yee Hah
I still have to remove the doghouse on the crane, wash it, rough it up with scotch brite and then weather it, but I am getting there.
There's a bunch of photos attached below.

Attachments
Images (10)


Chris, I'm glad to see your smiling face again! The cars really look great!!
Mark, Thanks for the kind words ! From the few times I have checked out your layout thread, it's really progressing into a great layout.
Add Reply
Sign In To Reply
