trainroomgary posted:Started to paint the flat structures.
Using Acrylic White Wash paint for the bricks and mortar.
Gary

Any chance you can make this into a tutorial for your technique, in the scenery area, of course.
Thanks, and have fun!


|
|
trainroomgary posted:Started to paint the flat structures.
Using Acrylic White Wash paint for the bricks and mortar.
Gary
Any chance you can make this into a tutorial for your technique, in the scenery area, of course.
Thanks, and have fun!
mike g. posted:For your enjoyment! Donavans Reef.
That's great Mike. I was looking for a clip on Youtube but only found a really poor quality one with no sound. ![]()
![]()
RSJB18 posted:mike g. posted:For your enjoyment! Donavans Reef.
That's great Mike. I was looking for a clip on Youtube but only found a really poor quality one with no sound.

I was at the grand daughters b-day yesterday all day! So I had time to watch the whole movie!![]()


Train plans were derailed Saturday as I was a last minute chaperone for the grandsons at their Pinewood Derby car "build" session. We had fun without electronics for a few hours and no fingers were lost to the bandsaw ! Later, I did manage to weather the rest of my track & switches - as the temp got above 55F in our detached garage (quick- spray then run away). This afternoon will see some track being laid, it's fun to make progress !
Mo985 posted:trainroomgary posted:Started to paint the flat structures.
Using Acrylic White Wash paint for the bricks and mortar.
Gary
Any chance you can make this into a tutorial for your technique, in the scenery area, of course.
Thanks, and have fun!
Hi Mo985: Yes I am working on a new YT video about this project. Look for it as a two part video. around February 8th and March 8th, 2018. On my YT Channel.
I do have this video below about the bricks already on YT.
https://www.youtube.com/watch?v=s5llwGqLjJs
Hope this helps: Gary
Yesterday I worked a bit on the ground turf and mounted the buildings. I think I am done with the flats on main street so I can start working on the street and lower area. Street wise I have to drill holes for the telephone poles. Decided to cut off the base on them. Today I am working on adding a switch to the mainline so I can enter the next freight yard from both ends. All I want to do has to wait till uncouple tracks and bumpers come in along with the cattails. I get those I can finish the freight yard and drainage ditch and move on to the next yard. After putting in the switch I'll go back and add bushes and trees around the Sauerkraut factory. Before I forget MIKE G, I have another long wall that will need buildings flats. LOL Once I clean up that area that is also where the next freight yard and industrial sidings are going. Pics.............Paul


WOW Paul! Things were looking wonderful, till I got to the last picture! I guess you do have a little clean up ahead of you!![]()
Well. The wall is gone! All traces of it! Mess cleaned up! Now its time to start the take down of 12x6 table in the front room. I just cant bring myself to take it apart : (
Jim
Sorry Jim, But you know it's going to a better place! I have faith in you!![]()
carsntrains posted:Well. The wall is gone! All traces of it! Mess cleaned up! Now its time to start the take down of 12x6 table in the front room. I just cant bring myself to take it apart : (
Jim
Short term pain for long term gain Jim.
Bob
OK guys I got it taken down. All trains, track, buildings, cars, people, foam. Got the two 2 foot extensions off of the base 6x8 table. Got it marked to cut in two. Need to run down to HD and get some 2x4 so I can fix the two 3x8 sections. And put two legs on each. Been a busy Sunday!
Jim
Worked on putting the new switch. After pulling up the old track and cutting new track to go with the switch I penciled in my center lines and laid down some cork. I am hoping after dinner that the glue will be dry and I can paint the cork. Still pretty much in slow mode until my stuff comes, I am keeping my fingers crossed for tomorrow. Once I work the switch area I went back to the Sauerkraut factory and put in some trees. Had a couple that I didn't put leaves on so I thought I would plant a couple of dead trees. That was the afternoon. Pics ........Paul


A quick suggestion regarding legs ( a repeat of an idea i posted here over 10 years ago) -- 2x4's are overkill for most model railroads. 2x3's work just fine. My local lumber yard rips 2x6's for me at no extra charge, and now i have 2x3's. Don't know if the big box stores will do this for you. I prefer straight dry wood so i patronize my local lumber yard opposed to the big box stores. 2x3's can be very cost effective as well.
paul 2 posted:Worked on putting the new switch. After pulling up the old track and cutting new track to go with the switch I penciled in my center lines and laid down some cork. I am hoping after dinner that the glue will be dry and I can paint the cork. Still pretty much in slow mode until my stuff comes, I am keeping my fingers crossed for tomorrow. Once I work the switch area I went back to the Sauerkraut factory and put in some trees. Had a couple that I didn't put leaves on so I thought I would plant a couple of dead trees. That was the afternoon. Pics ........Paul
Looking good Paul ![]()


Way to go Jim! You will be so happy when you start putting it back together!![]()
Paul, Bob is right! looking good!![]()
Brian, there you go again having so much fun!![]()
Me I have been working on a special project, You will all know about it when the time comes!![]()

The cold weather closed schools the last few days so I was able to get lots of wiring done on my amusement park area. 13 rides wired (plus 1 menards billboard) and each ride is on its own switch so I can turn on as many or few as I want. Also switches are kid height so they can control each ride.
![DSC_1185[1]](https://ogrforum.ogaugerr.com/fileSendAction/fcType/0/fcOid/12129987997660671/filePointer/77311805211785201/fodoid/77311805211785195/imageType/LARGE/inlineImage/true/DSC_1185%255B1%255D.JPG "DSC_1185[1]")
![DSC_1186[1]](https://ogrforum.ogaugerr.com/fileSendAction/fcType/0/fcOid/12129987997660671/filePointer/77311805211785202/fodoid/77311805211785196/imageType/LARGE/inlineImage/true/DSC_1186%255B1%255D.JPG "DSC_1186[1]")
![DSC_1187[1]](https://ogrforum.ogaugerr.com/fileSendAction/fcType/0/fcOid/12129987997660671/filePointer/77311805211785203/fodoid/77311805211785197/imageType/LARGE/inlineImage/true/DSC_1187%255B1%255D.JPG "DSC_1187[1]")
![DSC_1185[1]](https://ogrforum.ogaugerr.com/fileSendAction/fcType/0/fcOid/12129987997660671/filePointer/77311805211785201/fodoid/77311805211785195/imageType/LARGE/inlineImage/true/DSC_1185%5B1%5D.JPG "DSC_1185[1]")
![DSC_1186[1]](https://ogrforum.ogaugerr.com/fileSendAction/fcType/0/fcOid/12129987997660671/filePointer/77311805211785202/fodoid/77311805211785196/imageType/LARGE/inlineImage/true/DSC_1186%5B1%5D.JPG "DSC_1186[1]")
![DSC_1187[1]](https://ogrforum.ogaugerr.com/fileSendAction/fcType/0/fcOid/12129987997660671/filePointer/77311805211785203/fodoid/77311805211785197/imageType/LARGE/inlineImage/true/DSC_1187%5B1%5D.JPG "DSC_1187[1]")
Very cool Bryan! The kids are going to love it!![]()
Bryan- that amusement park is awesome ![]() . Post some more photos and video of everything in action
. Post some more photos and video of everything in action ![]()
Bob
carsntrains posted:OK guys I got it taken down. All trains, track, buildings, cars, people, foam. Got the two 2 foot extensions off of the base 6x8 table. Got it marked to cut in two. Need to run down to HD and get some 2x4 so I can fix the two 3x8 sections. And put two legs on each. Been a busy Sunday!
Jim
Photos, Photos, Photos!!! I enjoy hearing about progress, but I LOVE seeing it!
Congrats on ripping the wall down. One of the negatives about buying a move-in-ready home is, I can't find any walls that need removing!
I remember the emotions of tearing down my basement layout in the old home two and a half years ago. All the track fit in a small box. I sat there staring at it. Texted a photo to Dad. But good times are ahead for you and for me...more on that in a minute...
Bryan, amazing what you can accomplish with a few days off. Night scene is fantastic........Paul
Spent the whole weekend in the basement (aside from loading the club trailer for the Greenburg Show in PA next weekend). Got a LOT cleaned up. The goal is to begin work on my new layout! Keep an eye out for a new thread soon. I'm going to need some help and ideas with planning. (Yes, Mr. Coy, I've read all your posts and seen your YT videos, I'm thinking about operations BEFORE laying out track!).
A few years ago, I built a shelf. I put slots in the top and bottom plates for an eventual set of sliding doors. I bought the plexi when I bought all the other supplies. It's been underfoot for probably 3 years now. Today, I FINALLY got the courage to start cutting it. I scored it real deep with a carpenter's knife with a fresh blade and then snapped it. I measured multiple times, but screwed up the math on the first door. I'm going to have to fill in one of the slots with something about 3/32" thick so the door catches both slots. I don't have enough material left to make another door. I put a piece of bare 12ga copper wire in the slot and that seems to help, it's just not straight enough to work perfectly.
I left the protective film on for this photo so you could see the doors.

Took the film off (my favorite part).

Now to fill up those shelves!
Thanks for the compliment....I will next weekend when I should have the rest wired up. I still have the roller coaster, hot air balloon ride, 5 little scenes (miniature golf, test of strength, tug of war, balancing chair, and pony ride), plus my midway with food stands and games of chance. My goal is to knock out 1 to 2 each night this week after work and coaching basketball. Here are a few pics of those areas still needing wiring. After that of course I want to add grass, walkways, and fencing.


paul 2 posted:Bryan, amazing what you can accomplish with a few days off. Night scene is fantastic........Paul
Yep, every time I get a snow day I get to live a day in the life of Paul.....sitting around all day working on the layout.
Today I put in embankment between my lower and upper level. Supplies were left over foam board covered with joint compound. Just slap on compound and Wa La natural looking embankment. I've also used joint compound over plaster cloth.
Ok this is where I ended the day/night at.. 12 hours it took to take down a wall, and to take down my existing 12x6. Not much to see lol Now all I have is a 3x16 storage table to put all my train stuff on lol I have some more stuff to take out of that room. Its supposed to rain here tomorrow so MAYBE I can get a bit more bench work up. Still sad about taking the table layout down. I have a new engine and a BLI water tower on the way. And some electrical stuff to power up 4 or 5 woodland scenic buildings. 

Jim


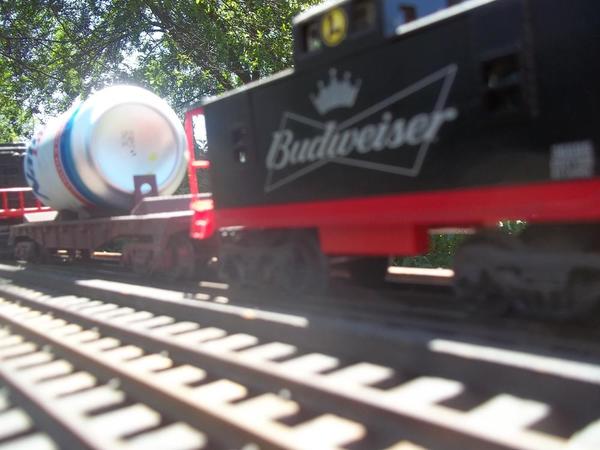
p51 posted:Got the water car done just now.
Excellent work!
Truly exceptional, P51.
Lee, the water car came out great. Nice weathering job.......Paul
Radar493 (Ralph) - Glad to hear someone else uses joint compound. 20+ years ago i did all of my scenery with heavy duty paper towels dipped in slightly diluted joint compound. Cheap, easy to use, readily available, and has held up. I can't figure out why more people don't use it. The money i saved bought me an awful lot of boxcars.


Patrick came over today, and it was the end of an era. This was the final roller stroke of sky blue. It took five years, and Patrick did all of it!


He had me take a picture of the date and time on his phone to mark the occasion.

Let me back up a minute, I got a little ahead of myself. The first thing we did was correct the mismatched fascia from a couple weeks ago, and added the little piece of backdrop over the track.

We added the Masonite strip around the base of the helix. I'll be wrapping that with embossed stone plastic sheets to form a retaining wall. The Backdrop will get the back side of downtown Red Wing.

The plan here is to have a road go up a hill alongside the track, then there will be a bridge over the track to help hide the opening.

We hit another milestone today, when we put in the last piece of fascia.

Actually, the last piece isn't the big one with all the curves, it's the little filler with the two screws in it on the left. There's still some sanding left to get rid of the little steps.

We marked all the layout power cords and their respective outlets. Brown is layout convenience outlets, red is track power, orange is layout accessory power and yellow is layout lighting.

Patrick grabbed the camera, and took half these pictures. He's seen enough of my posts to know what to shoot. I don't know why I keep ending up in them. First my wife, then Scott (Miggy) and now Patrick. Anyway, we pulled the red and orange plugs from the wall and opened up the box with the layout power switches in order to add a new run of conduit over to the third peninsula for the C/MRI node.

We added an extension box to have more room for the new wires.

We didn't get the entire run finished, but the hard part is done. It's anchored to the box and run under the aisle.

Paul - I had a late night shopping spree on eBay, and bought a bunch of those buildings, among other things. We'll see if I learned anything. ![]()

The J. Reilly McCarren Transportation Museum has three new layouts (two Lionel, one American Flyer) courtesy of Bob Bretch of Van Buren!
We got cowboys!

And dinosaurs!

And...well...

Plus a really nifty Polar Express layout!

Which I spent a few hours assembling this afternoon...

Fortescue has told me he can't wait to take a ride on the Polar Express! ![]()
Mitch
modeltrainsparts posted:Radar493 (Ralph) - Glad to hear someone else uses joint compound. 20+ years ago i did all of my scenery with heavy duty paper towels dipped in slightly diluted joint compound. Cheap, easy to use, readily available, and has held up. I can't figure out why more people don't use it. The money i saved bought me an awful lot of boxcars.
Count me in fellas. I too used diluted joint compound with paper bags cut into 2" wide strips over cardboard lattice. Came out great, it's at least 15 years old and I've had no problems ever!


M. Mitchell Marmel posted:The J. Reilly McCarren Transportation Museum has three new layouts (two Lionel, one American Flyer) courtesy of Bob Bretch of Van Buren!
We got cowboys!
Mitch
I wonder... do them thar cowboys (or is the correct term cowpersons ![]()
![]() ) hunt long necked buffalo???
) hunt long necked buffalo???
Apples55 posted:I wonder... do them thar cowboys (or is the correct term cowpersons

Fortescue: "I HOPE not!" ;D
Excellent work!
Truly exceptional, P51.
Thank you very much, gentlemen. This was a project I'd set out to accomplish inside of a weekend, but some paint and parts issues stretched it out a little more.
As an MOW car, I doubt it'll be on the layout all the time, but I might place it in various spots t make op sessions just a little more challenging.

Measuring Fortescue for a bridle & saddle? ![]()
I used to have that set as a kid. Still have two sections of the corral fence, small crew, small horse herd, and some Natives.
Joint compound, powdered and latex premix both, over aluminum screen.
The brick is laytex wood putty spread like peanut butter on some 1/8" hardboard, covered smooth & carefully with plastic wrap, then pressed with a brick mold for candies/cakes, let to cure then peeled & painted. It slides up & out of the two portals.

Started scratch building a flat for the upper level, and tested a paint for my roads. I came across a couple 4x6 sheets of 1/8" hardboard packing material at work. I fist used them for facia on the lower level, then took what I had left to use as my roads. While at Lowes this weekend, found a textured paint. It has a finer texture than the "stone" sprays. Sprayed a test piece last night, and I think it came out really good. Gonna apply some lines this evening.


Mo985 posted:Started scratch building a flat for the upper level, and tested a paint for my roads. I came across a couple 4x6 sheets of 1/8" hardboard packing material at work. I fist used them for facia on the lower level, then took what I had left to use as my roads. While at Lowes this weekend, found a textured paint. It has a finer texture than the "stone" sprays. Sprayed a test piece last night, and I think it came out really good. Gonna apply some lines this evening.
I used the same paint in black. Looks great. I added some black paint on the joints to simulate tar-filled cracks.


p51 posted:Excellent work!
Truly exceptional, P51.
Thank you very much, gentlemen. This was a project I'd set out to accomplish inside of a weekend, but some paint and parts issues stretched it out a little more.
As an MOW car, I doubt it'll be on the layout all the time, but I might place it in various spots t make op sessions just a little more challenging.
Lee- the tank looks great. I wasn't sure where you were going with it when it was painted tan. I thought it looked too clean and shiny for your layout ![]() The weathering is just right.
The weathering is just right.
Bob
M. Mitchell Marmel posted:Apples55 posted:I wonder... do them thar cowboys (or is the correct term cowpersons
Fortescue: "I HOPE not!" ;D
If I were him I'd keep my head down.....![]()
Last night I added the Building that was the collaboration of Eric's Trains, Legacy Station, and MTH to my Layout, though I should really get the backdrop up soon, but I haven't had a chance to get the Backboard from anywhere to put the backdrop on, no pictures, since I put the building on then ran trains for a bit, then headed back upstairs.
Lee, very nice MOW water car.
RSJB18, gloss black really looks like tar in the cracks.
tcochran posted:Last night I added the Building that was the collaboration of Eric's Trains, Legacy Station, and MTH to my Layout, though I should really get the backdrop up soon, but I haven't had a chance to get the Backboard from anywhere to put the backdrop on, no pictures, since I put the building on then ran trains for a bit, then headed back upstairs.
I really like that building and Eric's Trains. I had one in my "cart" but decided it wouldn't go well with my 1950s layout.. ???
Jim
Ok Mark, I am going to make this one easy on me!
Everyone I would like to point out each and everyones great work, but you guys have overloaded me this morning, so this is for everyone and there wonderful projects!
GREAT EVERYONE! Keep it up!![]()
carsntrains posted:I really like that building and Eric's Trains. I had one in my "cart" but decided it wouldn't go well with my 1950s layout.. ???
Jim
I will have to someday in the future get pictures of it, I don't run trains a lot, no era modeling so I do not need to find things that fit an era. Though I mainly have steam engines in my roster.
RSJB18 posted:I used the same paint in black. Looks great. I added some black paint on the joints to simulate tar-filled cracks.
The cap shows it’s black, but it did come out a faded/ grayish color. I may do some random spays of black, from about 36”.
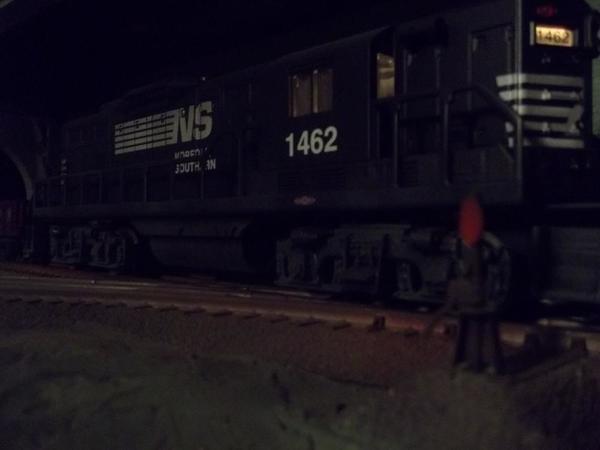
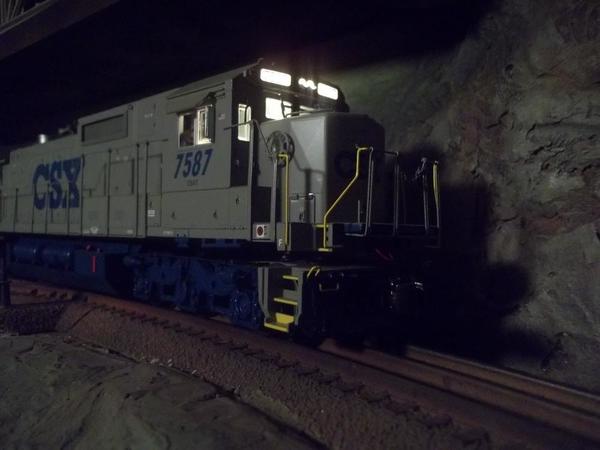
Made a Video last night Featuring new W&LE Power
2 Part Video with Caption's edited in on my you tube channel @13min
WLE Take the Grade pt1-The Drag up Wooster Hill
WLE Take The Grade pt2-The Return trip to Craneville
The video cover's the entire 10 x 12 dbl tier inter-connected shelf layout & features 2 new WLE locomotives (106 is non-powered) added to the fleet over the weekend by RC Jr.
Over the past 2 months the layout has received;
1 new MTH ABC (Akron Barberton Cluster) SW1500 Switcher (1501 Pusher in video)
Scratch Built dbl track trestle bridge
The entire lower tier added with Y Loop & 3 yard tracks
MTH WiFi Module with multiple devices
Also on loan from RC Jr is the MTH 999 Empire State Express set
Enjoy!
PS; These MTH GP35's have the canac radio control antenna & sticker on carbody, system's which I installed on the actual units years back!
Lee, great shot of the car. A nice project adding to an already great layout. Going to make it my desktop. This morning it was do wait do wait do. I got the cork painted ballasted and track screwed down. And it looks like none of the things I ordered are going to get here till maybe tomorrow.While putting that switch in I decided to pull up one track and one switch going to the power station leaving the one going through it so I will probably work on that after lunch. Also in the last picture I lined up some telephone poles and before I placed them I was wondering how the spacing looks????. I am cutting off the base and drilling holes in the sidewalk. Pics...........Paul


Paul- the utility poles in my neighborhood are between 100' - 120' apart. At 1:48 scale that's 25"-30" apart. Don't know what the distance is in your photo but they look fine to me.
Bob
Paul, I agree with Bob, I think they look fine! Nice work!![]()


Brian, Love all the trains you keep putting up! Something is coming your way!![]()
Matt, that sure is a great looking Vet, Oh the layout looks great also! ![]()
mike g. posted:Ok Mark, I am going to make this one easy on me!
Everyone I would like to point out each and everyones great work, but you guys have overloaded me this morning, so this is for everyone and there wonderful projects!
GREAT EVERYONE! Keep it up!
Mike, I was going to do like you this weekend, but I was just thinking of doing the same thing as you just did since I am a day late...and always a dollar short!
i am amazed at the large number of people who have made excellent accomplishments this past day!! Great work everyone!!
Yep you miss a day or even half a day and your screwed! LOL![]()
Christmas vacation travel, bad weather, and sick kids conspired me from working on the table. But I had a couple of hours today and managed to complete the transformer table, as well as add the "top deck". The top deck is attached to the main table by four screws. It's where my above ground layout will be. When the kids grow in height, I will lift it up, and add a subway system underneath, and then place it back on top. So the table is sort of modular. Just need to put down 11/32" plywood, and a 1x4 bumper around the back and sides. I'll also build a small control box for a couple SPST switches that will control power to the sidings and a couple of accessories. And then to paint it all black.


RSJB18 posted:p51 posted:
Lee- the tank looks great. I wasn't sure where you were going with it when it was painted tan. I thought it looked too clean and shiny for your layout
The weathering is just right.
Thanks, Bob. The lighting is always tricky, as it's actually painted in light gull grey, similar to D&RGW MOW colors. That way, I could make my own decals on my computer.
As a water car, I figured that some rust streaks would be likely, but not too much if its to be used as potable water. The frame and base is weathered pretty harshly, but not so much the tank. I could have weathered and aged the paint on the tank more, as this wouldn't have been repainted for several years before the layout takes place (it's the name of the RR before the ET&WNC bought them out) but I decided against 'going all Malcom Furlow' on it.
The modification of the tender into a water car will be in the 2018 On30 Annual.
Deuce posted:Christmas vacation travel, bad weather, and sick kids conspired me from working on the table. But I had a couple of hours today and managed to complete the transformer table, as well as add the "top deck". The top deck is attached to the main table by four screws. It's where my above ground layout will be. When the kids grow in height, I will lift it up, and add a subway system underneath, and then place it back on top. So the table is sort of modular. Just need to put down 11/32" plywood, and a 1x4 bumper around the back and sides. I'll also build a small control box for a couple SPST switches that will control power to the sidings and a couple of accessories. And then to paint it all black.
I’m glad you finally got a chance to get back at it! Yes you have to plan for the kids to grow fast!! Looks great!
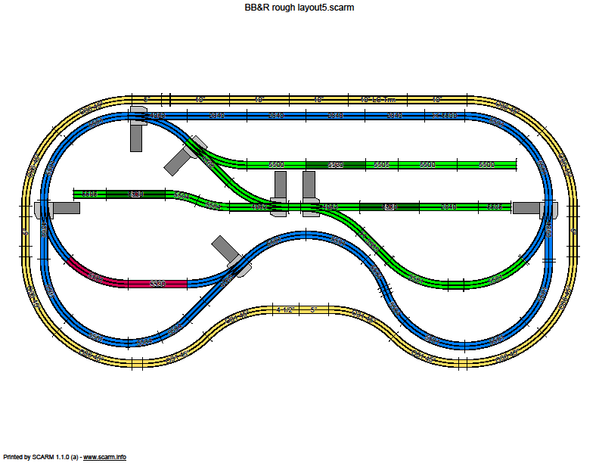
Over the weekend, I made a few changes to the layout. After running the 2055 (which I've named "Old Bill" in honor of the gent who originally owned it) for a while, there were a few things that started to bother me a bit. Grandson was fine of course, just happy to see trains running! The first thing that was irksome was not enough space for the #97 Coal Elevator that we picked up at the DuPage Train Show a few months ago. Then we noticed that that there really wasn't a good place to park rolling stock, and then we saw that there was no way to change direction on the loop without physically picking up the engine. Grandson and I messed about in SCARM with some ideas, and he really liked the train simulator. I did have trouble with trimming tracks to fit. So we did two "major" changes to the layout tracks, end result of which was more siding space, room for the Coal Elevator, and eliminating 1 switch.
There's a bunch of stuff on the layout right now, so I'm a bit embarrassed to show any pictures, however here's the SCARM file of what we've done. After running "Old Bill" for a while, we like the changed layout so far. While it isn't great that changing back to the original direction of travel requires backing around about 1/2 the layout, at least it is an operating "feature" that we don't have to pick up the engine.
Next thing to work on is getting the switches to be all directly powered instead of track power.

Pulled up the rest of the carpet that was in the closet that I removed the wall from. What a pain. And pulled hundreds of nail gun staples!! Got all that cleaned up and some stuff put away. Studying track. I have a ton of fastrack and it hasn't giving me any problems so I think I'll stick with it. But I been looking at curves. I have 036 and 048. Was going to use the 048 and get some 060 for the inner and out main on the main level. But I'm reading that you cant use 048 with 060 .. Or 036 with 048 because O48 is some kind of oddball?? So I think I'm going to have to buy some 060 and 072 curves. Which I think will make a better mainline anyway!
Jim
Edit. I just ordered 16 060 and 16 072 curves from Mario's Trains. Hope it pays off!
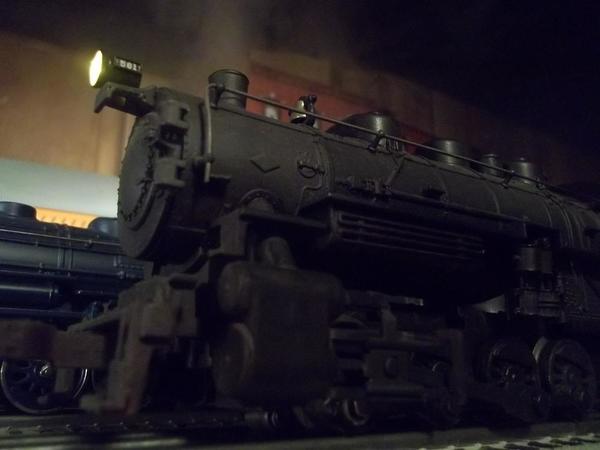
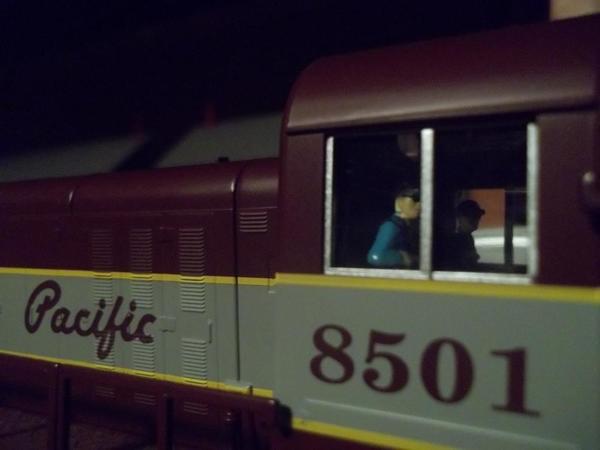
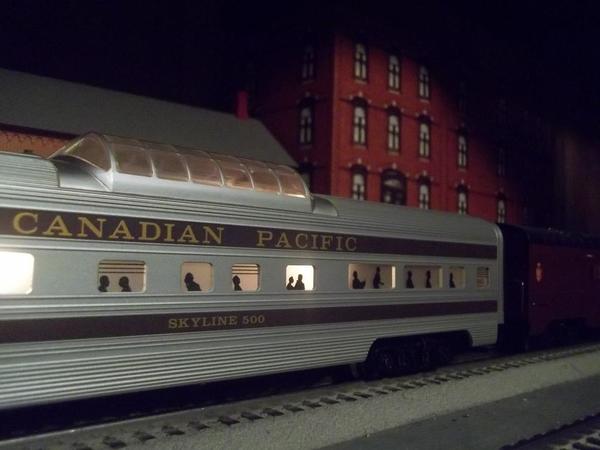
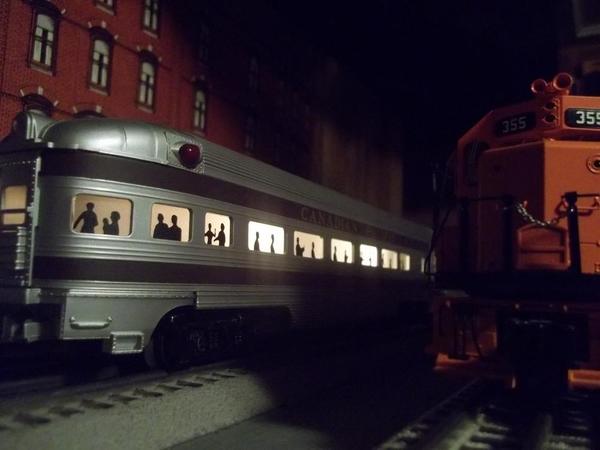
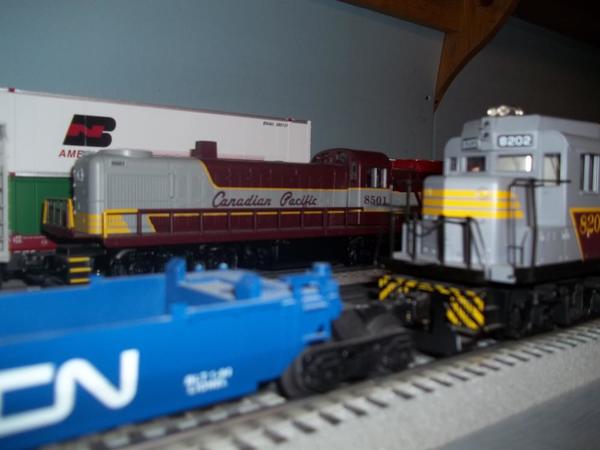
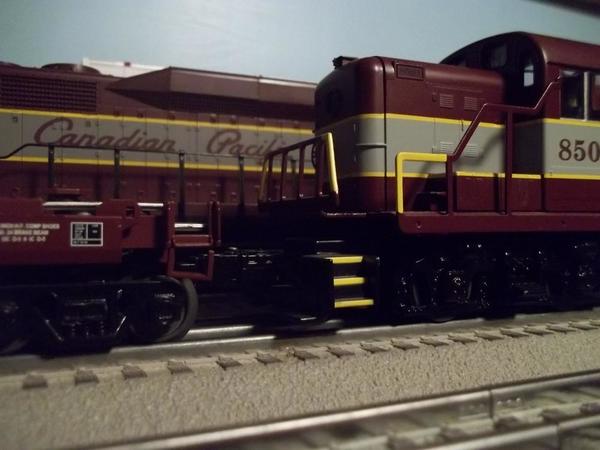
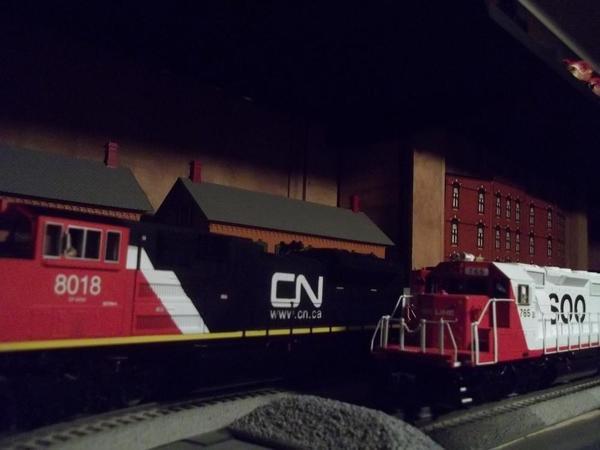
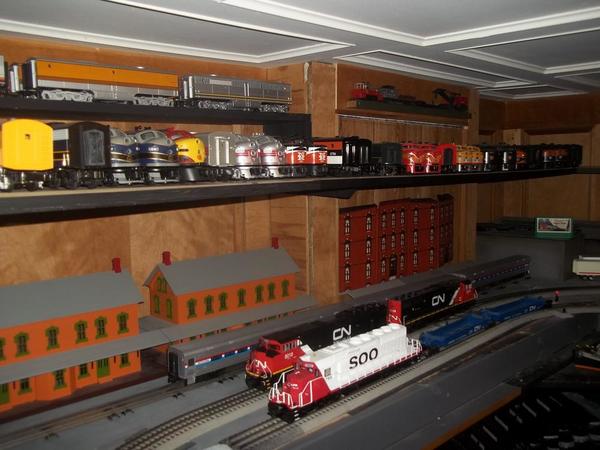
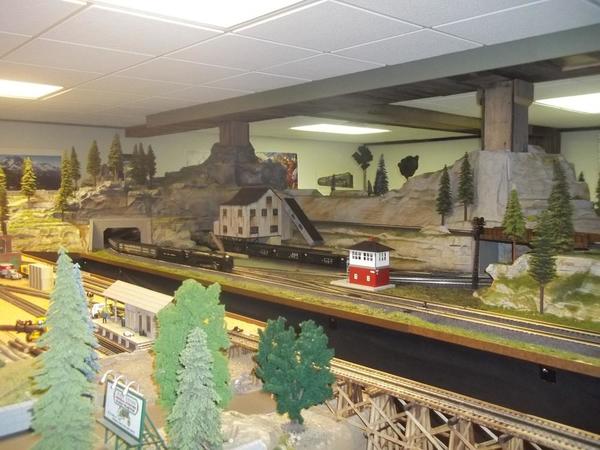
Ran trains for a short while this afternoon while I visualized new scenes on the layout. I find it fun to do this. Later I shot a few photos.


Slowhands posted:Over the weekend, I made a few changes to the layout. After running the 2055 (which I've named "Old Bill" in honor of the gent who originally owned it) for a while, there were a few things that started to bother me a bit. Grandson was fine of course, just happy to see trains running! The first thing that was irksome was not enough space for the #97 Coal Elevator that we picked up at the DuPage Train Show a few months ago. Then we noticed that that there really wasn't a good place to park rolling stock, and then we saw that there was no way to change direction on the loop without physically picking up the engine. Grandson and I messed about in SCARM with some ideas, and he really liked the train simulator. I did have trouble with trimming tracks to fit. So we did two "major" changes to the layout tracks, end result of which was more siding space, room for the Coal Elevator, and eliminating 1 switch.
There's a bunch of stuff on the layout right now, so I'm a bit embarrassed to show any pictures, however here's the SCARM file of what we've done. After running "Old Bill" for a while, we like the changed layout so far. While it isn't great that changing back to the original direction of travel requires backing around about 1/2 the layout, at least it is an operating "feature" that we don't have to pick up the engine.
Next thing to work on is getting the switches to be all directly powered instead of track power.
What kind of track are you using? Your track plan looks pretty good!!!
Jim
Jim, the outside loop is FastTrack, mostly from the LionChie John Deere set. The majority of the track is Lionel tubular track, with the black ties. The switches are all 022 that I actually had fun rebuilding; all but 2 were inexpensive train show purchases (two were part of the original set that wife got from her friend, Bill's widow.)
Slowhands posted:Jim, the outside loop is FastTrack, mostly from the LionChie John Deere set. The majority of the track is Lionel tubular track, with the black ties. The switches are all 022 that I actually had fun rebuilding; all but 2 were inexpensive train show purchases (two were part of the original set that wife got from her friend, Bill's widow.)
They are not realistic, and I'm sure that the new modern track and switches are great, but I still love post war 022 switches.
For me, Post war O22 switches, when in good operating order, work great, are easy to maintain and repair, which for me is a very rare once they are in good operating order, and capture the spirit and charm of postwar Lionel trains.
Congratulations on getting yours at a good price and resurrecting them, which is so satisfying.
It is also cool that one man's junk is another man's treasure.
Slowhands posted:Jim, the outside loop is FastTrack, mostly from the LionChie John Deere set. The majority of the track is Lionel tubular track, with the black ties. The switches are all 022 that I actually had fun rebuilding; all but 2 were inexpensive train show purchases (two were part of the original set that wife got from her friend, Bill's widow.)
Sounds cool! And please do post pictures! No display is too big! No display is too small!
Jim


 Well this may not be glamorous but I have been using several space heaters in the train room. Since My train room is my converted 2 car garage and it’s detached there is no heat, Just a window A/C unit, Well this cold snap and snow forced me to invest in a heating and a/c system so train buying has to be put on hold for a wile, There was some good news I received a box with my new crane I ordered some time ago so I put it together and will string it this weekend, So I will be warm and get back to playing trains
Deuce, the bench work and the small table for the transformer looks nice! Plus that's a great idea to be able to raise the top as the kids get bigger! Way to think ahead!![]()
Lee- your water car turned out just wonderful, fits right in! I bet you could set it anywhere on the layout and it would look like it belongs!![]()
Slowhands, sounds like a lot of work going on there, I hope things run smooth for you as you go along!![]()
carsntrains, Keep up the good work and add some pictures, now its all up hill from here!![]()
FL9, that sure is a great looking crane! You must plan on doing some hi-rise construction! ![]()
mike g. posted:FL9, that sure is a great looking crane! You must plan on doing some hi-rise construction!
My sparrows point Md. steel mill will start construction on the layout next week so all the construction equipment had to be in place for the construction to begin
 I like your new poles Paul !! We were selling these for 20.00 a box this weekend. I brought a few home too..
mike g. posted:Deuce, the bench work and the small table for the transformer looks nice! Plus that's a great idea to be able to raise the top as the kids get bigger! Way to think ahead!
Thanks Mike. I wish I could remember the discussion that gave me the idea here on the forum, but if it were not for OGR and the people here, I would be stuck with a non-expandable table and that'd be that!
This table is going to go in the tool-shed area attached to my workshop. I already told the wife that we'll eventually have to buy an outdoor tool-shed so I can convert that entire area into a train room. It's unheated/uncooled, but it's roughly a 14x10 area which will have to suffice for my train obsession. I should be able to fit plenty of track and train in an area that size ... and I can always go up/down!
Very nice plan! Would be interested to know how you go about wiring the switches independently from the track. I’m struggling with the concept.
Deuce, I have the same problem, we tried to start a new train room off the back of my garage last summer 12' X 24' but ran into some health problems for a short bit. I hope to get it built this summer, its ready for concrete but the weather is not on our side right now!![]()
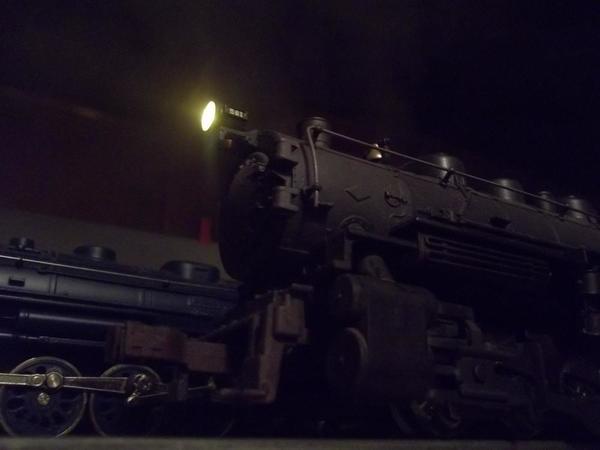
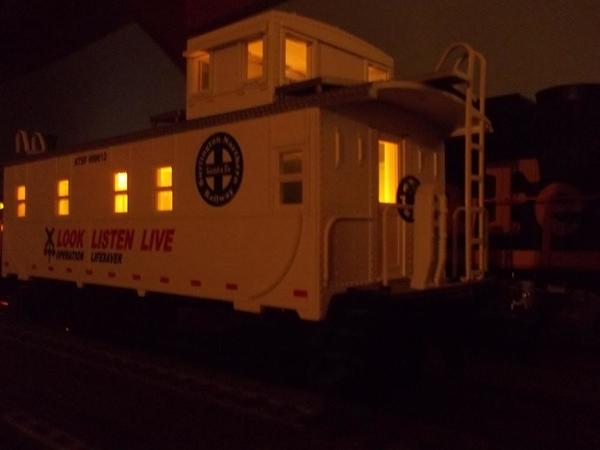
Taking down the Christmas Display, did one last run with my new arrival the Peanuts Lion Chief loco and tender. Found that it was not getting traction pulling 5 post war era (1951) freight cars. I was starting to wonder if I had mad a bad deal when I discovered that the caboose had a frozen truck which was dragging it down. The caboose had been sitting in a box since 1989 and most likely last run some time in the mid 1960's.
Vacation from the layout today, maybe. First a lunch with a bunch of TCA guys at 1:00 then tonight the Tuesday night crew will be getting together so not much time to do layout work. But hopefully by the end of the day my scenic materials and cork will be here so I can start back in tomorrow on the layout. However if I have time between the two maybe I could do a little work before I go back out tonight...........Paul
THADDEUS, just saw your post. I have been using the longer uncouple tracks but I see you have the shorter one. Which one do you prefer................Paul
This is my first compact gargraves uncoupler that I have bought. I have a siding with the cork already down that I want to sneak in. I've also used a couple atlas uncouplers since they are much cheaper, but I have grown to really like the 107's, it gives you the perfect spot to stop the car on a track and not interfere with a passing car. Especially since I am trying to cram so much in a fairly tight space

Thaddeus posted:This is my first compact gargraves uncoupler that I have bought. I have a siding with the cork already down that I want to sneak in. I've also used a couple atlas uncouplers since they are much cheaper, but I have grown to really like the 107's, it gives you the perfect spot to stop the car on a track and not interfere with a passing car. Especially since I am trying to cram so much in a fairly tight space
Thaddeus, nice track work! got a question for you about uncoupler track sections. Do you know if they work with Kadee couplers also?![]()
Mike G, sorry but the only thing I know about Kadee couplers is that they are scale.


Things are slowing down, because detail painting takes time. Went out to watch some football, at a friends house and played the card game Euchre. No train room at his house.

1. Painting the keystone and header over the windows, along with the window sills.

2. Today: I hung up the Family Train Calendar in the shop next to the train room. This is a custom family wall calendar that I design and have ten copies printed at one of those online printing company’s. I do this every year.
Photo’s for this post, shot with an iPhone 7 Plus, I call this the dark side of photography, Not using a camera.
Today I am going to take the grandchildren to a train store.
Gary


If you are in the market for more grandsons Gary, I'm available ![]()
I wish someone would take me to a train store and feed me lunch on a HD bucket. Looks like a good time was had by all. Very cute! ![]()
Bob
Hi Bob:
Two are a lot of work. 3 and 4 year old boys. They love everything about trains. Lunch will be at Culver's, they serve Pepsi. See you soon. Waterford, Michigan.
Gary
Denny, nice job on the crash car! Love the smoke!~~![]()
trainroomgary posted:Hi Bob:
Two are a lot of work. 3 and 4 year old boys. They love everything about trains. Lunch will be at Culver's, they serve Pepsi. See you soon. Waterford, Michigan.
Gary
Thanks Gary- unfortunately its a bit of a hike from Long Island ![]()
just swing on down Bob, you can see me and Clem too !! ![]()

I think a good bucket list item would be a trip to see all of the amazing layouts of all the guys on this forum. Kind of like seeing a baseball game in every stadium around the country.
Bob ![]()
I would join you Bob, but when I got home it would be to an empty house including all the train stuff! LOL![]()
I'll bring the hot dogs and BEER ![]()

mike g. posted:I would join you Bob, but when I got home it would be to an empty house including all the train stuff! LOL
Yea- same here......wait, this may not be a bad thing. Empty house= more room for trains ![]()
RSJB18 posted:I think a good bucket list item would be a trip to see all of the amazing layouts of all the guys on this forum. Kind of like seeing a baseball game in every stadium around the country.
Bob
Yes, that is a great idea! The list is so long, we better quit working and get started now!
Access to this requires an OGR Forum Supporting Membership


