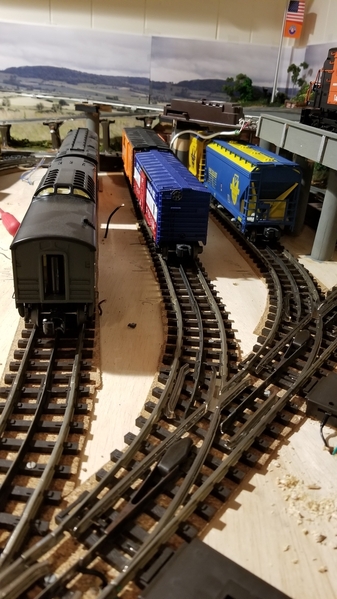
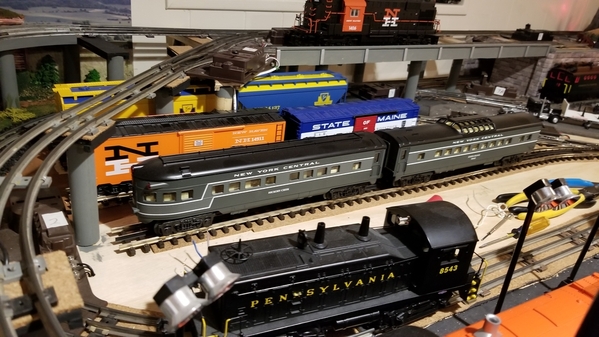
Jeff, you are right.  My number was 269, of course it didn't matter.

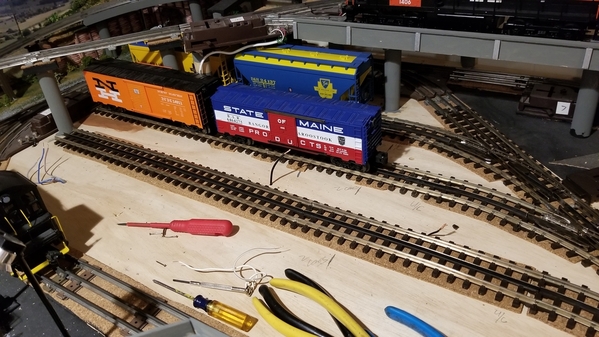
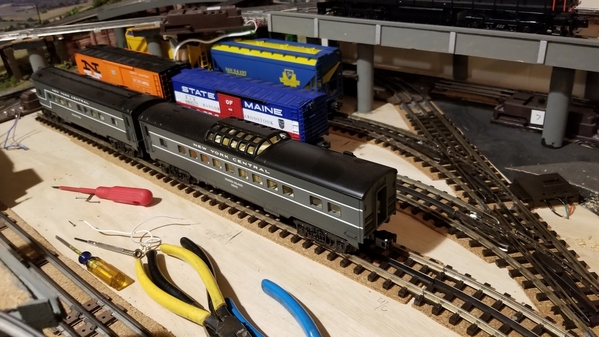
Finding enough Homasote scraps under a pile of Styrofoam, I pulled up my sidings I started putting in last weekend and put in the Homasote on top of the plywood base.  I also added some cork roadbed to make up the difference in height to match the wood.  That is tacked down with the glue drying.  I'll post a photograph once that project is a little farther along.

Mark and Jeff, I graduated in 1973.

My number was in the low 20's.   Got reclassified as 1H. I thank Mr Nixon for ending the draft, I figure he literally saved my life. 

I lived less than a half mile from EMD.  I could walk down to the plant and watch the new locomotives exit for a haul on the 4 track BRC /IHB main.

@ScoutingDad posted:

So we have established 1973 and 1974 were good years to graduate from high school. As I remember this group of guys never had to go to Nam. I had a number but knew the draft was ending by that time. Funny I thought about going to West Point. Life would surely have been different! Wound up going to Illinois and getting an engineering degree.


Happy Railroading all.

Jeff,

I went to Illinois Chicago Medical Center and got a Pharmacy degree. Retired this past June after 46 years total.

Bill - I presume you are referring to the McCook EMD plant. Never got a chance to get a tour there. One of my college frat brothers spent his entire career there. He could tell some interesting stories about the build and design of these Diesels.  The BRC /IHB is not ringing a bell.

My number was in the mid-100's but at that time we were the last ones to even get a draft card and we knew our numbers would never be called. Wow - a 20 was one of those were you went ahead and enlisted at least to get a choice of service. 

Congrats on the retirement - I am sure you've seen a lot of change in the pharma business over the years, I'm looking at another year or so - maybe tomorrow who knows  : )

@farmerjohn posted:

Postmaster.

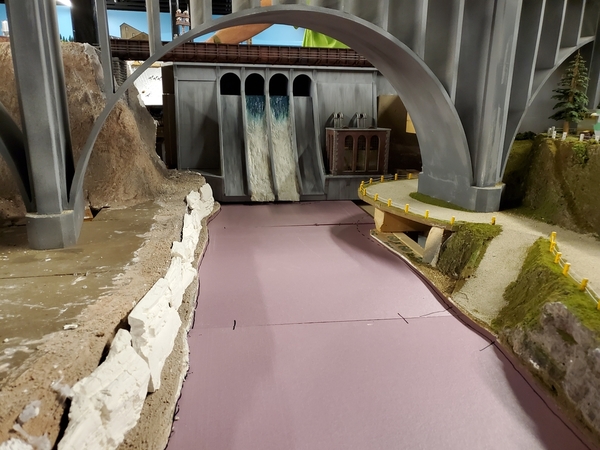
Please Tell me what you see. Please be honest. We still have time to change the water rapids if it is something vulgar or something that people wouldn't  appreciate  on my layout. . Thanks.

John, the rocks looked like a man to me with arms and legs outstretched.  I only thought of it after Postmaster mentioned it and I looked again.  Now, maybe I’m all wet.  Nothing nasty in my opinion.  

Great work everyone! I guess I am a little slow John as I did not see any monster! LOL I knew I joined this forum for a reason, I have all you older wiser folks to learn from! I graduated in 1983. Guess that makes me the kid on the block! LOL

Well nothing new from me as yesterday was a great day outside with the sun shinning and 74 degrees, wonderful painting weather. But the rain is coming today so maybe some train room time! Man I know I could use a break! LOL

I hope everyone has a great weekend and finds time for there layout and fun with there trains!

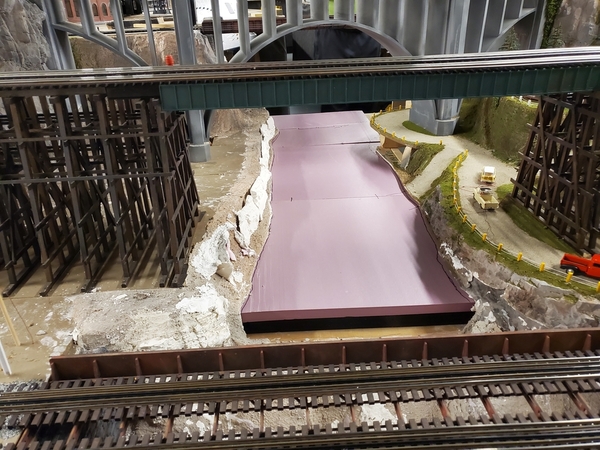
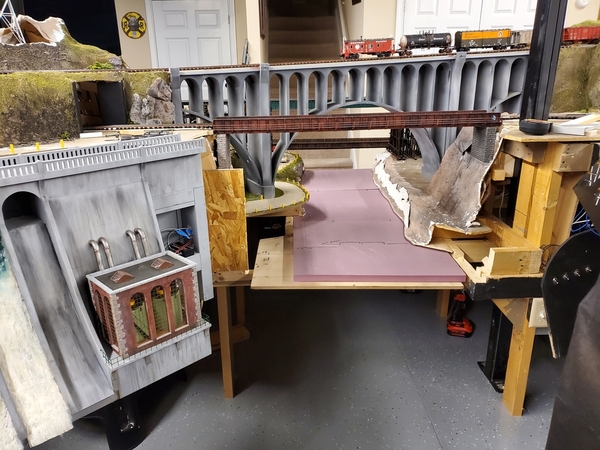
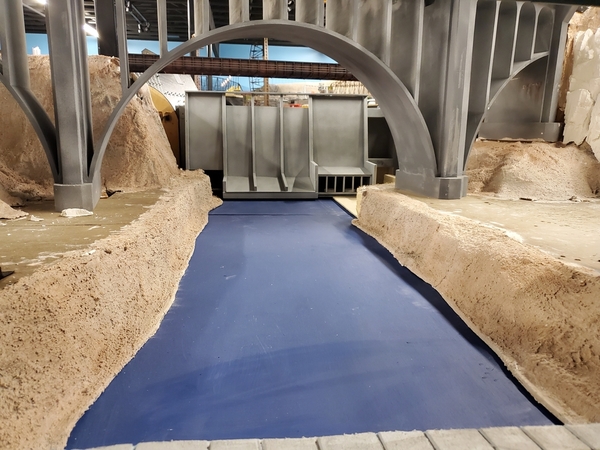
Farmerjohn, your River, which is really a lot larger than it appears in the above pictures is going to be so cool, and when you add the realistic resin, it’s going to look Real.  Your creative ideas of raised edges, rocky ledges will really look great when finished. I see it as a great place to possibly do some fly fishing, it’s going to be so unique to your finely detailed layout. Is where Rich is standing where this scene will be placed? If not, would you place a picture of where this river will flow. It’s awesome work, the finished product will be Awesome. Happy Railroading Everyone CD2CB555-FA98-4BA9-B303-B2AF2DF2F6303043BB20-2F70-4A9D-A7F1-1A4FF35F4649E8128859-2EBD-477B-A234-15850FB5210C7F8A3B1E-A1FC-431E-AF15-0D9E4207A1C3

Attachments

Images (4)
  • CD2CB555-FA98-4BA9-B303-B2AF2DF2F630
  • 3043BB20-2F70-4A9D-A7F1-1A4FF35F4649
  • E8128859-2EBD-477B-A234-15850FB5210C
  • 7F8A3B1E-A1FC-431E-AF15-0D9E4207A1C3

Class of '80 for me....2005 for my bachelors degree.....

I got down to the basement last night and started roughing in the track for the yard. So far so good. It's not a lot, but I picked up space for 2-4 more cars depending on length. I have to take it all apart to add the power drops and then screw it all down. I had to move the two supports for the upper level between tracks 2 & 3 but I knew that going in. I'm going to move the wire for the turnout too.

2021-04-29 20.29.332021-04-29 20.30.332021-04-29 20.32.182021-04-29 20.32.442021-04-29 20.32.57

I'm also bashing some old UCS uncouplers that I will cut into each siding. I need to scrounge one more.

2021-04-29 20.52.472021-04-29 20.56.30

Happy Friday!

Bob

Attachments

Images (7)
  • 2021-04-29 20.29.33
  • 2021-04-29 20.30.33
  • 2021-04-29 20.32.18
  • 2021-04-29 20.32.44
  • 2021-04-29 20.32.57
  • 2021-04-29 20.52.47
  • 2021-04-29 20.56.30
Last edited by RSJB18
@ScoutingDad posted:

Bill - I presume you are referring to the McCook EMD plant. Never got a chance to get a tour there. One of my college frat brothers spent his entire career there. He could tell some interesting stories about the build and design of these Diesels.  The BRC /IHB is not ringing a bell.

The BRC  (Belt Railway of Chicago ) had a 4 track main that in part went from the giant Clearing yard on Chicago's southwest side through Summit and Argo and LaGrange to the  Proviso yard of the CNW.  IHB had trackage rights. All day long there would be transfer runs back and forth. They also had a transfer yard in Brookfield with the CB&Q >BN>BNSF. We could watch the switching maneuvers occasionally.

My brother has a friend who worked at EMD during his college years. His job was to "gift wrap" the locomotives for delivery to the buyer.

My number was in the mid-100's but at that time we were the last ones to even get a draft card and we knew our numbers would never be called. Wow - a 20 was one of those were you went ahead and enlisted at least to get a choice of service.

I held on to my draft card for 5 years after I got it. Times were crazy, never knew what to expect.

Congrats on the retirement - I am sure you've seen a lot of change in the pharma business over the years, I'm looking at another year or so - maybe tomorrow who knows  : )

Thanks, don't wait too long.

@RSJB18 posted:

Class of '80 for me....2005 for my bachelors degree.....

I got down to the basement last night and started roughing in the track for the yard. So far so good. It's not a lot, but I picked up space for 2-4 more cars depending on length. I have to take it all apart to add the power drops and then screw it all down. I had to move the two supports for the upper level between tracks 2 & 3 but I knew that going in. I'm going to move the wire for the turnout too.

2021-04-29 20.29.33

I'm also bashing some old UCS uncouplers that I will cut into each siding. I need to scrounge one more.

2021-04-29 20.52.47

Happy Friday!

Bob

WOW, I like the sidings. Congrats2005 era.... I got my draft numbers in 70, hauled garbage and went to community college to try and pass an accounting class, did better in computers... gave up on accounting even though my Thursday morning customer on the G-route turned out to be the teacher. "Well, Hi Frank, I did not recognize you with your clothes on." Good laughs from the rest of the class. Retired 5 years ago, CEO told me to put away the 4x8....... working on the pretend Trestle that I will have over the pretend gully that I will jump into

Really like your work Bob. Salute

Larry, great photographs of FarmerJohn's layout.  My dad was an avid fly fisherman and fly tyer.  Now he is 90 and in a personal care home.  I fully intend to have three fly fishermen in my Black Fork when I get that far; Jim Boyce and his 2 friends, Bill Saul and Mac Reader, both long deceased.

Bob, the compact yard is looking great!!  Yes, I have to add uncouplers to my tracks also.  In fact, I forgot about them when I built the yard under the enginehouse.  The top section can be removed for better access, but I wasn't smart enough just make it a simple unplug and lift off. 

Bob, your making great progress! It's nice to see things moving forward.

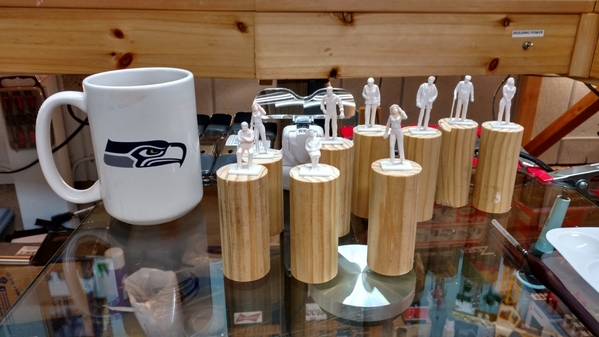
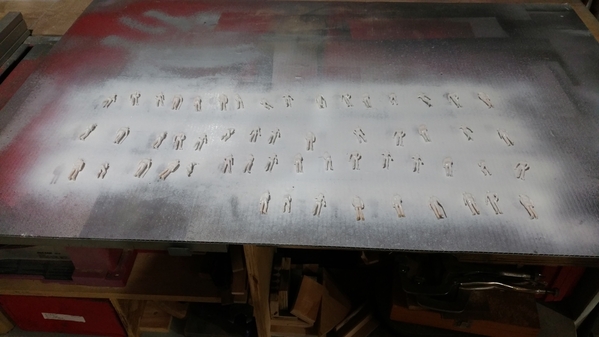
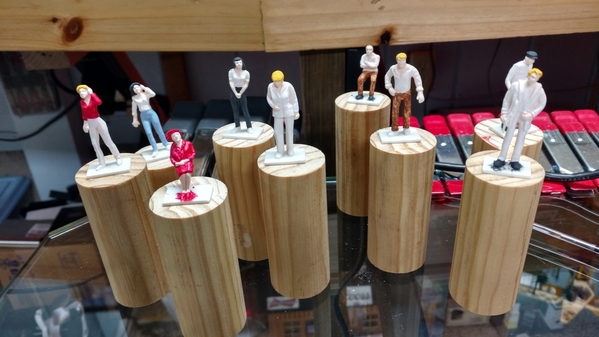
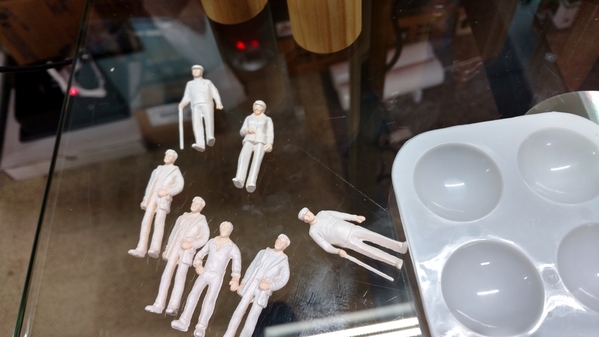
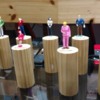
As for me I painted a couple little people skin color a couple days ago and did not like the look. So today I sprayed all my little people with white primer and maybe tomorrow I will get to painting. I also made a couple pedestal to use when painting them.IMG_20210430_064902984_HDRIMG_20210430_053831268

Attachments

Images (2)
  • IMG_20210430_064902984_HDR
  • IMG_20210430_053831268
@mike g. posted:

Bob, your making great progress! It's nice to see things moving forward.

As for me I painted a couple little people skin color a couple days ago and did not like the look. So today I sprayed all my little people with white primer and maybe tomorrow I will get to painting. I also made a couple pedestal to use when painting them.IMG_20210430_053831268

Great idea with the pedestals Mike.

I thought that the cops did chalk outlines at the crime scene.....

Thanks guys! Not sure if anything will get done today I have been up since 3 and an hour drive to the nearest vet ER for my buddy inspector Tank. Still waiting to see the Vet. But if I am up to it when I get home I plan on trying to paint a few folks!

I hope everyone has a great weekend

Derby Day here in KY Mike..

Post  time 6:57 pm so you have time for  a nap when  you return home after your buddy’s repaired to watch the race!  
A sincere good luck with the Inspector this morning!


Today I’m attempting to set up my new Triton router an table.  I have the oak board planed an ready finish.  


It’s designated as a display board for a friend’s B&O  F3 ABA .

Paul, I know what your talking about. I have the same thing but never thought a bout using it for painting. I use it to hold wires together while I solder them together.

Well after making it home after 9 hours driving to and from the vet and the time waiting in the parking lot. I have no energy to do anything let alone paint. So Tank and I are going to watch TV, well really I am he is already taking a nap! LOL

@trestleking posted:

We moved into a new train room (with a house over it) in April and all the train stuff seems to have survived the 1350 miles without issues.  Have a nice workshop off the train area (for an older house) so I have been settling in there.   Rich in SD.IMG_1769   

Looks good Rich! I hope you enjoy SD, plus when the big winds come you and the wife can be in the basement running trains together!

Leapin Larry. The river will go below the dam which you see as soon as you go down my stairs  into trainroom. Yes this river is bigger than the pics show. We are building it out of foam on plywood braced with aluminum   because it will drop down for  access  to camping area and front two bridges. It doesn't weigh that much but before the rapids is 8ft long and the rapids is 2 feet. O gauge takes a lot of real estate.20201020_12140620201020_12132320201020_12123520191013_181335

Attachments

Images (4)
  • 20201020_121406
  • 20201020_121323
  • 20201020_121235
  • 20191013_181335

I've been working on my railroad. Been rewiring a bunch of buildings, converting to dimmable LEDs in the buildings, and relocating buildings. Of course that means moving wiring, cutting holes, and generally messing up things that I thought were finished.  Also put people in my Pink Cadillac - unfortunately they will never walk again and have no need for seat belts.  In the middle of it all, I ran an ICG freight which decided not to follow the switch points. With all the power off, I was fiddling with it pushing it back, when crash!!! one of my box cars went off the rails and hit the floor. Cracked off the top walkway which was easily glued back in place. My swing bridge was swung to provide access to work on the derailment. Funny I heard the first set of wheels going off the tracks and kept pushing - then crash. Kill switch would not have been of help since all power was off.

Hoping to take vids of Twin Pines RR tomorrow and post, there is always something else I want to finish before recording.  The 10,000 lumen garage lights arrived yesterday - wow they sure light up the space. Just unscrewed my 4 inch LED can lamps and screwed these bad boys in. I think  these only go in when I will take vids or photos.

BTW - saw all the Williams stuff going at auction - I know zero about them. Are they suitable for scale and are there any issues to them in general. Can anyone point me to a forum page which does a good job discussing.

Thanks ...  Jeff

Scouting dad. The idea for dam born when my wife and I took our two kids on a white water rafting adventure  in the mountains of Tennessee  and NC. Great memories  I have of those times.

Capetrainman .the river has a foam base which is carved out and painted for depth. We are pouring a 2 part resin for the water effect. Will put ripple effects below dam for turbine effects when the pour is done on river.

Hopefully  will have some more pics soon. Thanks for asking .

Wow, Farmerjohn, thats going to be a Fantastic view, Awesome, and do you remember this, September 2019, just before the pandemic. Coming down the stairs to see your fabulous layout which, to me, is the 8th wonder of the world. Thank you for showing your ideas and thoughts on this fun to review forum. Happy Railroading Everyone 6B6C35D3-F7A3-4CCC-A596-3D389694D6C00246213B-EADF-4E06-82AB-4D7A30BF6FE8CFCB047E-CA29-4F19-B883-76F5256573E553CE64D9-03C3-4D3F-852E-D5953E502E62

Attachments

Images (4)
  • 6B6C35D3-F7A3-4CCC-A596-3D389694D6C0
  • 0246213B-EADF-4E06-82AB-4D7A30BF6FE8
  • CFCB047E-CA29-4F19-B883-76F5256573E5
  • 53CE64D9-03C3-4D3F-852E-D5953E502E62

I have a small 1-room (13x22) layout compared to the rail empires I'm seeing in posts here. As such, my space is very limited and the scenes can't compare...   but here's my current project.  I created a triggered unloading ramp scene for my collection of MTH reefers.  Upon trigger, it plays some rail chatter plus a warning bell just before the load is pushed out of the reefer. The scene unloads 3 crates before ending.  Note that I adapted the activation rails for the O72 curve where the unloading ramp resides.   (You'll also hear traffic sounds by any traffic on the 2 blocks in front of the station).

I'm amazed by all the talent you all have. It keeps me inspired to create more interesting scenes.

(I used an online video compression service to get the video file down to a reasonable/acceptable size ... hoping it works).

Attachments

Videos (1)
unload-ramp_UTCb1i0l
Last edited by ScottV

FarmerJohn, WOW 10' of river and rapids! That's almost half the size of the length of my train room. But man I it is going to look Amazing in your train room, coming down the stairs and seeing that first thing is surly going to be the big WOW factor! Cant wait to see more!

Jeff, that is quite the project to rewire all your building and move them to different locations, I have been telling the wife I was going to start over after seeing everyone's wonderful layout and she calls me crazy! LOL I am sorry about the crash of your box car but I am glad it was an easy fix. I am surprised that NTSB wasn't out doing an investigation and testing the operator!

JJWyatt, Looks great and easy, I think Elliott went one step further and used weed fabric on part of his huge layout. I was thinking about using it but its hard to store engines and rolling stock on it! LOL

ScottV, Nice work on the unloading area! It sure looks like it works great. You might think about backing a truck up to that area so folks dont say your wrecking there packages! LOL I also like the jogger in the beginning of your video also as you pan to the unloading area it sure shows a wonderful train room. I sure would like to see more of it as its about the same size of mine. 12' X 24'

Well its Sunday which means relaxation and trains or train projects. Since I have been busy lately I just might do both and sit down turn on NASCR, start up one or 2 of the engines and run some trains while I watch tv and paint my little people!

I hope you all are safe and having fun with your trains and layouts!

Scott - compressed video looks fine. I had a Tyco Burlington box car (HO) which used to shoot out crates from the door. Also a semi-scale car that threw out letters (that one was lame). The cold air fog is a nice touch on the reefer.  What video compression did you use - was it the dot.com on the video?

Mike - boy starting over is an interesting question. For me starting over would involve tearing out basement walls that I put up way before I ever thought about getting back into model railroading. Getting an extra 5 feet would be great pushing to 9x18   Even without that I probably would have torn the layout apart and rebuilt if I thought I would stay in this home another few years. Hoping to find another place in a year or sooner and move on.     The accident was the failure of the RR operator to post a bridge out sign and failure to put up a barrier to prevent cars from going over the chasm and failure of the operator to even consider the results of his actions knowing he moved the bridge out of the way in the first place. If the NTSB had jurisdiction over my TPRR, I would have been shut down long ago for goofy operating errors.

On my layout a 12 car train plus engines extends at least 1/3 of the way around a loop. This means one end of a train is always behind me and out of sight if I am inside the loops. I already had taken 4 cars off to re-rail the engine - so I could move my bridge out of the way - never even considered that was not enough. Just glad there was repairable damage to the box car.   

@ScoutingDad posted:

Scott - compressed video looks fine. I had a Tyco Burlington box car (HO) which used to shoot out crates from the door. Also a semi-scale car that threw out letters (that one was lame). The cold air fog is a nice touch on the reefer.  What video compression did you use - was it the dot.com on the video?

Mike - boy starting over is an interesting question. For me starting over would involve tearing out basement walls that I put up way before I ever thought about getting back into model railroading. Getting an extra 5 feet would be great pushing to 9x18   Even without that I probably would have torn the layout apart and rebuilt if I thought I would stay in this home another few years. Hoping to find another place in a year or sooner and move on.     The accident was the failure of the RR operator to post a bridge out sign and failure to put up a barrier to prevent cars from going over the chasm and failure of the operator to even consider the results of his actions knowing he moved the bridge out of the way in the first place. If the NTSB had jurisdiction over my TPRR, I would have been shut down long ago for goofy operating errors.

On my layout a 12 car train plus engines extends at least 1/3 of the way around a loop. This means one end of a train is always behind me and out of sight if I am inside the loops. I already had taken 4 cars off to re-rail the engine - so I could move my bridge out of the way - never even considered that was not enough. Just glad there was repairable damage to the box car.   

I dont know if I would start fresh, but I see so many great ideas that would make it more fun and the wife says I should add a second level! I sure like her thinking, but she hates the price! LOL As for us its not a problem as we have talked about it and if nothing drastic ever changes were here till our last days!

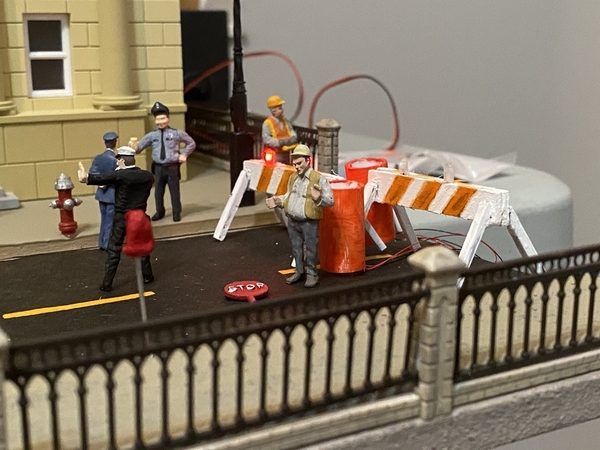
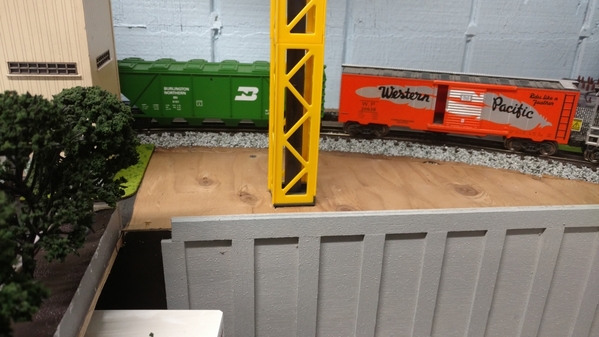
I’m going to build a “on ramp under repair” scene on the right side of my elevated station and needed some lighted barricades to begin the project. I didn’t really like the mth ones and couldn’t find any of the old K-line blinking ones that I really wanted, so I decided to build my own.  The blinking LEDs arrived yesterday along with a shipment of Arttista figures and today, after three hours of cutting, painting, and wiring, I’m pretty pleased with the results.  

288502B7-3820-4D6B-99E5-B2DDC07B0271

I need to glue the stop sign into the construction workers hands. Then, after I mount the building back on the layout, I need to install the construction crane and  suspend the on ramp piece from it.  Looking forward to seeing how it all comes together. FYI, the best source for reasonable priced arttista figures is Crusader. Great service.

Attachments

Images (1)
  • 288502B7-3820-4D6B-99E5-B2DDC07B0271
Videos (1)
10E1D58D-7D05-43E5-A24B-6C176C45FA32
Last edited by Strap Hanger

Thanks Bob/Mike.  I buy all my LEDs from these guys - https://lighthouseleds.com/pre...pico-nano-micro.html

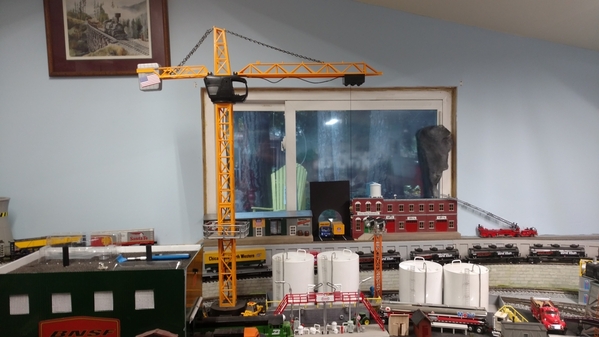
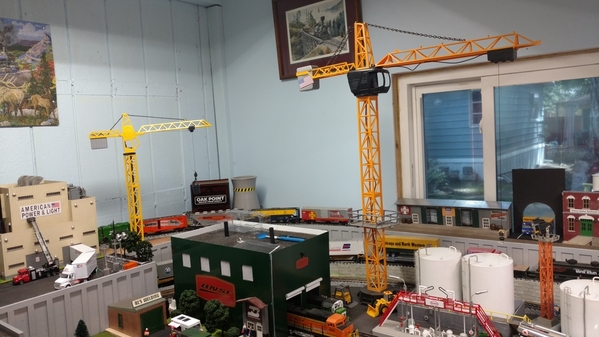
decent prices and reasonable shipping.  You’re totally correct Mike and no, I won’t shoot you! However, the hardest part for me was stenciling out the angled hazard Orange color. After doing one balsa wood bar, I quickly decided that I was going to limit my barricade to one per unit.  It works for me and matches the other K-line ones I have on the layout.  Mike, if I’m not mistaken, i thought I saw one of those cranes on your layout.  Is that correct? If so, did you discard the base and mount it directly to the layout?

Last edited by Strap Hanger

Thanks Bob/Mike.  I buy all my LEDs from these guys - https://lighthouseleds.com/pre-wired-leds-1.html

decent prices and reasonable shipping.  You’re totally correct Mike and no, I won’t shoot you! However, the hardest part for me was stenciling out the angled hazard Orange color. After doing one balsa wood bar, I quickly decided that I was going to limit my barricade to one per unit.  It works for me and matches the other K-line ones I have on the layout.  Mike, if I’m not mistaken, i thought I saw one of those cranes on your layout.  Is that correct? If so, did you discard the base and mount it directly to the layout?

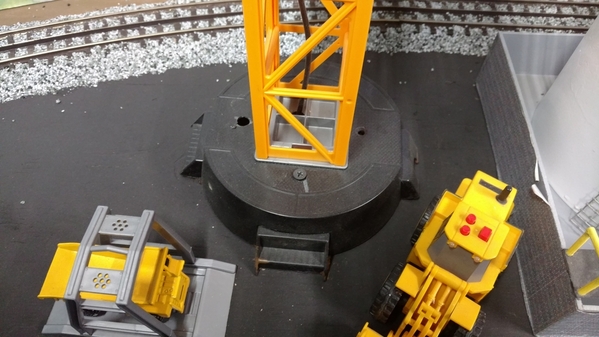
Hi I do have a couple on the layout and I will go out and get a couple photos of them and the base for you. one I got rid of the base and just cut a square hole to slide it into. The bigger one I kept the base, just cut the legs off and screwed it to the base as its taller and really pick some weight. The big one can pick the front of a powered engine like the ones in my service house!

Thanks Bob/Mike.  I buy all my LEDs from these guys - https://lighthouseleds.com/pre...pico-nano-micro.html

decent prices and reasonable shipping.  You’re totally correct Mike and no, I won’t shoot you! However, the hardest part for me was stenciling out the angled hazard Orange color. After doing one balsa wood bar, I quickly decided that I was going to limit my barricade to one per unit.  It works for me and matches the other K-line ones I have on the layout.  Mike, if I’m not mistaken, i thought I saw one of those cranes on your layout.  Is that correct? If so, did you discard the base and mount it directly to the layout?

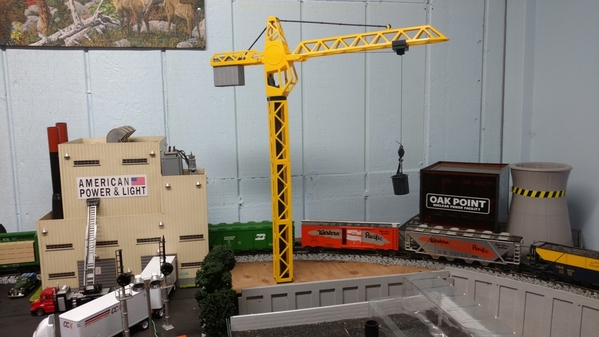
Here are a couple photos of both cranes, the little one works but only has limited swing both ways and is more for looks.IMG_20210502_143158375IMG_20210502_143205340

The bigger one is screwed down as the kids love to play with it when they come to visit!

IMG_20210502_143213165IMG_20210502_143222586

guess I should have taken a photo so you could see them both at the same time. I will be right back!

Attachments

Images (4)
  • IMG_20210502_143158375
  • IMG_20210502_143205340
  • IMG_20210502_143213165
  • IMG_20210502_143222586

Awesome, Mike! Your cranes look fantastic. Thanks for sharing those photos. Cutting the legs like you did and screwing it down is probably what I’m going to attempt. However, that smaller one looks great mounted without the base.  When I get back to the layout, I’ll see how much room I have and work it from there.   When I was racking my brain trying to figure out how to deal with the road to nowhere in front of my station, I remembered seeing a crane on your layout and it just clicked. This is why this forum is so good. If I hadn’t seen your work, I would never have come up with my project idea.

Last edited by Strap Hanger

I did several things today:

  1. Deleted all my MTH E8's.  I was having challenges getting powered AA's to work well.  @AGHRMatt had helped me out with that.  Thank you sir!!
  2. Added back all the MTH E8's.  This can be a challenge - primarily user error but I have gotten wiser on it.
  3. Added my new Premier Wisconsin Central SD 35. thanks again @Berwyns Toys and Trains.
  4. Looked up the history of the Wisconsin Central SD 35 engine number 2500, interestingly it was originally a Southern engine.  When I went to add a caboose, I went to where my caboose are and low and behold I have a Southern caboose, right next to a CN caboose.  Go figure.  CN acquired Wisconsin Central in the early 2000s.

Will run trains after dinner.

John

@ScoutingDad posted:

Scott - compressed video looks fine. I had a Tyco Burlington box car (HO) which used to shoot out crates from the door. Also a semi-scale car that threw out letters (that one was lame). The cold air fog is a nice touch on the reefer.  What video compression did you use - was it the dot.com on the video?


...

Yes,  the video compression website leaves its address as a watermark unless you wish to pay for an monthly/annual subscription. I saw an online review of compression tools... this one was rated as one of the highest.

....and yeah,  i also have a few Lionel cars that shoot stuff out.  I seldom use them.

Strap Hanger, you are so right! I have learned so much from this forum and if someone ask me I am always going to share what I can as those who have been here before me have always helped me out! What a great group of people!

John, sounds like you had one heck of a day. But I can tell you still happy cause you mentioned running trains after dinner! most of the time that's always a happy place!

@mike g. posted:

As for me guys, I went out and started painting my little people and I know some of you guys really like doing this but I have to tell you after I get all of these painted the next batch will be pre painted! LOL

IMG_20210502_133552621_HDRIMG_20210502_133559502_HDR

Mike...nice job on the painting so far...I take it your patience maybe running thin like mine did a few years ago. After the first batch I did, I said time to move on to less tedious work...

Last edited by Capetrainman

Mike...nice job on the painting so far...I take it your patience maybe running thin like mine did a few years ago. After the first batch I did, I said time to move on to less tedious work...

Your right Paul, but I guess I will see how I feel after doing 50 of them! LOL I like the idea of saving  me money. but I dont know if its worth losing my mind! LOL

Mike, I had no idea those cranes were that strong!  Great scene!!

Scott, the video is great! 

This weekend I finished the roadbed and fastened the track into place.  One of the switches has a dead spot.  I will have to check the jumpers I soldered in.  I'm guessing I have a cold joint.  Speaking of soldering, I replaced the tip on my soldering gun, and I have better heat transfer.  That should do the trick on fixing the bad connection.

@ScoutingDad  ....but there's only ONE pine in front of the Twin Pines Inn.    I like the detailing of the town, including the stair stepped sidewalk and the bridge work to that lower level. Those would be good for my corner town scene when finish construction heads that way.  

@Andrew Steiner  ...that coaling elevator is nice!  Would adding some kind of sloping insert (high on the sides, low in the center) into the loading tray help the "coal" to find its way to the center ? It might keep Mr. Finger's working hours down.

ScottV - you got me! you guys are a rough crowd.  I've been working out how I was going to build my ancient twin pine - present well before the founding of the town.

When I reconfigured my layout to include a curved yard I wanted to deck it over to allow space for more buildings. That meant I needed the deck to be a few inches higher than the "lower" part of the town. The stairs are just a sandwich of 1/4 nominal plywood sandwiched together at 2 inch intervals to get the step effect and the strength to span an access "hatch".

All the structure in this area is removable, this then exposes the access hatch where I can stand up in this space to work on the track and switch at the right side of this photo. All the buildings, street lights and signs have electrical quick connects for service work as needed.  This is one reason I will limit the use of a plywood deck to build my next layout. Fine tuning the grade change using 2x4 blocks was tedious and it transmits sound to the plywood base.

IMG_2716

Attachments

Images (1)
  • IMG_2716
@ScoutingDad posted:

ScottV - you got me! you guys are a rough crowd.  I've been working out how I was going to build my ancient twin pine - present well before the founding of the town.

When I reconfigured my layout to include a curved yard I wanted to deck it over to allow space for more buildings. That meant I needed the deck to be a few inches higher than the "lower" part of the town. The stairs are just a sandwich of 1/4 nominal plywood sandwiched together at 2 inch intervals to get the step effect and the strength to span an access "hatch".

All the structure in this area is removable, this then exposes the access hatch where I can stand up in this space to work on the track and switch at the right side of this photo. All the buildings, street lights and signs have electrical quick connects for service work as needed.  This is one reason I will limit the use of a plywood deck to build my next layout. Fine tuning the grade change using 2x4 blocks was tedious and it transmits sound to the plywood base.

IMG_2716

Superb work, Scouting dad.  Thanks for sharing that video as well. I really like how your town has uneven elevation, with steps and grades.  Very realistic and unlike the flat  elevated board used by most modelers building that second level.

Last edited by Strap Hanger

Andrew, Nice work on getting the 97 Coal Elevator up and working! ScottV might have a good idea there, also you could make a longer shoot to load the cars. I would reduce the mess after loading a lot of cars.

Jeff @ScoutingDad, Nice little video, what program did you use to add the title? I really like the video of your layout and how things look from different point of views! I really like your second level, the wife said I should do one on my layout so between painting little people, I have been scratching my head on that one! You have done such a great job!

@mike g. posted:

Andrew, Nice work on getting the 97 Coal Elevator up and working! ScottV might have a good idea there, also you could make a longer shoot to load the cars. I would reduce the mess after loading a lot of cars.

Jeff @ScoutingDad, Nice little video, what program did you use to add the title? I really like the video of your layout and how things look from different point of views! I really like your second level, the wife said I should do one on my layout so between painting little people, I have been scratching my head on that one! You have done such a great job!

Thanks, Mike and Scott. I'll see what I can come up with, like cutting a strip of cardboard/corrugated plastic and putting on the dumping base as a sleeve. The chute I might think about, since I've never worked with tinplate before.

Last edited by Andrew Steiner

Mike Strap Hanger Mark, thanks for the comments - all the elevation changes were brought about by my wanting an over and under trackplan with the ability to have a train use both "loops". The Ross crossover saved a lot of space I needed to get the elevation change without needing to go over 2.8% grade.  Plus the 9x13 forced some creative thinking on how to get it all to work together. That said after construction I realized there was more I could add. Additional passing tracks, lower yard, third loop - all interconnected.

Most of these changes are on the TPRR topic.  Mike you can also see how I ended up doing the deck over. The deck over the "yard" is held in place by 4 screws and is "easily" removed if I need to work on the yard track. The supports are 1/2 plywood with Kreig pocket screws set into the underlying plywood. The deck itself is 1/2 plywood so relatively light.  Later on I added 1/2 wood blocks to the to of the supports to add a better look and to have good fastening points.

I was looking at a cab video I took of the layout Sept 2019. Lots of changes and way more finishing work completed. On the agenda is to take a cab perspective video tour starting in the terminal and winding around the layout.

Jeff

@Strap Hanger

That is a GREAT scene. If I haven't asked you this question already, where did you get the combination stone and ornamental iron fence?

Thanks Randy. It’s going to look even better when I install the construction crane lifting the "on ramp" section of roading next to the side with the barricades.  

I went up to the great white North for that fence. I thought ordering from a Canadian company would be a disaster, but it worked out well. I’ve since ordered roof details and o scale factory machines/workers from them without a hitch as well. The deliveries usually arrive within 2 weeks for me down in South Florida. Here is the link - https://modelbuilderssupply.com/fence/

Last edited by Strap Hanger

Thanks Randy. It’s going to look even better when I install the construction crane lifting the "on ramp" section of roading next to the side with the barricades.  

I went up to the great white North for that fence. I thought ordering from a Canadian company would be a disaster, but it worked out well. I’ve since ordered roof details and o scale factory machines/workers from them without a hitch as well. The deliveries usually arrive within 2 weeks for me down in South Florida. Here is the link - https://modelbuilderssupply.com/fence/

Strap Hanger, its cool you are sharing all these companies you order from. I have been checking them out and I forgot to tell you that the LED supplier is from Washington State, just down the road from my sisters! about  5hr drive for me. But I would think shipping would have to be cheaper with it being in state! LOL

@ScoutingDad posted:

Mike Strap Hanger Mark, thanks for the comments - all the elevation changes were brought about by my wanting an over and under trackplan with the ability to have a train use both "loops". The Ross crossover saved a lot of space I needed to get the elevation change without needing to go over 2.8% grade.  Plus the 9x13 forced some creative thinking on how to get it all to work together. That said after construction I realized there was more I could add. Additional passing tracks, lower yard, third loop - all interconnected.

Most of these changes are on the TPRR topic.  Mike you can also see how I ended up doing the deck over. The deck over the "yard" is held in place by 4 screws and is "easily" removed if I need to work on the yard track. The supports are 1/2 plywood with Kreig pocket screws set into the underlying plywood. The deck itself is 1/2 plywood so relatively light.  Later on I added 1/2 wood blocks to the to of the supports to add a better look and to have good fastening points.

I was looking at a cab video I took of the layout Sept 2019. Lots of changes and way more finishing work completed. On the agenda is to take a cab perspective video tour starting in the terminal and winding around the layout.

Jeff

Hi Jeff, just wondering if you had a thread of your build? I would love to go back and read up on it!

Thanks Randy. It’s going to look even better when I install the construction crane lifting the "on ramp" section of roading next to the side with the barricades.  

I went up to the great white North for that fence. I thought ordering from a Canadian company would be a disaster, but it worked out well. I’ve since ordered roof details and o scale factory machines/workers from them without a hitch as well. The deliveries usually arrive within 2 weeks for me down in South Florida. Here is the link - https://modelbuilderssupply.com/fence/

@Strap Hanger

Thanks for the link. I found the fence. What did you use to create the stone work around the fence?

@mike g. posted:

Strap Hanger, its cool you are sharing all these companies you order from. I have been checking them out and I forgot to tell you that the LED supplier is from Washington State, just down the road from my sisters! about  5hr drive for me. But I would think shipping would have to be cheaper with it being in state! LOL

They’re pretty cheap already, I think $5 per package to ship to Florida. But heck, if you need LEDs and  can drive by after visiting your sister, it’s a win win!  I don’t mind sharing at all, Mike. Many here did the same for me.  It’s the least I could do.

@Strap Hanger

Thanks for the link. I found the fence. What did you use to create the stone work around the fence?

Hi Randy. Like Mike said, It comes with the fence kit. All I did was paint the stone and iron fence. Assembly is very easy. If you click on the link and scroll to the fence you like, they have pictures of the unpainted stonework and fenceing that come with the kit. Here is a link to one of the other model fences with a picture of the entire kit that they send, which includes the plastic stone wall -  https://modelbuilderssupply.co...o-gauge-39-fen-4804/

For between $11 to $15 depending on the one you pick (plus I think $10 shipping to the US) it’s a great deal.  They also have other great Ogauge architectural details and products that I’ve had a hard time finding here in the states, like o scale factory machines and large roof size sky lights and other roof details.

Last edited by Strap Hanger

Got the TPRR video edited and posted under the TPRR link below.

A Pennsy P5A electric arrived from Cabin Fever today.  It looks like it was never on the rails. Replaced the white battery of death with a BCR and lubed and greased the engine. However it just did not want to run in either direction. Took the body off and noticed the metal side frames around the motors were in contact with the flywheels. Bent the frames out a touch for some needed clearance and the engine ran fine after that. 

@ScoutingDad posted:

Got the TPRR video edited and posted under the TPRR link below.

A Pennsy P5A electric arrived from Cabin Fever today.  It looks like it was never on the rails. Replaced the white battery of death with a BCR and lubed and greased the engine. However it just did not want to run in either direction. Took the body off and noticed the metal side frames around the motors were in contact with the flywheels. Bent the frames out a touch for some needed clearance and the engine ran fine after that.

Can't open the video. The link required a password to access.

Bob

Last edited by RSJB18

Haven't done much since my hospital discharge.  I wasn't allowed to climb stairs for about 2 weeks but now I'm stronger so I can get to the layout in the basement.  No heavy lifting or straining but I  can do some lightweight work.

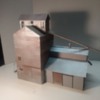
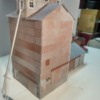
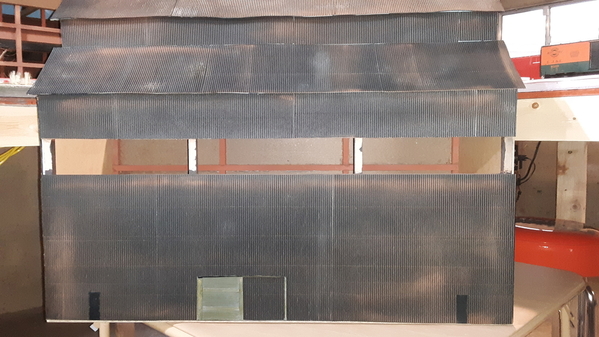
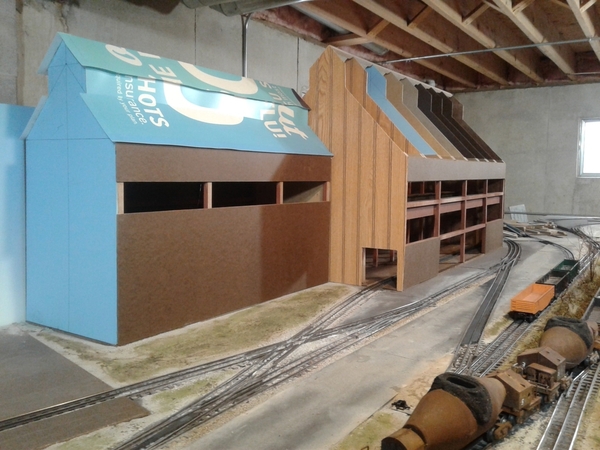
I clad my slab mill with corrugated cardboard for a ribbed siding effect. I used E-flute single faced corrugated that comes in 1X12 sheets and affixed them to the building with Scotch 77 spray adhesive.   Don't know if the ribbing is scale but since this is a background building, 4 feet from the edge  of the table,  it won't matter.  After cladding I hit it with matte acrylic spray to dull the finish and then I  used red oxide weathering powder to age the siding. Made a couple of sliding doors from scratch polystyrene and painted them with acrylics also. I still need to make a few signs for the front and ends. The slab mill is 12X32x24 and sits next to the Electric Arc Furnace building that is 24X48X32 inches tall, my next cladding project but it's too heavy for me to lift. My son will have to pull it off the layout for me to work on.

20210506_10361020210506_103521

Still need to place windows in it. I can get Korber  Models windows from Mr. MUFFIN'S TRAINS , but they're on pre-order right now.

Hope you like it.

Attachments

Images (2)
  • 20210506_103610
  • 20210506_103521
@third rail posted:

Haven't done much since my hospital discharge.  I wasn't allowed to climb stairs for about 2 weeks but now I'm stronger so I can get to the layout in the basement.  No heavy lifting or straining but I  can do some lightweight work.

Looks good Bill. The cardboard is a good siding material. Glad to hear you are up and around a little.

@ScoutingDad posted:

Bob - redid the link to the video - let me know if it works this time.  It should just run the video through the link. The Video is too big to post to the forum.  Jeff

Also added here TPRR May 2021 Trains Running

That one works Jeff. Things are looking good.

As for me- no layout time but I did order a Williams PRR 44 ton diesel from Trainland yesterday. I've been wanting a scale version for a while.

Bob

Hi guys, been gone from here the last couple days as I have been busy with the house painting and a sick bull dog. I havent done anything in the train room since my last post but I wanted to get on here to see what you guys were up to!

Jeff, thanks for putting the link for your video up, I havent watched it yet as I have to leave soon to the vets to get my buddy! But I will for sure!

Bill nice work on the building once everything is all said and done with your next one they are going to look great on your layout!

I am so glad to see you all having fun with your layout and trains!

@ScoutingDad posted:

third rail - looking great and the size perspective is very helpful. I am not sure I will ever have that kind of real estate to do something on that grand a scale - wow.

Planning track is one area where I am challenged using cross overs. Your placement makes a lot of sense and looks natural.

Thanks

I used an Atlas 12&1/2 degree crossing with 2 Gargraves O 100 turnouts.  The right stub goes to the arc furnace and the left stub goes through a future forge building to a slab and coil yard.

Building up can make your layout more realistic.  Too many people have buildings that are only 1 or 2 stories tall, making the industries not worthy of a track spur. Steel mill buildings are huge and no one can model them to scale.  But by condensing the size, I'm still able to force the perspective and make them plausible.

@ScoutingDad posted:

Bob - redid the link to the video - let me know if it works this time.  It should just run the video through the link. The Video is too big to post to the forum.  Jeff

Also added here TPRR May 2021 Trains Running

Jeff, I just skipped back to see your video.  Very nice trains on your layout.  I didn't know what was on the other side of the layout from the town with the track underneath.  Now I do. 

No actual work on the layout the last couple days.  I discovered a Premier PS3 Western Maryland H9 #734 for sale locally, so I decided to sell one of my PS2 models also locally.  I picked up the #734 (the engine the Western Maryland Scenic Railroad has run the last few years) yesterday.  It has very low use.  I have been playing around with it and one of the PS2 models to have them double-head, pulling a (long to me) coal train.  Testing went well, so I will be adding the dummy claw coupler to the PS2 engine and take a video when I get it going.  The upgrade in engines set me back only $50.

Afternoon guys, I thought I would take a break from painting little people and run some trains. I never used the smoke before and thought I would give it a try, took awhile for one to work properly and a fair amount of smoke fluid. The second one never did even after trying all the ideas I got from folks on another post I put up asking for help. So I decided to take the shell off to see if I could figure out the problem and I sure did! Now mind you I bought this new right from MTH, but anyways some how the smoke unit was put in backwords! Thank God I didn't fry the fan motor as the first amount of fluid was going right on top of it. I took it loose turned it around so the funnel was under the smoke stack, added a little more fluid and it seams to work fine now. Just wish there was more!


A little video for your enjoyment! LOL

I hope everyone has a great weekend and finds time for there layout and trains!

Attachments

Videos (1)
VID_20210507_103317683

Add Reply

Post

OGR Publishing, Inc., 1310 Eastside Centre Ct, Suite 6, Mountain Home, AR 72653
800-980-OGRR (6477)
www.ogaugerr.com

×
×
×
×
Link copied to your clipboard.
×
×