


LOU1985, the redo came out great...........Paul

Lou I m with Paul, The rebuild it looing good!![]()
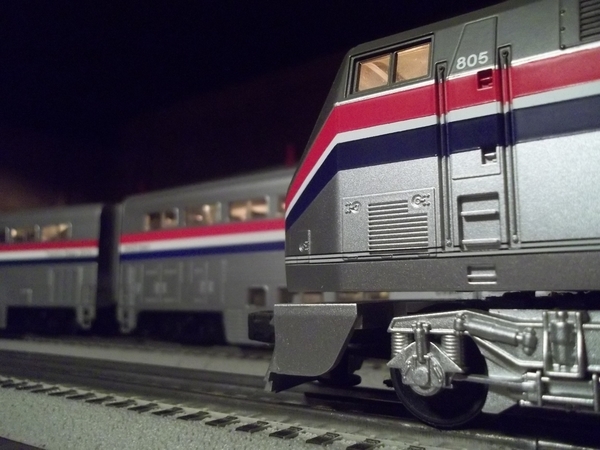
briansilvermustang posted:mike g. posted:Brian, can you explain the lights on top of the last passenger car? Is that normal as I have never seen one like that!
Metroliner Cab Car...
https://youtu.be/7kLIoWS3dwE https://youtu.be/-zA-JrYGb2s
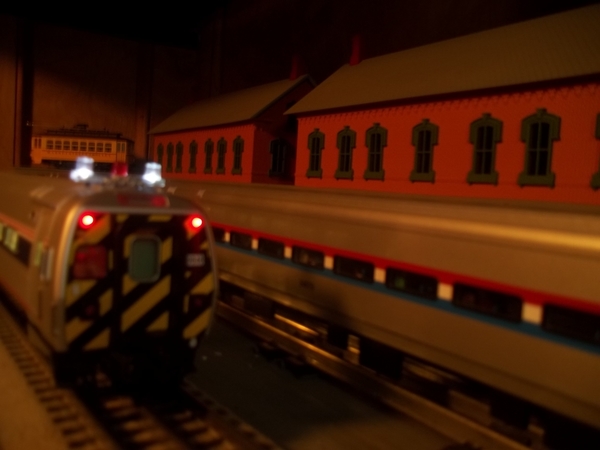

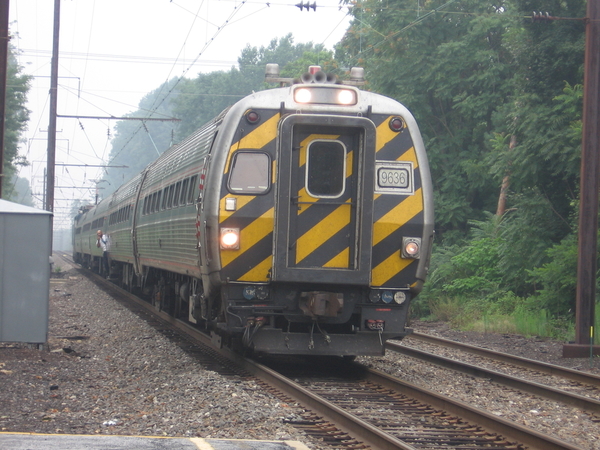
Thanks Brian, Must be a East Coast thing!
Lou, Your new terminal area is looking great! I’m sure you will have lots of action there soon!
Tom, upgrading from 036 to 072 will really make your trains look better besides letting you run longer equipment!
Brian, As always, great photographs of models and the prototype!!


Attachments
Images (13)


Panther97 posted:It took me a few years. I finally purchased the last ride for my amusement park at York! Next s the scenery.....
I may be able to fit an o-scale free fall ride!
Just watched the video....nicely done!!!
I got a few hours in on Saturday, and made some serious progress on my girder viaduct.
My painted parts are almost all used up.

I had to splice three pieces together to get the length I needed.

Now the fun part, getting my feeders reinstalled. I took a very long drill bit, and went through block on top of the pier, then through the pier, and finally through the plywood. I made four of these holes, one hot, one ground, and two detection.


Then I soldered them onto the web below the tie line. I used a dental pick to scrape the rail clean, it even took off the black coating from the center rail.

I glued the front girder to the frame. I still have to do the back one, but it's cut to length and ready to go.


Both ends of this thing still need their abutments, then I just have to clean up the paint and weather it. The good news is the auto rack makes it around, no problem. I'll have to check a Superliner.

Attachments
Images (8)
Lou, your layout is obviously a labor of love. Looking great!
Mike ![]()
Elliiot, nice work...!
Mike ![]()
Guys my layout isn't that nice. Especially compared to most of the ones on here. It's only a 12'x16' tabletop with a 4'x5' extension for the passenger terminal/downtown. It's got two loops (072 outer, 054 inner) and conventional power with a ZW and Z. But at least all the trains are scale sized, except the 60' passenger cars ![]() .
.
I'm hoping to fill/smooth out joints, paint the supports and platforms, and wire the tracks in the terminal this week.
The bridge is coming together nicely Elliot. ![]()
Great Work Elliot! The bridge it looking great! I needed a long drill bit for my last layout and a friend took a welding rod took all the outside welding stuff off, then ground a Paddle bit out of it! It's 16" long so to go threw my old raised section all the way threw the plywood all in one hole!![]()
But then again it doesn't matter you have great work going there!![]()
The bridge looks great Elliot. That’s good concealing wires.
Finally got all the LED's installed in the background buildings and got them wired through an adjustable AC/DC buck converter. Added a 3 rd floor to the brick building over the tracks so it wasn't so "square", and weathered the large girder beam supporting the building .... Time to start building more layout at the other end of the room. Tried to take some night time photos but it's challenging ...... Also finally found a reasonable formula for ballasting the tracks in the engine service facility..... 


Attachments
Images (5)

Things are looking good Chris! I agree that night pictures are hard! One day when you get a chance if you can make a video of your layout! Everything looks so great!![]()
Lou1985 posted:Guys my layout isn't that nice. Especially compared to most of the ones on here. It's only a 12'x16' tabletop with a 4'x5' extension for the passenger terminal/downtown. It's got two loops (072 outer, 054 inner) and conventional power with a ZW and Z. But at least all the trains are scale sized, except the 60' passenger cars
.
Lou, Don't sell yourself short. Layouts are a reflection of what each of us likes about the hobby and our talents as well as the time put into them. Some are detailed. Some are toy train like. Most are never finished. The best layouts are the results of many years of improvements and changes that reflect our increased knowledge and talent in the hobby. You have a great looking layout. Better than most and capable of growing into much more.
Pat Kn posted:Lou1985 posted:Guys my layout isn't that nice. Especially compared to most of the ones on here. It's only a 12'x16' tabletop with a 4'x5' extension for the passenger terminal/downtown. It's got two loops (072 outer, 054 inner) and conventional power with a ZW and Z. But at least all the trains are scale sized, except the 60' passenger cars
Lou, Don't sell yourself short. Layouts are a reflection of what each of us likes about the hobby and our talents as well as the time put into them. Some are detailed. Some are toy train like. Most are never finished. The best layouts are the results of many years of improvements and changes that reflect our increased knowledge and talent in the hobby. You have a great looking layout. Better than most and capable of growing into much more.
Hear! Hear! You are definitely too modest Lou. Your layout is very nice and will only get better with time.
Bob
Today: April 24, 2018 • Lunch with Grandpa in the Train Room


After lunch we went to the backyard to hangout and just have old fashion fun.

Then the rain came and back inside we went.........
Gary
Attachments
Images (4)


Ok! Now I want to come play at Grandpa Gary's house! What a great deal that you can share this with your grandsons! I wish mine would get into it! It takes everything to get them outside to play! Darn computers!![]()
Priceless Gary! Your Grandsons have a great grandpa!! I agree with Mike! I never had a grandpa!
trainroomgary posted:Today: April 24, 2018 • Lunch with Grandpa in the Train Room
After lunch we went to the backyard to hangout and just have old fashion fun.
Then the rain came and back inside we went.........
Gary
Awww so precious.
I have been working on my new layout, it is basically a shelf around my reloading/storage room. I think it is 12x20. One part is the last remaining piece of my old O scale trolley line, the rail is code 148. I think I can use it as kind of a homage to my past. I have been blown away at the quality of everyone`s railroads, you all are quite an inspiration. I`ll get pictures this weekend and post them.
Mike
Dobermann, that sure did turn out nice! Great Job!![]()
mike g. posted:Dobermann, that sure did turn out nice! Great Job!
Thanks.
Really nice looking building, Doberman.
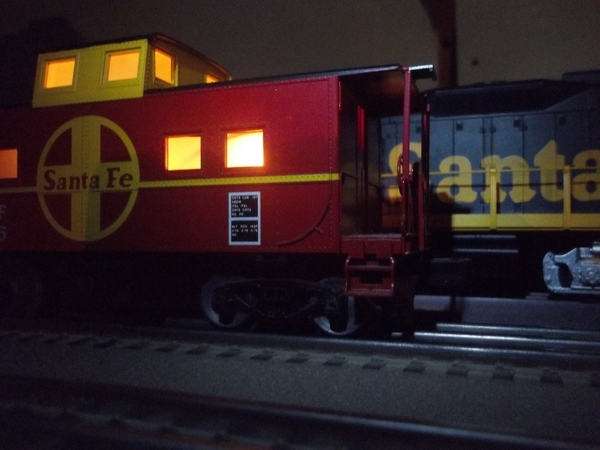
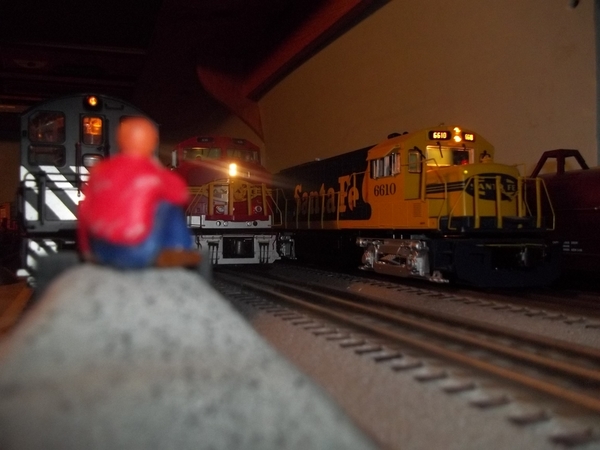
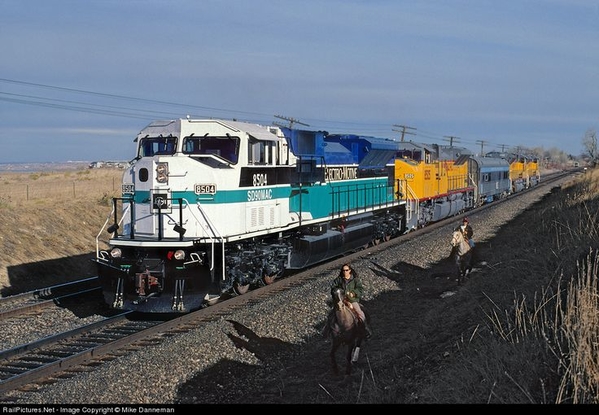
some early morning train watching...
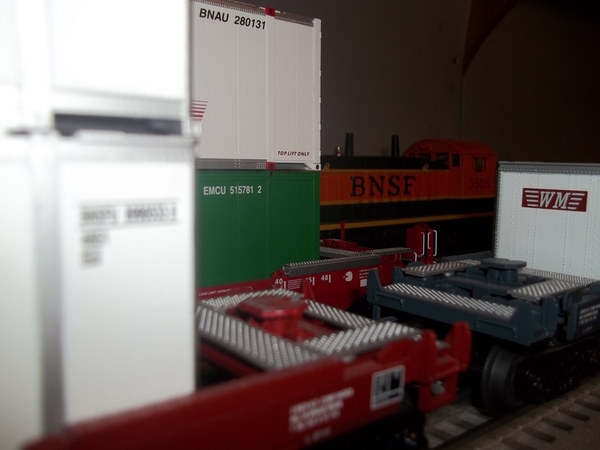
down at the freight yard... looks like a busy day here...
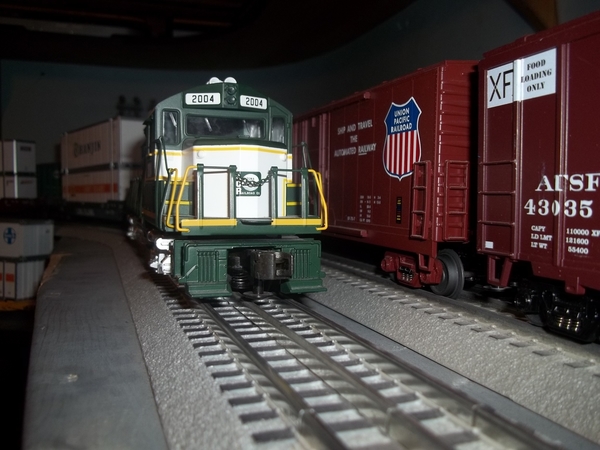
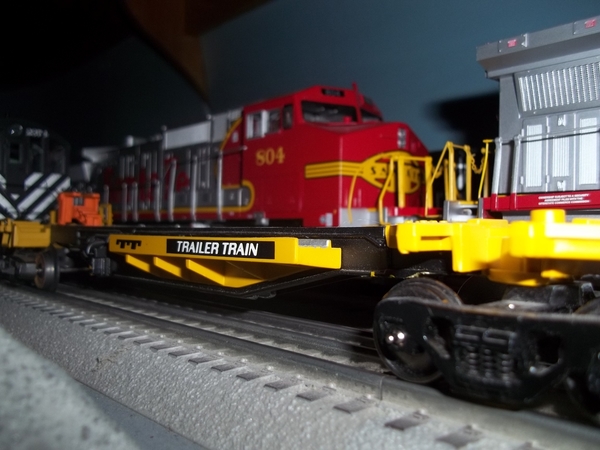

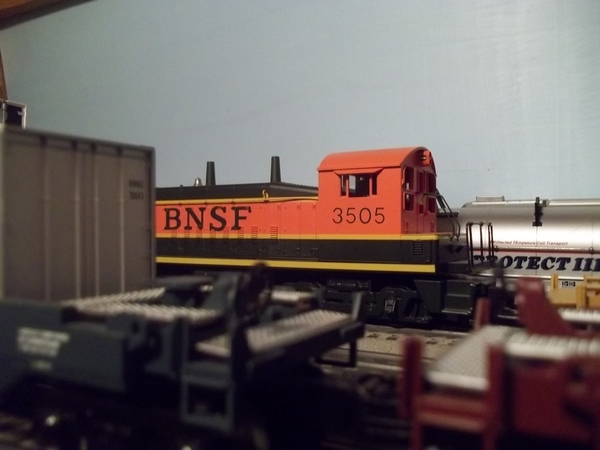

and then caught a neat surprise coming through the yard... ![]()

Attachments
Images (9)


Well I have to hand it to Paul 2, he did a fabulous job hosting our Tuesday night train group last night. Great food and train conversation and honestly the pictures he posts online don't do his layout justice. The man is a machine churning out area after area in his basement. Maybe not as big as the Treaty of Versailles but look what I saw when I arrived last night. I guess roughing him up at the last meeting paid off.

Attachments
Images (1)
Bryan in Ohio posted:Well I have to hand it to Paul 2, he did a fabulous job hosting our Tuesday night train group last night. Great food and train conversation and honestly the pictures he posts online don't do his layout justice. The man is a machine churning out area after area in his basement. Maybe not as big as the Treaty of Versailles but look what I saw when I arrived last night. I guess roughing him up at the last meeting paid off.
I’m glad everyone had a good time at Paul’s house last evening! Great job Paul!
btw Mark our offer still stands if you want to venture over this way this summer and check out a few layouts.
Bryan in Ohio posted:Well I have to hand it to Paul 2, he did a fabulous job hosting our Tuesday night train group last night. Great food and train conversation and honestly the pictures he posts online don't do his layout justice. The man is a machine churning out area after area in his basement. Maybe not as big as the Treaty of Versailles but look what I saw when I arrived last night. I guess roughing him up at the last meeting paid off.
I guess his security detail had the night off. ![]()
Bob
briansilvermustang posted:
Great shots as always, but I just have to ask, is it ever daytime on your layout?
Bryan in Ohio posted:btw Mark our offer still stands if you want to venture over this way this summer and check out a few layouts.
Bryan, Thank you again! I hope to be able to take you up on that offer!
Paul, sure sounds like you stepped up to the plate! I sure am glad you all had a great time!![]()
hey Mark, you get that close, you can also stop by and see Clem and I ... ![]()
p51 posted:briansilvermustang posted:
Great shots as always, but I just have to ask, is it ever daytime on your layout?
not very often, it is usually later in the evening by the time I get to the trains...

Attachments
Images (1)

briansilvermustang posted:hey Mark, you get that close, you can also stop by and see Clem and I ...
Well let’s see; I think Paul said he lives in Cuyahoga Falls. That is about 2 hours away. Bryan is somewhere nearby. Toledo is 2 hours from Cuyahoga Falls, and Clem is just over the state line. Minimum driving is 4 hours one way. Wow, that’s a lot of railroading!! Thank you Brian!!
see you soon... ![]()
"ROAD TRIP" Mark, pack a lunch.............Paul

Attachments
Images (1)

paul 2 posted:"ROAD TRIP" Mark, pack a lunch.............Paul
See Paul is back to his old ways of NON hospitality ....if you do stop over I would provide lunch.
I thank Bryan for the compliments. And Bryan said it for me. Whenever you get time to see layouts you are more then welcome. Hosting the Tuesday night crew went without a hitch. So with the morning behind me now and I got pretty much everything cleaned up plus it is wet outside from the rain that means I can go to the basement and work on the layout the rest of the day. Got a few things that I can get into since I cleaned off the tables so everyone could see the layout. Maybe I'll have some pics later in the day.............Paul
Treat you nice Bryan with a happy face and this is how you treat me. I feel like Caesar LOL. Armed guards ( new younger ones ) will be at the door at my next night to host to escort you out of town. Mark is welcome to come. And I meant to pack something in case a person gets hungry on the road. Mark will be treated to good food but you if allowed in will only get water and some old bread.............LOL................Paul
Got all the "concrete" painted before work today. Now I just need to wire the track, ballast the terminal tracks, and repair the scenery next to the support area. Then I can mount the plywood top and start rebuilding the downtown area. So yeah, almost done ![]()
![20180425_105741[1]](https://ogrforum.ogaugerr.com/fileSendAction/fcType/0/fcOid/12129987997660671/filePointer/79142442609064189/fodoid/79142442609064183/imageType/LARGE/inlineImage/true/20180425_105741%255B1%255D.jpg "20180425_105741[1]")
![20180425_105817[1]](https://ogrforum.ogaugerr.com/fileSendAction/fcType/0/fcOid/12129987997660671/filePointer/79142442609064190/fodoid/79142442609064184/imageType/LARGE/inlineImage/true/20180425_105817%255B1%255D.jpg "20180425_105817[1]")
![20180425_105829[1]](https://ogrforum.ogaugerr.com/fileSendAction/fcType/0/fcOid/12129987997660671/filePointer/79142442609064191/fodoid/79142442609064185/imageType/LARGE/inlineImage/true/20180425_105829%255B1%255D.jpg "20180425_105829[1]")
Attachments
Images (3)
![20180425_105741[1]](https://ogrforum.ogaugerr.com/fileSendAction/fcType/0/fcOid/12129987997660671/filePointer/79142442609064189/fodoid/79142442609064183/imageType/LARGE/inlineImage/true/20180425_105741%5B1%5D.jpg "20180425_105741[1]")
![20180425_105817[1]](https://ogrforum.ogaugerr.com/fileSendAction/fcType/0/fcOid/12129987997660671/filePointer/79142442609064190/fodoid/79142442609064184/imageType/LARGE/inlineImage/true/20180425_105817%5B1%5D.jpg "20180425_105817[1]")
![20180425_105829[1]](https://ogrforum.ogaugerr.com/fileSendAction/fcType/0/fcOid/12129987997660671/filePointer/79142442609064191/fodoid/79142442609064185/imageType/LARGE/inlineImage/true/20180425_105829%5B1%5D.jpg "20180425_105829[1]")
Brian, Bryan, and Paul!! Thank you each and every one of you!! I needed that tee shirt last week when I went to York. ![]() 4 1/2 hours each way! Yes, that is what I did, packed food, coffee, and pop. On two days, I only bought a meal at the OGR Quaker Steak and Lube and a burger on the Turnpike on the way home, since I ran out of groceries!
4 1/2 hours each way! Yes, that is what I did, packed food, coffee, and pop. On two days, I only bought a meal at the OGR Quaker Steak and Lube and a burger on the Turnpike on the way home, since I ran out of groceries! ![]()
Lou, your track and "concrete" look great!! I'll look forward to the city above the tracks!!
Mark Boyce posted:briansilvermustang posted:hey Mark, you get that close, you can also stop by and see Clem and I ...
Well let’s see; I think Paul said he lives in Cuyahoga Falls. That is about 2 hours away. Bryan is somewhere nearby. Toledo is 2 hours from Cuyahoga Falls, and Clem is just over the state line. Minimum driving is 4 hours one way. Wow, that’s a lot of railroading!! Thank you Brian!!
No worries Mark- if you make it to Brian's (silvermustang), I'm sure you can bunk with Izzy ![]()
Lou1985 posted:Got all the "concrete" painted before work today. Now I just need to wire the track, ballast the terminal tracks, and repair the scenery next to the support area. Then I can mount the plywood top and start rebuilding the downtown area. So yeah, almost done
Looks great so far!
Lou1985 posted:Got all the "concrete" painted before work today. Now I just need to wire the track, ballast the terminal tracks, and repair the scenery next to the support area. Then I can mount the plywood top and start rebuilding the downtown area. So yeah, almost done
Looking good Lou. I like what you did with the switch. I have the same 5121's but I only ballasted up to the body of the switch. Yours blend in to the scene better.

Attachments
Images (1)

RSJB18 posted:Mark Boyce posted:briansilvermustang posted:hey Mark, you get that close, you can also stop by and see Clem and I ...
Well let’s see; I think Paul said he lives in Cuyahoga Falls. That is about 2 hours away. Bryan is somewhere nearby. Toledo is 2 hours from Cuyahoga Falls, and Clem is just over the state line. Minimum driving is 4 hours one way. Wow, that’s a lot of railroading!! Thank you Brian!!
No worries Mark- if you make it to Brian's (silvermustang), I'm sure you can bunk with Izzy
![]()
![]()
He! He! ![]()
Thanks Mike, Bob, Mike and Mark.
Yesterday was the big day, my guy came over to take the photos for the convention (for the second time). This time he seemed more excited. I staged some trains for him, and I think he got some good shots. Now they'll be sent to the webmaster for selection. As soon as they are up, I'll put a new link in my signature.
When that was done, I did a couple of small projects. I got some more 3.5 gallon buckets. I use them to store scenic materials. So I spent some time putting away most of what I sorted a couple weeks ago. It's nice not having boxes full of random stuff.
After Patrick and I carved the roadbed, some of the lettering that I had applied to the fascia was messed up. The vinyl letters don't really like to stick to the semi-gloss paint. My solution was to go over them with Mod Podge, and secure them once and for all. So I repaired the damage in aisle three, and locked down aisle four. After that, I started fresh in aisle two, and got all of that done.
It's not too difficult, but it is time consuming, getting everything just right. I cut a strip of Masonite, and just clamp it on to serve as a guide. You can't really see it, but there's a small pencil mark where I wanted the center of the words to be. There are 14 letters in University Jct. The space counts as one.


I did Shoreham. Here it is with wet Mod Podge.

Same for Pig's Eye, as well as Red Wing and 35th Avenue. I still have to get the semi-gloss over in aisle one before I can finish over there.

Remember the last thing I said in my previous post from Monday, about the clearance on the new bridge? There's about a 1/4" gap for the auto rack...

but only an 1/8" for the Superliner. WHEW!!! May need to do some more testing using other passenger cars with skirts.

Attachments
Images (6)
Lou, looking good. Elliot, you never know till you run a car over your work whether you allowed for the right clearance. Sometimes it is trial and error but better to catch it at the beginning. Today I installed a set of weaver three rail die cast trucks I got off EBAY on a Weaver flat I picked up at York that was for 2 rail. I also started placing more trees and shrubs on the other side of the bridge abutment. Tonight the wife has a game so that gives me a train night in the basement. Pics..............Paul


Attachments
Images (2)
Lue, things are looking really nice!![]()
Paul, the car and shrubs look wonderful!![]()
Mark, Izzy might share her bed with you, but don't count on getting any of her ice cream!![]()
Big_Boy_4005 posted:Thanks Mike, Bob, Mike and Mark.
Yesterday was the big day, my guy came over to take the photos for the convention (for the second time). This time he seemed more excited. I staged some trains for him, and I think he got some good shots. Now they'll be sent to the webmaster for selection. As soon as they are up, I'll put a new link in my signature.
When that was done, I did a couple of small projects. I got some more 3.5 gallon buckets. I use them to store scenic materials. So I spent some time putting away most of what I sorted a couple weeks ago. It's nice not having boxes full of random stuff.
After Patrick and I carved the roadbed, some of the lettering that I had applied to the fascia was messed up. The vinyl letters don't really like to stick to the semi-gloss paint. My solution was to go over them with Mod Podge, and secure them once and for all. So I repaired the damage in aisle three, and locked down aisle four. After that, I started fresh in aisle two, and got all of that done.
It's not too difficult, but it is time consuming, getting everything just right. I cut a strip of Masonite, and just clamp it on to serve as a guide. You can't really see it, but there's a small pencil mark where I wanted the center of the words to be. There are 14 letters in University Jct. The space counts as one.
I did Shoreham. Here it is with wet Mod Podge.
Same for Pig's Eye, as well as Red Wing and 35th Avenue. I still have to get the semi-gloss over in aisle one before I can finish over there.
Remember the last thing I said in my previous post from Monday, about the clearance on the new bridge? There's about a 1/4" gap for the auto rack...
but only an 1/8" for the Superliner. WHEW!!! May need to do some more testing using other passenger cars with skirts.
Elliot, things are looking great! I hope the bridge isn't going to become a problem as it looks so nice! If they don't chose you for the tour, just let us know! We can go find him and have a little chat!![]()
The car and the scenery look great Paul!
Elliot, I’m glad the inquisition were all smiles when they visited!!
So while the wife watched the Cavs I got some work done. I spent the evening adding a bit more to the first bridge abutment I was working on. Then I jumped to the other side and started adding tree, a couple of bushes and ground turf. I still have to glue it down. I took a minute to add the coal loads I got from Don Kane to my AC&Y hoppers.He makes great loads. So the game is over and the wife wants me to spend time with her watching some TV. Can't say no. Pics of the work tonight............Paul


Attachments
Images (9)
Paul, The scenery is looking better and better. Yes Don makes dandy loads. I have a few. I’m glad you are keeping Mum happy!
Elliot, it looks great! I thought that I had all my clearances checked out and then found that my new Atlas 21" California Zephyr cars hits my tunnel liner on my freight mainline. I hadn't checked running passenger cars in the reverse direction on my freight line, but had checked everywhere on the passenger line. It does make a difference what direction you are running on some bridges and tunnels as the cars swing out on curves. I didn't have enough straight track before the bridge on one.
Art
Former Member
I had an interesting, cleansing train day. I had several items ending on the bay
today. Nothing sold even tho I had some nice things priced to sell, not make money on.
And the shipping I charge is so low I usually end up contributing. Anyway, after realizing
I have spent a lot of time trying to sell this stuff, I have decided to take a break from selling.
I sorted thru the stuff and actually threw some in the trash. I started my Fortescue Foundation
box of stuff for him to donate to the Museum. ((coming soon Mitch)). It was actually kind of
uplifting to throw some stuff away, fill the Fortescue box and know tomorrow I don't have to
check my "all selling" on the bay. I even started breaking down and discarding boxes I had been
hoarding to ship things. My life is good.![]()
Took some photos of buildings I bought at York last week. I integrated these buildings into Patburg's Westend neighborhood.... a fire house and three town houses. I also angled mirrors to give a down hill effect on one of the streets and the other mirror was angled to give the impression that a Ford T bird is making a right had turn. 


Attachments
Images (4)
Paul2- the bridge area is looking good. Funny- I think that's where you where when I started following your build a couple of years ago.
Patrick- I didn't think Patsburg had any vacant lots. The new construction looks good. The mirrors are a neat touch too.
Beardog- sometimes a good clean up is the best thing.
Art and Elliot- We can all sympathize with you about spots on our layouts where the scenery interferes with the trains. The reverse travel issue Art had is particularly annoying. Just when you think you checked everything BOOM!
Bob


Attachments
Images (6)


I had to go back after looking at the last pics I took of the last hill I was working on. The big trees in the back just looked out of place so I pulled them out and added smaller trees. I can live with that now. Pic before and pic after......Paul


Attachments
Images (2)
I put new tires on my NYC GP20 and added double pick-up rollers to a NYC caboose so the lights would stop blinking.
Dennis
Paul, the bridge abutment is looking really nice! I really like all the bushes and trees you are putting up!![]()
Patrick, sure looks like you got some great deals ! I really like the mirrors!![]()
Lou1985 posted:Got all the "concrete" painted before work today. Now I just need to wire the track, ballast the terminal tracks, and repair the scenery next to the support area. Then I can mount the plywood top and start rebuilding the downtown area. So yeah, almost done
Your track looks good! I enjoy seeing layouts using 027.
A Northern Pacific 44 ton diesel hauling some of Lionel's more unusual postwar freight cars.....
Attachments
Images (1)
balidas posted:Lou1985 posted:Got all the "concrete" painted before work today. Now I just need to wire the track, ballast the terminal tracks, and repair the scenery next to the support area. Then I can mount the plywood top and start rebuilding the downtown area. So yeah, almost done
Your track looks good! I enjoy seeing layouts using 027.
027 profile track. Outer main line has 072 curves, inner 054. Lets me run scale sized equipment. I went with 027 profile because it's shorter and looks much better than 0 tubular track.
I did get the three terminal tracks wired in this evening. Tomorrow I hope to ballast and finish up scenery repair. Then next week I'll be on to mounting plywood and starting on the downtown area.
I am pleased to announce that, with the able assistance of Fortescue (and friend), I have successfully resuscitated a DeWitt Clinton belonging to our own John D.'s dad...

Sylvia Siamese was on hand for the initial test flight... ![]()
Mitch
Attachments
Images (1)
Videos (1)

Former Member
and the friendly and helpful flamingos slowly assimilate into the
local populations..................


Nice job, Mitch.
M. Mitchell Marmel posted:I am pleased to announce that, with the able assistance of Fortescue (and friend), I have successfully resuscitated a DeWitt Clinton belonging to our own John D.'s dad...
Mitch
I'd forgotten it was out of commission! Thanks for your help!!
Let the trains run as I do physical therapy for my rotator cuff injury.

had therapy running trains... ![]()
Attachments
Images (2)


clem k posted:Let the trains run as I do physical therapy for my rotator cuff injury.
hope you're getting better Clem !!! 

Attachments
Images (1)

Chugman posted:Elliot, it looks great! I thought that I had all my clearances checked out and then found that my new Atlas 21" California Zephyr cars hits my tunnel liner on my freight mainline. I hadn't checked running passenger cars in the reverse direction on my freight line, but had checked everywhere on the passenger line. It does make a difference what direction you are running on some bridges and tunnels as the cars swing out on curves. I didn't have enough straight track before the bridge on one.
Art
Good morning Art....If you use those really cool switch track lanterns from Ross make sure you move them far away from the track.
Clem
beardog posted:and the friendly and helpful flamingos slowly assimilate into the
local populations..................
![]()
Pat Kn posted:Nice job, Mitch.
Thankee! ![]()
If anyone else has problems with their DeWitt Clinton, let me know; I am now familiar with the innards of the thing. ![]()
John D. posted:I'd forgotten it was out of commission! Thanks for your help!!
My pleasure! The tricky bit was resoldering the plug... and then reassembling the little indefinite... ![]()
briansilvermustang posted:hope you're getting better Clem !!!
Seconded!
Mitch
 A little bridge work... I dug out my atlas industrial rail track for this layout, but was missing one straight. I noticed this track uses the same pins and has almost the same rail profile as gargraves track, which I have a few sections of, so I cut a piece to match the missing straight, and immediately thought "gee, those sure look like bridge ties compared to the atlas track"... a few scraps of wood and some paint and now I have a bridge!
Attachments
Images (1)
Jon, nice work! Way to think out of the box!![]()
Thanks guys.
Yesterday I worked on a few things. I started with the girder on the back side of the bridge, and got it glued in place. The big cars were still OK for clearance, but of all things, the track cleaning car was hitting in a couple spots on the newly installed back girder. The car is only six inches long, but it has thumb screws sticking out the side, that were the problem. I just popped the glue joint in those spots on the bridge, and solved the problem. There are still some cars that will need testing.

I got my paints out and weathered the bridge. I only used two colors to do all of this, a bright rusty red-orange, and black.

Blending the two colors together, I got a range of rusty browns. I used a stippling technique to get this effect. I think I over did it on the piers though. I'll have to go back and fix that.

I spent a couple hours over at Hoffman, cleaning track and switches after ballast touch ups. Nothing like a dental pick for getting switches unstuck. Then I touched up paint on guard rails and frogs, where the track cleaning car scratched it off.

I just used a foam scrap as a pallet for the afternoon. The small brush was for the rail touch ups.

Finally, I totally switched gears, and soldered some plugs on one of my signal bridges. Seems like forever ago that I touched the signals. I'd like to get these off my workbench and onto the layout. They will make things look better.

Here's the best picture from Tuesday's photo session. I wish I could have had the signals lit up. That's a lot of work, but if I plan my time carefully, it could be done.

Attachments
Images (7)
Good question. That was lifted from an email sent to me by the photographer. I'll have my wife check it out. If she can't see it, I'll try and fix it.
She couldn't. I'll work on it. Check back in a little while, it's worth it.![]()
Ran my MTH UP passenger train with Lionel Station sound diner, finished filming my video review of diner sound car.
started the wiring for the upper level today. Have the holes drilled for the power leads from below and the jumper leads cut from the number 14 stranded reels for 6 or 7 connections planned. Installed and soldered two of the connections and ran some temp connections from the track below with alligator clips. Just to check out the running of the train.So far so good.
It's fixed.
clem k posted:Let the trains run as I do physical therapy for my rotator cuff injury.
Work hard, Clem! I went through is about 10 years ago! Fell on the ice. The rotator cuff still gives me pain when I move a certain way. Let the trains run!
Elliot, the bridge is really taking shape. You did a nice job with the painting. I really like the pic of the finished cliff area with one of my favorite railroads going through....CP Rail. Tonight I got a chance to work again on the layout. Wife watched the Cavs, Because I had the table top pretty much cleaned off I finally decided which two buildings I would put in that area. The Sur Sweet and the creamery from Walthers ( now Atlas ). Once I got them positioned I laid down some cork and glued it down. Once I lay down track I am going to extend the rail loading dock so I can spot two reefers there at one time. Then I glued down the ground turf I put down yesterday or the day before. Tomorrow morning I can pull the nails and paint the cork and should sometime during the day put down some ballast. Pics........Paul


Attachments
Images (4)
Elliot, thing are looking great! Love the picture of the signal bridge! Who could ask for more!![]()
Paul, I think your trying to give Elliot a run for the money! Things are looking great at your place! I bet you guys have been trading secrets! LOL![]()
Got the new terminal tracks ballasted and repaired the scenery damaged by removal of the mountain. Glue is still wet in the pictures. I've got to paint the underside of plywood base for the downtown area before I mount it. Also paint "rust" on the rails of the new track. Not bad for two weeks of progress. I probably won't get much done this week as I'll be busy. I'll hopefully make some progress again next weekend.


Attachments
Images (4)
Lou- looking good. Amazing want we can accomplish when we put our minds to it. Helps to have the free time too.
Paul- I notice mostly ground throws on your switches. Are you leaving them or adding motors? Can't believe you have another new area under construction ![]()
Elliot- the cliff photo looks great. Really brings your masterpiece to life.
Bob, this layout will have mostly manual ground throws. However there will be a spot where the switches will have switch motors because they will be out of arms reach. Paul
Lou, things are looking very nice! You cant eve tell there was damage from where the mountain was! Great Job! I cant wait to see the city growing above the tracks!![]()
Got the cork roadbed painted. Now just waiting for it to dry. Pics........Paul


Attachments
Images (3)
Looking good Paul! While your waiting you might as well go up stairs and run some trains! LOL![]()
The ballast is down and glued. I'll have to let it dry a bit before I start to put down track. So mike now I will go up and run some trains for a while. Pics...........Paul


Attachments
Images (5)
Looks good Paul, I just have a question for you, do you go back and Ballast between the ties and rails?![]()
Mike, I do not ballast the track. I just ballast beveled sides of the cork.............Paul
The buildings and spurs look good Paul!!
Remember this dummy? I rounded up some more LEDs and added headlights & ditch lights. There's a selector switch in the chassis that turns on either red for stop/reverse or headlights for forward/go. Whenever I convert a powered unit to a dummy and I see a slider switch I leave it there for future use - like today!


Attachments
Images (2)


Ralph, great job! All I can say is it looks wonderful!![]()
Looking good John! keep posting!![]()
I sure like the looks of that scene taking form, John!! I'm looking forward to seeing how it develops!!
If I may, today its not so much what I did ON my layout, but what I did FOR my layout.

I finally purchased a MTH Premier Bombardier 4-car set for my local South Florida commuter railroad, Tri-Rail. Got it today in the store from Bill and the guys at Ready To Roll in Miami. No place or space to run it yet (we're in the process of moving again) but these items sell out quickly and when they do show up on auction are ridiculously overpriced. Don't have the locomotive to pull it either ![]() . I'll purchase the GP 40 in the next month or so.
. I'll purchase the GP 40 in the next month or so.
Now I have both an O and HO (which the coaches are illuminated inside) Tri-Rail sets!
Attachments
Images (1)

Looks great, Kevin! One piece at a time!!
I’m out of town this weekend, so the only work on my layout gets done in my head! But the advantage to getting out of town is visiting other hobby shops. And I found a Williams six car NP aluminum set. I thought I was in heaven till I noticed the trucks - they’re milky minty green! And they are molded inexpensively too. I’ve got to open my books, but I don’t believe the NCL even ran on silver trucks, I’m sure they were black. So if I make the purchase am I headed for a really painful job of truck replacement or painting - I am a three rail toy train operator, but my heart is still in St. Paul! (Lionel’s zephyr cars also had cheapened trucks if I remember correctly) the trucks from the 2500 series aluminum cars were the best! WhT are your thoughts guys?
Former Member
I am kinda partial to the trucks on AMT aluminum passenger cars. Nice detail, flexible for track deviations....
Never got back to the layout last night but this morning I got the track down. Marked off where the buildings will be in pencil and then got the plaster wrap out and covered the table. Now just waiting for the plaster to set up and dry and I can start laying down Gypsolite. I have some Balsa wood left over so I am going to make a curving dock off the Creamery so I can set two cars there. Pics.............Paul


Attachments
Images (5)
Last night I unpacked the rest of my York loot. Ran trains and took a few photos. Had BIG fun!!!


Attachments
Images (5)


All those scenes look great, Matt!


fl9turbo2 posted:
latest addition to my construction area
Man, talk about some heavy lifting...!
Mike ![]()
I didn't do much. I just put in my first power drops to one location and fastened down the track with GarGraves track screws. I used 4 screws here at the joint where my power drops are, but only 2 at the other joints of my 3/4 curve. They seem to hold the track down fine.

Attachments
Images (1)

After supper, I decided to bring my buildings down out of the attic, where I put them for safe keeping while heavy construction was going on. I arranged some of them on the lower town site along with a few operating accessories I had in a bin in the garage. I have more, and I will have an upper town. This is just to start thinking again about what will go in each town and how it may fit. The two sidings are not fastened down and can be moved to accommodate other building arrangements. It was a happy time getting a start at visualizing what it may look like. One thing I do know is that I want the operating accessories near the front so this little 61-year old boy can play with them, and the more realistic buildings and scenes in the background so the adult me can overlook the accessories and think he is up in the West Virginia mountains along the Western Maryland or Baltimore and Ohio back in the 1950s.


Attachments
Images (2)


Ok Guy's a lot has been done today! A lot of great work! So here I go if I didn't like your post its because I am tired and missed it! LOL![]()
Paul, the track work looks great! I also like the placement of your buildings! Things are coming right along. You blew me away with the Crane, man is that so cool! Where did you get it? Please don't say Menards! LOL![]()
Patrick, I sure enjoy all the pictures you post of your layout! I can tell it would be a fun place to relax!![]()
Matt, I just love how you have pets on your layout! Sure brings thing to life!![]()
Mark Power to the rails is a great step in the right direction! Then the building is just and extra for the day! Great Job!![]()
All I did was open boxes I have had packed for over a year just to see what I really had! After I packed everything back up I noticed I missed 4 more boxes that were full of box cars! LOL Here are a few pictures of what I have!![]()


 This doesn't include the stuff in the house! Once its in the new train room the CEO is going to be so happy!
![]()
Attachments
Images (5)
Thank you, Mike!! Yes it wasn’t a great day to be outside, so good day in the train room. High was 43. Snow flurries when we went to church. I let the dog out and she didn’t stay out long.
Mike, so you had stuff stashed away in boxes too! Nice! I have a crane too, but don’t think I will use it on this layout.
Spring has finally arrived and I have been taking advantage of the warm weather to complete the Minntac taconite plant which is located on the summit of Mountain Iron. The summit has been in the garage for electrical work, ground cover and forestation. It even spent some drying time out in the warm spring sunshine. The building and yard lighting is functional and more than 125 trees have been planted. It will soon to be back on the layout awaiting final landscaping and additional forestation. I received one loan palm tree amongst a mixed order of trees from Amazon. I will plant it on the layout as a challenge for visitors - Find the lone tree that does not belong in northern Minnesota. The palm will move around the layout from time to time. This will be my version of “Where's Waldo.”
My next step is to relocate the summit back on the layout for additional tree planting and landscaping. Then I plan to hookup wireless DCS.
Cheers to all and to the progress that has been recently posted.
Dave

Cork foundations for some of the plant buildings.

Building placement - final check.


Added ground cover after completing electrical wiring.

Enjoying some springtime sun drying.

Lighting check - daylight.

Lighting check - nighttime.

Beginning of forestation.


Wayward palm tree in Northern Minnesota!

Attachments
Images (12)
Mark Boyce posted:Mike, so you had stuff stashed away in boxes too! Nice! I have a crane too, but don’t think I will use it on this layout.
I bought the crane cause it was a good price, I will have to make a place for it. After looking at all the stuff I can see I am going to have to do some changes to my plan!![]()
No pictures, but I finally have the power for all four of my districts all sorted out. When we were wiring, a friend came over to help. I made a bad strategic error of allowing him to terminate the feeds. Either the wiring plan didn't make sense to him, or he was not very diligent in his efforts. FWIW, feeds 10,11,12, etc. went to district "1", 20, 21,22, etc. to district "2", and so on. Made sense to me.
Three of four districts had feeders that were all crossed-up. Back-feeding TIU channels really makes for a mess when you're trying to run DCS.
The only apparent casualty is one TIU Variable output channel will only work in fixed mode now. Not the end of my day as I don't plan to run anything in conventional on this layout anyway.
Lots of great stuff going on folks
Mike and Mark looks like Christmas in your houses.
Bob
Darlander, I’m hoping you are sending that warmer weather to Western Pennsylvania! The scene looks great! One lone palm tree in Minnesota!! That’s great!
Gilly, Congratulations on progress with your power districts!
RSJB18 posted:Lots of great stuff going on folks
Mike and Mark looks like Christmas in your houses.
Bob
Yes, it seemed like it!!
Mark, the area is taking shape with all the buildings. Good job so far............Paul
Went to the CAMRC show in Charleston with my son on Sunday. It was a nice show, had nice HO and O gauge displays, and had good supply of vendors. Mostly saw HO stuff, but they had a few people selling O stuff as well. I honestly think I spent more in gas getting there/home than I did at the show*. Did walk away with a vehicle and a nice trackside detail item (I'll take a photo later) along with the number of the guy who makes them ... I may request some custom work done in the future when I get the layout finally sorted out ... I have so much stuff crammed onto the layout at this point that there is no more room for anything that has a width larger than 2.5".
*My goal was spend time with my son, and then to possibly get vehicles and people, and I didn't see anyone selling people that I wanted.
paul 2 posted:Mark, the area is taking shape with all the buildings. Good job so far............Paul
Thank you, Paul!
Well not on the layout but under it I guess. The wife had a girls weekend away so I used that time to organize the basement and everything that was underneath it. I was getting tired of going through box after box looking for stuff that I knew I bought but just couldn't find. (Small electronics was the real pain) So I dumped everything out and started to categorize it. Good thing the wife wasn't home as it was a huge mess. Surprisingly, in a good way, I found a lot of people and vehicles that I had completely forgotten about along with 2 korber building kits.
With the day turning out to be nice I got down to the layout after breakfast and added plaster to the table and painted the foot prints for the buildings black. Got to go outside and do some yard work but I hope later today to add color to the plaster if it is dry by then. Pics.................Paul


Attachments
Images (3)
Looking good Paul. Every available square inch is being put to good use in that basement for sure.
I'm liking the plaster cloth technique. I may try that on my layout too. I've been using grass paper in some areas but it doesn't look very realistic IMHO.
Bob
Mark Boyce posted:Darlander, I’m hoping you are sending that warmer weather to Western Pennsylvania! The scene looks great! One lone palm tree in Minnesota!! That’s great!
Gilly, Congratulations on progress with your power districts!
Mark, If it is OK with you, we're keeping the warm weather here for a while. Will send it on in JUNE! It has been a tough spring. Dave
darlander posted:Mark Boyce posted:Darlander, I’m hoping you are sending that warmer weather to Western Pennsylvania! The scene looks great! One lone palm tree in Minnesota!! That’s great!
Gilly, Congratulations on progress with your power districts!
Mark, If it is OK with you, we're keeping the warm weather here for a while. Will send it on in JUNE! It has been a tough spring. Dave
Ha, ha! I don’t blame you!
Yes it has been a tough spring here too!
Bought a few KwiKonnect 2-pin connectors from Model Power. They seem like an ideal way to get some of my accessories connected without having to use a wire nut between my 14/16/18 gauge track wire and those puny wires that come with a majority of the Lionel and MTH accessories (as well as the Model Power LED figures I recently purchased).
Darlander, Your work looks wonderful! It's hard to believe its in your garage, as it looks fine by it's self! Once again I think everything looks great and love the night picture!![]()
Gilly, I sorry about the electrical problem, but and glad you got it fixed! I know its going to be a nightmare for me!![]()
Bob, a lot of the stuff I had forgotten I had ever bought! LOL![]()
Paul, the Plaster is looking great I sure like how it turns out! After you put the cloth down, what method do you use for the molding compound?![]()
![]()
Mike, I was using a spatula but now for the ground areas I am using a plastic spoon. When I do the hills and cliffs I use the spatula..... Paul's
Thanks Paul! With the spoon I guess you put a dab down and put an indentation in it?![]()
Mike, I spoon it out of a small mixing pail and then after putting it on the plaster wrap I use the bottom of the spoon and sort of spread it around. Today the postman brought another set of die cast Weaver trucks I got off the Bay. So the plaster was dry enough that I got a coat of earth color on the plaster. Now I am going to let it dry all night, check it out tomorrow morning and add another coat of color. Pics.............Paul


Attachments
Images (4)
I got the rails on the new tracks painted so they match the "rusted" look of the other tracks. I'm hoping to paint the underside of the plywood I'll be using for the downtown area this weekend. Things should move along quickly once the painting is done. Waiting for paint to dry slows progress 😉.
Paul, that sure looks great!![]()
Lou, Waiting for paint give us time to do something else! Like Paul work on different section of the layout, while I use the time to play with my bulldog and have a beer! Sometimes wet paint can be a good thing! LOL![]()
mike g. posted:Darlander, Your work looks wonderful! It's hard to believe its in your garage, as it looks fine by it's self! Once again I think everything looks great and love the night picture!
Gilly, I sorry about the electrical problem, but and glad you got it fixed! I know its going to be a nightmare for me!
Bob, a lot of the stuff I had forgotten I had ever bought! LOL
Paul, the Plaster is looking great I sure like how it turns out! After you put the cloth down, what method do you use for the molding compound?
Thanks Mike! The taconite plant is located in a darker area of the room so the plant lighting will show up even in daylight. I do like the lighting effect from the yard lights. They came from China, $14.95 for 10 and that included shipping. Can't beat the price and quality. As far as the garage is concerned - the work was done in the clean corner of the garage!
Dave
Put out people ...

Placed vehicles...
And put out trackside details ...
And then brought my son out to run trains... until the wife came out and started saying "Is that new? When did you get this? I dont remember seeing that last time." So much for my shop being a place of refuge. I guess I'll start going drinking with the guys at night.
Attachments
Images (3)
The DeWitt Clinton is back home home at John D's dad's layout! ![]()

Here's some more happy snaps of Joe D's layout! Scenicking is by local artist Gene Austin. ![]()


Mickey Mantle says hi! ![]()


Attachments
Images (10)
Former Member
looks like that layout could use a friendly and helpful flamingo ![]()
beardog posted:looks like that layout could use a friendly and helpful flamingo
Well, he DOES have the second largest collection of gi-raffes in Northwest Arkansas... ;-)
Mitch
Former Member
hmm give me his coordinates, oops, location


beardog posted:hmm give me his coordinates, oops, location
You can write him c/o the Fortescue Foundation. I'll pass any itinerant flamingos along. ![]()
jgtrh62 posted:Cool layout M, great scenicking.
Scratchbuilt, to the best of my knowledge. ![]()
Mitch
@M. Mitchell Marmel, is that your first time to Dad's layout?
Let me share a bit about this layout. Dad's layout is about 17 x 21. It is named "Grandpa's Wine Cellar Trains." You can read more here: http://winecellartrains.com/
There are three operating levels. The main level is 3 loops. Second level is his "Vintage Level" and is two loops of tubular track running his and his brother's original Lionel trains from the 50s/60s (the exact ones he played with as a kid). The third level is "The Mountain" with a W&ARR General Style train weaving in and out of a mountain. Inspiration for this level was the opening scene of Support Your Local Gunfighter.
All of his layout is conventional locomotives controlled via PLC (Programmable Logic Controller--typically used to control automated manufacturing equipment). There are about 9 PLCs around the layout.
This scene:
This is the far end of the "Trolly Loop" where the Gene D. Austin Train Museum is. The DeWitt Clinton hangs out at the museum and every minute or so, the trolley gets out of the way, a special announcement is made for all to board the DeWitt Clinton and off she goes around the table. This is fully automated, of course!
The museum was a Rico Station kit that Mr Gene bought when he first met my dad. I was in town visiting the day it was delivered. This was the first and last kit Gene will ever build. He hated it. He's been scratch building dioramas for years for his photography career (http://www.genedaustin.com/). Following someone else's instructions is not his style. Mr. Gene bought this DeWitt Clinton because it looked good in front of the museum. When he was done photographing it, he just gave it to Dad! A friendship was born.
One day, Dad and Mr. Gene were eating lunch and there was a painting of a barn scene hanging on the wall. One thing led to another and this is the physical embodiment of that photo. This is the first "O-Scale" diorama Mr. Gene ever built. No measurements, just instinct and the memory of the painting. Mr. Gene was hooked! Dad had an empty train table. The rest is history!

Dad doesn't remember if these trees are store bought or custom. Most of the trees Mr. Gene uses are store bought (JTT Microscale) but he heavily modifies them.
If you watch any of the Thomas the Tank Engine cartoons, look for the grist mill in the opening credits. It was the inspiration for this scene:
This is my daddy! Seems like Mitch sees him more than I get to.
Ok, one last story. The propane tank next to this house was a gift from me to Dad a few years ago. I got the idea from Tom Groff at Choo Choo Barn. It is built from the packaging of some O-scale One Direction figures he found at 5-Below. He showed it to me and I knew I had to build one for Dad. MANY years ago, we were living in southern Arkansas and had a propane tank just like this fueling our home. One Christmas, we went to NJ to see family. On Christmas morning, we got a call from our neighbor who came over to feed the dogs. A pipe froze and burst and flooded our sunken living room and destroyed the presents Santa left for us for when we returned. Turns out, the propane tank ran out, but the gauge still read 80%. The delivery guy didn't think anything of it and just drove on. When we got home, Dad suspected the float was stuck. With the manager of the propane company by his side, Dad grabbed a hammer and walked over to the tank, gave it a quick rap on the side and the gauge dropped to 0. In the below scene, you can see Dad, hammer raised, walking over to the tank to check the level.
That reminds me, I need to go check the level in my tank...where's my hammer?
An interesting and charming read, John D. I enjoyed it very much and especially appreciated the photos highlighting your narrative points and explaining scenic inspirations. And your father's wonderful smile is beyond description, telling of many joys and satisfactions in his life.
This was so enjoyable, maybe you should start a thread entitled "My Dad, Me, and Trains," inspired by your posting here.
I'm glad you made the effort to tell us this story.
With respect and applause, FrankM
Moonson posted:An interesting and charming read, John D. I enjoyed it very much and especially appreciated the photos highlighting your narrative points and explaining scenic inspirations. And your father's wonderful smile is beyond description, telling of many joys and satisfactions in his life.
This was so enjoyable, maybe you should start a thread entitled "My Dad, Me, and Trains," inspired by your posting here.
I'm glad you made the effort to tell us this story.
With respect and applause, FrankM
You're too kind. Of course the photos were snapped by @M. Mitchell Marmel. My handiwork is under the tables. At 40, I'm still considered "young and dumb" in my dad's eyes, so I get to crawl under the layout. From time to time, I have a good idea that he steals.
I come from a long line of story tellers. If there's anything we DiMaggio's love, it's a good story. I would like very much to do a narrative on Grandpa's Wine Cellar Trains. Of course, Dad would love to tell that story as well!
Nick R, I like your launch area. Interesting engine. I was looking for an Air Force engine because my daughter was in the Air Force. Did you make that one yourself?
Deuce posted:Put out people ...
Placed vehicles...
And put out trackside details ...
And then brought my son out to run trains... until the wife came out and started saying "Is that new? When did you get this? I dont remember seeing that last time." So much for my shop being a place of refuge. I guess I'll start going drinking with the guys at night.
Showed my wife your post and she just laughed! I think thing are looking really nice!![]()
Mitch and John- great stories from both of you.
John- sounds like you and your dad have a lot of fun together. The propane tank story was hilarious ![]() (I'm sure it wasn't to you and the family at the time). Great layout too.
(I'm sure it wasn't to you and the family at the time). Great layout too.
Bob
mike g. posted:Deuce posted:Put out people ...
Placed vehicles...
And put out trackside details ...
And then brought my son out to run trains... until the wife came out and started saying "Is that new? When did you get this? I dont remember seeing that last time." So much for my shop being a place of refuge. I guess I'll start going drinking with the guys at night.
Showed my wife your post and she just laughed! I think thing are looking really nice!
Face it Deuce- as sneaky as we think we are, our wives always know what we are doing. Might as well come clean and admit it.
Nick, you should think about applying to NASA! Things are looking really nice!![]()
John D. you are one lucky man to have such a great Dad and all the great memories ! He has such a great looking layout, I can see why Mitch spends a good amount of time there!![]()
John, side note, did you say somewhere you worked for a lighting company?![]()
darlander posted:mike g. posted:Darlander, Your work looks wonderful! It's hard to believe its in your garage, as it looks fine by it's self! Once again I think everything looks great and love the night picture!
Gilly, I sorry about the electrical problem, but and glad you got it fixed! I know its going to be a nightmare for me!
Bob, a lot of the stuff I had forgotten I had ever bought! LOL
Paul, the Plaster is looking great I sure like how it turns out! After you put the cloth down, what method do you use for the molding compound?
Thanks Mike! The taconite plant is located in a darker area of the room so the plant lighting will show up even in daylight. I do like the lighting effect from the yard lights. They came from China, $14.95 for 10 and that included shipping. Can't beat the price and quality. As far as the garage is concerned - the work was done in the clean corner of the garage!
Dave
Dave you wouldn't happen to have a link of where you got the light would you?![]()
coach joe posted:Nick R, I like your launch area. Interesting engine. I was looking for an Air Force engine because my daughter was in the Air Force. Did you make that one yourself?
Thank you, the engine is just a dummy I found for 10 bucks at a train show. A little paint and some decals is all. I spent some time in the Air Force as well at Vandenberg AFB in California so Ive wanted to incorporate a rocket launch site for a long time.
Nick
RSJB18 posted:mike g. posted:Deuce posted:Put out people ...
Placed vehicles...
And put out trackside details ...
And then brought my son out to run trains... until the wife came out and started saying "Is that new? When did you get this? I dont remember seeing that last time." So much for my shop being a place of refuge. I guess I'll start going drinking with the guys at night.
Showed my wife your post and she just laughed! I think thing are looking really nice!
Face it Deuce- as sneaky as we think we are, our wives always know what we are doing. Might as well come clean and admit it.
Mike: Thanks. I'm starting to get into the scenery now that the table is crammed with items. I actually had to pull some things off to make others fit ... so now I've clearly hit "critical mass" for this table. So now it's time to decorate ... people, ballast, shrubs, and other items.
Bob: I shall admit NOTHING! Since she last inquired about my purchases, I didn't buy anything train- or building- related. It was all either purchased and in transit or stored under the table waiting to be placed. ![]()
Got the second coat of earth color on. Left areas with the first coat because I will be placing cinders down for the the truck traffic. Not sure if I will get back to adding any ground cover today. Last evening for the Tuesday night crew till September but the weather looks like rain for the next three days so I could get in some good work on the layout. Also have to make up some bumpers for the ends of the siding Pics.....................Paul


Attachments
Images (7)
Deuce, I just keep things out in the garage, and when the wife notices something new I just tell her its been in a box out in the garage! I can tell when it work and when it doesn't from her look she gives me! LOL![]()
Paul, things are really coming together nicely! Keep up the good work ! But most of all have fun tonight as it sounds like a long dry spell till the next Tuesday night with Trains!![]()
mike g. posted:
John, side note, did you say somewhere you worked for a lighting company?
I work for Lutron Electronics. We are a lighting control company. email me if you have specific questions!
Former Member
no wife, happy life
John and Mitch, great stories about John's dad and his layout! The layout looks great! Is there going to be some land someday under that trestle that is hanging in mid air? ![]()
![]()
Paul, the scene is looking good! No Tuesday night group until September! I hope everyone has a great time tonight!
Mark Boyce posted:John and Mitch, great stories about John's dad and his layout! The layout looks great! Is there going to be some land someday under that trestle that is hanging in mid air?
Yup! I believe that's going to be some sort of gully or gultch or some other western thing that would warrant a trestle bridge. Obviously it's not structural.
I think Mr. Gene has the dimensions and is working on it.
Sounds like a plan, John! Thank you!
Nick, first of all, great work on your "launchpad" addition! What are you using for your extra ties?
Mike ![]()
LoadMaster posted:Nick, first of all, great work on your "launchpad" addition! What are you using for your extra ties?
Mike
Thank you! Im using 3/8 basswood strips cut 2" long. The 1/2" matches up better with the original tubular "ties" but I prefer the look of the skinnier ties. Im really happy with how its coming out. Quite a difference from "stock" tubular track.
Nick
mike g. posted:darlander posted:mike g. posted:Darlander, Your work looks wonderful! It's hard to believe its in your garage, as it looks fine by it's self! Once again I think everything looks great and love the night picture!
Gilly, I sorry about the electrical problem, but and glad you got it fixed! I know its going to be a nightmare for me!
Bob, a lot of the stuff I had forgotten I had ever bought! LOL
Paul, the Plaster is looking great I sure like how it turns out! After you put the cloth down, what method do you use for the molding compound?
Thanks Mike! The taconite plant is located in a darker area of the room so the plant lighting will show up even in daylight. I do like the lighting effect from the yard lights. They came from China, $14.95 for 10 and that included shipping. Can't beat the price and quality. As far as the garage is concerned - the work was done in the clean corner of the garage!
Dave
Dave you wouldn't happen to have a link of where you got the light would you?
Mike, The lights are OO/HO scale and they were on ebay. Web browser: Model train street lighting on ebay. When you are on ebay search, type: LQS12 10pcs Model Railway Train Lamp Post, You will see a whole host of LED pole lighting options. The building bracket lamps: 5 x OO/HO scale street bracket light model wall lamp posts. Again, many varieties available. You can also specify O gauge and you will find a large array of lighting options. Good luck and Happy lighting! Dave
darlander posted:mike g. posted:darlander posted:mike g. posted:Darlander, Your work looks wonderful! It's hard to believe its in your garage, as it looks fine by it's self! Once again I think everything looks great and love the night picture!
Gilly, I sorry about the electrical problem, but and glad you got it fixed! I know its going to be a nightmare for me!
Bob, a lot of the stuff I had forgotten I had ever bought! LOL
Paul, the Plaster is looking great I sure like how it turns out! After you put the cloth down, what method do you use for the molding compound?
Thanks Mike! The taconite plant is located in a darker area of the room so the plant lighting will show up even in daylight. I do like the lighting effect from the yard lights. They came from China, $14.95 for 10 and that included shipping. Can't beat the price and quality. As far as the garage is concerned - the work was done in the clean corner of the garage!
Dave
Dave you wouldn't happen to have a link of where you got the light would you?
Mike, The lights are OO/HO scale and they were on ebay. Web browser: Model train street lighting on ebay. When you are on ebay search, type: LQS12 10pcs Model Railway Train Lamp Post, You will see a whole host of LED pole lighting options. The building bracket lamps: 5 x OO/HO scale street bracket light model wall lamp posts. Again, many varieties available. You can also specify O gauge and you will find a large array of lighting options. Good luck and Happy lighting! Dave
Thanks Dave! Your the man! I am sure a lot of other guys will find this information useful!![]()
Deuce posted:Put out people ...
Placed vehicles...
And put out trackside details ...
And then brought my son out to run trains... until the wife came out and started saying "Is that new? When did you get this? I dont remember seeing that last time." So much for my shop being a place of refuge. I guess I'll start going drinking with the guys at night.

Attachments
Images (1)
Sgt Schultz is timeless!! 😂
Former Member
drinking with the guys always worked for me, the wife complains more, but make sure
you are too drunk to care
Former Member
actually drinking with the girls was even better


Attachments
Images (5)


Very nice, Brian!!
thank you Mark !
That engine is gorgeous! Nice pictures Brian...
Mike ![]()
thank you Mike !
Looking good Brian! You must have a spare on the back of that car as I don't see any white walls! LOL Way to keep it on the road!![]()
Mike G, knowing Brian and seeing the lake pipes on the side, he’s probably got slicks on that old street rod. ![]()
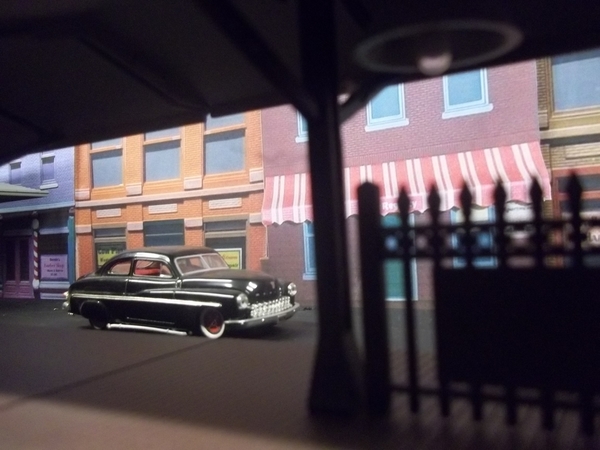
Grocery shopping this morning I found these cars in the card section. When I got back home I had to do laundry so that gave me time to do something on the layout. I decided to put some trees in to break up the area between the last two buildings I put in. I got some dirt and ground cover down. Still have to add some shrubs and ground foliage. Pics Paul


Attachments
Images (8)
TedW posted:Mike G, knowing Brian and seeing the lake pipes on the side, he’s probably got slicks on that old street rod.
Ted, you may be right. He sure sounds like a hotrod! Just look at his forum name! LOL
Nice cars, Paul and Brian. I found a bunch at Rite Aid and Walgreens here in Western Pennsylvania. I stayed away from the pink however. ![]() They are all packed away in the attic, I forgot to bring them down when I got the buildings don from the attic last weekend. I'll have to get them.
They are all packed away in the attic, I forgot to bring them down when I got the buildings don from the attic last weekend. I'll have to get them.
mike g. posted:TedW posted:Mike G, knowing Brian and seeing the lake pipes on the side, he’s probably got slicks on that old street rod.
Ted, you may be right. He sure sounds like a hotrod! Just look at his forum name! LOL
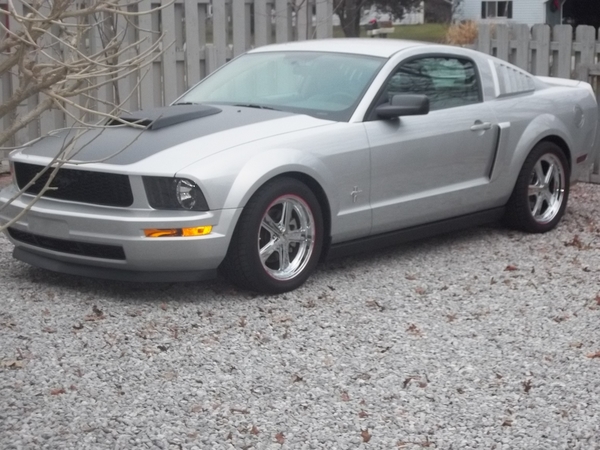
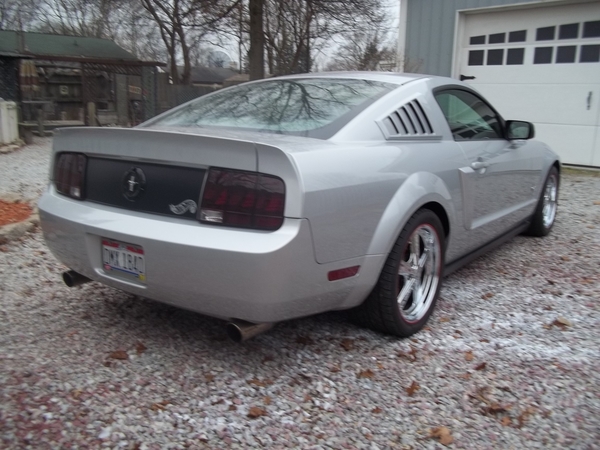
yep, I like building "hotrods"....


got the car a little dirty train watching... ![]()
Attachments
Images (9)


Does anybody else remember when this thread used to be about what you did on your layout today? It seems like it is deteriorating into another photo thread. Do we need to start a new what did you do on your layout thread?
Art
Former Member
I think it pretty much sticks to the thread, every thread moves to a siding once in awhile. Otherwise it
would be pretty boring. But of course you are always free to start your own new thread.
Made some headway this morning. I added more ground foam and put down cinders for the roads. Still have more to do but I have to go to Parma today to help set up for the TCA show tomorrow in Parma at the UAW hall. A few pics of so far.........Paul


Attachments
Images (7)
The scenery is looking good, Paul! Have a good day at Parma!!
yes- Looks great Paul. You are a scenery building machine. ![]()
Looking good, Paul. Enjoy Parma.
Art
paul 2 posted:Made some headway this morning. I added more ground foam and put down cinders for the roads. Still have more to do but I have to go to Parma today to help set up for the TCA show tomorrow in Parma at the UAW hall. A few pics of so far.........Paul
Looking good.
What are you using for black ballast? I plan on rearranging the tracks in the freight yard on my layout this coming winter and I'd like to use black/dark gray ballast when I do.
Oh, Paul another thing. I would like to make a trip out to the Parma show someday. We've talked here about visiting your layout and others in Northeast Ohio. Parma and Kirkland are also on my long list. I may take Social Security in the fall and work even less hours than I do now. If so, the time is short when I could fit some of those things in.
LOU 1985, I am using Rubber ballast from Brummy's. For the road areas I use his fine ground black............Paul
Mark, I think I can speak for Bryan. You do not have to wait for the train shows to come. We can always possibly do a day without a train show involved...................Paul
Paul, your work is looking just amazing! You make everything look so easy! Keep up the great work!![]()
I purchased this MTH Railking Amtrak FP45 a while ago. I was looking for a reasonably priced Amtrak loco with speed control and Phase I paint. This unit fit the bill. Once I took delivery, things began to get curious(er).
1st thing I discovered was that apparently Amtrak did not own any FP45s. Oops.
What Amtrak did have was the ill-fated SDP40F. Seems as though MTH is quite aware of this as they gave this model the road # 642 which was in fact, (according to the historical Amtrak roster) an SDP40F locomotive. Here it is:

Although similar, one distinguishing difference between the FP45 and SDP40F is the front hand rail. FP45 yes, SDP40F no.

MTH conveniently omitted the front hand rail (FP45) out of the catalog photo. The locomotive as sold has the (FP45) front handrail.

Very confusing. Anyway, I set out to right a wrong as I saw it and make ol’ #642 look more like it was supposed to – an SDP40F (IMHO).
First to go was the “front porch railing”. This was easily removed.

Now we’re getting somewhere.
I also couldn’t help but notice that both the FP45 and SDP40F have additional headlights in the front cowl. MTH cast these into the model but didn’t bother to illuminate them.

Problem solved:

Here it is, the SDP40F (or pretty close) that could have been.
-RM
Attachments
Images (6)


I didn't do anything on my layout today as I don't have one yet but I did sit and doodle and I looked around my small space and tried to come up with a different track plan than the one I originally had drafted for me. I keep looking at it and I'm trying to figure out how I can downsize it so I can add some of the great structures I have waiting to be built. It's getting closer....
paul 2 posted:Mark, I think I can speak for Bryan. You do not have to wait for the train shows to come. We can always possibly do a day without a train show involved...................Paul
I appreciate that Paul! Thank you very much! Maybe we can do it this summer
Add Reply
Sign In To Reply
