At Gunrunner John's suggestion, here is a featured thread for uploading old instruction manuals and other out-of-print reference documents.
Replies sorted oldest to newest
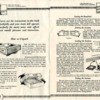
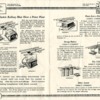
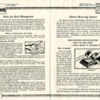
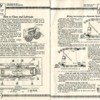
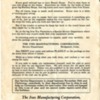
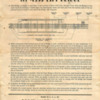
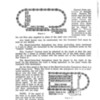
I have a few old tinplate manuals. This was my dad's copy c. 1925
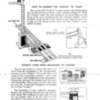
HOW TO OPERATE YOUR IVES RAILWAY SYSTEM
Click on pictures to enlarge and read.
Attachments
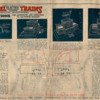
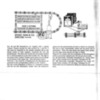
Lionel 840 Power Station wiring diagram:
Attachments
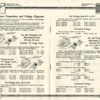
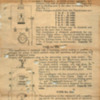
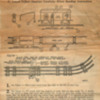
Ives prewar Transformer wiring Instructions:
Attachments
Wiring Marx 1392 Lift Bridge:
Attachments
This one is not strictly electrical, but it's pretty cool. Another of my dad's originals.
American Flyer #4122 Standard Gauge Mail Bag Set instructions:
Attachments
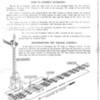
More tinplate. Lionel 80, 080, 084, and 82N Semaphores, wiring diagrams:
Attachments
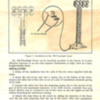
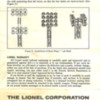
Here's one on the Lionel #195 floodlight tower,
Attachments
Any chance you could just embed the thumbnails and not expand all the photos? It takes a lot longer to find what you're looking for if each post is pages long. With a description, there's no need to actually have the expanded full-size graphic.
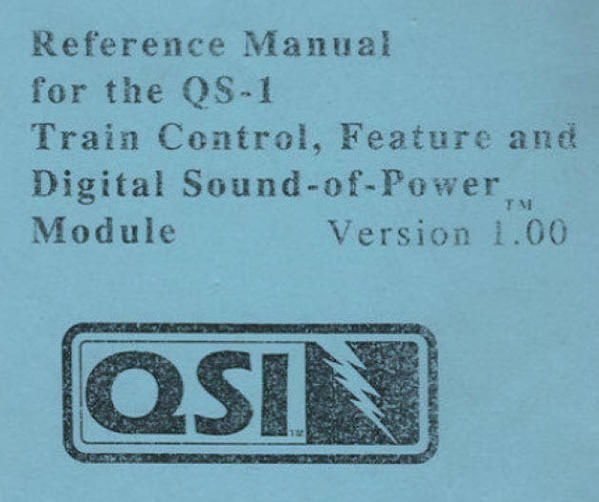
Here's a QSI manual for the below referenced system for anyone interested. The PDF file is attached.
Attachments
Excellent starting point for toy train layouts. This booklet is Dad's copy that was with my starter trains.
Attachments
Just a caveat guys: be careful about posting materials that have been the subject of copyrights. I expect most Lionel pubs have been. I express no opinion on whether any copyrights have expired or not.
Expecting that there will be a fusillade of complaints, I state that I am only raising a caution flag and will not partiicpate in any discussions. If you don't like copyrights, take it up with your elected lawmakers.
Here is the Popular Science Reference Library #15 Manual.
How to make Common Repairs for Electric Trains
Attachments
Cooper Bussman catalog of automotive circuit breakers for your layout or post war transformer.
FYI: ATC style blade circuit breakers fit common female spade connectors!
Attachments
Here is a PDF version of Hojacks original Ives instruction manual.
"How to Operate Your Ives Railway System"
Attachments
Great idea and I can see I'll be busy scanning numerous old manuals.
SUGGESTION for all: Please include the year of publication in the original post. Many of LIONEL's operating manuals use similar covers and titles. Perhaps others do as well; probably easier to include the year in the original post than leaving it in the thumbnail.
Here are the Protosound 1 and QS2-Plus command manuals I scrounged from somewhere years ago.
Attachments
Here's a PDF of the Marx 439 Semaphore Instructions.
Attachments
there should be links to Dale's stuff here too.
like this one:
http://www.jcstudiosinc.com/LE...r-Cars-and-Buildings
I had to do a search for it.
I hope to add some of Stan's and G's too!
Hey, the heading didn't say old?? ELECTRICAL REFERENCE MATERIALS & MANUALS
http://www.jcstudiosinc.com/Co...-Using-12V-LED-Strip
I just used Stan's post to do some MTH G scale cars along with help from CRH:
Attachments
At Gunrunner John's suggestion, here is a featured thread for uploading old instruction manuals and other out-of-print reference documents.
Rich:
Back in the ?90's? OGR had centerfolds - the train kind - of Lionel parts lists, work sheets etc. Maybe add those to this thread????
Joe
PTC and TVS - Some Commonly Used Sizes and Part Numbers (from other threads)
This started in another thread and some thought it would good for future reference. It's a list of some commonly used resettable fuses and TVS diodes to help protect against damage to electronics. I will add to the list when/if more information becomes available.
Original thread here: Electric RR and PTC Resettable Fuses - (GRJ) - gunrunnerjohn
PTC resettable Fuse - 750mA hold, 1.5A trip for ERR Cruise Commander Lite - Digi-Key: MF-R075-0-99-ND - Notes: These go in one of the motor leads to protect a the drivers from a stalled motor. Only used for the Cruise Commander Lite. (GRJ)
PTC resettable Fuse - 130mA hold, 250mA trip for passenger car LED lighting - Digi-Key: 490-4808-1-ND - Notes: As long as the trip is around 250mA, the hold takes care of itself for LED passenger car lighting applications. (GRJ) Edit: 05-15-2021 - passenger car LED lighting - Stan2004 has pointed out in this thread MTH Passenger Car Wiring up in smoke that this PTC had been discontinued (but Digikey still had some in stock at that time). Here is a link to a replacement found and posted to that thread by GRJ, also from Digi-Key: 507-1332-ND - this one is also less expensive.
PTC resettable Fuse - 0.5A hold, 1A trip for Fastrack Uncoupler tracks drawing about 1.8A - Digi-Key: MF-R050-ND (other brands of un-coupler tracks may have similar requirements?) (Info - PLCPROF; Part #'s - NVOCC5, PLCPROF, GRJ) Update 09/20/2016 - Gargraves un-coupler tracks use approx. 2.1 amps and the old Lionel UCS tracks use approx. 1.2 amps. No info on recommended PTCs for these items, none have been tested. (Info - RJR)
PTC resettable Fuse - 50mA hold, 100mA trip for MTH smoke fan motors - Digi-Key: MF-R005-0-ND - (MTH smoke fan motors should not draw more than 50mA) (Info from a question in this thread started by WillyGee. (GRJ, WillyGee)
TVS Diodes are used to help guard against voltage spikes on a layout. Some recommended locations for them around a layout would be across the transformer outputs and across the tracks at each track power drop.
TVS - Conventional - Digi-Key Part Number 1.5KE36CALFCT-ND - 1.5KE36CA - 36 volt, bi-directional - Sized for a PWZW when the whistle button is depressed. This peaks over 33 volts if the compensation winding is considered. (Part number recommended by many, explanation by Dale H) (Digi-Key part numbers from GRJ)
TVS - Command Control - Digi-Key Part Number 1.5KE33CALFCT-ND - 1.5KE33CA - 33 volt, bi-directional - Sized for the modern 18 volt bricks. The 18 volts peaks a bit over 25 volts. (HiRailers Unlimited & Independent HiRailers Group, explanation by Dale H) (Digi-Key part numbers derived from GRJ's above for 33 volt version)
For the TVS, I believe the 1.5KE36CA is the most recommended here on the forum and also the most widely used as it seems it would be suitable for either the modern bricks or the transformers with whistle buttons.
In the thread: TIU no power through fixed 2 after spark there is discussion about using a 1.5KE39CA (Digikey: 1.5KE39CALFCT-ND) for folks using 19-22 volts for track power (Z-4000 at full power for example). The higher 19-22 volts are reaching the limits of the TVS supplied in TIUs (1.5KE33CA) and these may last much longer and still provide protection. Also, note that any power to Lionel command control equipped products should not exceed 19 volts maximum to the track. (Per Lionel instructions stating not to exceed 19 VAC or damage to the product may occur.)
Here's some added info on chokes used with DCS to help eliminate interference with the DCS signal from other devices. The thread is here: TIU Active vs Passive Mode DCS Signal Voltage. The part (selected by GRJ) is Bourns Inc. SRP1770TA-220M from Digi-Key. It's 12 amp and can be used on the TIU channel's full power which is a maximum of 10 amps. (Adrain! and GRJ)
Any and All corrections and/or additions welcome. They will be added as soon as I see them posted here or I get them via email.
I also posted this as an addition to the ELECTRICAL REFERENCE MATERIALS & MANUALS thread for Reference Only. Please, No additional Comments to that thread.
So we don't add clutter the 'Electrical Reference Materials & Manuals'thread with a bunch of unnecessary comments, please use this thread for further additions, corrections, discussion and any questions you might have. You can also email me with any corrections or additions. My email is in my profile. Thanks!
Last Updated 12/01/2019
Position sensor guide table suggested for posting on 6/15/18.
Attachments
gunrunnerjohn posted:
Hi, as a complete novice to 3rail trains this manual has helped me find the volume pot on my QS-2+ MODULE installed in my as new Weaver Reading Crusader locomotive.
Thank you for posting it.
Regards
Geoff Dobbin.
Electronics Projects Developed on the OGR Forum by OGR Forum Members
All projects listed here were designed and created right here on the OGR Forum by some of our very own talented forum members. There are some really good and very useful projects here.
The purpose of this list is to provide information on some of these projects and links to their threads where you can find more specific details if you are interested in a project. It's also to help others interested in the electronics part of the hobby and for those that would like to learn more about electronics and how they can be used on your layouts.
Each project listed below includes a link to the complete thread discussing the project design and creation. Also included is also a link directly to the post containing the design files for the circuit boards, parts list, etc. All links to the project files are current as of this post. As time passes a project may evolve with improvements and be updated. It's always important to check the individual project threads to be sure you have the most current information available.
This list was created from suggestions posted in this thread: Creating a List of Electronics Projects developed on the OGR Forum - Please post any comments or suggestions to the above linked thread linked.
Rod Stewart has graciously offered to assist other forum members wanting to build projects from this list by helping them order boards for their project. Details here: Who Needs Help Getting Project Boards Made? (For Those Who Are Not Comfortable With The Process).
For further discussion of any of the above projects, please post to the Project's respective thread linked below.
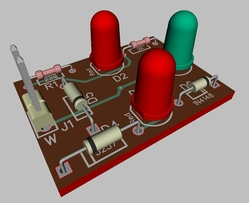
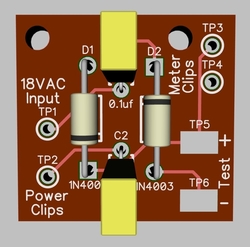
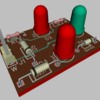
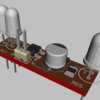
1. - Track Transient Spike Detector - Circuit: Stan2004 - Project: Rod Stewart - Added: Rod Stewart - Level: Beginning - Estimated Cost:
Truck or railcar mounted Track Transient Spike Detector you can haul around your layout. Two Red LEDs will flash when a spike is detected. It is compact and easy to build, a great beginner project. Uses all Through-Hole Components and requires only a few parts. Gerber Files are included for PCB ordering.
Link to Thread: Gerber files for Stan 2004's Track Spike Detector - Project Files Located in First Post of Thread
1.1. - Example Project using the Transient Spike Detector board - Project Built By: Rod Stewart
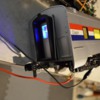
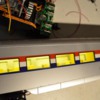
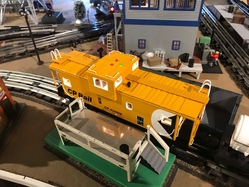
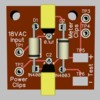
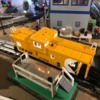
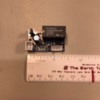
Rod came up with a great idea for using this little board and adding a neat feature on his layout! He has customized the tester PCB to fit in a caboose that can be pulled around the layout checking for spikes as it goes along. For more information on how Rod built this project, he has posted detailed instructions with pictures in the thread below. Here's a couple of pictures from Rod's thread.
Link to Thread: Track Spike Detector Board Mounted in a Caboose Cupola
2. - AGHR DCS Telemetry Train Rev 7 - Circuit: Adrian!: Project: Adrian! - Level: Experienced - Estimated Cost: $250-$300
A rail car mounted project to be run around a layout to measure DCS signals and help identify problems. This is a neat project, but will require some knowledge of programming as well an Arduino and Raspberry Pi. Probably for the folks that are somewhat advanced in electronics and also have some programming background. The thread includes links to parts used as well as some C code for the project.
Link to Thread: AGHR DCS Telemetry Train Rev 7 - Project Files Located in First Post of Thread
3. - 2 or 3 Aspect Block Signal LED's - Circuit: Rod Stewart - Added: Rod Stewart - Level: Intermediate - Estimated Cost: $4.62-$16.26
This project will control a 2 or 3 Aspect RailRoad Signal with Common Anode wiring typical of offshore aspect signals such as those sold by we_honest and JTD. It also has several nice features, AC or DC powered, isolated activation, manual activation (board powered) and adjustable timing. All Through-Hole components are used fro easier assembly. Bill of Material is included with pricing for both domestic or offshore components including circuit boards. User notes are included to help choose between different assembly options and methods of use. Many folks contributed ideas and suggestions to this project, including Stan2004, gunrunnerjohn, cjack, RTR12, and Rob Paisley who operates the Model Railroad and Misc. Electronics website.
Link to Thread: Updated: Build Files For 2-3 Aspect Signal Actuator; Common Anode LEDs; Video Added Project Files Only: Link to Project Files
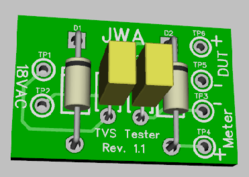
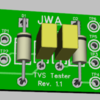
4. - Protection Against Voltage Spikes (TVS Tester) - Circuit: Stan2004 PCBs - gunrunnerjohn, rtr12 - Added: rtr12 - Level: Beginner - Estimated Cost: $1.50 - $3.00
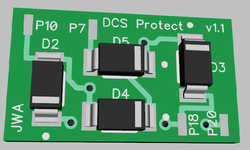
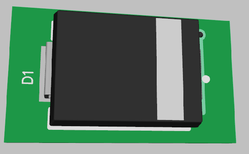
Thread title is a bit misleading. The result of this thread was a small project designed to test your TVS diodes which are used to help protect your trains' electronics. There is a Through-Hole version, good for Beginning level and an SMT (Surface Mount) version for Intermediate to Advanced level. Could also be a good project for learning to solder smaller SMT parts to PCBs.
Link to Thread: Protection Against Voltage Spikes - Project Files Only - Link To Project Files & Smaller Updated Version
5. - 1 Amp LED/Incandescent Lamp Flasher Using Mosfets - Circuit: Rod Stewart - Added: Rod Stewart - Level: Beginning - Estimated Cost: $2.05 - $7.62
This circuit flashes two lamps alternately at about 1 Hz. Speed can be varied by using different value components. Easy through-hole assembly. Cost to produce them is very reasonable. Boards can be ordered using the Gerber files included. This board works equally well with leds or bulbs such as the PW #154 Lionel crossing signal, which has no internal circuitry of its own. BOM's and User Notes are included.
Link to Thread: First Videos of 1 Amp LED Flasher Board Using Mosfets, now including gerbers - Project Files Only: Link To Project Files
6. - LED Crossing Signal Flasher Module - Circuit: Rod Stewart - Added: Rod Stewart - Level: Beginning - Estimated Cost: $1.00 - $4.75
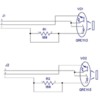
This is a lower powered LED Crossing Signal Flasher Module suitable for any dual led crossing signal that does not have built in flashing circuitry. Again the suggested values give you about a 1 Hz flash rate, but this rate can be changed by using different value resistors as detailed in the thread. Very easy to build.
Link to Thread: An Easy To Build DIY Trackside Crossing Signal Flasher Module, with Gerbers - Project Files Located in First Post of Thread
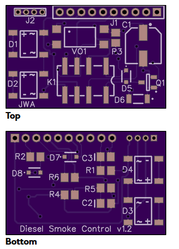
7. - Automatic Cab Light Control, Rule-17 Lighting, and Smoke Intensity Control for Diesels - Circuit: gunrunnerjohn - Added: RRDOC - Level: Intermediate - Estimated Cost: $2.15 - $4.40 for 3 PCBs
This is actually two separate, but related projects. This module senses voltage on loco motors, when the loco is stopped, a relay turns on the cab light, dims the front and rear headlights, and reduces the smoke intensity. GJR included Gerber files and BOM. This uses surface mount components. He includes a wiring diagram for TMCC diesels. Could possibly be adapted to other control systems. Also in this thread, a second smaller version without the smoke effects.
Link to Thread: Microcontroller To Control Lighting in Loco - Project Files Only: Link to Project Files & Smaller Version Files Note: These are PCB and Component Projects Only - No Microprocessor involved and No Programming.
8. - DIY Constant Current Passenger Car Lighting Module - Circuit: gunrunnerjohn - Added: Rod Stewart - Level: Beginning - Estimated Cost: Less than $3 per Board
Easy to build module with only 6 components, and easy Through-Hole assembly. Very nice beginner level project. (Rod says: If I can build them, anyone can! ![]() ) Cost is less than $3 a board, and could be reduced to about $1.00 with all offshore parts. User notes are included for even more assistance with building this project.
) Cost is less than $3 a board, and could be reduced to about $1.00 with all offshore parts. User notes are included for even more assistance with building this project.
Link to Thread: GRJ's Original DIY Constant Current PAX Car Lighting Module Files - DIY Project Files are in First Post of Thread - Gunrunnerjohn has posted this project on OSHPark, you can now order boards directly from this link: This Project on OSHPark - GRJ's post, including this link, is several posts down in the project thread.
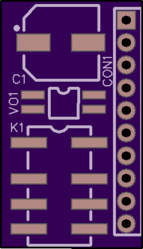
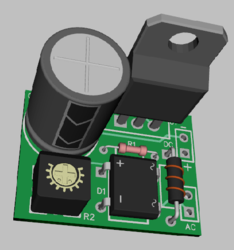
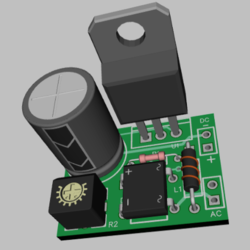
9. - AC-DC DIY LM317 Voltage Regulator Module - Circuit: Rod Stewart - Added Rod Stewart - Level - Beginning - Estimated Cost: $1.00 - $3.00
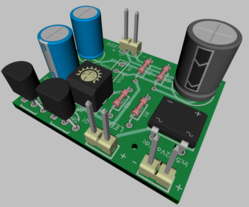
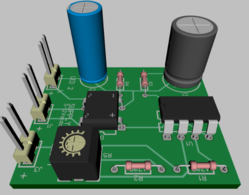
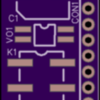
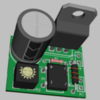
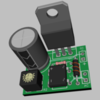
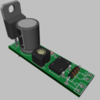
This is a small inexpensive, easy to build, very versatile little module, which offers DCS interference protection and is ideal for engine or railcar installation. There are many inexpensive DC-DC voltage regulators available, but this one will accept either AC or DC as an input with adjustable DC output. Using offshore parts it costs less than $1.00 to build! This project was adapted from GRJ's DIY constant current passenger car lighting board (with his permission).
Link to Thread: AC-DC LM317 DIY Voltage Regulator, Top Adjust Module Build Files - Project Files are in First Post of Thread
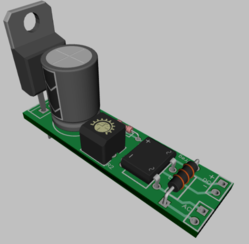
Revised Narrow Design. Recently, Rod created a narrow version of this project and posted it to a new thread with all the files for building them. The new PCBs are only 1/2" wide x 1-3/4" long. This board is identical to the one above in everything but PCB size.
The project is described and details can be found here: Narrow Version of DIY 317 Voltage Regulator Board, with Build Files
10. - Protection Boards For TIU ACT244 Chips And DCS Signals - Circuit: Adrian!, gunrunnerjohn - Added: rtr12 - Level: Advanced - Estimated Cost:
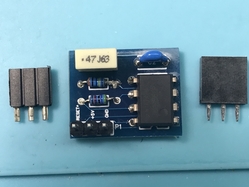
This project is for a board that can be added to your Rev L TIU to help protect it's DCS signal output ships against voltage spikes. Please see the thread for more details. There is a lot more to this project than can be summed up here in a brief project description. It's a fairly long thread, but Adrian! describes problems in the first post, the protection board is discussed and then later refined by gunrunnerjohn.
Link To Thread: Weak DCS Signals, Failed TIU Output Drivers, and Design Solutions Developed Under Collaboration Between AGHR and MTH - Project Files Only: Link To Project Files
11. - Design of a $10-20 DCS-TIU Port Tester Tool - Circuit: Adrian!, gunrunnerjohn, Stan2004 - Added: rtr12 - Level: Beginner to Intermediate - Estimated Cost: $14.00 each (in quantities of 5, parts from DigiKey)
This tool will check the DCS output signal of a TIU channel and indicate whether you have a good output signal. It helps you to easily find any channels on a TIU with weak outputs. It's a fairly small PCB and uses all Through-Hole parts for easy assembly. This thread contains all the information, instructions and files needed to build your own TIU Port Tester Tool. This item is also available as a kit. Please see main project thread for more details.
Link To Thread: Design of a $10-20 DCS TIU Port Tester Tool? - Project Files Only: Link To Project Files
12. - DCS Watchdog Signal Generator (for DCS Remote Commander Receiver) or Perpetual Barking Watchdog (PBW) - Circuits: Stan2004, gunrunnerjohn - Added: rtr12 - Level: Beginner to Intermediate - Estimated Cost: $7.50-$8.00 each (in quantities of 5, parts from DigiKey and Mouser)
Please Note: You Must have a DCS Remote Commander Receiver in order to use this device.
The PBW is added to a DCS Remote Commander receiver and will output a DCS watchdog signal about every second. You can then power a siding after your layout is operating and any parked DCS engine will come up in DCS command mode. There are two threads about this project, both worth reading. The first discusses the original concept and design. The second covers updating the original design. This thread contains all the information, instructions and files needed to build your own PBW. This item is also available as a kit. Please see the project threads for more details.
Link To Original Thread: Proposed Solution to DCS Watchdog in Yard Tracks (DCS-RC WD Gerber Files Added to First Post) - Link To Design Update Thread: PBW needed - Project Files Only: Link To Updated Project Files
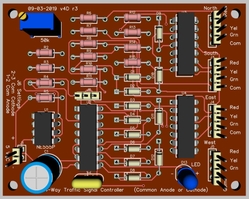
13. - 4-Way Traffic Signal Controller - Circuit: Stan2004, gunrunnerjohn, rtr12 - Added: rtr12 - Level: Beginner to Intermediate - Estimated Cost: Digikey parts shipped for one PCB are $20.00 (or $21.00 with IC sockets). PCBs are 5 for $7.24 from JLCPCB.
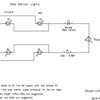
Here's a thread that covers a couple of different projects and contains a lot of good information as well. The final project was a 4-Way Traffic Signal Controller for use with either Common Anode or Common Cathode traffic signals. A couple of other projects are also discussed here, including a Knight Rider circuit. There are schematics for the Knight Rider project, but no PCB was made. Files and information is included for the 4 Way Traffic Light Project.
Link To Original Thread: Semaphore and 555 Timer Circuit - Project Files Only: Link to Project Files - The current design has been updated to include a few more features, but the new PCB has not yet been tested. It will be posted when testing is complete.
14. - Keep Alive for O Sized DCC Decoders - Circuit: Thor73 - Added: calvin - Level: Intermediate - Estimated Cost:
This thread covers a Keep-Alive circuit for DCC decoders to prevent dropouts from switches, bad track spots, etc. The thread covers the design of the Keep-Alive and discusses some different parts tested for the project. It also lists different timings obtained with different caps and the parts used in the final design.
Link To Original Thread: Keepalives, O-Sized - Project Files Located in First Post of Thread
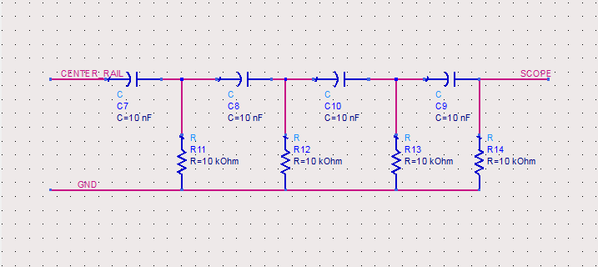
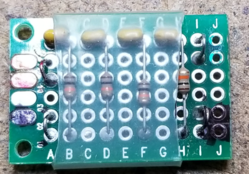
15. - High Pass Filter for Use in Measuring a TIU's DCS Signals Using A Scope - Circuit: Ardian! Added: Rod Stewart & rtr12 - Level: Beginner & Intermediate (Creating Project Board - Beginner, Using with Scope - Intermediate) - Estimated Cost: $3.50 - $5.00
This project was posted by Adrian!. It is a small high pass filter centered at 15KHz for use with an oscilloscope in measuring DCS signals from a TIU. It will filter the 60Hz power and still allow the DCS signal to pass through allowing measurements to be taken. This and much more about the DCS signal is described in detail in the first post of the original thread by Adrian!.
Link To Original Thread: Viewing the DCS Spread-Spectrum (CDMA) Track Signalling Format - Project Files Located in First Post of Thread
Schematic by Adrian! - Completed Filter Board by gunrunnerjohn
16. - Two New Versions of Crossing LED Flashers (similar to Project #6 above, but adjustable) - Circuit: Rod Stewart - Added: Rod Stewart - Level: Beginner - Estimated Cost: Version 1 - $1.20 - $5.75 - Version 2: - $2.20 - $5.90
Version 1: This version is the identical basic multivibrator circuit, except it has a small trim pot added, so the flash speed can be adjusted to your liking. It uses all easy to get, and build, through-hole parts. It offers the versatility of either AC or DC power, It can activate leds wired separately, or common anode style, the latter being typical of offerings from Wehonest and JTD. I have built several of these boards and they work very well.
Link To Original Thread: Two New Versions of Crossing LED Flashers Posted; with Adjustable Speed; all Build Files Included - Project Files Located in First Post of Thread
Version 2: Is another adjustable speed LED activator, that will really appeal to the fans of 555 timer chips. It has all the attributes of the board above, but uses the 555 as the timing device. It also includes a small trim pot for speed adjustment. It has fewer components; only nine.It offers the versatility of either AC or DC power. Note that unlike the above board, it CANNOT work with common anode wired leds. The leds must be wired separately to the board.
Link To Original Thread: Two New Versions of Crossing LED Flashers Posted; with Adjustable Speed; all Build Files Included - Project Files Located in Second Post of Thread
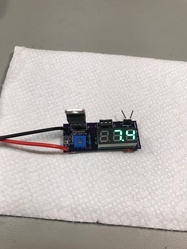
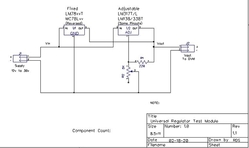
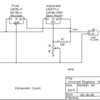
17. - Universal Fixed and Adjustable Voltage Regulator Tester-Build Files - Circuit: Rod Stewart - Added: Rod Stewart - Level: Beginner - Estimated Cost: About $3.00
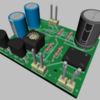
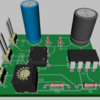
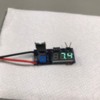
This is an easy to make test board for checking commonly used voltage regulators. The tester is very easy to use and the regulator in question easily plugs into a socket. For testing adjustable regulators such as the 338 or 317 there is a pot so it can be run through its entire range of voltages. The voltage indicator is an inexpensive offshore 2-wire digital DC voltmeter of the 0.28 variety. These are available in several colors including red, green, yellow etc. The regulator receptacles are made using an 8-DIP IC socket. Gerber Files for PCBs are included in the Original Thread.
Link To Original Thread: A Universal Fixed and Adjustable Voltage Regulator Tester-Build Files - Project Files Located in First Post of Thread
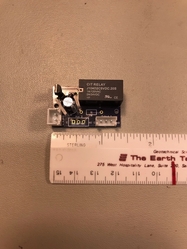
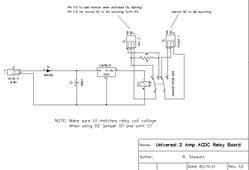
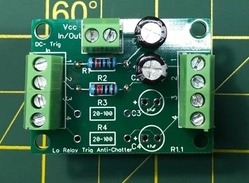
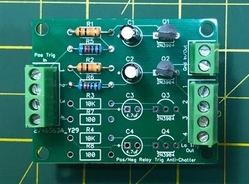
18. - Relay Board - A Simple Relay Board With Many Uses - Circuit: Rod Stewart - Added: Rod Stewart - Level: Beginner - Estimated Cost: About $5.00
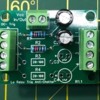
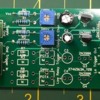
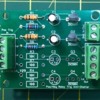
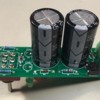
This is a compact easy to use module with rectifier, filter, voltage regulation and relay all on one small easy to hookup board. It is ideal around the layout for such chores as driving 2 or 3 wire signals that require one output when triggered and another output when not triggered. A minimal installation needs only 2 input trigger wires and 2 output C-NO wires. It can also operate the ever-popular RK Scale Crossing Gates 30-11012 and similar crossing gates that need to be driven up as well as down.
Link To Original Thread: Yet Another Relay Board Project? - Project Files Located In First Post Of Thread
19. - Replacement MTH DCS Tach Sensor Board Design and Production Files - Circuit: Gunrunnerjohn Added: Gunrunnerjohn Level: Intermediate to Advanced - Estimated Cost: $1.00 to $2.00
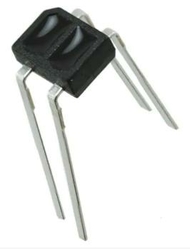
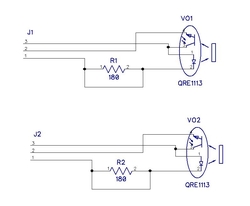
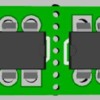
This is the end result of a discussion about the MTH tach sensor board availability and the fact that it's using an out of production sensor. A universal board was the result that uses a widely available sensor, the QRE1113, and also provides for use in DCS and LocoSound installations. (Original Discussion: MTH Premiere (ps2/ps3 upgraded by previous owner) wont chuff, poor speed control) The Gerber files for PCB production are included as well as schematics and drawings of the board design.
Link To Project Thread: Replacement MTH DCS Tach Sensor Board Design and Production Files - Project Files Located In First Post Of Thread
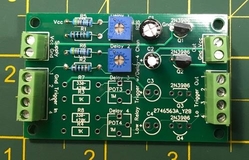
20. - Triggers For Multi Relay Arduino Boards - Circuit: Rod Stewart & Stan2004 - Added: Rod Stewart - Level: Beginner - Estimated Cost: $1.50 to $5.00
These boards are designed to operate the Multi-Relay Arduino boards without using an Arduino. There are two types of multi-relay boards available, and 3 types of trigger boards. One is for preventing relay chatter when activated using an isolated rail, another adds to that a time delay to keep the relau on for a short time time is adjustable). The third one is designed to convert a positive trigger signal to a negative signal for using the Low only multi-relay boards. In the linked thread, Rod has provided detailed descriptions along with the gerber files for all three types.
Link To Project Thread: Triggers For Multi Relay Arduino Boards; Cleaned Up!! - Updated Project Files Located Here
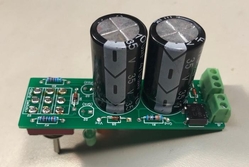
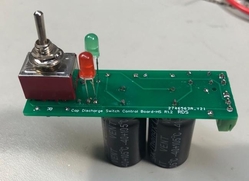
21. - Simple Capacitor Discharge PCB Switching for Atlas (and other) Switches - Circuit: Dale Holzmann & Rod Stewart - Added: Rod Stewart - Level: Beginner - Estimated Cost: $5.00
This circuit is designed to prevent burn out of twin coil type switch machines such as Atlas uses. The method used here is burn out proof since only the energy stored in the capacitor goes to the machine coil (thus “capacitor discharge”). Each board can operate one or two switches and any number of them can be mounted side by side on 1" spacing as required.
Link To Project Thread & Files: Simple Capacitor Discharge PCB Switching for Atlas (and other) Switches
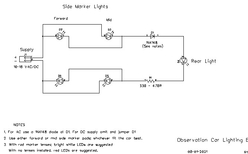
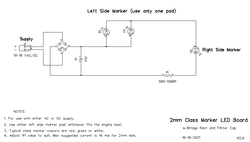
22. - Observation Car Marker LED Board - Circuit: Rod Stewart - Added: Rod Stewart - Level: Beginner - Estimated Cost: $1.50 to $5.00
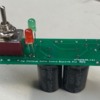
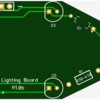
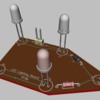
This board was made to simplify the use of LEDs to light the marker lights in your observation cars. It's 31 x 55 mm overall size, with pads to solder in a rear led, and two alternate locations for side marker leds. Which ones to use will depend on what fits the particular car best. The board would mounted up inside the car roof, near the back end, using double sided foam adhesive tape, CA glue, or something similar.
Link To Project Thread & Files: Observation Car Marker LED Board: Making Wiring a Little Easier!
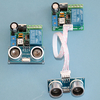
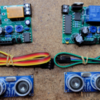
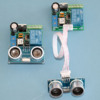
23. - HC-SR04 Ultrasonic Sensor For Block Detection - Concept: sjbuff (Ron) - Posted: sjbuff (Ron) - Circuits: sjbuff; Stan2004; gunrunnerjohn; SGJeff - Level: Intermediate - Estimated Cost: See Thread - varies with circuit used.
This project uses the HC-SR04 sensor for train detection. There are a few different methods of using the HC-SR04 covered in this thread with details for each method. Too much to describe here, please see the complete thread for details. It's been reported to work very well and is a great way to add reliable block detection to a layout. Also a fun project!
Link To Project Thread & Files: HC-SR04 ultrasonic sensor for outdoor layout block detection
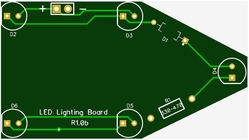
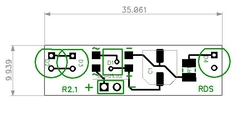
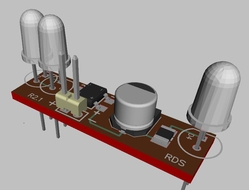
24. - PCB for Adding Marker LEDs To Hood Diesels - Circuit: Rod Stewart - Added: Rod Stewart - Level: Beginner - Estimated Cost: $1.00 to $2.00
This project is intended to make it easier to add marker leds to a hood diesel. The leds and load resistor (with optional diode for AC) are soldered to the thru-hole board, version R1.0. Two led pads (selectable) on one end for use with narrow or wider hood diesels. Any color or size leds can be used. Version R2.1 with full bridge rectifier was also added (shown below). Due to size constraints, R2.1 uses SMD parts.
Link To Project Thread & Files: A Handy Little PCB for Adding Marker LEDs to a Hood Diesel
-----------------------------------------------------------------------------------------------------------------------------------------------------------------------------------------------
That completes the list for now. We hope to continue updating this list with new and exciting projects as they are created or discovered here on the OGR Forum.
Please post comments or suggestions to the discussion thread here - Creating a List of Electronics Projects developed on the OGR Forum
For further discussion of any of the above projects, please post to the Project's respective thread linked above.
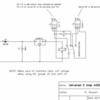
I posted this to another thread, but it might be of interest here as well. All pricing info was checked on 12/02/2019 and is current as of that date. These prices have been fairly stable over the last year or two, but I will try to check on them every so often and update as needed.
For anyone interested in ordering some PCBs, I recently sampled a few PCB manufacturers to compare pricing. The sample PCB I used was from the 4-way traffic signal project (#14 above). Some components were added to the above project (which i will post when it's been fully checked out) so the board size used for comparison is a bit larger than the one shown above. The final PCB ended up being fairly large at about 80mm x 68mm (or approx. 3-1/4" x 2-3/4").
| PCB Estimated Costs | |||||||
| Qty | PCB Supplier | PCB Size (2 Layer Std) | Cost | Shipping | Totals | Cost Per PCB | |
| 5 * | JLCPCB - 5 PCBs | 80mm x 68.1mm | $2.00 | $5.24 | ** | $7.24 | $1.45 |
| 10 | JLCPCB - 10 PCBs | 80mm x 68.1mm | $5.00 | $6.48 | *** | $11.48 | $1.15 |
| 10 | SEEED - 10 PCBs | 80mm x 68.1mm | $3.92 | $11.08 | $15.00 | $1.50 | |
| 10 | PCBWAY - 10 PCBs | 80mm x 68.1mm | $5.00 | $8.00 | $13.00 | $1.30 | |
| 5 * | ALLPCB - 5 PCBs | 80mm x 68.1mm | $13.00 | $10.00 | $23.00 | $4.60 | |
| 10 | ALLPCB - 10 PCBs | 80mm x 68.1mm | $14.00 | $12.00 | $26.00 | $2.60 | |
| 3 | OSHPark - 3 PCBs | 80mm x 68.1mm | $42.40 | $0.00 | **** | $42.40 | $14.13 |
| 12 | OSHPark - 12 PCBs | 80mm x 68.1mm | $169.60 | $0.00 | **** | $169.60 | $14.13 |
* = JLCPCB and ALLPCB are 5 PCBs as default quantity. ** = Best - Per PCB for 5. *** = Best - Per PCB for 10. **** = See Below
Some places offered a default quantity of 5 PCBs and others offered 10. I upped the quantities to 10 at the places using 5 as their default for fair comparison with the others. As far as I could determine, OSHPark offers PCB quantities in increments of 3 only. All are located in Asia except OSHPark, which is located in the US (I believe they also have their PCBs made in the US).
I have used OSHPark, JLCPCB and SEEED, all had very good quality PCBs and I have had good results with them. I have not used PCBWay or ALLPCB. Shipping times from the suppliers I have used are all similar and will usually take 2-3 weeks when using their standard shipping, their least expensive shipping method. The Asian suppliers also offer PCBs in several colors at no extra cost, but choosing a non-standard color adds 3-4 days to the PCB manufacturing process. They also offer Expedited DHL (or other carriers) shipping at additional cost over their standard shipping rates.
I have used JLCPCB the most. JLCs shipping prices seem to sometimes vary a bit with different quantities. I have also noticed that sometimes selecting greater quantities can actually lower the pricing, so pricing seems to fluctuate slightly, but not by a substantial amount. I have never ordered more than 20 PCBs at one time. Pricing and shipping on my lot of 20 was inline with increases in quantity prices and shipping costs shown above.
OSHPark offers free shipping as standard, and their shipping is pretty fast once they get the PCBs back from manufacturing. Manufacturing takes the most time. One thing to watch for on the Asian PCB manufacturers is shipping selections when you check out. They usually have some type of Expedited shipping selected as the default, so unless you want them faster, be sure to change that to the least expensive shipping selection.
**** OSHPark Notes: To be fair to OSHPark, they are very competitive and cost much less than any of the others up to a certain size. I didn't compare sizes to see where they became most competitive, but I am guessing it's somewhere around one to two square inches in size. If you have small PCBs OSHPark is definitely worth checking and can be quite inexpensive. One example would be project #12 above (PCBs are 20.3mm x 16.2mm). Total for 3 would be $2.55 shipped or $10.20 shipped for 12.
Currently (as of this post) the Asian PCB makers all offer their default pricing for PCBs up to 100mm x 100mm in size. That is a fairly large sized PCB and most projects here will come in under that size. Their prices start going up for anything larger.
Also, some of the Asian suppliers are offering free or discounted PCB assembly for a small quantity of PCBs, one site offered this service free for 5 PCBs. I'm not sure if this is a one time deal or what on their assembly, but I suspect it might be a limited time offer to get you to try their assembly service?
I've never tried ordering any assembled PCBs and am not quite sure how to go about it, so I didn't pursue any of the details for these services on any of the sites. However, this might be a good option if you want to use very small Surface Mount parts on your PCBs. I believe you also have to use their supplied parts for this offer as well, but didn't check into that either.
Quick-Start PCB Design-Fab Notes (Rod posted this to the other thread and I thought it would be good to add here as well.) This is a Word doc for anyone who might be interested in dabbling with DipTrace (DT) and PCB board design. It is not comprehensive at all, but should help any newcomer get started. My first few stabs at DipTrace were a pretty bumpy road, but I got a lot of help from grj, as well as Tom; and a lot has been learned through the School of Hard Knocks.
If you simply download and install DipTrace, then open it, you will be looking at a pretty boring empty black screen. Not very exciting. But I am also attaching two working Diptrace files for the DIY LED Flasher Module; for which the gerber file was linked earlier above (Project #6 in this list). This is so anyone can load the file and simply play around with it to get some DT experience. After you install DT, simply click on the red diamond file (.dch) attached (after downloading it) and you will have the circuit on the screen. ![]() Way more interesting.
Way more interesting.
The .dip file is the board layout file that would be created from the circuit drawing file, it's included just as an example. These are the exact same files that I used to create the gerbers from which the boards are built. Have fun!
Rod (Rod's files are listed below as Attachments)
The link to this offer also appears at the top of this post, but I thought it might be appropriate to add it here with the information on ordering project boards as well. Rod Stewart has graciously offered to assist other forum members wanting to build projects from this list by helping them order the boards for their project. Rod's offer is fully explained in the link below.
Details here: Who Needs Help Getting Project Boards Made? (For Those Who Are Not Comfortable With The Process).
Attachments
@gunrunnerjohn posted:
Thank you have old MTH with QSI will read and see if it will help me understand all this digital stuff.
@Rich Melvin posted:At Gunrunner John's suggestion, here is a featured thread for uploading old instruction manuals and other out-of-print reference documents.
I don’t know if it’s still up on Lionel’s site, but they used to have every maintenance manual/repairs sheets for everything ever produced
@ThatGuy posted:I don’t know if it’s still up on Lionel’s site, but they used to have every maintenance manual/repairs sheets for everything ever produced
Good luck finding them. Used to is the operative word, the new website broke many of the links to information on the Lionel site. Besides, there's a lot more than just Lionel information posted here.
@gunrunnerjohn posted:Good luck finding them. Used to is the operative word, the new website broke many of the links to information on the Lionel site. Besides, there's a lot more than just Lionel information posted here.
You know it’s funny how,Amy people get their hair out of place. I was just pointing out that they used to have it all on line. I have 10 binders full of all the paperwork downloaded from their site. I also find it funny how people must have a Fluke meter. I think their is a snob appeal to them, truly a waste of money. I asked multiple people all Master electricians, not one ever needed a Fluke. Just like the question asked about “what should I use to monitor my layout “. A simple analog meter would work fine, just to give an overall view. Mounted in a panel it gets the job done without breaking the bank.
@ThatGuy posted:You know it’s funny how,Amy people get their hair out of place. I was just pointing out that they used to have it all on line. I have 10 binders full of all the paperwork downloaded from their site. I also find it funny how people must have a Fluke meter. I think their is a snob appeal to them, truly a waste of money. I asked multiple people all Master electricians, not one ever needed a Fluke. Just like the question asked about “what should I use to monitor my layout “. A simple analog meter would work fine, just to give an overall view. Mounted in a panel it gets the job done without breaking the bank.
Near as I can tell, you're the only one that has their hair out of place. As far as the Lionel documentation, used to is the operative words.
Regarding my choice of multi-meters, I missed the point where I said anyone had to have a Fluke. I really sorry my engineering education doesn't allow my to discuss measurement accuracy to your standards. I also don't recall the school offering any Master Electrician degree, I must have missed that in the curriculum. Finally, I don't understand the vendetta against discussions of accuracy in any case. Many folks with layouts don't own a meter of any kind, that's just fine with me. The discussion wasn't intended for them. There's a lot of people here that actually do work that benefits from more accuracy than 40%, they might get more from accuracy discussions.
From your last few posts, you clearly have a burr under your saddle, regarding my posts. Maybe you should just ignore my posts, I have no problem with that, I'll do the same.
@ThatGuy posted:You know it’s funny how,Amy people get their hair out of place. I was just pointing out that they used to have it all on line. I have 10 binders full of all the paperwork downloaded from their site. I also find it funny how people must have a Fluke meter. I think their is a snob appeal to them, truly a waste of money. I asked multiple people all Master electricians, not one ever needed a Fluke. Just like the question asked about “what should I use to monitor my layout “. A simple analog meter would work fine, just to give an overall view. Mounted in a panel it gets the job done without breaking the bank.
I agree on both points.
Regarding the meter, I've never met a master electrician that has a Fluke. But, every electronics technician worth their weight that I've ever met uses one. It's quite important to have the extra precision for electronics, but not so much for things that are simply electrical.
And as far as your simple analog meter goes, I'll give you this, and I agree with you: Movement of the meter's needle does indeed give you a quick and simple means to see that current is flowing. But to avoid a big problem later I suggest taking the cover off, painting over the numbers on the scale with white paint, and then reassembling it. After this modification there's no way to make an incorrect conclusion from what the meter says when the AC waveform isn't a true sinusoid.
Mike
(I couldn't resist, even if this is the wrong place for this discussion.)
@gunrunnerjohn posted:Near as I can tell, you're the only one that has their hair out of place. As far as the Lionel documentation, used to is the operative words.
Regarding my choice of multi-meters, I missed the point where I said anyone had to have a Fluke. I really sorry my engineering education doesn't allow my to discuss measurement accuracy to your standards. I also don't recall the school offering any Master Electrician degree, I must have missed that in the curriculum. Finally, I don't understand the vendetta against discussions of accuracy in any case. Many folks with layouts don't own a meter of any kind, that's just fine with me. The discussion wasn't intended for them. There's a lot of people here that actually do work that benefits from more accuracy than 40%, they might get more from accuracy discussions.
From your last few posts, you clearly have a burr under your saddle, regarding my posts. Maybe you should just ignore my posts, I have no problem with that, I'll do the same.
John, I hit the wrong button as I thought I was doing a general response, not directly to you or about you. I had multiple people tell me if I did not use a certain type of testing equipment I am basically an idiot. Mellow Mike had it right, general work or just keeping an eye on the layout analog should be fine. I have a tiny radio shack meter the size of a Cc for when I go to help someone, yes it lacks all the bells and whistle’s but it gets the job done. So no the bur is not direct to you….sorry about the miss understanding/post.
@ThatGuy posted:John, I hit the wrong button as I thought I was doing a general response, not directly to you or about you. I had multiple people tell me if I did not use a certain type of testing equipment I am basically an idiot. Mellow Mike had it right, general work or just keeping an eye on the layout analog should be fine. I have a tiny radio shack meter the size of a Cc for when I go to help someone, yes it lacks all the bells and whistle’s but it gets the job done. So no the bur is not direct to you….sorry about the miss understanding/post.
Sounds good. FWIW, I've given away a number of the free Harbor Freight multimeters to friends that don't have any meter just so they had basic voltage and resistance measurement capability. They're fine for a majority of model train tasks. I've also never told anyone they're an idiot for using a cheap meter, or any other adlib tool to solve a problem. That doesn't mean there's not a better way at times, it just means they either don't have the tools, skill, or the desire. I'm guilty of that as well for many tasks. I marvel at some of the mechanical solutions I see with finely crafted creations, my mechanical skills don't run to milling precision parts, so I do my creations with hand tools, a Dremel, and a bandsaw. ![]()
I happen to come at the electronic issue from a different direction. I design and build train electronics and do repairs on countless electronic boards and modules. For me, a basic analog meter would never do the trick. As you say, it takes all kinds to make the whole of the hobby.
@gunrunnerjohn posted:Sounds good. FWIW, I've given away a number of the free Harbor Freight multimeters to friends that don't have any meter just so they had basic voltage and resistance measurement capability. They're fine for a majority of model train tasks. I've also never told anyone they're an idiot for using a cheap meter, or any other adlib tool to solve a problem. That doesn't mean there's not a better way at times, it just means they either don't have the tools, skill, or the desire. I'm guilty of that as well for many tasks. I marvel at some of the mechanical solutions I see with finely crafted creations, my mechanical skills don't run to milling precision parts, so I do my creations with hand tools, a Dremel, and a bandsaw.
I happen to come at the electronic issue from a different direction. I design and build train electronics and do repairs on countless electronic boards and modules. For me, a basic analog meter would never do the trick. As you say, it takes all kinds to make the whole of the hobby.
John, I too repair boards and antique radio’s yes a simple meter would not cut it. I have also found the motto “keep it simple stupid” works well. I have installed many of your units brought to me by customers. I have always found the straightforward and well built.
on another note, I have been given as a gift a set of proto 1 centipedes, I know both engines have to be set up as two independent engines married together, what did you do/use to get rid of the so called coupler that was originally installed.
@ThatGuy posted:on another note, I have been given as a gift a set of proto 1 centipedes, I know both engines have to be set up as two independent engines married together, what did you do/use to get rid of the so called coupler that was originally installed.
Piece of cake, I have the same ones I'm about to convert to Legacy. Look at the trucks, they have a standard truck with a standard coupler mount. You just have to break out the Dremel and modify the pilot for the new coupler. I have a bag with the RCMC boards and two RS-Lite Centipede boards sitting on my bench waiting for me to get to it.
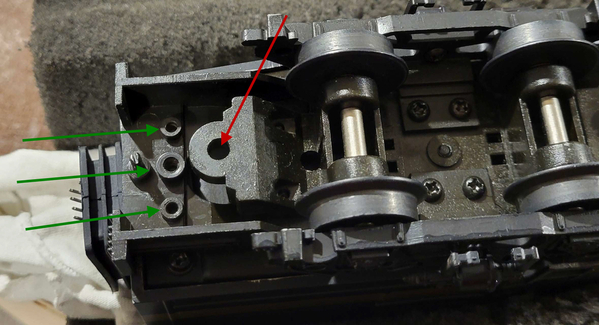
Remove posts at green arrows, mount coupler on standard mount at red arrow. You can unscrew the attachment posts and then whack the remaining posts. You may need a longer coupler I forget if I used a 2" one or the longer DASH-9 couplers. I did this mod for a customer with a single Centipede so he could use it as a standard locomotive.
Attachments
@gunrunnerjohn posted:Piece of cake, I have the same ones I'm about to convert to Legacy. Look at the trucks, they have a standard truck with a standard coupler mount. You just have to break out the Dremel and modify the pilot for the new coupler. I have a bag with the RCMC boards and two RS-Lite Centipede boards sitting on my bench waiting for me to get to it.
Remove posts at green arrows, mount coupler on standard mount at red arrow. You can unscrew the attachment posts and then whack the remaining posts. You may need a longer coupler I forget if I used a 2" one or the longer DASH-9 couplers. I did this mod for a customer with a single Centipede so he could use it as a standard locomotive.
Thanks John, just flipped them over and yes Sir…..the real joy is the room in the body


