
First why do I choose an Atlas car? All new MTH cars come with Kadee mounts, so all you have to do is screw in the Kadee box. Atlas Master Line cars will be highly accurate representations of the prototype with accurate paint schemes, but no kadee mounts like MTH cars. Lionel cars are too difficult for the beginner to convert. How easy is it to convert an Atlas car? This easy. No real reason not to.

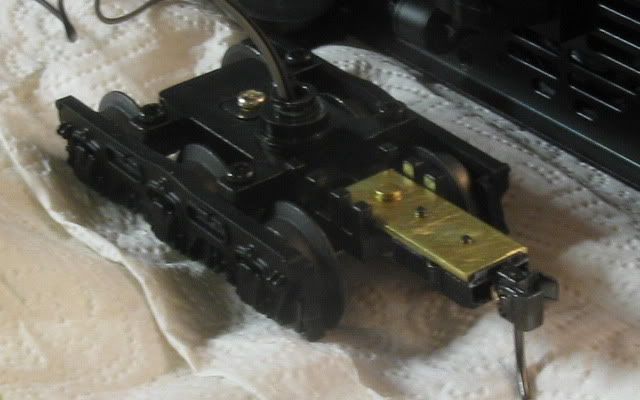
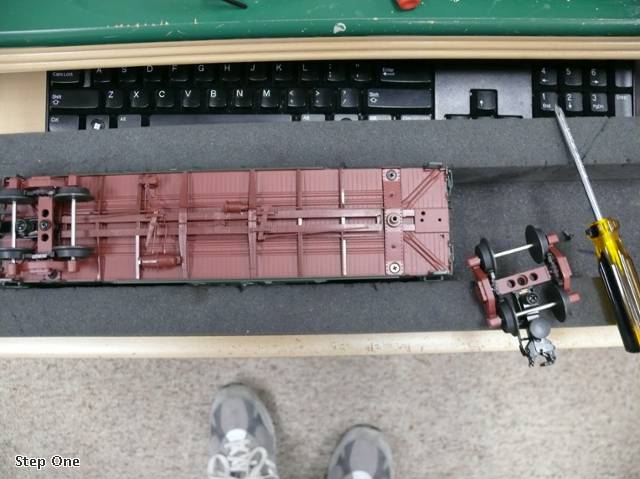
Step 1. Unscrew and take off the trucks.


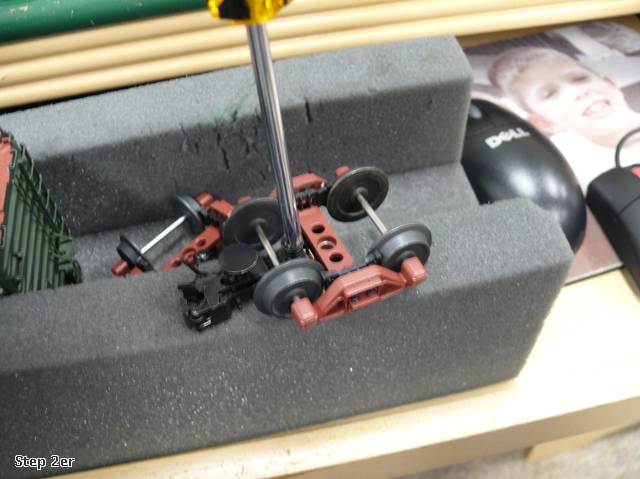
Step 2. Unscrew this screw.


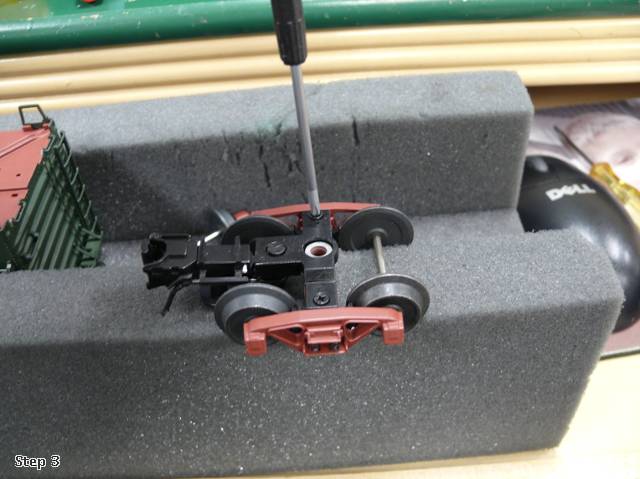
Step 3. Take these two screws off, one on each side.


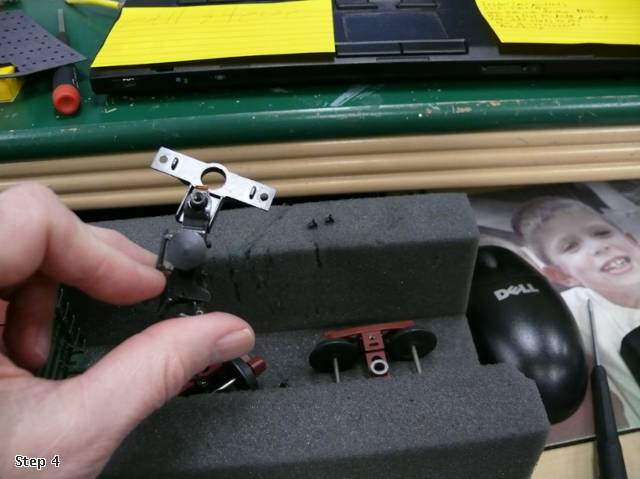
Step 4. Take this off and toss it!


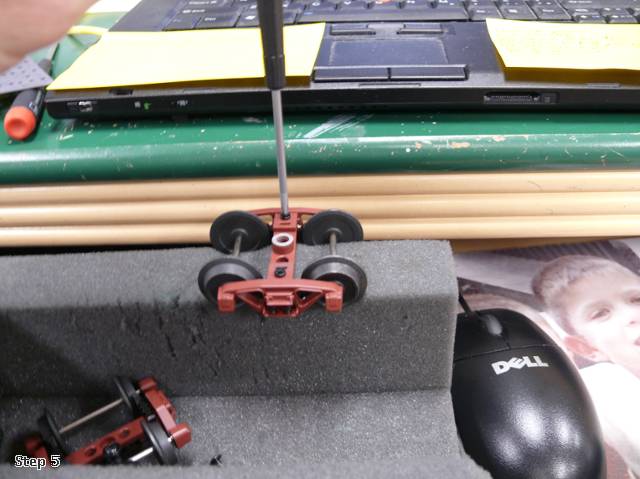
Step 5. Screw the two screws you just took out back in. Advanced Option: Don't screw these back in for truck equalization, but be careful, the trucks may come apart.


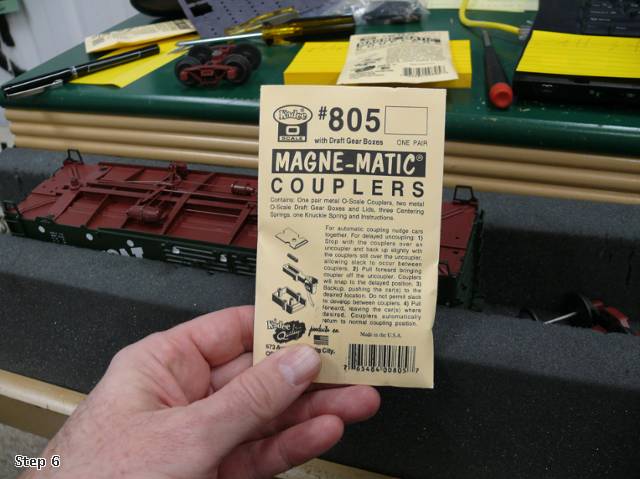
Step 6. Buy these couplers (Kadee 805s)


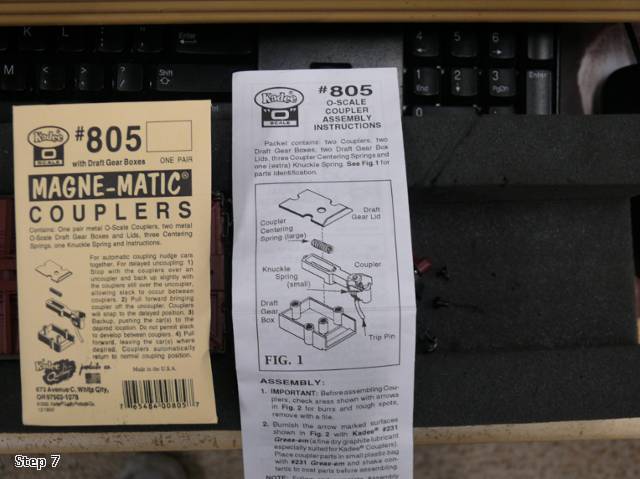
Step 7. Open up the package, follow these super easy assembly instructions.


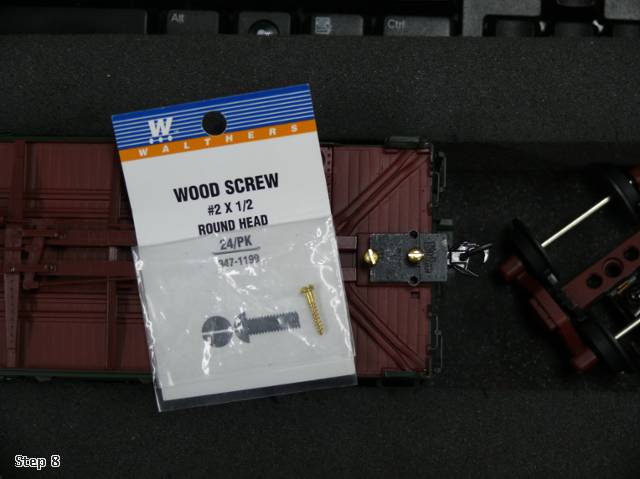
Step 8. Buy these screws from Walthers.


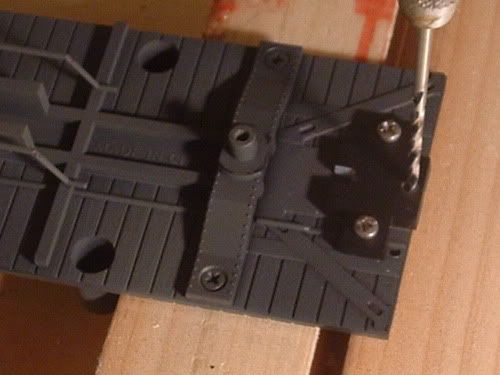
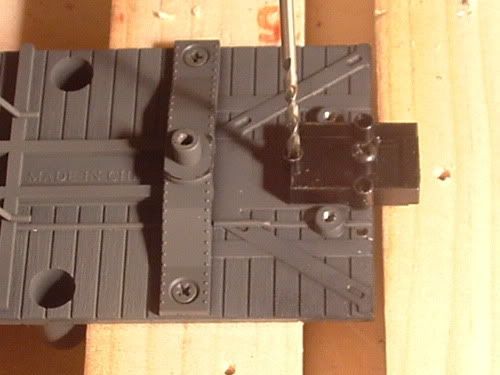
Advanced Option: You will notice that Atlas places the holes a little too far forward, causing the coupler box to stick out a bit.


You can see here how the pre-drilled Atlas holes are too far forward.


You may drill new holes if you like with a #51 drill bit, to do a proper job. Using the Kadee box as a guide/locator. The you can use #2 X 1/2" round head stainless steel sheet metal (i.e. self taping) screws from Micro Fasteners (1-800-892-6917)


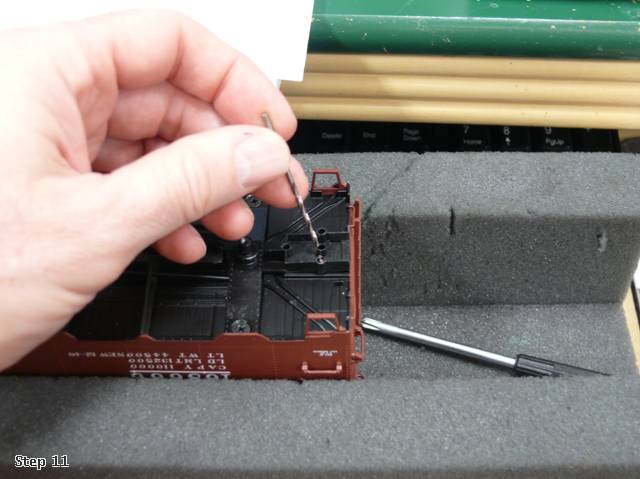
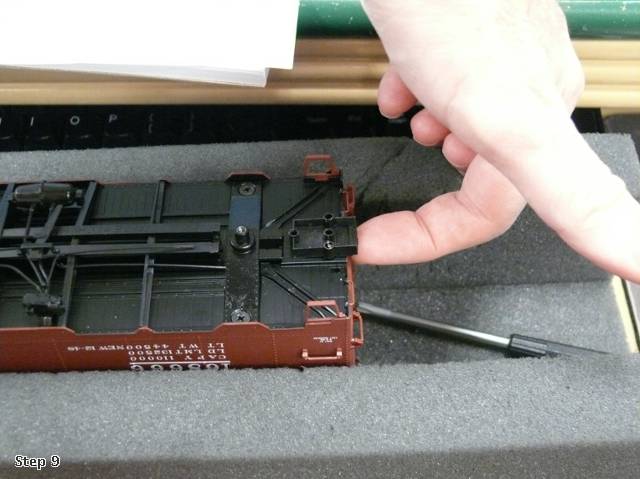
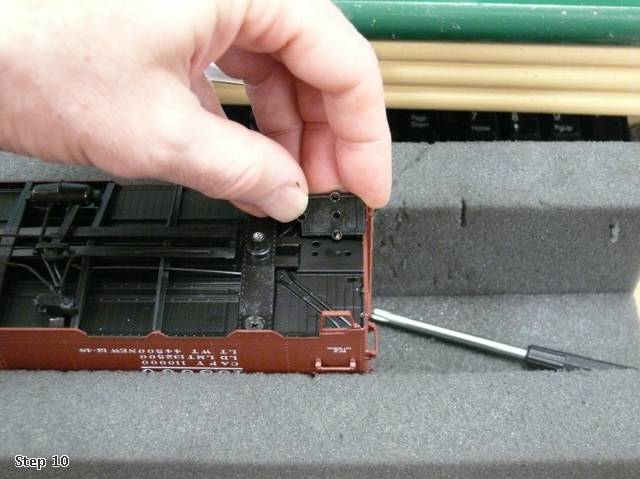
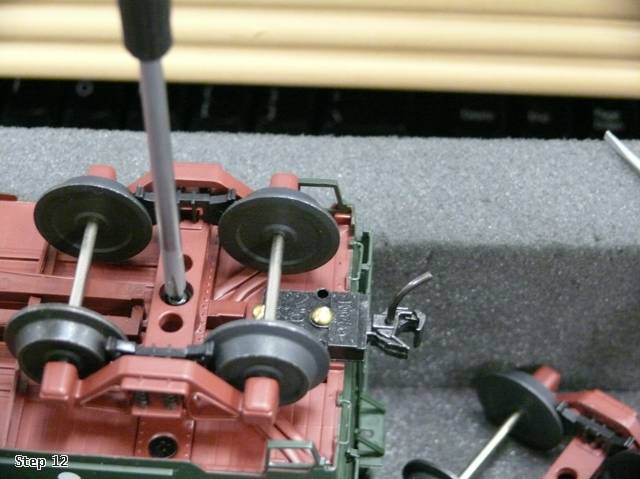
Step 9. Screw the coupler assembly in with the Walthers screws as shown, and put the trucks back on.


Buy one of these. A Kadee Height Gauge. Buy it here:http://www.kadee.com/


Put your car on the track to see if the height gauge is even with your new Kadee coupler.


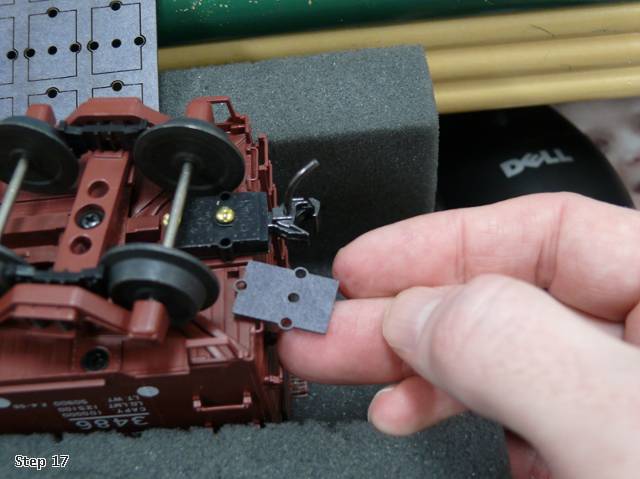
If it does not match buy these.


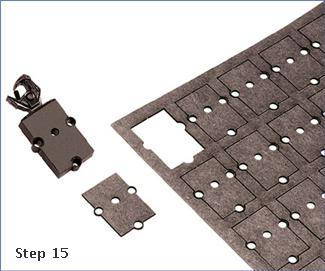
You can buy them here:


Then take off your coupler, and screw one or two of these underneath the coupler box to get to match the height of the gauge. Most likely all Atlas cars will need these, so you can do this in step 9.


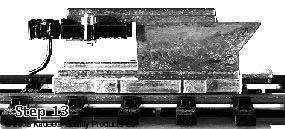
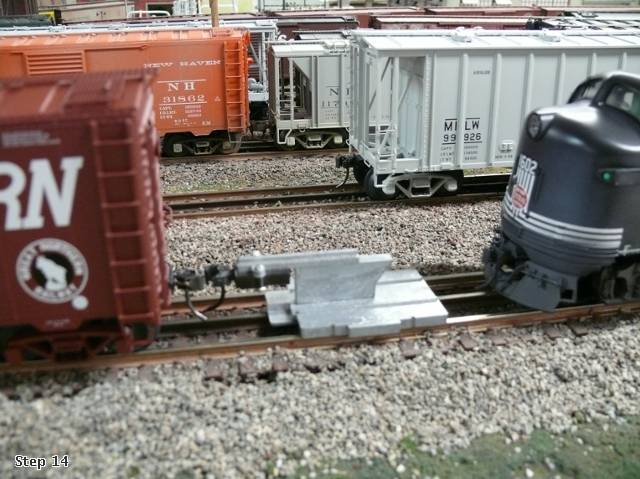
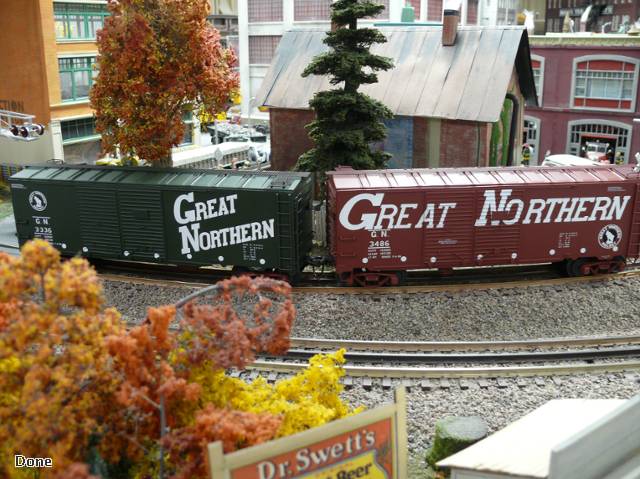
Done. You now have a 3RS Atlas freight car.


Of course you should have all these supplies before you start.
Last edited {1}
Original Post

Replies sorted oldest to newest

Great job Pete! Just what anybody wanting to get into 3RS needs to know about converting Atlas cars to Kadee.

However, one thing that I have descovered about Atlas cars is; those two screw mounting holes for the Kadee coupler box are not quite located correctly. You will notice that the Kadee coupler & box stick out past the end sill of the car. Thus, I have been drilling new mounting holes on all my Atlas cars so that the coupler box is flush with the car end sill. Never figured out why Atlas does that!
quote:
Originally posted by mwb:
Why do you use a wood screw vs. a 2/56 machine screw?


I use the 2/56 machine screws.

Also I found that atlas cars need 1 shim to get the proper height.

I also don't put the screws back in on step 5. I just leave those out. The screws disable the trucks ability to ride on the springs.

Excellent photo instructions!
Martin,

I think the wood screws take care of that slight mismatch between the spacing of the Kadee holes and the Atlas holes. You can start the pointed wood screws where you could not do the same as easily for machine screws. Plus they eliminate the tapping step.

I'm going to have to try them.

What I've been doing is tapping one Atlas hole for 2-56 (they come tapped for an odd metric size). I install the Kadee box with a 2-56 machine screw in this hole. Then, on the drill press, I drill through the other hole in the Kadee box and into the frame. Then, I tap that hole for 2-56 and install the second machine screw.

Pete's wood screw method eliminates those steps. Excellent how-to, Pete. Thank you. Smile

Jim
quote:
Originally posted by Trevize:
quote:
Originally posted by mwb:
Why do you use a wood screw vs. a 2/56 machine screw?


I use the 2/56 machine screws.

Also I found that atlas cars need 1 shim to get the proper height.

I also don't put the screws back in on step 5. I just leave those out. The screws disable the trucks ability to ride on the springs.

Excellent photo instructions!


Trevize,

Do you shim it with a .010 or .015 thick washer ... or something else?

Thanks,
GP
I believe the Atlas cars with the coupler pads are tapped for 2mm screws. As mentioned, they do not fit the Kadee pocket profile exactly. What I do is take a #43 drill and ream out the Kadee pocket holes I will be using to mount the coupler. This does leave the holes & sleeves completely intact. The 2mm screws (that I obtained from Micro Fastners) are also just a tad smaller in diameter that the 2-56 screws. The 2mm screws will now perfectly align with the threaded holes in the Atlas cars. Besides, the heads on these screws are allot smaller than the on the wood screws.
WOW! Guys, terrific response that I did not expect so soon! I started this last night as a work in progress and was going to finish it this morning, and never expected the great, enthusiastic responses so quick. I have to run out, but look for two more things I was going to add, height and shim pics. Remember, this is meant to attract guys to 3RS, new people, and maybe those that are sitting on the fence. If I make it too complicated, or add too many steps it will be a turnoff, look hard and defeat the purpose. Once someone tries this, and as they "get into it" I believe they will discover better and more correct methods on their own. We have to get them started first. So I may eliminate a step, and had planned to add two more pics. There were some good thoughts I'll address later, I have to run out now.

MWB,

quote:
I think the wood screws take care of that slight mismatch between the spacing of the Kadee holes and the Atlas holes. You can start the pointed wood screws where you could not do the same as easily for machine screws. Plus they eliminate the tapping step.


Jim's got it. But, again too much info may defeat the purpose here. I'll look at all the good tips you guys have added, figure out a way to simply incorporate them, in the next few days, change it with your everyone's good ideas to make it as simple as possible, and maybe submit to OGR? Word has to get out there is a new age dawning! Big Grin

Jack,

I don't get Atlas either, but last thing I want to do is start off with "take out your drill", you'll have the 3R guys running for the hills. Smile

Trev,

If you don't put those screws back, with some rough handling the trucks may come apart, again, don't want that to happen and frustrate someone. A good tip to add though.

Overall, we have to "tread" lightly here. Drill sizes, using measurements etc. believe it or not turn many guys off. Everyone here is dead on, but my goal will be to try and make it simple. So, there is a trade off. But I think once they get started, see the joys of realistic couplers, taking out the slack, uncoupling etc, the more advanced methods will come naturally.

Maybe outline the east way, and then in brackets or something outline the "advanced modelers tip"?
Pete,

You did not have to repost Jim's explanation; it was clear. I've used #0 x 3/8" wood screws for KD's for decades, but only on cars made of wood.

But for all plastic and brass I drill, tap, and go the 2/56 route. There are some good reasons for that.

And, I disagree with about providing drill sizes, etc -- giving novices a complete "how to" is the easiest way to make it foolproof. It's when they try something and use the wrong sizes of drills, taps, screws, etc and have problems or fail that their frustration sets in and they walk away wondering why they ever bothered and/or start using your name in vain, Wink

The more succinct and simple, a variation on the KISS principle, the better this will work for novices.
Way easier to do those than MTH.... Something to think about if you
do not own a lot of rolling stock already. Although new MTH isn't as
hard as older ones. Car disassembly alone can take some time on MTH.
(Tropicana tanker, for instance).

I use a Sharpie to color all the screw heads, and now usually do the springs
and axels while I am at it.
Scherbear57,

I much prefer walking around with a small screw driver to uncouple my Kadee couplers, instead of those HUGE "Lionel type" things. Besides, two points to consider: 1) you can always use the Kadee "delay" feature for backing cars into a specific "spot", and 2) my layout has all manual throw switches since it is a "walk-around layout". The Kadee couplers sure eliminate the crash & bash issues.

However, I really don't think that the Kadees will work all that well on your Lionel "Conventional Classics".
Like Mike mentioned, it's important to point out the level of difficulty in converting different brands of rolling stock.

If the beginner sticks with Atlas and Weaver, he can get his feet on the ground and be off to a good start. Starting out with one of the more difficult freight cars is sure to discourage.

I know that other manufacturers now provide Kadee mounting pads also on some newer models, but beginners should be encouraged to start simple, and all Weaver and Atlas are easy.

As far as uncoupling is concerned, in this day of walk-around command control, the screwdriver/coffee stirrer method works fine. Like Hot Water pointed out, by taking advantage of the delay feature you can spot cars in just about any "unreachable" location.

Pete, I think the time is definitely right for an OGR article on Kadee couplers.

Jim
Here is an "alternate" method of mounting the Kadee coupler box/coupler assembly on ANY manyfacturer's car:

1) Use a #44 dril bit to increase the hole sizes on the Kadee box.

2) Drill new a new hole/holes in the PROPER LOCATION (using the Kadee box as a guide/locator) with a #51 drill bit.

3) Using #2 X 1/2" round head stainless steel sheet metal (i.e. self taping) screws from Micro Fasteners (1-800-892-6917), screw the box to the underside of the car. Styrene shim stock from .125" thick up to .250" thick may be required. Simply drill the clearance hole in the shim with the same #44 drill bit.


Finally, for those of you trying to save the $16 for the Kadee "height gauge", DON"T TRY IT!!!! Your dealing with thousands of dollars worth of rolling stock, why skimp on one of the best little modeling aids available? Look carefully at Pete's photo above, and you will see that the rear end of the Kadee gauge even shows how much shim material you will need prior to mounting the coupler! That function alone has been a GREAT help when converting my steam locomotive tenders to Kadee couplers (I use 1/2" wide by .065" thick brass for that).
The gauge is also useful for bending the "air hose" to the proper height.
Not so important, perhaps, if you do not plan to use magnetic uncoupling,
but presumably important if you do.

Laid some of my first track last night. It was tricky because it was
a dual custom curves, 1% grade (1/2" over about 6' or so), and when I
rolled a car on it, it touched another and the couplers clicked together.
Too cool! Lots of switches on each end that need to be flat and level,
too. Nothing like starting simple :-)

Mike
quote:
Originally posted by mwb:
quote:
Originally posted by dws:
Great idea! Love simple solutions. How well does body mounted kaydee's work with sharper curves?
DWS


That is dependent on the length of your cars & engines and what you define as "small".


The majority of my cars are 40' and I am using Atlas 45 curves. I have also read where the coupler can be attached to the trucks but prefer to have them body mounted.

DWS
quote:
The majority of my cars are 40' and I am using Atlas 45 curves. I have also read where the coupler can be attached to the trucks but prefer to have them body mounted.


Its possible to modify the coupler shank and the box if necessary to get some more lateral movement. With such modifications, this car will negotiate 072 (36 inch radius curves).

By the way, this is a very good thread. Do we dare post a link over on the three rail forum?

Pete,

I think this is ready for publication for the masses! I did notice one broken image link, but I don't know if it's just my lame home computer or not. In my recent 3R postings, I have seen less resistance to Kadee couplers than in the past. I think you certainly have a winner here.

Finally, thanks for the image and contact info for Micro-Mark shims. I've been cutting mine out of sheet styrene ... That will make life much better.
quote:
Originally posted by dws:
quote:
Originally posted by mwb:
quote:
Originally posted by dws:
Great idea! Love simple solutions. How well does body mounted kaydee's work with sharper curves?
DWS


That is dependent on the length of your cars & engines and what you define as "small".


The majority of my cars are 40' and I am using Atlas 45 curves. I have also read where the coupler can be attached to the trucks but prefer to have them body mounted.

DWS


With 40' cars you should have no problem but the larger cars may be an issue particualrly if you have "s" curves or some funky switching arrangements. The nature of the engine also is important, length & wheel arrangement(s).
I really like the combined effort here. Smile Good Thread It has been mention about truck mounted KD couplers. Dave C did a very nice post a few months ago on this subject.


Doubleheadering Steam with scale couplers Click on the underlined phrase to link.

This approach to scale couplers reduces O-72 (Radius 36") even further. You might pick up a few more converts with this info.

Pete:
We do have something in common. I like those New Balance shoes. Smile
Best wishes all,
Mike CT
I can't lose,
it's my shoes!

Think they'll ever do a commercial about how NBs can improve the modeler's stance with stronger torque for taking out screws?

I remember Mike, that was a great thread. You have given another great idea, a thread on truck mounted kadees on cars instead of engines.

Jon,

I'll fix the pic!

Al,

Can we get Rich to make one of those connecting double threads to both forums like the Train America Studio thread?
Great thread with some great tips. I pretty much follow Cape Cod Northerns advice and use the 2mm phillips head screws and drill out the Kadee's slightly. I end up cutting off the 3 rail coupler mount on the Atlas truck as well as I have no intention of going back.

My favorite Atlas car is the Single Sheathed Wood Boxcar. There are no mounting holes provided to fasten a Kadee. The Atlas 2 rail car uses a plastic mount secured by 2 screws and then the coupler attaches to this with 2 more. I'd suggest picking up a few if you want to convert this car.

Start by fastening the mount with some 2mm screws.


Use the front hole as your drill guide. Drill and tap for a 2mm or 2 56 thread. When thats done. Remove the Atlas mount and snug done the Kadee's coupler box. Square it up and drill and tap your second hole.


Now remove the rear of the Atlas mounting hole to accept the Kadee mounting holes. One shim is usually needed to get the right height. The mount isn't required to get the job done. But it sure is a handy template to get you started off with the first hole correctly drilled. In the end a thick shim is needed and it serves that purpose nicely.

While the cars Pete has shown are a great way to get started. When you start doing everything you own and making custom mounts. A drill press is a great investment. As well as a numbered set of small bits and taps.
The CBS is a Transition era layout. We run mostly 40 ft cars, 4 axle diesel and Small steam. Only because this looks much better around 072 and 081 curves. Also gives the layout a much larger appearance. My kids do like the modern era of course. So I have plenty of larger 6 axle modern motive and 50 ft cars. Not too many cars larger than that, as again they don't look that good on my tight curves. However, we have never had a problem, kadee to kadee, doing anything.
This is a wonderful set of Q & A; just what the doctor ordered, answering many of my questions . But my layout is largely 042 and 054 curves, with turnouts to match ( It's C shaped in 13 x 14). Any thoughts on the best way to use kadees in this sharp curve environment, using 40 foot cars, RS 3s, Geeps and SW1 switchers + Lionel 0-8-0,K-Line 0-6-0 and the like ( PRR & NYC, thank you very much). Also, are you converting the engines or using them as is, with KDs on the cars only ?
Thanks,
Rubin
Post

OGR Publishing, Inc., 1310 Eastside Centre Ct, Suite 6, Mountain Home, AR 72653
800-980-OGRR (6477)
www.ogaugerr.com

×
×
×
×
Link copied to your clipboard.
×
×