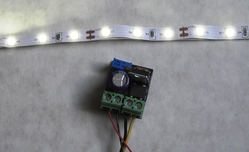
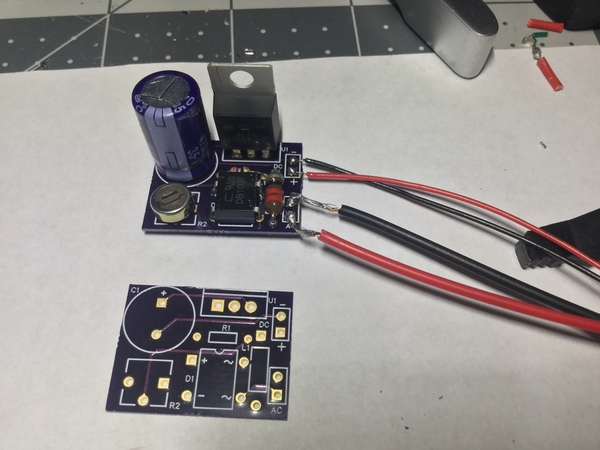
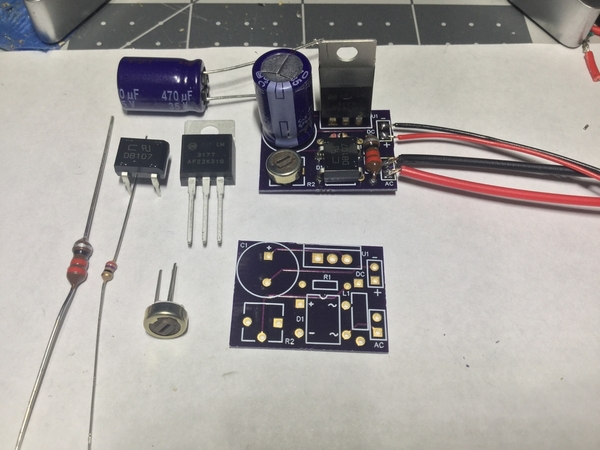
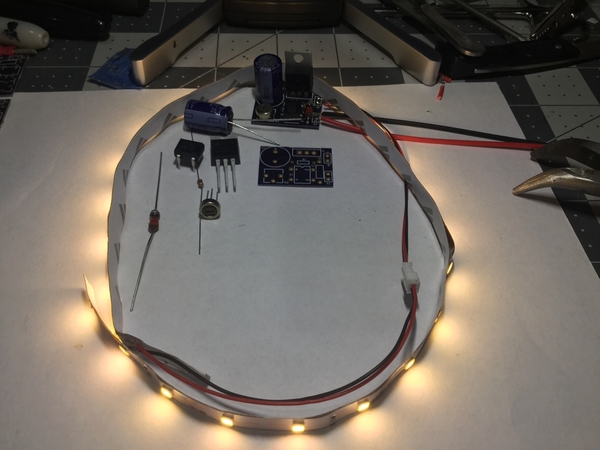
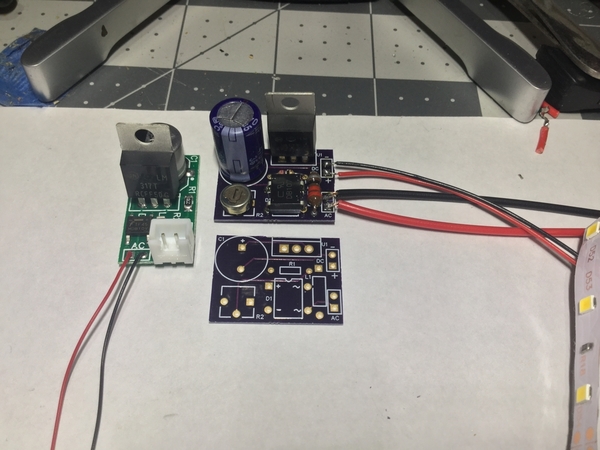
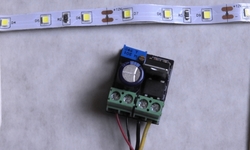
So FWIW   here’s the GRJ designed “roll ur own” board made up.  End result, works great.  Took maybe 15’ to make the first one and hook up to CW80 for testing.  Nice variation on current(brightness), holds lighting very well after power down(flicker control), and should be able to hide easily in the cars.  Also, for comparison, photos of GRJ’s own board and another I have used in the past that is fixed voltage out.71D7764A-D13E-4D08-BE5E-1234E4E17B9BB7954DDB-E5A4-49A6-B1F2-85F8E24B84E40C2CA135-A5BB-44EC-9306-600F76EDC0035B9DA766-1F3F-44FE-9E8E-14FC773B3821C4CB450A-AAEF-4F42-BE09-FB44119BAEAE 

Attachments

Images (5)
  • 71D7764A-D13E-4D08-BE5E-1234E4E17B9B
  • B7954DDB-E5A4-49A6-B1F2-85F8E24B84E4
  • 0C2CA135-A5BB-44EC-9306-600F76EDC003
  • 5B9DA766-1F3F-44FE-9E8E-14FC773B3821
  • C4CB450A-AAEF-4F42-BE09-FB44119BAEAE

Ted, looking good and great to know it works as intended, though I had no real doubts. Still giddy with excitement?  

I received my boards today also and did a test fit of the components I have, including the 1000 uF filter cap and 12 ohm R1. All good. Now just waiting for the R2 pots and the LM317's to arrive. These new boards are somewhat bigger than grj's first design for sure, but that is mostly due to the former being SMT instead of thru-hole I imagine. They are still very small and should fit most any pax car I would think.

IMG_3381

Rod

Attachments

Images (1)
  • IMG_3381

Well, I made something that's transformer powered, it has a high intensity 40ma LED on top, a button on the side for the AC, and spring loaded test pins to probe the board.  The pins are spaced to mate with the lighting module. I press the AC button, and it applies power to the module and the test LED on top lights.  When I release the button, I can check for the decay of the light to see that the cap is working.  I typically test these before they're split, so I have 25 completed units on a panel, and I just probe them one at a time for test before I separate them.


Attachments

Images (2)
  • mceclip0
  • mceclip1

Ahhh, ok.  The photo I remembered from a couple of years ago didn’t show the whole device, only the probe end.  That’s why I thought it might be a battery.  No matter, xfrmr is easier.  And I have some button switches for other projects.  It’s something I’m sure I can replicate.  The difference of course is your boards come assembled, so I’ll have to do mine individually as I complete each one.  Will work well I’m sure.  Thx again for the help.

I was thinking of a test device something like this, but I was going to include a 0-100 milliammeter. Then when I find the light intensity I liked the best, I could quickly set each module to the same intensity (same milliamps) and thereby have all cars in the set at the same brightness level, at least in theory. I thought this might be kind of good because taking one or two cars apart again to adjust the light intensity after completion would be kind of a pita.

Rod

Last edited by Rod Stewart

As long as you have the same number of similar LED's in each car, that will work.  You don't actually need an LED in series with the meter, this is a constant current design, so you can just measure the current with a direct connection across the output.

Ted, the reason mine come assembled is it would take me a LONG time to hand solder a thousand modules!

GRJ's application is to test large batches whereas the rest of us would be testing much fewer.  In case anyone missed it, what's neat about GRJ's tool are the spring-loaded test pins to make reliable contact to the 4 pads.  These so-called "pogo pins" (like a kid's pogo stick) are not expensive but hard to imagine using them if assembling/testing just a handful of boards.

As GRJ states, the LED confirms capacitor operation.  You see the brightness decay rather than going instantly dark.   Note that GRJ mentions a high intensity LED that can presumably take the full current.  So if using this for a 100mA board, use a suitable LED.

As for skipping the LED and hooking an ammeter directly across the board's output.  A digital meter updates a few times per second so its numbers would jump making it tricky to see a smooth decay.  An analog (needle) meter's spring slows the needle's return-to-zero and could be mis-interpreted as a smooth decay.  Separately, if using a digital mA meter, most are fused when making mA-range measurements.  Fuse values may be, say, 1/4 Amp or whatever.   OTOH, using the 10 Amp setting may not give enough resolution when testing or calibrating the range of these low-current boards.  So if the purpose of the mA metering is for test (before and as opposed to calibration), you may pop the mA fuse if there was an assembly error - fuse is replaceable but kind of a hassle.

Here are a few pictures of the revised version of the PCB for my lighting project(s).  These pictures were taken with my camera so they are a little better than the iPad pictures in the conversion thread.

Top and bottom of version 1.0.2.
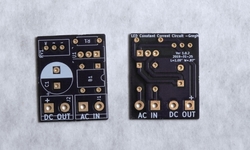
Pic 1 - PCB Ver 1.0.2


Comparing length of this board to the original version.
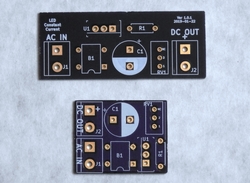
Pic 2 - PCB Ver 1.0.2


Comparing width.

Pic 3 - PCB Ver 1.0.2


PCB populated with same components as original version.  I will say it was more work to solder the components to the board this time as it was harder to hold everything in place and apply the heat and solder.
Pic 4 - PCB Ver 1.0.2


Even though it was harder to populate the PCB it does work. 

Pic 5 - PCB Ver 1.0.2


I was a little concerned, but both connectors do fit on the revised PCB.  However, I plan on using only one connector on the remaining boards.  I will solder the supply wires directly to the PCB's AC IN pads along with a PTC to protect the wires.  Since the PCB is attached to the floor of the cars' with double sided tape, one connector for the DC OUT wires will be sufficient to allow me to completely detach the roof if needed in the future.  Paint the roofs white maybe?


Okay, breaks over, back to soldering.  Well maybe later.


Edited***  I ended up using connectors for both the AC input and the DC output.  Since I am using the original wiring from the wheel sets in the PE cars, it was just easier than trying to solder the wires directly to the board.

Attachments

Images (5)
  • Pic 1 - PCB Ver 1.0.2
  • Pic 2 - PCB Ver 1.0.2
  • Pic 3 - PCB Ver 1.0.2
  • Pic 4 - PCB Ver 1.0.2
  • Pic 5 - PCB Ver 1.0.2
Last edited by GregM
Rod Stewart posted:

...For grj's new board, I am thinking that since the center rail is the one carrying the DCS signal, the center rail pickups should be connected to pin 2 of the AC input (ie the round hole) since this connector runs through the 22 uH choke. Does that make sense? 

Doesn't matter.  Choke performs same function either way.  

Consider that the board works with 2-rail where DCS "hot" could be either rail depending on car orientation.  


Add Reply

Post

OGR Publishing, Inc., 1310 Eastside Centre Ct, Suite 6, Mountain Home, AR 72653
800-980-OGRR (6477)
www.ogaugerr.com

×
×
×
×
Link copied to your clipboard.
×
×